
DCS8600LH - Surveillance Camera D-LINK - Free user manual and instructions
Find the device manual for free DCS8600LH D-LINK in PDF.

| Product type | Outdoor surveillance camera |
| Brand | D-Link |
| Model | DCS8600LH |
| Dimensions (approx.) | 70 x 70 x 120 mm |
| Weight (approx.) | 300 g |
| Power supply | USB adapter 5V / 1A |
| Connectivity | Wi-Fi 802.11n/g, Bluetooth 4.0 |
| Mobile app | mydlink (iOS, Android) |
| Video resolution | 1080p Full HD |
| Viewing angle | 130° (diagonal) |
| Night vision | Yes, infrared LEDs |
| Motion detection | Yes, with push notifications |
| Two-way audio | Yes, built-in microphone and speaker |
| Storage | Cloud mydlink (subscription required), microSD card (not included) |
| Protection rating | IP65 (weather resistant) |
| Operating temperature | -20°C to 45°C |
| Mounting | Wall mount, with included bracket |
| Status LED | Green, red, orange (see manual) |
| Compatibility | Requires Wi-Fi router and Internet connection |
| Box contents | Camera, power adapter, USB cable, wall mount, screws and anchors |
| Warranty | 2 years |
Frequently Asked Questions - DCS8600LH D-LINK
User questions about DCS8600LH D-LINK
0 question about this device. Answer the ones you know or ask your own.
Ask a new question about this device
Download the instructions for your Surveillance Camera in PDF format for free! Find your manual DCS8600LH - D-LINK and take your electronic device back in hand. On this page are published all the documents necessary for the use of your device. DCS8600LH by D-LINK.
USER MANUAL DCS8600LH D-LINK
Full HD Outdoor Wi-Fi Camera
Quick Start Guide
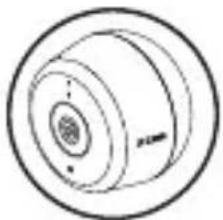
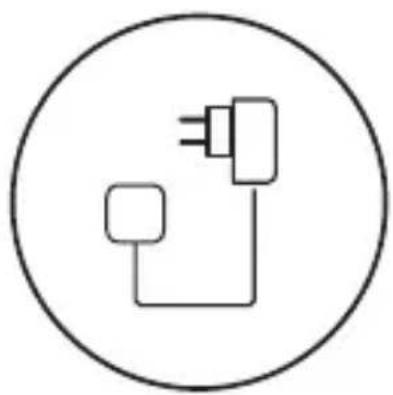
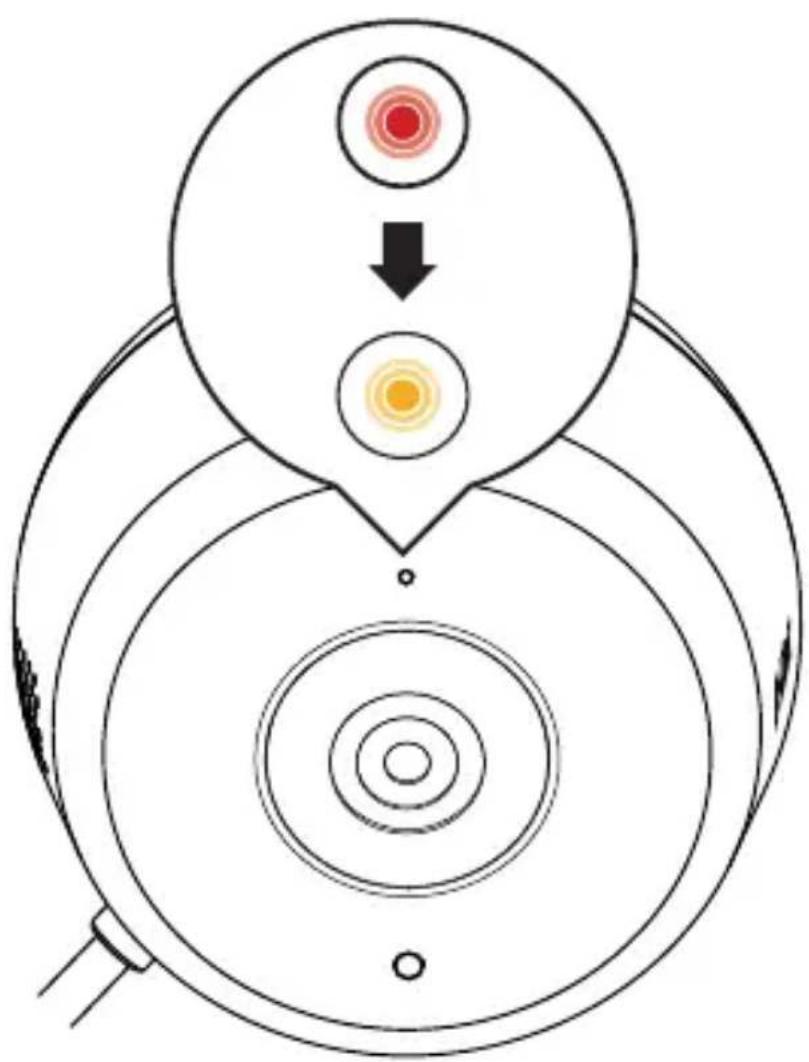
Plug the included USB Power Adapter into the back of the camera. Wait until the LED at the front changes from red to blinking orange.
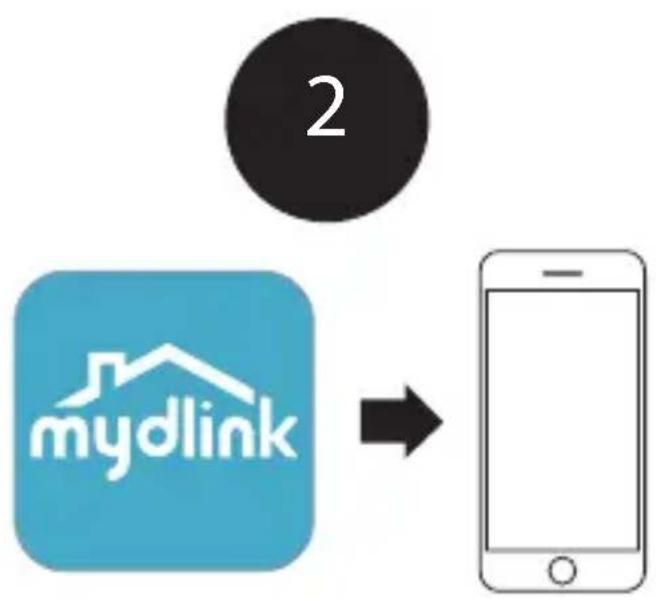
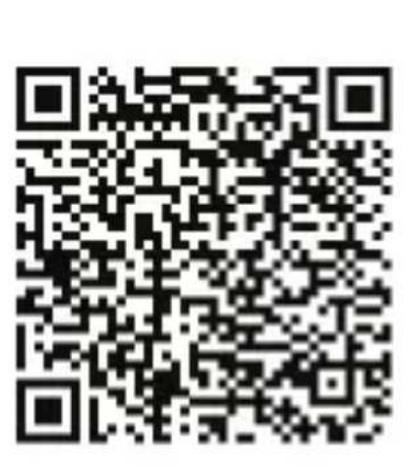


To download and install the mydlink app on your mobile device, scan the QR code above for your Android or iOS device.
Note: For best results and cloud recording use the new mydlink app. This product is NOT COMPATIBLE with mydlink Lite or mydlink+ apps.
If you are a mydlink Lite user, sign in to the new app with the same username and password and your existing cameras will appear in the new app.
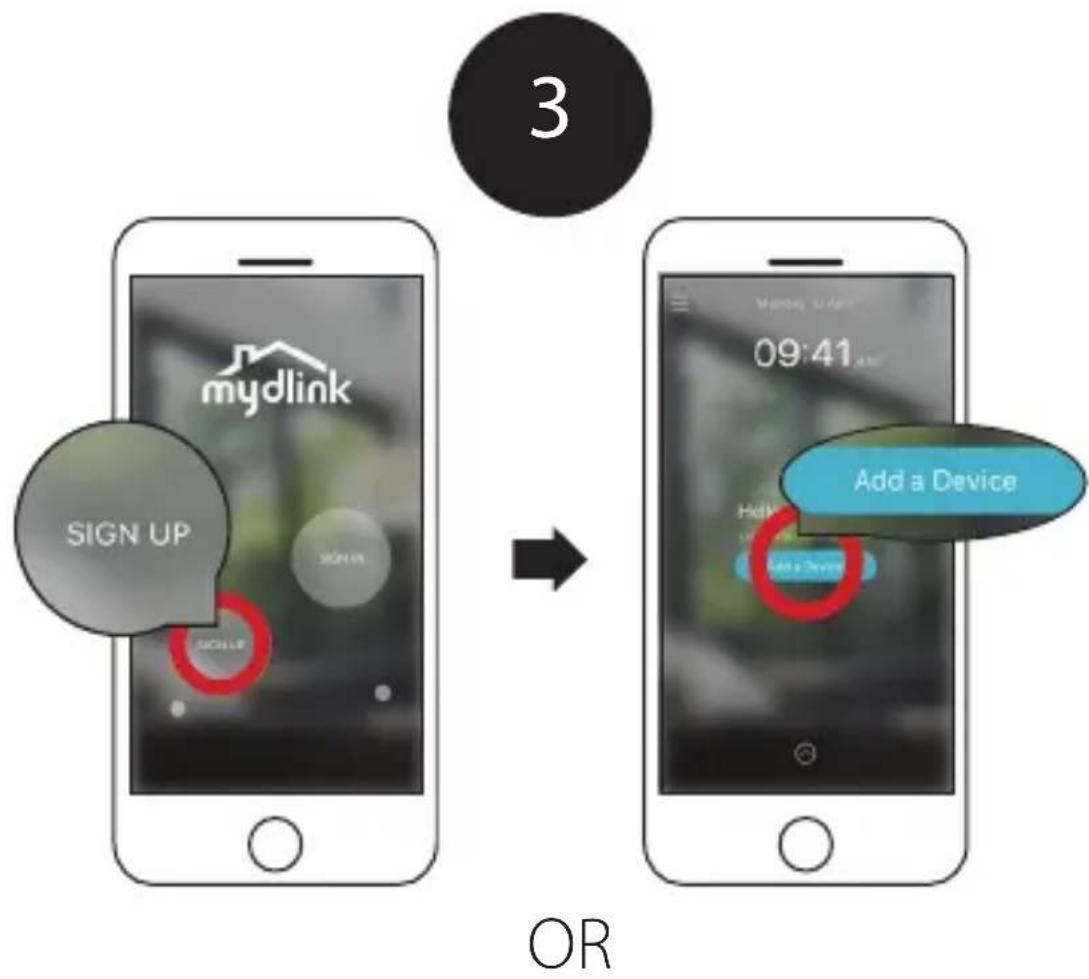
New users: Tap Sign Up to register for a mydlink account, then tap Add a Device to install your camera.
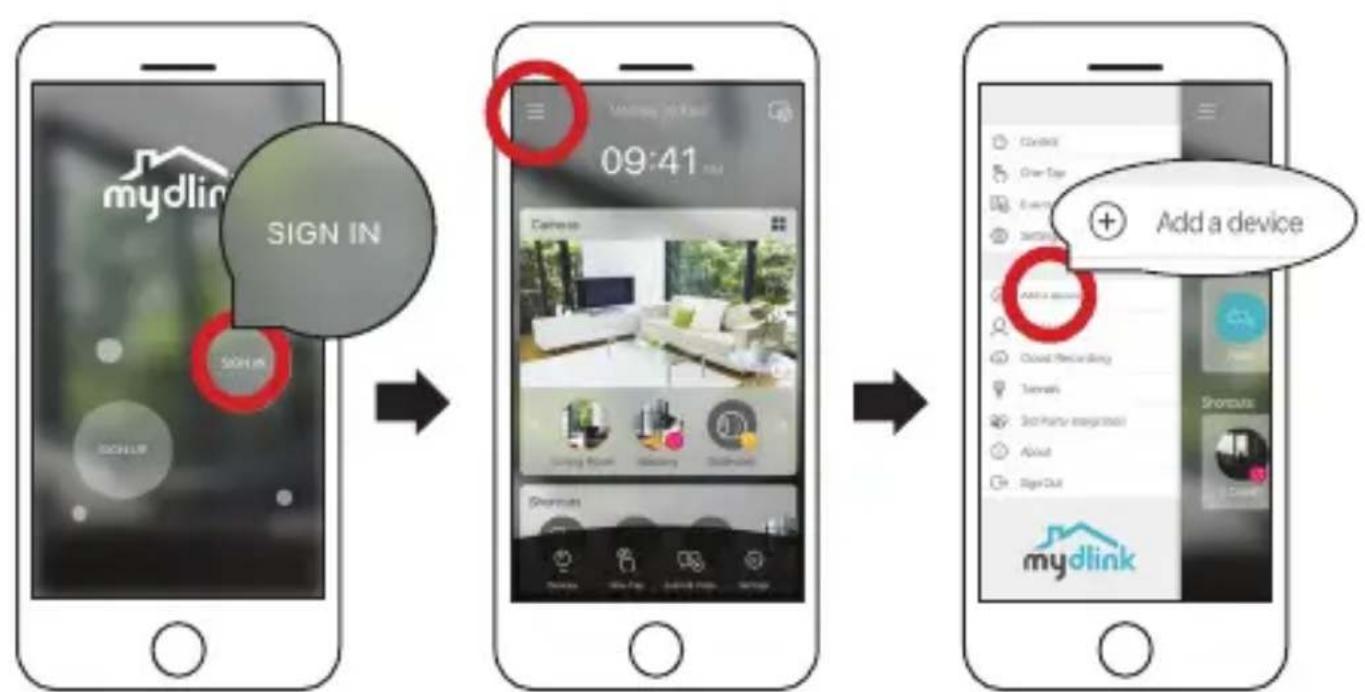
Existing users: Sign In using your mydlink account and tap the icon at the top left, then tap Add a Device to start the setup wizard.

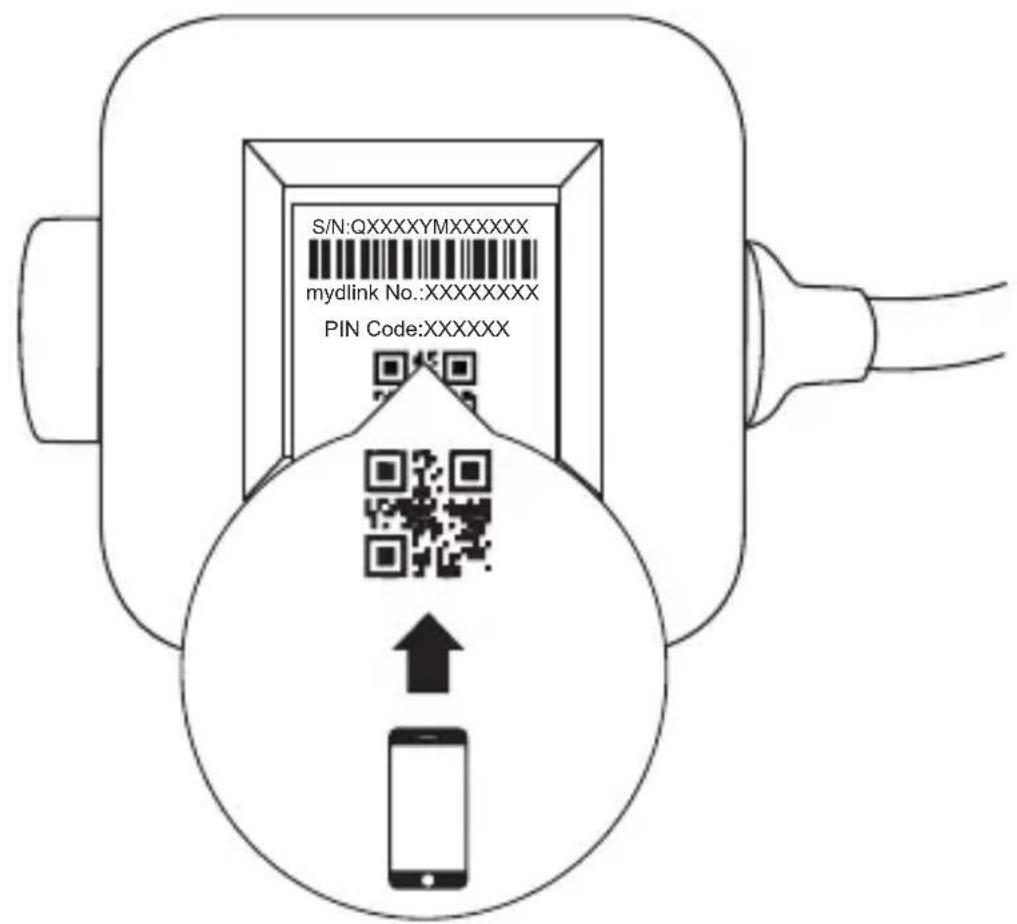
When asked to scan the QR code, use the code found on the bottom of the adapter. Repeat steps 1 through 4 to set up additional cameras.
Note: The QR and pin code on the bottom of the adapter is unique to the camera itself. Please be sure to scan each camera individually during set up.
Minimum Requirements
To install this product, you will need:
802.11n/q wireless router
- Internet connection
- A mobile device with Bluetooth 4.0 is required for setup.
- The latest version of the mydlink app from your operating system's application store.
- The mydlink app is available for iPhone, iPad and Android™ devices. Please refer to the mobile app's store page to check whether your device is compatible.
- An e-mail account (required to register for mydlink service)
Camera LED Information
| LED Indicative Color | olor Status | Description | |
| Link/Act/Power | Green | On Get IP Setup complete | |
| Blinking Live streaming | |||
| Red | On Power on Factory reset | ||
| Blinking F/W upgrading / Recovery | |||
| Orange | On Bluetooth on | ||
| Blinking Bluetooth Setting | |||
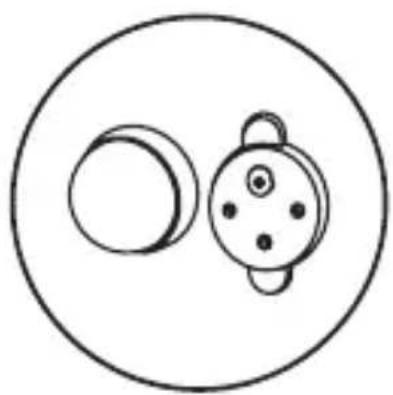
Outdoor Camera Mounting instructions
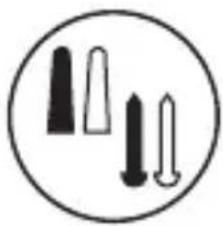
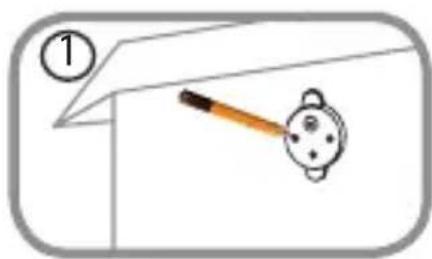
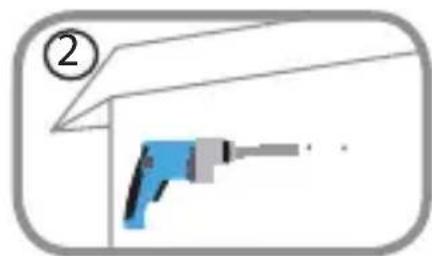
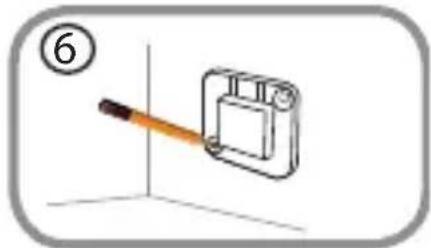
- Place the baseplate at the desired location, assuring that it is at least 20cm from the ceiling. Make sure the screw is facing up and the holes are level. Use a pencil to mark the holes.
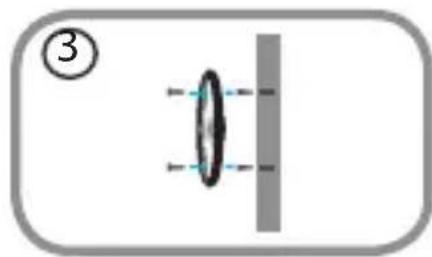
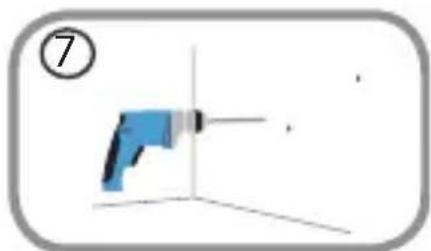
- Using a 6 mm drill bit, drill two 25 mm deep holes over the pencil marks. For a plaster, drywall, or concrete wall, insert the plastic anchors to support the screws first.
- Place the baseplate over the holes. Use the supplied screws to attach the baseplate to the wall.
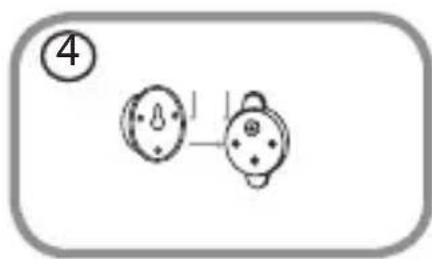
- Align the large top screw with the largest hole on the snap mount. Slide the mount down to lock into place.
- Attach the back of the camera to the mount. Adjust the angle as desired.
Power Supply Mounting instructions
-
Place the baseplate at the desired location, assuring that it is placed where close enough for the cord to reach a power outlet. Make sure the release tab facing up. Use a pencil to mark the holes.
-
Using a 6mm drill bit, drill two 25~mm deep holes over the pencil marks. For a plaster, drywall, or concrete wall, insert the plastic anchors to support the screws first.
-
Place the baseplate over the holes. Use the supplied screws to attach the baseplate to the wall.
-
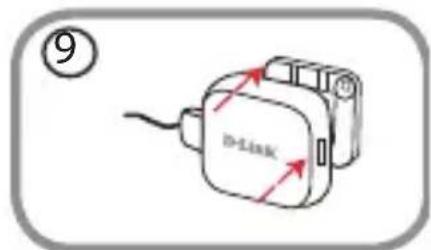
Align the power supply with the baseplate. Press towards the wall to snap into place.
-
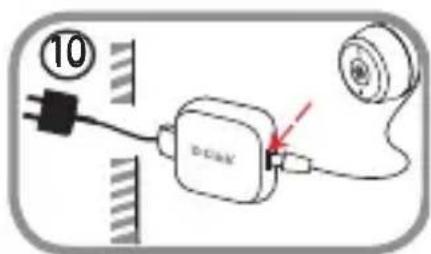
Connect the USB cable from the camera to the power supply. Plug the power supply into the power outlet.
Note: Both power cords can be used both indoors and out.

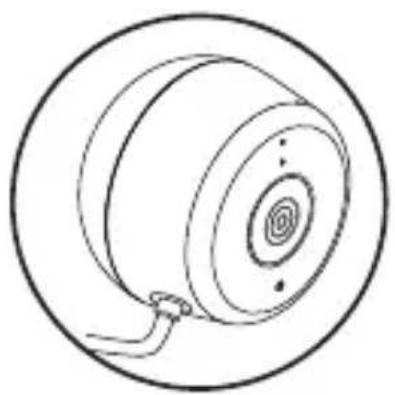

Link/Act/Voeding Rood

Brand : D-LINK
Model : DCS8600LH
Category : Surveillance Camera