Evidence Plus EA894T - Coffee machine KRUPS - Free user manual and instructions
Find the device manual for free Evidence Plus EA894T KRUPS in PDF.

| Product type | Automatic coffee machine with grinder |
| Brand | Krups |
| Model | Evidence Plus EA894T |
| Dimensions (H x W x D) | 367 x 240 x 380 mm |
| Weight | 8.4 kg |
| Power supply | 220-240 V~ / 50 Hz |
| Power | 1450 W |
| Pump pressure | 15 bars |
| Water tank capacity | 2.3 L |
| Bean hopper capacity | 250 g |
| Grinder type | Metal burrs, adjustable grind |
| Main functions | Espresso, Ristretto, Lungo, Cappuccino, Latte Macchiato, Caffè Latte, Flat White, Tea, Hot water |
| Additional functions | DARK (intensify coffee), EXTRA SHOT (add espresso shot), 2-cup preparation, automatic shut-off |
| Display | OLED screen |
| Milk system | One Touch Cappuccino - removable unit, milk tube and mixer |
| Water filter | Claris Aqua Filter System (optional) |
| Maintenance programs | Coffee circuit cleaning, milk cleaning, automatic descaling |
| Automatic rinsing | On startup and shutdown (adjustable) |
| Timer | Programmable auto-on and auto-off |
| Coffee temperature setting | 3 levels |
| Tea temperature setting | 3 levels |
| Safety | Automatic shut-off, emergency stop, overheating protection |
| Spare parts | Cleaning tablets, descaler packets, filter cartridge, milk jug (depending on model) |
| Repairability | Krups after-sales service, hotline, approved centers |
| Country of origin | France (Mayenne) |
Frequently Asked Questions - Evidence Plus EA894T KRUPS
User questions about Evidence Plus EA894T KRUPS
0 question about this device. Answer the ones you know or ask your own.
Ask a new question about this device
Download the instructions for your Coffee machine in PDF format for free! Find your manual Evidence Plus EA894T - KRUPS and take your electronic device back in hand. On this page are published all the documents necessary for the use of your device. Evidence Plus EA894T by KRUPS.
USER MANUAL Evidence Plus EA894T KRUPS
natural_image
Sequence of glass glasses showing different types of beverages: dark liquid, mugs, and clear liquid (no text or symbols)Astuces
(Blonde) (Light French) (Brune)
natural_image
Diagram of a tire with three circular cross-sections showing internal components (no text or labels)
natural_image
Diagram showing a car tire and its temperature scale (no text or labels)
natural_image
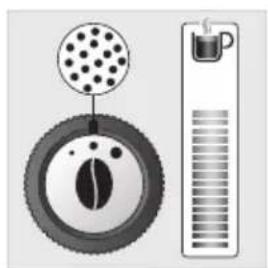
Diagram showing a circular object with dots above a ring and a vertical bar with liquid, next to a mug (no text or symbols)
natural_image
Illustration of a tire and a water tap with a film reel, no text or symbols presentThank you for purchasing your KRUPS espresso machine with bean grinder. Designed and manufactured in France to give you “cafe” quality drinks with the greatest ease, your KRUPS machine allows you to enjoy espresso, ristretto, lungo, cappuccino, latte macchiato, flat white and even more drinks all day long.
Your KRUPS espresso machine is equipped with advanced technologies and an intuitive OLED interface; in order to obtain the best extraction possible with total ease, to reveal maximum aromas and flavours from the freshly ground coffee. For the best taste experience make sure you use water fresh from the tap.
For even greater pleasure, your KRUPS EVIDENCE PLUS machine allows you to make multiple drinks automatically, at the simple touch of a button. You will appreciate the possibility of achieving great cappuccino, latte macchiato and caffe latte thanks to the milk container and its One Touch Cappuccino system.
Because not all coffees are the same, you can customise your drinks:
- By changing the coffee beans (mixture or different roast) you can discover different flavours. You will probably need several tests to find the coffee beans that suit your tastes.
- By varying the grinding fineness you can obtain coffee that is more or less full-bodied.
- By choosing your length you'll always achieve the perfect cup.
We wish you a good coffee experience coffee and hope that your KRUPS machine will give you complete satisfaction.
The KRUPS team
natural_image
Sequence of glass glasses showing increasing volume of dark liquid from a small cup to a clear glass, with no text or symbols present.Tips
- The quality of the water strongly influences the quality of the flavours. Limescale and chlorine can alter the taste of coffee. We recommend that you use the Claris Aqua Filter System cartridge, or water with low mineral content, in order to preserve all the flavours of your coffee.
- When preparing drinks we recommend using preheated cups (by passing them under hot water) of a size appropriate to the quantity you want to make. For your milk-based preparations, we recommend that you use thick glass cups for an appetising result.
- The roasted coffee beans can lose their flavour if they are not protected. We advise you to use the amount of beans equivalent to your consumption over 2-3 days and to choose 250g bags. Always store beans in an airtight container in a cool, dry place. To achieve a good crema you should always use fresh beans.
- The quality of the coffee beans is variable and tastes are subjective. Arabica will give you fine, floral flavours unlike Robusta which is higher in caffeine, more bitter and full-bodied. It is common to mix the two types of coffee to get a more balanced coffee.
- We do not recommend the use of oily and caramelised beans as these can damage the machine.
- When using a new bean roast, start at the most coarse grind setting, and adjust to taste. Be careful of flavoured beans or extra dark roast coffee as some beans become oily in the roasting process and can cause blockages in the grinders. The finer the grind setting the slower the flow of coffee to your cup. Always make a long coffee using a coarse grind.
- For a strong coffee you do not need a fine grind. Grinding fineness does not affect the strength of the coffee – it is the type of bean (dark roast/light roast etc...). Dry beans on a fine grind will produce a powder – which may block the system.
- Use fresh pasteurised, UHT, skimmed, semi-skimmed or whole milk from the fridge (3-5°C) for best results.
- The use of special milks: micro filtered, raw, fermented, enriched or plant milks such as rice, oat or almond milk can give results that are less satisfactory in terms of quality and quantity of froth.
CONTENTS
Z
IMPORTANT INFORMATION CONCERNING THE APPLIANCE AND INSTRUCTIONS....p.24
TECHNICAL DATA.... p.24
APPLIANCE DESCRIPTION.... p.25
OVERALL VIEW p.25
USING YOUR APPLIANCE
INSTALLING THE APPLIANCE ...... p.26
BEFORE PREPARING DRINKS
IMPORTANT INFORMATION.... p.28
PREPARING COFFEE DRINKS VIA DIRECT ACCESS ..... p.29
PREPARING MILKY DRINKS VIA DIRECT ACCESS.... p.30
PREPARING TEAS.... p.31
PREPARING OTHER DRINKS.... p.31
OTHER FUNCTIONS.... p.32
FILTER CARTRIDGE p.33
GENERAL MAINTENANCE....p.34
TROUBLESHOOTING.... p.36
IMPORTANT INFORMATION CONCERNING THE APPLIANCE AND INSTRUCTIONS
In this manual you will find all of the important information concerning the preparation, use and maintenance of your machine.
Read the instructions carefully before using your appliance for the first time and keep them for future reference: KRUPS may not be held liable in the event of any use that does not comply with the instructions.
GUIDE TO THE SYMBOLS USED IN THE INSTRUCTIONS

Warning: Risk of serious injury or death. The lightning bolt symbol warns against electrical dangers.

Warning: Risk of possible malfunction, damage, or destruction of the appliance.

Warning: General or important note concerning the operation of the appliance.
Products supplied with your machine
Check the products supplied with your machine. If any parts are missing, contact your hotline (see p. 26: Initial settings).
Parts supplied:
- Espresso Automatic Series EA894
- 2 cleaning tablets
- 1 descaling sachet
- Milk conduit adaptable to the "One Touch Cappuccino" block
- Dismantling key for cleaning the steam circuit
- Safety instructions booklet
- Claris – Aqua Filter System cartridge with fitting accessory
- 1 stick for testing water hardness
- Instructions
- List of approved Krups service centres
- Guarantee documents
TECHNICAL DATA
| Appliance Espresso Automatic Series EA89 | |
| Power supply 220-240V~ / 50 Hz | |
| Pump pressure 15 bars | |
| Coffee bean container 250 g | |
| Power consumption During operation: 1,450 W | |
| Water tank 2.3 L | |
| First use and storage Indoors, in a dry place (protected from frost). | |
| Dimensions (mm) H x L x D 367 x 240 x 380 | |
| Weight EA89 (kg) 8.4 | |
Subject to technical adaptations.
APPLIANCE DESCRIPTION
Z
A Water tank lid handle
B Water tank
C Coffee grounds collector
D Height-adjustable coffee outlets
E Grid and removable drip tray
F Coffee bean container lid
G One Touch Cappuccino removable block
G1 Dismantling key for cleaning the steam circuit
G2 One touch cappuccino block
H Milk tube and connector
I Water level float
1 Coffee bean container
J Grinding fineness adjustment button
K Cleaning tablet funnel
L Metal grinding mill
2
Display panel
M OLED screen
N ON/OFF button
- Selection buttons
Details:
The drip tray allows you to collect the water or the coffee that flows from the appliance during and after preparations. It is important to always leave it in place and to empty it regularly or as soon as the floats indicate.
Important: Read these instructions carefully and keep them for future reference. Please follow the safety guidelines.
Manufacturer:
SAS GSM
Presentation of the control panel:
| Button Description / General Functions | |
 | Turn the machine on and off.A long press is necessary when turning the machine on for the 1st time. |
 | Allows you to return to the previous screen or stop a recipe in progress. |
 | Navigating upwards in the menu / increment the selected parameter. |
 | Navigating downwards in the menu / decrement the selected parameter. |
 | Validation of the selection made. |
 | Function to increase the strength of the coffee by increasing the quantity of ground coffee. |
| DARK | |
 | Function to add a shot of espresso to the selected recipe.Accessible with the main recipes: espresso, long coffee, cappuccino, latte macchiato, caffe latte and tea. |
| EXTRA SHOT | |
 | Starts preparing an espresso. |
| ESPRESSO | |
 | Starts preparing a long coffee. |
| LONG COFFEE | |
 | Starts preparing a cappuccino. |
 | |
| CATTEMACCHIATO | Starts preparing a latte macchiato (a large dose of milk, a shot of espresso topped with a creamy milk froth). |
| CAFFE LATTE | Starts preparing a caffe latte. |
| TEA | Allows you to access the menu to prepare a tea or an infusion. |
| MORE | Allows you to access additional preparations: Ristretto, doppio, americano, espresso macchiato, flat white and frothed milk. |
| Allows access to the general menu (Machine settings, maintenance and product info). | |
Our interface and its buttons illuminate in an intuitive way to facilitate the use of the machine and to guide you.
- Unlit button: the corresponding function is not accessible.
- Low-lit button: the function is available and can therefore be selected.
- Lit button/bright light: the function is selected/in progress.
- Hal-lit button: the function is no longer accessible.
USING YOUR APPLIANCE INSTALLING THE APPLIANCE

Danger : Connect the appliance to an earthed 230 V mains socket. Failure to do so means that you run the risk of fatal injury due to electricity!
Respect the safety guidelines indicated in the "Safety guidelines" booklet.
Powering on
Turn on the appliance by pressing the ON/OFF button ⏻ until "Hello" appears on the screen Fig. 1. For the following steps, let your appliance guide you.
Initial Settings
When using the machine for the first time, you are asked to make various settings. Follow the directions that appear on the screen. The objective of the following paragraphs is to give you a few marks of the first requested settings:
- Language: Select a display language by pressing the arrows until the language of your choice appears. Press the "OK" button to confirm.
- Unit of measurement: You can select the unit of measurement of the volume of your choice: ml or oz.
- Date and time: For setting the time, press the time format you want: 24 hr or AM/PM.
- Auto on: It is possible to schedule the time at which you want your machine to come on automatically. This setting can be adapted to your convenience: daily, weekly, or weekend. Choose the time at which you want the automatic start-up in accordance with the time format you previously selected.
- Auto off : You can also choose the length of time after which your selected appliance will automatically turn off in order to optimise your energy consumption: 15 mins, 30 mins, 1 hr, 1 hr 30 mins.
- Rinsing the coffee circuit: to ensure the quality of your coffees, the coffee circuit is rinsed at each start-up, however, you can choose to disable this for greater ease of use.
- Installing the filter: When powering up for the first time, the appliance asks you if you want to install a filter. If you want to and if the hardness of your water requires it, select "YES" and follow the instructions on the screen.
Installation of the filter cartridge in the appliance:
We advise you to use a Claris Aqua Filter System cartridge for KRUPS machines in order to remove any trace of chlorine and limescale. In addition it limits the formation of limescale and ensures the longevity of your machine.
- Turn the grey ring located on the upper end of the filter cartridge until it displays 2 months. Fig. 5
- Empty the water tank and screw the filter cartridge in the bottom of the water tank using the accessory supplied with the cartridge. Fig. 4
- Fill the water tank and put it back in place. Fig. 7-8
- Let the machine guide you to finish the installation.

It is important to replace the filter cartridge properly on the date indicated
Priming the appliance:
The machine must be primed whether the filter is installed or not. Priming allows the water circuits to be filled, so that the machine can operate.
Follow the on-screen instructions
- Place a 600 ml container under the steam outlet. Fig. 6
- The machine will start by filling the water circuits, followed by preheating and then will proceed to automatic rinsing.
- The screen will indicate the end of the installation
Water hardness
Water hardness is a high concentration of minerals, in particular calcium, that is responsible for the formation of limescale. To avoid scaling of your machine which can lead to the malfunction or alteration of the taste of your coffee, you must adjust your machine depending on the hardness of your water, between 0 and 4.
Before the 1st use and in order to be able to adjust your machine, determine the hardness of your water using the stick supplied with your machine: Fig. 2
- Fill a glass of water
- Immerse the stick
- Wait for 1 minute to get the result
- The level of hardness of the water is equal to the number of red areas on the stick. Fig. 3
It is also possible to ask your water company.
The details of the classes are given in the table below:
| Degree of hardness | Class 0 Very soft | Class 1 Soft | Class 2 Average hardness | Class 3 Hard | Class 4 Very hard |
| ^ dH < 3° > 4° | >7° > 14° > 21° | ||||
| ^ e < 3.75° > | 5° > 8.75° > 17.5° > 26.25° | ||||
| ^ f | < 5.4° | >7.2° | >12.6° | >25.2° | >37.8° |
| Appliance setting | 0 | 1 | 2 | 3 | 4 |

Be sure to perform this operation at each time you use your machine in a place where the water hardness is different or if you notice a change in the hardness of your water.
Preparing the appliance
- Remove and refill the water tank and put it back in its place. Fig. 7-8
- Remove the lid of the coffee bean container and pour in the coffee beans and replace the lid. Fig. 9 - 10
BEFORE PREPARING DRINKS IMPORTANT INFORMATION
Your machine offers pre-set drinks to obtain the best results. You can however customise your coffee depending on the result in the cup.
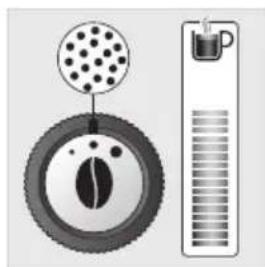
Preparing the grinder: adjust the grinding fineness (J)
You can adjust the strength of your coffee by adjusting the grinding fineness of the coffee beans; the finer the grinder setting, the stronger and creamier the coffee. The type of coffee used can also influence the result obtained.
We recommend to use a very fine setting for ristretto, fine for espresso and more coarse for lungo.
To adjust the degree of grinding fineness:
- Turn the adjustment button located in the bean container. This adjustment must be performed during grinding and notch by notch.
- After 3 preparations you will notice a very distinct difference in taste.
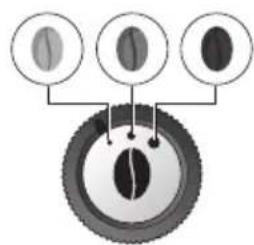
The variation of grinding fineness allows:
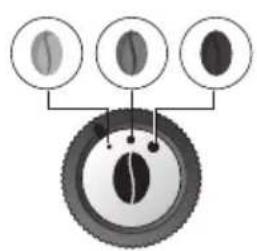
- To be able to adapt to the different types of bean: a highly roasted and rather oily bean will require a coarse grinding while a more lightly roasted bean will be drier and will require a finer grinding (dark to light bean)
Roasting:

Light

Average

Dark
- More or less flavour and power in the cup
natural_image
Diagram showing three circular objects with internal patterns, connected by lines to a central circular object (no text or symbols)
natural_image
Diagram showing a car tire and its vertical thermometer with a perforated lid (no text or symbols)
natural_image
Illustration of a circular device with a dotted pattern and a vertical scale bar (no text or symbols)
natural_image
Illustration of a car tire and its water tap (no text or symbols)Adjusting the coffee output
For all of the drinks proposed you can lower and adjust the coffee outputs according to the size of your cup(s). Fig. 11
Stopping a drink mid-preparation
You can stop the preparation at any time by pressing the back button
When a cycle is interrupted, stopping is not immediate. The machine will not be accessible for a period of time.
Preparation of two cups
Your appliance allows you to prepare two cups simultaneously. The dual cup function is valid for all directly accessible recipes and is accessible simply by pressing twice on the selected recipe (except for ⬆ and ≡). Fig. 12
DARK function
The DARK function allows you to increase the strength of the selected recipe by increasing the amount of ground coffee used.
This function is effective for the following drinks:


You can activate or deactivate it in different ways:
- Before each recipe you can press DARK and then the desired recipe.
- During the making of the drink and up to the end of the grinding you can press DARK.
You can activate it systematically for all directly accessible drinks (see above):
- Press the Settings button
- Choose "Settings" using the navigation buttons
- Go to "Drinks Settings" then press OK
- Select "DARK" using the OK button to activate it.
- You can disable the DARK function using the same steps.


EXTRA SHOT function
To add to your drink you can use the extra shot function that allows you to add an espresso at the end of your drink. This function is effective for the following drinks: 📁, 📄, 📅, 🌐, 🏠, 🍸
You can activate or deactivate it in different ways:
- Before each recipe you can press on EXTRA SHOT and then on the desired recipe.
- During the making of the drink and up to the end of the grinding you can press EXTRA SHOT.
You can activate it automatically for all directly accessible drinks:
- Press the Settings button
- Choose "Settings" using the navigation buttons
- Go to "Drinks Settings" then press OK
- Select "EXTRA SHOT" using the OK button.
- Then you can enable or disable the EXTRA SHOT function


PREPARING COFFEE DRINKS VIA DIRECT ACCESS
Please note: when starting each drink, the machine will take into account the settings for the last drink that was made.
The full-bodied espresso with pronounced aromas is covered with a slightly bitter caramel coloured crema. We recommend that you choose a volume between 40ml and 50ml.
The long coffee is an espresso of 80ml, higher in caffeine but lighter in the mouth. Very well suited to the mornings
The stages of preparation of the drink:
- Bean grinding
- Compaction of the grinding
- Percolation
Starting a drink
- Check that there are beans in the bean tray.
- Check that there is water in the water tank: if there is not enough water the machine will tell you and ask you to fill the tank.
- Place the cup or cups under the coffee nozzles.
- Press the button for the chosen drink.
Possible settings
You can:
- Prepare one or two cups at the same time.
- Increase the strength of the coffee by pressing DARK
- Add an espresso coffee in your DRINK by pressing EXTRA SHOT
- Adjust the volume of coffee being prepared using the navigation buttons
You can stop the preparation at any time by pressing

PREPARING MILKY DRINKS VIA DIRECT ACCESS
Please note: when starting each drink, the machine will take into account the settings for the last drink that was made.
The stages of preparation of the drink:
- Bean grinding
- Compaction of the grinding
- Percolation
- Preheating phase to froth the milk
Possible settings
You can:
- Prepare one or two cups at the same time.
- Increase the strength of the coffee by pressing DARK
- Add an espresso coffee in your DRINK by pressing EXTRA SHOT
- Adjust the coffee volume
- Adjust the length of time for frothing the milk.
Making a Cappuccino

A cappuccino is made up of 1/3 creamy froth, 1/3 coffee and 1/3 hot milk.
- Connect the milk tube Fig. 13 to the right side of the "One Touch Cappuccino" block.
- Immerse the other end of the tube (slanted side) in a container filled with milk or directly in your milk bottle or milk pot (according to model). Fig. 14
- Place the cup or cups under the coffee nozzles. Fig. 15
- Press the cappuccino button. Fig. 16
- The preparation begins with frothing the milk
You can adjust your frothing time using the navigation buttons √ ∧ which allow the quantity of milk and froth to be varied.
- This process continues with the flow of coffee
You can adjust your volume of coffee using the navigation buttons if you wish. - Your drink is ready. Fig. 17.
A latte macchiato is made up of a higher dose of milk than a cappuccino. 1/4 of creamy froth, 1/4 of coffee and 2/4 of hot milk.
We recommend that you use a cup of approximately 250 ml.
To make a latte macchiato you can follow the same steps as for cappuccino by pressing the latte macchiato button.
Fig. 18.
Making a Caffe latte

A caffe latte is made up of an espresso mixed with a large dose of milk and topped with froth tasting slightly of coffee.
We recommend that you use a cup of approximately 250ml.
To make a caffe latte you can follow the same steps as for cappuccino by pressing the caffe latte button.
For this recipe the coffee is poured in first and then the machine delivers the frothy milk.
Rinsing milk after making milk-based drinks.
The screen shows "Rinse milk?" at the end of each preparation.
- Press OK to perform rinsing.
- During milk rinsing, you are required to systematically dismantle and clean the milk tube and connector with hot water. Fig. 21-25
- For the best results, it is advised to clean the “One Touch Cappuccino” removable block regularly (see general maintenance chapter).

Important: If you note a change in the quality of your milk froth, do not hesitate to repeat the rinsing and cleaning process: indeed a milk system that is not well maintained may cause this type of problem.
PREPARING TEAS
Z
Possible settings
Your appliance offers you the preparation of 3 types of tea (green tea, black tea and infusions).
The temperature of the water is adapted to the selected drink.
You can adjust the volume of the drink according to your tastes.
You can program an EXTRA SHOT in your tea which will allow you to achieve fashionable “tea/coffee” drinks.
Preparing a tea
- Place the cup or cups under the coffee nozzles
-Press.
-Press. OK
- You can change the volume using the navigation buttons.
If the machine detects a lack of water during the request it will ask you to refill the tank, then the cycle will resume automatically.
PREPARING OTHER DRINKS
Please note: when starting each drink, the machine will take into account the settings for the last drink that was made.
- Press the button
- Using the Navigation buttons √ select the desired drink.
-Press. OK - Adjust the volume of coffee you want.
You can stop the preparation at any time by pressing
Ristretto :
Ristretto with a strong and powerful taste covered with a caramel coloured crema for difficult mornings. To prepare a ristretto, choose a volume between 20ml and 30ml.
Doppio :
A doppio is a double espresso, black in colour, covered with an amber crema. A double dose of coffee for a drink with strong taste and aromas.
Americano :
The americano is a double espresso into which we simply pour hot water. This order of preparation makes the crema which covers the drink disappear. Ideal for people who like long coffees.
For the recipes below:
- Connect the milk tube to the right side of the "One Touch Cappuccino" block.
- Immerse the other end of the tube (slanted side) in a container filled with milk or directly in your milk bottle or milk pot (according to model).
- Press the button
- Using the navigation keys, select the desired drink.
- Press OK
- Adjust the coffee volume and/or the milk frothing time if you wish.
Flat white :
The flat white is made with a double ristretto base in which a large dose of frothy milk has been poured.
Espresso macchiato
With its strong taste and consistent texture, the espresso macchiato is made up of an espresso softened with a spoon of foam milk.
Milk rinsing
Please refer to the paragraph "Milk rinsing" in the section PREPARING MILKY DRINKS
OTHER FUNCTIONS
The Settings button allows you to access the general menu (machine setting, maintenance and product info).
To exit the Settings menu, press return or Settings.

Adjustments
By selecting Settings, you can adjust various settings of your machine for a optimum comfort of use, adapted to your preferences.
Main settings available:
| Date Setting the date is necessary, particularly if using an anti-limescale cartridge. | |
| Clock Setting the time/ | 12 or 24 hour clock. |
| Language Selection of | the language of your choice from 19 languages. |
| Unit of measurement | Selection of the unit of measurement: ml or oz. |
| Screen brightness To | adjust the screen brightness. |
| Coffee temperature 3 | temperature adjustment levels for your coffee drinks. |
| Tea temperature 3 tem | perature adjustment levels for your tea drinks. |
| Water hardness | To adjust the hardness of the water between 0 and 4. See chapter “Measuring the water hardness”. |
| Auto-on | To turn on the machine and automatically start preheating the equipment at a chosen time. |
| Auto-off To choose the | duration after which your appliance will stop automatically. |
| Auto rinsing | You can choose to activate automatic rinsing of the coffee outlet or not when starting the machine. |
| Drinks settings | To restore the default settings, you can also permanently activate the DARK and EXTRA SHOT function for all of your drinks. Except for the drinks in MORE ≡ |
If you disconnect your machine, the will be retained in the memory, with the exception of the date and time.
Maintenance
The options below allow you to start the selected programs. Next, you must follow the instructions on the screen.
| Cleaning milk | Allows you to clean the One Touch Cappuccino block of the machine. Essential for ensuring good hygiene and good quality frothing. This process requires the use of KRUPS cleaning liquid. |
| Milk rinsing | Allows you to clean the One Touch Cappuccino block of the machine. Essential for ensuring good hygiene and good quality frothing. This process performs simple rinsing with warm water of the One Touch Cappuccino block. |
| Coffee cleaning | Allows you to perform cleaning and degreasing of the coffee circuit of the machine. This process requires the use of a KRUPS cleaning tablet. Ensures you optimal preservation of the aromas of your drinks. |
| Coffee flushing | Allows you to perform flushing of the coffee circuit of the machine. This process uses only hot water. Ensures the authentic taste of your coffee. |
| Descaling | Allows you to perform descaling. This process requires the use of KRUPS descaler sachets. Eliminates any deposit of limescale or tartar that can influence the taste of the coffee. When the number of drinks is not enough for descaling to be necessary, the function is not active. |
| Filter | Allows you to access the filter setting to install it, change it or remove it. Maximises the life of your machine, removes any trace of chlorine or limescale for a more delicious coffee. |
Info
The “Info” menu gives you the opportunity to access information on:
The use of your machine
Certain steps in the life of your machine
Information of the upkeep requirements
Here we present to you the main information available.
| Drinks prepared Displays | the number of drinks made. |
| Coffee circuit cleaning Indicates that it should be done in x cycles. | |
| Descaling Indicates that it should be done in x cycles. | |
| Filter Indicates that it will be changed in x days or x litres. | |
FILTER CARTRIDGE
To access the Filter menu
- Press Settings ⏱
- Using the navigation arrows √ ∧ go to "Maintenance" and press "OK" and then go to "Filter" and press "OK".
Installing the filter cartridge
- In the Filter menu, select "Insert".
- Turn the grey ring located on the upper end of the filter cartridge until it displays 2 months.
- Empty the water tank and screw the filter cartridge in the bottom of the water tank using the accessory supplied with the cartridge.
- Fill the water tank and put it back in place.
- Let the machine guide you to finish the installation.
Replacement of the filter cartridge
- In the Filter menu, select "Change".
- Remove the water tank and remove the old filter cartridge.
- Turn the grey ring located on the upper end of the filter cartridge until it displays 2 months.
- Empty the water tank and screw the new filter cartridge in the bottom of the water tank using the accessory supplied with the cartridge.
- Fill the water tank and put it back in place.
- Let the machine guide you to finish.
Remove the filter cartridge
- In the Filter menu, select "Remove".
- Remove the water tank and remove the old filter cartridge.

It is important to replace the filter cartridge properly on the date indicated.
GENERAL MAINTENANCE
Carrying out proper maintenance will prolong the life of your machine and preserve the authentic taste of your coffee.
Maintenance of the coffee grounds collector and drip tray
The drip tray receives the waste water
The coffee grounds collector receives grindings extracted.
When do I empty the drip tray?
When the float is in the upper position indicating that it is too full.
When the machine shows "empty the 2 trays".
When do I empty the coffee grounds collector? Fig. 19 - 20
When the machine shows "empty the 2 trays".
You can periodically empty it before the machine asks you to.
Not performing these operations correctly can damage your machine.
Rinsing of circuits
You can perform rinsing at any time.
-Press.
- Select Maintenance.
- Choose 'Milk rinsing" or "Coffee rinsing".
Depending on the preparation, the machine can perform automatic rinsing during its powering off.
It is also possible to set automatic rinsing at start-up (see Settings section).
Automatic coffee circuit cleaning programs (approximately 13 minutes)
Cleaning of the coffee circuit allows you to combat residue, fatty deposits of coffee and preserve the aromas of your drinks.
To perform this cleaning you will need:
- 1 KRUPS cleaning tablet
- 1 container of a minimum of 600 ml
The cycle will link two phases:
- 1 cleaning phase
- 1 rinsing phase
When do I run this program?
- When it is necessary to run a cleaning program, the appliance notifies you. Allow yourself to be guided by the instructions displayed on the screen.
Important: You do not have to run the cleaning program as soon as the appliance requests it, but you must do it reasonably soon after. If the cleaning is postponed the alert message will remain displayed as long as the operation has not been performed.
You can also launch cleaning at any time:
-Press.
- Select Maintenance.
- Choose "Coffee cleaning".
Important: if you unplug your machine during cleaning or in the event of electrical failure, the cleaning program will resume the current step at the time of the incident. It will not be possible to postpone this operation: it is mandatory for reasons of rinsing the water circuit. In this case a new cleaning tablet may be necessary.
Cleaning program for the "One Touch Cappuccino" block (approximately 5 minutes)
Cleaning the “One Touch Cappuccino’ block allows you to fight against milk deposits and ensures the best possible hygiene.
Z
To perform this cleaning you will need:
- KRUPS cleaning liquid
- 1 container (minimum 600 ml)
- Press the Settings button
- Select Maintenance.
- Then Milk Cleaning.
- Let yourself be guided by the instructions on the screen.
Removing the "One Touch Cappuccino" block
In addition to the rinsing it is necessary to clean the different elements of the block after each use. To remove the block follow the following instructions:
- Remove the milk tube Fig. 21
- Remove the front cover of the “One Touch Cappuccino” removable block by sliding it down and pulling it toward you. Fig. 22
- Remove the “One Touch Cappuccino” block by pulling on the upper part of the block and pull the orange cleaning tool. Fig. 23
- Completely dismantle the block. Fig. 24
- Remove the connector of the milk tube. Fig. 27
- Clean all of the dismantled parts (block, connector and milk tube) in soapy water. Then rinse them under hot water. Fig. 28
- Once the elements are cleaned and dried, assemble the block. Put it back in its original position. Fig. 32
- Reposition the front cover of the removable "One Touch Cappuccino" block.
- Replace the connector in the milk tube. Fig. 35
- Reconnect the milk tube to the "One Touch Cappuccino" removable block". Fig. 36
Automatic descaling program of the steam circuit: (approximately 20 minutes)
Descaling your machine ensures its proper functioning and eliminates any deposit of limescale or tartar that can influence the taste of the coffee.
The frequency at which this program is run depends on the quality of the water used and whether a Claris Aqua Filter System filter cartridge is used or not. The more limescale from your water, the more often the descaling has to be carried out.

Warning: If your appliance is equipped with our Claris cartridge Aqua Filter System cartridge please remove it before the descaling procedure.
To perform this cleaning you will need:
- 1 dose of KRUPS descaler
- 1 container of a minimum of 600 ml
The cycle will link two phases:
- 1 descaling phase
- 1 ^st rinsing phase
- 2^nd rinsing phase
When do I run this program?
When you need to carry out descaling, your appliance will notify you.
- Fill the water tank up to the CALC mark.
-
Pour the dose of descaler into the water tank.
-Press to start the descaling program. -
To postpone it press,
- Then let yourself be guided by the instructions on the screen.


Important: You do not have to run the cleaning program as soon as the appliance requests it, but you must do it reasonably soon after. If the cleaning is postponed the alert message will remain displayed as long as the operation has not been performed.
When the number of drinks is not enough for descaling to be necessary, the function is not active.
You can also start the descaling program when you want:
- Fill the water tank up to the CALC mark.
- Pour the dose of descaler into the water tank.
- Press the Settings button
- Select Maintenance.
- Then Descaling.
Important: if you unplug your machine during cleaning or in the event of electrical failure, the descaling program will resume the current step at the time of the incident. It will not be possible to postpone this operation. Complete the full descaling cycle in order to remove all traces of the descaling product which is harmful to health.
TROUBLESHOOTING
| PROBLEM CORRECTIVE ACTIONS | ||
| OPERATION | The machine displays a fault, the software is frozen.ORYour machine has a malfunction. | Turn off and unplug the machine, remove the filter cartridge, wait a minute and restart the machine.Press and hold the on/off button for at least 3 seconds for starting. |
| The appliance does not turn on after pressing the On/Off button (for at least 3 seconds). | Check the fuses and the power socket of your electrical installation.Check that the two power plugs are correctly inserted into the socket. | |
| The appliance must be disconnected and reconnected. | Unplug the appliance for 20 seconds, remove the Claris Aqua Filter System cartridge if necessary, then put it back into service. | |
| A power failure has occurred during a cycle. | The appliance resets automatically when it turns back on. | |
| USE | The grinder makes an abnormal noise. Foreign bodies are surely present in the grinder. | |
| There is water under the appliance. | Before removing the water tank, wait 15 seconds after the flow of coffee so that the machine finishes its cycle correctly.Verify that the drip tray is well positioned on the machine. It must always be in place even when the machine is not in use.Verify that the drip tray is not full. | |
| When switching off, hot water flows through the coffee outputs and the One Touch Cappuccino block. | Depending on the type of preparation the machine can perform automatic rinsing during its powering off.The cycle lasts only a few seconds and stops automatically. | |
| The adjustment button for the grinding fineness is difficult to turn. | Turn the adjustment button of the grinding fineness only when the grinder is operating. | |
| The appliance has not issued any coffee. | An incident has been detected during its making.The appliance is reset automatically and is ready for a new cycle. | |
| You have used ground coffee instead of coffee beans. | Use your vacuum cleaner to collect the ground coffee contained in the bean container. | |
| STEAM | The steam output of your machine appears to be partially or completely blocked. | Remove the end piece from its support using the dismantling key Fig. 25.Clean the different parts and check that the hole in the tip is not blocked by residues of milk or limescale. Use the cleaning needle if necessary. Fig. 26Replace the nozzle Fig. 31.Launch the milk rinsing cycle of the One Touch Cappuccino block to remove any deposits. |
| No steam comes out. | Ensure that the steam output is not blocked. See above “The steam output of your machine appears to be partially or completely blocked”.If this does not work, empty the water tank and temporarily remove the Claris Aqua filter system cartridge. Fill the tank with mineral water high in calcium (>100mg/L) and make successive steam cycles (5 to 10 cycles) in a container until a continuous jet of steam is obtained.Put the cartridge back in the tank. | |
| Steam escapes from the grid of the drip tray. | Depending on the type of preparation, steam may escape from the grid of the drip tray. | |
| Appearance of steam under the bean tray lid. | Close the cleaning tablet funnel located under the lid. (K) | |
| MAINTENANCE | The machine asks for the drip tray to be emptied while it is not full. | The machine is programmed to ask for the emptying of the drip tray after a certain number of coffees, independently of the intermediate emptyings that you make. |
| The machine does not request descaling. | The descaling cycle is requested only after a large number of uses of the steam circuit. | |
| Some grounds are in the drip tray. | A small amount of ground coffee can get into the drip tray. The machine is designed to evacuate any excess ground coffee so that the percolation zone remains clean. | |
| The warning message is still displayed after you have emptied the coffee grounds tray. | Reinstall the coffee grounds tray and follow the directions on the screen. | |
| The warning message is still displayed on the screen after you have filled the water tank. | Check the correct positioning of the tank in the appliance.The float at the bottom of the tank must move freely. Check and unlock the float if necessary. | |
| DRINKS | After starting to make a drink, if you ask for an extra shot the machine tells you that this is not possible. | The coffee grounds collector is full and the extra shot function is not available.Once the drink has been made, you have the option to restart an espresso after you have emptied the coffee grounds collector. |
| The One Touch Cappuccino block does not suck the milk up.The One Touch Cappuccino block makes little or no froth. | Verify that the block is assembled correctly (including the connector in the milk tube) Fig. 35Check that the connector Fig. 29 is not blocked or dirty; soak it in a mixture of warm water and dishwasher liquid, then rinse and dry before reassembly.Ensure that the steam output is not blocked. If it is, see “The steam output of your machine appears to be partially or completely blocked”.Verify that the flexible pipe is not blocked or kinked and that it is well seated in the One Touch Cappuccino block to avoid any air leaks. Check that it is properly immersed in the milk.Rinse and clean the block (see chapters corresponding to the rinsing and cleaning of the One Touch Cappuccino block).For the milk-based preparations, we advise you to use fresh, pasteurised or UHT milk, recently opened. It is also recommended to use a cold container. | |
| The milk or the water is not flowing correctly in the cup or cups. | Check that the One Touch Cappuccino block is correctly positioned. | |
| The coffee is flowing too slowly. | Turn the “fineness of grinding” button to the right (I) to obtain a coarser ground coffee (depending on the type of coffee used).Perform one or several rinsing cycles.Start the cleaning of the machine (see “Automatic cleaning program”)Change the Claris Aqua Filter System cartridge (see “Installing the filter”) | |
| Traces of milk are present in an americano or a hot water. | Perform a milk rinsing, or disassemble and clean the One Touch Cappuccino block before starting to prepare the drink. | |
| The coffee is too light or not full-bodied enough. | Avoid the use of oily, caramelised or flavoured coffees.Check that the bean container contains coffee and that it is moving down correctly.Decrease the volume of the preparation and increase the strength of the preparation using the DARK function.Turn the “fineness of grinding” button to the left to obtain a finer ground coffee.Make your drink in two cycles using the 2-cup function. | |
| The espresso or the coffee is not hot enough. | Perform a coffee rinsing circuit before you start to make your coffee.Increase the temperature of the coffee in the Settings menu.Heat the cup in the rinsing with hot water before starting to prepare the drink. | |
| Your tea is not hot enough or is too hot. | Increase or decrease the temperature of the hot water in the Settings menu. | |

If one of the problems outlined in the table persists, contact the KRUPS Consumer Service.
Here some example of recipes to make
Café crème
Prepare a lungo in a large cup, sweeten it and then pour in thick cream. For even more luxuriousness add chocolate chips.
Moka
Run a cappuccino, sprinkle the milk foam with a teaspoon of cocoa and finally cover with whipped cream
Coffee Smoothie
For a luxurious breakfast, mix a natural yoghurt with an espresso. To soften add 1 teaspoon of liquid honey, then depending on the season, add a banana or a peach to make the smoothie more creamy.
Café Viennois
Make yourself a double espresso or doppio, sweetened, and then cover it with a generous layer of whipped cream. Those looking for something more luxurious can sprinkle with a teaspoon of cocoa and/or add chocolate sprinkles.
natural_image
Sequence of glass glasses showing different types of beverages: dark liquid, mugs, and clear liquid (no text or symbols)Tipps
(Blonde) (Light French) (Brune)
natural_image
Diagram showing three circular objects with internal patterns, connected by lines to a central circular object (no text or symbols)
natural_image
Diagram showing a car tire with a dotted pattern and a vertical thermometer (no text or symbols)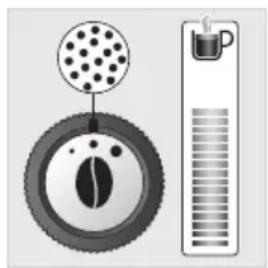
natural_image
Diagram showing a car tire with a dotted pattern and a water tap (no text or symbols)
natural_image
Illustration of a car tire and water tap with a coffee cup (no text or symbols)natural_image
Sequence of glass mugs showing different types of beverages: dark liquid, clear glass, medium liquid, and clear glass (no text or labels)Tips
BESCHRIJVING VAN HET APPARAAT
A Dekselhandgreep waterreservoir
B Waterreservoir
C Koffiedik-opvangbak
D In de hoogte verstelbare koffie-uitlopen
E Rooster en afneembare druppelopvangbak
F Deksel van het koffiebonenreservoir
G Afneembaar blok One-Touch Cappuccino
G2 One touch-cappuccino blok
H Melkslangetje en mixer
IWaterniveauindicator
1 Koffiebonenreservoir
JRegelknopmaalgraad
(Blonde) (Light French) (Brune)
natural_image
Diagram showing three circular objects with internal patterns, possibly representing a biological or mechanical structure (no text or symbols present)
natural_image
Diagram showing a car tire and its vertical thermometer (no text or labels)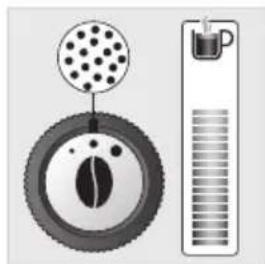
natural_image
Diagram showing a circular object with dots above a ring and a vertical scale with tick marks (no text or symbols)
natural_image
Illustration of a tire and a vertical scale with a magnified view (no text or symbols)natural_image
Sequence of glass glasses showing different types of beverages: dark liquid, mugs, and clear (no text or symbols)Tips
(Blonde) (Light French) (Brune)
natural_image
Diagram showing three circular objects with internal patterns, no text or symbols present
natural_image
Diagram of a car tire and its vertical thermometer, no text or symbols present
natural_image
Diagram showing a circular object with dots above a ring and a vertical bar with tick marks (no text or symbols)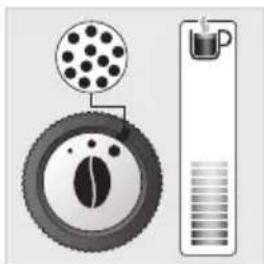
natural_image
Diagram showing a tire with a drum and a vertical scale, no text or symbols presentnatural_image
Sequence of glass glasses showing different types of beverages: dark liquid, mugs, and clear liquid (no text or symbols)Tips
GENERELT VEDLIKEHOLD....s.114
PROBLEMER OG KORRIGERENDE TILTAK....s.116
VIKTIG PRODUKTINFORMASJON OG BRUKSANVISNING
J Justeringsknapp for kverningsgrad
K Trakt for rengjøringstablett
L Kvern i metall
2 Displaypanel
M OLED-skjerm
N AV/PÅ-knapp
- Valgknapper
Detaljer:
(Blonde) (Light French) (Brune)
- Mer eller mindre aroma og kraft i koppen
natural_image
Diagram showing three circular objects with internal patterns, connected to a central circular object (no text or symbols)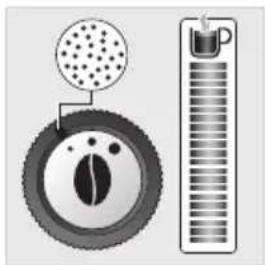
natural_image
Diagram showing a car wheel with a sensor emitting particles and a thermometer scale (no text or symbols)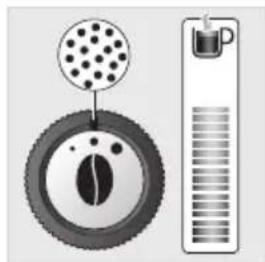
natural_image
Diagram showing a car tire with a dotted head and a vertical scale bar (no text or symbols)
natural_image
Illustration of a tire and a vertical scale with a magnified view (no text or symbols)GENERELT VEDLIKEHOLD
natural_image
Sequence of glass mugs showing different types of beverages: dark liquid, clear glass, medium glass, and clear glass (no text or symbols)Några tips
(Blonde) (Light French) (Brune)
natural_image
Diagram showing three circular objects with internal patterns, possibly biological or material samples, connected to a central circular structure (no text or symbols)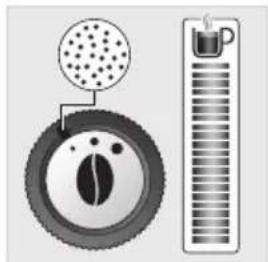
natural_image
Diagram showing a car tire and its height measurement with a magnified view of the wheel (no text or symbols)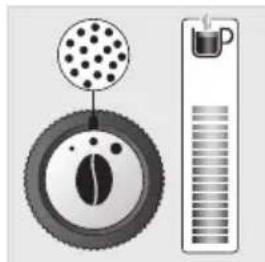
natural_image
Diagram showing a car tire and its height scale (no text or symbols)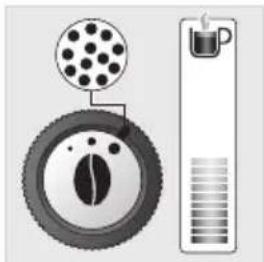
natural_image
Illustration of a tire and a thermometer with no visible text or symbolsnatural_image
Sequence of glass mugs showing different types of beverages: dark liquid, clear glass, medium glass, and clear glass (no text or symbols)Vinkkejä
MUUT TOIMINNOT p.152
SUODATINPATRUUNA p.153
YLEISHUOLTO p.154
ONGELMAT JA KORJAAVAT TOIMENPITEET...... p.156
TÄRKEÄÄ TIETOA TUOTTEESTA JA KÄYTTÖOHJEESTA
(Blonde) (Light French) (Brune)
natural_image
Diagram of a circular object with three labeled circular features, no text or symbols present
natural_image
Diagram showing a car tire with a perforated lid and a vertical bar indicating a weight (no text or symbols)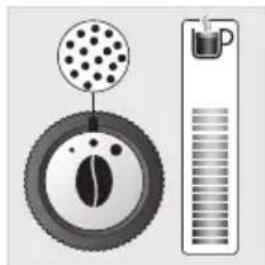
natural_image
Diagram showing a circular component with dot pattern and a vertical scale bar (no text or symbols)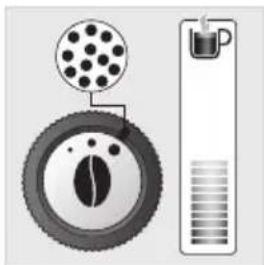
natural_image
Illustration of a tire and a thermometer with no visible text or symbolsnatural_image
Five glass mugs of varying shades of liquid, arranged horizontally (no text or symbols)Trucos
(Blonde) (Light French) (Brune)
natural_image
Diagram showing three circular objects with internal patterns, no text or symbols present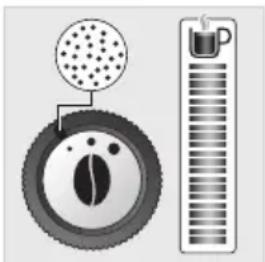
natural_image
Illustration of a tire and thermometer with no visible text or symbols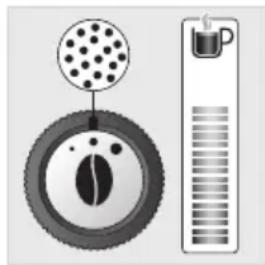
natural_image
Illustration of a mechanical device with a circular component and a vertical scale bar (no text or symbols)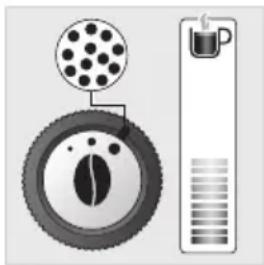
natural_image
Illustration of a tire and a water tap with a drum, no text or symbols presentnatural_image
Five glass mugs of varying shades of liquid, arranged horizontally (no text or symbols)Suggerimenti
(Blonde) (Light French) (Brune)
natural_image
Diagram showing three circular objects with internal patterns, no text or symbols present
natural_image
Diagram showing a car tire with a perforated lid and a thermometer (no text or symbols)
natural_image
Diagram of a car wheel and its height scale (no text or symbols)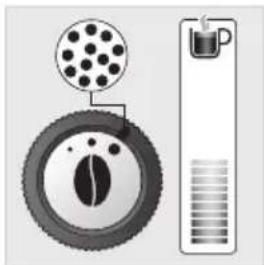
natural_image
Diagram showing a tire and a vertical container with liquid, no text or symbols presentnatural_image
Sequence of glass mugs showing different types of beverages, from dark liquid to clear liquid (no text or labels)Dicas
(Blonde) (Light French) (Brune)
natural_image
Diagram showing three circular components with internal patterns, no text or symbols present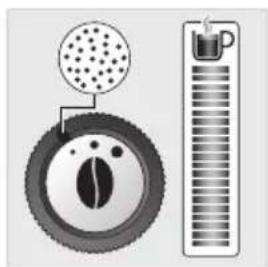
natural_image
Illustration of a tire and a measuring cup (no text or symbols)
natural_image
Diagram showing a car tire with a sensor emitting particles, alongside a vertical scale bar (no text or symbols)PROBLEMAS E AÇÕES CORRETIVAS
natural_image
Five glass bowls of different beverages: two dark, one light, two medium, and two clear (no text or symbols)E
Μικρά μυστικά
(Blonde) (Light French) (Brune)
natural_image
Diagram showing three circular objects with internal patterns, connected by lines to a central circular object (no text or symbols)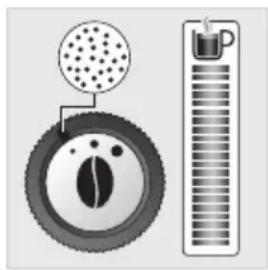
natural_image
Illustration of a car tire and its thermometer (no text or symbols)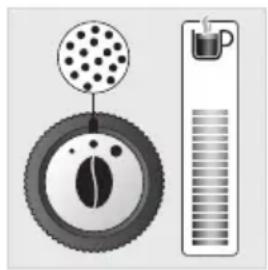
natural_image
Diagram showing a car tire with a dotted pattern and a water tap (no text or symbols)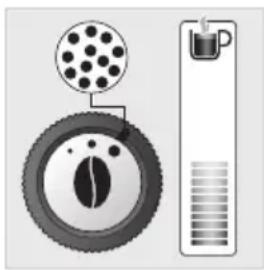
natural_image
Illustration of a tire and water tap with a drum, no text or symbols presentnatural_image
Sequence of glass glasses showing different types of beverages: dark liquid, mugs, and clear liquid (no text or symbols)Tipy
(Blonde) (Light French) (Brune)
natural_image
Diagram showing three circular objects with internal patterns, connected to a central circular object (no text or symbols)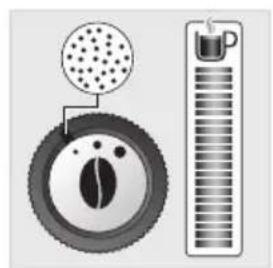
natural_image
Diagram showing a car tire with a dotted pattern and a vertical bar with a mug (no text or symbols)
natural_image
Illustration of a car tire and its water tap (no text or symbols)
natural_image
Diagram showing a tire and water tap with a magnified inset of the tire (no text or symbols)natural_image
Five glass mugs of varying shades of liquid, arranged horizontally (no text or symbols)Tipy
natural_image
Diagram showing three circular objects with internal patterns, possibly biological or scientific artifacts (no text or symbols)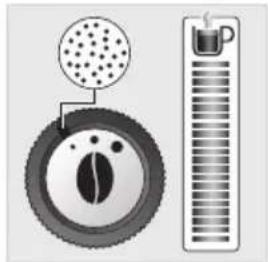
natural_image
Diagram showing a car tire and its vertical thermometer, no text or symbols present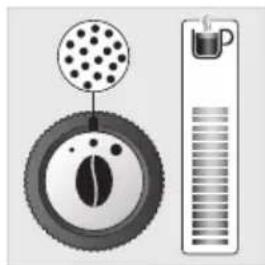
natural_image
Diagram showing a car wheel with a dot pattern and a vertical thermometer (no text or labels)
natural_image
Illustration of a car tire and its water tap (no text or symbols)natural_image
Five glass mugs of varying shades of liquid, arranged horizontally (no text or symbols)Tippek
(Blonde) (Light French) (Brune)
natural_image
Diagram of a circular object with three circular insets showing internal structures, no text or symbols present.
natural_image
Diagram showing a car tire with a dotted pattern above it and a vertical bar with a mug on the right side (no text or symbols)
natural_image
Illustration of a car tire and its thermometer (no text or symbols)
natural_image
Illustration of a car tire and its water tap with a thermometer (no text or symbols)natural_image
Five glass mugs of varying shades of liquid, arranged horizontally (no text or symbols)PL
Rady praktyczne
(Blonde) (Light French) (Brune)
natural_image
Diagram of a circular object with three labeled circular features, no text or symbols present
natural_image
Illustration of a car tire and its height scale (no text or symbols)
natural_image
Illustration of a car wheel and its temperature scale (no text or symbols)
natural_image
Illustration of a tire and a thermometer with no visible text or symbolsWykonywanie cappuccino

PROBLEMY I DZIAŁANIA NAPRAWCZE

natural_image
Sequence of glass glasses showing different types of beverages: dark liquid, mugs, and clear liquid (no text or labels)Советы
(Blonde) (Light French) (Brune)
natural_image
Diagram showing three circular objects with internal patterns, no text or symbols present
natural_image
Diagram showing a car tire and its corresponding thermometer, no text or symbols present
natural_image
Diagram showing a car tire with a dotted pattern and a vertical scale bar (no text or symbols)
natural_image
Illustration of a tire and a vertical scale with a magnified view (no text or symbols)natural_image
Five glass bowls of different beverages: two dark, one light, two medium, and two clear (no text or symbols)Поради
natural_image
Diagram of a tire cross-section with three circular insets showing different eye regions (no text or labels)
natural_image
Diagram of a car tire and its internal structure, showing wheel, gear, and cylinder (no text or labels)
natural_image
Diagram showing a car tire and its corresponding sensor or sensor device (no text or symbols present)
natural_image
Diagram showing a tire and a container with a drum, no text or symbols presentnatural_image
Five glass mugs of varying shades of liquid, arranged horizontally (no text or symbols)Recomandări
(Blonde) (Light French) (Brune)
natural_image
Diagram showing three circular objects with internal patterns, possibly biological or geological samples, connected by lines to a central circular structure (no text or symbols)
natural_image
Illustration of a car tire and its height scale (no text or symbols)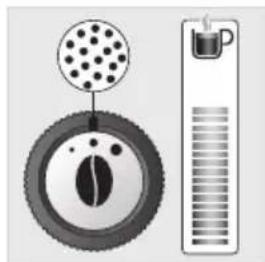
natural_image
Diagram showing a car tire and its water level indicator (no text or symbols)
natural_image
Illustration of a tire and a thermometer with no visible text or symbolsnatural_image
Sequence of glass glasses showing different types of beverages: dark liquid, mugs, and clear liquid (no text or symbols)Съвети
(Blonde) (Light French) (Brune)
natural_image
Diagram showing three circular objects with internal patterns, possibly biological or material samples, connected to a central circular object (no text or symbols present)
natural_image
Diagram of a car tire and its vertical barrel, showing internal components without any text or labels.
natural_image
Illustration of a car tire and its thermometer (no text or symbols)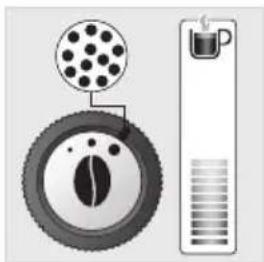
natural_image
Illustration of a tire and a thermometer with no visible text or symbolsnatural_image
Five glass glasses showing different types of beverages: one filled with dark liquid, two filled with clear liquid, three filled with clear liquid, and one empty with clear liquid.Savjeti
(Blonde) (Light French) (Brune)
- Dobivanje kave s više ili manje arome i jačine u šalici
natural_image
Diagram of a circular object with three circular insets showing internal structures (no text or symbols)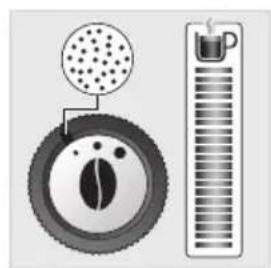
natural_image
Diagram showing a car tire with a dotted pattern and a water tap (no text or symbols)