NAZ 2.4 B2 - Toothbrush NEVADENT - Free user manual and instructions
Find the device manual for free NAZ 2.4 B2 NEVADENT in PDF.
User questions about NAZ 2.4 B2 NEVADENT
0 question about this device. Answer the ones you know or ask your own.
Ask a new question about this device
Download the instructions for your Toothbrush in PDF format for free! Find your manual NAZ 2.4 B2 - NEVADENT and take your electronic device back in hand. On this page are published all the documents necessary for the use of your device. NAZ 2.4 B2 by NEVADENT.
USER MANUAL NAZ 2.4 B2 NEVADENT
Operating instructions
FR BE
Before reading, unfold the page containing the illustrations and familiarise yourself with all functions of the device.
DK
GB/IE Operating instructions Page 1
text_image
Diagram of a toothbrush with labeled parts including clean, soft, push, and cleaning sectionsContents
Introduction 2
Proper use 2
Package contents....2
Appliance description 2
Technical details 2
Safety instructions 3
Set-up/wall bracket 4
First use ....4
Fitting/removing brush heads 5
Operation 5
Brushing teeth 5
Cleaning and care 7
Warranty and service 7
Disposal 8
Importer 8
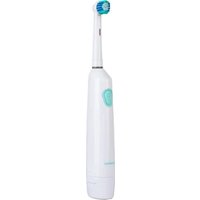
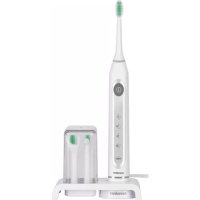
ELECTRIC TOOTHBRUSH
Introduction
Congratulations on the purchase of your new appliance.
You have selected a high-quality product.
The operating instructions are a constituent of this product. They contain important information about safety, use and disposal. Before using the product, familiarise yourself with all operating and safety instructions. Use this product only as described and only for the specified areas of application. Please also pass these operating instructions on to any future owner(s).
Proper use
This appliance is intended exclusively for personal dental care at home. This appliance is intended solely for use in domestic households. The appliance is not intended for use in industrial or medical environments. It is not suitable for animal care. Not to be used for commercial purposes.
Package contents
Hand element
8 brush heads
Charger
2 screws
2 plugs
Travelling case
Operating instructions
NOTE
Check contents for completeness and damage immediately after unpacking. Contact Customer Services if necessary.
Remove all packaging materials and plastic film from the appliance.
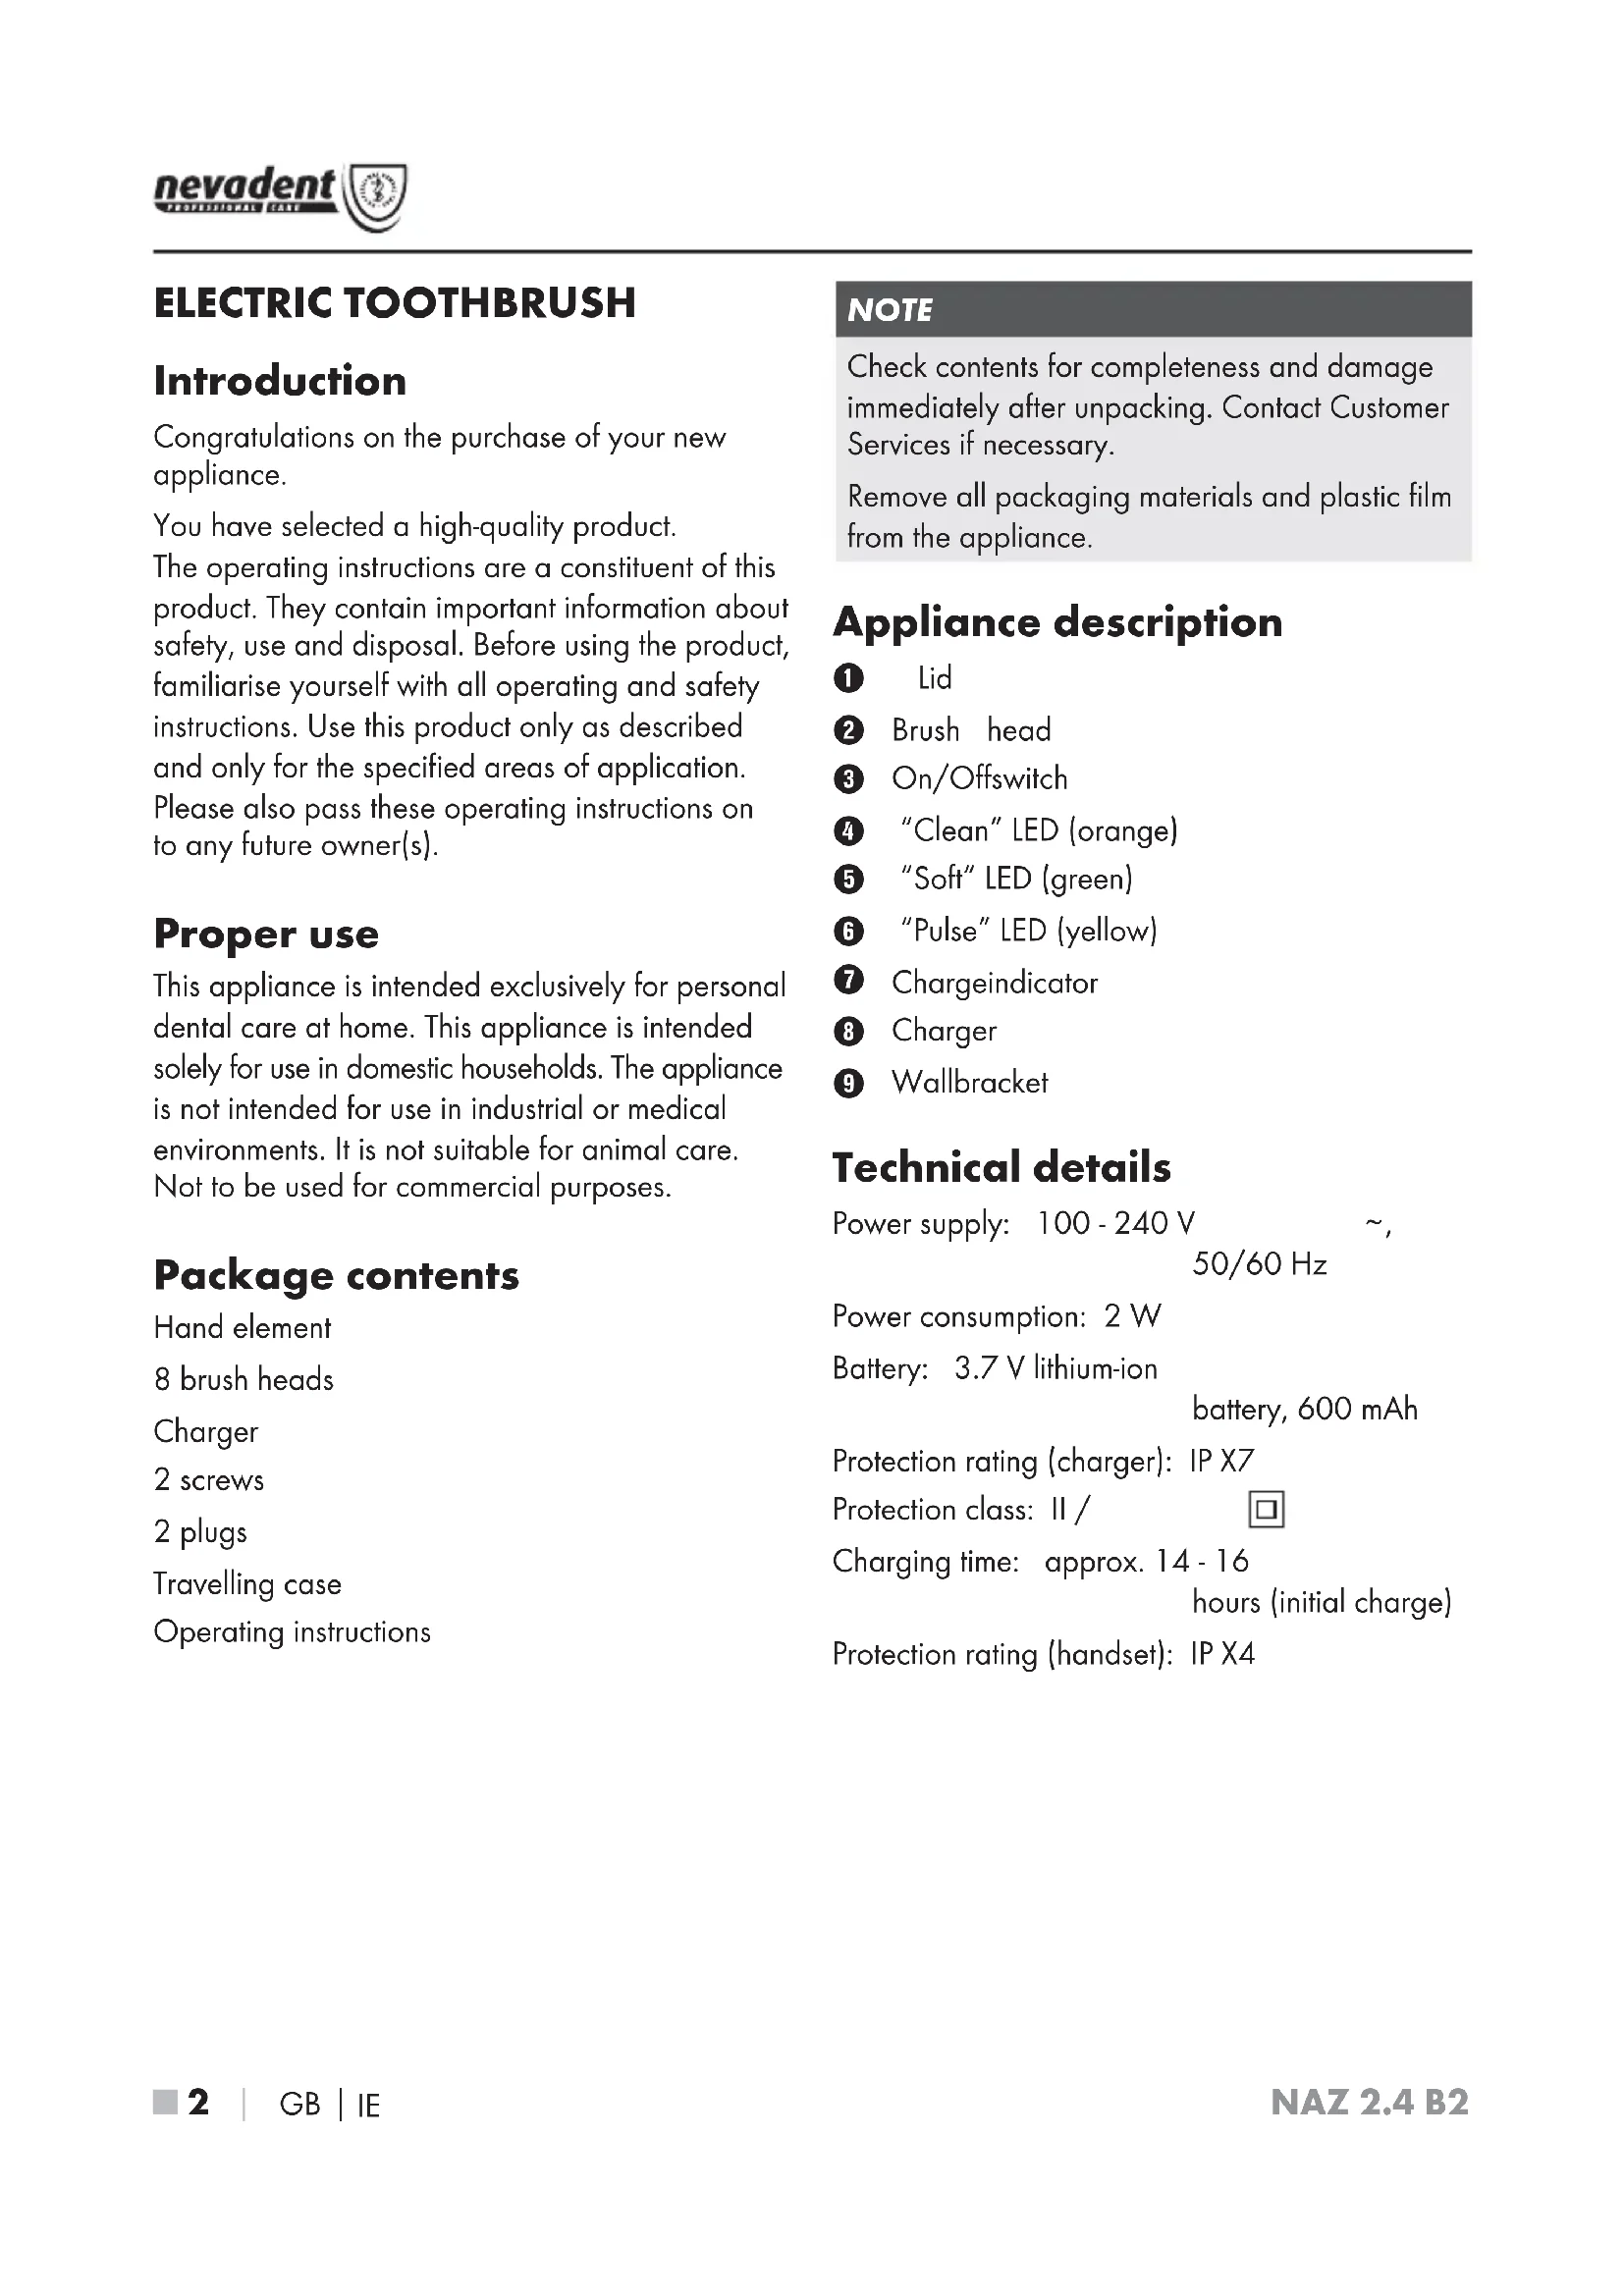
Appliance description
1 Lid
② Brush head
③ On/Offswitch
4 "Clean" LED (orange)
5 "Soft" LED (green)
6 "Pulse" LED (yellow)
7 Chargeindicator
8 Charger
9 Wallbracket
Technical details
Power supply: 100 - 240 V \~, 50/60 Hz
Power consumption: 2 W
Battery: 3.7 V lithium-ion
battery, 600 mAh
Protection rating (charger): IP X7
Protection class: II /

Charging time: approx. 14 - 16
hours (initial charge)
Protection rating (handset): IP X4
Safety instructions

DANGER - RISK OF ELECTRICAL SHOCK!
▶ To avoid damage, do not allow liquids to penetrate the appliance and do not submerge it in water.
▶ Ensure that no foreign objects penetrate the appliance.
▶ In the event of malfunctions or obvious damage, please contact our Customer Service department.
- Ensure that the power cable can never become wet or damp during operation. Route the power cable in such a way that it cannot become trapped or damaged in any other way. Risk of electric shock!
The mains cable of this appliance cannot be replaced. In the event of the cable being damaged, the whole appliance must be scrapped.
▶ Never touch the charger if it has fallen into water. Remove the plug from the wall socket first! Risk of electric shock!

Do not submerge the handset or the charger in water or other liquids.

WARNING – RISK OF INJURY!
- Toothbrushes may be used by children and by persons with reduced physical, sensory or mental capabilities or lack of experience and/or knowledge if they are supervised or have been told how to use the appliance safely and are aware of the potential risks.
- Cleaning and user maintenance should not be performed by children unless they are under supervision.
▶ Children must not use the appliance as a plaything.
CAUTION - PROPERTY DAMAGE!
The electric toothbrush may only be recharged with the supplied charger. The appliance could otherwise be irreparably damaged!
▶ Only operate the appliance with the original accessories supplied.
Set-up/wall bracket
NOTE
The charger ⑧ may only be operated freestanding if used in dry rooms.
In damp rooms, especially in the vicinity of water (bath), the charger ⑧ must be firmly fixed to the wall to protect it from falling into water.
1) Pull the wall bracket ⑨ downwards from underneath the charger ⑧.
2) Using the screw holes of the wall bracket ⑨, mark the spacing for the boreholes on the wall. Check to ensure that there is a mains power socket in close vicinity.
3) Before drilling the holes, check to ensure that there are no electrical cables or water pipes behind the markings.
4) Use a 5 mm drill bit to drill the required holes and insert the supplied wall plugs.
5) Attach the wall bracket ⑨ using the screws provided.
6) After you have attached the wall bracket ⑨, push the charger ⑧ a short way onto the wall bracket ⑨. The mains cable should lie in the middle. Guide the mains cable through the right-hand or left-side recesses on the wall bracket ⑨ and then push the charger ⑧ all the way onto the wall bracket ⑨.
7) Ensure that the mains cable is not trapped and that it lies properly in the recess.
First use
NOTE
Before starting to use the appliance, check that it is in fault-free condition. If it is not, it must not be used.
1) Insert the plug into the mains power socket.
2) Before initial use, clean the new brush heads ② with fresh water.
3) Open the lid ① of the charger ⑧ and place the replacement brush heads on the brush holders. Re-close the lid ①.
4) Place the handset on the charger ⑧ so that it slides onto the pin on the base.
5) Allow the handset to charge up for around 14 - 16 hours before using it for the first time. The charge indicator ⑦ on the front of the hand appliance lights up red during the charging process.
6) Use the handset repeatedly without charging the battery until the performance becomes noticeably weaker or the toothbrush stops working and the charge indicator ⑦ blinks red. Then recharge the battery for 14 - 16 hours. When the appliance is fully charged, the charge indicator ⑦ lights up green.
7) Charge and discharge the toothbrush completely 3 times. The battery will have then reached its full capacity.
8) You can now leave the handset in the charger ⑧ after every use, so as to always have full power available.
Fitting/removing brush heads
■ To remove the brush head ②, turn it clockwise and then pull it upwards.
■ To fit the brush head ② place it slightly offset on the hand element and then turn it anti-clockwise.
NOTE
To avoid damage to the appliance, always use original brush heads.
(For replacement brush heads, see the order card)
Operation
This toothbrush has 3 different performing levels:
- "Clean": normal speed, orange "Clean" LED 4.
For cleaning the teeth.
- "Soft": slow speed, green "Soft" LED 5. For cleaning the teeth of people with sensitive gums.
- "Pulse": alternating speeds, yellow "Pulse" LED 6.
For massaging the gums.
Press the on/off switch ③ once to activate the "Clean" mode. The "Clean" LED ④ lights up.
■ Press once more to switch to "Soft" mode. The "Soft" LED ⑤ lights up.
■ Press it a third time to switch to "Pulse" mode. The "Pulse" LED ⑥ lights up.
■ To switch the toothbrush off, press the on/off switch ③ once more.
Brushing teeth

WARNING!
Due to the unaccustomed effect of the tooth-brush, there may be some initial gum bleeding, this is normal. If this continues for more than two weeks, you should consult your dentist.
1) Place the brush head ② on the handset.
2) Moisten the brush under flowing water.
3) Put a little toothpaste onto the wet brush.
NOTE
To avoid spray, do not switch on the appliance until it is in your mouth
4) Use the on/off switch ③ to select the desired operating mode.
NOTE
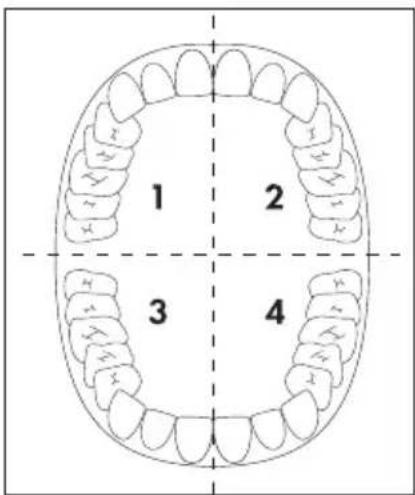
This toothbrush has a 30-second interval timer, so that all four jaw quadrants can be cleaned evenly.
5) Divide your mouth into four parts (quadrants): upper left, upper right, lower left and lower right.
text_image
1 2 3 46) Start in one quadrant:
Start with the brush head ② on your gums, and move the brush upwards/downwards from the gums to the crown of the tooth.
Proceed in this manner on both the inside and the outside of the tooth. Start again at the gums for each individual tooth.
Do not forget to brush the back of the rear molars.
To clean the chewing surfaces, guide the rotating brush head over the chewing surfaces with a little pressure.
7) After 30 seconds, the toothbrush stops briefly to signal that you should start cleaning the next quadrant. Clean each jaw quadrant using the same technique.
8) After two minutes the toothbrush stops its operation briefly 4 times. This informs you that you have complied with the dental recommendation of two minutes cleaning.
9) Press the on/off switch ③ repeatedly until the toothbrush stops.
10) Then take the toothbrush out of your mouth.
11) After use, rinse the brush head ② thoroughly under running water.
12) Remove the brush head ② from the handset. To clean the drive shaft and the handset, allow a little water to flow over them. Hold the handset so that the drive shaft is pointing downwards.
NOTE
Regularly massage your gums. This promotes blood circulation and helps to keep them healthy. Set the mode to "Pulse" and guide the moistened brush over your gums with a light pressure.
Cleaning and care

DANGER - ELECTRIC SHOCK!
▶ Always remove the plug of the charger ⑧ from the power socket before cleaning the appliance! Risk of electric shock!

Never submerge the handle or the charger ⑧ in water or other liquids.
NOTE
Never open the housing of the charger ⑧ or the toothbrush! They cannot be resealed in a water-tight manner.
1) Clean the charger ⑧ only with a soft, lightly moistened cloth. Do not use detergents or solvents. They can damage the plastic surfaces.
2) Remove the brush head ② from the handset. After use, clean the brush heads ② thoroughly under running water.
We recommend cleaning the brush heads ② in a standard commercial denture cleaning fluid every 2 - 4 weeks. A new brush head ② should be fitted after about 3 months, and the brush head must always be replaced when the bristles start to bend outwards.
3) To clean the drive shaft and the handset, allow a little water to flow over them. Hold the handset so that the drive shaft is pointing downwards.
Warranty and service
The warranty provided for this appliance is 3 years from the date of purchase. This appliance has been manufactured with care and inspected meticulously prior to delivery. Please retain your receipt as proof of purchase. In the event of a warranty claim, please contact your Customer Service by telephone. This is the only way to guarantee free return of your goods.
The warranty only covers claims for material and manufacturing defects, not for transport damage, wearing parts or for damage to fragile components such as switches or batteries. This appliance is intended solely for private use and not for commercial purposes.
The warranty is deemed void if this product has been subjected to improper or inappropriate handling, abuse or modifications which were not carried out by one of our authorised service centres.
Your statutory rights are not restricted in any way by this warranty.
The warranty period is not prolonged by repairs made under the warranty. This also applies to replaced and repaired parts. Damage and defects present at the time of purchase must be reported immediately after unpacking, or no later than two days after the date of purchase. Repairs made after expiry of the warranty period are chargeable.

Service Great Britain
Tel.: 0871 5000 720 (£ 0.10/Min.)
E-Mail: kompernass@lidl.co.uk
IAN 273037

Service Ireland
Tel.: 1890 930 034
(0,08 EUR/Min., (peak))
(0,06 EUR/Min., (off peak))
E-Mail: kompernass@lidl.ie
IAN 273037
Hotline availability:
Monday to Friday 08:00 - 20:00 (CET)
Disposal
the appliance be disposed of in the normal domestic waste. This product is subject to the provisions of European Directive 2012/19/EU.
Dispose of the appliance via an approved disposal company or your municipal waste facility. Please observe the currently applicable regulations. Please contact your waste disposal centre if you are in any doubt.
Disposal of batteries
To dispose of the appliance in an environmentally friendly way, you must remove the battery from the appliance:
CAUTION - PROPERTY DAMAGE!
▶ Remove the battery from the appliance only if you want to scrap/dispose of the appliance! The appliance is permanently defective after you have removed the battery!
1) To remove the battery from the handset, remove the small screw from the bottom of the handset with a Phillips screwdriver.
2) Lever out the bottom plate of the handset, for instance with a screwdriver.
3) Press the two tabs that hold the contents of the handset in place inwards and pull out the contents using a pair of pliers.
4) Snip the cables from the battery and remove it from the holder.
5) Dispose of the battery in an environmentally friendly manner.

Used batteries may not be disposed of in the household waste. All consumers are statutorily obliged to dispose of batteries at a collection site of his community/city district or at a retail store. The purpose of this obligation is to ensure that batteries are disposed of in a non-polluting manner. Only dispose of batteries when they are fully discharged.
The packaging is made from environmentally friendly material and can be disposed of at your local recycling plant.
Importer
KOMPERNASS HANDELS GMBH
BURGSTRASSE 21
44867 BOCHUM
GERMANY
www.kompernass.com
Indholdsfortegnelse
Indledning 10
Anvendelsesområde 10
Pakkens indhold....10
4 "Clean"-LED(orange)
5 "Soft"-LED(grøn)
6 "Pulse"-LED(gul)
7 Ladeindikator
8 Ladestation
9 Vægholder
Tekniske data
(ladestation): IP X7
KOMPERNASS HANDELS GMBH
BURGSTRASSE 21
44867 BOCHUM
GERMANY
www.kompernass.com
BESTILLINGSKORT NAZ 2.4 B2
www.kompernass.com
ANTAL BESTILTE DELE
The Ground Truth image displays a single, solid horizontal line, which is a stylistic or background element (like a ruled paper line or separator), not a placeholder for text. According to Rule 2, such stylistic/background lines must be ignored by the OCR result. The OCR content provided is "", which consists of no characters. This correctly represents the absence of any textual content in the GT and correctly ignores it as a fill-in-the-blank placeholder. Since the GT contains no such placeholder and only a continuous line, outputting nothing constitutes the correct interpretation of the visual line. Therefore, the OCR result is consistent with the Ground Truth.
natural_image
Seven identical white toothbrush models arranged in a 3x3 grid (no text or symbols visible)+
SWIFT (BIC): PBNKDEFF 440
KOMPERNASS HANDELS GMBH
BURGSTRASSE 21
44867 BOCHUM
GERMANY
www.kompernass.com
CARTE DE COMMANDE/ BESTELKAART NAZ 2.4 B2
www.kompernass.com
| QUANTITÉ/AANTAL(max. 3 sets par commande)(max. 3 sets per bestelling) | DESCRIPTION DES ARTICLES/ARTIKELBESCHRIJVING | PRIXUNITAIRE/PRIJS P. STUK | PRIXNET/TOTAALBEDRAG |
| ► Set de 8 têtes de brosse à dent► 8-voudige set tandenborstelkoppen | 5,50 € | €+Frais de port, magasinage, emballage et expédition non inclus./ Verwerkingskosten voor porto, afhandeling, verpakking en verzending.=€MODE DE RÈGLEMENT/BETALINGSWIJZEVirement/Overschrijving | |
| (Lieu, date)/(Plaats, datum) (Signature)/(Handtekening) | |||
CARTE DE COMMANDE/ BESTELKAART NAZ 2.4 B2
www.kompernass.com
(borstelhouder): IP X4
VAARSCHUWING - LETSELGEVAAR!
KOMPERNASS HANDELS GMBH
BURGSTRASSE 21
44867 BOCHUM
GERMANY
www.kompernass.com
BESTELKAART NAZ 2.4 B2
www.kompernass.com
AANTAL
(max. 3 sets per bestelling)
ARTIKELBESCHRIJVINGPRIJSP.STUK
TOTAALBEDRAG
▶ 8-voudige set tandenborstelkoppen


tandenborstelkoppen
+ Verwerkingskostenvoor porto, afhandeling, verpakking en verzending. 3,00 €
natural_image
Seven identical white toothbrush designs arranged in a 2x2 grid (no text or symbols visible)


natural_image
Simple gray arrow pointing right on white background (no text or symbols)BETALINGSWIJZE
□ Overschrijving
m = 311
KOMPERNASS HANDELS GMBH
BURGSTRASSE 21
44867 BOCHUM
GERMANY
www.kompernass.com
KOMPERNASS HANDELS GMBH
BURGSTRASSE 21
44867 BOCHUM
DEUTSCHLAND / GERMANY
www.kompernass.com
Last Information Update · Tilstand af information
Version des informations · Stand van de informatie · Stand der Informationen:
11 / 2015 · Ident.-No.: NAZ2.4B2-092015-1