DO918WK - Wine cellar DOMO - Free user manual and instructions
Find the device manual for free DO918WK DOMO in PDF.

User questions about DO918WK DOMO
0 question about this device. Answer the ones you know or ask your own.
Ask a new question about this device
Download the instructions for your Wine cellar in PDF format for free! Find your manual DO918WK - DOMO and take your electronic device back in hand. On this page are published all the documents necessary for the use of your device. DO918WK by DOMO.
USER MANUAL DO918WK DOMO
All of our products are always submitted to a strict quality control before they are sold to you. Should you nevertheless experience problems with your device, we sincerely regret this. In that case, we kindly request you to contact our customer service. Our staff will gladly assist you.

+3214217191

info@linea2000.be
Monday-Thursday:8.30-12.00 and 13.00-17.00 Friday:8.30-12.00 and 13.00-16.30
This appliance has a two year warranty period. During this period the manufacturer is responsible for any failures that are the direct result of construction failure. When these failures occur the appliance will be repaired or replaced if necessary. The warranty will not be valid when the damage to the appliance is caused by wrong use, not following the instructions or repairs executed by a third party. The guarantee is issued with the original till receipt. All parts, which are subject to wear, are excluded from the warranty. If your device breaks down within the 2-year warranty period, you can return the device together with your receipt to the shop where you purchased it.
The guarantee on accessories and components that are liable to wear-and-tear is only 6 months.
The guarantee and responsibility of the supplier and manufacturer lapse automatically in the following cases:
If the instructions in this manual have not been followed.
In case of incorrect connection, e.g., electrical voltage that is too high.
In case of incorrect, rough or abnormal use.
In case of insufficient or incorrect maintenance.
In case of repairs or alterations to the device by the consumer or non-authorised third parties.
- If the customer used parts or accessories that are not recommended or provided by the supplier / manufacturer.
SAFETYINSTRUCTIONS
When using electrical appliances, basic safety precautions should always be taken, including the following:
- Read all instructions carefully. Keep this manual for future reference.
- Make sure all packaging materials and promotional stickers have been removed before using the appliance for the first time. Make sure children cannot play with the packaging materials.
This appliance is intended to be used in household and similar applications such as:
- staff kitchen areas in shops, offices and other working environments;
farm houses; - by clients in hotels, motels and other residential type environments;
- bed and breakfast type environments.
Children should be supervised to ensure that they do not play with the appliance.
This appliance can be used by children aged from 16 years and above and persons with reduced physical, sensory or mental capabilities or lack of experience and knowledge if they have been given
supervision or instruction concerning use of the appliance in a safe way and understand the hazards involved. Children shall not play with the appliance. Cleaning and user maintenance shall not be made by children unless they are older than 16 and supervised.
- Keep the appliance and its cord out of reach of children younger than 16 years.
- Before use, check if the voltage stated on the appliance corresponds with the voltage of the power net at your home.
- Do not let the cord hang on a hot surface or on the edge of a table or counter top.
- Never use the appliance when the cord or plug is damaged, after malfunction or when the appliance itself is damaged. In that case, take the appliance to the nearest qualified service center for check-up and repair.
- The use of accessories that are not recommended or sold by the manufacturer can cause fire, electrical shock or injuries.
- Unplug the appliance when it is not in use, before assembling or disassembling any parts and before cleaning the appliance. Put all buttons and knobs into the 'off' position and unplug the appliance by grasping the plug. Never unplug by pulling the cord.
- Never place this appliance near a gas stove or electrical stove or in a place where it may come into contact with a warm appliance.
- Do not use the appliance outdoors.
- Only use the appliance for its intended use.
Always use the appliance on a steady, dry and level surface. - Only use the appliance for domestic use. The manufacturer can not be held responsible for accidents that result from improper use of the appliance or not following the instructions described in this manual.
All repairs should be carried out by the manufacturer or its aftersales service. - Never immerse the appliance, the cord or the plug in water or any other liquid.
- Make sure that children do not climb into the appliance and that they can not get trapped inside.
- Never clean the appliance with inflammable products. The fumes could cause a fire hazard or explosions. Never store gasoline or inflammable products inside the wine cooler.
- Do not store any food inside the wine cooler.
- Always connect the wine cooler to an earthed power outlet.
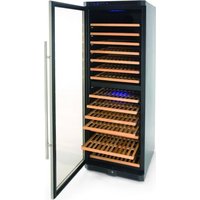
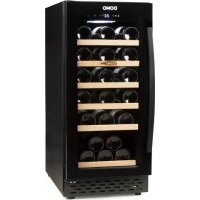
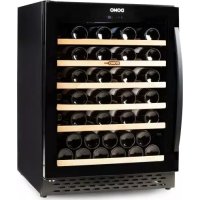
PARTS
- Hinge
- Wooden racks
- Control panel
- Switch
- Support feet
- Door

INSTALLATION
- Remove all packaging materials and any promotional stickers.
- Before connecting the appliance to the power net, leave it standing upright for about 8 hours. This reduces the risk of any malfunctioning of the cooling system due to transportation.
- Clean the inside of the wine cooler with lukewarm water and a soft cloth.
- Place the appliance on a firm, steady surface, that is strong enough to carry a filled wine cooler. To level the appliance, you can adjust the front support feet at the bottom of the appliance.
- Do not place the appliance directly into sunlight or near heat sources. Direct sunlight could affect the coating of the appliance and the proximity of heat sources may cause an increase of the energy consumption. Extreme temperatures may also cause malfunctioning of the appliance.
- Make sure that the air can circulate around the appliance. Therefore, leave a free space of at least 5 cm between the appliance and any other object.
- The cord should not be exposed or left hanging loose to prevent possible accidents.
HANDLE
Attach the handle to the door with the supplied screws. Make sure the screws are at the bottom of the handle. Screw it tight with a hex key.

USE
REVERSING THE DOOR
- Make sure that the appliance is empty and disconnected from the power net.
- Remove the cover plate (1) and the hinge pin (2) on top of the door.
- Remove the screws (3), the plate of the switch (4), the door stop (5) and the hinge pin (6) at the bottom of the door.

乙
- Turn the door over.
- Replace the cover plate (1) and the hinge pin (2) on top of the door, on the opposite side.
- Replace the screws (3) and the plate of the switch (4) at the bottom of the door.
- Replace the door stop (5) and the hinge pin (6) at the bottom of the door, on the opposite side.

TEMPERATURE
Make sure that the room temperature lies between 10^ and 26^ . If the temperature is higher or lower, the performances of the appliance may be affected. The temperature may vary depending on whether the bottles are on the upper, middle or lower racks and whether the inside lighting is on or not.
The standard temperature for the lower part is 14^ and for the upper part 8^ . You can adjust the temperature using the control buttons. In case of a power cut, the standard temperatures will be used again.
CONTROL PANEL

A: upper zone
B:lower zone
- Button to raise the temperature
- Button to lower the temperature
- Display
- On/off button of the light
- On/off button of the appliance
The desired temperature can be set using the buttons to raise or lower the temperature. (1 + 2) Pressing these buttons, the temperature will change with 1^ each time you push the button.
- The temperature of the lower part (10^ till 18^) and the temperature of the upper part (5^ till 14^) can be set separately with a minimum and maximum temperature difference. The upper part
needs to be minimum 1^ hotter than the lower part. The maximum temperature difference between both zones is 7^ . This implicates it is possible that, when setting the temperature of a zone, the temperature of the other zone will be adjusted automatically.
- You can read the selected temperature on the display.
You can turn on/ off the lights inside the appliance by pushing the on/off button for the light. (4)
- Turn on/off the appliance using the on/off button. (5) If the appliance has been switched off with this button, it still will receive power.
- The temperature can be expressed in degrees Celsius or Fahrenheit. To adjust this setting, you will need to press the on/off button of the light and the on/off button of the appliance simultaneously for 2 seconds.
BOTTLES
The wine cooler can cool 45 bottles at a time. This number is based on the bottles with below dimensions and according to the storage as shown on the picture.


MOVING THE APPLIANCE
- Remove all bottles from the wine cooler.
- Tape all loose parts to the inside of the wine cooler.
- Set the support feet at the bottom of the appliance to their lowest position to avoid damaging.
·Tape the door shut. - Make sure that the appliance is kept upright during transportation.
CLEANING AND MAINTENANCE
- Remove the plug from the socket and remove the bottles from the wine cooler.
- Clean the door seal rubber with warm water.
Clean the inside and outside of the wine cooler with warm water and a mild detergent. - Do not use aggressive or abrasive cleaning products.
ENVIRONMENTAL GUIDELINES

This symbol on the product or on its packaging indicates that this product may not be treated as household waste. Instead it must be brought to the applicable collection point for recycling of electrical and electronic equipment. By ensuring this product is disposed of correctly, you will help prevent potential negative consequences for the environment and human health, which could otherwise be caused by inappropriate waste handling of this product. For more detailed information about recycling of this product, please contact your local city office, your household waste disposal service or the shop where you purchased the product.


The packaging is recyclable. Please treat the packaging ecologically.
GARANTIA
- Ujistěte se,Že je lednice prázdné a hypojena z el. sîte.
- Remove the cover plate (1) and the hinge pin (2) on top of the door.
- Remove the screws (3), the plate of the switch (4), the door stop (5) and the hinge pin (6) at the bottom of the door.