
Pro X2 Volare FX811RE - Lawn mower BABYLISS - Free user manual and instructions
Find the device manual for free Pro X2 Volare FX811RE BABYLISS in PDF.
| Product type | Professional hair and beard trimmer |
| Brand | BaByliss |
| Model | Pro X2 Volare FX811RE |
| Power supply | Mains via AC adapter or built-in rechargeable battery |
| Battery type | Rechargeable Lithium-Polymer |
| Charging time | 3 hours for full charge |
| Runtime | 3 hours minimum cordless (quick charge 1h = 75 min) |
| Charge indicator | Red light (charging), blue light (full charge), slow red flashing (low battery), fast red flashing (10-15 min remaining) |
| Cutting height adjustment | 4 positions from 0.8 mm to 2.0 mm in 0.4 mm increments |
| Included cutting guides | 8 guides: 1-3 mm, 2-6 mm, 3-10 mm, 4-13 mm, 5-16 mm, 6-19 mm, 7-22 mm, 8-25 mm |
| Main functions | Hair and beard cutting, corded or cordless use |
| Maintenance and cleaning | Clean blades with included brush, regular lubrication with included oil |
| Safety | Do not use in water, do not expose to heat, do not use on animals |
| Included accessories | AC adapter, stand, 8 cutting guides, cleaning brush, lubrication oil |
| Usage | Professional |
Frequently Asked Questions - Pro X2 Volare FX811RE BABYLISS
User questions about Pro X2 Volare FX811RE BABYLISS
0 question about this device. Answer the ones you know or ask your own.
Ask a new question about this device
Download the instructions for your Lawn mower in PDF format for free! Find your manual Pro X2 Volare FX811RE - BABYLISS and take your electronic device back in hand. On this page are published all the documents necessary for the use of your device. Pro X2 Volare FX811RE by BABYLISS.
USER MANUAL Pro X2 Volare FX811RE BABYLISS
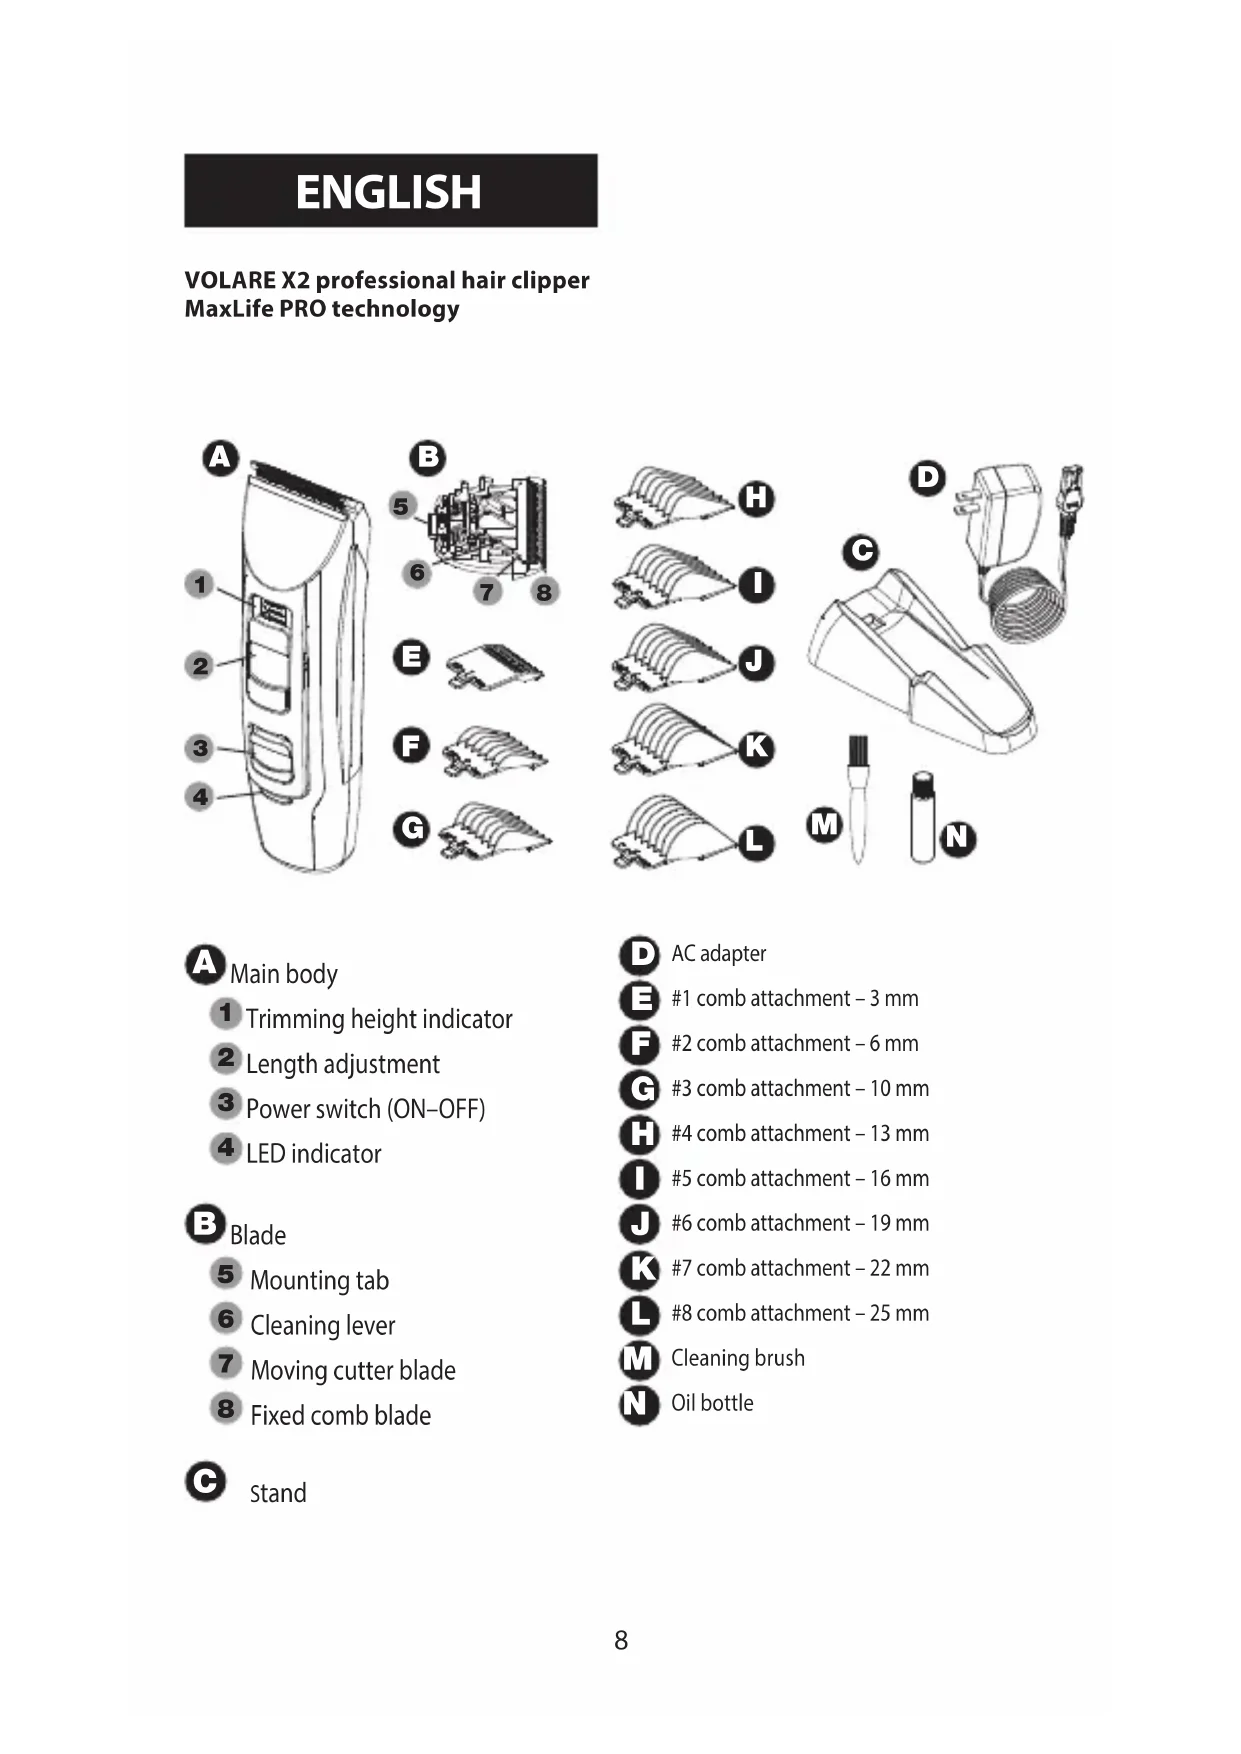
VOLARE X2 professional hair clipper MaxLife PRO technology
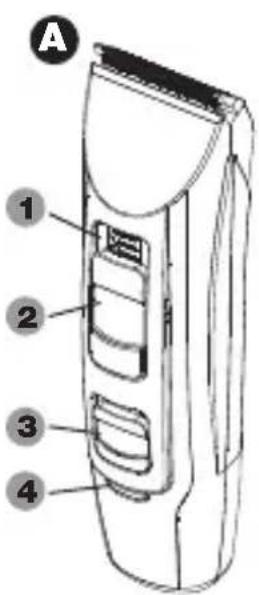


A Main body
1 Trimming height indicator
2 Length adjustment
3 Power switch (ON-OFF)
4 LED indicator
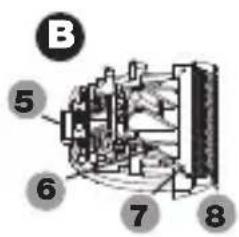
Blade
5 Mounting tab
6 Cleaning lever
7 Moving cutter blade
8 Fixed comb blade
stand
ACadapter
1 comb attachment - 3 mm
F #2 comb attachment -6 mm
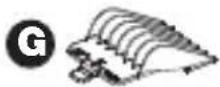
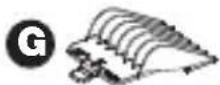
G #3 comb attachment - 10 mm
4 comb attachment - 13 mm
5combattachment-16mm
6combattachment-19mm
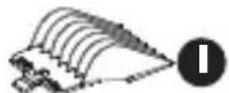
K #7 comb attachment - 22 mm
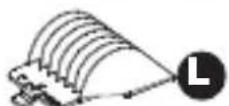
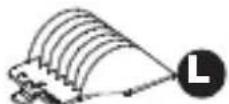
L #8 comb attachment - 25 mm
M Cleaning brush
Oil bottle
BEFORE USE
This clipper is designed for professional use to trim hair and beards. Charge it for 3 hours before use for the first time in order to activate the built-in rechargeable batteries. It can be operated on either the AC adapter or the rechargeable batteries.
Read all instructions carefully before use.
CLIPPER CHARGING PRECAUTIONS
- Do not use any power cord or AC adapter other than those provided.
- Avoid charging the batteries at temperatures below 5^ or above 35^ .
- Avoid charging the batteries in direct sunlight or near a radiating heat source.
- Even though the clipper may not be used for an extended period, charge once a month to preserve battery life.
- The power cord cannot be replaced. If it is damaged, the AC adapter should be discarded.
CLIPPER OPERATING PRECAUTIONS
- This clipper has a built-in rechargeable battery. Do not throw into fire, apply heat, or charge, use, or leave in a high temperature environment.
WARNING
Keep the appliance dry.
- The clipper may become warm during operation and/or charging. This is normal.
- Check that the blades and the attachments are not damaged before use. Replace them if they are damaged.
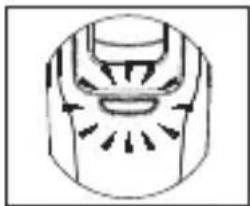
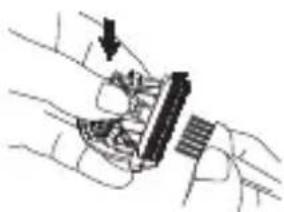
- Before each use, apply oil at the places marked with arrows (see drawing).
- Do not allow permanent wave lotion, hair restorer or hair spray to come into contact with the main body or the blades. Doing so may result in cracking, discoloring or corrosion.
- Do not drop the clipper on the floor.
- Do not knock the blades and the attachments against hard objects.
- Do not use the clipper to trim the hair of a pet.
CLIPPER CLEANING PRECAUTIONS
- Clean the housing using only a cloth slightly dampened with water or a mild soap solution.
- Never use a caustic solution.
- Never submerge the clipper in water.
CHARGING THE CLIPPER
- Slide the power switch to OFF position.
- Connect the plug from the AC adapter to the unit. The LED will turn red to indicate charging.
-
Place the unit on the stand or on a counter.
-
It will take approximately 3 hours for the clipper to fully charge, as indicated by the blue LED light. This will give you approximately 3 hours or more of run time.
- Your clipper can be quick charged for approximately 1 hour, providing about 75 minutes of run time. Note the LED light may not change from red to blue.
- Important Note: To prolong the life of your battery, it is recommend that you wait for the flashing red LED before charging your clipper.
ABOUT THE LED DISPLAY
Your clipper has one LED to indicate the different modes.
Red: the unit is charging.
Blue: the unit is fully charged.
Slow Flashing Red: early warning indicates the unit will soon need to be charged.
Rapid Flashing Red: indicates only 10 to 15 minutes more run time.
AC OPERATION
You can use your clipper even when the battery capacity is low.
-
Make sure the power switch is off before connecting the adapter.
-
Connect the AC adapter in the same way as for charging. Plug adapter into outlet. The red charging light will come on.
-
Move the power switch to the ON position. The red charging light will stay on for a second and then the unit will start.
-
If the clipper does not operate, charge the clipper for approximately 1 minute. Slide the taper control up or down to adjust the moving blade to the desired height. The blade is adjustable in four (4) stages from 0.8mm to 2.0mm , in 0.4mm steps without attachments. The actual cut length may be longer than the set length.
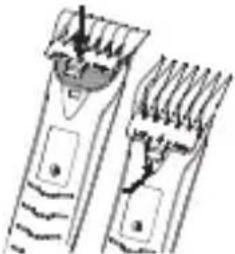
Using the Comb Attachments
- Select the desired comb attachment.
Trimming height is indicated on the outside and sides of the attachments.
-
Set the taper control to 0.8 and then mount the attachment to the clipper.
-
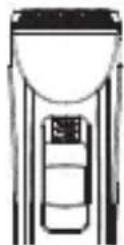
To attach the comb, do not press on the tab. You must press over the number as shown. The tab is only for comb removal.
Press here to attach.
Push up here to remove.
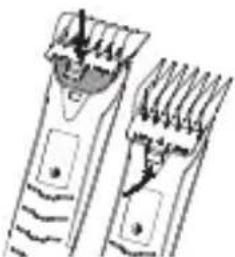
Removing the Attachment from the Clipper
- Remove the attachment as illustrated.
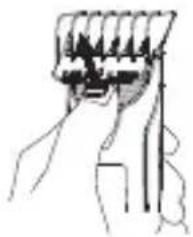
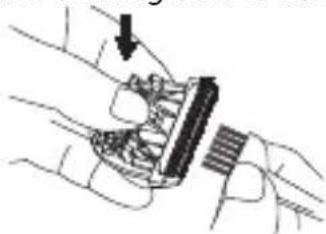
Removing the Blade
-
Be sure to turn off the power before you remove the blade.
-
Hold the clipper with the switch facing upward and push the blade with your thumb while catching the blade in your other hand.
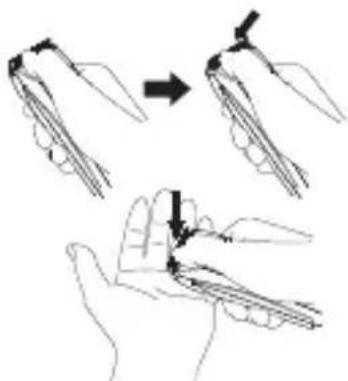
Mounting the Blade
- Set the taper control to 2.0.
You cannot mount the blade in any other position or you will damage the engagement.
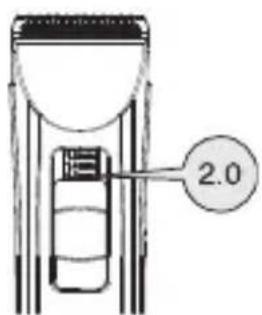
- Fit the mounting tab into the blade tongue on the clipper and push in until it clicks.
CLIPPER CARE
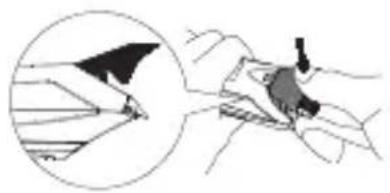
Cleaning the Blade
- Brush off any hairs from the clipper and from around the blade.
- Remove the blade and brush off hairs from the blade edge.

- Brush the hairs out from between the fixed comb blade and the moving cutter blade while pressing down on the cleaning lever to raise the moving cutter blade.
Note: Do not attempt to take the blade apart or you will not be able to use it again.
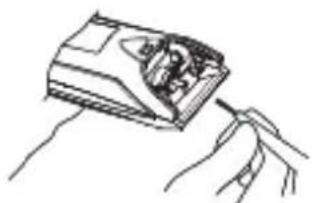
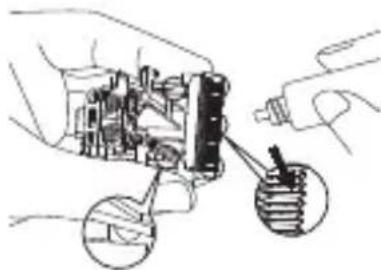
Lubrication
- Apply a few drops of the oil to the space between the fixed comb blade and moving cutter blade. Apply the oil to the clipper before and after each use.
VERY IMPORTANT
Blades must be cleaned and oiled on a regular basis so they will function properly. Failure to regularly clean and oil the blades will void the warranty.
- Set the taper control to 2.0 and then remount the blade on the clipper.
About the Lithium-Polymer Battery Pack
To ensure that the new battery reaches its full potential, the battery should be drained to rapid flashing red LED after the first use. This operation will only have to be performed once. The unit should then be fully charged until blue LED appears.
Note: It may take 5-10 charging cycles for the battery to reach its full potential.
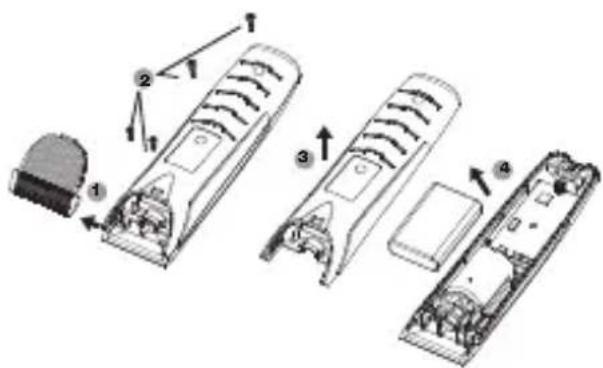
Removing the Built-in Rechargeable Battery Pack
- Turn unit off and disconnect the clipper from household outlet.
- Discharge the battery pack completely before removing it.
- Remove the blades 1 and four screws 2
- Lift off outer housing 3
- Remove the lithium-polymer battery 4
DEUTSCH
VOLARE X2 professioneller Trimmer MaxLife PRO technology


A Trimmer
WAARSCHUWINGEN VOOR HET OPLADEN
VANDETONDEUSE
AC-adapter
E Distancekam #1 - 3mm
F Distancekam #2-6mm
G Distancekam #3 - 10mm
C Distancekam #4-13mm
Distancekam #5-16mm
Distancekam #6-19mm
K Distancekam #7-22mm
Distancekam #8 - 25mm
M Rensebørste
N Smoreolie
Sokkel
FOR ANVENDELS
Tryk her for at fastgore den.
Tryk her for at fjerne den.
MEpbI I PEPIOCTOPOXHOCTN IPN 3APJDKEMAUHKN
- Повьтугсь Только TemперхODнБIM yCTpoINCTBOM, KOTOPoe BXODNT B KOMПЛeKT NOCTaBKn.
He cTaBbTe MaunHky Ha 3apAky, ecn TempepaTypa Okpykaioe Cpebl Hnxke 5^ nn Bbiue 35^
He octabJIte MaunHKy Ha 3apJKe NOd npAIMN COJIeHbIMN LyaMn nnB6IIN NCTOUYHkA TENla.
JaXe ecn Bbl OueHb DOnrO He NOnb3yeTecb MaunHKoN, ee CneJyET 3apjXaTb pa3 B Mecau, YTO6bl PpOdnnTb cPOK cnJx6bl 6aTapeKn.
3aMeHntb 5Hyp nItaHnMaunHKn HeBO3MOxHo. Pn noBpeXdeHn shHpa CneDyET 3aMeHntb BeCb nepeXODHnK.
MEPbI INPEDOCTOPOXHOCTN PNI NOJb3OBAHIN MAUHHKOJ
-Данная машинка осашиета BCТроевно AkКуМУЛТОпНо 6aTapeико. Машинky He cneуET 6pOcaTb B OROHb, NOДВерраТ b HarpeBy, a TAKKE 3apЯKaTb, xpaHNTb NIN NCNoIb3OBaTb B yCNOBnX BbICOKO TempeaTpybl.
PPEOCTEPEXEHNA
Annapat donkhen Bcerda octabaTbcra cyxmM.
B npouecce nCnObl3OBaHnna nn 3apAdkn MaunHka MoKeT HArpeBaTbcra. To HOpMaJIbHOe RaIeHne.
- Pered kaxdbim nCnoB3OBaHnem cIeIyET npOBepntb, He nobpejKeHO IIN ne3Bne INHbIe akceccyapbl MaunHKn. Pn HEO6xOIMoCTn IX CJIeIyET 3AmEHNTb.
- Ipepe KaKdbIM NcNoJIb3OBAHnEm Heo6xoIIMO Cma3aTb MaUHHky B TOkax, yKa3aHHbIX Ha CXeMe CTpeJkoI.
Hn Kopnyc MaunHKn, Hn Je3Bn He DoJXHbI KOHTaKTnpoBaTb C TexHnueckmXmNueckmnpenapaTaMn (npenapaTbI Jn XmNueckO 3aBnBKn, Hanpnmep, nIn nHbI npenapaTb), Hn c naKOM dJa fKcau. 3TO MoKeT Bbl3bBaTb TpeunHbl, Kopp03nU nn o6ecuBeuHaHne.
He donyckaIte naJeHnMaunHKn Ha noJ.
He cTyuIte Ie3Bnem nn npyumn akceccyapamn MaunHKn no TBepdbim npedmetam.
He noJb3yIteCb MaunHKo JnCTpnKKn KINBOTbIX.
YXOD3A MAUHHKOJ
- Дя ухoda за корпсом Maшинки BOCNoIb3yIteCb мягков Тряноков, сlerka CMO ueHHoB MblbHOM pactBOpe.
HnkOrda He noIb3yInTecb arpeccnBbIMN MOUcIMN cpeCTBaMn dJa yxoJa 3a MaunHKoJ. - Hn B koem clyuae He norpykaTe MaunHKy B BODY nHnyIO xndKOCTb.
KAK 3APRДNTb MAUINHKY
- BbiknIOuHTe MaunHky, nepeBbHyB nepeKNIouaTeIb B noJoxHe Nc OFF.
- BkIIOHTe nepexOHNK B cetb. CBeTOBOn DaTnK 3aROpNTc KpaCHbIM CBETOM, yKa3bIBaHa TO, YTO MaUNHka 3apJXaeTc.
- NocTaBbTe MaunHky Ha onOpny nn npyryu yctOnuByu nobepxHOCTb.
MaunHka DOCTnHET MaKcMmaJbHOrO yPoBn 3apAKn IIO nCTeueHnn 3acOB; CBetOBoN DaTnK npn 3Tom 3arOpntc CnHm CBetOM. Nocne 3toro MaunHKo MOxHO NOlb3OBaTbCRAk MInHMym B TeueHne 3acOB, He NOdknUoya K cTeN.
- Быстая заразда в теймену са обсесит Функцюнроваши К abTOHOMHOM ржиме в теймену 75 мин. Bo3moхно, уTo на заши CBETOBОДдатчК OCTaHETСКраСьIM, He nOMEHЯВ CBOI CBET Ha CINH.NTO HOPMaJIbHO.
BaxHoe 3ameaHHe: yTo6bI npOJInTb cPOK CnyX6bIMaunHKn, peKOMeHnyeTcCTaBtB ee Ha 3apAky TOnbKO nocne TORo, KaK CBETOBON DaTuNK HaUHeT MURatbKpaCHbIM CBETOM.
- Chmnte ne3Bne n ydaIte coCTpIXeHHbIe BOLOCKN, KOTOpbie MOryT HaKoONITbcnHa cTrpIryuie IroOBKe.

- Haxkab Ha pbuajok dna ouhctkn, yTO6bl npINoHnTb NOBHXHoe ne3Bne, ydaIte ueTocko BOLockn, KOtOpble MOryT HaxOHTbcr MeXdy NODBXHbIM I HeNoDvIXHbIM ne3BnEM.
IpimueaHne: He nbTaTecb demoHTnpOBaTb HenoDbXKHOe ne3Bne; erO HeBO3MOxHo 6ydt yCTaHOBtB Ha MeCTO!
CMA3KA
- HaheCHTe HeCKoJIbKO KaIeIb MaIcIa B InpocTpaHCTBO MeJdy 3y6uHKAMn NOBnKHO r HEnOaBnKHO rE3BnIy. 3Ty onepaIIO CneIyET NOBTOpIb nepeI d N oCNe KaKDoRO nONb3OBaHnMaunHKOJ.
OBPATUTE BHUMAHNE
Для обесеньяnx Hopмальноуншоваяп le3вя MaunHк Heo6xOДМо ретунго очиать и сma3bIBaTB.Есн He BblonHЯть 3ТИХ peKOMeHdaци, DeiCTBne rapaHTn Ha MaunHky MoXeT 6bITb NOCTabNeHo noBONpoc.
CE DECLARATION OF CONFORMITY
We the undersigned, hereby certify the conformity of the following product:
Type of product : Hair Clipper
Type Number :T116a
Trademark : BaByliss / CPL
with following characteristics : 100-240V~ 50-60Hz
12VDC 1000mA
Country of origin : Taiwan
Within the essential requirements of the CE Directives:
2014/30/EU ElectroMagnetic Compatibility Directive
2014/35/EU Low Voltage Directive
2011/65/EC RoHS Directive
2009/125/EC Ecodesign Directives implemented by the Commission
Regulations (EC) No. 1275/2008 and (EC) No. 278/2009
(where applicable) amended by 2008/28/EC
2006/42/EC Machinery Directive
In accordance with the following standards:
LVD: EN 60335-1 2012
A11; AC (2014)
EN 60335-2-8
2015
A1
(including EMF)
EN 62233
2008
Ecodesign
EN 50564
2011
EMC: EN 55014-1
2006
A1; A2
EN 61000-3-2
2014
EN 61000-3-3
2013
EN 55014-2
1997 A1; A2
CE mark first affixed : December 2012
BABYLISS FACO S.P.R.L.
(authorised by BABYLISS S.A.R.L. and Conair Group Ltd)

BaByliss FACO s.p.r.l.

- VOLARE X2 professional hair clipper MaxLife PRO technology
- A Main body
- Blade
- stand
- comb attachment - 13 mm
- 5combattachment-16mm
- BEFORE USE
- CLIPPER CHARGING PRECAUTIONS
- CLIPPER OPERATING PRECAUTIONS
- WARNING
- CLIPPER CLEANING PRECAUTIONS
- CHARGING THE CLIPPER
- ABOUT THE LED DISPLAY
- AC OPERATION
- Using the Comb Attachments
- Removing the Attachment from the Clipper
- Removing the Blade
- Mounting the Blade
- CLIPPER CARE
- Cleaning the Blade
- Lubrication
- VERY IMPORTANT
- About the Lithium-Polymer Battery Pack
- Removing the Built-in Rechargeable Battery Pack
- DEUTSCH
- VOLARE X2 professioneller Trimmer MaxLife PRO technology
- A Trimmer
- WAARSCHUWINGEN VOOR HET OPLADEN
- VANDETONDEUSE
- Sokkel
- FOR ANVENDELS
- MEpbI I PEPIOCTOPOXHOCTN IPN 3APJDKEMAUHKN
- MEPbI INPEDOCTOPOXHOCTN PNI NOJb3OBAHIN MAUHHKOJ
- PPEOCTEPEXEHNA
- YXOD3A MAUHHKOJ
- KAK 3APRДNTb MAUINHKY
- CMA3KA
- OBPATUTE BHUMAHNE
- CE DECLARATION OF CONFORMITY
Brand : BABYLISS
Model : Pro X2 Volare FX811RE
Category : Lawn mower