ProSport PSC1335HD - Camcorder SALORA - Free user manual and instructions
Find the device manual for free ProSport PSC1335HD SALORA in PDF.

User questions about ProSport PSC1335HD SALORA
0 question about this device. Answer the ones you know or ask your own.
Ask a new question about this device
Download the instructions for your Camcorder in PDF format for free! Find your manual ProSport PSC1335HD - SALORA and take your electronic device back in hand. On this page are published all the documents necessary for the use of your device. ProSport PSC1335HD by SALORA.
USER MANUAL ProSport PSC1335HD SALORA
natural_image
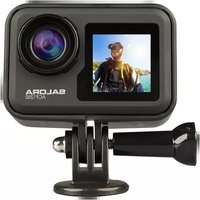
Exterior view of a silver HD camera with black frame and transparent casing (no text or symbols visible)text_image
Diagram showing camera setup with lens, lens, and camera components alongside a mounted camera with camera module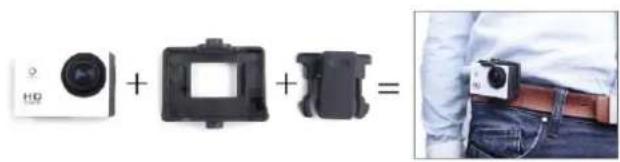
natural_image
Product assembly diagram showing a camera module, a square frame, and a camera with a belt (no text or symbols)text_image
Language VoiceRecord EV Delete Lock/Unlock 2/5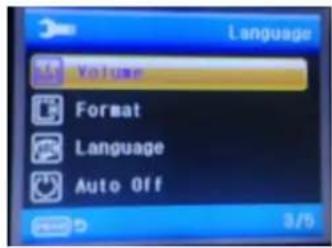
text_image
Language Volume Format Language Auto Off 3/5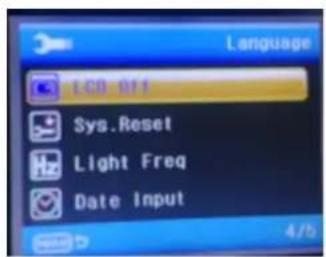
text_image
Language LCD Off Sys.Reset Light Freq Date Input 4/5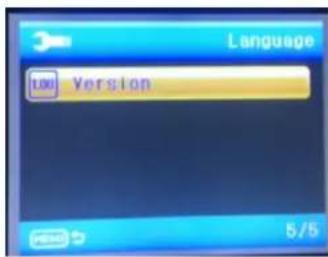
text_image
Language Low Version 5/5natural_image
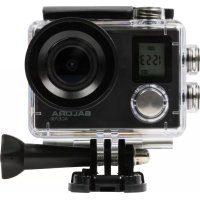
Exterior view of a silver and black HiDA (HD) camera module with visible lens and mounting base (no text or symbols beyond branding)text_image
Diagram showing the assembly of camera modules and accessories with icons and labelstext_image
Diagram showing camera module components and camera setup with labeled parts and imagestext_image
Language VoiceRecord EV Delete Lock/Unlock 2/5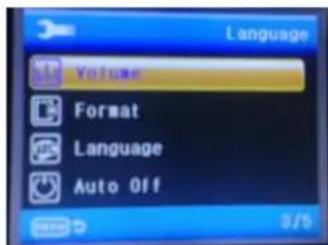
text_image
Language Volume Format Language Auto Off 3/5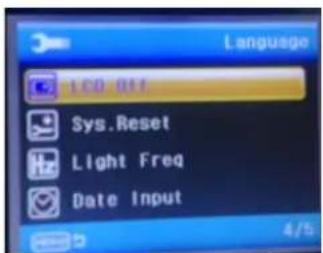
text_image
Language LCD Off Sys.Reset Light Freq Date Input 4/5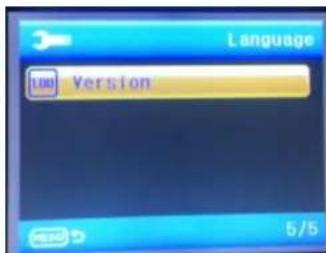
text_image
Language 100 Version 5/5natural_image
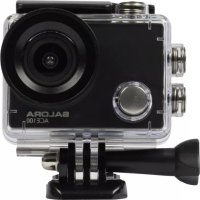
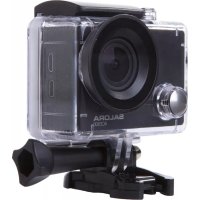
Exterior view of a white and black HD video camera with visible lens and mounting base (no text or symbols beyond branding)Notification :
High definition and high frame rate video capture devices, put a heavy strain on memory cards. Depending on your settings, it is recommended that a 4GB(or higher) CLASS 10 SD Card be used to avoid Read/Write complications, which will appear as an error message on the screen during use. If you are not sure, please test any lower class cards (Read/Write speed) in the device before use.
Functions
This user manual contains the most current information we obtained when this user manual was made. The screen display and illustrations are used in this user manual for the purpose of introducing details of this digital camera in a more specific and direct way. Difference may arise between these displays and illustrations and the digital camera actually available for you due to difference in technological development and production batch, under which case, the actual functions of this video camera will be the standard.
Precautions
Please read the precautions carefully before using this video camera for proper and safe operation, to optimize its performance and extend its life.
Do not expose the video camera to direct sunlight, nor point its lens to sunlight. Otherwise, the image sensor of the video camera may be damaged.
Take good care of the video camera and prevent water or sand particles from entering the video camera when it is used on the beach or water, because water, sand particles, dust or component containing salt may damage the video camera.
◆ Keep the video camera free of dust and chemical materials. Keep it in a cool, dry and well ventilated environment. Do not keep the video camera in a high temperature, moist or dusty environment.
◆ Please check if the video camera operates normally before use.
If dirt or stain is accumulated on the video camera or on its lens, use soft, clean and dry rag to wipe it away gently. If the video camera or its lens is stained with sand particles, blow them away gently. Do not use a cloth to wipe the surface.
Otherwise, it may scratch the surface of video camera or its lens.
If it is required to clean camera surface, firstly blow away the sand dust accumulated on this surface, and then wipe the camera gently with rag or tissue applicable to optical equipments. Please use the cleaning agent of video camera for wiping if necessary. Do not use organic solvent to clean the video camera.
◆ Do not touch the lens surface with fingers.
◆ Please back up the data if the memory card inside this video camera is used for the first time.
◆ The externally installed memory cards are manufactured from precise electronic components. Data may be lost or damaged under the following circumstances:
- Improper use of the memory card.
- The memory card is bent, dropped or scratched.
- Place it under high temperature or moist environment or expose to sunshine directly.
- Electrostatic or electromagnetic field exists around the memory card.
- This memory card is taken out or power supply is interrupted when this video camera or computer is connected to the memory card (i.e. during reading, writing and formatting).
- Touch the metal contact surface of the memory card with fingers or metal materials.
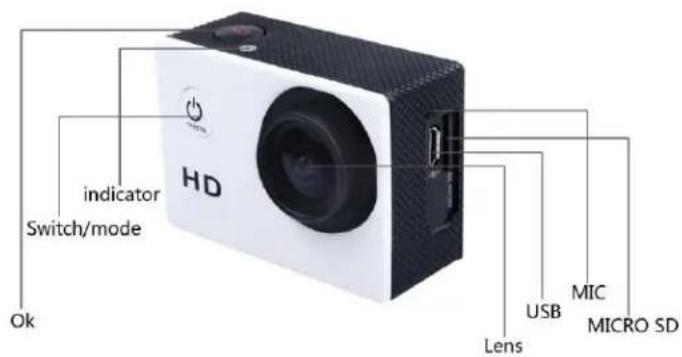
Picture of product
text_image
indicator Switch/mode OK HD USB MIC LENS MICRO SD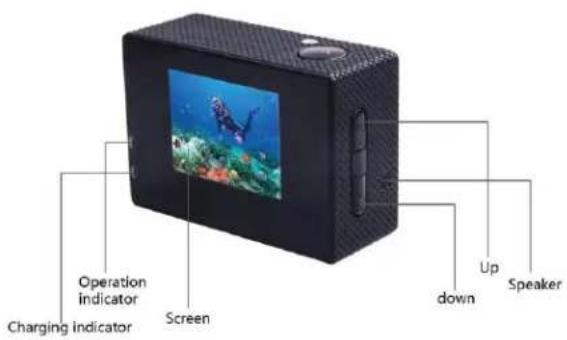
text_image
Operation indicator Charging indicator Screen Up down Speaker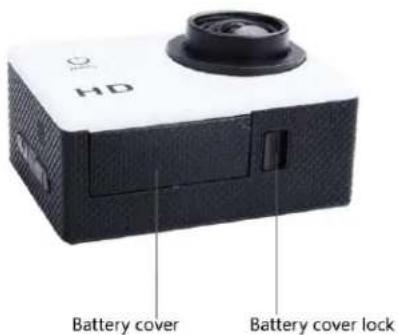
text_image
HD Battery cover Battery cover lockPicture of waterproof case
text_image
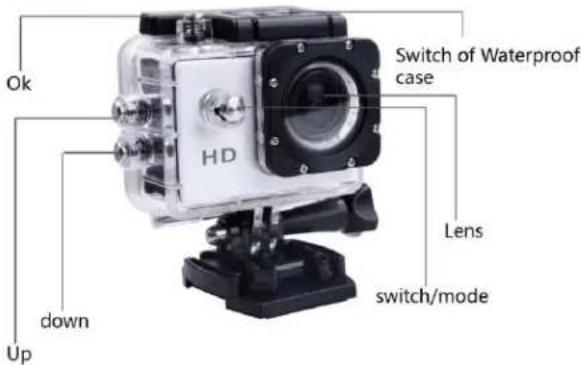
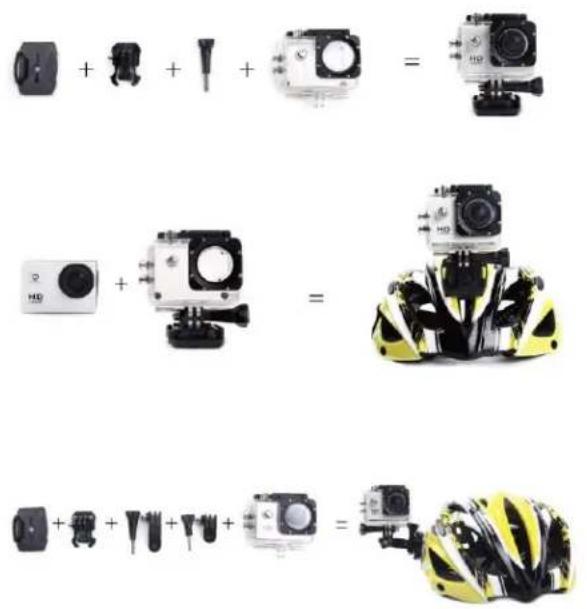
Ok Switch of Waterproof case HD down Up Lens switch/modeAccessories instructions on helmet mount
text_image
Diagram showing the assembly of camera modules and a racing helmet with various camera components and labels.Accessories instructions on bicycle mount and clip

text_image
Diagram showing camera module components and a close-up of the camera's image, including lens, camera, and camera modules.1. Inserting Micro SD Card
Note: Please choose branded Micro SD card and format it on computer before use. Neutral cards are not guaranteed to work normally.
2. Installing and removing batteries
A Press on battery cap to open it.
B Correctly install battery into camera as indicated by +/- symbols and direction of arrows marked on battery until it's in place.
C Battery Indicator: Please refer to image.
D Remove Battery: Open cap to take battery out.
3. Charging
A Charging can be done by either connecting unit to computer or power adaptor.
B Charge camera on vehicle by connecting it to car charger.
4. Switching camera on and off
A Press and hold power switch for 3 to 5 seconds to turn it on / off.
B Switch it on and off by turning display screen on and off.
5. Mode Switching
Switch between video recording / photo shooting / playback / menu by pressing "Power On-Off" button.
1) Video mode:

recording mode, press ok to start to record the video and press ok again to stop the video.
In normal video recording maximum recording time is 29 minutes for each video sequence.
2) Photo mode
Press the mode button to change into the photo mode, press ok to take photo
3) Replay mode
press mode button to enter the replay screen, choose the video or photo to replay.

4) Setting
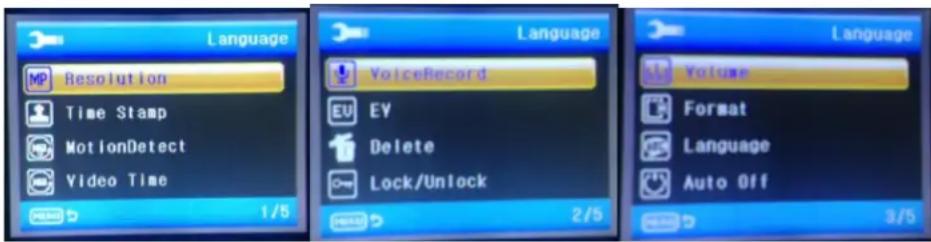
text_image
Language MP Resolution Time Stamp MotionDetect Video Time 1/5 Language VoiceRecord EV EY Delete Lock/Unlock 2/5 Language Volume Format Language Auto Off 3/5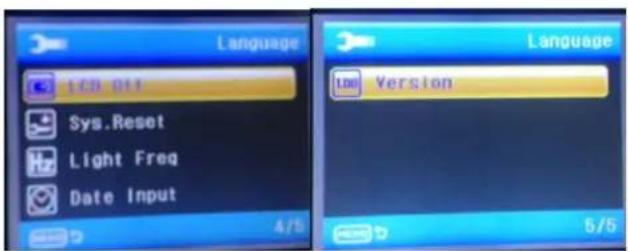
text_image
Language LCD 011 Sys.Reset Light Freq Date Input 4/5 Language 1.00 Version 5/5There are five pages available in the Setting mode, as shown above, you can customize these settings to your preference by changing the data.
6. Connecting to computer
The camera is provided with the plug and play function. Connect the device to the computer with USB cable. Open the unit, it will appear Disk Drive, "DR_DISK", open the file there is a folder named DCIM. Here you can view the content of the Micro SD card.
| Liquid Crystal Display (LCD) | 1.5LTPS |
| Lens | 120° A+ HD wide-angle lens |
| Language Options | English / German / French / Spanish / Italian Portuguese / Chinese Traditional / Chinese Simplified / Japanese / Russian/ Korean. |
| Resolution of Videos Recorded | 720P (1280*720) 30FPS VGA (848*480) 30FPS |
| Video Format | AVI |
| Compressed Format of Videos | M-JPG |
| Storage | Micro SD |
| Frequency of Optical Source | 50Hz / 60Hz |
| USB Interface | USB2.0 |
| Power Source Interface | 5V1A |
| Battery Capacity | 900MAH |
| Recording Time | About 70 minutes |
| Charging Time | About 3hours |
| Operating System (OS) | Windows XP/Vista or above/Win7/Mac os |
| Dimension | 60*40*29mm |
Note: Specifications could be subject to modification due to upgrading or updating. Please regard the actual product as the standard.