
MAC24POSC - Fan Master - Free user manual and instructions
Find the device manual for free MAC24POSC Master in PDF.
| Product Type | Pedestal Fan |
| Brand | Master |
| Model | MAC24POSC |
| Adjustable Height | 61 cm to 76 cm (24 in to 30 in) |
| Blade Diameter | 61 cm (24 in) |
| Supply Voltage | 120 V |
| Frequency | 60 Hz |
| Circuit Rating | Minimum 15 amps |
| Plug Type | 3-prong grounded |
| Intended Use | Indoor Only |
| Housing Material | Steel and plastic |
| Protective Grill | Front and rear |
| Assembly Required | Yes |
| Assembly Tools | Pliers, Phillips screwdriver, flat-head screwdriver, 10 mm wrench |
| Placement | Floor |
| Wall Mountable | No (cannot be wall mounted) |
| Safety - Speed Control | Do not use with a speed control circuit |
| Safety - Grounding | Use only on a grounded circuit |
| Safety - Water | Do not expose to water or rain |
| Safety - Maintenance | Unplug before any maintenance |
| Warranty | 1 year limited |
| Customer Service | 800-641-6996 |
| Manufacturer | Pinnacle Climate Technologies, USA |
| Certification | Intertek |
| Warning | Contains lead (California Prop 65) |
Frequently Asked Questions - MAC24POSC Master
User questions about MAC24POSC Master
0 question about this device. Answer the ones you know or ask your own.
Ask a new question about this device
Download the instructions for your Fan in PDF format for free! Find your manual MAC24POSC - Master and take your electronic device back in hand. On this page are published all the documents necessary for the use of your device. MAC24POSC by Master.
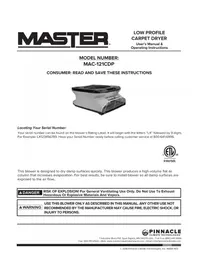
USER MANUAL MAC24POSC Master
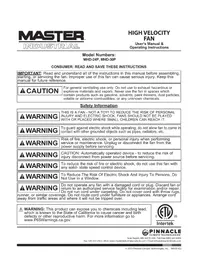
IMPORTANT: Read and understand all of the instructions in this manual before assembling, starting, or servicing the fan. Improper use of this fan can cause serious injury. Keep this manual for future reference.
CAUTION
For general ventilating use only. Do not use to exhaust hazardous or explosive materials and vapors. Never use the fan in spaces which contain products such as gasoline, solvents, paint thinners, dust particles, volatile or airborne combustibles, or any unknown chemicals.
Safety Information
WARNING
THIS IS A FAN - NOT A TOY! TO REDUCE THE RISK OF PERSONAL INJURY AND ELECTRIC SHOCK, FANS SHOULD NOT BE PLAYED WITH OR PLACED WHERE SMALL CHILDREN CAN REACH IT.
WARNING
To guard against electric shock while operating, do not allow fan to come in contact with other grounded objects such as pipes, radiators, etc.
WARNING
Risk of fire, electric shock, or personal injury when performing service or maintenance. Unplug or disconnect the fan from the power supply before servicing.
WARNING
CAUTION: Automatically operated device - to reduce the risk of injury disconnect from power source before servicing.
WARNING
To reduce the risk of fire or electric shock, do not use this fan with any solid-state speed control device.
WARNING
To Reduce The Risk Of Electric Shock And Injury To Persons, Do Not Use In a Window.
WARNING
Do not operate any fan with a damaged cord or plug. Discard fan or return to an authorized service facility for examination and/or repair. Do not run cord under carpeting. Do not cover cord with throw rugs,
runner, or similar coverings. Do not route cord under furniture or appliances. Arrange cord away from traffic areas and where it will not be tripped over.

WARNING: This product can expose you to chemicals including lead, which is known to the State of California to cause cancer and birth defects or other reproductive harm. For more information go to www.P65Warnings.ca.gov.

Intertek

Pinnacle
CLIMATE TECHNOLOGIES
Sauk Rapids, MN 56379 USA · Toll Free (800) 641-6996
Fax: 320-251-2922 • Web: www.masterindustrialproducts.com • Email: info@pinnacleclimate.com
WARNING
To Reduce The Risk Of Electric Shock, Do Not Expose To Water Or Rain. This unit is designed for indoor use only.
WARNING
Installation work and electrical wiring must be done by qualified person(s) in accordance with all applicable codes and regulations.
WARNING
When servicing or replacing a component requires the removal or disconnection of a safety device, the safety device is to be reinstalled or remounted as previously installed before operating this fan.
WARNING
Use this fan only in the manner intended by the manufacturer. If you have any questions, contact Customer Service at 800-641-6996.
- Before operating always check fan for loose or damaged parts. Inspect power cord for any damage. Never use fan if any parts are damaged or missing. Never use fan without safety guards attached.
-
Operate only on 120 volt 60Hz (cycle) current with a minimum of a 15 amp circuit.
-
When used with an extension cord, use only cord of proper size (Amp rating), UL listed, and with receptacle to accept three prong grounded plug furnished on the fan's power cord. Always keep power cord and extension cords away from heat, oil, and sharp edges. Inspect cords periodically and replace if damaged.
24"30" Pedestal Fan
24P
24POSC
30P
30POSC

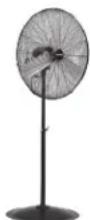
24" & 30" PEDESTAL FANS: 24P / 24POSC / 30P / 30POSC
Installation and Assembly
Tools Needed:
Pliers
Phillips head screwdriver
Flat head screwdriver
Adjustable wrench
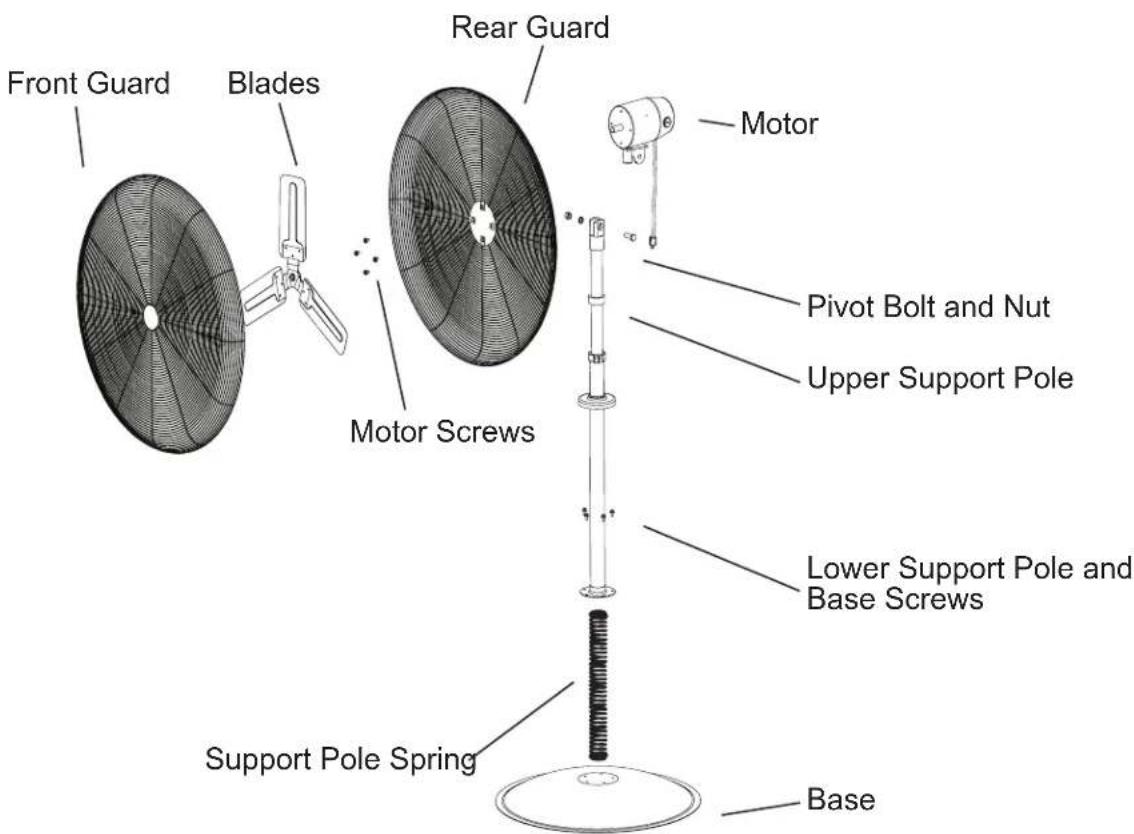
Parts Included In Box:
(1) Base
(1) Front Guard
(1) Rear Guard
(1) Motor Assembly
(1) Fan Blade Assembly
(1) Locking Collar
(1) Upper Support Pole
(1) Lower Support Pole
(1) Support Pole Spring
Bag of hardware
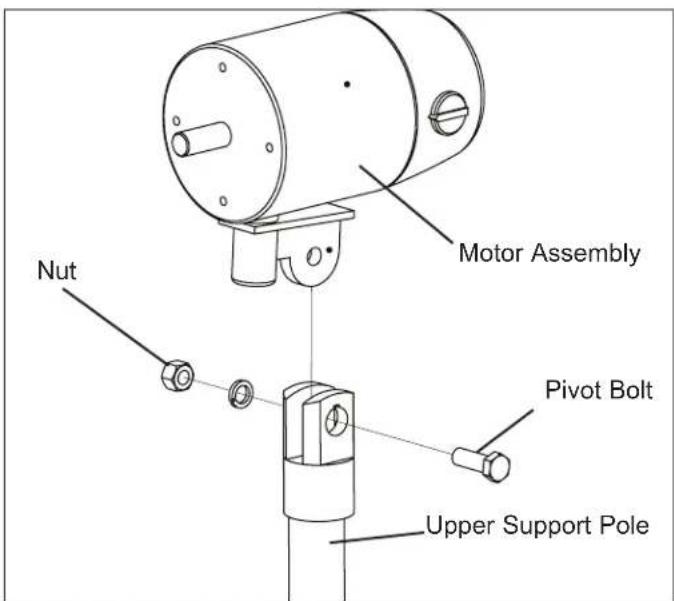
Figure 1: Attaching Motor to Motor Support Assembly
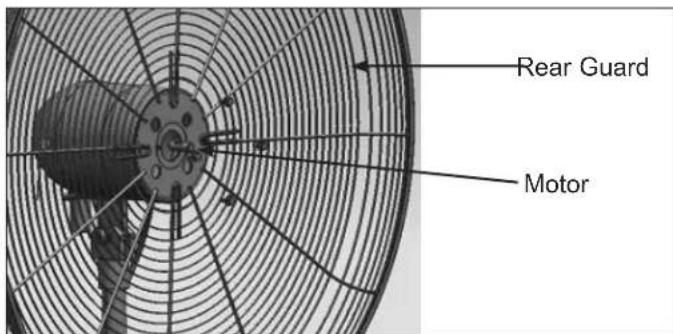
Figure 2: Attaching Rear Guard to Motor
- Remove the base from rear guard. Keep the (2) screws holding the base to the rear guard. These screws will be used to connect the base and lower support pole.
- Place the fan base on level ground.
- Loosen the locking collar on the support pole using the provided Allen wrench (hex wrench). Extract the upper support pole slowly to adjust the height of the fan. The support pole must be fully extended before the spring is placed inside. Place the spring into the bottom of the upper support pole.
- Place the support pole plug into the bottom of the upper support pole to secure spring in the upper support pole.
- Mount entire support pole to the base. Align holes and use (3) screws from the hardware bag and the (2) screws from Step 1 to secure the entire support pole to the base.
- Push down the base cover over the base support bolts.
- Mount the motor assembly to the connector on the upper support pole (see Figure 1). Make sure the holes align.
- Secure motor assembly with Pivot Bolt and Nut. Tighten the nut and bolt firmly using the wrench.
- Slide the rear guard onto the motor assembly and secure it with (4) flange screws (screws from the motor). See Figure 2. Tighten the screws firmly using the wrench.
- Loosen the screw on the back of the fan blade assembly using the Allen wrench (Hex Wrench). Slide the fan blade assembly onto the motor shaft.
- Tighten the screw on the back of the fan blade assembly using the Allen wrench onto the flat part of the fan shaft.
- Attach the front guard to the rear guard and secure with the fasteners on the front guard.
CAUTION
Do NOT slide fan blade screw beyond the groove on
the shaft! This will cause the fan blade to spin improperly, damaging the fan! Be sure that fan shaft is flush with front of fan blade assembly.
NOTE: This model CAN NOT be wall mounted
24" & 30" PEDESTAL FANS
Exploded View
1 YEAR LIMITED WARRANTY
PINNACLE CLIMATE TECHNOLOGIES, INC. WARRANTY THIS PRODUCT TO THE ORIGINAL RETAIL PURCHASER ONLY, TO BE FREE FROM DEFECTS IN MATERIAL AND WORKMANSHIP FOR A PERIOD OF ONE (1) YEAR FROM THE DATE OF INITIAL PURCHASE. THIS PRODUCT MUST BE PROPERLY INSTALLED, MAINTAINED AND OPERATED IN ACCORDANCE WITH THE INSTRUCTIONS PROVIDED.
PINNACLE CLIMATE TECHNOLOGIES, INC. REQUIRES REASONABLE PROOF OF YOUR DATE OF PURCHASE FROM AN AUTHORIZED RETAILER OR DISTRIBUTOR. THEREFORE, YOU SHOULD KEEP YOUR SALES SLIP, INVOICE, OR CANCELLED CHECK FROM THE ORIGINAL PURCHASE. THIS LIMITED WARRANTY SHALL BE LIMITED TO THE REPAIR OR REPLACEMENT OF PARTS, WHICH PROVE DEFECTIVE UNDER NORMAL USE AND SERVICE WITHIN THE WARRANTY PERIOD, AND WHICH PINNACLE CLIMATE TECHNOLOGIES, INC. SHALL DETERMINE AT ITS REASONABLE DISCRETION.
THIS WARRANTY DOES NOT APPLY TO PRODUCTS PURCHASED FOR RENTAL USE.
THIS LIMITED WARRANTY DOES NOT COVER REPLACEMENT OF BELTS OR TIGHTENING OF BELTS, OR ANY FAILURES OR OPERATING DIFFICULTIES DUE TO NORMAL WEAR AND TEAR, ACCIDENT, ABUSE, MISUSE, ALTERATION, MISAPPLICATION, IMPROPER INSTALLATION OR IMPROPER MAINTENANCE AND SERVICE BY YOU OR ANY THIRD PARTY. FAILURE TO PERFORM NORMAL AND ROUTINE MAINTENANCE ON THE FAN, SHIPPING DAMAGE, DAMAGE RELATED TO INSECTS, BIRDS, OR ANIMALS OF ANY KIND, AND DAMAGE DUE TO WEATHER CONDITIONS ARE ALSO NOT COVERED. IN ADDITION, THE LIMITED WARRANTY DOES NOT COVER DAMAGE TO THE FINISH, SUCH AS SCRATCHES, DENTS, DISCOLORATION, RUST OR OTHER WEATHER DAMAGE, AFTER PURCHASE.
ALL TRANSPORTATION COSTS FOR THE RETURN OF THE DAMAGED PRODUCT OR PARTS WILL BE THE RESPONSIBILITY OF THE PURCHASER. UPON RECEIPT OF DAMAGED ITEM, Pinnacle CLIMATE TECHNOLOGIES, INC. WILL EXAMINE THE ITEM AND DETERMINE IF DEFECTIVE.
PINNACLE CLIMATE TECHNOLOGIES, INC. WILL REPAIR OR REPLACE AND RETURN THE ITEM, FREIGHT PRE-PAID. IF Pinnacle CLIMATE TECHNOLOGIES, INC. FINDS THE ITEM TO BE IN NORMAL OPERATING CONDITION, OR NOT DEFECTIVE, THE ITEM WILL BE RETURNED FREIGHT COLLECT.
THIS LIMITED WARRANTY IS IN LIEU OF ALL OTHER EXPRESS WARRANTIES. Pinnacle CLIMATE TECHNOLOGIES, INC.
DISCLAIMS ALL WARRANTYES FOR PRODUCTS THAT ARE PURCHASED FROM SELLERS OTHER THAN AUTHORIZED RETAILERS OR DISTRIBUTORS.
AFTER THE PERIOD OF THE ONE (1) YEAR LIMITED WARRANTY EXPIRES, PINNACLE CLIMATE TECHNOLOGIES, INC. DISCLAIMS ANY AND ALL IMPLIED WARRANTYES, INCLUDING WITHOUT LIMITATION THE IMPLIED WARRANTYES OF MERCHANTABILITY AND FITNESS FOR A PARTICULAR APPLICATION. FURTHER, PINNACLE CLIMATE TECHNOLOGIES, INC. SHALL HAVE NO LIABILITY WHATSOEVER TO PURCHASER OR ANY THIRD PARTY FOR ANY SPECIAL, INDIRECT, PUNITIVE, INCIDENTAL, OR CONSEQUENTIAL DAMAGES. PINNACLE CLIMATE TECHNOLOGIES, INC. ASSUMES NO RESPONSIBILITY FOR ANY DEFECTS CAUSED BY THIRD PARTIES. THIS LIMITED WARRANTY GIVES THE PURCHASER SPECIFIC LEGAL RIGHTS; A PURCHASER MAY HAVE OTHER RIGHTS DEPENDING UPON WHERE HE OR SHE LIVES. SOME STATES DO NOT ALLOW THE EXCLUSION OR LIMITATION OF SPECIAL, INCIDENTAL OR CONSEQUENTIAL DAMAGES, OR LIMITATIONS ON HOW LONG A WARRANTY LASTS, SO THE ABOVE EXCLUSION AND LIMITATIONS MAY NOT APPLY TO YOU.
PINNACLE CLIMATE TECHNOLOGIES, INC. DOES NOT AUTHORIZE ANY PERSON OR COMPANY TO ASSUME FOR IT ANY OTHER OBLIGATION OR LIABILITY IN CONNECTION WITH THE SALE, INSTALLATION, USE, REMOVAL, RETURN, OR REPLACEMENT OF ITS EQUIPMENT, AND NO SUCH REPRESENTATIONS ARE BINDING ON PINNACLE CLIMATE TECHNOLOGIES, INC.
ALWAYS BE SURE TO SPECIFY MODEL NUMBER AND SERIAL NUMBER WHEN MAKING ANY CLAIM WITH PINNACLE CLIMATE TECHNOLOGIES, INC. FOR YOUR CONVENIENCE USE THE SPACE PROVIDED BELOW TO LIST THIS INFORMATION:
Model #:
Serial #:
Date of Purchase:
Numérodesmodeles:
MAC-24P, MAC-24POSC, MAC-30P, MAC-30POSC
NOTE AU CLIENT : LIRE ET CONSERVER CE MANUEL POUR CONSULTATION ULTÉRIEURE
Brand : Master
Model : MAC24POSC
Category : Fan