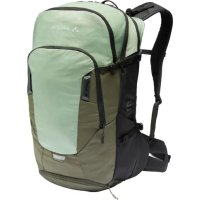
Top Case - Bag Vaude - Free user manual and instructions
Find the device manual for free Top Case Vaude in PDF.

| Features | Details |
|---|---|
| Product type | Bag |
| Capacity | Volume suitable for carrying various items |
| Materials | Made from durable and water-resistant materials |
| Dimensions | Specific dimensions adapted to transport needs |
| Usage | Ideal for outdoor activities, cycling, and travel |
| Maintenance | Clean with soapy water, air dry |
| Repair | Repair possible in case of damage, spare parts available |
| Safety | Reflective elements for better visibility |
| Warranty | Manufacturer warranty against manufacturing defects |
| Additional information | Compatible with various transport accessories |
Frequently Asked Questions - Top Case Vaude
User questions about Top Case Vaude
0 question about this device. Answer the ones you know or ask your own.
Ask a new question about this device
Download the instructions for your Bag in PDF format for free! Find your manual Top Case - Vaude and take your electronic device back in hand. On this page are published all the documents necessary for the use of your device. Top Case by Vaude.
USER MANUAL Top Case Vaude
bike hardware b ike bags
DEUTSCH 1
ENGLISH 9
FRANÇAIS 17
ITALIANO 25
ESPANOL 33
中文 41
ALLGEMEINE WARNING!
These instructions may contain WARNINGS. Read the instruction manual thoroughly before using the product for the first time and save it for future reference.
The incorrect assembly and use of VAUDE Bike backpacks can lead to severe injury or death.

Before use, inspect all parts to make sure they are functioning properly and do not show signs of significant wear.
Before use, make sure that all movable parts have been secured.
Before use, make sure that all hooks and/or ties of the fastening system have been attached and are securely closed.
Do not use too much or too little torque to tighten screws and fasteners. Otherwise, you run the risk of excessive tension or parts falling off.
The Plug and Ride, Hard Back Pro and Cycle fastening systems are approved to bear loads of maximum 10 kg.
Use only original VAUDE accessories and replacement parts.
ENGLISH
TABLE OF CONTENTS
Hard Back Pro 10
Cycle 12
Plug and Ride 13
Top Case 14
Karakorum 15
Handlebar bags with KLICKfi x^® The KLICK 15
VAUDE seat bags 16

QUICK GUIDE

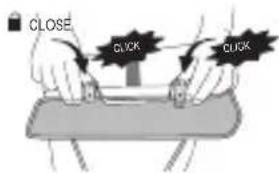
HARD BACK PRO
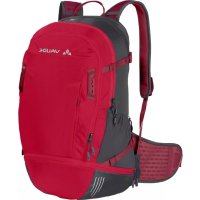
Using the adapter included, the Hard Back Pro holder QMR hook can be adapted to different rack tube diameters (1).
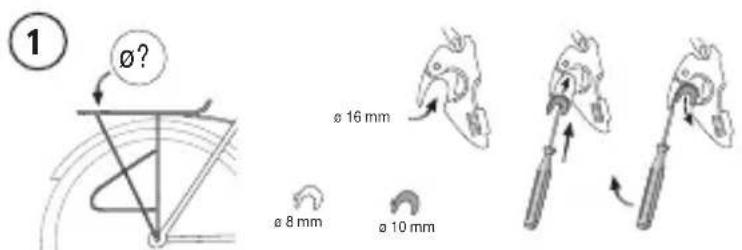
To assemble, release the QMR hook knurl catches and move them into position. Tighten the knurl catches again to fix the hook in position (2).
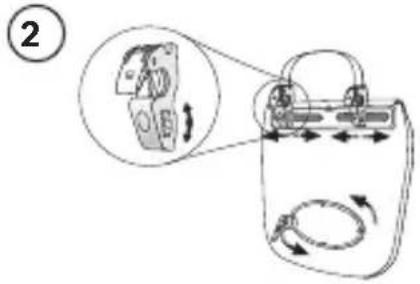
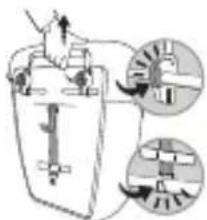
Pull the bag's handle to open the QMR hooks. Next, hang the bag on the rack and press it until the QMR hooks automatically click into place (3).
Now loosen the fi xing screw of the lower guide hook (Caution: maximum two turns) and turn and shift the hook until it hooks into the rack (4). Hand-tighten the fi xing screw (Caution: not too tightly). Note: If possible, align the lower guide hook on the rack in the direction of motion. This will prevent the bag from slipping, even when braking suddenly.
You will only need to set the hook once, before initial use.
3
4
ENGLISH

QUICK GUIDE


①
②
3
CYCLE
Using the adapter included, the Hard Back Pro holder QMR hook can be adapted to different rack tube diameters (see Hard Back Pro).
To assemble, release the QMR hook knurl catches and move them into position. Tighten the knurl catches again to fix the hook in position (1). Pull the bag's handle to open the QMR hooks. Next, hang the bag on the rack and press it to make the QMR hooks automatically click into place (2).
Now hook the elastic band with the hook to the rack and pull it tight with the slide adjustment buckle at the other end (3).
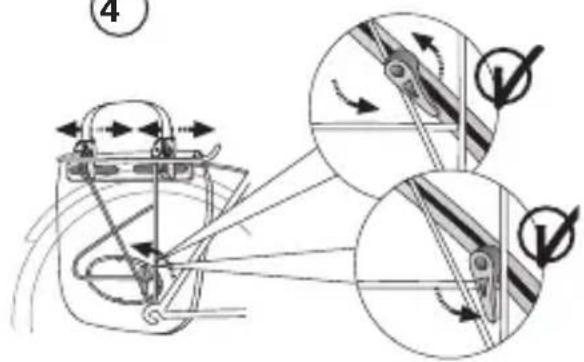
PLUG AND RIDE
The Plug and Ride fastening system allows you to adjust the upper guide rail. Fix the bag at a slant to prevent your heel from catching it while pedaling. The upper guide rail can also be removed - it won't get in the way when you are using your pannier bag as a shoulder bag.
ADJUSTING THE GUIDE RAIL
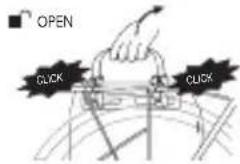
Flip open the buckle catch on the right side of the guide rail. First, pull the rail out of the ftting on the right side and then on the left side. Now you can return the rail to the ftting at the required angle - proceeding in reverse order. Press the buckle catch to close it again, listening for the click.
Using the adapter included, the QMR hook can be adapted to different rack tube diameters (see Hard Back Pro).
To assemble, release the QMR hook knurl catches and move them into position. Tighten the knurl catches

QUICK GUIDE


ENGLISH
Top Case
again to fix the hook in position (see Hard Back Pro). Pull the bag's handle to open the QMR hooks. Next, hang the bag on the rack and press it to make the QMR hooks automatically click into place (see Hard Back Pro).
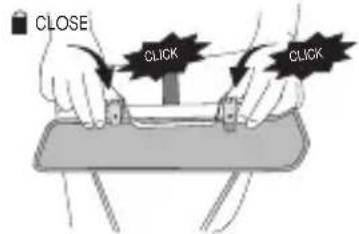
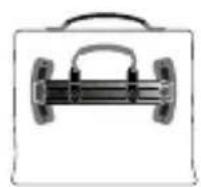
TOP CASE
The welded Top Case provides 30 l of extra storage volume. You can combine it with the Aqua Back and Aqua Back Plus pannier bags.
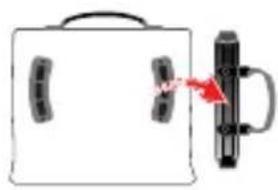
To fix the Top Case in place, use the two side quick-release buckles to attach it to the Aqua Back (2) and one quick-release buckle to the seat post (3). Extra quick-release buckles (1) are included. They are stowed in the side straps of the Aqua Back bags.
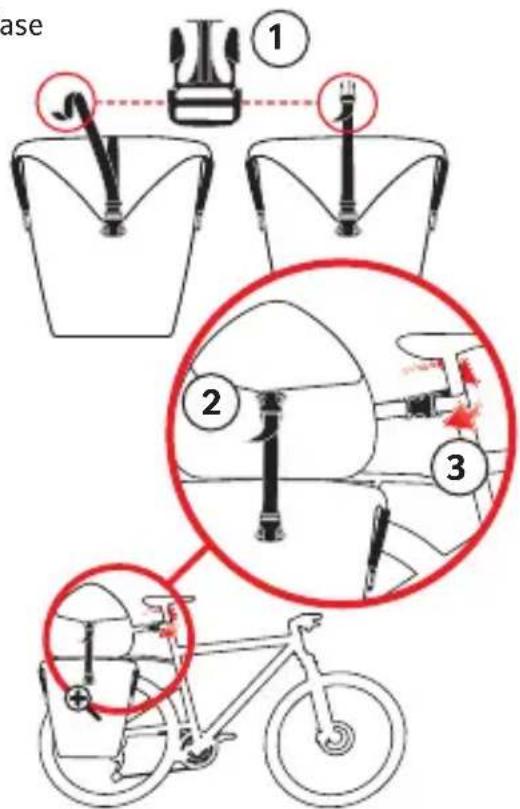
KARAKORUM
The Karakrom 3-piece bag set is also equipped with the Hard Back Pro attachment system. To assemble the side bags, see the Hard Back Pro section.
You can place a Top Case on top of the side bags and attach it with a zip on each side. Remove it and use the two shoulder straps in the pocket at the back to turn it into a lightweight day pack. A rain cover is included.

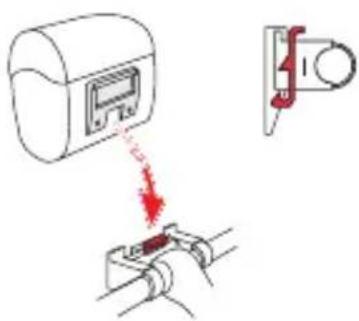
HANDLEBAR BAGS WITH KLICKFIX® THE KLICK
fi x^® system is a quick, safe method of securely attaching handlebar bags to a bicycle. Put the adapter piece of the bag on the holder attached to the handlebar - it catches automatically with a click. A push of the red button is all it takes to release the bag. VAUDE handlebar bags are made with the KICKfi x^® system. Read the enclosed instructions for use carefully.

QUICK GUIDE
KLICKfix
ENGLISH
StickTwist Adapter
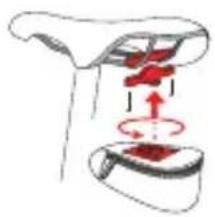
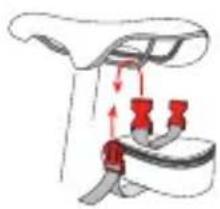
VAUDE SEAT BAGS
The seat bags are attached with the Twist adapter or Stick closure, and the Ultralight bags are attached with a lightweight Velcro closure. In the Twist adapter system, an adapter is installed between the seat braces. Simply insert the seat bag into the adapter and use a half-turn to lock it in place. In the Stick closure system, attach one or two straps to the seat bag, weave them through the seat braces and fasten the two quick-release buckles.

Velcro-Closure