EEWA1260 - Kettle ELECTROLUX - Free user manual and instructions
Find the device manual for free EEWA1260 ELECTROLUX in PDF.
| Product type | Electric kettle |
| Brand | Electrolux |
| Model | EEWA1260 |
| Capacity | 1.7 L |
| Power | 2200 W |
| Power supply | 220-240 V ~ 50/60 Hz |
| Material | Plastic and stainless steel |
| Dimensions (approx.) | 23 x 15 x 25 cm |
| Weight (approx.) | 1.2 kg |
| Anti-scale filter | Removable |
| Water level indicator | Yes |
| Automatic shut-off | Yes |
| Separate base | Yes, with power cord |
| Lid opening | By button |
| Anti-overflow safety | Yes (do not fill above the max mark) |
| Indoor use only | Yes |
| Domestic use | Yes |
| Maintenance | Wipe with a damp cloth, do not immerse |
| Filter cleaning | Rinse with clean water |
| Descaling | Required periodically |
| Warranty | 2 years (standard) |
Frequently Asked Questions - EEWA1260 ELECTROLUX
User questions about EEWA1260 ELECTROLUX
0 question about this device. Answer the ones you know or ask your own.
Ask a new question about this device
Download the instructions for your Kettle in PDF format for free! Find your manual EEWA1260 - ELECTROLUX and take your electronic device back in hand. On this page are published all the documents necessary for the use of your device. EEWA1260 by ELECTROLUX.
USER MANUAL EEWA1260 ELECTROLUX
EasyBreakfast EEWA1xxx
GB INSTRUCTION BOOK
D ANLEITUNG
F MODE D'EMPLOI
natural_image
Abstract geometric composition with two overlapping white circles on a gray background (no text or symbols)CONTENTS
ENGLISH....3
DEUTSCH....3
FRANÇAIS......3
NEDERLANDS......3
ČEŠTINA....13
SLOVENČINA 13
РУССКИЙ 13
УКРАЇНСЬКА 13
POLSKI....23
MAGYAR....23
HRVATSKI 23
ROMÂNĂ ......23
БЪЛГАРСКИ ....33
SLOVENŠČINA....33
СРПСКИ 33
TYRKCE....33
ΕΛΛΗΝΙΚΑ 43
EESTI....43
LATVIEŠU....43
LIETUVIŠKAI....43
WE'RE THINKING OF YOU
Thank you for purchasing an Electrolux appliance. You've chosen a product that brings with it decades of professional experience and innovation. Ingenious and stylish, it has been designed with you in mind. So whenever you use it, you can be safe in the knowledge that you'll get great results every time.
Welcome to Electrolux.
Visit our website to:

Get usage advice, brochures, trouble shooter, service information:
www.electrolux.com

Register your product for better service:
www.electrolux.com/productregistration

Buy Accessories and Consumables for your appliance:
www.electrolux.com/shop
CUSTOMER CARE AND SERVICE
When contacting Service, ensure that you have the following data available.
The information can be found on the rating plate. Model, PNC, Serial Number.

Warning / Caution-Safety information

General information and tips

Environmental information
Subject to change without notice.

text_image
Labeled diagram of a white kettle with parts marked A through I, showing internal components and a digital display.GBF
Components Éléments et D'nderdelen
A. Jug
B. Removable mesh filter
C. Spout
D. Lid
E. Opening lid button
F. Handle
G. Water level indicator
H. ON/OFF switch with indicator light
I. Separate base and mains cable
D
Read the following instruction carefully before using the appliance for the first time.
- This appliance is not intended for use by persons (including children) with reduced physical, sensory or mental capabilities, or lack of experience and knowledge, unless they have been given supervision or instruction concerning use of the appliance by a person responsible for their safety. Children should be supervised that they do not play with the appliance.
• Children shall not play with the appliance. - Cleaning and user maintenance shall not be made by children unless they are older than 8 and supervised.
- Keep the appliance and its cord out of reach of children less than 8 years.
- The appliance may only be connected to a power supply whose voltage and frequency comply with the specifications on the rating plate!
- Never use or pick up the appliance if – the supply cord is damaged, – the housing is damaged."
- The appliance must only be connected to an earthed socket. If necessary an extension cable suitable for 10 A can be used.
- If the appliance or the supply cord is damaged, it must be replaced by the manufacturer, its service agent or similarly qualified person, in order to avoid hazard.
• Always place the appliance on a flat, level surface. - Never leave the appliance unattended while connected to the supply mains.
- The appliance must be switched off and the mains plug withdrawn each time after use, before cleaning and maintenance.
- The appliance and accessories become hot during operation. Use only designated handles and knobs. Allow to cool down before cleaning or storage.
- The mains cable must not come into contact with any hot parts of the appliance.
- Do not immerse the appliance in water or any other liquid.
' Attention: If the kettle is overfilled there is a risk that the boiling water may spray out, which could scald or burn! Therefore never fill the kettle above the maximum marking. - Never operate appliance with open lid.
- Do not use or place the appliance on a hot surface or near source of heat.
- Only use the kettle for heating water!
- The kettle can only be used with the stand provided.
- Appliance is for indoor use only.
- This appliance is intended for domestic use only. The manufacturer cannot accept any liability for possible damage caused by improper or incorrect use.
- This appliance is intended to be used in household and similar applications such as:
-staff kitchen areas in shops, offices and other working environments; -farm houses;
-by clients in hotels, motels and other residential type environments; -bed and breakfast type environments. - While water boiling, avoid contacting with steam from the spout when water is boiling or just after it has switched off. Do not be anxious to uncover the lid.
natural_image
White kitchen kettle with a cloth and a paper towel, next to a wall-mounted stand (no text or symbols visible)
- Before first use, wipe the inside and outside of the kettle with a damp cloth.

natural_image
Medical imaging device with a magnified inset showing internal mechanical components (no text or symbols visible)-
Place the base unit on a firm and flat surface. Plug the mains plug into a wall socket. Redundant cord can be wound up at the bottom of base unit.
-
Die Basis auf eine stabile ebene Fläche stellen. Den Netzstecker in eine Steckdose stecken. Nicht benötigtes Kabel kann an der Unterseite der Basis aufgewickelt werden.
-
Placez le soclesur une surface plane solide. Branchez l'appareil à une prise secteur murale. Si le cordon d'alimentation est trop long, vous pouvez l'enrouler autour de la base du socle.
-
Plaats de voet op een stevige en vlakke ondergrond. Steek de stekker in een stopcontact. Overtollig snoer kunt u onder aan de voet oprollen.
natural_image
White electric water heater with handle and spout, showing internal components (no text or symbols visible)-
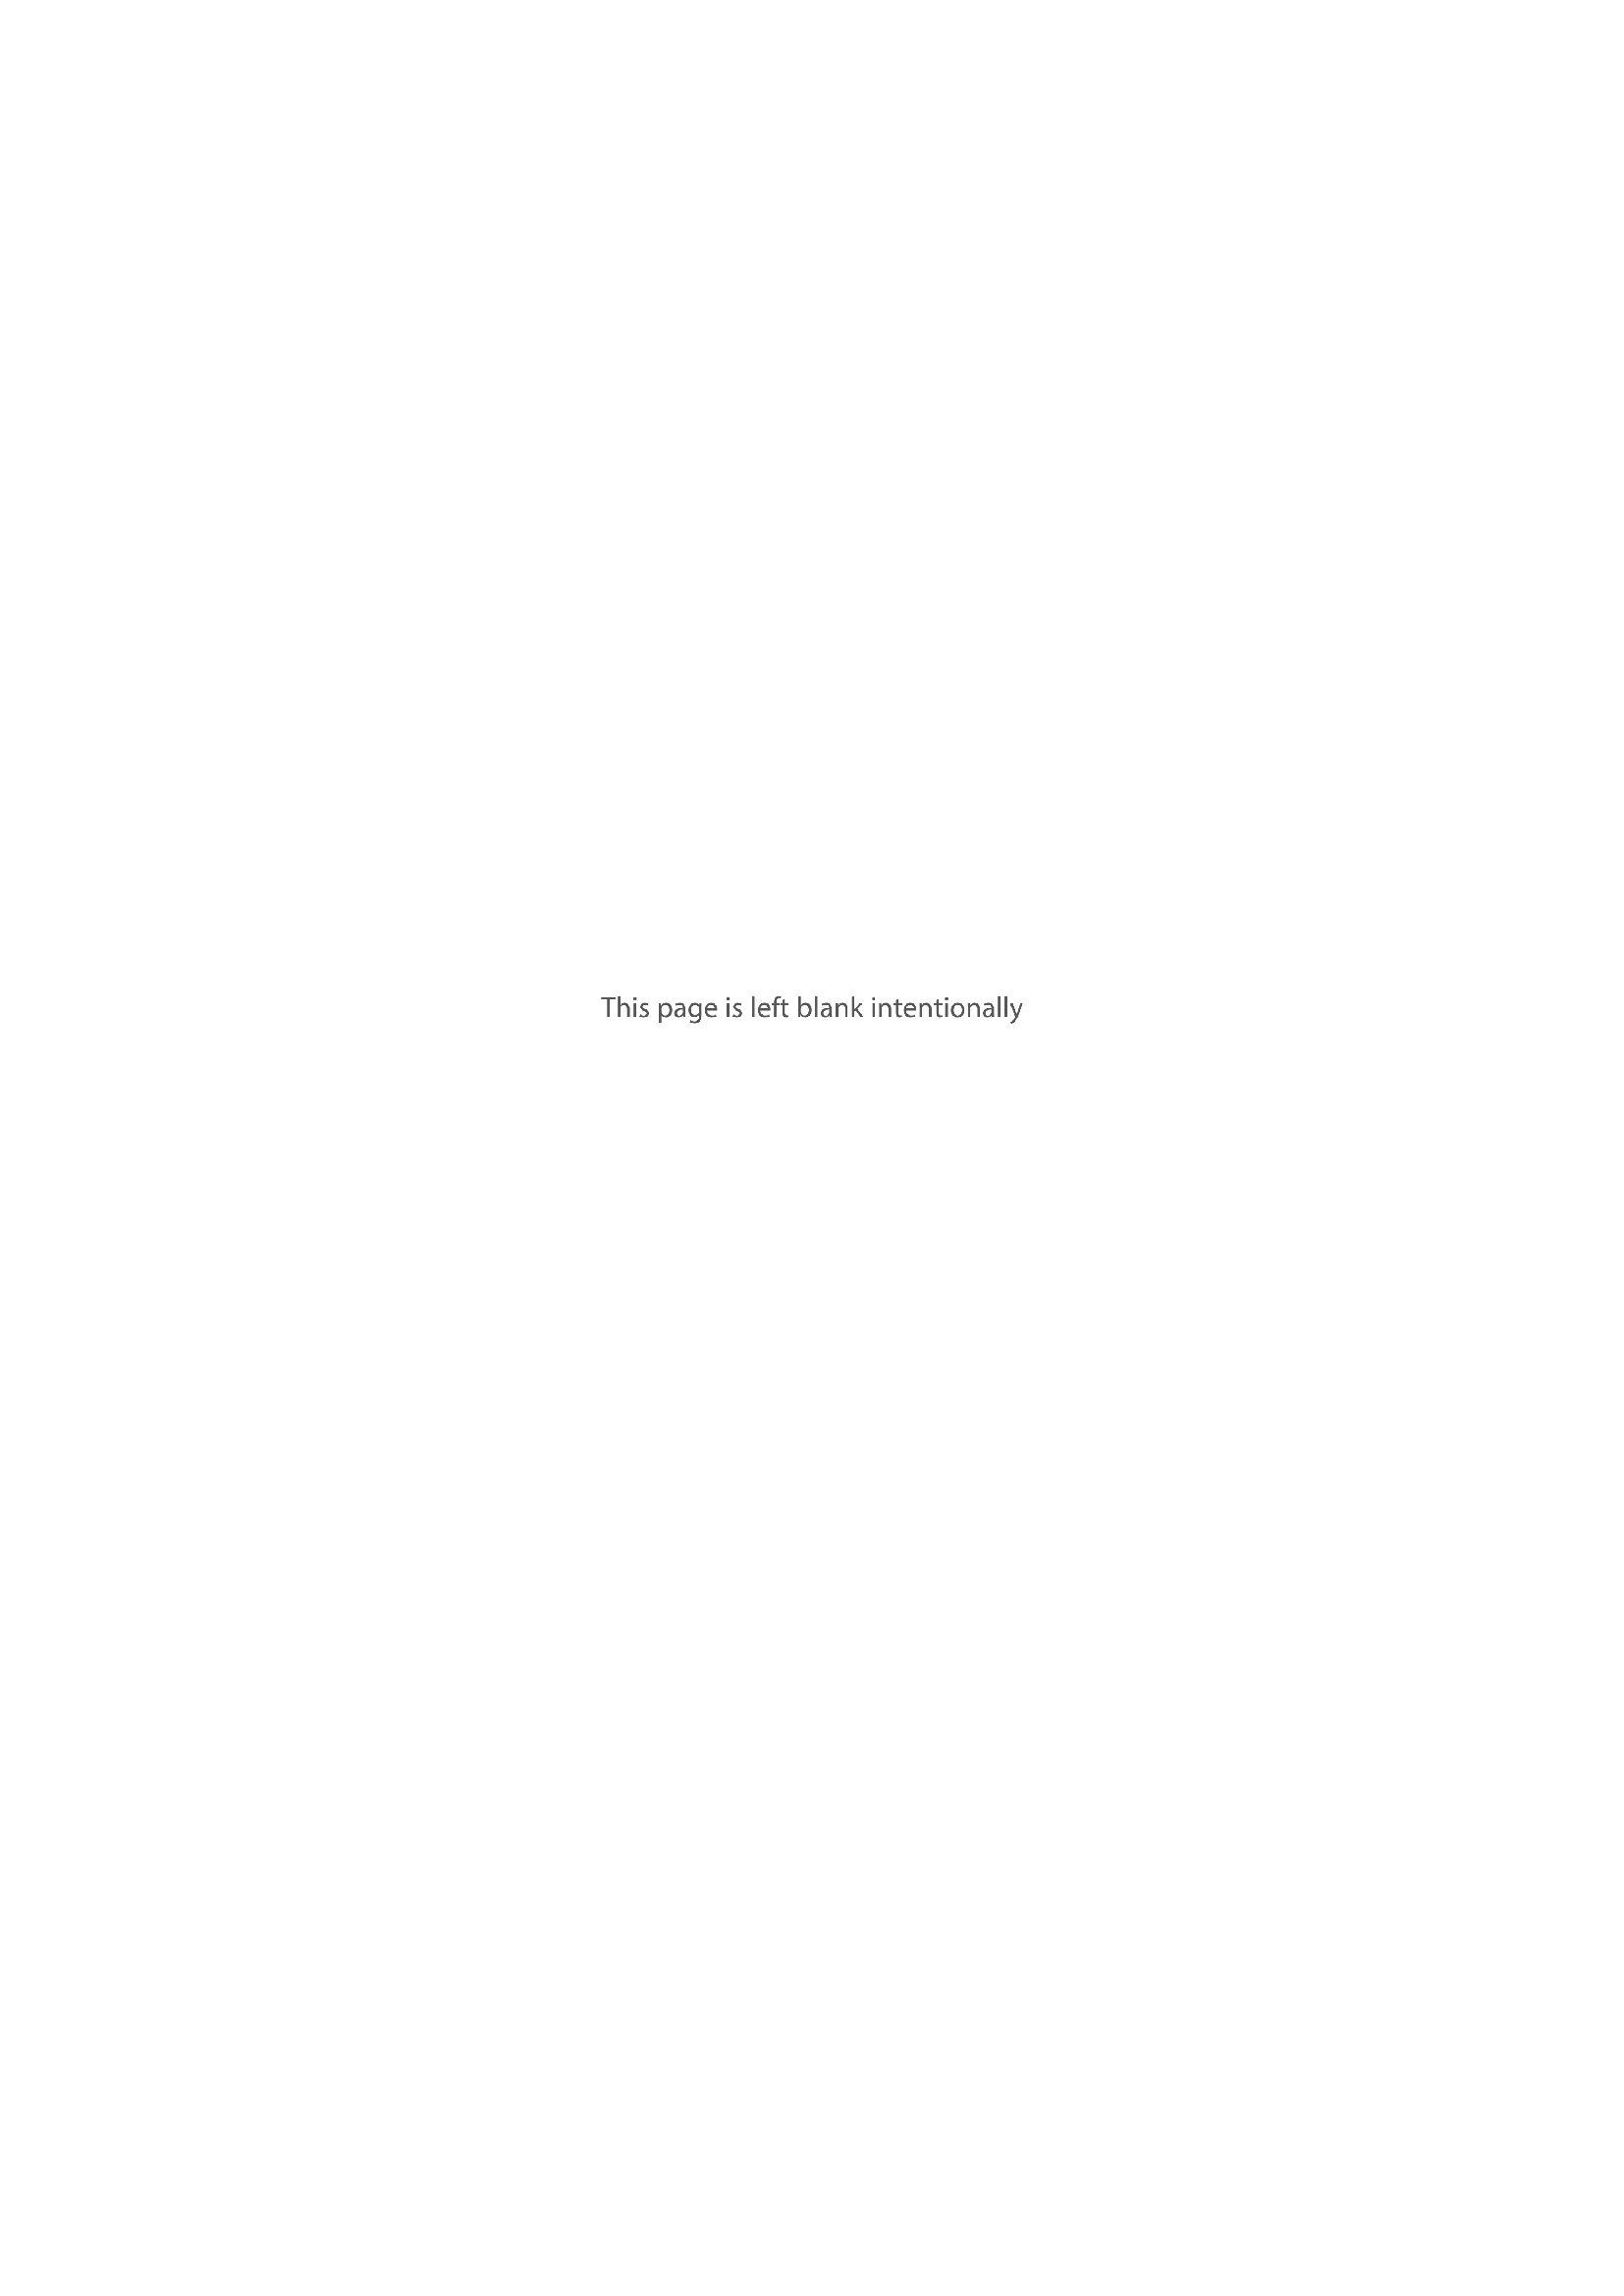
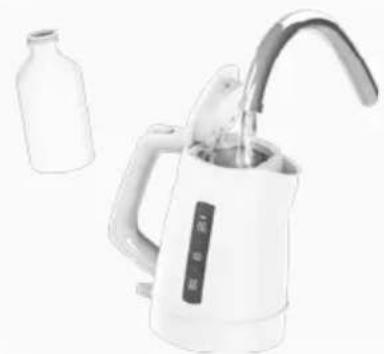
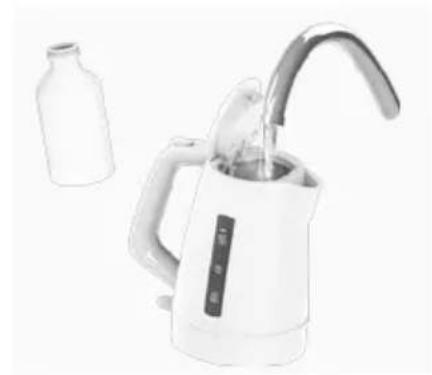
Press the button to open the lid, pour water into the kettle. Make sure water level is visible in the water level indicator, but not exceeding the Max. mark.
-
Die Taste zum Öffnen der Abdeckung drücken, Wasser in den Kocher füllen. Der Wasserstand soll an der Wasserstandanzeige sichtbar sein, die oberste Markierung jedoch nicht übersteigen.
-
Pour ouvrir le couvercle, appuyez sur le bouton, puis versez de l'eau dans la bouilloire. Assurez-vous que l'indicateur de niveau d'eau soit visible, afin de ne pas dépasser le repère Max.
-
Druk op de knop om het deksel te openenen giet water in de waterkoker. Zorg ervoor dat het waterpeil binnen de waterniveau-aanduidingen blijft, en niet boven de aanduiding Max. uitkomt.
natural_image
Illustration of a kitchen appliance with a downward arrow indicating cooling or waste (no text or symbols)GB
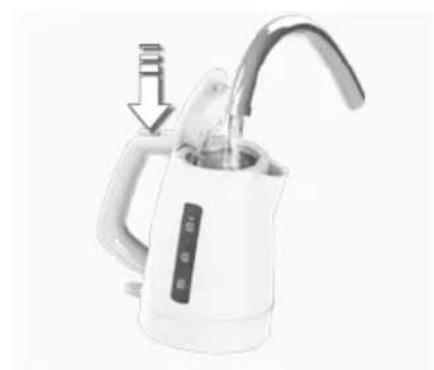
- Close the lid and make sure it snaps in correctly. Otherwise the auto switch off function will not work reliably. Place the kettle onto the base. Press down the ON/OFF switch; the indicator light will illuminate and the kettle will start to heat up.
D
natural_image
Product photo showing a white kettle with a lid and a magnified inset highlighting the interior area (no text or symbols visible)-
The automatic switch off function. When the water has boiled or the kettle is moved from the base, it will switch off automatically. If you wish to stop the heating process before the water is boiling, simply lift up the ON/OFF switch to the OFF position.
-
Die automatische Abschaltung. Wenn das Wasser gekocht hat oder der Wasserkocher von der Basis genommen wird, schaltet er sich automatisch aus. Soll die Wassererhitzung vor dem Siedepunkt abgebrochen werden, einfach den EIN/AUS-Schalter in die Position AUS anheben.
-
Fonction d'arrêt automatique. Une fois l'eau bouillie, ou la bouilloire retirée de son socle, cette dernière s'arrête automatiquement. Si vous souhaitez arrêter la bouilloire avant ébullition, il vous suffit de mettre l'interrupteur sur la position arrêt.
-
De functie voor automatisch uitschakelen. Als het water kookt of als u de waterkoker van de voet haalt, wordt het apparaat automatisch uitgeschakeld. Als u het proces wilt stoppen voordat het water kookt, drukt u gewoon de AAN/UIT-schakelaar omhoog naar de UIT-stand.
Cleaning / Reinigen Nettoyage / Reinigen
natural_image
White kitchen pot with towel and a paper towel, next to a wall-mounted dish (no text or symbols visible)GB
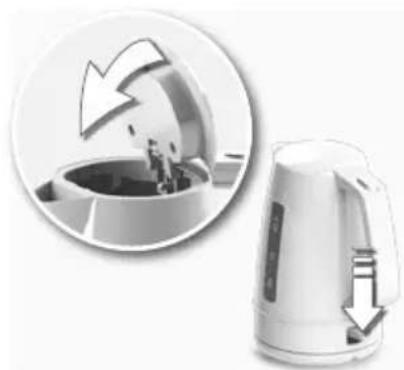
- Before cleaning, always unplug the appliance. Never rinse or immerse the kettle or base unit in water. Just wipe with a damp cloth, using no abrasive detergents. Occasionally rinse out the kettle with clean water.
D
natural_image
Close-up of a white electric kettle with open lid and handle, showing internal components (no visible text or symbols)-
To clean the mesh filter, grab the strainer insert and lift out. Cleaning the heating plate – superficial spots of rust may appear on the base unit. Remove with a stainless steel cleaning agent.
-
Zum Reinigen des Filters den Siebeinsatz nach oben herausziehen. Reinigen der Heizplatte – Auf der Heizplatte können sich oberflächliche Flecken bilden. Mit einem Edelstahlputzmittel entfernen.
-
Pour nettoyer le filtre, retirez-le en le tirant vers le haut. Nettoyage de la plaque chauffante: de la rouille superficielle peut se former sur la plaque chauffante. Éliminez-la à l'aide d'un nettoyant pour acier inoxydable.
-
Voor het reinigen van het netfilter, pakt u de zeefinzet vast en tilt deze eruit. De warmhoudplaat schoonmaken. Er kunnen oppervlakkige vlekken of roest op de warmhoudplaat verschijnen. Verwijder deze met een schoonmaakproduct voor roestvrij staal.
natural_image
White electric water heater with a curved handle and water inlet, next to a small bottle (no visible text or symbols)-
Decalcifying is recommended regularly, depending on water hardness. Fill the kettle with water and decalcifier according to decalcifier product instructions. Do not boil the solution as it could foam over. Afterwards, rinse kettle thoroughly with fresh water.
-
Je nach Wasserhärte sollte das Gerät regelmäßig entkalkt werden. Den Wasserkocher der Produktanleitung entsprechend mit Wasser und Entkalker füllen. Die Lösung nicht kochen lassen, da sie überschäumen könnte. Danach den Wasserkocher gründlich mit frischem Wasser ausspülen.
-
Il est recommandé il est recommandé de procéder à un détartrage régulier en fonction de la dureté de l'eau. Remplissez la bouilloire d'eau et de détartrant en respectant les consignes d'utilisation du produit détartrant. Ne laissez pas bouillir la solution, car la mousse formée pourrait déborder. Puis,, rincez soigneusement l'intérieur de la bouilloire à l'eau claire.
-
Ontkalken doet u bij voorkeur regelmatig, afhankelijk van de hardheid van het water. Vul de waterkoker met water en ontkalker, volgens de gebruiksaanwijzing van het ontkalkingsproduct. Laat de oplossing niet koken, aangezien deze kan gaan schuimen. Naderhandspoelt u de waterkoker grondig na met schoon water.
| Problem Possible cause Solution | ||
| The appliance switches off before boiling. Too much lime scale at the base of the kettle. Run the decalcifying procedure. | ||
| The appliance does not switch off. Close lid until it locks. | ||
| Instert the strainer correctly. | ||
| The appliance cannot be switched on. After operating with little or no water, the appliance has not cooled down sufficiently. | Allow to cool a short time and try again. | |
text_image
Labeled diagram of a white kettle with parts marked A through I, showing internal components and a digital display.CZS
Součásti
natural_image
Illustration of a kettle and a device with a downward arrow, no text or symbols present.CZ
natural_image
Illustration of a white kettle with a close-up inset showing the interior and exterior views (no text or symbols)natural_image
White kettle with paper and a switch, no visible text or symbolsnatural_image
Close-up of a white electric kettle with open lid and digital display (no visible text or symbols)-
Chcete-li vyčistit sitkovaný filtr, uchopte a zvedněte fi ltrovací vložku. Čištění topné desky – na povrchu topné desky se mohou objevit skvrny od rzi. Odstranit je lze čisticím prostředkem na nerezavějící ocel.
-
Ak chcete vyčistiť sietkový filter, uchopte filter na vodný kameň a vyberte ho. Čistenie ohrevnej platne – na povrchu ohrevnej platne sa môžu objaviť hrdzavé škvrny. Odstrániť ich možno čistiacim prostriedkom na antikoro.
-
Для очистки сетчатого фильтра выньте сито. Чистка нагревающей поверхности: на нагревающей поверхности могут появляться поверхностные пятна ржавчины. Удалите их средством для чистки нержавеющей стали.
-
Для чищення сітчастого фільтра вийміть касету сітчастого фільтра. Чищення нагрівального елемента
- на поверхні нагрівального елемента можуть з'явитись плями іржі. йх можна видалити за допомогою миючого засобу для поверхонь із нержавіючої сталі.

natural_image
White electric water heater with a metal handle and spout, next to a small bottle (no visible text or symbols)text_image
Labeled diagram of a white kettle with parts marked A through I, showing internal components and a digital display.PLH
Części i oznaczenia
natural_image
Illustration of a kitchen appliance with a downward arrow indicating cooling or waste (no text or symbols)PL
natural_image
Product photo showing a white kettle with a close-up inset of its internal component (no visible text or symbols)natural_image
White kitchen pot with paper towel and a cross symbol, next to an electric plug (no text or symbols visible)PL
natural_image
Close-up of a white ceramic kettle with open lid and handle, no visible text or symbols-
Aby oczyścić filtr siatkowy, wyjmij wkład sitka. Czyszczenie płyty grzejnej – na płycie grzejnej mogą pojawić się powierzchowne plamy rdzy. Usuń je, używając płynu do czyszczenia powierzchni stalowych.
-
A hálós szűrő megtisztításához fogja meg és emelje ki a szűrőbetétet. A fűtőlemez tisztítása: a fűtőlemezen felszíni rozsdafoltok jelenhetnek meg. Ezeket rozsdamentes eszközökhöz való tisztítószerrel távolíthatja el.
-
Da biste očistili filtar s mrežicom, dohvatite element za umetanje filtra i izvucite ga. Čišćenje grijaće ploče – na grijaćoj ploči mogu se pojaviti površinske mrlje od hrđe. Uklonite ih sredstvom za čišćenje nehrđajućeg čelika.
-
Pentru a curăța filtrul din plasă, apucați de inserția sitei și ridicăți-o. Curățarea plitei electrice - pot să apară pete superfi ciale de rugină pe plita electrică. Îndepărtați-le cu un agent de curățare a inoxului.
natural_image
White electric water heater with a curved arm, next to a small bottle (no visible text or symbols)-
Odkamienianie należy wykonywać regularnie, zależnie od twardości wody. Napełnij czajnik wodą z dodatkiem odkamieniacza zgodnie z instrukcją danego preparatu. Nie doprowadzaj do zagotowania roztworu, ponieważ może powstać piana, która wyleje się z czajnika. Następnie, przepłucz czajnik dokładnie czystą wodą.
-
Rendszeres vízkömentesítés ajánlott a víz keménységi fokától függő gyakorisággal. Töltse fel a kannát vízzel és vízköoldószerrel a vízköoldószer termékleírásának megfelelően. Ne forralja fel az oldatot, mert a keletkező hab kifolyhat a készülékből. Ezután tiszta vízzel alaposan öblítse ki a kannát.
-
Uklanjanje kamenca je preporučljivo izvoditi redovito ovisno o tvrdoći vode. Napunite grijač vodom i sredstvom za uklanjanje kamenca sukladno uputama za proizvod. Otopinu nemojte grijati jer bi se mogla zapjeniti. Nakon toga temeljito isperite grijač za vodu čistom vodom.
-
Decalcifierea este recomandată cu regularitate, în funcție de duritatea apei. Umpleți vasul cu apă și cu agent de decalcifiere, în conformitate cu instrucțiunile produsului de decalcifiere. Nu fierbeți soluția, deoarece este posibil ca spuma să se reverse. Apoi, clătiți bine vasul cu apă proaspătă.
text_image
Labeled diagram of a white kettle with parts marked A through I, showing internal components and a digital display.BGS
Komponenti Sestavni deli Bileşenler
A. Корпус
natural_image
Illustration of a kitchen appliance with a downward arrow indicating cooling or reduction (no text or symbols)BG
natural_image
Product photo showing a white kettle with a close-up inset of its internal component (no visible text or symbols)natural_image
White kitchen pot with paper towel and a switch, no visible text or symbolsBG
natural_image
Close-up of a white ceramic kettle with open lid and handle, no visible text or symbolsnatural_image
White electric water heater with a curved handle, next to a small bottle (no visible text or symbols)-
Декалцифициране се препоръчва редовно, в зависимост от твърдостта на водата. Напълнете чайника с вода и дикалцифицирйте съгласно инструкциите на използвания декалцификатор. Не кипвайте разтвора, тъй като може да се разпени. След това изплакнете чайника с прясна вода.
-
Odstranjevanje vodnega kamna je priporočljivo izvajati redno, odvisno od trdote vode. Napolnite grelnik z vodo in čistilnim sredstvom po navodilih za odstranjevanje vodnega kamna. Raztopine ne zavrite, saj se lahko speni. Natotemeljito splaknite grelnik s svežo vodo.
-
Preporučuje se da uklanjanje kamenca bude redovno, u zavisnosti od tvrdoće vode. Napunite lonac vodom i sredstvom za uklanjanje kamenca u skladu sa uputstvima proizvođača sredstva. Nemojte kuvati rastvor zato što bi mogao da se prelije. Nakon toga, temeljno očistite lonac svežom vodom.
-
Kireç çözme işleminin suyun sertliğine bağlı olarak düzenli bir şekilde yapılması önerilir. Kireç çözücü ürünün talimatlarına uygun şekilde su ıstıcıyı su ve kireç çözümü ile doldurun. Suyu kaynatmayın, köpürüp taşabilir. Ardından, su ıstıcıyı taze su ile iyice yıkayın.
text_image
Labeled diagram of a water heater with parts marked A through I, showing internal components and part numbers.Εξαρτήματα
natural_image
Illustration of a kitchen appliance with a downward arrow and a magnified inset showing internal components (no text or symbols)GR
natural_image
Product photo of a white electric kettle with a magnified inset showing the internal structure (no text or symbols visible)-
Η λειτουργία αυτόματης απενεργοποίησης. Όταν το νερό βράσει ή ο βραστήρας αφαιρεθεί από τη βάση, θα απενεργοποιηθεί αυτόματα. Αν θέλετε να σταματήσετε τη διαδικασία θέρμανσης πριν βράσει το νερό, απλώς σηκώστε τον διακόπτη ΟΝ/ΟFF (ΕΝΕΡΓΟΠΟΙΗΣΗ/ ΑΠΕΝΕΡΓΟΠΟΙΗΣΗ) στη θέση OFF (ΑΠΕΝΕΡΓΟΠΟΙΗΣΗ).
-
Automaatne väljalülitamine. Kui vesi on keema hakanud või kann eemaldatakse aluselt, lülitub kann automaatselt välja. Kui soovite vee soojendamise enne vee keematõusmist katkestada, siis lükake SISSE/VÄLJA-lüliti ülemisse asendisse.
-
Automātiskās izslēgšanās funkcija. Kadūdens ir uzvārijies vai tējkanna tiek noņemta no pamatnes, tā tiek automātiski izslēgta. Ja vēlaties pārtrauktūdens karsēšanu, pirms tas ir uzvārijies, iestatiet ieslēgšanas/izslēgšanas slēdzi pozīcijā OFF (Izslēgts).
-
Automatinio išsijungimo funkcija. Vandeniui užvirus arba virdulį nuėmus nuo pagrindo jis išsijungs automatiškai. Jei norite sustabdyti kaitinimą prieš užverdant vandeniui, tiesiog pakelkite aukštyn IJUNGIMO / IŠJUNGIMO jungiklį i padėtį IŠJUNGTA.
natural_image
Close-up of a white ceramic kettle with open lid and internal cooling mechanism (no visible text or symbols)-
Για να καθαρίσετε το φίλτρο, πιάστε την υποδοχή του πλέγματος και σηκώστε τη. Καθαρισμός της βάσης – ενδέχεται να εμφανιστούν επιφανειακοί λεκέδες σκουριάς στη βάση. Αφαιρέστε τους με ένα καθαριστικό για ανοξείδωτο ατοάλι.
-
Kaitsefiltri puhastamiseks tõstke äravõetav söel välja. Kuumutusplaadi puhastamine – kuumutusplaadile võivad tekkida pindmised roosteplekid. Eemaldage need roostevaba terase puhastamise vahendiga.
-
Lai iztīrītu filtra sietiņu, izņemiet filtra ieliktni. Uzsildīšanas pamatnes tīrišana – uz uzsildīšanas pamatnes virsmas var parādīties nelieli rūsas traipi. Notīriet tos ar tīrīšanas līdzekli, kas paredzēts nerūsējošam tēraudam.
-
Norėdami išvalyti filtrą su tinkleliu, ranka paimkite jdėtą filtrą ir ištraukite. Kaitinamosios plokštės valymas: kaitinamosios plokštės paviršiuje gali atsirasti rūdžių dėmių. Pašalinkite jas nerūdijančiam plienui skirta valymo medžiaga.
natural_image
White electric water heater with a curved handle and water inlet, next to a small bottle (no visible text or symbols)-
Η αφαλάτωση συνίσταται τακτικά, ανάλογα με τη σκληρότητα του νερού. Γεμίστε το βραστήρα με νερό και αποσκληρυντικό σύμφωνα με τις οδηγίες χρήσης του αποσκληρυντικού. Μη βράζετε το διάλυμα γιατί μπορεί να ξεχειλίσει. Στη συνέχειαξεπλύνετε καλά το βραστήρα με τρεχούμενο νερό.
-
Katlakivi eemaldamist on soovitatav teha regulaarselt, söltuvalt vee karedusest. Täitke kann vee ja katlakivieemaldajaga vastavalt katlakivieemaldaja tootejuhistele. Ärge keetke lahust, sest see vöib üle keeda. Seejärel loputage kannu pöhjalikult puhta veega.
-
Atkalkošanu ir ieteicams veikt regulāri — atkarībā no ūdens cietības. Piepildiet tējkannu ar ūdeni un atkalkošanas līdzekli atbilstoši tā lietošanas instrukcijai. Nevāriet škīdumu, jo var rasties putas un škīdums var izplūst no tējkannas. Pēc tamrūpīgi izskalojiet tējkannu ar tīru ūdeni.
-
Kalkių nuosėdų šalinimo procedūrą rekomenduojama atlikti reguliariai, atsižvelgiant į vandens kietumą. Pripildykite virdulį vandens ir kalkių nuosėdų šalinimo tirpalo pagal gaminio kalkių nuosėdų šalinimo instrukcijas. Tirpalo neužvirkite, nes putos gali išsilieti per kraštus. Paskui išskalaukite virdulį švariu vandeniu.
This page is left blank intentionally
This page is left blank intentionally
This page is left blank intentionally
www.electrolux.com/shop


Electrolux Appliances AB
St. Göransgatan 143
S-105 45 Stockholm
Sweden
Share more of our thinking at www.electrolux.com

Printed on recycled paper