PL1085 - Powerline adapter Esscom - Free user manual and instructions
Find the device manual for free PL1085 Esscom in PDF.
| Product Type | Powerline Network Adapter (PLC) |
| Brand | Esscom |
| Model | PL1085 |
| Standard | HomePlug 1.0 |
| Maximum Data Rate | 85 Mbps |
| Ethernet Port | 1 x RJ45 10/100 Mbps |
| Maximum Range | 200 meters (on electrical wiring) |
| Theoretical Number of Connections | Up to 253 adapters, 10 recommended simultaneously |
| Encryption | Yes, via private network (password on label) |
| Quality of Service (QoS) | Support for online gaming, audio/video, VoIP |
| LED Indicators | Power, Network, Ethernet |
| Power Supply | 230V, 50 Hz mains plug (built-in) |
| Power Consumption | Approximately 3 W in operation |
| Dimensions (approx.) | 10 x 6 x 3 cm |
| Weight (approx.) | 150 g |
| Included Software | PowerPacket utility for configuration |
| Compatibility | Windows (with utilities) |
| Maintenance and Cleaning | Clean with a dry, soft cloth. Do not use liquids. |
| Safety | Do not open, do not use near water, during a storm, or in dusty/corrosive environments. |
| Warranty | 36 months (except accessories, batteries). Requires purchase receipt. |
| Repairability | Inspection only by an approved professional. |
| Recycling | Do not dispose of with household waste. Take to a WEEE collection point. |
Frequently Asked Questions - PL1085 Esscom
User questions about PL1085 Esscom
0 question about this device. Answer the ones you know or ask your own.
Ask a new question about this device
Download the instructions for your Powerline adapter in PDF format for free! Find your manual PL1085 - Esscom and take your electronic device back in hand. On this page are published all the documents necessary for the use of your device. PL1085 by Esscom.
USER MANUAL PL1085 Esscom
This product is in compliance with the essential requirements and other relevant provisions of the R&TTE directive.
This is confirmed by the CE-mark. The Declaration of conformity can be found on:
http://www.esscom.be/cedeclarations.asp
UK The CE symbol indicates that the unit complies with the essential requirements of the R&TTE directive.
1 Inleiding
7.3 Quality of Service (QoS)
The maximum number of PL-1085 adaptors in a single-family house is theoretically 253 connections, but in practice no more than 10 devices should be transferring data simultaneously.
Network Security
The PL-1085 products will immediately work after unpacking and plugging them into the power connection of your home, even without any software installation and configuration.
Normally the electric meter forms a physical barrier, i.e. only devices connected to this meter can be part of the network and benefit from the phase coupling.
We strongly recommend that you use the PL-1085 Adaptor internal device encryption. It is configured with the PL-1085 Adaptor Configuration Utility.
Limitations
In optimal conditions, the maximum cable distance between two PL-1085 devices can be 200 meters.
However, the connection quality will be influenced by :
- Bad quality of electricity cabling.
-Fuses. - Lightning/overvoltage protections.
- Multiphase electricity: some homes have 3-phase electricity. The PL-1085 quality will decrease dramatically when connecting the devices on different phases. In some cases there will be no communication possible at all!
- Some electrical equipment like microwave ovens, vacuum cleaners, earlier laptop/mobile phone chargers will generate noise on the electrical network during operation.

The PL-1085 is a 85Mbps based Intellon HomePlug device and is not recommended for DSL TV.
2 C E M a r k
The CE symbol on the unit, user guide and giftbox indicates that the unit complies with the essential requirements of the R&TTE directive 1995/5/EC.
3 Safety instructions
For your safety, be sure to read and follow all warning notices and instructions.
- Do not open the device. Opening or removing the device cover can expose you to dangerous high voltage points or other risks. Only qualified service personnel can service the device. Please contact your vendor for further information.
- Do not use your device during a thunderstorm. There may be a risk of electric shock brought about by lightning.
- Do not expose your device to dust or corrosive liquids.
- Do not use this product near water sources.
- Make sure to connect the cables to the correct ports.
- Do not obstruct the ventilation slots on the device.
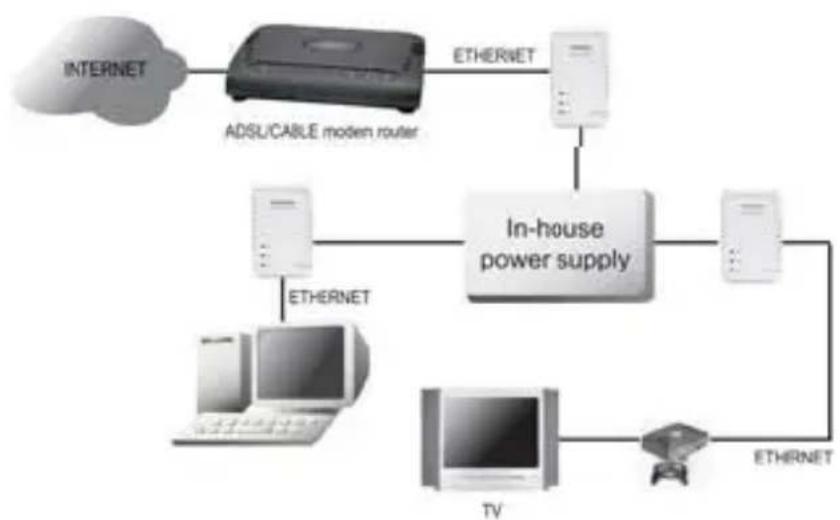
4 Typical applications

5 LED's and connections
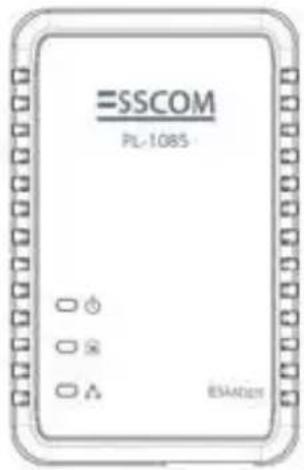
On when connected to AC power supply.
On when detected and connected with another PL-1085 adaptor within the network.
Lights up when connected to the Ethernet port of the computer or other Ethernet devices. Blinks during data transfer.
ETHERNET: This is the connection point for connecting it to a computer or other devices with Ethernet port.
6 Utility Installation
- Turn on the computer. Insert the CD into the CD-ROM Drive. The Autorun screen will automatically appear:
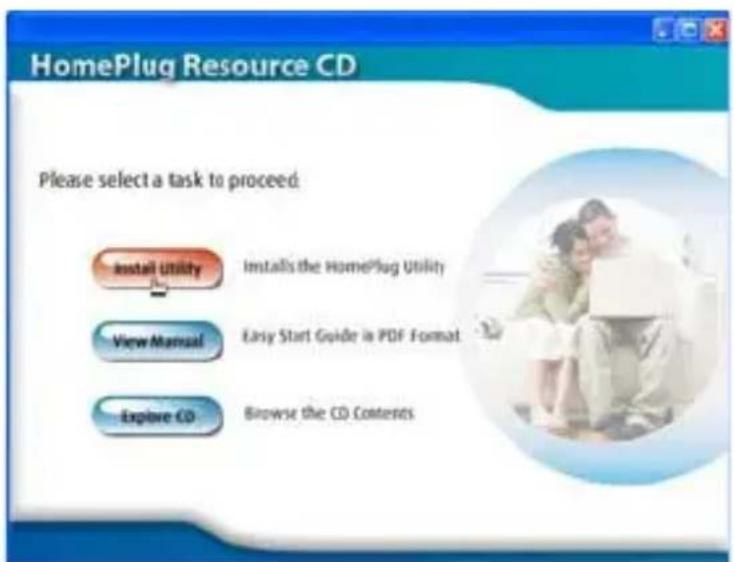
Click "Install Software".

If the autorun menu does not start, you can browse the CD and execute the "install.exe"
- InstallShield Wizard will automatically start.
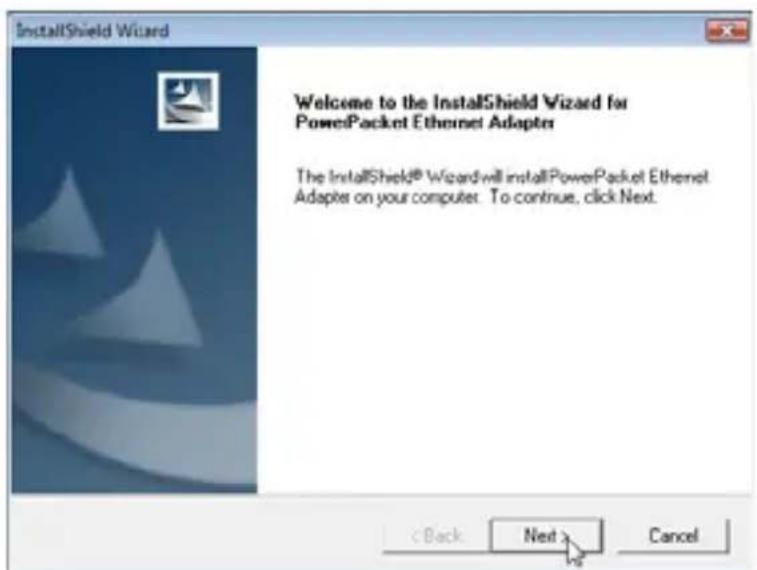
Click "Next".
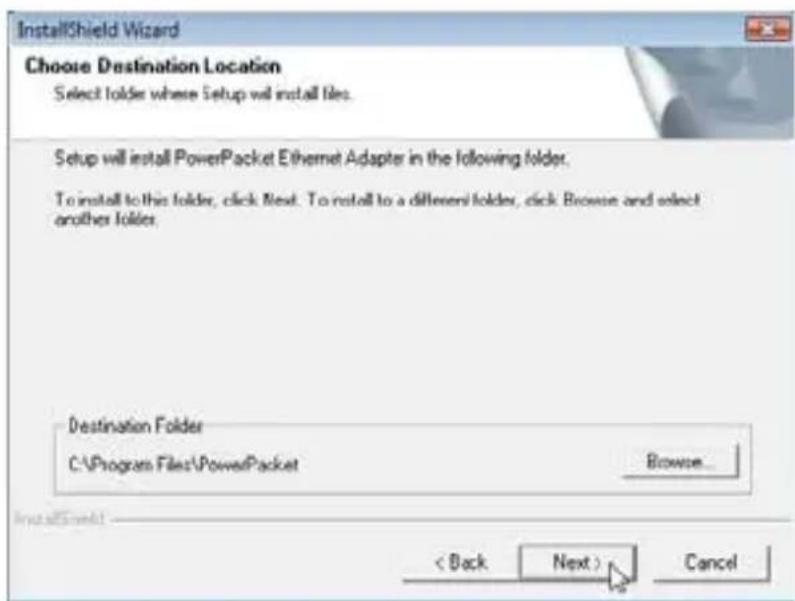
Click "Next" to finish the installation.
- After successful installation an icon will appear on your desktop :

7 Configuration
To start the utility, double click the PowerPacket Utility icon on your desktop.

7.1 Main Screen
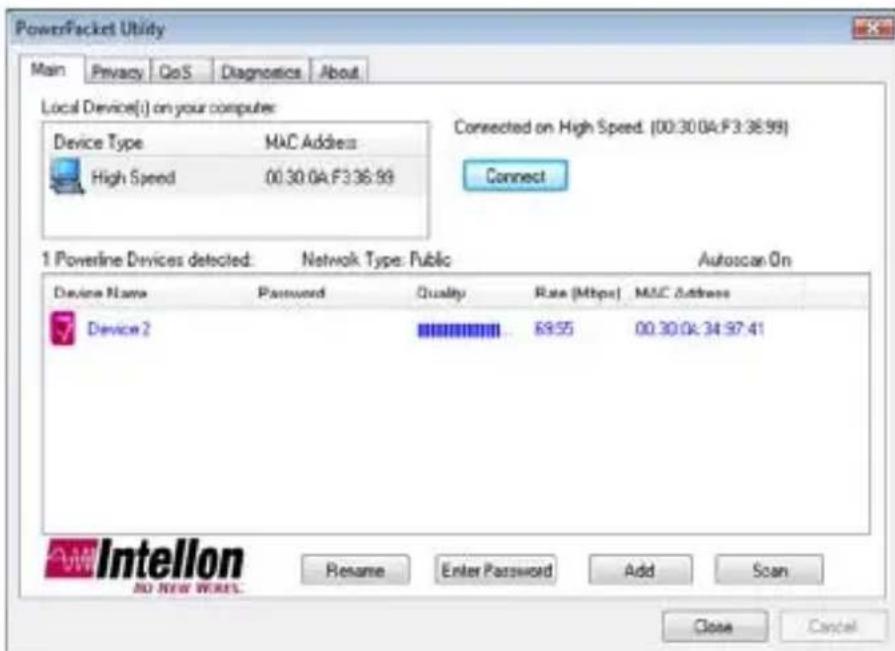
The Main screen provides a list of all PL-1085 devices connected to the computer where the utility is running.
The top panel shows all local PL-1085 devices connected to the computer's NIC (Network Interface Card). In most cases, only one device will be seen. If more than one device is connected, you can select the device and click the Connect button. The status area above the button indicates that your PC is connected.
The lower panel displays all the PL-1085 devices, discovered on the current logical network (remote devices). Displayed above this panel is the number of
remote devices found, the type of logical network (Public or Private), and a message area that reports the connectivity and scan status.
The following information is displayed for each device discovered :
- Device Name : shows the default device name. You can change the name by clicking the name, or by using the Rename button.
An icon is optionally shown with the name. A distinction in icons is made between low-speed and high-speed devices (14 Mbps or 85 Mbps devices) - Password : shows the user-supplied device password (initially left blank). You can enter the password by using the Enter Password button.
To enter the Password of the device (required when creating a private network), first select the device by clicking on its name in the lower panel and then click on the Enter Password button.
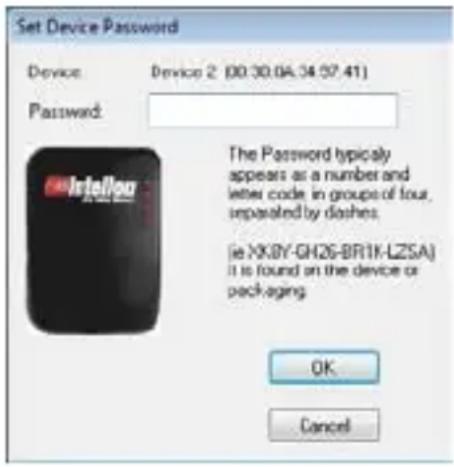
Above dialog box will appear.
The selected device name is shown. Now enter the password. (The password is located at the bottom label of the device). Click OK to confirm the password. A confirmation box will appear if the password was entered correctly.
The Add button is used to add a remote device to your network that is not on the displayed list in the lower panel. For example a device currently on another logical network.
When you click Add, below dialog box will appear:
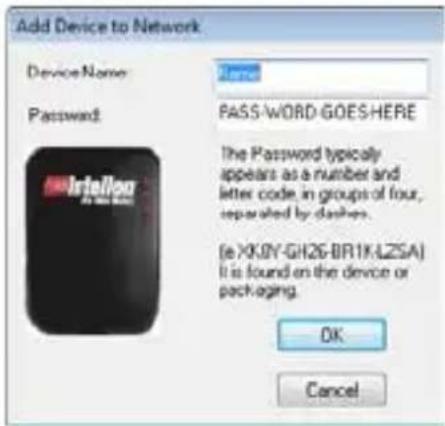
Now enter both a device name and the password (The password is located at the bottom label of the device).
A confirmation box will appear if the password was entered correctly and if the device was found.
-
Quality : shows the connection quality rate between the remote plug and the plug connected to your computer.
-
MAC Address : shows the device's MAC address.
Note:
The device must be present on the power line (plugged in) in order for the password to be confirmed and added to the network. If the device could not be located, a warning message will be shown.
The Scan button is used to perform an immediate search of the PL-1085 devices connected to the computer. By default the utility automatically scans every few seconds and updates the display.
7.2 Privacy
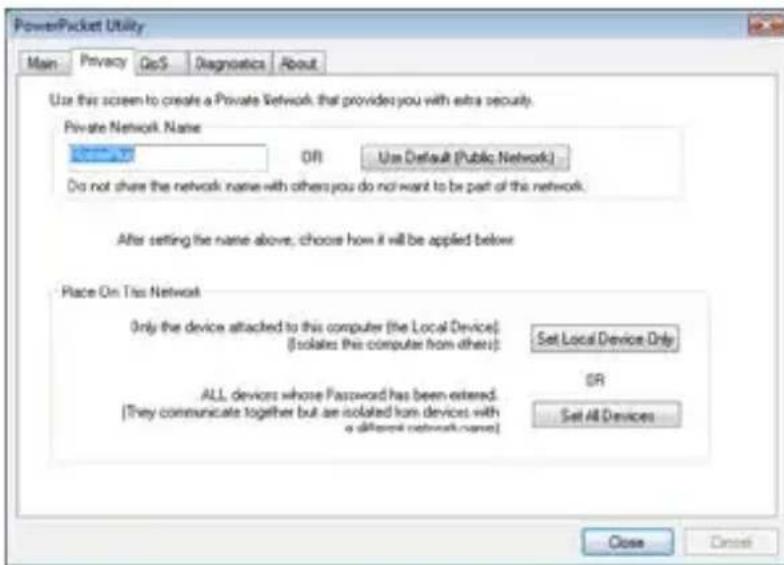
The Privacy dialog screen is used for managing the security of the local network. All PL-1085 devices are shipped using a default logical network (network name), which is normally "HomePlug". The Privacy dialog screen allows you to make the network private by changing the network name (network password) of your devices. You can always reset the network password to default (HomePlug) by clicking on the Use Default button.
The Private Network Name is composed of 4 up to 24 alphanumeric case-sensitive characters.
Note :
Changing the network name to any other name other than HomePlug will show the network type on the main screen as Private.
Click the Set Local Device Only button to change the network name (network password) for the local device connected directly to the computer.
After doing this, all the devices seen on the Main panel prior to this will no longer be able to communicate or respond to the computer.
Devices previously set up with the same logical network (same network name) will appear in the device list afterward selecting this option.
The Set All Devices button is used to change the logical network of all devices that appear on the Main panel. The user must have entered the device's Password in order to set it to the new logical network. A notification message will appear to report the success of this operation.
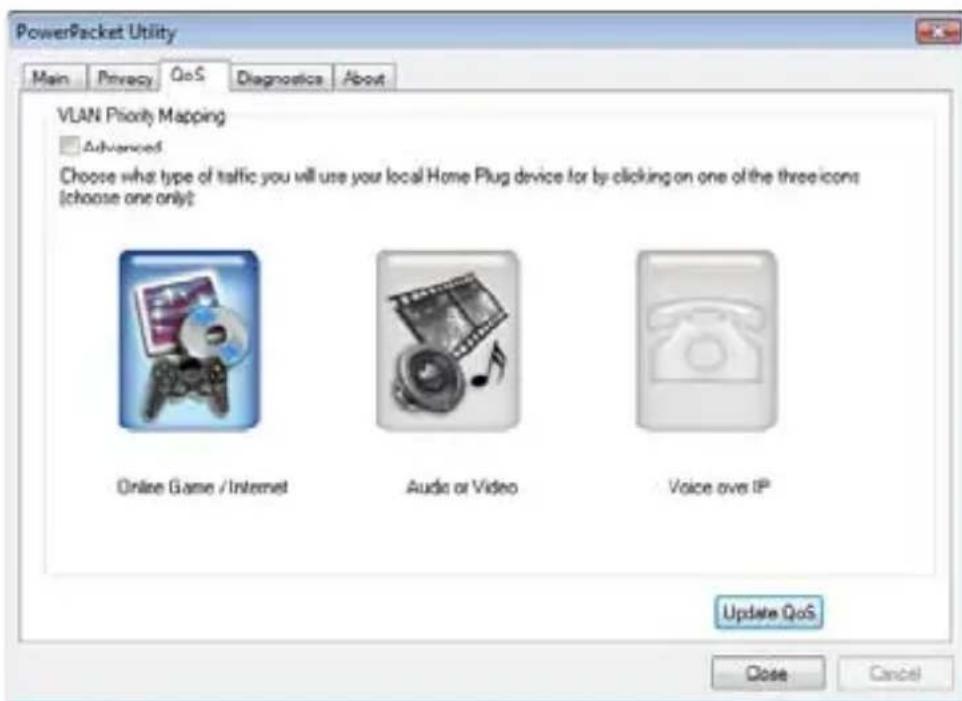
7.3 Quality of Service
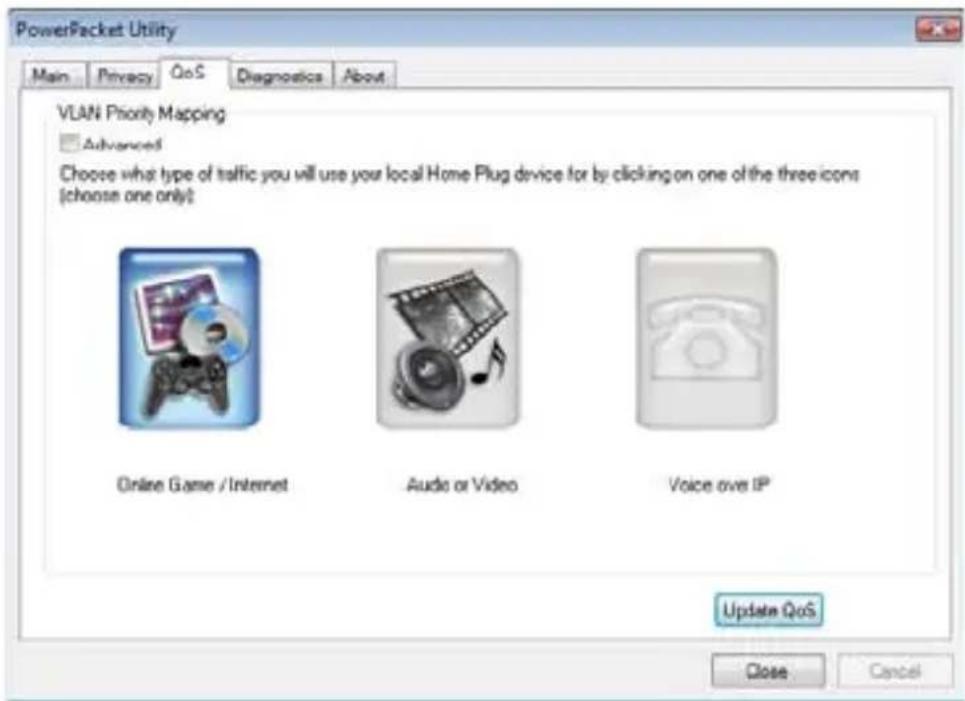
Quality of service (Qos) allows you to determine which application will be given a guaranteed priority over other applications. Qos is not enabled by default.
There are three types of Qos available :
- Online Game/Internet: if the device will be connected to a gaming console or a computer
Audio or Video : if the device is used for audio/video streaming - Voice over IP : if the device is connected to an IP phone
Select your application and click Update Qos to apply the settings.
7.4 Diagnostics Screen
The Diagnostics screen shows system information and a history of all devices seen.
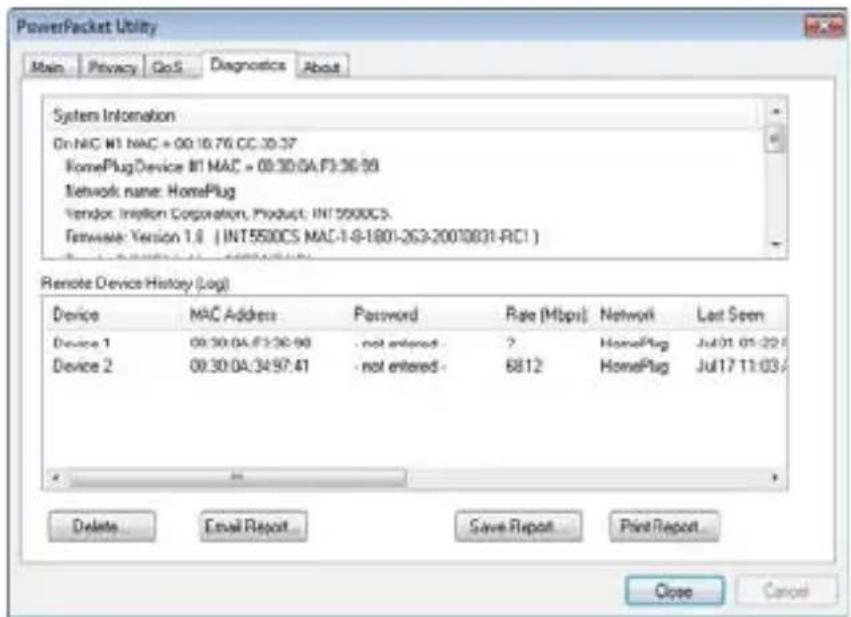
The upper panel shows technical data concerning software and hardware on the host computer used to communicate over HomePlug.
The lower panel contains a history of all remote devices seen on the computer, over time.
7.5 About Screen

The About screen shows the software version.
You can activate or deactivate the Autoscan feature by clicking on the checkbox under the 'Preferences' column.
8 W a r r a n t y
8.1 Warranty period
The devices have a 36-month warranty period. The warranty period starts on the day the new unit is purchased. There is no warranty on standard or rechargeable batteries (AA/AAA type).
Consumables or defects causing a negligible effect on operation or value of the equipment are not covered.
The warranty has to be proven by presentation of the original or copy of the purchase receipt, on which the date of purchase and the unit-model are indicated.
8.2 Warranty handling
A faulty unit needs to be returned to an authorized service centre including a valid purchase note and a filled in service return card.
If the unit develops a fault during the warranty period, the service centre will repair any defects caused by material or manufacturing faults free of charge, by either repairing or exchanging the faulty units or parts of the faulty units. In case of replacement, colour and model can be different from the original purchased unit.
The initial purchase date shall determine the start of the warranty period. The warranty period is not extended if the unit is exchanged or repaired by the service centre.
8.3 Warranty exclusions
Damage or defects caused by incorrect treatment or operation and damage resulting from use of non-original parts or accessories are not covered by the warranty.
The warranty does not cover damage caused by outside factors, such as lightning, water and fire, nor any damage caused during transportation.
No warranty can be claimed if the serial number on the units has been changed, removed or rendered illegible.
Any warranty claims will be invalid if the unit has been repaired, altered or modified by the buyer.
UK Disposal of the device (environment)
At the end of the product lifecycle, you should not throw this product into the normal household garbage but bring the product to a collection point for the recycling of electrical and electronic equipments. The symbol on the product, user guide and/or box indicate this.
Some of the product materials can be re-used if you bring them to a recycling point. By re-using some parts or raw materials from used products you make an important contribution to the protection of the environment.
Please contact your local authorities in case you need more information on the collection points in your area.

Technical Data
Protocol/Standards
- HomePlug 1.0 specification, IEEE 802.3 10/100 Ethernet (100Mbps) and IEEE 802.3u Fast Ethernet Compliant
10/100 Mbps AutoMDI/MDIx Support
- 85Mbps / 14Mbps Homeplug 1.0 compatible
Modulation Support
OFDM 256/64/16, DQPSK, DBPSK and ROBO Modulation Scheme
Frequency Band
4.3 Mhz to 20.9 Mhz band
Quality of Service
- Forward Error Correction (FEC) support
- Channel Adaptation ensures that signal integrity is maintained even under harsh noise environment
- CSMA/CA with prioritization and ARQ for reliable delivery of Ethernet packets via Packet
Encapsulation
Four Level prioritized random access method
- Segment bursting and contention-free access ensures high throughput while maintaining low latency response and jitter performance
Security Support
- 56 bit DES Encryption with key management for secure powerline communications (Utilize Windows 98SE, 2000, ME, XP to enable encryption)
Hardware
- Intellon INT5500 Integrated Single-chip Powerline Network Transceiver
- Intellon INT1200 Analog Front End IC
Platform Support
- OS Independent with TCP/IP protocol installed
Power Supply
- Switch Mode 90V-264V Supply for Europe/UK/US/Australia plugs
LED Indicators :
- 1 x Power LED
- 1 x Powerline Activity Status LED
- 1 x Ethernet Link/Activity Status LED
Temperature
- Operating: 0^ to 40^ Celsius
- Non-Operating : -25° to 70° Celsius
Humidity
- Operating : 30% to 80% Relative Humidity (Non-Condensing)
Non-Operating : 30% to 95% Relative Humidity (Non-Condensing)
=SSCOM
visit our website www.esscom.be