ER 2 - Slow cooker STEBA - Free user manual and instructions
Find the device manual for free ER 2 STEBA in PDF.
Frequently Asked Questions - ER 2 STEBA
User questions about ER 2 STEBA
0 question about this device. Answer the ones you know or ask your own.
Ask a new question about this device
Download the instructions for your Slow cooker in PDF format for free! Find your manual ER 2 - STEBA and take your electronic device back in hand. On this page are published all the documents necessary for the use of your device. ER 2 by STEBA.
USER MANUAL ER 2 STEBA
natural_image
White Steba brand water heater with a digital display, no visible text or symbols on the device itself.220 - 240V\~; 50/60Hz; 120-140W (Motor) 450-550W (Heizen)
Vegan-Drink-Maker VDM 2 Hot & Cold
Instructions for use 14
Mode d'emploi 26
text_image
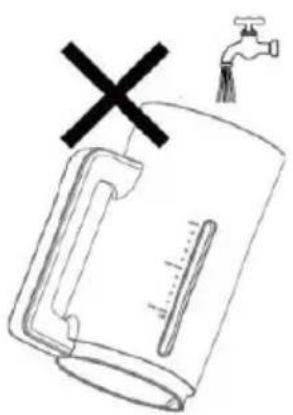
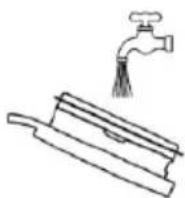
Diagram showing a water tap with a cross mark and a thermometer, indicating incorrect water quality or measurement.
text_image
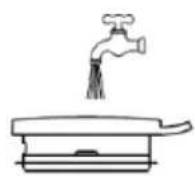
Diagram showing a measuring cup with a cross mark and a faucet, indicating incorrect measurement or inspection.natural_image
Line drawing of a measuring cup with a faucet above it (no text or symbols)natural_image
Line drawing of a micrometer measuring a cylindrical container with a brush (no text or symbols)natural_image
Close-up of a white plastic water dispenser with a red annotation box highlighting the side portion (no text or symbols on the device itself)text_image
Diagram showing the process of a blender with temperature measurement and control panel, including a magnified view.This appliance is for private and indoor use only and must not be used commercially. Please read the instruction manual carefully and keep it at a safe place. When the appliance is given to another person the instruction manual should be passed to that person, too. Only use the appliance as described in the instruction manual and pay attention to the safety information. No liability for damages or accidents will be accepted, which are caused by not paying attention to the instruction manual. Remove all packaging and sticker (except the rating label). Wash up all parts carefully (see cleaning).
Safety information
The blade is very sharp!
- Connect and operate the appliance in accordance with the specifications shown on the rating label.
- Do not use if the plug cord is damaged. Verify before every use.
- Do not plug with wet hands.
- Connect the power plug to a properly installed and easily accessible socket only.
- To unplug the power plug, always pull the plug – not the cable.
- Plug off the appliance after each use or in case of failure.
- Do not pull at the cord. Don't pull it over edges and don't bend it too much.
- Keep the cord away from hot parts.
The appliance can be used by children aged 8 and above and persons with limited physical, sensory or mental capabilities or lack of experience/knowledge, provided that are supervised or have been provided with instruction in the safe use of the appliance and have understood the resulting dangers. Children must not use the packaging as a toy. Cleaning and user maintenance must not be carried out by children unless they are 8 years or older and are supervised.
- Children under the age of 8 must be kept away from the appliance and the connecting cable.
- Children should be supervised to ensure that they do not play with the appliance or packaging material (e.g. Plastic Bags).
- The appliance must not be operated using a timer or a separate remote system!
- Never leave the appliance unattended when in use.
- Do not leave the appliance outdoors or in a damp area.
- Never immerse the unit in water.
- Never use the device after a malfunction, e.g. if it felt down or has been damaged in any other manner.
- The manufacturer is not liable for damage which is occurring due to the usage of the appliance in a different way as described or a mistake in the handling has been made.
- To prevent injury, repairs such as replacing a damaged cord, should only be carried out by a customer service. Only original spare parts have to be used.
- Only use the device as described in this manual.
- This appliance is intended to be used in household and similar applications such as:
o staff kitchen areas in shops, offices and others working environments
o by clients in hotels, motels and other residential type environments
o bed and breakfast type environments.
- Before initial use: clean all parts carefully and leave to dry.
- If an extension cable is used, it has to have a cross-section of 1,5mm^2 . A cable drum must always be unwound.
- If a GS-tested 16 A multi-pin extension is used, it may not be charged with more than 3680 watts due to fire hazard.
- Make sure that children do not tease the cable or that a trip hazard occurs.
- The device must always be disconnected from the power supply if it is not supervised and before assembling, disassembling or cleaning.
- Hygiene: Please always clean the device to avoid bacteria and mould formation.
Safety switch-off: if the lid is opened during use, the appliance switches off.
The surface of the jug becomes hot! Hot steam escapes from the steam opening in the lid! Do not cover!
Risk of glass breakage! Never pour cold water into the hot glass jug.
Cleaning
- Attention! Pull the plug before cleaning. - Never immerse the unit into water.
text_image
Diagram showing a water tap with a cross mark and a thermometer, indicating incorrect water usage or measurement.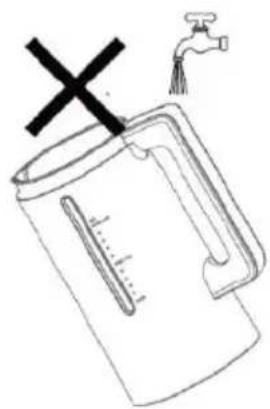
text_image
Diagram showing a measuring cup with a 'X' mark above it and a faucet, indicating incorrect measurement or water level.- Food residues must be removed for reasons of hygiene.
- Fill the container with warm water (300 ml) with a little washing-up liquid and select the “Clean” programme. The appliance runs for 1 minute, then rinse thoroughly.
natural_image
Line drawing of a measuring cup with a faucet above it (no text or symbols)• If there is stubborn dirt in the glass jug, use the enclosed cleaning brush to remove it.
- Clean and dry the lid.

natural_image
Line drawing of a micrometer measuring a cylindrical container with a pointer (no text or symbols)
Attention! Blade is sharp!
- Clean the housing with a damp cloth.
- Do not use abrasive or acidic cleaning agents or steel sponges.
Workplace
Important:
Never place this device on or next to hot surfaces (e.g. hot stoves). Only use it on a
even, stable and a heat resisting surface. It is important that no inflammable items are near to the device. Do not place the device on the edge of the table so that it cannot be touched by children or fall down when touched.
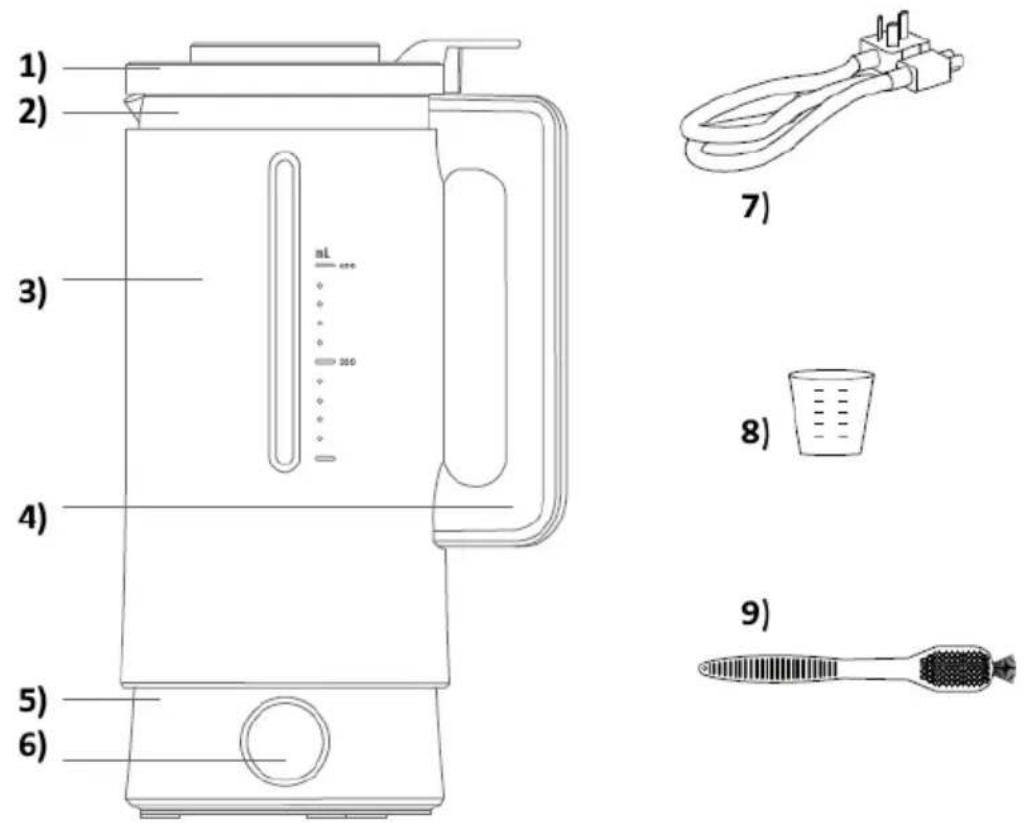
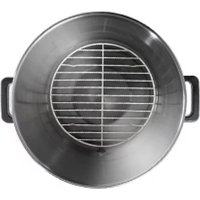
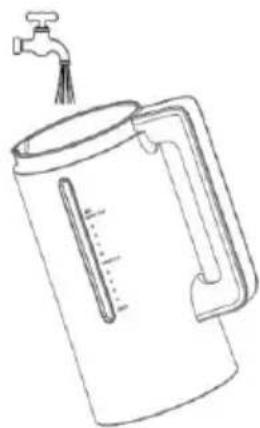
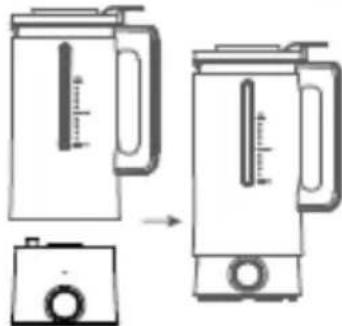
- Lid
- Glass jug
- Housing
- Handle
- Motor part
- OLED-Display, knob, control dial
- Power plug
- Measuring cup
- Cleaning brush
Usage
Never leave the appliance running unfilled, as this can cause the bearings to overheat.
- Only fill the appliance with food and liquids up to max. 600ml. The minimum filling quantity is 200 ml (see scale on the appliance).
· The appliance is not suitable for dry mixing, grinding or pulverising.
- For safety reasons, the lid must always be placed correctly on the jug (see picture). If the lid is not placed correctly, the appliance will not start and 'Cover the Lid' will appear in the display.

natural_image
Close-up of a white plastic water dispenser with a red annotation box highlighting the side portion (no text or symbols on the device itself)• Always place the jug on the motor part with the handle to the right.
natural_image
Diagram of a blender with a control panel and side view showing internal components (no text or symbols)- Connect the appliance, a signal can be heard and the display lights up "short press turn on".
- Press the knob 6), the standard programme SOYA lights up.
- With the control dial 6) you can select the different programmes.
- Put the ingredients into the appliance and start the programme by briefly pressing the knob 6).
- After the time has elapsed, a beep sounds and "SOYA complete" is shown in the display.
- If an ingredient is to be added while the programme is running, open the lid. The machine beeps and says "Cover the Lid". Add the ingredient and replace the lid as described above, the programme will continue.
- If the programme is to be ended prematurely, press and hold knob 6) for 3 seconds.
- Note: when preparing hot dishes, the cooking time starts to run after the cooking temperature has been reached.
- Let the appliance cool down for a few minutes before starting a new programme.
Preset - Time Preselection
- This function allows you to set the number of hours in which a programme should start.
- Connect the appliance and select the PRESET programme with the control dial 6).
- Press the knob, the display shows 04 HOUR. Turn the knob to select the time preset between 1 and 12 hours. Confirm your entry by pressing the knob.
- Now select your desired programme, e.g. SOYA, and confirm it as well.
- The display now shows "Preset Soya" and the selected time preset.
- After the preset time has elapsed, the selected programme starts.
Programmes
| Programme | Time in Min | Temperature °C | Mode |
| Soya 21 100 heat + mix | |||
| Paste – Baby food | 21 | 100 | heat + mix |
| Grains – cereals | 20 | 100 | heat + mix |
| Soup 25 100 heat + mix | |||
| Congee – Rice soup | 20 | 100 | heat + mix |
| Corn – Sweetcorn drink | 19 | 100 | heat + mix |
| Juice | 1,5 | cold | mix |
| Smoothie | 1 | cold | mix |
| Preset – Time preselection | |||
| Clean / Mix | 1 | cold | mix |
Note: the appliance clocks in some programmes. i.e. the mixer function does not run constantly.
Troubleshooting
Dear Client,
Thank you for buying this STEBA product. The following table will help you with problems that may occur when using your device. For many problems there is a simple solution, because not everything that appears like a malfunction must be serious. Please check the following list before contacting our customer service.
| Problem Reason Solution | ||
| OLED-Display does not work | ·Device is not plugged in·Jug is not in the correct position | ·Check fuse·Plug it in·Place jug correctly |
| Display is on, but device does not work | ·Lid is not placed correctly·No programme selected | ·Place lid correctly·Select a programme |
| Food spills over ·Food exceeds the max marking | ·Do not overfill | |
| Food is not well cooked | ·Too many ingredients·Security switch has triggered | ·Put in less food·Contact service |
| Error code E1 | ·Short circuit | ·Contact service |
| Error code E2 | ·Jug is not in the correct position | ·Place jug correctly |
| Error code E3 | ·Overheating | ·Contact service |
| Error code E4 | ·Temperature too low | ·Contact service |
RECIPES
- Please use flawless ingredients.
- Fruit should be ripe but not rotten.
- The dishes must be eaten immediately or stored in the refrigerator for no longer than 2 days.
• Note: All dishes are guidelines and depend on your own taste or the food.
Soy Drink
Soak 40 g soybeans overnight in plenty of water. Drain the soybeans, rinse and place in the device. Fill up to the "MAX" mark with water. Add 1 - 2 tbsp. maple syrup. Start the soya programme. Then filter the liquid as desired in a sieve and squeeze out the residue.
Tofu
Soak 60 g soybeans overnight in plenty of water. Drain the soybeans, rinse and place in the device. Fill up to the "MAX" mark with water. Add 1 - 2 tbsp. maple syrup.
Start the soya programme. Once the programme is finished, add 2 - 3 tbsp vinegar or 2 tbsp lemon juice, and 12 tsp salt to the liquid and start the mix / clean programme.
Then pour the liquid into a bowl and let it stand for 1 hour until the whey has settled. Pour the mixture into a sieve lined with a cloth and allow to drain.
Mix spices and herbs into the still soft mass and then squeeze.
Note: The more you squeeze, the drier and firmer the tofu will be. You can then strain the tofu and fry it. You can also use sweet lupins instead of soya.
Silken tofu
The mass is soft, still contains liquid and is suitable for salads, soups or smoothies without the spices.
Paste - Baby food
Vegetables - Meat - Paste
100 g sweet potatoes
50 g courgette
40 g leaf spinach, fresh
30 g meat
1 carrot
10 g butter (rapeseed oil)
70 ml water
Cut everything into small pieces (approx. 2 cm). Place in the jug and add approx. 70 - 80 ml water.
Start the paste programme.
Fruit paste
1 apple
12 pear
1 banana
Approx. 30 - 40 ml water
(Possibly 20 g tender oat flakes).
Cut the fruit into small pieces (2 cm), place in the jug and fill with water.
Start the paste programme.
Vegetables - Fruit - Porridge
14 courgette
50 g leaf spinach, fresh
60 g broccoli
12 apple
14 sweet potato (potato or parsnip)
12 pear
1 carrot
10 g butter (rapeseed oil)
Note: if the porridge is too coarse, mix again for 1 min using the Mixer / Clean programme.
The porridge is very hot!
Grains / Cereals
Basic recipe:
Put 60 g of various grains into the device. Add 500 ml water, 1 pinch of salt and, if desired 3 - 4 tbsp. maple syrup.
Start the Grains programme.
Then filter the liquid if necessary. The residue can be used for baking bread, sauces or muesli.
Grains-Nuts-Drink
20 g macadamia nuts
20 g cashew nuts
200 ml cereal drink
1 pinch of salt
3 - 4 tbsp. maple syrup or honey
Possibly a little vanilla
Fill up to max. 600 ml with water and select the mix / clean programme.
Soup
Basic recipe:
150 g vegetables (also mixed)
Salt, pepper
Vegetable stock
Fill up to max. 600 ml with water and select the Soup programme.
Congee - rice soup
Asian rice porridge
1 tsp rice
12 tsp water or stock bring to the boil is eaten plain or mixed with bamboo shoots, shallots and soy sauce.
As a dessert, mix in maple syrup or honey.
Corn
Place 25 g of corn in the device and fill up to 600 ml with water.
Select the Corn programme and start. After the time has elapsed, add maple syrup or chilli powder according to taste and mix in with the mix / clean programme (1 minute).
Mix / Clean
You can use this programme to mix in spices or herbs after the cooking process is finished.
You can also use this programme for cleaning by adding warm water and a few drops of washing-up liquid to the glass jug.
Put the lid on, select the Mix programme.
Smoothie
Cut fruits into small pieces and place in the glass jug, fill up to 600 ml with water and select the smoothie programme. Instead of water, you can use cold milk or soy drink.
Use honey or maple syrup to sweeten.
Note: Intended for immediate consumption because of the vitamins. The fruit used should be ripe
Green smoothie
100 ml water
1 apple
50 g field salad
1 banana
1 mango
4 strawberries
Cut everything into small pieces, place in the appliance and select the smoothie programme.
Summer Smoothie
100 ml water
100 g pineapple
200 g melon (yellow)
100 g mango
1 banana
12 apple
Some fresh lemon juice
Select the smoothie programme.
The fruits can also be frozen.
Tomato and pepper smoothie
100 - 200 ml water
14 apple
150 g pepper
25 g avocado
150 g tomatoes
100 g pomegranate
50 g carrots
20 g bananas
50 g melon
Cut the fruit and vegetables into small pieces, fill with water and press the smoothie button.
If you don't want the grains of the tomatoes, press the Clean/Mix button a few more times.
Correct Disposal of this product

This marking indicates that this product should not be disposed with other household wastes throughout the EU. To prevent possible harm to the environment or human health from uncontrolled waste disposal, recycle it responsibly to promote the sustainable reuse of material resources. To return your used device, please use the return and collection systems or contact the retailer where the product was purchased. They can take this product for environmental safe recycling.
Packaging disposal: Do not throw away the package materials. Please put it in the recycling bin.


Gift box: Paper, should be put to the old paper collection point. Plastic packaging material and foils should be collected in the special collection containers.
Service and Repair:
If the appliance must be repaired, please get in touch with your trader or with the manufacturer:
text_image
Diagram showing a water tap with a cross mark and a thermometer, indicating incorrect water safety.
text_image
Diagram showing a water tap with a cross mark above it and a measuring cup with a scale, indicating incorrect water level.
natural_image
Line drawing of a measuring cup with a faucet above it (no text or symbols)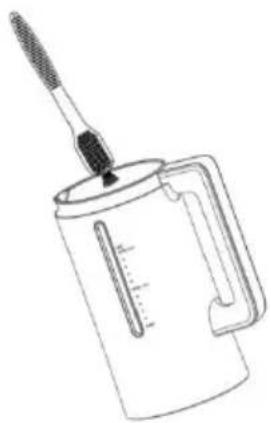
natural_image
Line drawing of a micrometer measuring a cylindrical container with a pointer (no text or symbols)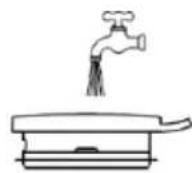

Plan de travail
natural_image
Close-up of a white plastic water dispenser with a red zoomed-in section highlighting the lid area (no text or symbols visible)text_image
Diagram showing two types of kitchen appliances with measurement scales and a control panel, illustrating a process from raw material to final product.text_image
Diagram showing a water tap with a cross mark and a thermometer, indicating incorrect water usage or measurement.
text_image
Diagram showing a measuring cup with a 'X' mark above it and a faucet, indicating incorrect measurement or water level.
natural_image
Line drawing of a measuring cup with a faucet above it (no text or symbols)
natural_image
Line drawing of a micrometer measuring a cylindrical container with a pipette (no text or symbols)

Plaatsing
Belangrijk:
natural_image
Close-up of a white plastic soap dispenser with a red annotation box highlighting the side (no text or symbols on the device itself)text_image
Diagram showing the process of a blender with temperature measurement and control panel, including a separate view of the device.⚠️ De pap is erg heet!
o bed and breakfast miljøer
text_image
Diagram showing a water tap with a cross mark and a thermometer, indicating incorrect water usage or measurement.
text_image
Diagram showing a measuring cup with a 'X' mark and a faucet, indicating incorrect measurement or water level.natural_image
Line drawing of a measuring cup with a faucet above it (no text or symbols)natural_image
Line drawing of a micrometer measuring a cylindrical container with a pointer (no text or symbols)natural_image
Line drawing of a coiled electrical plug with terminal connectors (no text or symbols)7)

9)

natural_image
Close-up of a white plastic water dispenser with a red annotation box highlighting the side portion (no text or symbols on the device itself)text_image
Diagram showing the process of a blender with labeled parts and a directional arrow indicating transformation.Start programmet Grains.