
SPD2519BM - CD Player PHILIPS - Free user manual and instructions
Find the device manual for free SPD2519BM PHILIPS in PDF.
| Product type | Internal CD-ROM drive |
| Brand | Philips |
| Model | SPD2519BM |
| Interface | S-ATA |
| Form factor | 5.25 inches (internal bay) |
| Supported disc formats | CD-ROM, CD-R, CD-RW, Audio CD |
| Maximum read speed | 52x (estimated) |
| Dimensions (L x H x D) | 146 x 42 x 170 mm (estimated) |
| Weight | 0.5 kg (estimated) |
| Power supply | Via S-ATA connector (5V / 12V) |
| Power consumption | ~8 W (estimated) |
| Operating temperature | 5 °C to 45 °C (estimated) |
| Loading method | Motorized tray |
| Main functions | CD reading, internal installation, PC compatible |
| Package contents | Drive, user manual, 4 screws |
| Care and cleaning | Clean with a soft dry cloth; do not use solvents |
| Safety | Keep plastic bags out of reach of children (choking hazard) |
| Spare parts and repairability | Mounting screws provided; Philips customer support |
| General information | Warranty included; disposal in accordance with WEEE directive; support at www.philips.com/support |
Frequently Asked Questions - SPD2519BM PHILIPS
User questions about SPD2519BM PHILIPS
0 question about this device. Answer the ones you know or ask your own.
Ask a new question about this device
Download the instructions for your CD Player in PDF format for free! Find your manual SPD2519BM - PHILIPS and take your electronic device back in hand. On this page are published all the documents necessary for the use of your device. SPD2519BM by PHILIPS.
USER MANUAL SPD2519BM PHILIPS
How to... for Internal S-ATA Drives
EN Install Guide 3+24
natural_image
Exterior view of a Philips DVD drive (no visible text or symbols beyond branding)
How to install?
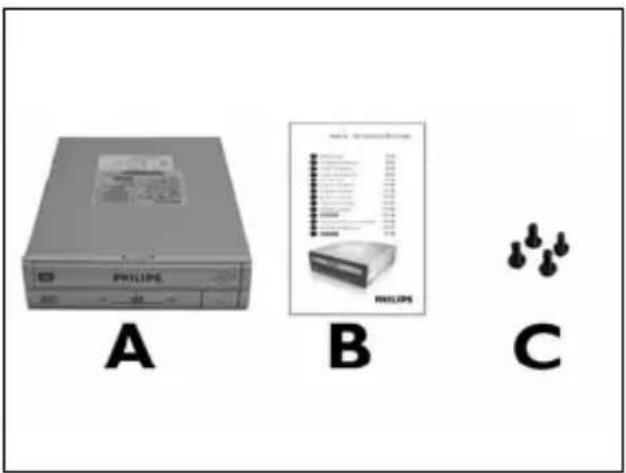
EN This can be found in the box:
A: Your new drive
B: This manual
C: 4 screws in a small bag
natural_image
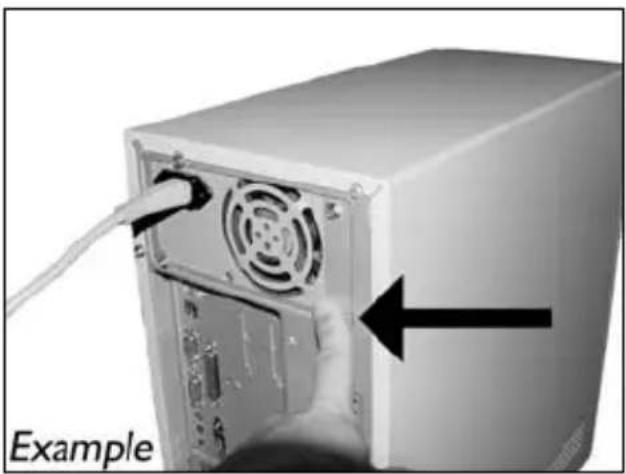
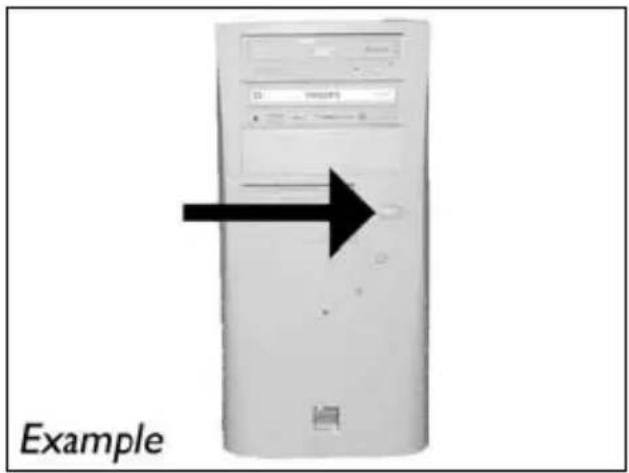
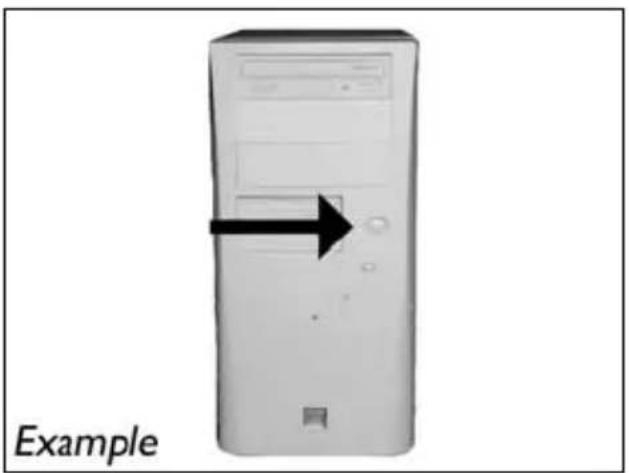
Computer tower case with monitor and control buttons, labeled 'Example' (no text on device)EN Switch your computer off.
DE Schalten Sie Ihren Computer aus.
FR Éteignez l'ordinateur.
IT Spegnere il computer.
NL Zet de computer uit.
2
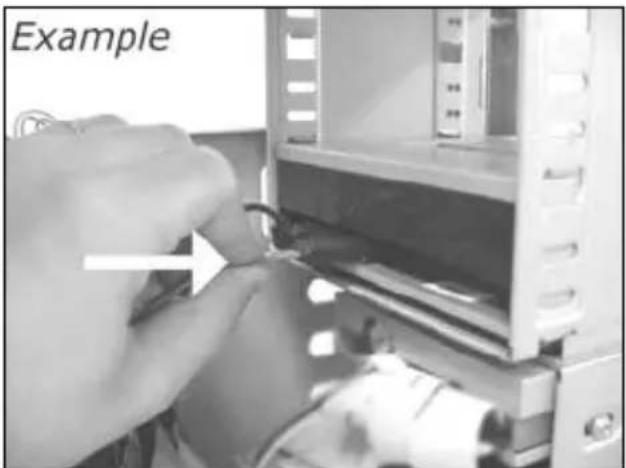
natural_image
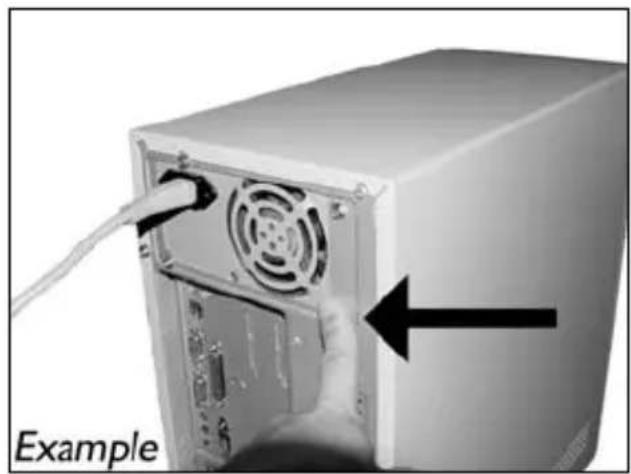
Computer tower rear panel with ventilation fan and cable, showing a hand inserting a cable (no text or symbols on the device itself)EN Touch an unpainted metal part (eg. your heating or an unpainted part of your computer case). This will avoid any damage to your computer by electrostatic discharge.
DE Berühren Sie ein unlackiertes Metallteil (z.B. Ihre Heizung oder ein unlackiertes Teil Ihres Computergehäuses).
Das verhindert Schäden an Ihrem Computer aufgrund von elektrostatischer Entladung.
FR Touchez une partie métallique non peinte (p. ex. un radiateur ou une partie non peinte du boîte de l'ordinateur).
Ce contact permettra d'éviter tout endommagement de l'ordinateur par décharge d'électricité statique.
3
natural_image
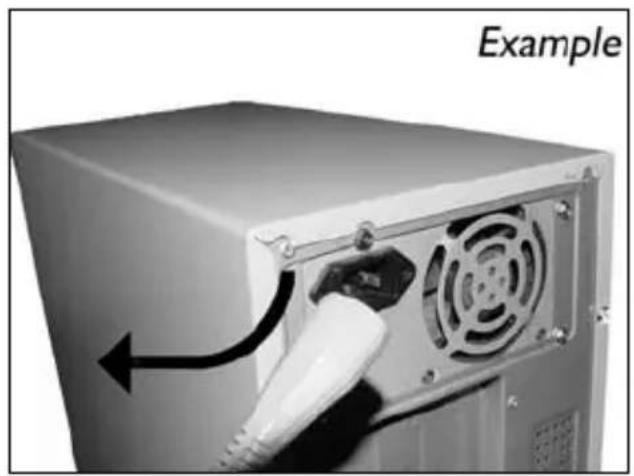
Close-up of a computer power adapter with a white plug inserted, showing ventilation grille and fan (no text or symbols)EN Disconnect the power cable from the PC.
DE Ziehen Sie das Netzkabel vom Computer ab.
FR Débranchez le câble d'alimentation de l'ordinateur.
IT Disconnettere il cavo di alimentazione dal PC.
NL Trek de netstekker uit de PC.
4
5
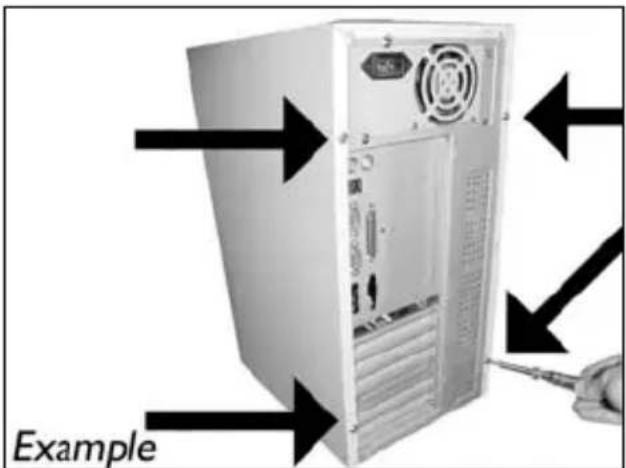
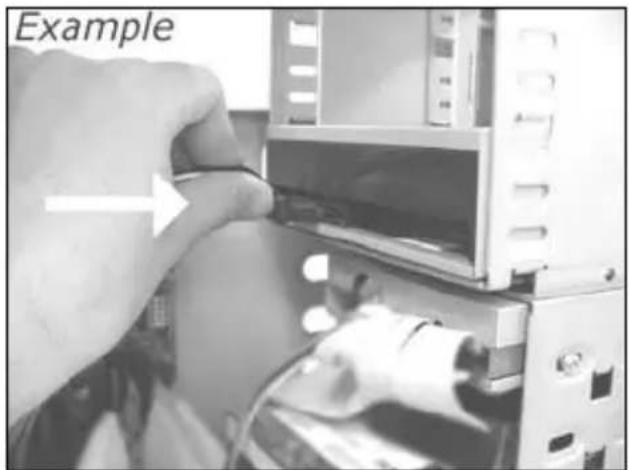
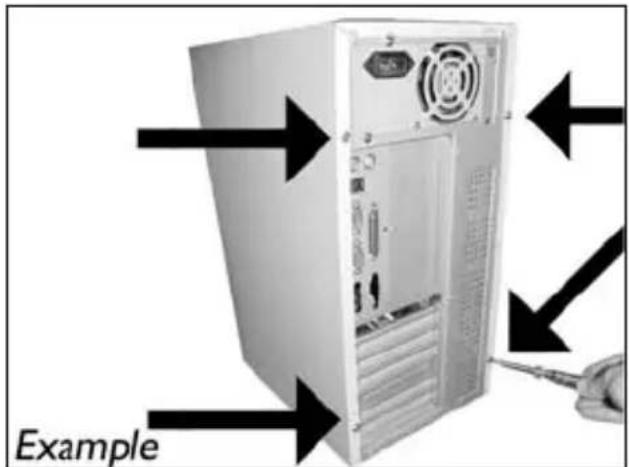
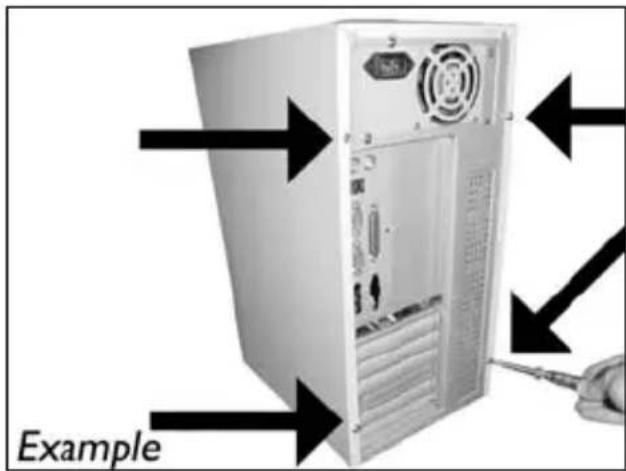
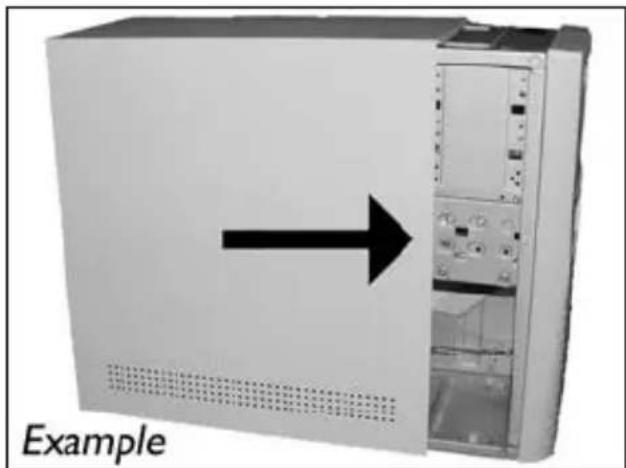
EN Open your computer. You may have to unleash screws which are mostly located at the back of your computer. See your computer manual for more details.
EN Take off the cover of the computer.
natural_image
Exterior view of a server rack unit with an arrow pointing left, labeled 'Example' (no other text or symbols)7
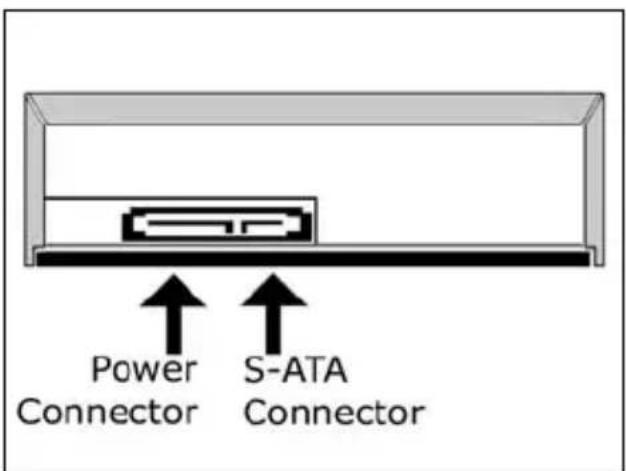
EN These are the connections (on the back of your drive) you will have to use for connecting the drive to the computer.
natural_image
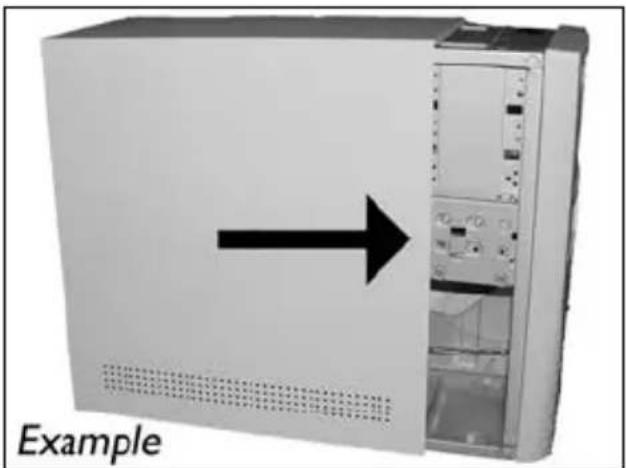
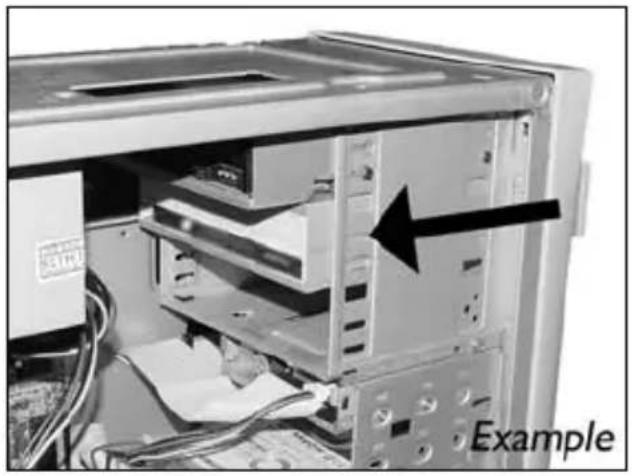
Interior view of a computer tower showing internal components and a black arrow pointing to a specific area, labeled 'Example' (no text or symbols on the main structure)EN Put the drive into your computer.
DE Schieben Sie das Laufwerk in Ihren Computer.
FR Montez l'appareil dans l'ordinateur.
IT Mettere l'unità nel computer.
NL Schuif het station in uw computer.

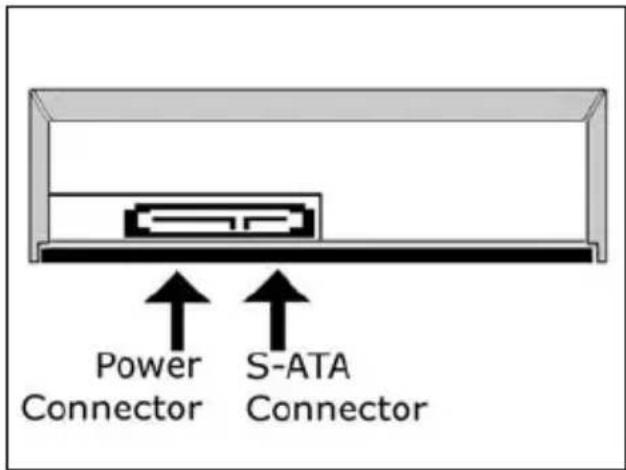
EN Attach a S-ATA Power Cable to your drive.
DE Schließen Sie ein S-ATA-Stromkabel an Ihr Laufwerk an.
FR Branchez un câble d'alimentation S-ATA à votre lecteur.
IT Collegare un cavo di alimentazione S-ATA alla propria unità.
NL Sluit een S-ATA-stroomkabel aan op uw station.
EN Attach the S-ATA data cable to your drive.
DE Schließen Sie das S-ATA-Datenkabel an Ihr Laufwerk an.
FR Branchez le câble de données S-ATA à votre lecteur.
IT Collegare un cavo dati S-ATA alla propria unità.
NL Sluit de S-ATA-gegevenskabel aan op uw station.
11
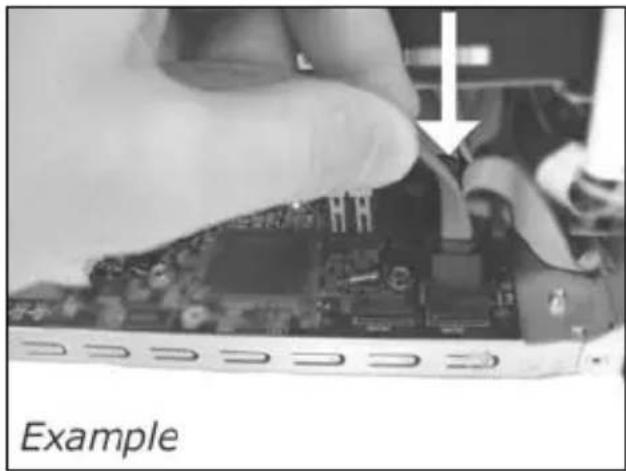
EN Connect the S-ATA data cable to your motherboard.
natural_image
Close-up of hands holding a computer motherboard with a hand pointing to a component (no visible text or symbols)12
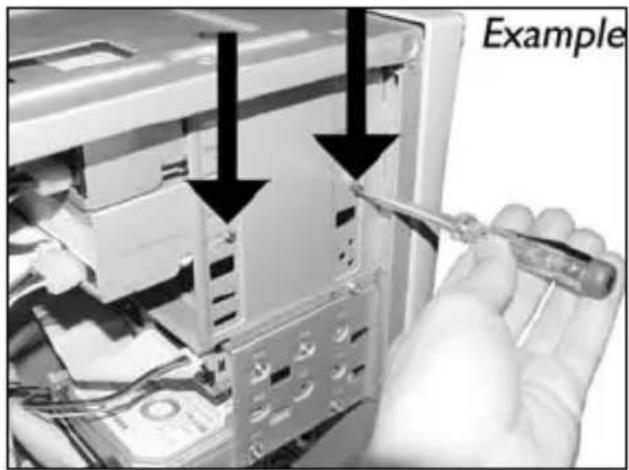
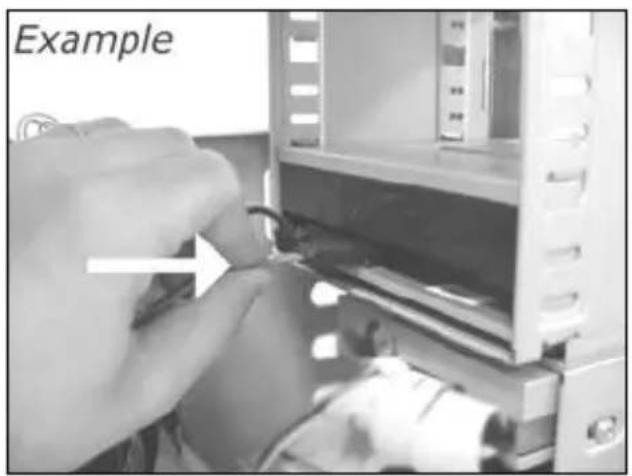
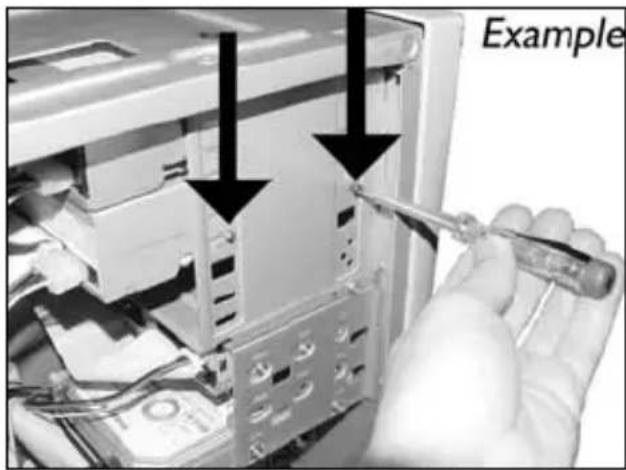
EN Secure the drive with the screws (if possible on both sides).
EN Put the cover you took off in step 5 back on.
natural_image
Exterior view of a server rack unit with an arrow pointing to the front panel (no text or symbols on the device itself)
natural_image
Computer tower with monitor and control buttons, labeled 'Example' (no other text or symbols)ES Apague el ordenador.
PT Desligue o seu computador.
TR Bilgisayarınızı kapatın.
PL Wyłącz komputer.
sv Stäng av datom.
3

natural_image
Close-up of a computer tower with a cable inserted, showing ventilation and power outlet (no text or symbols on the main subject)ES Toque una parte metálica no pintada (por ejemplo, radiador o cualquier parte no pintada de las carcasa de su ordenador). Esto evitará cualquier daño en su ordenador debido a una descarga eléctrica.
PT Toque em alguma parte metálica que não esteja pintada (por exemplo, sua ventoinha ou alguma parte que não).
Esteja pintada na carcaça do seu computador).
TR Boyanmayan metal kisma dokunun (öm. ıstıcınız veya bilgisayarınızın kasasının boyanmayan kısmı).
Bu, elektrostatik deşarj nedeniyle bilgisayarınıza zarar vermesini engelleyecektir.
natural_image
Close-up of a computer power adapter with a white plug inserted, showing ventilation grille and fan (no text or symbols)ES Desconecte el cable de alimentación del PC.
PT Desligue o cabo de alimentação do PC.
TR Güç kablosunu bilgisayardan çıkarın.
PL Odłącz kabel zasilający od komputera.
SV Dra ut nätsladden från datorn.
natural_image
Exterior view of a server rack unit with an arrow pointing left, labeled 'Example' (no other text or symbols)ES Quite la carcasa del ordenador.
PT Retire a cobertura do computador.
TR Bilgisayarın kapağını çıkarın.
PL Zdejmij obudowę komputera.
sv Avlägsna datorns hölje.
natural_image
Interior view of a computer tower with visible CPU socket and drive bays, showing internal components and a black arrow indicating a specific area (no text or symbols on the main image)9
ES Conecte un cable de alimentación S-ATA al equipo.
PT Conecte um cabo de alimentação S-ATA em sua unidade.
TR Sürücünüze bir S-ATA Güç Kablosu bağlayın.
PL Podłącz kabel zasilający S-ATA do napędu.
sv Anslut en S-ATA-nätkabel till enheten.
natural_image
Close-up of a hand inserting cable into a device component (no visible text or symbols)10
ES Conecte el cable de datos S-ATA al equipo.
PT Conecte o cabo de dados S-ATA em sua unidade.
TR Sürücünüze S-ATA veri kablosunu bağlayın.
PL Podłącz kabel danych S-ATA do napędu.
sv Anslut S-ATA-datakabeln till din enhet.
natural_image
Close-up of hands operating a device with a tool, no visible text or symbols
natural_image
Close-up of a hand holding a computer motherboard with a partially visible component, labeled 'Example' (no other text or symbols)ES Conecte el cable de datos S-ATA a la tarjeta principal.
PT Conecte o cabo de dados S-ATA em sua placa-mãe.
TR Ana kartınıza S-ATA veri kablosunu bağlayın.
PL Podłącz kabel danych S-ATA do płyty głównej.
sv Anslut S-ATA-datakabeln till ditt moderkort.
ES Asegure la unidad con los tornillos (si es posible en ambos lados).
PT Utilize os parafusos para fixar a unidade (se possível, de ambos os lados).
TR Sürücüyü vidalarla iyice sıkıştırın (mümkünse her iki tarafı).
PL Przymocuj napęd śrubami (jeżeli jest to możliwe, obustronnie).
SV Säkra enheten med skruvar, om möjligt på båda sidoma.
natural_image
Exterior view of a server rack unit with an arrow pointing to the front panel (no text or symbols on the device itself)ES Vuelva a instalar la carcasa que quitó en el paso 5.
PT Recoloque a cobertura que tirou no passo 5.
TR 5. adımda çıkardığınız kapağı yerine takın.
PL Nałóż z powrotem obudowę, zdjęta w punkcie 5.
sv Sätt tillbaka höljet du avlägsnade i steg 5.
14
ES Ponga los tornillos (si hay alguno) en la parte posterior y vuelva a conectar los cables.
PT Coloque os parafusos (se havia algum) de volta no lugar e reconecte os cabos.
TR Vidaları (eğer varsa) yerine koyun ve kabloları tekrar bağlayın.
PL Wkręć śrubki (jeśli zostały wykręcone) i podłącz kable.
SV Sätt tillbaka skruvarna (om sådana finns) och återanslut kablarna.
15
ES Reinicie el ordenador.
PT Reinicie o computador.
TR Bilgisayarınız yeniden başlatın.
PL Uruchom ponownie komputer.
sv Starta datom.
如何安装?
EN This can be found in the box:
A: Your new drive
B: This manual
C: 4 screws in a small bag
natural_image
Computer tower case with monitor and control buttons, labeled 'Example' (no other text or symbols)sc 关闭计算机。
RU Выключите ваш компьютер.
DK Sluk for din computer.
TC 將您的電腦關機。
EN Switch your computer off.
2
natural_image
Close-up of a computer tower with ventilation slots and a cable inserted, showing a hand pointing to the front panel (no text or symbols on the device itself)TC 觸摸未塗漆的金屬部分(例如,您的電腦外殼發熱或未塗漆的部分)。這可避免靜電釋放而損壞您的電腦。
EN Touch an unpainted metal part (eg. your heating or an unpainted part of your computer case). This will avoid any damage to your computer by electrostatic discharge.
natural_image
Close-up of a computer power adapter with a white cable plugged into the front panel, showing airflow direction (no text or symbols on device)sc 断开计算机电源。
RU Отсоедините кабель питания от вашего РС.
DK Tag strømkablet fra computeren ud.
TC 拔掉電腦電源線。
EN Disconnect the power cable from the PC.
3
4
5
SC 打开计算机。可能需要松开计算机最后面的螺钉。有关详细信息,请参阅您的计算机手册。
RU Откройте компьютер. Для этого нужно отпустить винты, расположенные чаще всего на задней стенке компьютера. Более подробно см. в руководстве по компьютеру.
DK Åbn computeren. Du skal muligvis løsne nogle skruer, der ofte sidder bag på computeren. Find mere information i manualen til din computer.
TC 拆開您的電腦。您可能需要拆下螺絲,通常位於您電腦的背面。請參閱您的電腦手冊以取得更多資訊。
EN Open your computer. You may have to unleash screws which are mostly located at the back of your computer. See your computer manual for more details.
6
natural_image
Exterior view of a server rack unit with an arrow pointing left, labeled 'Example' (no other text or symbols)7
SC 驱动器后面有一些接口,用来将驱动器连接到计算机。
RU Здесь находятся соединения (на задней стенке вашего дисковода), которые должны использоваться для подключения дисковода к компьютеру.
DK Dette er de forbindelser (bag på drevet), som du skal bruge, när drevet skal tilsluttes computeren.
TC 這些是您將用來把光碟機連接到電腦的連接設定(在您的光碟機背面)。
EN These are the connections (on the back of your drive) you will have to use for connecting the drive to the computer.
natural_image
Interior view of a computer tower with visible drive bays and an arrow pointing to a component (no text or symbols on the main image)sc 将驱动器放入计算机。
RU Вставьте дисковод в ваш компьютер.
DK Sæt drevet ind i computeren.
TC 將光碟機放入您的電腦。
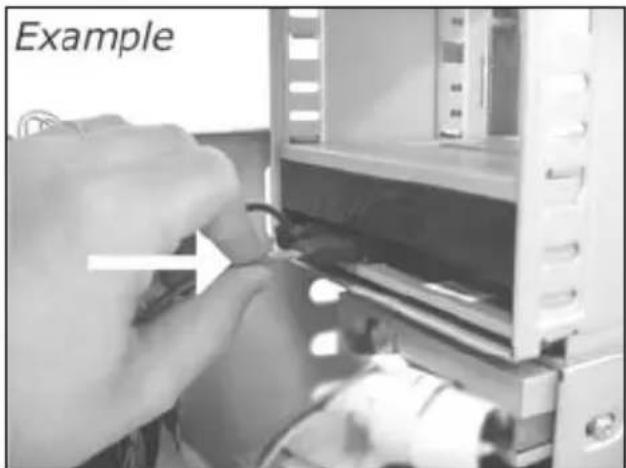
EN Put the drive into your computer.

natural_image
Close-up of a hand inserting a component into a device (no visible text or symbols)SC 将 S-ATA 电源线连接到驱动器。
RU Присоедините кабель питания S-ATA к вашему дисководу.
DK Tilslut et S-ATA strømkabel til drevet.
TC 將 S-ATA 電源線連接至您的光碟機。
EN Attach a S-ATA Power Cable to your drive.
natural_image
Close-up of hands operating a computer interface with a device and cable (no visible text or symbols)sc 将 S-ATA 数据线连接到驱动器。
RU Присоедините кабель данных S-ATA к вашему дисководу.
DK Forbind S-ATA datakablet til drevet.
TC 將 S-ATA 數據線連接至您的光碟機。
EN Attach the S-ATA data cable to your drive.
11
EN Connect the S-ATA data cable to your motherboard.
natural_image
Close-up of a hand holding a computer motherboard with a white arrow pointing to a component (no visible text or symbols)12
EN Secure the drive with the screws (if possible on both sides).
natural_image
Close-up of a hand using a screwdriver to adjust internal components, with arrows pointing to specific parts (no text or symbols visible)13
EN Put the cover you took off in step 5 back on.
natural_image
Front view of a computer tower with an arrow pointing to the front panel (no text or symbols on the tower itself)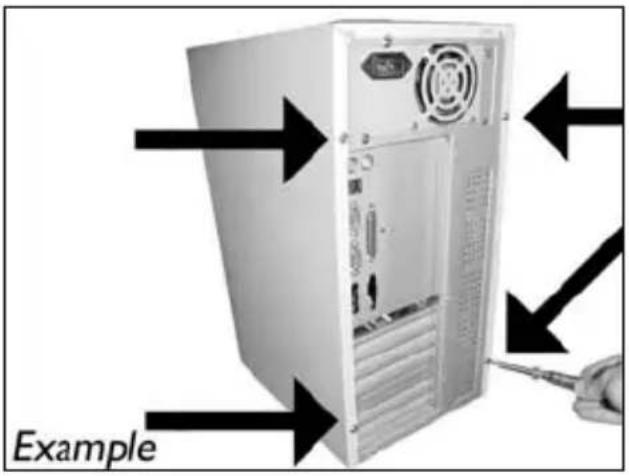
More info or help needed
Visit www.philips.com/storageupdates

Troubleshooting
Philips optical disc drives are manufactured with utmost care. In case of problems, it often appears that the drive itself is not defective. You can simply solve most of these problems by using the support tools offered by Philips.
When you're experiencing problems:
1 Please check the information in the "How to..." manual.
2 Check the Philips support websites www.philips.com/storageupdates and www.philips.com/support for interactive support, troubleshooting, and the newest software updates.
3 Should you encounter any more difficulties during installation or use, please contact Philips Customer Care via the e-mail address or telephone numbers that can be found at www.philips.com/contact.
Prior to claiming a drive for warranty, you must request a return reference number at www.philips.com/support or contact Philips Customer Care.
Additional warranty information is available in the "Philips Warranty" folder on the Nero software disc.
"The making of unauthorised copies of copy-protected material, including computer programmes, files, broadcasts and sound recordings, may be an infringement of copyrights and constitute a criminal offence. This equipment should not be used for such purposes."
WEEE mark: Disposal of your old product

Your product is designed and manufactured with high quality materials and components, which can be recycled and reused. Please inform yourself about the local separate collection system for electrical and electronic products, including those marked by following symbol. Please act according to your local rules and do not dispose of your old products with your normal household waste.
WARNING
Plastic bags can be dangerous.
To avoid danger of suffocation, keep this bag away from babies and small children.
Be responsible Respect copyrights
O: Indicates that this toxic or hazardous substance contained in all of the homogeneous materials for this part is below the limit requirement in SJ/T11363 - 2006.
X: Indicates that this toxic or hazardous substance contained in at least one of the homogeneous materials used for this part is above the limit requirement in SJ/T11363 - 2006.

环使用期限 Environmental Protection Use Period
This logo refers to the period (10 years)
This logo refers to the period ( 10 years ) during which the toxic or hazardous substances or elements contained in electronic information products will not leak or mutate so that the use of these substances or elements will not result in any severe environmental pollution, any bodily injury or damage to any assets.
More info or help needed
Visit www.philips.com/storageupdates

Troubleshooting
Philips optical disc drives are manufactured with utmost care. In case of problems, it often appears that the drive itself is not defective. You can simply solve most of these problems by using the support tools offered by Philips.
When you're experiencing problems:
1 Please check the information in the "How to..." manual.
2 Check the Philips support websites www.philips.com/storageupdates and www.philips.com/support for interactive support, troubleshooting, and the newest software updates.
3 Should you encounter any more difficulties during installation or use, please contact Philips Customer Care via the e-mail address or telephone numbers that can be found at www.philips.com/contact.
Prior to claiming a drive for warranty, you must request a return reference number at www.philips.com/support or contact Philips Customer Care.
Additional warranty information is available in the "Philips Warranty" folder on the Nero software disc.

"The making of unauthorised copies of copy-protected material, including computer programmes, files, broadcasts and sound recordings, may be an infringement of copyrights and constitute a criminal offence. This equipment should not be used for such purposes."
WEEE mark: Disposal of your old product
Your product is designed and manufactured with high quality materials and components, which can be recycled and reused. Please inform yourself about the local separate collection system for electrical and electronic products, including those marked by following symbol.
Please act according to your local rules and do not dispose of your old products with your normal household waste.
WARNING
Plastic bags can be dangerous.
To avoid danger of suffocation, keep this bag away from babies and small children.
FCC 15.105 rule:
This equipment has been tested and found to comply with the limits for a Class B digital device, pursuant to Part 15 of the FCC Rules. These limits are designed to provide reasonable protection against harmful interference in a residential installation. This equipment generates, uses and can radiate radio frequency energy and, if not installed and used in accordance with the instructions, may cause harmful interference to radio communications. However, there is no guarantee that interference will not occur in a particular installation. If this equipment does cause harmful interference to radio or television reception, which can be determined by turning the equipment off and on, the user is encouraged to try to correct the interference by one or more of the following measures:
- Reorient or relocate the receiving antenna.
- Increase the separation between the equipment and receiver.
- Connect the equipment into an outlet on a circuit different from that to which the receiver is connected.
- Consult the dealer or an experienced radio/TV technician for help.
Warning: Changes or modifications made to this equipment not expressly approved by Philips may void the FCC authorization to operate this equipment.
FCC 15.19 rule:
This device complies with Part 15 of the FCC Rules and with RSS-210 of Industry Canada. Operation is subject to the following two conditions:
(1) this device my not cause harmful interference, and
(2) this device must accept any interference received, including interference that may cause undesired operation.
CE
Electric-, Magnetic- and Electromagnetic Fields ("EMF")
- Philips Royal Electronics manufactures and sells many products targeted at consumers, which, like any electronic apparatus, in general have the ability to emit and receive electro magnetic signals.
- One of Philips' leading Business Principles is to take all necessary health and safety measures for our products, to comply with all applicable legal requirements and to stay well within the EMF standards applicable at the time of producing the products.
- Philips is committed to develop, produce and market products that cause no adverse health effects.
- Philips confirms that if its products are handled properly for their intended use, they are safe to use according to scientific evidence available today.
- Philips plays an active role in the development of international EMF and safety standards, enabling Philips to anticipate further developments in standardization for early integration in its products.
Safety Precautions
USA/Canada: This player is for use only with IBM compatible UL listed Personal Computers or Macintosh UL listed workstations, weighing less than 18 kg.
LASER SAFETY
This unit employs a laser. Do not remove the cover or attempt to service this device when connected due to the possibility of eye damage.
LASER-SICHERHEIT
USE OF CONTROLS OR ADJUSTMENTS OR PERFORMANCE OF PROCEDURES OTHER THAN THOSE SPECIFIED HEREIN MAY RESULT IN HAZARDOUS LASER RADIATION EXPOSURE.
WARNUNG
CAUTION INVISIBLE LASER RADIATION. WHEN OPEN AVOID EXPOSURE TO BEAM VARO! AVATTAESSA OLET ALTTIINA NÄKYVÄLLE JA NÄKYMÄTTÖMÄLLE LASER SÄTEILYLLE. ÄLÄ KATSO SÄTEESEEN WARNING OSYNLIG LASERSTRÄLNING NÄR DENNA DEL ÄR ÖPPNAD BETRAKTA EJ STRÅLEN ADVERSEL USYNLIG LASERSTRÄLING NÄR DEKSEL ÅPNES UNNGÅ EKSPONERING FOR STRÅLEN DANGER INVISIBLE LASER RADIATION. WHEN OPEN AVOID DIRECT EXPOSURE TO BEAM VORSICHT UNSICHTBARE LASERSTRAHLUNG WENN ABDECKUNG GEÖFFNET NICHT DEM STRAHL AUSSETZEN
LASER
Type Semiconductor laser GaAlAs
Wave length 775-795 nm (CD) - 660 nm (DVD)
Output power
(measured above the objective lens)
Read: 1,4 mW - 2,5 mW
Write: 90 mW (CD) - 27 mW (DVD)
Beam divergence
60 degree
Additional information available at our website: www.philips.com/storageupdates www.philips.com/storage
Specifications subject to change without notice. All dimensions shown are approximate. © 2007 Koninklijke Philips Electronics N.V.
All rights reserved. Reproduction, copying, usage, modifying, hiring, renting, public performance, transmission and/or broadcasting in whole or part is prohibited without the written consent of Philips Electronics N.V.

- How to... for Internal S-ATA Drives
- How to install?
- 如何安装?
- More info or help needed
- Troubleshooting
- WEEE mark: Disposal of your old product
- WARNING
- 环使用期限 Environmental Protection Use Period
- FCC 15.105 rule:
- FCC 15.19 rule:
- Electric-, Magnetic- and Electromagnetic Fields ("EMF")
- Safety Precautions
- LASER SAFETY
- LASER-SICHERHEIT
- WARNUNG
- LASER
Brand : PHILIPS
Model : SPD2519BM
Category : CD Player