
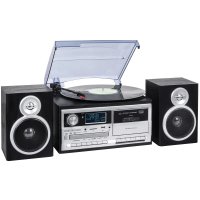
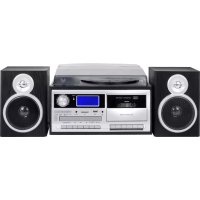
TT 1020 BT - Turntable Trevi - Free user manual and instructions
Find the device manual for free TT 1020 BT Trevi in PDF.
| Product Type | Turntable with CD player, cassette, FM/DAB radio, Bluetooth, USB/SD recording |
| Brand | Trevi |
| Model | TT 1020 BT |
| Dimensions (main unit) | 320 x 210 x 290 mm |
| Dimensions of speakers | 145 x 210 x 135 mm |
| Power supply | External adapter 12V 1A (100-240V ~ 50/60 Hz) |
| Power consumption | 17 W (standby < 1 W) |
| FM radio frequency | 87.5 - 108.0 MHz |
| DAB radio frequency | 174 - 240 MHz |
| Bluetooth | Version not specified, band 2.4 GHz, max power 2.5 mW, typical range 10 m |
| Disc playback | Audio CD, MP3 CD, vinyl records 33⅓ and 45 rpm |
| Supported audio formats (USB/SD) | MP3 |
| Inputs | Aux In (3.5 mm jack), USB, SD, FM antenna, built-in turntable |
| Outputs | Line Out (RCA), headphone (3.5 mm jack), built-in speakers |
| Recording functions | MP3 recording from CD, radio, turntable, cassette, Aux In, Bluetooth to USB/SD |
| Remote control battery | CR2025 |
| Laser type (for CD) | Low-power semiconductor laser |
| Laser safety | Safety device preventing operation when the flap is open |
| Cleaning | Soft, slightly damp cloth; avoid solvents and abrasives |
| Temperature and environment | Avoid magnetic fields, heat sources, humidity, dust, vibrations |
| Intended use | Domestic (non-professional) |
Frequently Asked Questions - TT 1020 BT Trevi
User questions about TT 1020 BT Trevi
0 question about this device. Answer the ones you know or ask your own.
Ask a new question about this device
Download the instructions for your Turntable in PDF format for free! Find your manual TT 1020 BT - Trevi and take your electronic device back in hand. On this page are published all the documents necessary for the use of your device. TT 1020 BT by Trevi.
USER MANUAL TT 1020 BT Trevi
WARNING: DO NOT OPEN THE SET. NEITHER CONTROLS OR SPARE PARTS TO BE USED BY THE USER ARE TO BE FOUND INSIDE IT. APPLY TO AUTHORISED TREVI CENTERS FOR SERVICE OPERATIONS.
EN If you will not find your language on the instruction manual, please go on our website www.trevi.it to find it
NOTE D'USO
This is a precision electronic appliance; avoid using it in the following cases:
Near magnetic fields.
-
Near heat sources such as heaters and stoves.
-
In very humid places such as bathrooms, swimming pools, etc ...
In very dusty places.
-
In places subject to strong vibrations.
-
Do not bring your ear close to the speaker during the setting up and volume adjustment phases, and in particular to keep the volume to a minimum in the ignition phase.
-
Position the appliance so that there is always enough space on its sides for the free circulation of air (at least 5 cm).
-
If liquids penetrate inside the appliance, immediately disconnect the plug from the socket and take the appliance to the nearest authorized TREVI service center.
-
Always check before recharging the appliance, that the power and connection cables are installed correctly.
-
No naked flame sources, such as lighted candles, should be placed on the appliance.
-
The appliance must not be exposed to dripping or splashing water and no objects filled with liquid, such as vases, must be placed on the appliance.
-
Before turning on the appliance, always check that the power cable and the connection cable are installed correctly.
-
The power adapter must be connected to an outlet near the device and must be easily accessible.
-
If you notice excessive heat on the device or on the power adapter, immediately disconnect the plug from the main power socket.
-
Do not pull on the power cable
-
Keep this manual for future reference.
CARE AND MAINTENANCE
Use a slightly damp soft cloth for cleaning. Do not use solvents and abrasive substances.
IMPORTANT
This device is designed for home use (not professional use). This appliance has been carefully built to ensure long-lasting perfect performance. However, should any inconvenience occur, please contact your local authorised TREVI Service Centre.
TREVI follows a policy of ongoing research and development. Therefore products may have different features from those described.
TO ACTIVATE THE REMOTE CONTROL AND BATTERY REPLACEMENT
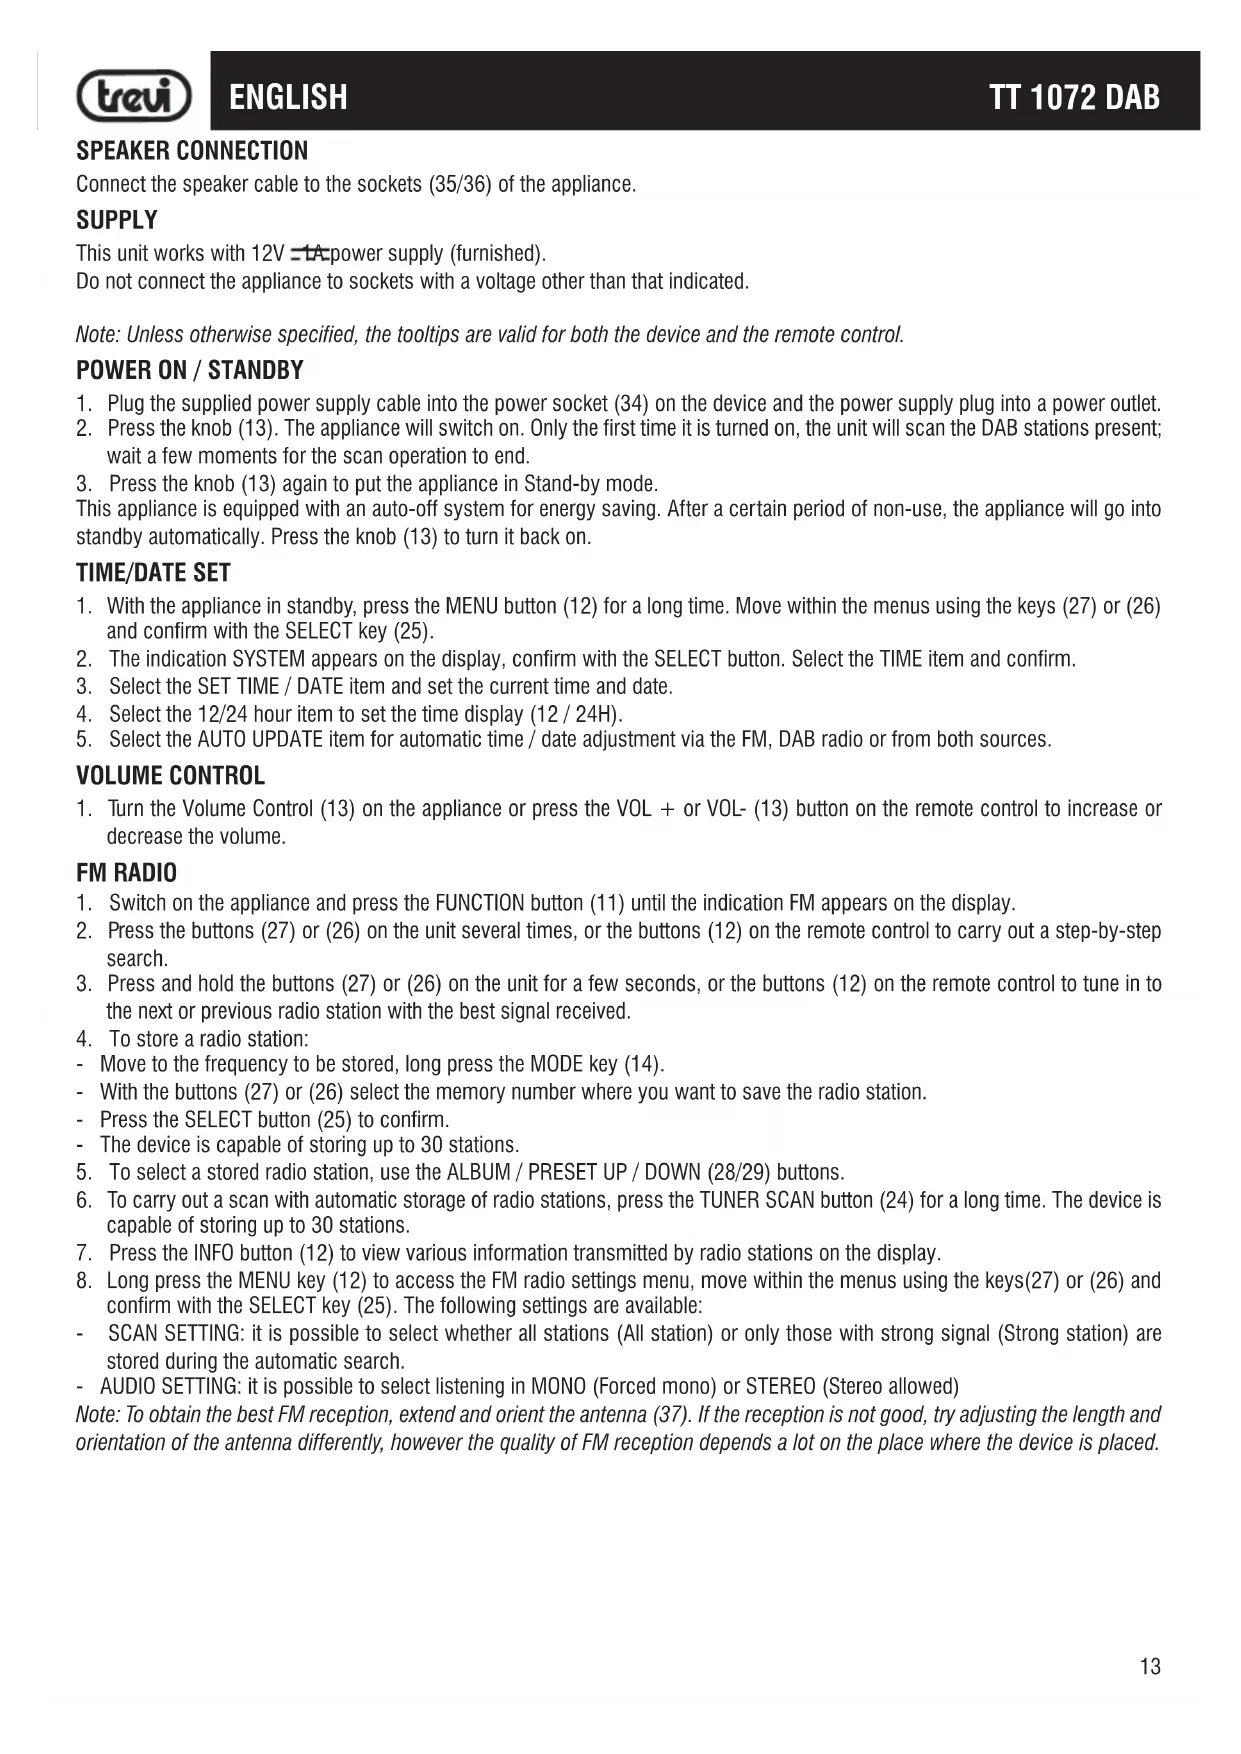
The remote control comes with a cell battery already installed. To activate the battery, remove the transparent tab at the bottom of the remote control. The remote control is now ready to use.
To Replace With a New Battery:
- Remove the battery compartment cover as per the illustration on the right.
- Observe the correct polarity and install a 3V --- lithium battery (CR2025).
- Close the cover.

CAUTIONS ON LASER
This device is equipped with a reading system with laser beam. Although the laser is low power, and with a safety device that prevents it from operating when the door opened always adhere to the following warnings:
- Do not approach the eye to the laser lens with the device opened, the danger of damage to the retina.
- Do not attempt to dismantle or tamper with the laser unit, danger of radiation absorption.
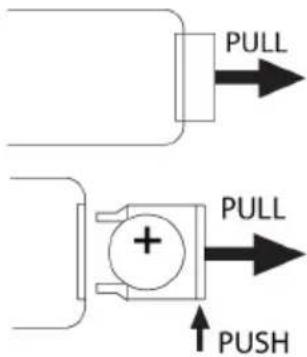
With earphone or headphones use:
To prevent possible hearing damage, limit the amount of time listening at high volumes.
LOCATION OF CONTROL
1) CASSETTE PLAYER
2) DUST COVER
3) EARPHONE JACK
4) CABINET
5) USB SLOT
6) LCD DISPLAY
7) SD SLOT
8) AUX IN JACK
9) REMOTE CONTROL RECEIVER
10) STANDBY / BT INDICATOR
11) FUNCTION
12) MENU/INFO
13) VOLUME/STANDBY KNOB
14) MEM/MODE
15) TIMER/SLEEP
16) CASSETTE - RECORD
17) CASSETTE - PLAY
Connect the speaker cable to the sockets (35/36) of the appliance.
SUPPLY
This unit works with 12V = TA power supply (furnished).
Do not connect the appliance to sockets with a voltage other than that indicated.
Note: Unless otherwise specified, the tooltips are valid for both the device and the remote control.
POWER ON/STANDBY
- Plug the supplied power supply cable into the power socket (34) on the device and the power supply plug into a power outlet.
- Press the knob (13). The appliance will switch on. Only the first time it is turned on, the unit will scan the DAB stations present; wait a few moments for the scan operation to end.
- Press the knob (13) again to put the appliance in Stand-by mode.
This appliance is equipped with an auto-off system for energy saving. After a certain period of non-use, the appliance will go into standby automatically. Press the knob (13) to turn it back on.
TIME/DATE SET
- With the appliance in standby, press the MENU button (12) for a long time. Move within the menus using the keys (27) or (26) and confirm with the SELECT key (25).
- The indication SYSTEM appears on the display, confirm with the SELECT button. Select the TIME item and confirm.
- Select the SET TIME / DATE item and set the current time and date.
- Select the 12/24 hour item to set the time display (12 / 24H).
- Select the AUTO UPDATE item for automatic time / date adjustment via the FM, DAB radio or from both sources.
VOLUME CONTROL
- Turn the Volume Control (13) on the appliance or press the VOL + or VOL- (13) button on the remote control to increase or decrease the volume.
FM RADIO
- Switch on the appliance and press the FUNCTION button (11) until the indication FM appears on the display.
- Press the buttons (27) or (26) on the unit several times, or the buttons (12) on the remote control to carry out a step-by-step search.
- Press and hold the buttons (27) or (26) on the unit for a few seconds, or the buttons (12) on the remote control to tune in to the next or previous radio station with the best signal received.
-
To store a radio station:
-
Move to the frequency to be stored, long press the MODE key (14).
- With the buttons (27) or (26) select the memory number where you want to save the radio station.
- Press the SELECT button (25) to confirm.
- The device is capable of storing up to 30 stations.
- To select a stored radio station, use the ALBUM / PRESET UP / DOWN (28/29) buttons.
- To carry out a scan with automatic storage of radio stations, press the TUNER SCAN button (24) for a long time. The device is capable of storing up to 30 stations.
- Press the INFO button (12) to view various information transmitted by radio stations on the display.
- Long press the MENU key (12) to access the FM radio settings menu, move within the menus using the keys(27) or (26) and confirm with the SELECT key (25). The following settings are available:
- SCAN SETTING: it is possible to select whether all stations (All station) or only those with strong signal (Strong station) are stored during the automatic search.
- AUDIO SETTING: it is possible to select listening in MONO (Forced mono) or STEREO (Stereo allowed)
Note: To obtain the best FM reception, extend and orient the antenna (37). If the reception is not good, try adjusting the length and orientation of the antenna differently, however the quality of FM reception depends a lot on the place where the device is placed.
DAB RADIO OPERATION
- Switch on the appliance and press the FUNCTION button (11) until the indication DAB appears on the display.
- Press the keys (27) or (26) on the unit, or the keys (12) on the remote control to select one of the available radios and confirm with the SELECT key (25).
-
To store a radio station:
-
Move to the frequency to be stored, long press the MODE key (14).
- With the buttons (27) or (26) select the memory number where you want to save the radio station.
- Press the SELECT button (25) to confirm.
- The device is capable of storing up to 30 stations.
- To select a stored radio station, press the MODE key (14) and select the desired memory location using the keys (27) or (26), confirm with SELECT (25).
- To re-scan the available DAB radio stations, long press the TUNER SCAN button (24).
- Press the INFO button (12) to view various information transmitted by radio stations on the display.
- Long press the MENU key (12) to access the DAB radio settings menu, move within the menus using the keys (27) or (26) and confirm with the SELECT key (25). The following settings are available:
- FULL SCAN: to carry out a new scan of the available DAB radio stations.
- MANUAL TUNE: to perform a manual search of the DAB stations present.
- DRC: allows you to enable / disable the DRC function to improve the sound when listening in noisy environments. You can set the DRC level to high (high), low (low) or Off (off).
- PRUNE: allows you to delete all the radios found but not available from the list of stored stations (poor signal).
- Switch on the appliance and press the FUNCTION button (11) several times until the indication CD appears on the display
- Open the CD compartment by pressing the button (30) on the unit, or the OP/CL button (5) on the remote control and insert the disc into the CD compartment (22), with the written side facing up. Close the door by pressing the button (30) on the unit again, or the OP./CL.(5) button on the remote control.
- After a few seconds the display will show the number of tracks on the disc. Playback will begin automatically. The display will show the track number being played and the elapsed time. If you play a disc with MP3 tracks, this indication will appear on the display.
- Press the button (24) to activate the pause. Press the button again to deactivate the pause.
- Press the button (25) on the device to stop playback permanently.
JUMP TRACK AND QUICK SEARCH
- Press the keys (27) or (26) once to go to the previous or next track.
- Press and hold the button (27) or (26) while listening to quickly search for a particular passage of music. Release the button to return to normal playback.
REPEAT
Press the MEM / MODE key (14) to activate the various repeat functions: REP ONE (single track), ALBUM (entire folder selected, only with MP3 discs and folders present), REP ALL (all tracks), RANDOM (playback random), CDDA / MP3 (normal playback).
PROGRAM FUNCTION
Playback according to a programming set by the user.
- If the CD is playing, stop it by pressing the button (25).
- Press the MEM / MODE key (14), the display will show P01 indicating the position of the track in the sequence to be played.
- Select the track number you want to play using the buttons (27) or (26).
- Confirm by pressing the MEM / MODE key (14), the message P02 will appear on the display.
- Continue selecting the number of other desired tracks following steps 3 and 4 up to a maximum of 20 tracks with audio CD or 99 tracks with MP3 disc. The display will show P01, P02, P03 etc. in sequence.
- Press the button (24) to start programmed playback. PROG appears on the display.
- Press the button (25) once to temporarily stop programming. Press the key (24) on the appliance to restart programming.
- Press the key (25) twice to deactivate and completely cancel the programming.
AUX IN INPUT
- Switch on the appliance and press the FUNCTION button (11) several times until ENTER AUX appears on the display.
- Connect any unit equipped with audio output by means of a special cable to the AUX IN input (8).
- Control the external unit from its commands.
- Adjust the volume using the control on the unit (13).
BLUETOOTH OPERATION
- Switch on the appliance and press the FUNCTION button (11) until the Bluetooth indication appears on the display.
- Activate the Bluetooth functionality on the external device to be paired and make it visible.
- Start searching for devices. At the end search for the "TT 1072 DAB" device.
- Enter the password "0000" if necessary.
- After successful pairing, the word CONNECTED appears on the display.
- Start playback on your device. The management of the audio tracks can be performed directly from the controls on the unit or from the remote control.
- Connect a USB memory device to the USB input (5) or insert an SD memory card to the SD input (7).
- Switch on the device and press the FUNCTION button (11) several times until the USB indication appears on the display, which indicates that the data in the USB device or CARD is loaded for the SD reader. In case of absence of the USB or SD device, the indication NO USB / NO CARD will appear on the display.
Note: the device may not support some SD / USB devices, this is due to the incompatibility of some processors.
3. For the rest of the functions, refer to the paragraph "MP3-CD PLAYER OPERATION".
RECORDING (ENCODING) MP3 FROM TURNTABLES / AUX IN / CD / RADIO / CASSETTE
This unit allows the recording of audio tracks from turntables, Aux In input, CD player, radio, cassette on USB or SD device in MP3 format.
ENCODING FROM CD
- Insert an audio CD into the CD player. When the disc starts playing, press the STOP button (25).
- Insert a USB memory into the input (5) or an SD card into the input (7).
If you want to record only one audio track:
- Select with the keys (27) or (26) the song you want to convert.
- Press the REC button (23) once, the word REC_ONE appears on the display, press the REC button (23) again and the playback / recording of the selected song will automatically begin. If there is a USB memory and an SD card at the same time, select (27) or (26) where to save the song to be recorded.
- At the end of the song the recording will stop automatically (END RECORDING appears on the display), the coded song is saved in the Usb / SD memory in a folder called RECORD / CDIN.
If you want to record the entire audio disc:
- Press the REC (23) key once, when the word REC_ONE appears on the display, press (27) or (26), the word REC_ALL appears on the display, press the REC key again. If there is a USB memory and an SD card at the same time, select via (27) or (26) where to save the song to be recorded. Automatically the playback / recording of the entire disc will begin.
- At the end the recording will stop automatically, the encoded tracks are saved in the USB memory in a folder called RECORD / CDIN.
If you want to record using the PROGRAM function:
- Program the tracks as described in the paragraph CD player operation - Program function.
- Press the REC (23) key once, when the word REC_ONE appears on the display, press (27) or (26), the word REC_ALL appears on the display, press the REC key again. If there is a USB memory and an SD card at the same time, select via (27) or (26) where to save the song to be recorded. The playback / recording of the programming will automatically begin.
- At the end the recording will stop automatically, the encoded tracks are saved in the Usb memory in a folder called RECORD / CDIN.
Note: the tracks are recorded / copied in 1: 1 mode, that is, the recording / copying phase requires the same playing time.
To copy an MP3 CD onto a USB memory, follow the instructions as for recording from an audio CD; the selected tracks will be copied without being played, the track being copied and the percentage of the copy made will appear on the display. In case of MP3 CDs with multiple folders it is possible to choose which folder to copy (FOLDER). The copied tracks are saved in the USB memory in a folder called RECORD / COPY.
RADIO ENCODING/TURNTABLE/CASSETTE/AUX IN/BT
The following instructions apply to both USB and SD memory card.
- Switch on the device and select the desired function (Radio / Turntable / Cassette / Aux In / BT).
- Insert a USB / SD memory into the corresponding input.
- Select the radio station you want to record or start playback from the selected source.
- Press the REC key (23) to start recording, in the case of radio recording, all functions such as station search and recall of stored stations are disabled.
- To end the recording, press the STOP button (25).
- The recorded song is saved in the USB memory in a folder called RECORD / LINE IN.
COPY OF MP3 TRACKS BETWEEN USB DEVICE AND SD CARD
It is possible to copy the tracks on USB to SD and vice versa:
- Single track: while listening to a track (from USB or SD source) press the REC button (23). When the ONE indication appears, press the REC button again (23). The track will be copied.
Entire folder: when playback is stopped, press the ALBUM UP / DOWN buttons (28-29) to select the folder to copy. Press the REC. Button (23). Using the keys (27) or (26) select FOLDER and press the REC key (23) again. The folder will be copied. - All tracks: with playback stopped, press the REC button (23). Using the keys (27) or (26) select ALL and press the REC Key (23) again. All tracks will be copied.
DELETING TRACKS ON USB / SD DEVICE
It is possible to delete the tracks present on USB / SD:
- Single track: while listening to a track (from USB or SD source), long press the DEL key (23). When the ONE indication appears, press the DEL key (23) again. The track will be cleared.
Entire folder: when playback is stopped, press the ALBUM UP / DOWN buttons (28-29) to select the folder to be deleted. Long press the DEL key (23). Using the keys (27) or (26) select FOLDER and press the DEL key (23) again. The folder will be deleted. - All tracks: with playback stopped, long press the DEL key (23). Using the keys (27) or (26) select ALL and press the DEL key (23) again. All tracks will be cleared.
Note: deleted tracks are not recoverable.
TURNTABLE OPERATION
Remember to carefully remove the stylus guard.
- Switch on the appliance and press the FUNCTION button (11) several times until the indication PHONO appears on the display.
- Open the turntable protection glass (2).
- Select the speed of the disc using the turntable speed selector (41).
- Place the disc on the platter. Use the adapter supplied (38) in case the disc is a 45 rpm.
- Release the head arm from the catch, raise the arm and place the stylus on the disc. Using the lever (39), lower the head arm. Playback of the disc will begin.
- At the end of the disc playback, the turntable will stop the rotation if the AUTOSTOP function is active (selector 40); bring the lever (39) to the raised arm position.
Note 1: Autostop may stop the rotation of the disc before the end of the incision. In this case, deactivate the function by setting the selector (40) to OFF.
Note2: Remove the turntable stylus protector before use.
Note3: make sure that the arm is locked by the arm retainer after each use
- Switch on the appliance and press the FUNCTION button (11) several times until the indication TAPE appears on the display.
- Press the STOP / EJECT button (20) to open the cassette door and insert a cassette with the side you wish to listen facing outwards.
- Adjust the volume to your liking.
- Press the PLAY button (17) to start playback.
- Press the PAUSE button (21) to temporarily stop playback, press it again to resume it.
- To fast forward the tape, press the FWD button (19).
- To rewind the tape quickly, press the REW button (18).
- Press the STOP / EJECT button (20) to stop playback permanently, press it again to eject the cassette.
REGISTRATION FROM OTHER SOURCES
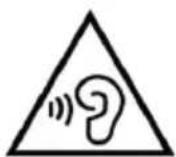
Note: make sure that the record enabling tab is present otherwise it will not be possible to record the cassette.
- Insert the cassette into the compartment.
- Press the REC (16) button to start recording.
- Activate playback of the desired source (Radio, USB / SD player, Bluetooth, AUX IN, turntable, CD).
- Use the PAUSE button (21) to momentarily stop the recording, press it again to resume it.
- Press the STOP / EJECT button (20) to stop recording permanently.
HEADPHONES
- Insert the headphones into the jack (3). The speakers will be turned off.
- Start the desired playback and adjust the volume.
LINE OUT
The LINE OUT output allows you to connect the unit to an external amplification system.
Connect an RCA cable (not supplied) to sockets 32-33 and the other end to the external system. Start the desired playback.
ALARM FUNCTION
This appliance is equipped with an alarm function; It is possible to set up to two alarms.
- With the appliance in standby, press the MENU button (12) for a long time. Move within the menus using the keys (27) or (26) and confirm with the SELECT key (25).
- The indication SYSTEM appears on the display, confirm with the SELECT button. Select the ALARM item and confirm.
- Select ALARM1 SETUP or ALARM2 SETUP.
- Select the activation (ON) of the alarm (alarm deactivated = OFF).
- Set the alarm activation time (ON TIME).
- Set the duration of the alarm (DURATION).
- Set the source to be played (buzzer = ringer, if the radio is selected as the source, you are asked which station to use, if the last listened to LAST LISTENED or one of those memorized).
- Set the activation frequency DAILY (every day), ONCE (once), WEEKENDS (Saturday and Sunday), WEEKDAYS (from Monday to Friday). Confirm / set the alarm date if required.
- Set the alarm playback volume.
At the end, the set alarm will be saved and the icon of an alarm with active alarm appears. If the second alarm alarm is also set, two icons will be present.
With the alarm active, press the SNOOZE button on the remote control to temporarily silence the alarm that will sound again after 9 minutes (the remaining time is shown on the display); press the SLEEP button to deactivate the alarm permanently.
SLEEP FUNCTION
It is possible to activate the automatic switch-off of the unit (standby) after a certain time.
- Press the SLEEP button (15) to set the desired automatic switch-off time; by pressing the button several times it is possible to select between 90, 60, 30, 15 and OFF.
- When the function is active, the "ZZZ" icon appears on the display.
SYSTEM SETTINGS
- Long press the MENU button (12). Move within the menus using the keys (27) or (26) and confirm with the SELECT key (25).
- Select SYSTEM and confirm with the SELECT button.
- Various menu items are available:
Alarm: it is possible to set the alarm alarm function (see the relative chapter for the settings).
Time: it is possible to set the current date / time (see the relevant chapter for the settings).
Backlight: it is possible to set the time of full display ignition (Timeout), the brightness level of the display when active (On level) and the brightness level when the display is at rest (Dim level).
Language: it is possible to set a different language for the menu.
Factory reset: it is possible to restore the settings to the factory values.
Software upgrade: menu reserved for technical assistance centers, do not use.
SW version: shows the current software version.
TECHNICAL SPECIFICATIONS
Power supply: 12V 1A with external power adaptor 100-240V ~ 50 / 60Hz
Consumption: 17W
Standby: <1W
FM frequency: 87.5 - 108.0 MHz
DAB frequency: 174 - 240 MHz
Transmission power BT: max 2,5 mW
Bluetooth transmission band: 2.4 GHz
Unit dimensions: 320 × 210 × 290 ~mm
Speaker dimensions: 145 × 210 × 135 mm

Precautions for correct disposal of the product.
The symbol shown on the equipment indicates that waste must be disposed of in "separate collection" and so the product must not be disposed of together with urban waste.
The user must take the product to special "separate waste collection centres" provided by local government, or deliver it to the retailer against the purchase of a new product.
Separate collection of waste and subsequent treatment, recycling and disposal operations promotes the production of equipment with recycled materials and limits negative effects on the environment and on health caused by improper handling of waste.
Illegal disposal of the product leads to the enforcement of administrative penalties.
NOTES D'EMPLOI
Ave t t a r t a a a a a a a a a a a a a a a a a a a a a a a a a a a a a a a a a a a a a a a a a a a a a a a a a a 0
FONCTION SOMMEIL
FM-Frequency: 87,5-108,0 MHz
DAB-Frequency: 174 - 240 MHz
SIMPLIFIED EU DECLARATION OF CONFORMITY
Hereby TREVI Spa declares that the radio equipment type TT 1072 DAB is in compliance with directive 2014/53/EU.
The full text of the EU declaration of conformity is available at the following internet address https://www.trevi.it/dms/zidi/TREVI/DOCTT1072DAB.pdf

- NOTE D'USO
- TO ACTIVATE THE REMOTE CONTROL AND BATTERY REPLACEMENT
- To Replace With a New Battery:
- CAUTIONS ON LASER
- LOCATION OF CONTROL
- SUPPLY
- POWER ON/STANDBY
- TIME/DATE SET
- VOLUME CONTROL
- FM RADIO
- DAB RADIO OPERATION
- JUMP TRACK AND QUICK SEARCH
- REPEAT
- PROGRAM FUNCTION
- AUX IN INPUT
- BLUETOOTH OPERATION
- RECORDING (ENCODING) MP3 FROM TURNTABLES / AUX IN / CD / RADIO / CASSETTE
- ENCODING FROM CD
- RADIO ENCODING/TURNTABLE/CASSETTE/AUX IN/BT
- COPY OF MP3 TRACKS BETWEEN USB DEVICE AND SD CARD
- DELETING TRACKS ON USB / SD DEVICE
- TURNTABLE OPERATION
- REGISTRATION FROM OTHER SOURCES
- HEADPHONES
- LINE OUT
- ALARM FUNCTION
- SLEEP FUNCTION
- SYSTEM SETTINGS
- TECHNICAL SPECIFICATIONS
- Precautions for correct disposal of the product.
- NOTES D'EMPLOI
- FONCTION SOMMEIL
- SIMPLIFIED EU DECLARATION OF CONFORMITY
Brand : Trevi
Model : TT 1020 BT
Category : Turntable