
STYLE 12 - Phone AEG-ELECTROLUX - Free user manual and instructions
Find the device manual for free STYLE 12 AEG-ELECTROLUX in PDF.



| Product type | Landline phone |
| Brand | AEG-ELECTROLUX |
| Model | STYLE 12 |
| Power | 3 AAA 1.5V alkaline batteries (not included) |
| Display | LCD screen with adjustable contrast |
| Network compatibility | Public analog telephone network or PBX extension |
| Operating temperature | 0 °C to 40 °C |
| Storage temperature | -20 °C to 60 °C |
| Warranty | 24 months |
| Signaling type | DTMF (Dual-tone multi-frequency) |
| PBX pause duration | 3.6 seconds |
| Hands-free function | Yes, via speakerphone |
| Mute function | Yes |
| Last number redial | Yes (up to 32 digits) |
| Flash function | Yes, adjustable (100, 300, 600, 1000 ms) |
| Indirect memories | 10 (keys 0 to 9) |
| Caller directory | Up to 30 entries with date and time |
| Cleaning | Damp cloth, avoid chemicals |
| Recycling | Do not dispose of with household waste, remove batteries |
| Standards | Compliant with R&TTE Directive 1999/5/EC |
Frequently Asked Questions - STYLE 12 AEG-ELECTROLUX
User questions about STYLE 12 AEG-ELECTROLUX
0 question about this device. Answer the ones you know or ask your own.
Ask a new question about this device
Download the instructions for your Phone in PDF format for free! Find your manual STYLE 12 - AEG-ELECTROLUX and take your electronic device back in hand. On this page are published all the documents necessary for the use of your device. STYLE 12 by AEG-ELECTROLUX.
USER MANUAL STYLE 12 AEG-ELECTROLUX
Thank you for purchasing this product. This product has been designed and assembled with utmost care for you and the environment. This is why we supply this product with a quick installation guide to reduce the number of paper (pages) and therefor save trees to be cut for making this paper. Thank you for supporting us to protect our environment.
2 UNPACKING YOUR PHONE
In the box you will find:
- Base unit
- Handset
- Coiled handset cord
- Telephone line cord for base unit
- User manual
Keep the packing materials in a safe place in case you later need to transport the unit.
Important note - batteries:
The Style 12 requires 3 × 1,5 ~V AAA size Alkaline batteries installed into the battery compartment before use.
Warning:
The caller display will not work without batteries installed.
3 INTENDED USE
This telephones is intended to be connected to a public analogue telephone network or to an analogue extension of a compatible PBX system.
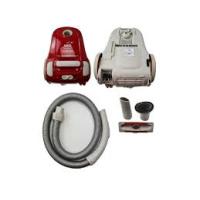
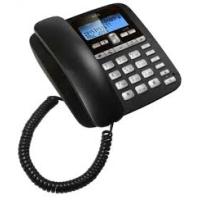
4 GETTING TO KNOW YOUR PHONE
(See P1)
| # | Meaning | |
| 1 | △ | Scroll up and down buttons and call list button |
| 2 | LCD screen | |
| 3 | Last number radial button | |
| 4 | Ringer light indication | |
| 5 | Speakerphone button | |
| 6 | R | Flash button |
| 7 | → | Memory button |
| 8 | ⊗ | Mute button |
| 9 | × | Delete button |
| 10 | [/{←] | Set / store button |
| 11 | [← + -△] | Speakerphone volume switch |
| 12 | [← ] | Ringer high/low switch |
5 INSTALLATION
1.Locating the base unit (see P2 and P3)
The base unit should be placed on a level surface, in a position where:
- the telephone line cable will reach your telephone line socket or extension socket.
- it is not close to a sink, bath or shower, or anywhere else where it might get wet.
- it is not close to other electrical equipment - fridges, washing machines, microwave ovens, TVs, fluorescent lights, etc.
2.Installing (or replacing) the batteries (see P4)
IMPORTANT:
Before removing the battery compartment cover, always make sure the base unit is disconnected from the telephone line.
- Install 3 Alkaline AAA batteries into the battery compartment and place back the cover before use.
Note:
1) Please do NOT use rechargeable batteries in this phone.
2) Batteries are not included with the unit.
3) The battery life is typically about 6 months, depending on usage.
When the battery is low? will show up on the display screen. If you do not replace the batteries, they will become totally discharged and your display screen will not work. You may lose all the telephone memories and settings.
3. Plug the coiled handset cord into the handset. Plug the other end into the jack on the left side of the base unit.
4. Place the handset in the base unit.
5. Plug the telephone line cord free end into a modular wall jack. Press the cable into the groove so that the base unit stands level.
6.Lift the handset and check for dial tone in the handset.
6 SETTING UP YOUR PHONE
Press the set button to enter the menu and then use up and down buttons to cycle through the following options:
- SET 1 DATE
- SET 2 LCD
- SET 3 FLASH
Note:
The system will time out if you leave more than 8 seconds between key presses.
6.1 Set time/date
You will need to set the correct time and date so they can be displayed correctly on the display. If you subscribe to a caller display service, the time and date will be set automatically on receipt of your first incoming call.
- In standby mode, press the set button.
The display shows "SET 1 DATE".
- Press the store button to confirm.
The "year" icon will be blinking.
-
Press the up or down button to set the year.
-
Press the store button to confirm.
The "month" icon will be blinking.
-
Press the up or down button to set the month.
-
Press the store button to confirm.
The "date" icon will be blinking
-
Press the up or down button to set the date.
-
Press the store button to confirm.
The "hour" icon will be blinking.
-
Press the up or down button to set the hour.
-
Press the store button to confirm.
The "minute" icon will be blinking.
-
Press the up or down button to set the minute.
-
Press the store button to confirm the setting.
The display shows "SET 2 LCD", you can continue with programming or press the delete button X to return to standby mode.
6.2 Set LCD contrast
- In standby mode, press the set button.
The display shows "SET 1 DATE"
Press the up or down button until the display shows "SET 2 LCD".
-
Press the store button to confirm.
-
Press the up or down button to select your comfortable display viewing level (1~8).
The default setting is 4.
- Press store button to confirm the setting.
The display shows "SET 3 FLASH", you can continue with programming or press the delete button × to return to standby mode.
6.3 Set flash time
This telephone gives you the possibility to use the special services of your network provider.
When pressing the flash button R, the phone generates a line interruption and the length depends on your flash time setting.
- In standby mode, press the set button.
The display shows "SET 1 DATE"
Press the up or down button until the display shows "SET 3 FLASH".
- Press the store button to confirm.
- Press the up or down button to select 100 (default), 300, 600, or 1000.
- Press the store button to confirm the setting.
The display shows "SET 1 DATE", you can continue with programming or press the delete button X to return to standby mode.
7 TELEPHONE OPERATIONS
7.1 Making a call
- Lift the handset and listen for a dial tone.
The display shows "00-00".
- Dial the telephone number.
The display shows the number as you dial (maximum of 14 digits will be shown)
- To end the call, return the handset to the base unit.
7.2 To answer a call
When the phone rings:
- Lift the handset or press the speakerphone button on the base unit.
The call timer starts about 7 seconds after going on line.
7.3 To adjust the speakerphone volume
During a call:
Adjust the volume of the speakerphone to your comfortable volume level using the speakerphone volume.
7.4 To end a call
- Replace the handset on the base unit cradle or press the speakerphone button on the base unit.
The speakerphone light indicator will turn off.
7.5 To switch between the handset and the speakerphone
- During a phone conversation through the handset, press the speakerphone button to speak hands-free.
Then the speakerphone light will turn on, but the conversation remains through the handset until the handset is replaced on the base unit cradle.
While in speakerphone mode, lift the handset to enable a private conversation.
7.6 Last number radial
- Lift the handset or press the speakerphone button on the base unit.
- Press the redial button
The phone automatically dials the last number you called (maximum of 32 digits).
7.7 Mute function
- During a call press the mute button
When the microphone is muted, the person at the other end of the call cannot hear you, but you can hear his side.
- To get back to the call, press the mute button again to release.
7.8 Use on PBX
If you are using your phone on a PBX and the PBX user guide tells you to press Flash
- Press the flash button R on your phone.
7.9 Storing a number in (0-9) the indirect memories
- In standby mode, key in the telephone number you wish to store. > Up to maximum 16 digits.
- Press the store button .
- Press the (0-9) button to store the number in the selected memory.
7.10 Dial out an (0-9) indirect memory number
To dial a number stored in a two-touch indirect memory (0-9):
- Lift up the handset or press the speakerphone button.
- Press the memory button .
Key in the memory location number (0-9).
The number dials automatically.
To use caller display you must first subscribe to your network provider's caller display service.
If you subscribe to a caller display service, you can see the phone number of the person calling you before you answer and in the calls list afterwards.
The caller display information includes:
- The caller's number
- The date and time of the call
| Condition of incoming caller information | LCD screen will display |
| It is a repeated call | REP |
| It is a new call | NEW |
| A call from someone whose number is with held (private call) | __P__ |
A call from someone whose number is unavailable (for example an international call)

The caller display is incomplete or corrupted

Your have a new voice mail message. (this is a network service provided by your network operator)

Caller display list
The phone dynamically stores up to 30 calls (12 digits) incoming information. If a call is received when the caller list is full, then the new entry will replace the oldest one.
8.1 Viewing the caller display list
- In standby mode, press the up or down button .
The display shows the most recent record.
If there are no caller display records, the display will show "00 CALL". - Press the up or down button again to scroll to the next caller display record.
8.2 To return a call
- When the caller display record is displayed press the redial button
- Lift the handset or press the speakerphone button on the base unit.
The phone automatically dials out the displayed record.
8.3 To delete caller display records
- When the caller display record is displayed. Press the delete button × to delete the caller display record.
The display shows the next caller displayed record.
- Press and hold the delete button × for 3 seconds, all the caller display records will be deleted.
The display automatically return to standby mode.
9 GUARANTEE AND SERVICE
The unit is guaranteed for 24 months from the date of purchase shown on your sales receipt. This guarantee does not cover any faults or defects caused by accidents, misuse, fair wea r and tear, neglect, faults on the telephone line, lightning, tampering with the equipment, or any attempt at adjustment or repair other than through approved agents.
Please keep your sales (till) receipt this is your proof of guarantee.
9.1 While the unit is under Guarantee
- Disconnect the base unit from the telephone line and the mains electricity supply.
- Pack up all parts of your unit, using the original package.
- Return the unit to the shop where you bought it, making sure you take your sales receipt.
- Remember to include the mains adapter.
9.2 After the Guarantee has expired
If the unit is no longer under Guarantee, contact us via www.aegtelephones.eu
10 TECHNICAL DETAILS
| Model | Style 12 |
| Temperature range | Operating 0 °C to 40 °C Storage -20 °C to 60 °C |
| PBX compatibility | Pause length: 3,6 seconds. Signalling type: DTMF (dual-tone multifrequency) |
11 CE DECLARATION
This product is in compliance with the essential requirements and other relevant provisions of the R&TTE directive 1999/5/EC.
The declaration of conformity can be found on: www.aegtelephones.eu
12 DISPOSAL OF THE DEVICE (ENVIRONMENT)

At the end of the product lifecycle, you should not throw this product into the normal household garbage but bring the product to a collection point for the recycling of electrical and electronic equipment. The symbol on the product, user guide and/or box indicate this. Some of the product materials can be re-used if you bring them to a recycling point. By reusing some parts or raw materials from used products you make an important contribution to the protection of the environment. Please contact your local authorities in case you need more information on the collection points in your area.
Batteries must be removed before disposing of the device. Dispose of the batteries in an environmental manner according to your country regulations.
13 CLEANING AND CARE
Do not clean any part of your phone with benzene, thinners or other solvent chemicals as this may cause permanent damage which is not covered by the Guarantee.
When necessary, clean it with a damp cloth.
Keep your phone system away from hot, humid conditions or strong sunlight, and don’t let it get wet.
- SET 1 DATE
- SET 2 LCD
- SET 3 FLASH
Hinweis:
- SET 1 DATE
- SET 2 LCD
- SET 3 FLASH
Remarque :
- SET 1 DATE
- SET 2 LCD
- SET 3 FLASH
Opmerking:
- SET 1 DATE
- SET 2 LCD
- SET 3 FLASH
Nota:
- SET 1 DATE
- SET 2 LCD
- SET 3 FLASH
Obs!
- SET 1 DATE
- SET 2 LCD
- SET 3 FLASH
Uwaga:
9 GWARANCJA I SERWIS
- SET 1 DATE
- SET 2 LCD
- SET 3 FLASH
Ineicwn:
Eav papeov v a 8 eutepoetta xwic va patnoe katoio koupi, to ouotma a
Byei autota a to Tov tpoTto aeitoupyiac apxikov puthetaewv.
7 XEPIEMO2 TOY THAEQNOY
- SET 1 DATE
- SET 2 LCD
- SET 3 FLASH
Bemerk:
Displayet viser "SET 1 DATE"
> Tryk pə op- ell ered-tasten , indtil displayet viser "SET 2 LCD".
Tryk på knappen Gem for at bekraefte.
6 HACTPOIBAHE HA TEΛΕΦΟHA
HATINCHETe 6yToHa 3a HAcTPOiKa 3a Da BAE3eTe B MeHIOTo, IN CaeA TOBa N3POn3BAJITe 6yTOHnTE 3a Nocoka HArope n HaDoAly △V, 3a Da IpeBbPTnTe CaeADnTe OPluN:
- SET 1 DATE
- SET 2 LCD
- SET 3 FLASH
3a6eAekka:
BpeMeTo Ha n3aKbAHe Ha cnCTeMaTa Ie n3Teue, aKO n3MnHAT NOBue O T 8 cekyHAn, 6e3 Da HATNCHEte 6yTOH.
6.1 3aaaahe Ha yac/aaTa
Ie Tp8Ba Da HactpoIne Yaca N DaTata, Taka Ye Da MoKe Ha DnCnAe Da Ce Noka3Ba npabHOTo BpeMe.
Ako cte aboHnpaHn 3a ycayrata 3a NOKa3BaHe Ha NOBnKBaLsna, YacbT n DaTata Lce Ce HACTPOrABTomATuHNo PnN POyUcBAHe Ha NpBBOTo BXoAALLO NOBnKBaHe.
BpeKIM HA rTOBHOCT HATINCHete 6yToHa 3a HAcTPOiKa目. >Ha dIcPnAe Ce nOKa3Ba ,SET 1 DATE".
- Hatnchete 6yToHa 3a 3aAMETRAHe 3a NOTBbPjKdEHNIE. >IKOHATA 3a „roAnHa" LcE MIna.
- Hatuchete 6yToHa 3a nocoka Harope nn HaOaly △ ∇, 3a da HactponTe roAnHata.
- Hatnchete 6yToHa 3a 3aametraHe 3a NOTBbpxkdeHne. >IKOHATA 3a Meceu" Ue Mira.
- Hatnchete 6ytoHa 3a nocoka Harope nn Hadoay △ V, 3a da Hactponte Meceua.
- Hatnchete 6yToHa 3a 3anametrahe 3a NtBbpxKdEHNHe. >IKOHATA 3a "Aata" luE mHa.
- Hatnchete 6ytoHa 3a nocoka Harope nn Hdoany V, 3a da Hactonte DaTata.
- Hatnchete 6yToHa 3a 3anametrahe 3a NtBbpxKdEHNHe. >IKOHATA 3a "uac" Lle Mna.
- Hatnchete 6ytoHa 3a nocoka Harope nn Hdoaly , 3a da 3daTe yaca.
- Hatnchete 6yToHa 3a 3aPamETRAHe 3a NOTBbpxKdEHNIE. >IKOHATA 3a ,MHyTa" Lze Mira.
- Hatuchete 6yToHa 3a nocoka Harope nn Hadoay △ V, 3a da HactponTe MHyTIne.
- Hatnchete 6yToHa 3a 3aPametraBaHe , 3a Da NOTBbPAnTe HAcTpOiKaTa.
Диспелг.TOKA3Ba „SET 2 LCD", можete дд прдьжITE C поррампаHTO ИИ DA HATINCHETe ByToHa 3a ИЗТрИВАнe X, 3a Дд се ВьрHETe B ржIM HA FOTOBHOCT.
6.2 3aaaahe Ha KOHTpacta Ha LCD aHcnae
BpejHMa rTOBHOCT HATNCHETe 6yToHa 3a HAcTPOJka目.>AHCnAeT NOKa3Ba ,SET1 DATE".
HaTnCHete6yToHa3aNoCokaHArOpE HAn HaOAty △V,doKATOHaDnCnAeCeNOKaKe SET2LCD"
- Hatnchete 6yToHa 3a 3anametrahe 3a NOTBbpxKdHHe.
- Hatnchete 6ytoHa nocoka 3a Harope nn HaOaly V, 3a Da n3bepeTe ydo6HO HnBO HA
Ha6AIODeHne Ha dnCnAe (1~8).
To3n TeAeOoH Bn DABa Bb3MOXHOCT Da N3PNOA3BATE CNEUHAHHTE YCAUYH Ha MPEXKOBNAOCTABYHK.
Korato HATINCHETe 6yToHa 3a BpeMe 3a npeKbcBAHe R, TeAefoHbT reHepnpa npeKcbCAHe HA AHHrTa N IPOAbXkNTeAHOCCTA 3ABNCN OT HAcTpOiKaTa 3a BpeMe 3a npeKbcBAHe.
BpeKIM HA rTOBHOCT HATNCHETe 6yToHa 3a HAcTPOiKa
ДиСпЯгТПОКАЗВА „SET 1 DATE".
HaTnCHete6yToHa3a nocoka HArope nn HaOaY △V,doKATOHa dnCnAe Ce nokaxe „SET 3 FLASH".
- Hatnchete 6yToHa 3a 3anametrahe 3a NOTBbpxKdEHNHe.
- Hatnchete 6ytoHa 3a nocoka Harope nn HaOaly △V, 3a da n3bepete 100 (no nopa3bnpaHe), 300, 600 nn 1000.
- Hatnchete 6yToHa 3a 3aPametraBaHe , 3a Da NOTBbPAnTe HAcTpOiKaTa.
Диспелг.TOKA3Ba ,SET 1 DATE",MOжete Да подьЖNTe C Прогампанeto ИAN DA HATИСHETe 6уTOHa 3a ИЗТрИВАнe X, 3a Дa ce BьРHTe B ржIM HA FOTOBHOCT.
7 ONEPAUIN C TEAEΦOHA
7.1 HnHnHaHe Ha NOBnKbaHe
BAnHHeTe caykaKaTa, Lue yyeTe CnHaA ,CBo6oAoHO".
ΔИСПАЕТ ПOKАВа „00-00".
- HabepeTe TeAefoHHnH oHmeP.
Диспелг ПОКАЗВА Homepa,ДOKATO Г НавирATE (Ie 6bDat ПОKA3aHn MaKcHmym 14 nDppn)
3a da npekpatnte NOBnKBaHeto, NOCTABETe CAYLsAkata Bbpxy 6a3OBATA CTAHnI.
7.2 3a npheMaHe Ha NOBnKbaHe
Korato TeAeOBoHbT 3BbHN:
BAnHete CAYUaAkaTaN HATINCHTe 6yToHa Ha BnCOKOrOBOpHTeA Ha 6a3OBATA CTAHZI.
TaɪmepbT Ha NOBɪKBAHɪrTa Ce BKAIOUBA OKOʌ 7 CEKYHʌn Cæd AKTINBɪpɑh E HʌNɪrTa.
7.3 3a peryuAnpaHe Ha cHAta Ha 3Byka Ha BNCOKOROBOpHTeA
- SET 1 DATE
- SET 2 LCD
- SET 3 FLASH
Poznámka:
© 2012 Binatone Electronics International Limited
All rights reserved
Subject to availability. Rights of modification reserved.
AEG is a registered trademark used under license from AB Electrolux (publ)
www.aegtelephones.eu



- UNPACKING YOUR PHONE
- Important note - batteries:
- Warning:
- INTENDED USE
- GETTING TO KNOW YOUR PHONE
- INSTALLATION
- 1.Locating the base unit (see P2 and P3)
- 2.Installing (or replacing) the batteries (see P4)
- IMPORTANT:
- Note:
- SETTING UP YOUR PHONE
- Set time/date
- Set LCD contrast
- Set flash time
- TELEPHONE OPERATIONS
- Making a call
- To answer a call
- To adjust the speakerphone volume
- To end a call
- To switch between the handset and the speakerphone
- Last number radial
- Mute function
- Use on PBX
- Storing a number in (0-9) the indirect memories
- Dial out an (0-9) indirect memory number
- Caller display list
- Viewing the caller display list
- To return a call
- To delete caller display records
- GUARANTEE AND SERVICE
- While the unit is under Guarantee
- After the Guarantee has expired
- TECHNICAL DETAILS
- CE DECLARATION
- DISPOSAL OF THE DEVICE (ENVIRONMENT)
- CLEANING AND CARE
- Hinweis:
- Remarque :
- Opmerking:
- Nota:
- Obs!
- Uwaga:
- GWARANCJA I SERWIS
- Ineicwn:
- XEPIEMO2 TOY THAEQNOY
- Bemerk:
- HACTPOIBAHE HA TEΛΕΦΟHA
- 3a6eAekka:
- 3aaaahe Ha yac/aaTa
- 3aaaahe Ha KOHTpacta Ha LCD aHcnae
- ONEPAUIN C TEAEΦOHA
- HnHnHaHe Ha NOBnKbaHe
- 3a npheMaHe Ha NOBnKbaHe
- 3a peryuAnpaHe Ha cHAta Ha 3Byka Ha BNCOKOROBOpHTeA
- Poznámka:
Brand : AEG-ELECTROLUX
Model : STYLE 12
Category : Phone