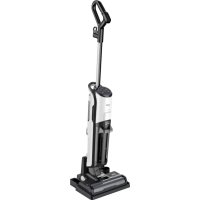
USER MANUAL VCW 70340 W BEKO
Wet & Dry Upright Vacuum Cleaner
User Manual

VCW 70340 W
EN - FR - IT - PL - RO - SR
Please read this guide first!
Dear Customer,
Thank you for choosing a Beko product. We would like you to achieve the optimal efficiency from this high quality product which has been manufactured with state of the art technology. Please make sure you read and understand this guide and supplementary documentation fully before use and keep it as a reference. Include this guide with the unit if you hand it over to someone else. Observe all warnings and information herein and follow the instructions.
Symbols and their meanings
These symbols are used throughout this guide:

Important information and recommendations regarding the use of the appliance.

CAUTION: Warnings on personal injury or property damage.
CONTENTS
| ENGLISH | 03-19 |
| FRANÇAIS | 20-38 |
| ITALIANO | 39-58 |
| POLSKI | 59-79 |
| ROMANIAN | 80-101 |
| SRPSKI | 102-117 |
1 Important safety and environmental instructions
1.1 General safety
To reduce the risk of fire, electric shock or injury, please follow these requirements:
This appliance can be used by persons with reduced physical, sensory or mental capabilities or lack of experience and knowledge if they have been given supervision or instruction concerning use of the appliance in a safe way and understand the hazards involved. Children shall not play with the appliance.
- Please store the appliance indoors to avoid getting wet.
- Please do not immerse the machine in water or other liquids.
- Please do not use the appliance with wet hands.
- Please do not use the appliance if it falls, breaks, or falls into water; please send the appliance to an authorized after-sales service center for repair.
- Please do not use the appliance if the power cord or plug is damaged.
- Please pull out the cable gently.
- Please do not damage the power cord: Do not lift the appliance with the power cord, or clamp the power cord, or pull the power cord to a sharp edge or corner. Do not use the appliance over the power cord. Keep cables away from heated surfaces.
- Please do not use extension cords. The plug should be directly inserted into the power socket.
- Please do not block the inlet of the appliance to avoid limiting the airflow.
1 Important safety and environmental instructions
- Please do not operate the appliance when the inlet is blocked; please keep hair, loose clothing, fingers or any part of the body away from the inlet to avoid the risk of danger.
- Please do not clean up anything that is burning or smoking, such as cigarettes, matches or hot ashes.
- Please do not clean up any flammable substances, such as lighter fluid, gasoline or kerosene, or in the case of explosive liquid or steam;
- Please do not clean up any paint, paint thinner, some mothproof materials or vapors released by flammable dirty or other explosive or toxic vapors;
- Please do not clean up any toxic substances, such as chlorine bleach, ammonia, pipe dredge or gasoline;
- Please do not operate the appliance for any other purpose not listed in this Manual;
- Please use accessories only recommended by the manufacturer. Using parts not provided or sold by the manufacturer may cause fire, electric shock or injury;
- Please use the official power cord;
- Please use the standard power socket (220-240V~50-60Hz);
- Please avoid dirty, lint, hair and other material accumulating the inlet;
- Please clean up the stairs carefully;
- If the power cord is damaged, it must be replaced by an official maintenance department from the manufacturer;
- Please make sure to unplug the power plug after use or maintenance cleaning;
1 Important safety and environmental instructions
- Please make sure to install the water tank and the brush roll properly;
- Do not operate or store the appliance under inappropriate conditions such as high temperature or low humidity. Store the appliance in a ventilated place, avoiding direct sunlight.
- Keep children away from the appliance when it is powered on or cooling down.
- Be aware of the heating floor brush.
- Do not spray steam directly on people, animals, or electric equipment.
- Do not clean leather, waxed furniture or floors, synthetic fibers, velvet, or other vulnerable and steam-sensitive materials.
- Do not direct steam toward other appliances with electrical components, such as an oven.
The plug must be removed from the socket-outlet before cleaning or maintaining the appliance.
Keep fingers, hair, and loose clothing away from moving parts and openings while using the product.
Children should be supervised to ensure that they do not play with the appliance.
The appliance is not to be used if it has been dropped, if there are visible signs of damage, or if it is leaking. Keep the appliance out of reach of children when it is energized or cooling down.
The appliance must be unplugged after use and before carrying out user maintenance.
1 Important safety and environmental instructions
- The liquid or steam must not be directed towards equipment containing electrical components, such as the interior of ovens.
- WARNING: Danger of scalding.
- A hazard may occur if the appliance runs over the supply cord.
- The plug must be removed from the socket-outlet before cleaning or maintaining the appliance.
- If the supply cord is damaged, it must be replaced by the manufacturer or its agent or similarly qualified person in order to avoid hazard.
1.2 Compliance with the WEEE Directive and disposal of the waste product

This product complies with EU WEEE Directive (2012/19/EU). This product bears a classification symbol for waste electrical and electronic equipment (WEEE).
This symbol indicates that this product shall not be disposed with other household wastes at the end of its service life. Used device must be returned to official collection point for recycling of electrical and electronic devices. To find these collection systems please contact to your local authorities or retailer where the product was purchased. Each household performs important role in recovering and recycling of old appliance. Appropriate disposal of used appliance helps prevent potential negative consequences for the environment and human health.

Packaging materials of the product are manufactured from recyclable materials in accordance with our National Environment Regulations. Do not dispose of the packaging materials together with the domestic or other wastes. Take them to the packaging material collection points designated by the local authorities.
1.4 Actions to be taken for energy saving
- To avoid redundant energy consumption while using the device, set the speed levels according to the floor you are sweeping.
- Under normal conditions, low speeds are used to clean the hard floors, curtains and sofas, and high speeds are used to clean the carpets.
1.5 Compliance with RoHS Directive
The product you have purchased complies with EU RoHS Directive (2011/65/EU). It does not contain harmful and prohibited materials specified in the Directive.
2 Overview
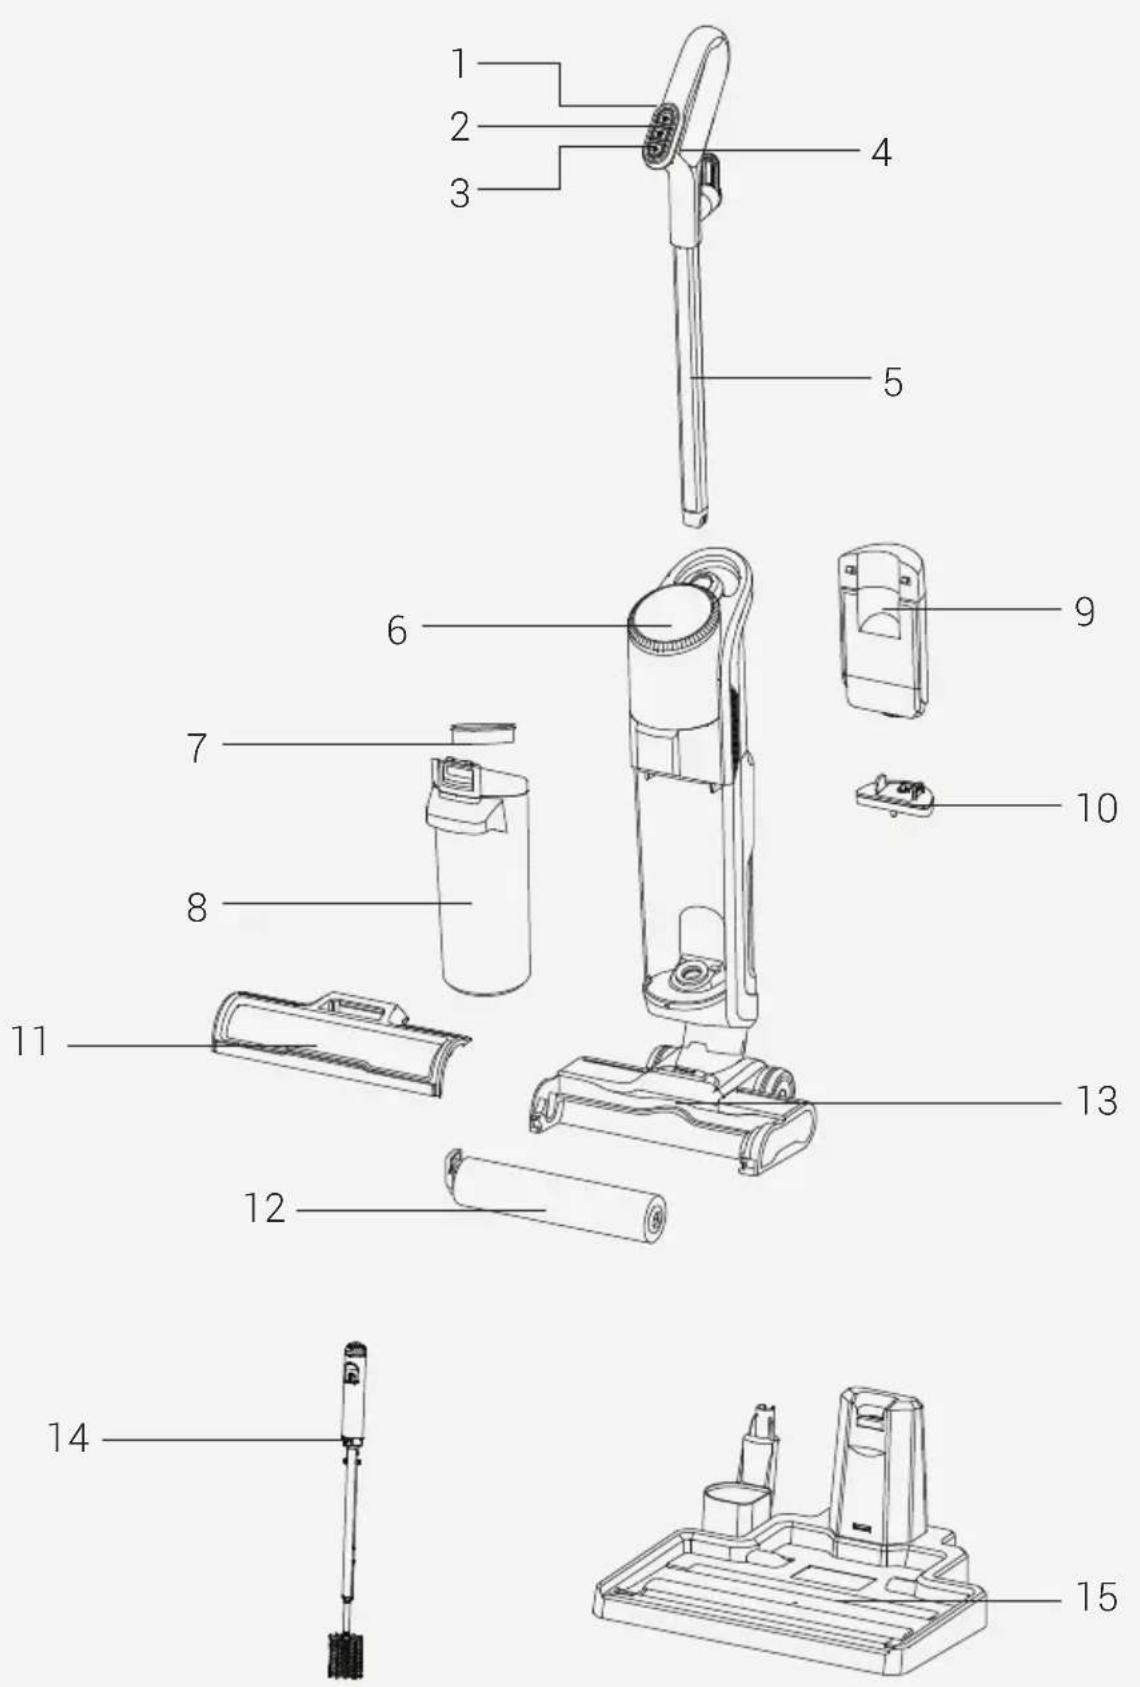
2.1 Controls and components
- On/Off Button
- Dry Mode Button
- Wet Level Adjustment Button (min-max)
- Steam Trigger
- Handle
- LED Screen + Self-cleaning touch
- Dirty Tank Strainer
- Dirty Tank
- Fresh Water Tank
- Fresh Water Tank Filtration
- Brush Roller Cover
- Brush Roller
- Floor Brush
- Multi-purpose Cleaning Brush
- Storage Station
2.2 Technical data
Nominal input power: 1800 W
Input: 220-240V~50-60Hz
Waterproof: IPX 4
Fresh Water Tank Capacity: 550 ml
Dirty Water Tank Capacity: 480 ml
2.3 Features of the Product
This appliance contains four functions: Steam Cleaning; Vacuuming; Mopping and Self-cleaning.
2.3.1 Floor Surface Cleaning
The product is equipped with fresh water tank, dirty tank, brush roll, motors, and other functional modules. The water pumps to the brush roll, and the motor drives it to rotate at high speed to clean up surfaces. After cleaning, the dirty are recycled to the dirty tank by the suction motor. During the cleaning process, the water spraying function can be turned off according to the cleaning requirements to achieve both dry and wet use. At the same time, it can also turn on the high temperature steam during the process of cleaning to achieve deep cleaning.
2.4 Introduction of the Product
- "On/Off Button: Press to turn on the vacuum function, and the low-level water spraying function will automatically start at the same time. Press again to turn off the above functions;
- Low Level Button: When on state, press to turn off the water spraying function, press again to turn on the function;
- "###" High Level Button: When on state, gently press to open the high-level water spraying function, and press to turn off function;
- Steam Trigger: When on state, hold the trigger to always turn on the steam function, release the trigger to turn off the function; *Please wait 30 seconds for steam preheating the steam function will not start when preheating is not completed.
- "💡" Self-cleaning Button: Place the appliance on the station after use, press the self-cleaning to turn on the self-cleaning function.
The values provided with the appliance or its accompanying documents are laboratory readings in accordance with the respective standards. These values may differ depending on the use and ambient conditions.
3 Installation
3.1 Installation of Handle
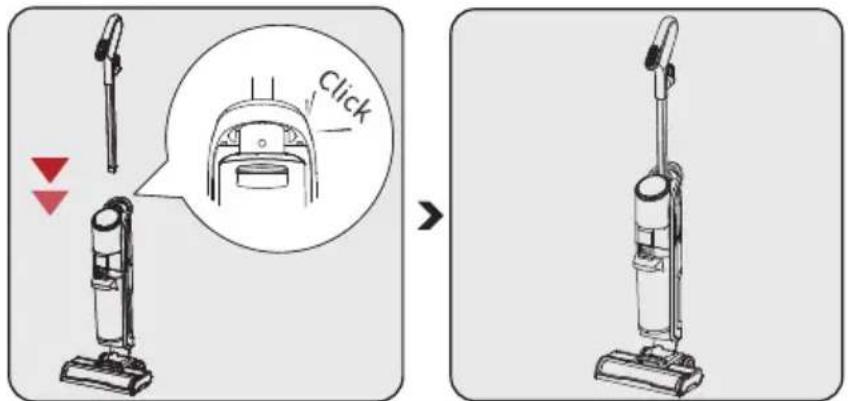
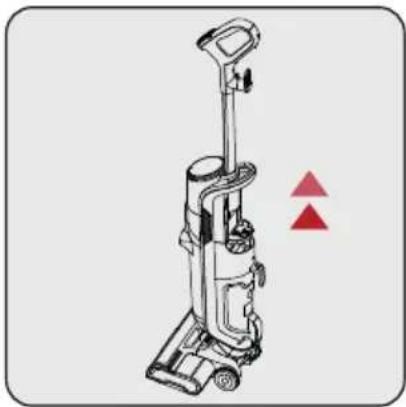
Insert the handle into the body vertically.
The assembly will be completed after hearing a "click".
3.2 Installation of Clean Water Tank
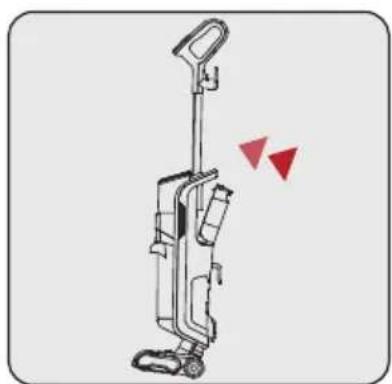
Install the fresh water tank into the corresponding position. The assembly will be completed after hearing a "click".
3 Installation
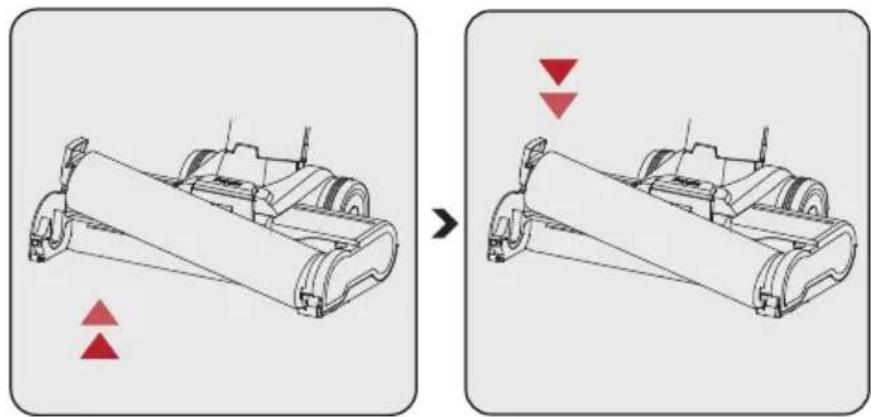
Removal:
Hold the handle of the brush roll and pull it out upward.
Installation:
Place the brush roll on the axle and push it inward, and press down. The assembly will be completed after hearing a "click".

When using the brush on the carpet floor, it is recommended to turn off the water spray function.
3.4 Installation of Brush Roll Cover

Insert the cover into the corresponding position of the floor brush component in the direction shown. The assembly is complete after hearing a "click".
4 Operation
4.1 How it Works


Water Refill:
Open the fresh water tank to add water.
Power On:
Tilt the body of the appliance and press the "on/off button" to turn on the vacuum function, and the low-level water spraying function will automatically start at the same time.
Level Adjustment:
Adjust the water spraying level according to the actual cleaning requirements.
4.1.1 Activating Steam Cleaning Function

Enable or disable the steam function as required.
4 Operation
4.1.2 Self Cleaning
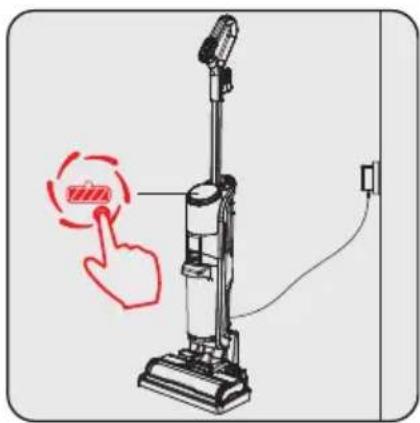
Place the appliance on the station, plug it in, and press the self-cleaning switch for a while. The machine will start self-cleaning. After self-cleaning is finished, please empty the dirty water tank and unplug the power cord.

The fresh water tank needs enough water for self-cleaning.

After self-cleaning, it is recommended to dry the brush roller in a ventilated place, so as not to affect the cleaning effect for the next use.
4.1.3 Self-Cleaning Mode Working Method:
- After cleaning is done, turn off the device and put it on its storage station.
- The Self-Cleaning button flashes on automatically.
- Press the self-clean button (white light on and no blink) and the process will start.
- The self-cleaning process will be finished, and the red light will be blinking.
- Clean the dirty water tank.
- After cleaning the dirty water tank, the red light goes off.
- The blue light ring will be on.

If the self-cleaning process would like to be repeated, please take the device and put it on its storage station again. The above steps must be done accordingly.

If the device is unplugged after the self-cleaning process, the self-clean light and red blink light will turn off. The self-clean function cannot be used if the product is unplugged/plugged or taken from the storage station and put back on it again.

When it is re-plugged in the next days, if the product is on its storage station, the self-clean light will be blinking, and the process can start with the above steps.
4 Operation

When it is re-plugged in the next day and the product is on the storage station, the self-clean light will be blinking. The product does not have to be cleaned again. It can be used regularly again if it is taken out of the storage station.
4.1.4 Cleaning of Dirty Tank
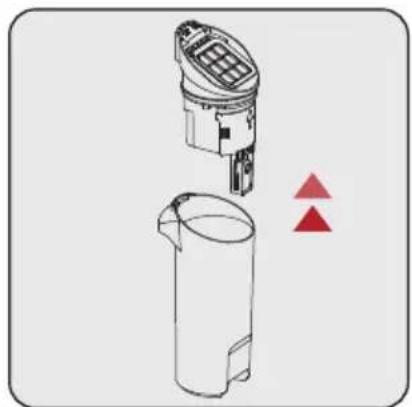

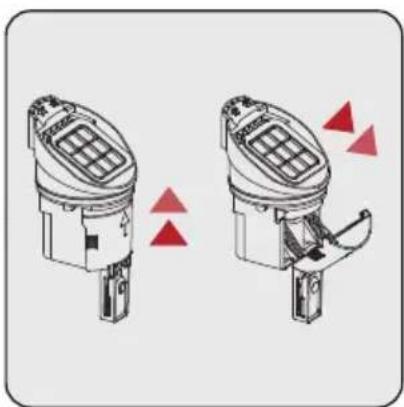
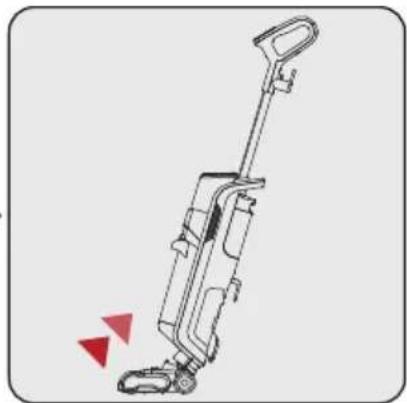
Step 1:
Press to take out the dirt tank.
Step 2:
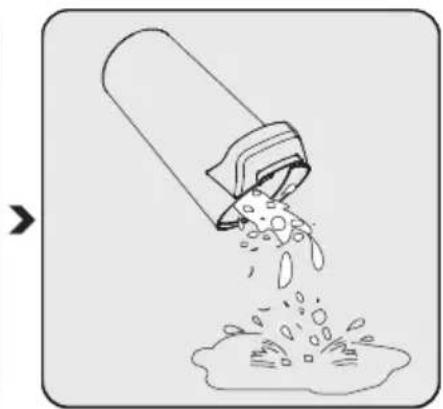
Take out the cap of the dirt tank.
Please pour out the wet waste and rinse the tank.
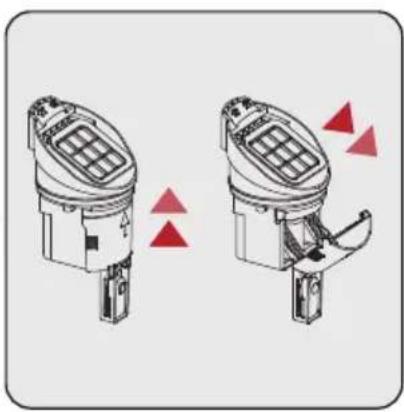
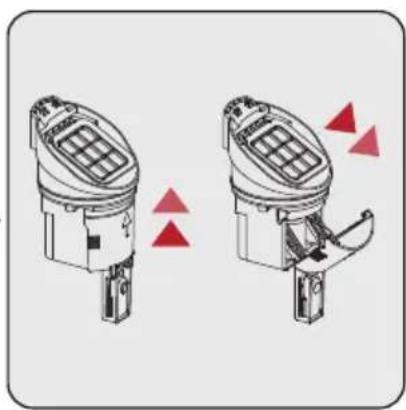
Step 3:
Slide to open the cover that is located on the cap and pour out the dry waste.
4 Operation
4.1.5 Indication Guide
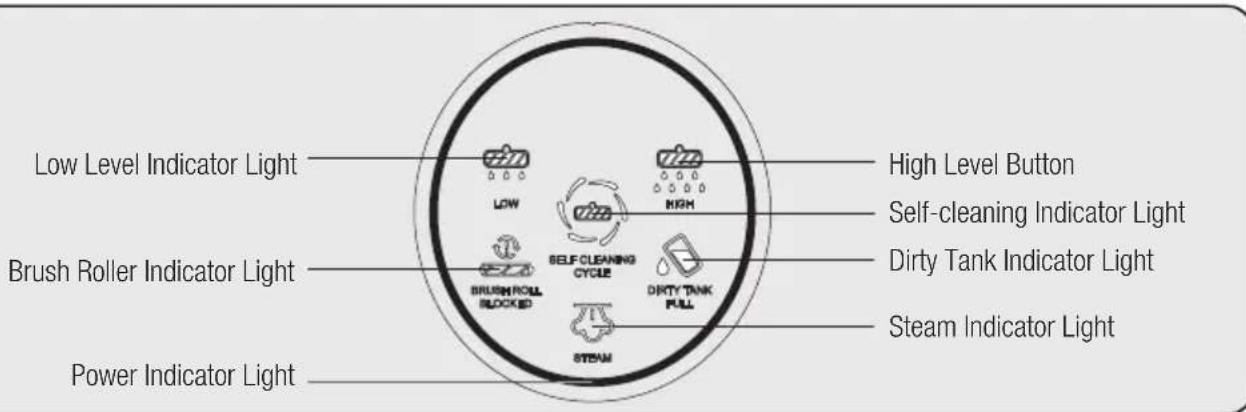
Level Indicator Light:
The light will be kept-on in white when the high / low level function is on.
Brush Roller Indicator Light:
The light will flash in red 5 times and then go off when brush roller blocked.
Power Indicator Light:
The light will be kept-on in blue when the power cord is plugged.
Self-cleaning Indicator Light:
The light flashes in white when the self-cleaning function is on.
Steam Indicator Light:
The light will be kept on in white when the steam function is on.
Note: When the steam function is on, the mopping function will automatically shut off.
Steam Indicator Light:
0-30s after power on, long press the steam trigger, the steam light flashes; then the steam light stays on.
Dirty Tank Indicator Light:
The light flashes in red when the dust tank is full. The light flashes in red after self-cleaning is finished. The light flashes in red when the dust tank is removed.
5 Cleaning and maintenance
5.1 The Cleaning of Brush

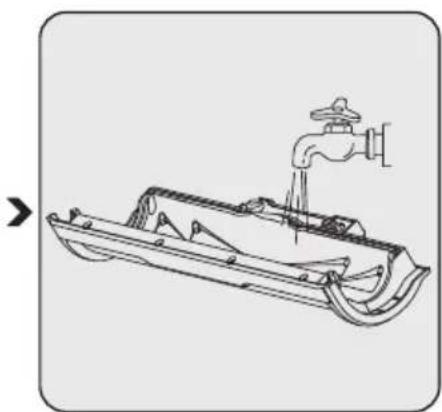
It is recommended to deep clean the brush roller after use every four to five times. To avoid hair wrapping on the brush roll, please use the multi-purpose cleaning brush. It is recommended to place the brush roller in a ventilated place to dry.
Please rinse the brush roll cover when needed.

The brush roller and filter must be dried after cleaning them.

For better user experience, it is recommended to replace the brush roller every 2-3 months (according to the daily frequency of use).
5.2 Cleaning the Filter

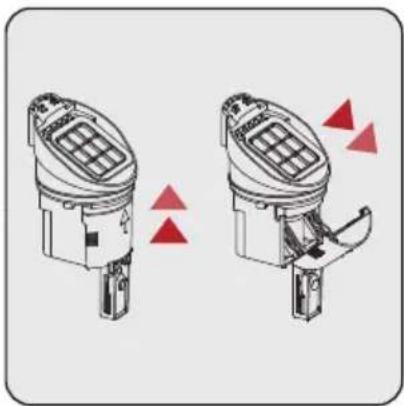
Take out the filter and rinse it to prevent the air outlet from becoming blocked.
5 Cleaning and Maintenance

For a better user experience, it is recommended to replace the filter every 2–3 months, depending on daily usage frequency.
5.3 Cleaning the Storage Station
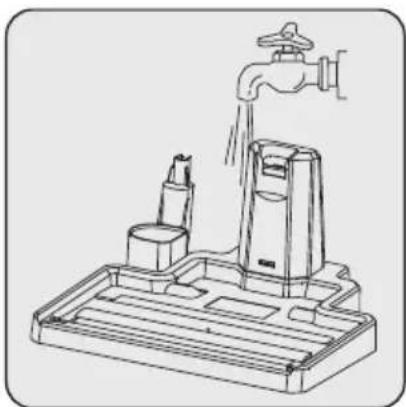
Rinse the station after every use.
5.4 Filter Replacement Guide

To prevent the steam vent from becoming blocked due to hard water, this appliance has a built-in ion exchange filter. This filter softens the water by replacing calcium, magnesium, and other hard water minerals through ion exchange. Please remove the water tank and replace the filter.
5 Cleaning and Maintenance

For a better user experience, it is recommended to replace the filter every 2–3 months, depending on daily usage frequency.
5.5 Daily Storage Guide
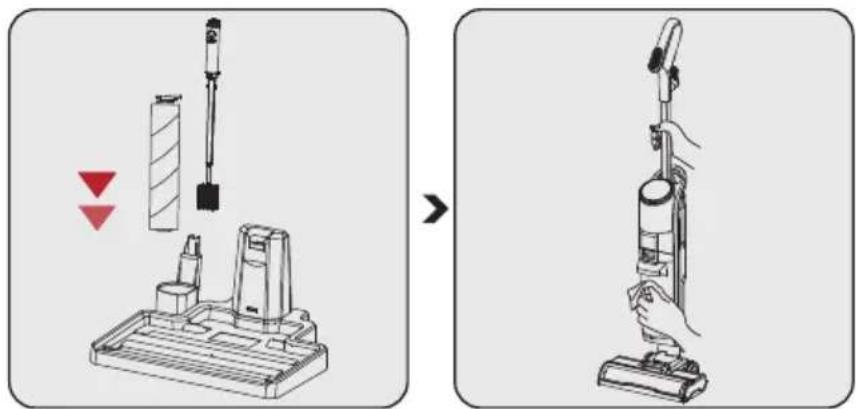
After daily cleaning, remove the brush roller and accessories and place them in the designated positions on the storage station.
First, turn off and unplug the appliance, then wipe the body with water or a neutral detergent. Do not allow water to penetrate any components of the appliance.
Store the appliance in a suitable place away from direct sunlight.
6 Problems and Solutions
| PROBLEM POSSIBLE CAUSE SOLUTION | |
| Product not working | Power cord is not fully plugged | Plug the cord well |
| Brush Roller Blockage | Restart after clean up the brush roll |
| Full Dirty Tank | Clean up the tank and restore back to restart |
| Suction Weakened | The brush roller is entangled by hair and other objects | Clean up the brush roll and restore back to restart |
| After eliminating the above conditions, the situation remains | Please contact our af-ter-sales service for mainte-nance |
| Abnormal noise during operation | The dust suction port of the product is blocked | Restart after clean up the dust suction port |
| After eliminating the above conditions, the situation remains | Please contact our af-ter-sales service for maintenance |

CAUTION: If the product cannot work normally according to the above steps, please contact our after-sales service department for help.
Dear customer,
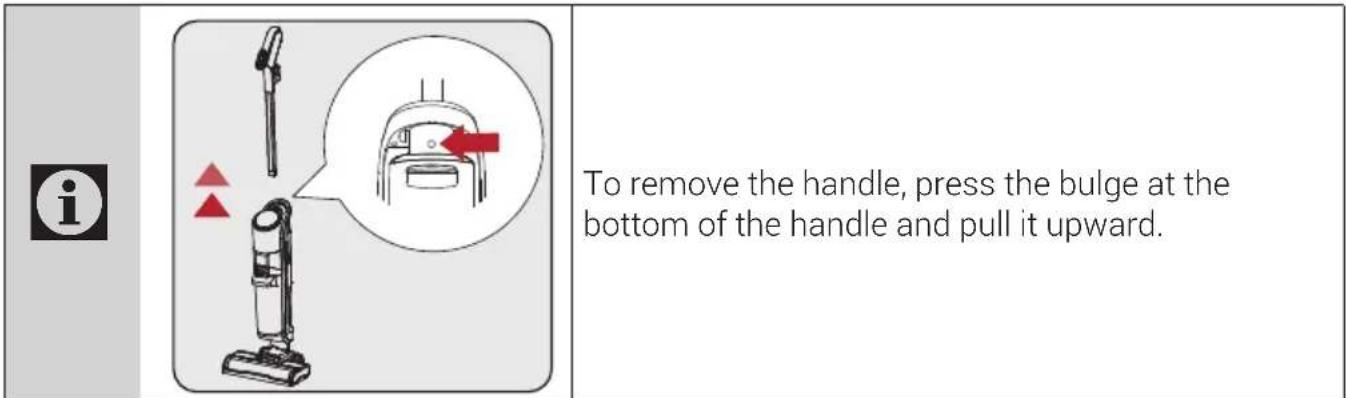
To remove it:


Step 1:
Removal:


Step 1:
Self-cleaning Light
Removal:


Step 1:

Removal:


Step 1:

Insert the handle vertically into the body.
Assembly will be complete after a "click" is heard.

3.2 Installation of the clean water tank

Removal:


Refilling water:
Place the device on the station, turn it on, and press the self-cleaning switch for a while; the machine will start self-cleaning. After self-cleaning is complete, empty the dirty water tank and unplug the power cord.

Step 1:
Press to remove the dirty water tank.
Step 2:
Remove the dirty water tank lid.
Pour out wet waste and rinse the tank.
Step 3:
Pull to open the cover on the lid and dispose of dry waste.
4.1.5 Indicator Guide

Level indicator:

It is recommended to deep clean the brush roller after every four to five uses. To avoid hair wrapping around the brush roller, use the multi-purpose cleaning brush. It is advisable to place the brush roller in a ventilated area to dry.
Rinse the brush roller cover as needed.

The brush roller and filter must be dried after cleaning.

Remove the filter and rinse it to avoid blocking the air outlet.
Wipe the station after each use.