JP1439S - Musical instrument Jupiter - Free user manual and instructions
Find the device manual for free JP1439S Jupiter in PDF.

| Product Type | B-flat clarinet (Bb) |
| Brand | Jupiter |
| Model | JP1439S |
| Body Material | ABS Resin |
| Approximate Length | 67 cm |
| Approximate Weight | 700 g |
| Number of Keys | 17 standard keys |
| Key System | Boehm |
| Mouthpiece | Ebonite mouthpiece with screw ligature |
| Included Accessories | Case, swab, cork grease, soft cloth |
| Assembly | Fit the bodies, barrel, and bell with a little grease on the corks |
| Maintenance | Wipe with a soft cloth, clean with a swab, oil pivots with a drop of key oil |
| Cleaning the mouthpiece and reed | Dry and store the reed in its case, clean the mouthpiece with warm water |
| Temperature Precautions | Avoid sudden temperature changes and excessive humidity |
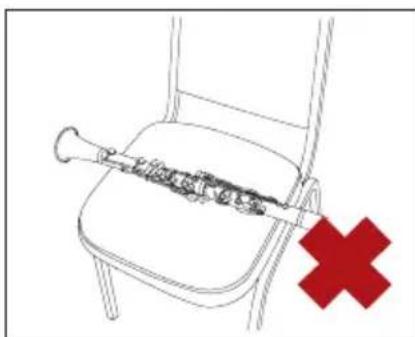
| Storage | Always in its case or on a stable stand, never on a chair |
| Repairs | Do not repair yourself, entrust to a qualified technician |
Frequently Asked Questions - JP1439S Jupiter
User questions about JP1439S Jupiter
0 question about this device. Answer the ones you know or ask your own.
Ask a new question about this device
Download the instructions for your Musical instrument in PDF format for free! Find your manual JP1439S - Jupiter and take your electronic device back in hand. On this page are published all the documents necessary for the use of your device. JP1439S by Jupiter.
USER MANUAL JP1439S Jupiter
Thank you for purchasing a Jupiter series clarinet. This manual provides you with basic care and maintenance instructions so you can get the most out of your instrument. We hope you will read this carefully to help alleviate any problems with your instrument and to get more enjoyment from your music.
- Assembly
2.Disassembly 5 - Inspection & Maintenance 6
- Caution 7
German
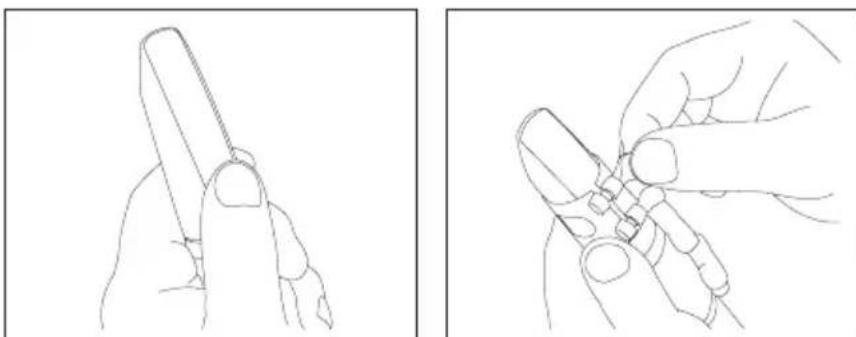
Liberally apply cork grease to the tenon corks on all joints.
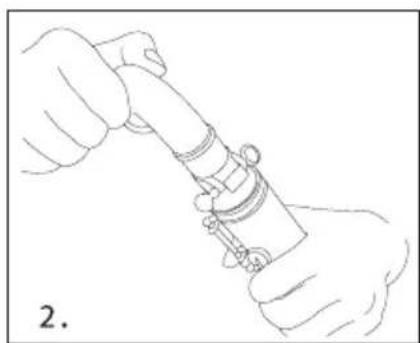
Step 2.
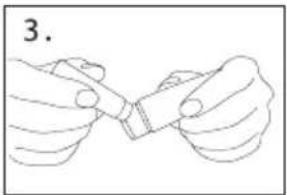
(1.) Bb Clarinet – Connect the barrel and the upper joint.
(2.) Bb Bass Clarinet - Connect the neck and the upper joint.
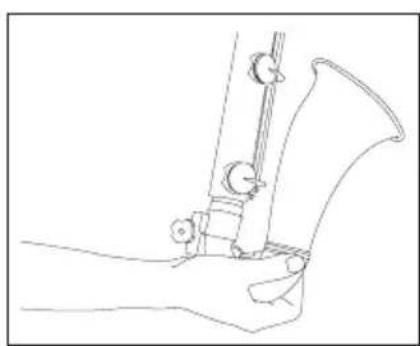
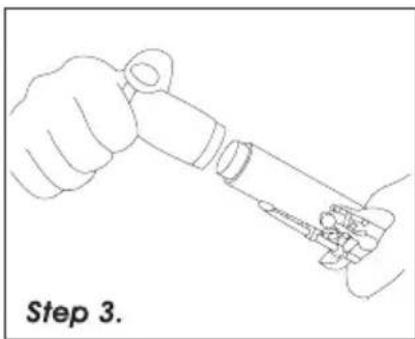
Step 3.
Connect the lower joint and bell.
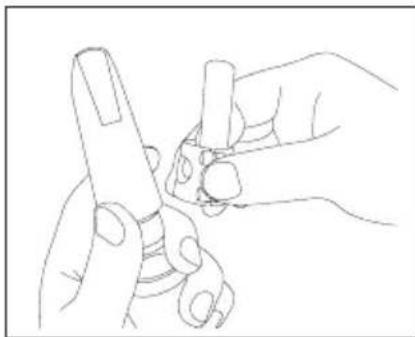
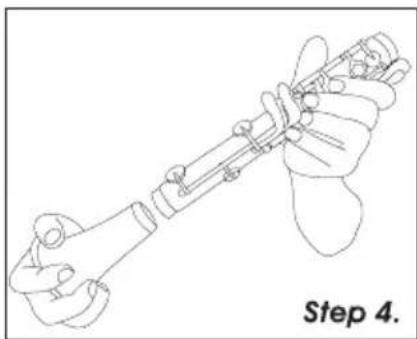
Step 4.
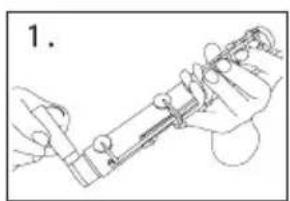
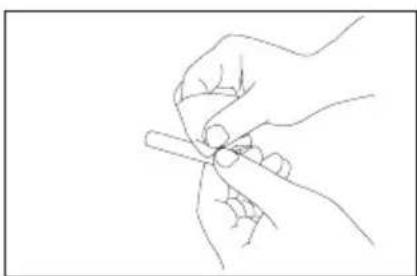
Connect the upper joint from Step 2 to the lower joint from Step 3 while depressing the ring keys of the upper joint. This prevents damage to the bridge key mechanism.
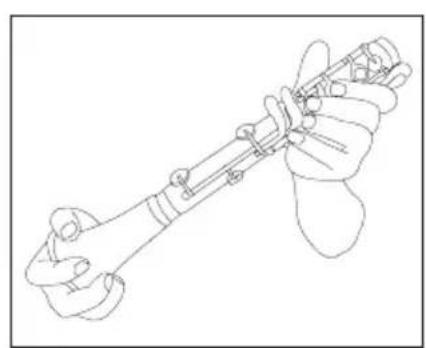
Step 5.
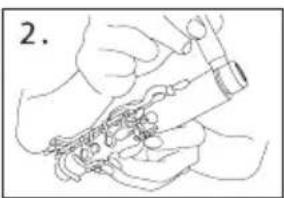
Attach the mouthpiece to the barrel. Align the ramp surface of the mouthpiece with the thumb register key.
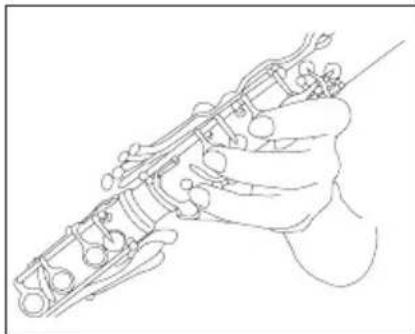
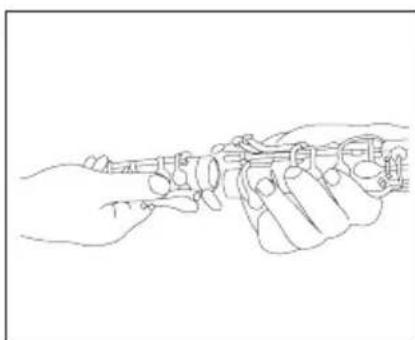
Step 6.
Properly position the reed on the mouthpiece. Slide the ligature over the reed being careful not to damage the reed tip. After the ligature is properly positioned, hand tighten the ligature screws.
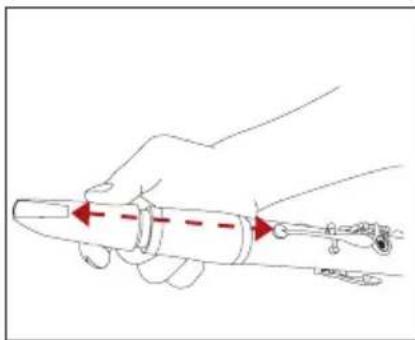
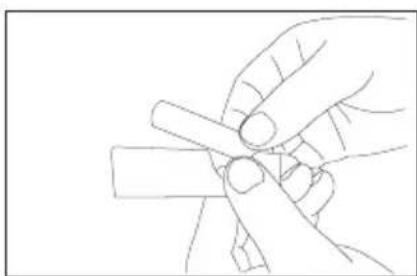
2 Disassembly
Step 1.
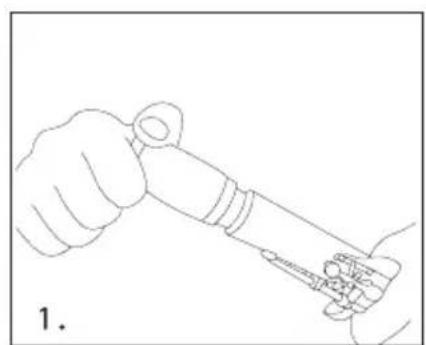
Remove the reed, ligature, and mouthpiece from the barrel.
Step 2.
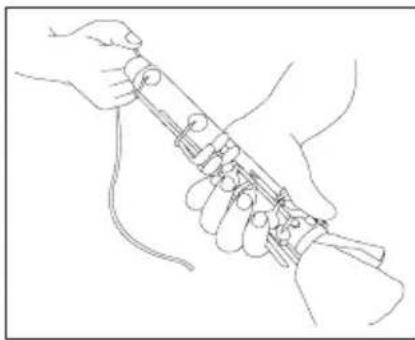
Press the ring keys on the upper joint while separating the upper and lower joints.
Step 3.
Detach the upper joint from the barrel.
Step 4.
Detach the lower joint from the bell.
3 Inspection & Maintenance
Step 1.
After playing and before returning to the case, draw the cleaning swab through the body sections to remove any moisture.
Step 2.
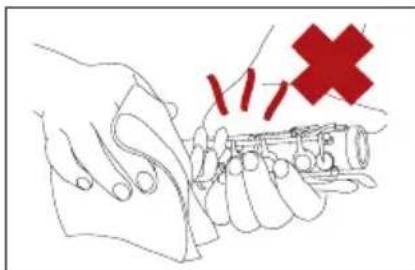
Wipe the body and the keys gently with the supplied cleaning cloth. Take care not to scratch or damage the body or keys by improper handling.
Step 3.
Clean and dry the mouthpiece and reed. To lengthen the life of the reed, store the reed in a reed protector.
4 Caution
-
Use key oil sparingly to all pivot points to keep the keys operating smoothly.
-
To avoid damaging the key mechanism, do not exert excess pressure on the keys during assembly and disassembly.

-
Remove any excess moisture from the body and keys to prolong the instrument's finish.
-
Do not expose any instrument to excessive temperature or humidity.
-
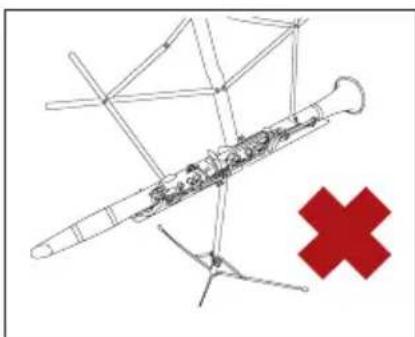
To avoid possible damage after playing, put the clarinet in a safe place such as an instrument case or a suitable instrument stand. Do not put it on a chair, desk, or anywhere else where it could easily fall.
- For adjustment or repair, take your instrument to a qualified technician or dealer. Don't attempt to adjust the clarinet yourself.
Specifications subject to change without notice www.jupitermusic.com