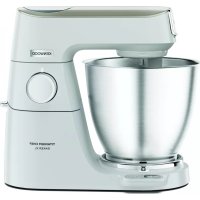
HM330 - Blender KENWOOD - Free user manual and instructions
Find the device manual for free HM330 KENWOOD in PDF.
Frequently Asked Questions - HM330 KENWOOD
User questions about HM330 KENWOOD
0 question about this device. Answer the ones you know or ask your own.
Ask a new question about this device
Download the instructions for your Blender in PDF format for free! Find your manual HM330 - KENWOOD and take your electronic device back in hand. On this page are published all the documents necessary for the use of your device. HM330 by KENWOOD.
USER MANUAL HM330 KENWOOD
- Read these instructions carefully and retain for future reference.
- Remove all packaging and any labels.
- If the plug or cord is damaged it must, for safety reasons, be replaced by Kenwood or an authorised Kenwood repairer in order to avoid a hazard.
DO NOT process hot ingredients. - Ensure the cord is fully unwound from the cord wrap before using the handmixer.
- Never put the handmixer body in water or let the cord or plug get wet.
- Keep fingers, hair, clothing and utensils away from moving parts.
- Never let the cord touch hot surfaces or hang down where a child could grab it.
- Never use a damaged handmixer. Get it checked or repaired: see 'service and customer care'.
- Never use an unauthorised attachment.
- Always switch off the appliance and disconnect from the power supply, if it is left unattended, before assembling, disassembling or cleaning.
- This appliance shall not be used by children. Keep the appliance and its cord out of reach of children.
Children should be supervised to ensure that they do not play with the appliance. -
Appliances can be used by persons with reduced physical, sensory or mental capabilities or lack of experience and knowledge if they have been given supervision or instruction concerning use of the appliance in a safe way and if they understand the hazards involved.
-
Only use the appliance for its intended domestic use. Kenwood will not accept any liability if the appliance is subject to improper use, or failure to comply with these instructions.
Cleaning
- Always switch off, unplug and remove the beaters or kneaders before cleaning.
- Never put the handmixer body in water or let the cord or plug get wet.
- Never use abrasives to clean parts.
Handmixer body/cradle/stand
- Wipe with a damp cloth, then dry.
- Never immerse in water or use abrasives
All other parts
- Wash by hand, then dry.
- Alternatively they can be washed in your dishwasher.
Use your Kenwood 6-speed handmixer for mixing, beating and whipping cream, eggs, sauces and many other mixtures. Heavier doughs and other mixtures can be prepared with the kneaders included with selected models of the handmixer.
Before plugging in
- Make sure your electricity supply is the same as the one shown on the rear of your handmixer.
- No action is required to switch between 50Hz and 60Hz.
Important - Plug and Fuse Information
- The wires in the cord are coloured as follows: Blue = Neutral Brown = Live.
- If the plug supplied with your appliance has a fuse fitted it is rated 3A. If the fuse fails it must be replaced with one of the same rating.
Note:
- For non-rewireable plugs the fuse cover MUST be refitted when replacing the fuse. If the fuse cover is lost then the plug must not be used until a replacement can be obtained. The correct fuse cover is identified by colour and a replacement may be obtained from your Kenwood Authorised Repairer (see Service).
- If a non-rewireable plug is cut off it must be DESTROYED IMMEDIATELY. An electric shock hazard may arise if an unwanted non-rewireable plug is inadvertently inserted into a 13A socket outlet.
- This appliance conforms to EC Regulation 1935/2004 on materials and articles intended to come into contact with food.
before using your handmixer for the first time
- Wash the parts (see 'cleaning').
key
① speed switch and tool release button
② Turbo button
③ bowl
④ stand
(5) kneaders
⑥ beaters
⑦ cord wrap
(8) stand release button
⑨ mixer holding bracket
bracket recess
mixer cradle
⑫ beater/kneader drive gear
⑬ bowl drive gear
to use your handmixer
- Unwrap the cord from the cord wrap
⑦ before use.
1 Fit the mixer to the stand by sliding the handmixer into the cradle ⑪ - ensuring the tabs at the front of the cradle slide into the slots on the underside of the Handmixer.
2 Fit the holding bracket ⑨ into the bracket recess ⑩ at the rear of the Handmixer and clip securely into place.
3 Press the stand release button 8 and lift the handmixer up so that the beaters or kneaders can be fitted.
Note: for safety, the mixer will only operate with the beaters or kneaders in position.
4 Insert the beaters or kneaders into the mixer - turn until a positive click is heard.
- If using the mixer with the stand, ensure the beater/kneader with the drive gear is inserted so it aligns with the drive gear on the stand 1.
- If using the mixer without the stand, the beater/kneader with the small metal collar must be inserted into the socket marked with the graphic 2.
5 Place the ingredients into the mixing bowl and then place the bowl on to the stand.
6 Lower the Handmixer down until the stand release button ⑧ clicks back into place.
7 Plug in and push the speed control ① forward.
- As the mixture thickens, increase the speed.
- If the machine starts to slow or labour, increase the speed and/or push the Turbo button ②.
- The Turbo button gives an extra boost of power for those extra tough mixing jobs. Use for up to 30seconds at a time.
It may be necessary to scrape down the sides of the bowl and along the bottom at regular intervals to assist the mixing operation.
8 When the mixtures has reached the desired consistency, return the speed switch to the off position and wait until the beaters or kneaders have stopped before removing.
9 To remove the tools, make sure the speed switch is in the off position and unplug the mixer. Press the stand release button ⑧ and lift the mixer up so that the tools are clear of the bowl. Hold on to the tool shafts and press the tool release button ①.
hints
- When creaming for cake mixtures, use butter or margarine at room temperature or soften before use.
- Egg whites should be at room temperature for best results.
- When whisking eggs whites ensure the bowl and beaters are completely clean and free from traces of fat or egg yolk.
- For best results with small quantities, use the handmixer without the stand.
Large quantities and thick mixtures may require a longer mixing time. - If you wish to mix larger quantities or heavier mixes, remove the mixer from the stand and use a bowl of an appropriate size.
To re-knead bread doughs remove the mixer from the stand and use hand held.
maximum quantities
Egg Whites 6 (210g)
Dough 450g (flour weight)
Pastry 250g (flour weight)
Creaming Method
Light Fruit cake 900g (total weight)
All in one cake mix 600g (total weight)
storage
- Wrap the cord around the end of the cradle ⑦.
service and customer care
UK
If you need help with:
- using your handmixer or
servicing or repairs (in or out of guarantee)
call Kenwood customer care on
0345 222 0458 or visit www.kenwoodworld.com. Have your model number (e.g. HM430) and date code (5 digit code e.g. 19C11) ready. They are located on the rear of the power unit.
spares and attachments
call 0844 557 3653.
other countries
- If you experience any problems with the operation of your appliance, before requesting assistance visit www.kenwoodworld.com.
- Please note that your product is covered by a warranty, which complies with all legal provisions concerning any existing warranty and consumer rights in the country where the product was purchased.
- If your Kenwood product malfunctions or you find any defects, please send it or bring it to an authorised KENWOOD Service Centre. To find up to date details of your nearest authorised KENWOOD Service centre visit www.kenwoodworld.com or the website specific to your Country.
Made in China.

IMPORTANT INFORMATION FOR CORRECT DISPOSAL OF THE PRODUCT IN ACCORDANCE WITH THE EUROPEAN DIRECTIVE ON WASTE ELECTRICAL AND ELECTRONIC EQUIPMENT (WEEE)
At the end of its working life, the product must not be disposed of as urban waste. It must be taken to a special local authority differentiated waste collection centre or to a dealer providing this service.
Disposing of a household appliance separately avoids possible negative consequences for the environment and health deriving from inappropriate disposal and enables the constituent materials to be recovered to obtain significant savings in energy and resources. As a reminder of the need to dispose of household appliances separately, the product is marked with a crossed-out wheeled dustbin.
guarantee (UK only)
If your handmixer goes wrong within one year from the date you bought it, we will repair or replace it free of charge provided:
- you have not misused, neglected or damaged it;
- it has not been modified (unless by Kenwood);
- it is not second-hand;
- it has not been used commercially;
you have not fitted a plug incorrectly; and - you supply your receipt to show when you bought it.
This guarantee does not affect your statutory rights.
white bread dough
10ml/2 tsp dried yeast (the type that requires reconstituting)
5ml/1 tsp sugar
250ml/9 fl.oz. warm water
450g/1 lb bread flour
5ml/1 tsp salt
15g/% oz. lard
1 Place the dried yeast, with the sugar and water, in a mixing bowl and leave to froth. The correct water temperature should be 43^ and can be achieved by mixing one third boiling water with two thirds cold water.
2 Add the remaining ingredients. Combine the ingredients together on a low speed until the flour is incorporated. Then increase the speed and knead for approximately 2-3 minutes, until the dough is smooth and elastic. Cover with oiled cling film and leave the dough to rise in a warm place for 45-60 minutes.
3 With the mixer removed from the stand and hand held re-knead the dough on maximum speed for 30 - 45 seconds, keeping the kneaders in the mix.
4 Shape the dough into a loaf, or rolls, and place on greased baking trays. Cover with oiled cling film and leave somewhere warm until it has doubled in size.
5 Bake in a preheated oven at 230^ / 450^ / Gas mark 8 for 20-25 minutes (for a loaf) or 10-15 minutes (for rolls). When ready, the dough should sound hollow when tapped on the base.
Français
jck jck jck jck jck jck
j 1
LgJoo
1 1
S AOB = S AOC + S_ BOC
yogag. aaiall liqall
1
i.
y 1
Laiy Lclj jell jy jil
jdo 1
y
a7. 180
SLaoljolal no bIJI 1
eall jnll ncc
100 100
J 1
K
jia jia jia jia jia jia jia jia jia
.
jdo clwll jolipj
i j k l s o 456 jll jj
- c^ EC = 90^ EC = 35EC
1 1
A jll 10xle -4gfo 1jy
(a)(a)
Lodic. (a)
Jdall no JcRgmoa aee
scll jaoa sic ciy jy
⑦ Jolal
yall 10
gulll
( p,q : r - 1,)
()
()j0.
a
a1 = 2,an + 1 = n1 + n2 - _n3
(1)
S ACD = S COD + S BDO - S CDA
S OBC = S BOC + S_ BOC
()

aall aal gao ola cloglo 1g jgl i g zill no al lal bai yolgi yol y
(WEEE)
p 111 111 111 111 111 111 111 111
aalal alal p aal glal alal jd
s
1
.
Lalalallgssllg 15Kenwood 0e 8y
aalalal alalalal alalalal alalalal alalalal
y
y
e 1
jolal
j7. g j8 0. . jy jll l y! y a laa
y
1111 1111 1111
Jla=
中
yaii 1
jlaa jlaa
.1gol
ED = 2GD = 210