WCO250XC - Oven Waring Commercial - Free user manual and instructions
Find the device manual for free WCO250XC Waring Commercial in PDF.

Frequently Asked Questions - WCO250XC Waring Commercial
User questions about WCO250XC Waring Commercial
0 question about this device. Answer the ones you know or ask your own.
Ask a new question about this device
Download the instructions for your Oven in PDF format for free! Find your manual WCO250XC - Waring Commercial and take your electronic device back in hand. On this page are published all the documents necessary for the use of your device. WCO250XC by Waring Commercial.
USER MANUAL WCO250XC Waring Commercial
For your safety and continued enjoyment of this product, always read the instruction book carefully before using.
When using electrical appliances, basic safety precautions should always be followed to reduce the risk of fire, electric shock and/or injury to persons, including the following:
- READ ALL INSTRUCTIONS.
- UNPLUG FROM OUTLET WHEN NOT IN USE, BEFORE PUTTING ON OR TAKING OFF PARTS, AND BEFORE CLEANING. Allow to cool before cleaning or handling.
- To protect against risk of electrical shock, do not put appliance in water or other liquids.
- Avoid contact with glass door during cooking process. It may be very hot.
- This appliance is not intended for use by persons (including children) with reduced physical, sensory or mental capabilities, or lack of experience and knowledge, unless they have been given supervision or instruction concerning use of the appliance by a person responsible for their safety.
- Children should be supervised to ensure that they do not play with the appliance.
- Avoid coming into contact with moving parts.
- The oven must be kept at a distance of 4 inches or more away from other objects around it in order to avoid heat damage to adjacent items.
- Do not operate any appliance with a damaged cord or plug, or after the appliance has malfunctioned or has been dropped or damaged in any way, or is not operating properly. Return the convection oven to the nearest authorized service facility for examination, repair, or mechanical or electrical adjustment.
- Do not let the cord hang over the edge of the table or countertop or touch hot surfaces, as this could damage the cord.
- The use of attachments not recommended or sold by Waring may cause fire, electric shock, or injury.
- Do not use outdoors.
-
Do not place convection oven on or near a hot gas or electric burner or in a heated oven.
-
Do not use this convection oven for anything other than its intended purpose.
- To disconnect, turn any control to OFF, then remove plug from wall outlet.
- Extreme caution should be exercised when using containers constructed of the following materials in the oven: paper, cardboard, plastic or similar products.
- To avoid burns, use extreme caution when removing tray or disposing of hot grease.
- Do not cover any part of the oven cooking compartment with metal foil. This will cause damage to oven. Covering the baking sheet with foil is okay. Covering the wire racks with foil is not recommended, as this will block airflow and create uneven cooking temperatures.
- Oversize foods, metal foil packages and utensils must not be inserted in the oven /broiler as they may involve a risk of fire or electric shock.
- A fire may occur if the convection oven is covered or touching flammable material.
- Do not store any items on top of the appliance when in operation. Installing oven in a cabinet is prohibited. The unit is designed for countertop use only.
- Do not clean with metal scouring pads. Pieces can break off the pad and touch electrical parts, involving a risk of electric shock.
- Do not attempt to dislodge food when the convection oven is plugged into electrical outlet.
- Warning: To avoid possibility of fire, NEVER leave oven unattended when using the Broil function.
- Use recommended temperature settings for baking and roasting.
- The appliance is off when the Timer control is in the OFF position.
- Do not rest cooking utensils or baking dishes on glass door.
- Do not operate your appliance in an appliance garage or under a wall cabinet. When storing in an appliance garage, always unplug the unit from the electrical outlet. Not doing so could create a risk of fire, especially if the appliance touches the walls of the garage or the door touches the unit as it closes.
APPROVED FOR COMMERCIAL USE
SAVE THESE INSTRUCTIONS FOR COMMERCIAL USE ONLY
CONTENTS
Important Safeguards 2
Grounding Instructions. 5
Extension Cords 5
Introduction 6
Parts and Accessories 7
Before Using Your Oven 10
Function Guidelines 10
Bake 10
Convection Bake 11
Roast 12
Broil 12
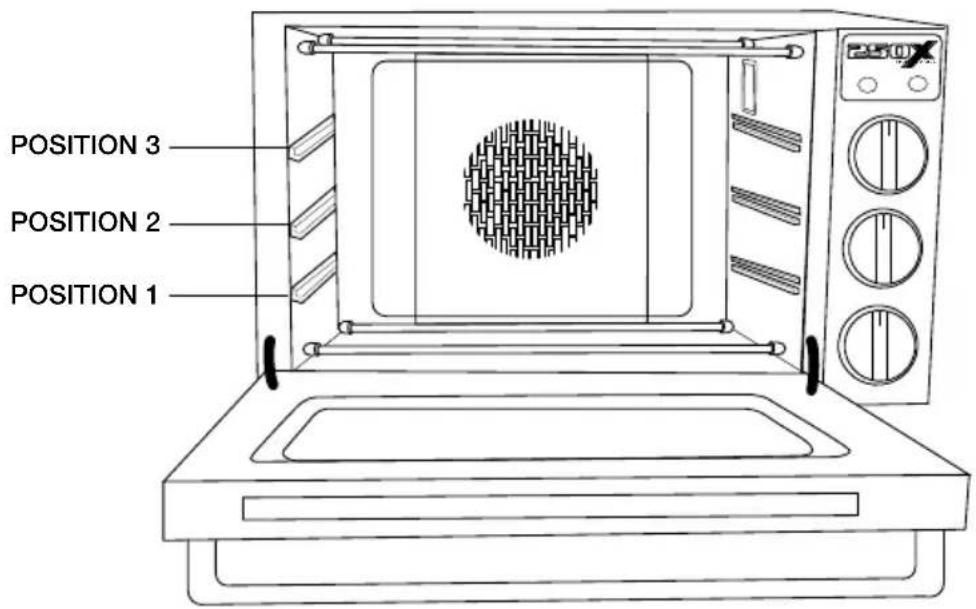
Oven Rack Positions 13
Bakeware Reference Guide 13
Tips and Hints 14
Use and Care 14
Installing and Replacing Oven Light. 15
Safety Features 16
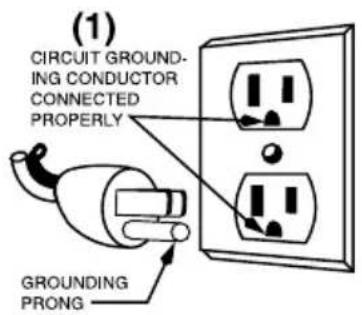
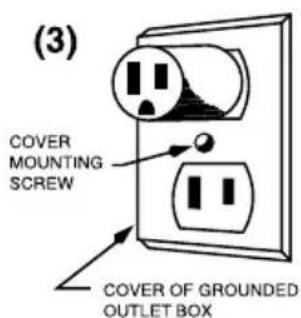
GROUNDING INSTRUCTIONS
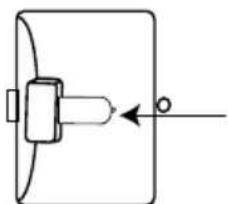
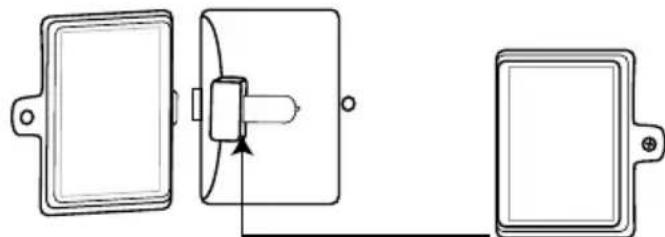
This appliance must be grounded while in use to protect the operator from electrical shock. The appliance is equipped with a 3-conductor cord and 3-prong grounding-type plug to fit the proper grounding-type receptacle. The appliance has a plug that looks like the plug in drawing (1). An adapter, as in drawing (2), should be used for connecting the appliance plug to two-prong receptacles. The grounding tab, which extends from the adapter, must be connected to a permanent ground such as a properly grounded outlet box as shown in drawing (3) using a metal screw.
NOTE: The use of an adapter is not authorized in Canada.

EXTENSION CORDS
Use only 3-wire extension cords that have 3-prong grounding-type plugs and 3-pole cord connectors that accept the plug from the appliance. Use only extension cords that are intended for indoor use. Use only extension cords having an electrical rating not less than the rating of the appliance. Do not use damaged extension cords. Examine extension cord before using and replace if damaged. Do not abuse extension cord and do not yank on any cord to disconnect. Keep cord away from heat and sharp edges.
NOTE: This appliance is for 120 volts only and should not be used with a converter.
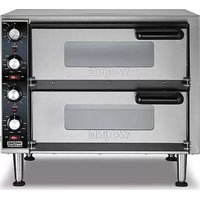
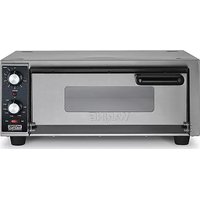
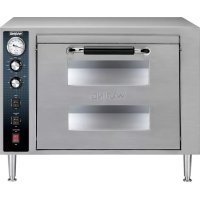
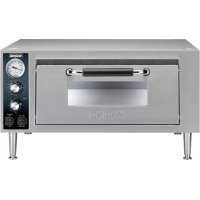
INTRODUCTION
The Waring® Commercial Convection Oven takes countertop cooking to a whole new level. Convection baking uses a rear heating element with a fan to circulate heated air, maintaining the selected temperature throughout the oven cavity. This constant flow of air eliminates the hot and cold spots often found in conventional ovens. Because the temperature remains consistent when using convection bake, you can set this oven approximately 25^ lower than a conventional oven, thus saving energy.
Cooking time is also reduced by approximately 25 to 30 percent. Use your convection oven to roast meat or whole chickens, bake cakes, cookies and more. Safe and easy to use. Exceptionally quick to clean. It's a better way to cook!
PARTS AND ACCESSORIES (continues on page 8)
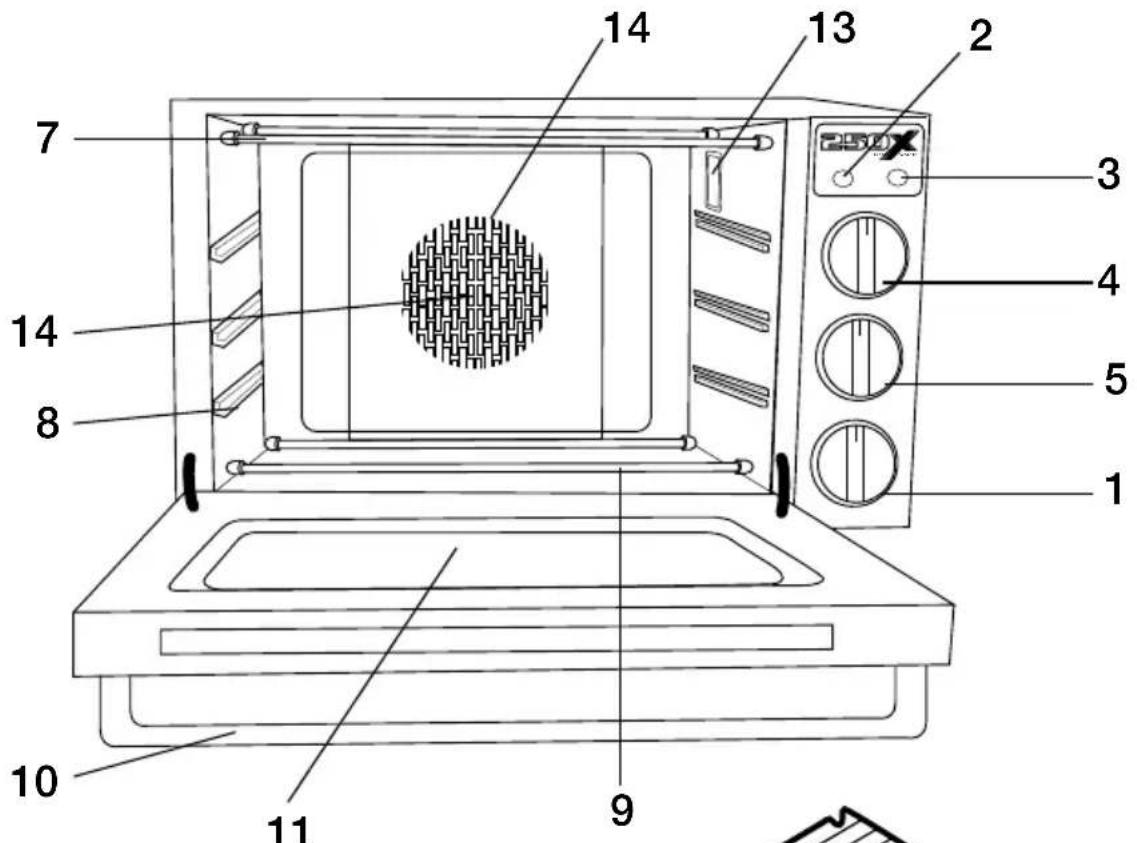
- Timer
- Power Indicator Light - Red
- Oven Temperature "Ready" Indicator Light - Green
- Function Control Knob
- Temperature Control Knob
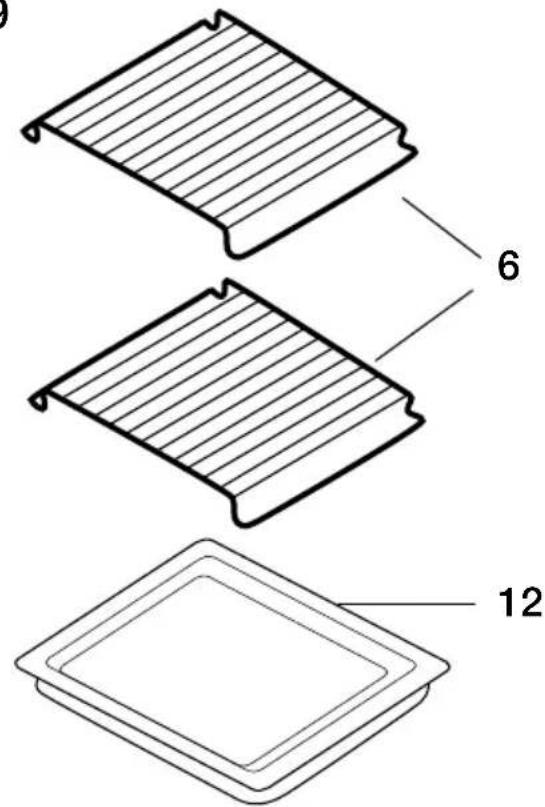
- Wire Racks
- Upper Heating Elements
- Rack Support Guides
- Lower Heating Elements
- Door Handle
- Double-Pane Tempered-Glass Door
- Stainless Steel Baking Tray
- Interior Light
- Convection/Roast Fan
- Rear Heating Element (not shown)
1.Timer
The range of the timer is 120 minutes. The timer setting is optional. You can set the timer either to the desired cooking time or to the OVEN ON position, which will keep oven continually on without timer. If the baking time is less than 20 minutes, first turn the timer clockwise past the 20-minute mark and turn it back to the desired time. If a longer time is required, turn the timer directly to the desired time.
2. Power Indicator Light - Red
- When the red power indicator light is on, the oven is in operation.
- When the timer is in the OFF position, the red indicator light will be off and the oven is in the OFF mode.
3. Oven Temperature "Ready" Indicator Light - Green
-
When the green oven temperature "ready" indicator light is on, the oven has reached the indicated temperature.
-
When broiling, "ready" indicator light will NOT be lit.
- The "ready" light will cycle on and off as the set temperature is maintained.
4. Function Control Knob and General Function Guidelines
This selector offers four choices of cooking options:
Bake
Indicates that upper and lower heating elements are operating. The fan is off. This mode is used for conventional baking.
Convection Bake
Indicates that the rear heating element as well as the convection fan are operating. This function is time-effective and efficient. It is perfect for baking most types of pastries, cookies, and for baking pizza, bread, soufflés, casseroles, as well as roasting poultry, pork and steaks.
Roast
Indicates that the upper elements and lower heating elements as well as the convection fan are operating. This function is used for roasting chicken, pork and steaks.
Broil
Indicates that the upper heating elements are operating.
Broil can be used for beef sirloin, hamburgers, chicken breasts, lamb chops, pork chops, fish fillets and steaks.
5. Temperature Control Knob
This thermostatic switch controls the temperature inside the oven; it maintains the proper temperature during the various heating, roasting and baking operations.
6.WireRacks
The wire racks are made of chrome-plated steel. The racks support food during broiling, roasting and baking.
7. Upper Heating Elements
There are two straight heating elements in the upper part of the oven.
8.RackSupportGuides
There are three different levels inside the oven for the wire racks and baking tray. Select the best position for the food relative to the heating elements. See diagram on page 13.
9. Lower Heating Elements
There are two straight heating elements in the lower part of the oven.
10. DoorHandle
Use this handle to avoid getting burned by the hot oven door.
11. Double-Pane d Tempered-Glass Door
Be sure the safety door is closed tightly while preheating, baking or roasting. To avoid getting burned, don't touch the door when the oven is in use. Wait until the oven cools before cleaning the door with a damp cloth.
12. Stainless Steel Baking Tray
Can be used for baking or as a drip tray.
13.InteriorLight
Lights up when timer is not in the OFF position. Allows for better viewing of the cooking process.
14.Convection/RoastFan
Utilizes a heating element and fan to circulate hot air which helps with even cooking and quicker results.
15. Rear Heating Element
The rear heating element is behind the rear panel of the oven.
Before using your oven for the first time, be sure to:
- Wash the wire racks and baking tray with soapy water, rinse with clean water and dry. These parts should be cleaned and thoroughly dried by hand only.
- Use a damp cloth to lightly wipe the inner walls of the oven. Use a small amount of detergent, but don't use a spray or abrasive polishing agent. Do not touch the heating elements and do not soak the inside of the oven with water.
- Place the wire racks and baking tray inside the oven.
- Preheat the oven. First close the oven door and then preheat the oven at the highest temperature for a minimum of 5 minutes. The oven may emit an odor. This is normal and should dissipate.
Note: This odor is not harmful.
- Turn off the oven and allow it to cool. Remove any smoke residue inside the oven with a damp cloth.
- Do not block the exhaust vents.
FUNCTION GUIDELINES
IMPORTANT: When using smaller baking trays, use only the wire racks for support.
Bake
Your convection oven is equipped with two wire racks and has three rack positions (see diagram, page 13). The racks can be easily removed and arranged at various levels. For best results when using the oven for conventional baking, do not use more than one rack at a time.
- Set wire rack to desired position.
- Set the Function knob to BAKE.
- Set the Temperature knob as specified in your recipe.
-
Set the Timer, if desired, for up to 120 minutes. If the baking time is less than 20 minutes, first turn the timer clockwise past the 20-minute mark and turn it back to the desired time. If a longer baking time is required, turn the timer directly to the desired time.
-
If not using the timer, set timer to OVEN ON position.
- Always use potholders or oven mitts when removing hot food from the oven.
Convection Bake
The general rule for using most regular baking recipes with a convection oven is to reduce the suggested temperature in the recipe by 25^ . For roasting larger items such as meats or roasts, use the same temperature as indicated, but the cooking time may be reduced.
In any case, always check your baked items 10 minutes before cooking time indicates. For larger roasted items such as meats, start checking 20 to 40 minutes before the set cooking time is reached.
With convection baking, the key is the airflow. Avoid using baking dishes with high sides. For example, even when baking cookies, try to use a cookie sheet with no sides. For roasting meats, use shallow baking trays as opposed to large, high-sided roasting pans. For the same reason, you'll want to avoid cooking anything with a lid when you use the convection feature, as the lid blocks the airflow.
- Set wire rack to desired position.
- Set the Function knob to CONV. BAKE.
- Set the Temperature knob to the desired level.
- Set the Timer, if desired. If the baking time is less than 20 minutes, first turn the timer clockwise past the 20-minute mark and turn it back to the desired time.
- If a longer baking time is required, turn the timer directly to the desired time. If not using the timer set timer to OVEN ON position.
- If required to catch drips, place the baking tray one level below the wire rack. The tray and the rack should be set at different levels for satisfactory air convection.
- When you are using the baking tray, in particular in position 1 (bottom rack position), make sure the tray is centered so that you have an air passageway in the back as well as the front of the oven.
- Always use potholders or oven mitts when removing hot food from the oven.
Roast
- Set wire rack to desired position.
- Set the Function knob to Roast.
- Set the temperature to the desired level.
- Set the time, if desired.
- Set the Timer, if desired. If the roasting time is less than 20 minutes, first turn the timer clockwise past the 20-minute mark and turn it back to the desired time.
- If a longer baking time is required, turn the timer directly to the desired time. If not using the timer set timer to OVEN ON position.
- Set the Timer, if desired. If the baking time is less than 20 minutes, first turn the timer clockwise past the 20-minute mark and turn it back to the desired time.
- If a longer baking time is required, turn the timer directly to the desired time. If not using the timer set timer to OVEN ON position.
Broil
- Set rack in position #3 or desired position (see page 13).
- Set the Function knob to Broil.
- Set the timer, if desired. If the broiling time is less than 20 minutes, first turn the timer clockwise past the 20-minute mark and turn it back to the desired time. If a longer broiling time is required, turn the timer directly to the desired time.
- Keep door ajar.
OVEN RACK POSITIONS
The diagram below illustrates the three rack positions for this convection oven.
BAKeware REFERENCE GUIDE
The following bakeware is suitable for the .9 cubic foot oven when using one rack (dimensions given in inches):
13 x 9 Rectangle
12 × 7% Rectangle
11 x 7 Rectangle
9 x 13 x 2 6 Muffin
9 x 13 x 2 12 Muffin, Traditional
8 × 8 × 2 Cake, Traditional
10 × 5 × 3 12 1 12 lb. Loaf Pan, Traditional
812 × 412 × 234 1 lb. Loaf, Nonstick
8 x 2 Round Cake, Nonstick
9 x 2 Round Cake, Traditional
10 x 2 Pie Plate, Nonstick
9½ Tart Pan
9½ 12-cup Bundt Pan
TIPS AND HINTS
- It is important to rotate any item you are baking in the oven to ensure even cooking.
- It is recommended to bake using one rack at a time. If you do bake with more than one rack, be sure to rotate both the baking trays and their rack positions halfway through bake time.
- To ensure even flow of air when using baking trays or other utensils, do not slide tray to the back of oven. Leave about 1 to 2 inches of air space around all sides of each pan for even air circulation.
Make sure the wire racks are in the desired position before you turn on the oven. - Bake on the shortest time suggested and check for doneness before adding more time.
USE AND CARE
Always allow the oven to cool completely before cleaning.
- Always unplug the oven from the electrical outlet.
- After the oven cools, use a damp cloth or sponge to clean interior and exterior surfaces.
- Do not soak the inside of the oven or wash it in running water, as this will cause serious damage to the appliance.
- Do not use any sharp or hard kitchen utensils on the oven as this could damage the surface of the appliance.
- The wire racks and baking tray should be washed and thoroughly dried by hand only.
- To clean the glass door, use a glass cleaner or a damp cloth. Wipe dry with a clean cloth.
- If the oven has not been used for an extended period of time, be sure to remove dust and moisture before operating.
- If there is something wrong with this product, please contact an authorized Waring Service Center for repair, or phone Waring Customer Service at 1-800-492-7464.
- Should the oven light located in upper back right-hand side of the oven become loose during shipping, please follow the steps to affix or replace light bulb:
INSTALLING & REPLACING THE OVEN LIGHT
In the top right hand corner of your oven is a halogen light bulb, which offers a longer lifespan than standard light bulbs and is able to withstand high temperatures. Purchase a new 120V 25 watt G9 halogen light bulb at your local hardware store and insert it as follows:
- Be sure that the oven is unplugged and completely cooled.
- Remove the screw from the cover with a Phillips head screw driver.
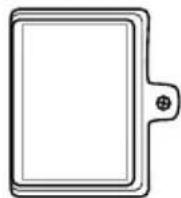
- Remove the cover.
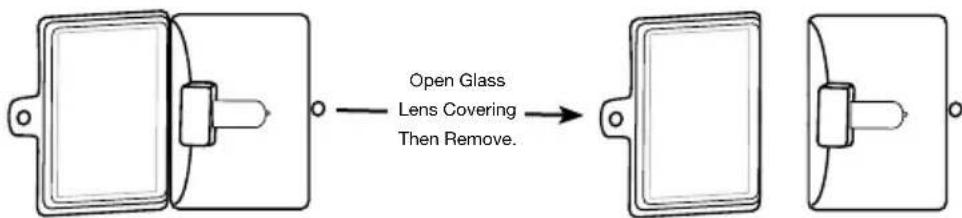
- Remove the old light bulb by pulling it out of the socket base (toward the front of the oven).
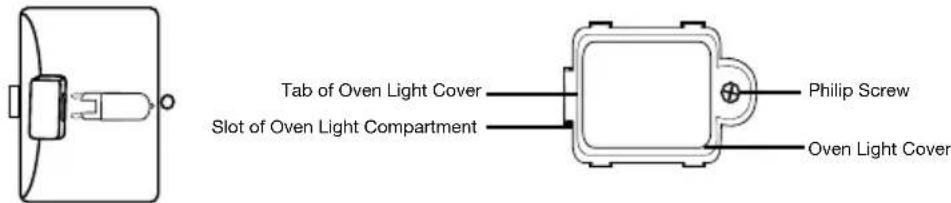
- Follow the guidelines on the light bulb instructions, without touching the light bulb with your bare hand (as this will reduce the lifespan). You can use a clean tissue or cloth glove to hold the bulb. Install the new bulb in the socket base by gently pushing it into place.
- Replace the cover and secure it tight with a Phillips head screw driver.
Any other servicing should be performed by an authorized service representative.
SAFETY FEATURES
The Waring® Commercial Convection Oven is equipped with the following feature to ensure safety:
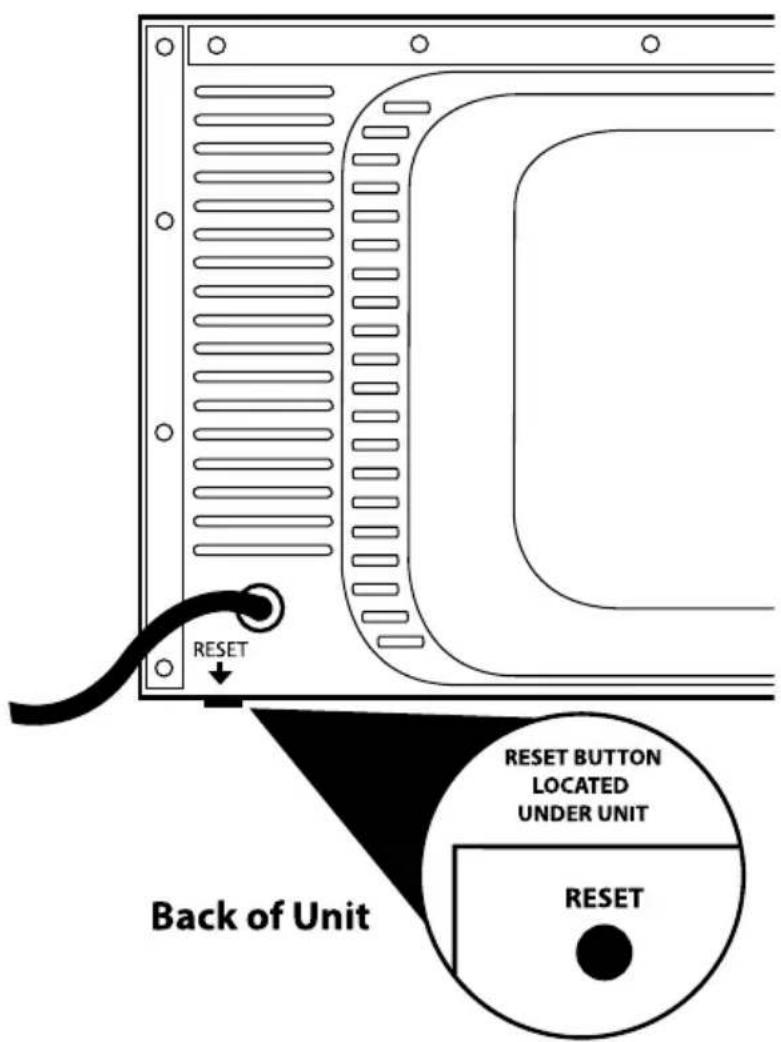
Thermostat Overload Protection
If the unit heats up beyond the recommended temperature level, the oven will automatically turn off. To reset, unplug the unit from the wall outlet and allow it to cool down. Once the unit has returned to a safe operating temperature, you can now reset the oven by locating the reset button on the right side of the rear panel (see illustration). Using a toothpick or another long, thing object, push the reset button in. Plug the unit back in, turn on and continue use. If the unit still does not operate, repeat steps above or call a Waring Certified Customer Service Center for assistance.
Protection anti-surchauffe
Trademarks or service marks of third parties used herein are the trademarks or service marks of their respective owners.
©2013 Waring Commercial Products
314 Ella T. Grasso Avenue
Torrington, CT 06790
www.waringcommercialproducts.com
Printed in China
Imprimé en Chine
WCO250X/WCO250XC
13WC133028