
Compact Force TW7824 - Vacuum Cleaner TEFAL - Free user manual and instructions
Find the device manual for free Compact Force TW7824 TEFAL in PDF.
| Brand | TEFAL |
| Model | Compact Force TW7824 |
| Product type | Cylinder vacuum cleaner |
| Technology | Cyclonic with air/dust separation system |
| Filters | HEPA filter (washable depending on model), black foam filter, microfiber filter |
| Dust container capacity | Approximately 1.5 L |
| Power cord length | Approximately 6 m |
| Power supply | 220-240 V, 50/60 Hz |
| Suction power | 800 W (estimated) |
| Noise level | 75 dB (estimated) |
| Weight | 5.5 kg (estimated) |
| Included accessories | Hose with ergonomic handle, metal telescopic tube, universal floor nozzle, crevice tool, upholstery tool |
| Power adjustment | Mechanical slider on handle (3 positions) |
| Locking system | LOCK SYSTEM |
| Usage | Domestic use only |
| Safety | Overheating protection, automatic shut-off |
| Maintenance | Removable and washable dust container, washable filters |
| Spare parts | HEPA filter (ref RS-RT3846 or RS-RT3733), filtration cassette (RS-RT3732) |
Frequently Asked Questions - Compact Force TW7824 TEFAL
User questions about Compact Force TW7824 TEFAL
0 question about this device. Answer the ones you know or ask your own.
Ask a new question about this device
Download the instructions for your Vacuum Cleaner in PDF format for free! Find your manual Compact Force TW7824 - TEFAL and take your electronic device back in hand. On this page are published all the documents necessary for the use of your device. Compact Force TW7824 by TEFAL.
USER MANUAL Compact Force TW7824 TEFAL
natural_image
Black and white photo of a Tefal compact vacuum cleaner with open lid and branding (no visible text or symbols on body)Compact force multi-cyclonic
TW78XX series
www.tefal.com
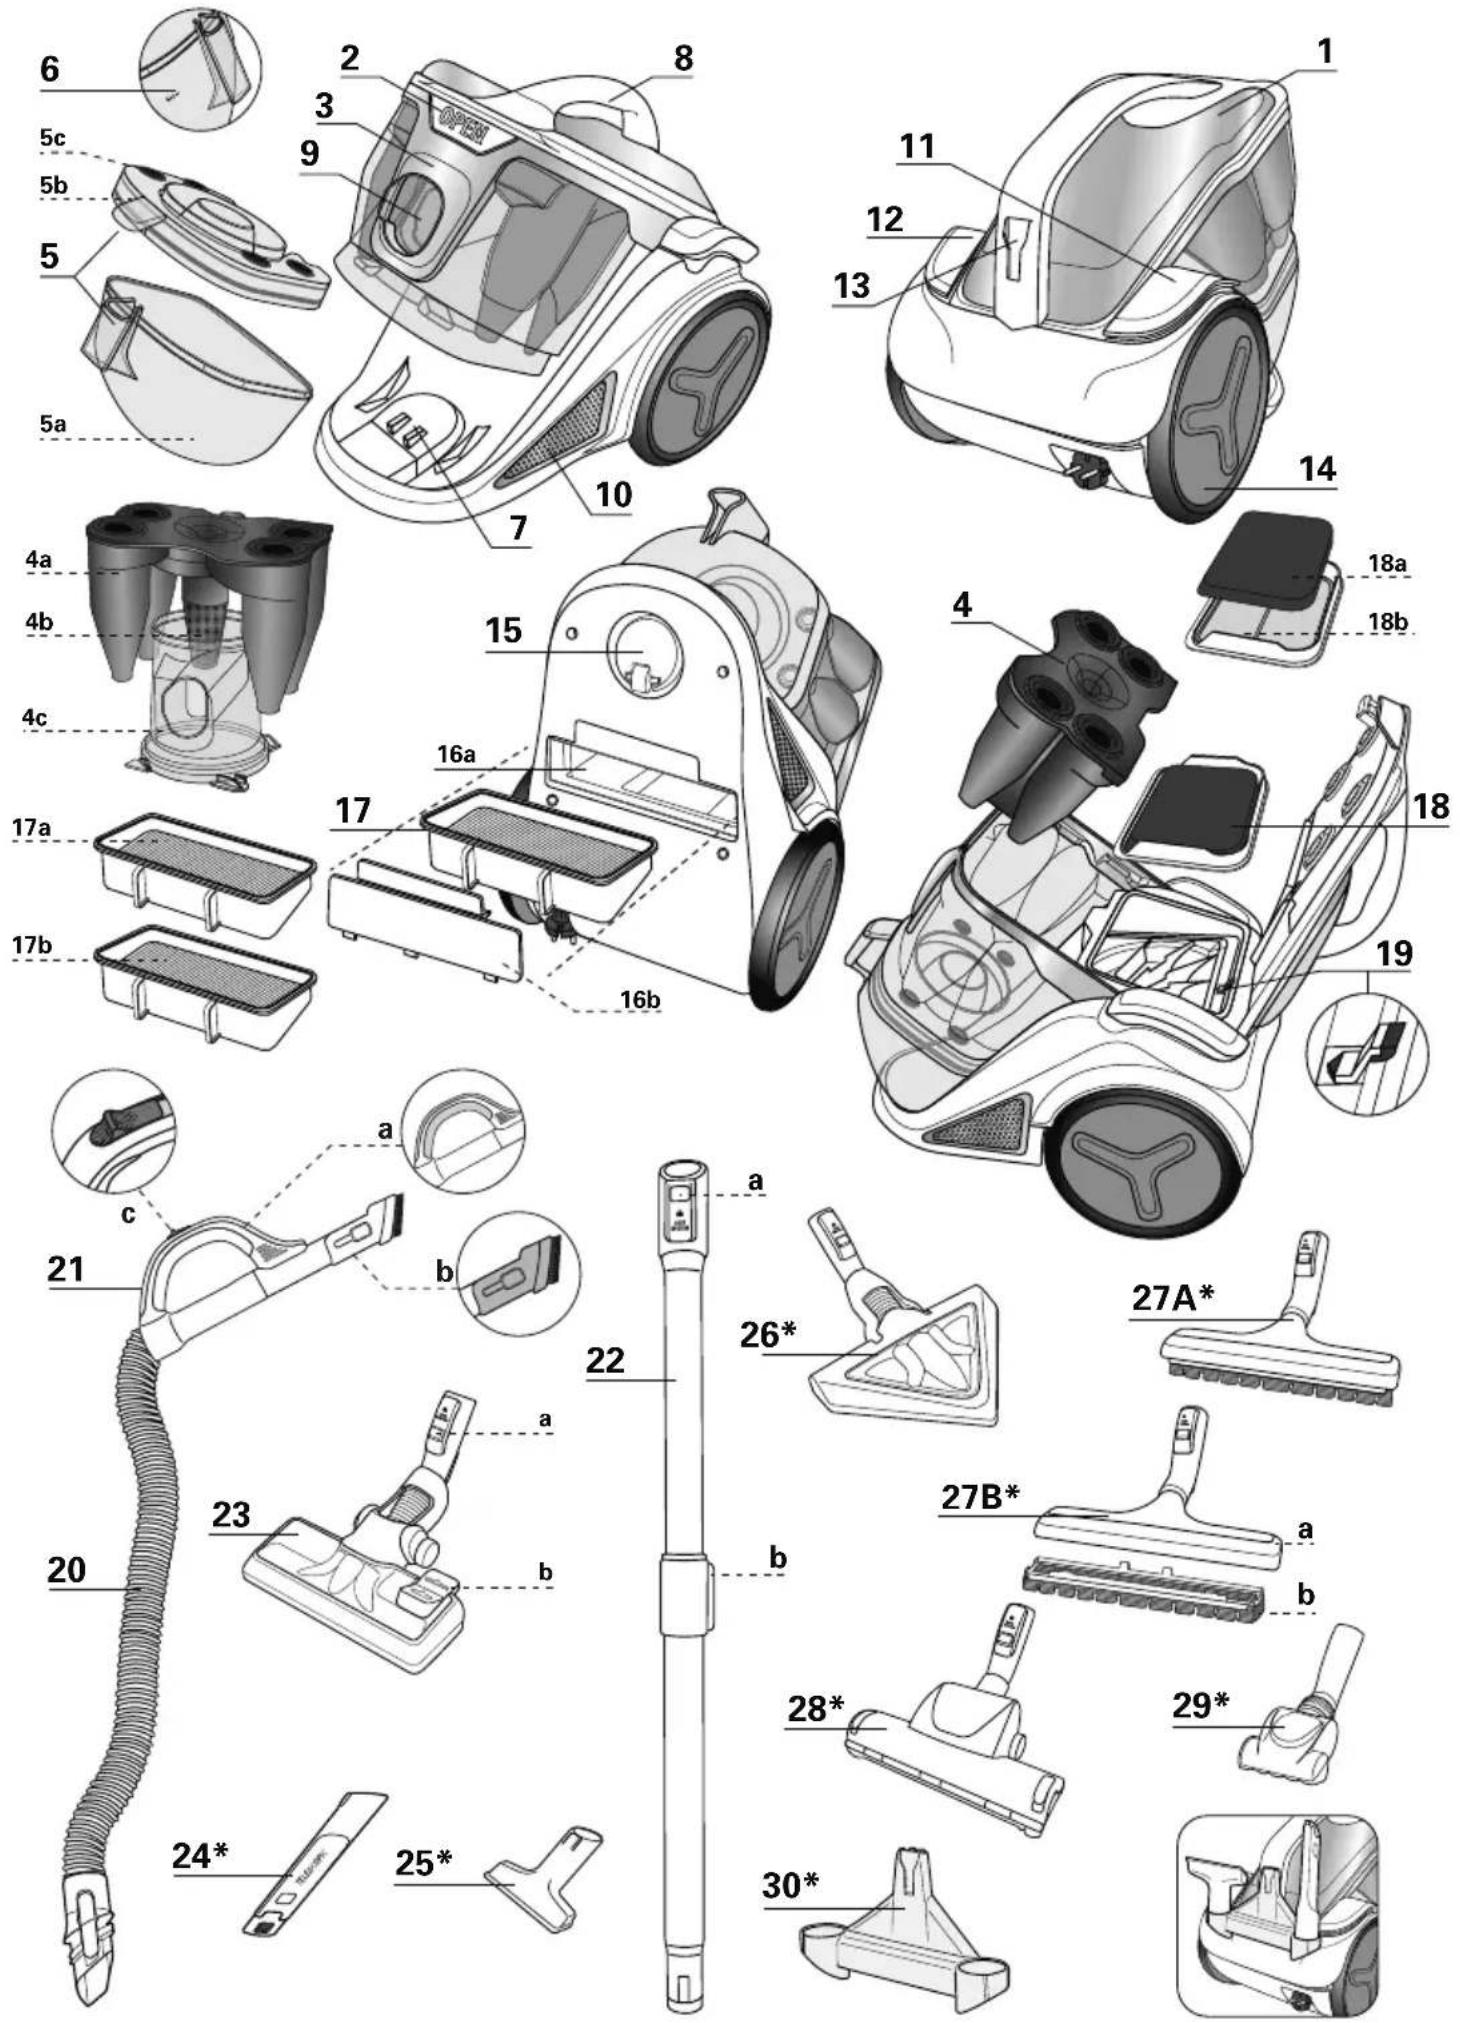
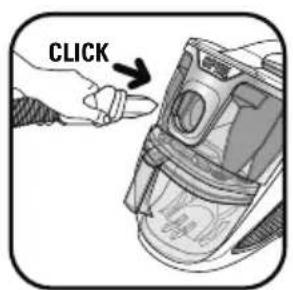
fig. 1
natural_image
Technical line drawing of a car seat assembly (no text or symbols)fig. 2

fig. 3
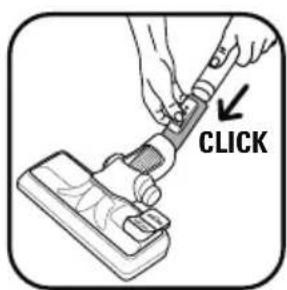
fig. 4
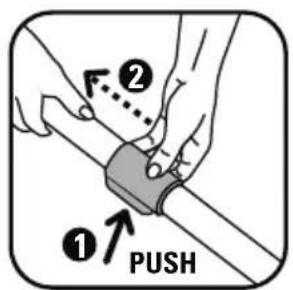
fig. 5
natural_image
Illustration of a person using a handheld vacuum cleaner (no text or symbols)fig. 6 fig. 7
natural_image
Line drawing of a robotic hand gripping a mechanical component (no text or symbols)
natural_image
Illustration of a computer monitor with an attached plug and cable, showing no text or symbolsfig. 8
natural_image
Diagram of a device handle with a scroll and directional arrow (no text or symbols)fig. 9
natural_image
Illustration of a medical device with arrows indicating force or movement (no text or symbols)fig. 10 fig. 11
natural_image
Illustration of a hand holding a small robotic device with a dashed arrow indicating motion (no text or symbols)
natural_image
Illustration of a person's legs wearing a bag and a seatbelt, with no visible text or symbolsfig. 12
natural_image
Illustration of a vacuum cleaner using a tool, no text or symbols presentfig. 13 fig. 14 fig. 15 fig. 16
natural_image
Illustration of a person using a vacuum cleaner device (no text or symbols visible)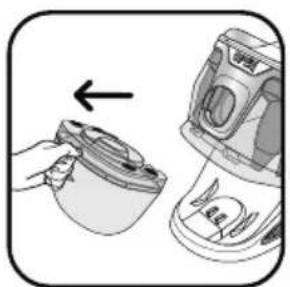
natural_image
Illustration of a hand holding a cup and a blender with a side panel (no text or symbols)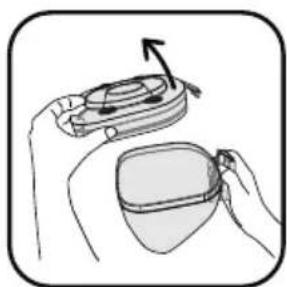
natural_image
Illustration of hands holding a device with an arrow indicating rotation (no text or symbols)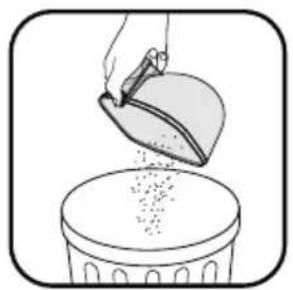
natural_image
Illustration of a hand pouring granular material into a trash bin (no text or symbols)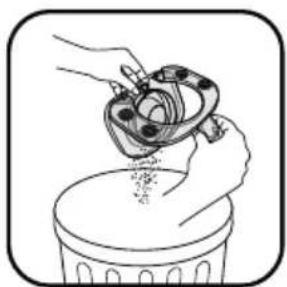
natural_image
Illustration of hands pouring liquid into a container (no text or symbols)
natural_image
Illustration of a hand holding a small object with a device, no text or symbols present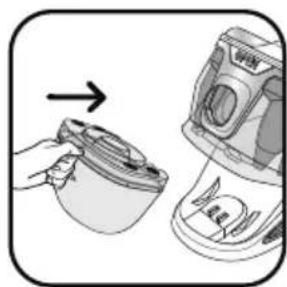
natural_image
Illustration of a hand holding a small cup and a computer monitor, with an arrow indicating transformation (no text or symbols present)fig. 19 fig. 17 fig. 18 fig. 20
natural_image
Illustration of a hand using a tool to adjust or install a mechanical component (no text or symbols visible)fig. 21

natural_image
Illustration of a hand holding a device with an arrow indicating rotation (no text or symbols present)fig. 22
natural_image
Diagram of a car interior showing seat, dashboard, and steering wheel (no text or symbols)fig. 23
[Non-Text]

natural_image
Diagram of a car interior showing seatbelt, dashboard, and rearview door (no text or symbols)fig. 25 fig. 26 fig. 27 fig. 28
natural_image
Illustration of a hand holding a device with a magnified inset showing time and duration (no text or symbols)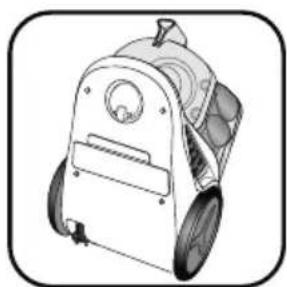
natural_image
Line drawing of a backpack with wheels and a handle (no text or symbols)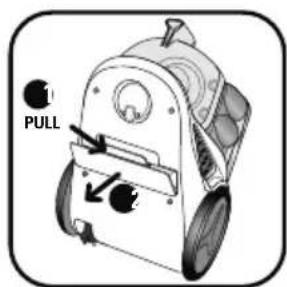
natural_image
Illustration of a small machine with a handle and base, showing mechanical components without any text or symbols.fig. 29 fig. 30 fig. 31 fig. 32
natural_image
Close-up of a hand inserting a plug into a car intake manifold (no text or symbols visible)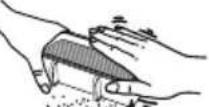

natural_image
Illustration of a mechanical device with a handle and wheels, no visible text or symbols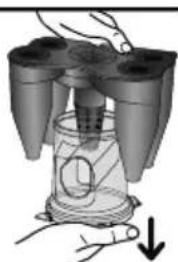
natural_image
Illustration of a hand holding a cylindrical device with a downward arrow indicating motion (no text or symbols)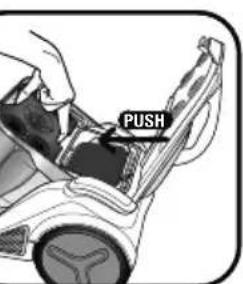
fig. 33 fig. 34 fig. 35 fig. 36
natural_image
Illustration of a hand inserting a device into a car interior (no text or symbols visible)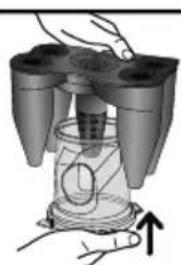
natural_image
Illustration of a hand holding three identical objects with a central container and an arrow indicating upward motion (no text or symbols)
natural_image
Illustration of a hand holding three identical objects with a central container and an arrow indicating upward motion (no text or symbols)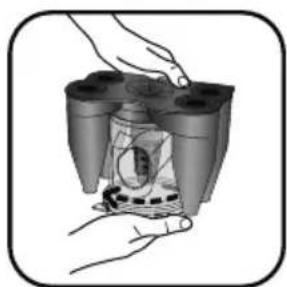
natural_image
Illustration of hands holding a device with internal components (no text or symbols visible)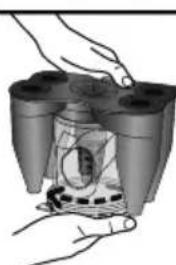
natural_image
Illustration of hands holding a device with internal components (no text or symbols visible)
natural_image
Illustration of hands holding a device with internal components (no text or symbols visible)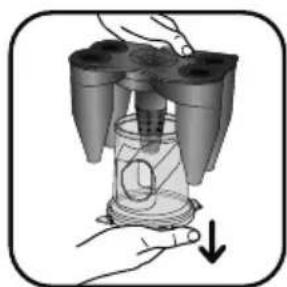
natural_image
Illustration of a hand holding a transparent container with a handle, showing internal components and a downward arrow (no text or symbols)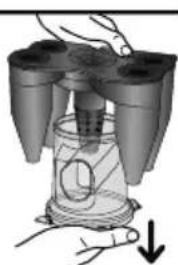
natural_image
Illustration of a hand holding three identical containers with a downward arrow indicating motion (no text or symbols)
natural_image
Illustration of a hand holding three identical containers with a downward arrow indicating motion (no text or symbols)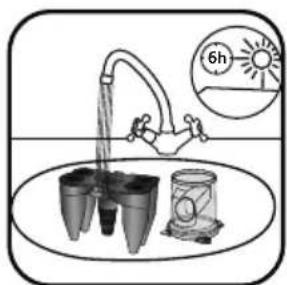
fig. 37 fig. 38 fig. 39 fig. 40
natural_image
Illustration of a hand holding a cylindrical device with internal components and an upward arrow indicating motion (no text or symbols)
natural_image
Illustration of a hand holding three identical objects with a central container and an arrow indicating upward motion (no text or symbols)
natural_image
Illustration of a hand holding three identical objects with a central container and an arrow indicating upward motion (no text or symbols)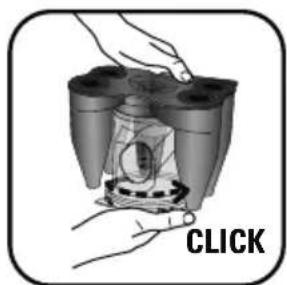
natural_image
Illustration of a hand holding a device with a button labeled 'CLICK' (no other text or symbols)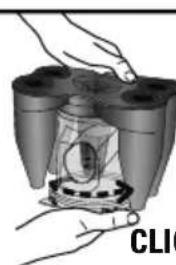
natural_image
Illustration of a hand holding a device with a highlighted internal component (no text or symbols visible)
natural_image
Illustration of a hand holding a device with a highlighted internal component (no text or symbols visible)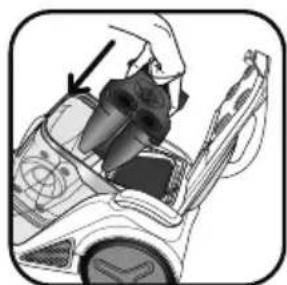
natural_image
Mechanical assembly diagram showing a hand inserting a component into a car body (no text or symbols visible)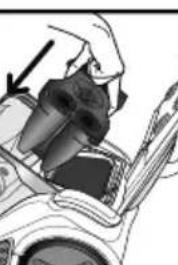
natural_image
Mechanical assembly diagram showing a piston and wheel assembly (no text or labels)
natural_image
Mechanical assembly diagram showing a piston and wheel assembly (no text or labels)FRANÇAIS Page 2 - 7
ENGLISH Page 8 - 13
한국어......페이지 14-19
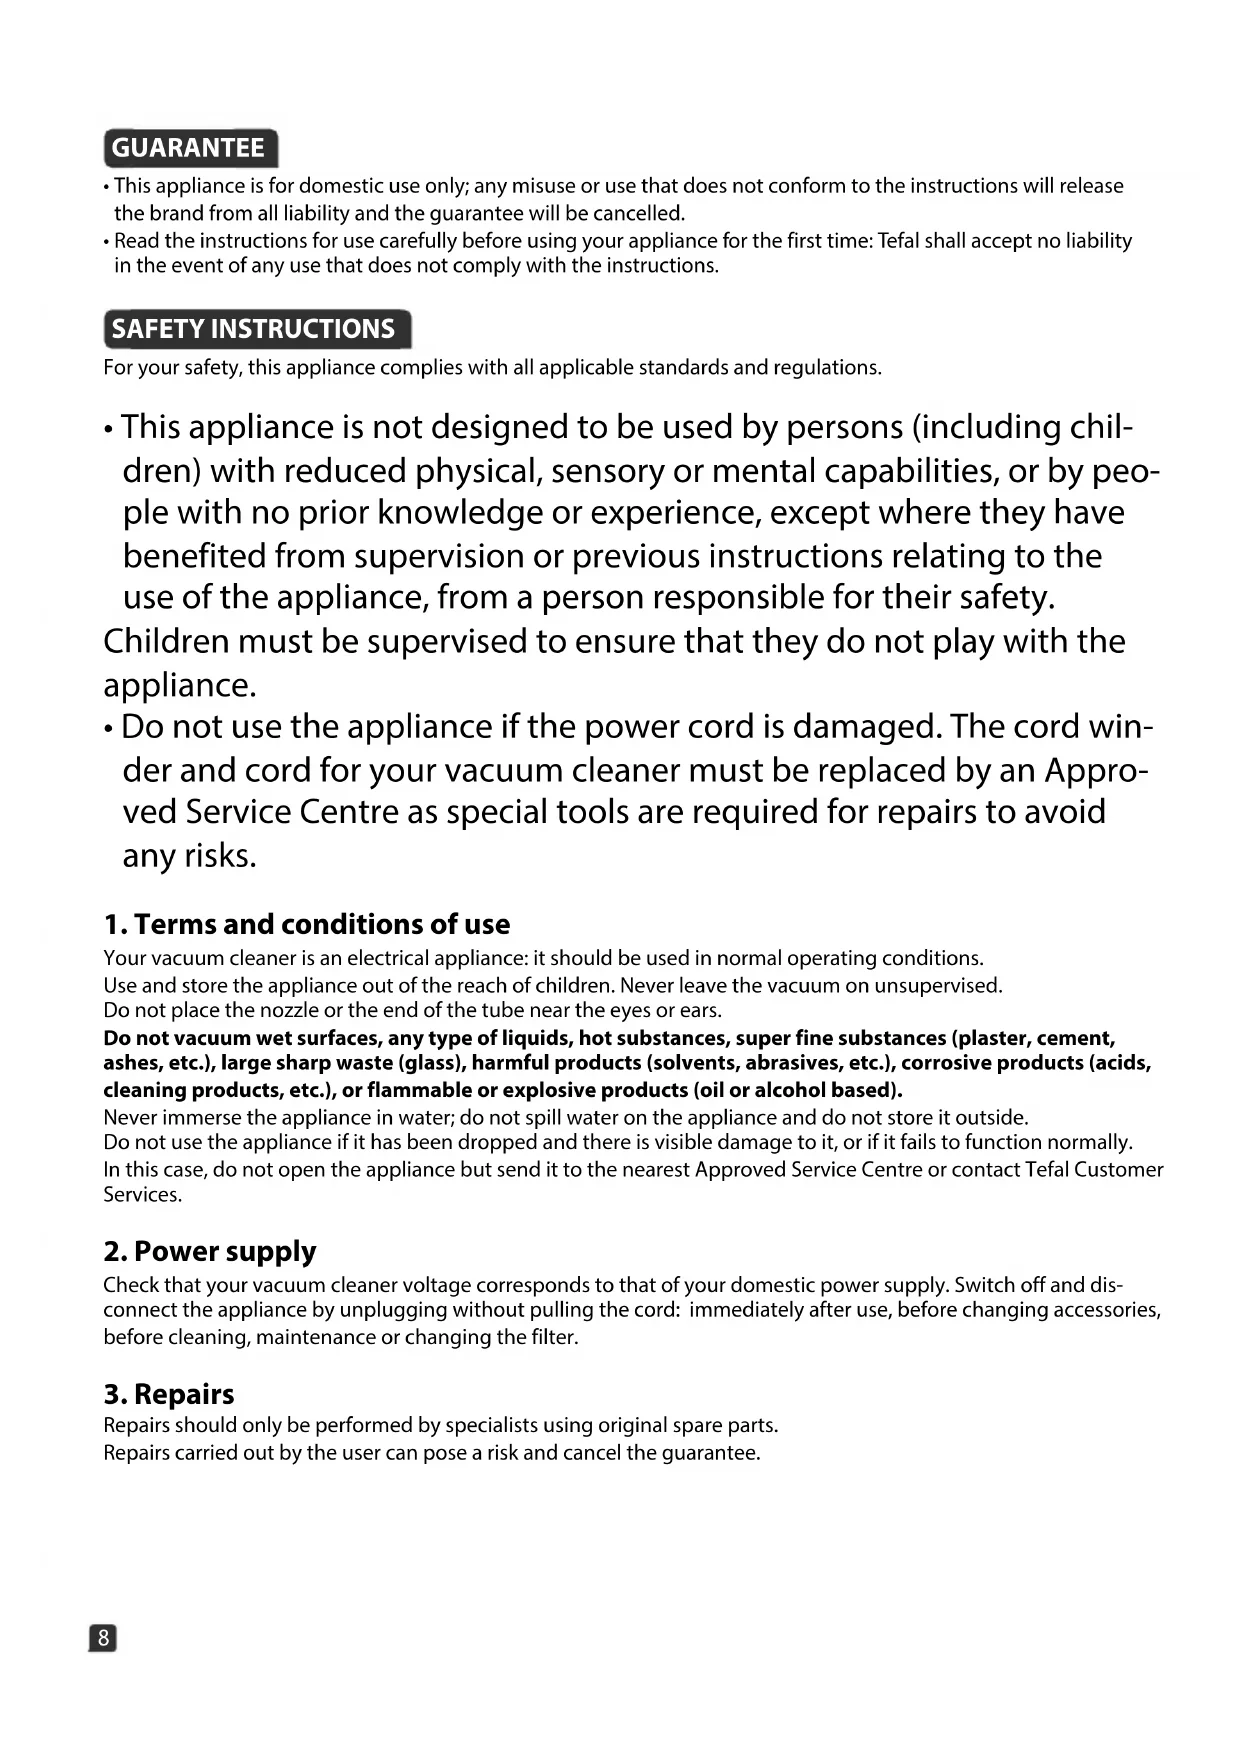
- This appliance is for domestic use only; any misuse or use that does not conform to the instructions will release the brand from all liability and the guarantee will be cancelled.
- Read the instructions for use carefully before using your appliance for the first time: Tefal shall accept no liability in the event of any use that does not comply with the instructions.
SAFETY INSTRUCTIONS
For your safety, this appliance complies with all applicable standards and regulations.
- This appliance is not designed to be used by persons (including children) with reduced physical, sensory or mental capabilities, or by people with no prior knowledge or experience, except where they have benefited from supervision or previous instructions relating to the use of the appliance, from a person responsible for their safety.
Children must be supervised to ensure that they do not play with the appliance.
- Do not use the appliance if the power cord is damaged. The cord winder and cord for your vacuum cleaner must be replaced by an Approved Service Centre as special tools are required for repairs to avoid any risks.
1. Terms and conditions of use
Your vacuum cleaner is an electrical appliance: it should be used in normal operating conditions.
Use and store the appliance out of the reach of children. Never leave the vacuum on unsupervised.
Do not place the nozzle or the end of the tube near the eyes or ears.
Do not vacuum wet surfaces, any type of liquids, hot substances, super fine substances (plaster, cement, ashes, etc.), large sharp waste (glass), harmful products (solvents, abrasives, etc.), corrosive products (acids, cleaning products, etc.), or flammable or explosive products (oil or alcohol based).
Never immerse the appliance in water; do not spill water on the appliance and do not store it outside.
Do not use the appliance if it has been dropped and there is visible damage to it, or if it fails to function normally.
In this case, do not open the appliance but send it to the nearest Approved Service Centre or contact Tefal Customer Services.
2. Power supply
Check that your vacuum cleaner voltage corresponds to that of your domestic power supply. Switch off and disconnect the appliance by unplugging without pulling the cord: immediately after use, before changing accessories, before cleaning, maintenance or changing the filter.
3. Repairs
Repairs should only be performed by specialists using original spare parts.
Repairs carried out by the user can pose a risk and cancel the guarantee.
DESCRIPTION
1 Cover
2 Cover release button
3 Front cover
4 Air/dust separation system
a - Cone separator
b - Air/dust separation grille
c - Separation compartment
5 Dust compartment
a - Main compartment
b - Fine dust compartment
c - Dust compartment seals
6 Maximum fill level for dust compartment
7 Dust compartment housing
8 Carrying handle
9 Suction inlet
10 Air outlet grille
11 ON/OFF button
12 Power cord wind button
13 Parking positions
14 Wheels
15 Multi-direction wheel
16 a - HEPA filter housing
b - HEPA filter access hatch
17 HEPA Filter, cccording to model :
a - HEPA* Filter (ref RS-RT3846)
b - HEPA* washable filter (ref RS-RT3733)
18 Filtration cassette (ref RS-RT3732)
a - Black foam filter
b - Microfilter
19 Filtration cassette detection system (18)
Accessories
20 Flexible hose with power nozzle ERGO COMFORT (21)
21 a - ERGO COMFORT ergonomic nozzle
b - Integrated brush (EASY BRUSH)
c - Manual power switch (POWER CONTROL)
22 ERGO COMFORT metal telescopic tube
a - Nozzle/tube locking system (LOCK SYSTEM)
b - Tube adjustment button
23 ERGO COMFORT multi-surface nozzle
a - Nozzle/tube locking system (LOCK SYSTEM)
b - 2-position button: brush retracted for rugs and arpets/brush released for parquet and smooth floors
24 Telescopic crevice nozzle*
25 Upholstery nozzle*
26 Delta parquet nozzle*
27A Rectangular parquet nozzle*
27B Nozzle with removable brush*
a - use on smooth surfaces with crevices
b - use on parquet
28 Turbo-brush*
29 Mini turbo-brush*
30 Accessory support*
USING FOR THE FIRST TIME
1. Unpacking
Unpack your appliance and remove any labels, keep your guarantee form and read the instructions carefully before using your appliance for the first time.
2. Recommendations and precautions
Unwind the power cord completely before each use. Do not jam it and do not allow it to rub against sharp edges. If you are using an electrical extension, check that it works properly and that it is suited to the power of your vacuum cleaner. Do not unplug the appliance by pulling on the power cord.
Do not move the vacuum cleaner by pulling on the power cord, the appliance must be moved using its carrying handle.
Do not use the power cord or the hose to lift the appliance.
Switch off and unplug your vacuum cleaner after each use. Always switch off and unplug your vacuum cleaner before maintenance or cleaning.
Your vacuum cleaner is fitted with a safety appliance which prevents the motor from overheating. In certain cases (when used on chairs, sofas, etc.) the safety appliance may be tripped and the appliance may make an unusual noise that is not serious. Only use original Tefal accessories and filters.
Check that all the filters are in place.
Do not operate your vacuum cleaner without the filtration system fitted (foam, microfilter and filter).
Never place the foam and microfilter in the appliance unless they are completely dry.
If you have any difficulties in finding accessories or filters for this vacuum cleaner, contact the Tefal Customer Service.
UTILISATION
1. Fitting the elements onto the appliance
Clip the end of the hose to the suction inlet located at the front of the appliance (fig.1). To remove, unclip the end using the clip and remove.
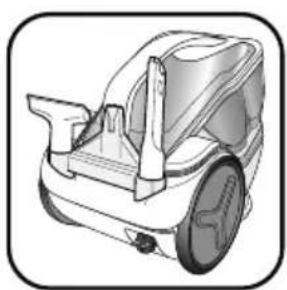
Fix the accessory support to the notch in the parking position located at the back of the vacuum cleaner (fig.2) and store the accessories on top.
IMPORTANT! If the accessory support\* (30) is positioned at the rear of the appliance, you must remove it so that the vacuum cleaner's lid (1) can be opened.
- Fit the metal telescopic tube to the end of the nozzle until you hear a click indicating that it is locked (fig.3). To remove, press the tube lock button and remove.
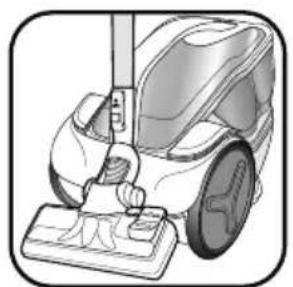
- Fit the multi-surface nozzle (23) to the end of the metal telescopic tube until you hear a click indicating that it is locked (fig.4). To remove, press the nozzle lock button and remove.
- Adjust the metal telescopic tube to the desired length using the telescopic system (fig.5).
Fit the corresponding accessory to the end of the metal telescopic tube or the nozzle:
- For rugs and carpets: use the multi-surface nozzle in the retracted brush nozzle position or the Turbo-brush* (fibres and animal hairs).
- For smooth surfaces with crevices (such as tiled floors): use the all-surface nozzle (23) with the brush extended or, for better results, use the smooth surface nozzle* (27B.a*) without the removable brush.
- For fragile surfaces, such as parquet, it is recommended to use the standard parquet nozzle (26* or 27A*) or the nozzle with line of bristles (27B.b*).
- For corners and hard to reach spots: use the telescopic crevice nozzle*.
- For upholstery and delicate surfaces: use the brush with the nozzle (EASY BRUSH) or the upholstery nozzle*.
IMPORTANT: always switch off and disconnect your vacuum cleaner before changing the accessories.
ERGONOMIC RECOMMENDATIONS
ERGO COMFORT range
Ergonomic, the ERGO COMFORT range has been designed to facilitate and improve user comfort when vacuuming.
To prevent bending over and to ensure upright posture, make sure to:
-
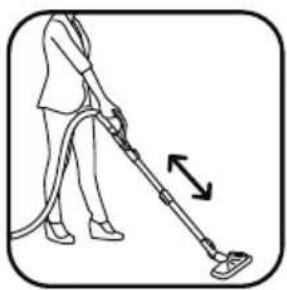
Adjust the length of the ERGO COMFORT metal telescopic tube to your body (fig.6).
-
Place your second hand on the front of the ERGO COMFORT nozzle handle (fig.7).
2. Plugging in the power cord and switching on the appliance
Unwind the power cord completely, plug in your vacuum cleaner and press the ON/OFF button (fig. 8).
ATTENTION: do not operate your vacuum cleaner without the filtration system fitted (foam, microfilter and filter).
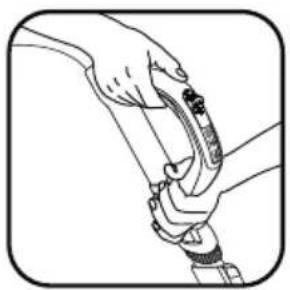
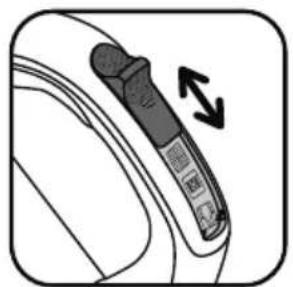
Set the suction power using the manual power switch on the power nozzle (fig.9):
- Position (MIN) for vacuuming delicate fabrics (curtains, textiles).
- Position (Medium) for daily vacuuming of all types of surfaces with low levels of soiling.
- Position (MAX) for vacuuming hard floors (tiled floors, parquet, etc.) and rugs and carpets in the case of high levels of soiling.
3 • Storing and transporting the appliance
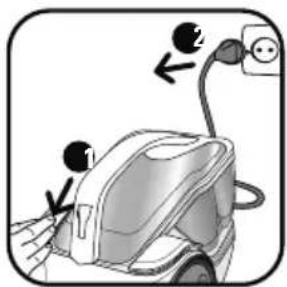
After use, switch off your vacuum cleaner by pressing the ON/OFF button and unplug it (fig. 10).
Wind the power cord by pressing the power cord wind button (fig. 11).
It is easy to carry your vacuum cleaner using the handle (8).
Do not carry your appliance using the dust compartment handle (fig.12).
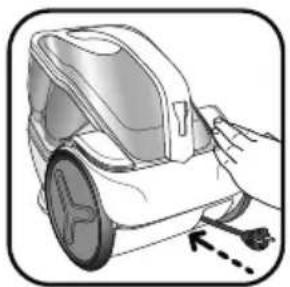
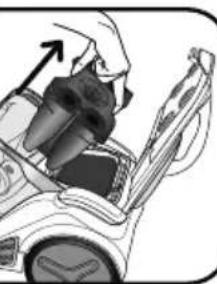
When storing your vacuum cleaner, place the tube in its storage compartment at the back of the appliance (fig.13).
You do not need to remove the accessory support (30) to store the accessory range (Fig.14).
CLEANING AND MAINTENANCE
The air we breathe contains particles that can be allergenic: larva and dust mite faeces, mould, pollen, smoke and animal waste (hair, skin, saliva, urine), etc.
The finest particles can penetrate deep inside the respiratory system or can cause inflammation and affect the entire respiratory system.
(H)EPA ([High] Efficiency Particulate Air Filter) filters retain the finest particles.
Thanks to the (H)EPA filter, the air released into the room is cleaner than the air suctioned.
IMPORTANT: always switch off and unplug your vacuum cleaner before cleaning or servicing. Check and clean your vacuum cleaner and the different filters regularly.
IMPORTANT: do not operate your vacuum cleaner without the filtration system fitted (foam, microfilter and filter).
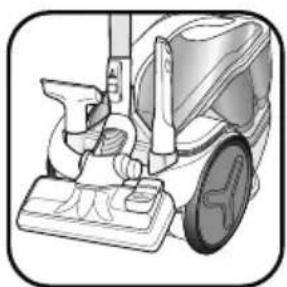
1 • Emptying the dust compartment (5)
After each use, empty the dust compartment as follows:
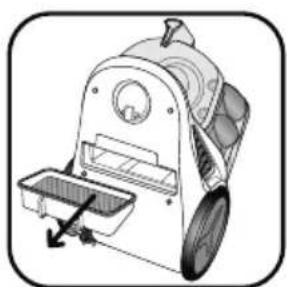
- Take the dust compartment by the handle and remove it (fig.15).
- Separate the fine dust compartment (5b) from the main compartment (5a) (Fig.16).
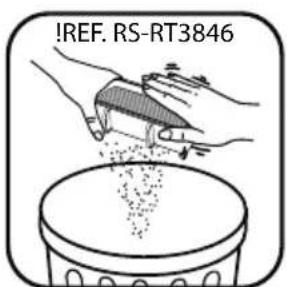
- Empty the main compartment over a dustbin (Fig.17) then empty the fine dust compartment (5b) (Fig.18).
- Clean the compartment seals using a cloth.
- Reposition the fine dust compartment on the main compartment (Fig.19) then put the dust compartment back into place (fig.20).
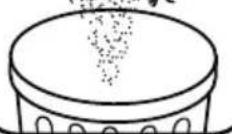
IMPORTANT: do not use the vacuum cleaner once the maximum level (6) is reached on the dust compartment.
2 • Cleaning the black foam filter (18a)
IMPORTANT: clean the black foam filter every 6 months or when the suction is no longer satisfactory.
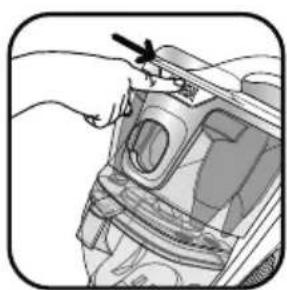
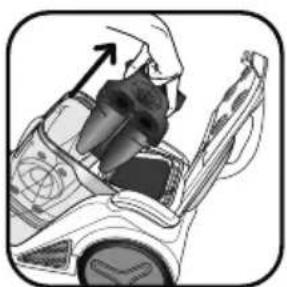
- Press the cover release button (fig.21). Tip the cover backwards (fig.22).
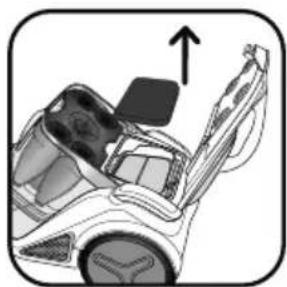
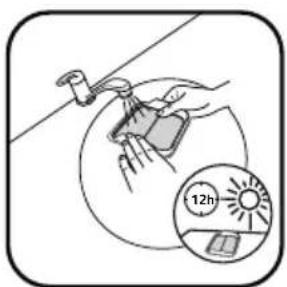
- Remove the black foam filter (fig.23) then wash and squeeze it (fig.24). Leave to dry for at least 12 hours before refitting.
ATTENTION: let the black foam filter dry completely and make sure it is completely dry before placing it back in the appliance.
- Reposition the black foam filter and close the cover.
3 • Cleaning the microfilter (18b)
IMPORTANT: clean the microfilter every 6 months.
- Press the cover release button (fig.21). Tip the cover backwards (fig.22).
- Remove the filtration cassette (18) then separate the black foam filter (18a) from the microfilter (18b) (fig.25).
- Wash the microfilter (fig.26). Leave to dry for at least 12 hours before refitting.
ATTENTION: let the microfilter dry completely and make sure that it is well dry before refitting on the appliance.
- Reposition the black foam filter and close the cover.
ATTENTION: your appliance is equipped with a safety system (19) for detecting the filtration cassette: the cover cannot be closed if the filtration cassette is not fitted (18a+18b).
The filtration cassette ref. RS-RT3732 (18a+18b) is available from shops or at Approved Service Centres.
IMPORTANT: if the appliance does not perform as normal after cleaning the black foam filter and microfilter on your vacuum cleaner, clean the HEPA filter.
4 • Cleaning the HEPA filter\* ref RS-RT3846\* (17a)
- If necessary, remove the accessory support (30)* then place the vacuum cleaner in the vertical position (Fig.27).
- Open the HEPA filter hatch (Fig.28).
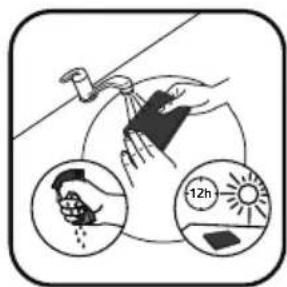
- Remove the HEPA filter from its housing (fig.29). Clean the HEPA filter by gently patting it over a dustbin (fig. 30).
- Reposition it in its housing (Fig.32).
- Reposition the hatch until you hear a click indicating that it is closed.
IMPORTANT: replace the HEPA filter every 12 months. The HEPA filter is available from your dealer or in Approved Service Centres.
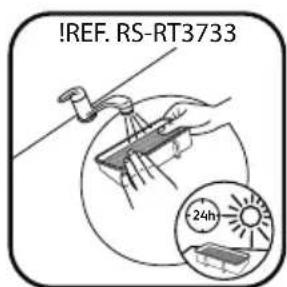
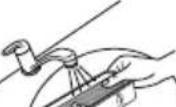
5 • Wash the washable HEPA filter \* ref. RS-RT3733\* (17b)
Important!: only the HEPA filter ref RS-RT3733* should be washed.
- If necessary remove the accessory support (30)* then place the vacuum cleaner in the vertical position (Fig.27).
- Open the HEPA filter access hatch (Fig.28)
- Remove the HEPA filter from its compartment (fig.29).
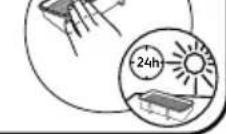
- Tap the HEPA filter whilst holding it over a dustbin (Fig.30), then pass it under some running water and leave it to dry for at least 24 hours (Fig.31) (make sure that the filter is well and truly dry before putting it back in place).
- Put the HEPA filter back in its compartment (Fig.32). Push the hatch back until you hear a locking click.
The washable HEPA filter* ref RS-RT3733 is available at shops or at Approved Service Centres.
6 • Cleaning the air/dust separator system (4)
- Remove the hose from the vacuum cleaner.
- Open the vacuum cleaner cover (fig. 21-22).
- Press the separator release button (fig.33) then remove from the separation system (fig.34).
- Remove the separation compartment (4c) by turning slightly to the left (fig.35) then separate the two components (fig.36).
- Wash the components (4a+b and 4c) in clear water (fig. 37) and leave to dry for 6 hours.
- Refit the filter system components (4):
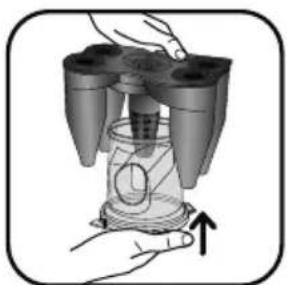
- Reposition the separation compartment (4c) on the separation system (4a+b) (fig. 38) by turning slightly until you hear the click indicating that it is closed (fig. 39).
- Then reposition the entire separation system (4) in the appliance (fig. 40) and close the cover.
7 • Cleaning your vacuum cleaner
- Wipe the body of the vacuum cleaner and accessories with a soft damp cloth, then dry with a dry cloth.
- Wash the dust compartment (5a+ 5b) under clear or soapy water, then dry with a dry cloth.
IMPORTANT: do not use aggressive or abrasive detergents. The transparency of the dust compartment and/or front cover and/or cover may change over time; this does not affect the appliance performance.
ATTENTION: do not wash the vacuum cleaner cover under clear water. Clean using a soft wet cloth.
TROUBLESHOOTING
IMPORTANT: stop your vacuum cleaner immediately by pressing the Start/Stop button as soon as it stops performing as normal and before performing any checks.
If your vacuum cleaner will not start
- The appliance is not powered. Check that the appliance is plugged in correctly.
If your vacuum cleaner has no suction power
- An accessory, the tube, hose, separator (4a), air/dust separation grille (4b) or the separation compartment (4c) is blocked: unblock them.
- Clean the HEPA filter ref RS-RT3846* (17a) as indicated in the procedure and put it back in its compartment or wash the washable HEPA filter ref RS-RT3733* (17b) following the procedure shown and put it back in its compartment. If the HEPA filter is damaged, replace it.
- Filtration cassette (ref RS-RT3732): clean the black foam filter (18a) and the micro filter (18b) as indicated in the procedure.
If your vacuum cleaner has less suction power, is noisy or makes a whistling noise
- An accessory, the tube, hose, separator (4a), air/dust separation grille (4b) or the separation compartment (4c) is partially blocked: unblock them.
- The dust compartment is full: empty and wash it.
- The vacuum cleaner cover is not fitted correctly: close properly.
- The dust compartment is not correctly fitted: fit it correctly.
- The nozzle's manual power switch is open: close it.
If the cone separator (4a) fills up
- Dust accumulates in the separation compartment (4c): Check that the pipe between the separator (4c) and the dust compartment (5) is not blocked. Check that nothing is obstructing the dust compartment inlets.
- The dust compartment inlets are blocked: remove the dust compartment and empty it. Clean the dust compartment seals.
If it is difficult to move the nozzle
- Open the manual power switch on the nozzle.
If the power cord does not wind completely
- The cord slows down as it winds up: pull the power cord out again and press the power cord wind button.
In the event of a persistent problem, take your vacuum cleaner to your nearest Tefal Approved Service Centre or contact Tefal Customer Services.
보증
b - Takip ng HEPA filter
17 HEPA Filter, batay sa modelo:
a - HEPA* Filter (ref RS-RT3846)
b - Nahuhugasang HEPA* filter (ref RS-RT3733)
18 Filtration cassette (ref RS-RT3732)
a - Filter na itim na foam
b - Microfilter
19 Filtration cassette detection system (18)
Mga Accessory
20 Flexible na hose na may power nozzle ERGO COMFORT (21)
21 a - ERGO COMFORT ergonomic nozzle
b - Nakakabit na brush (EASY BRUSH)
c - Manual power switch (POWER CONTROL)
22 ERGO COMFORT metal telescopic tube
a - Nozzle/tube locking system (LOCK SYSTEM)
b - Button para sa pag-adjust ng tube
23 ERGO COMFORT multi-surface nozzle
28 Turbo-brush*
29 Mini turbo-brush*
30 Accessory support*
PAGGAMIT PARA SA UNANG
1. Pag-aalis sa pagkakabalot
Huwag gamitin ang iyong vacuum cleaner nang walang nakakabit na filtration system (foam, microfilter at filter).
PAUNAWA: huwag gamitin ang iyong vacuum cleaner nang walang nakakabit na filtration system (foam, microfilter at filter).
5 • Linisin ang nahuhugasang HEPA filter \* ref. RS-RT3733\* (17b)
- SAFETY INSTRUCTIONS
- Terms and conditions of use
- Power supply
- Repairs
- DESCRIPTION
- Accessories
- USING FOR THE FIRST TIME
- Unpacking
- Recommendations and precautions
- UTILISATION
- Fitting the elements onto the appliance
- IMPORTANT! If the accessory support\* (30) is positioned at the rear of the appliance, you must remove it so that the vacuum cleaner's lid (1) can be opened.
- ERGONOMIC RECOMMENDATIONS
- ERGO COMFORT range
- Plugging in the power cord and switching on the appliance
- ATTENTION: do not operate your vacuum cleaner without the filtration system fitted (foam, microfilter and filter).
- • Storing and transporting the appliance
- CLEANING AND MAINTENANCE
- • Emptying the dust compartment (5)
- • Cleaning the black foam filter (18a)
- • Cleaning the microfilter (18b)
- • Cleaning the HEPA filter\* ref RS-RT3846\* (17a)
- • Wash the washable HEPA filter \* ref. RS-RT3733\* (17b)
- • Cleaning the air/dust separator system (4)
- • Cleaning your vacuum cleaner
- TROUBLESHOOTING
- If your vacuum cleaner will not start
- If your vacuum cleaner has no suction power
- If your vacuum cleaner has less suction power, is noisy or makes a whistling noise
- If the cone separator (4a) fills up
- If it is difficult to move the nozzle
- If the power cord does not wind completely
- 보증
- Mga Accessory
- PAGGAMIT PARA SA UNANG
- Pag-aalis sa pagkakabalot
- PAUNAWA: huwag gamitin ang iyong vacuum cleaner nang walang nakakabit na filtration system (foam, microfilter at filter).
- • Linisin ang nahuhugasang HEPA filter \* ref. RS-RT3733\* (17b)
Brand : TEFAL
Model : Compact Force TW7824
Category : Vacuum Cleaner