TX28 - Surveillance Camera TECHNAXX - Free user manual and instructions
Find the device manual for free TX28 TECHNAXX in PDF.
| Product type | Digital wireless surveillance camera |
| Brand | Technaxx |
| Model | TX28 |
| Protection rating | IP65 (waterproof) |
| Dimensions (camera) | 9.5 x 6.8 x 5.7 cm |
| Weight (camera) | 270 g |
| Dimensions (receiver) | 20.0 x 12.0 x 2.0 cm |
| Weight (receiver) | 395 g |
| Camera power supply | DC 5V / 1A |
| Receiver power supply | DC 12V / 1A |
| Transmission range | ≥ 200 m (without obstacles) |
| Night vision | Infrared (0 Lux with IR) |
| Sensor | 1/4" OV7725 CMOS |
| Resolution | 420 TVL |
| Microphone | High sensitivity built-in |
| Storage | MicroSD card up to 32 GB |
| Display | 7" TFT LCD |
| Number of channels | 4 (up to 4 cameras) |
| Motion detection | Yes, adjustable sensitivity (High/Standard/Low) |
| Recording modes | Manual, scheduled, motion triggered |
| Mobile connection | Compatible with My Secure APP (iOS/Android) |
| Cleaning | Soft, dry cloth, no solvents |
| Safety | Use supplied adapter, do not open, keep out of reach of children |
| Package contents | 1 camera, 1 receiver, cables, adapters, screws, manual |
| Warranty | 2 years |
Frequently Asked Questions - TX28 TECHNAXX
User questions about TX28 TECHNAXX
0 question about this device. Answer the ones you know or ask your own.
Ask a new question about this device
Download the instructions for your Surveillance Camera in PDF format for free! Find your manual TX28 - TECHNAXX and take your electronic device back in hand. On this page are published all the documents necessary for the use of your device. TX28 by TECHNAXX.
USER MANUAL TX28 TECHNAXX
Easy Security Camera Set TX-28
Important Hint regarding the User Manuals:
All languages of the user manual you find on the CD enclosed. Before using the device the first time, read the user manual carefully.
The manufacturer Technaxx Deutschland GmbH & Co.KG hereby declares that this device, to which this user manual belongs, complies with the essential requirements of the standards referred to the Directive RED 2014/53/EU. The Declaration of Conformity you find here: www.technaxx.de/ (in bar at the bottom "Konformitätserklärung"). Before using the device the first time, read the user manual carefully.
Service phone No. for technical support: 01805 012643 (14 cent/minute from German fixed-line and 42 cent/minute from mobile networks).
Free Email: support@technaxx.de
Keep this user manual for future reference or product sharing carefully. Do the same with the original accessories for this product. In case of warranty, please contact the dealer or the store where you bought this product. Warranty 2 years
This device has a rechargeable battery. It must be fully charged before first use. NOTE: Charge the battery of the device every 2-3 month if it is not used!
If you drill a hole in the wall, please make sure that power cables, electrical cords and/or pipelines are not damaged. When using the supplied mounting material, we do not take the liability for a professional installation. You are entirely responsible to ensure that the mounting material is suitable for the particular masonry, and that the installation is done properly. When working at higher altitudes, there is danger of falling! Therefore, use suitable safeguards.

Hints for Environment Protection: Packages materials are raw materials and can be recycled. Do not disposal old devices or batteries into the domestic waste. Cleaning: Protect the device from contamination and pollution (use a clean drapery). Avoid using rough, coarse-grained materials or solvents/aggressive cleaner. Wipe the cleaned device accurately. Distributor: Technaxx Deutschland GmbH & Co.KG, Kruppstr. 105, 60388 Frankfurt a.M., Germany
Features
- Digital wireless interference-free waterproof (IP65) camera set
100% Privacy & SD Recording - Has 4 channels, can support 4 cameras on one monitor (means simultaneous display of 4 cameras on one monitor is possible)
Transmission range ≥ 200m in open range
Infrared night vision
High sensitivity microphone
Supports MicroSD cards up to 32GB - Record function with different recording modes (manual, time-scheduled, motion-activated)
Motion Detection: Detect the moment to auto record - Mobile displayable on: iPhone / Android
- Anytime sharp picture and good sound quality
- Easy installation, Plug & Play
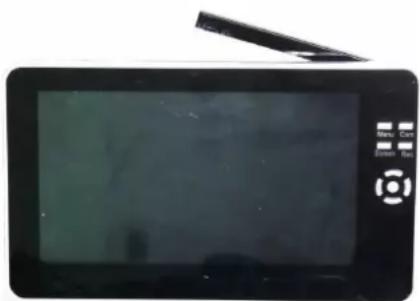
1. Front of the wireless receiver with 7" display
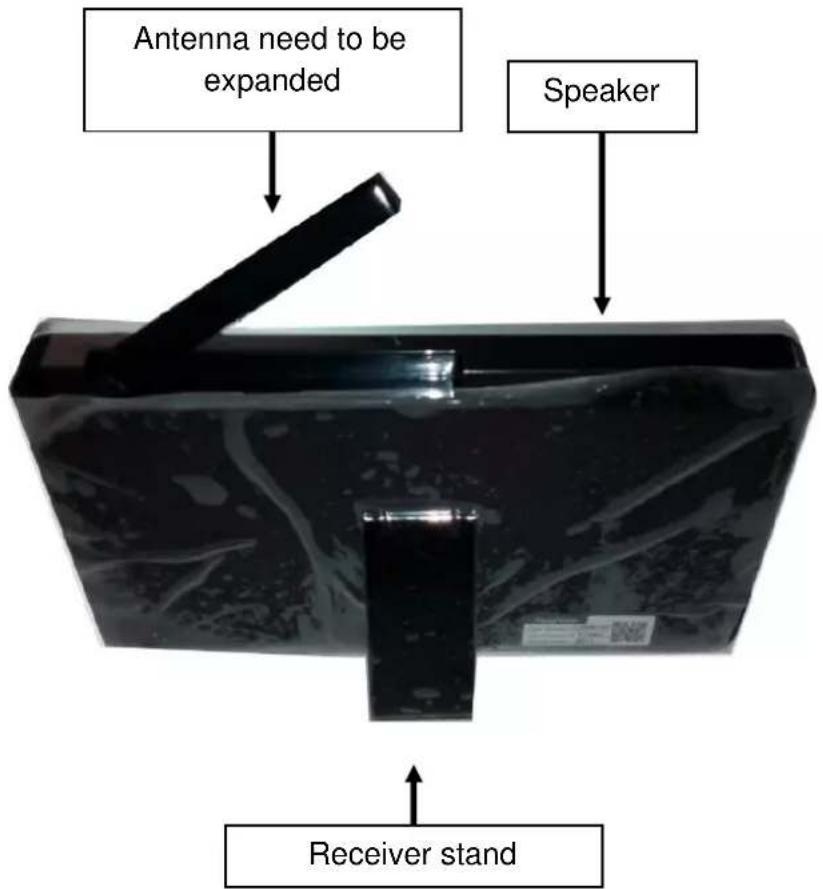
2. Side of the wireless receiver (Descriptions from up to down)
| Wireless monitor OFF / ON switch (= Power switch) | |
| TF: MicroSD memory card slot | |
| Mini USB port: Mini USB connector for wireless monitor software to update only | |
| AV-OUT port: use AV cable to connect with TV/LCD | |
| DC 12V Input Use of continuous current |
3. Rear side of the wireless receiver
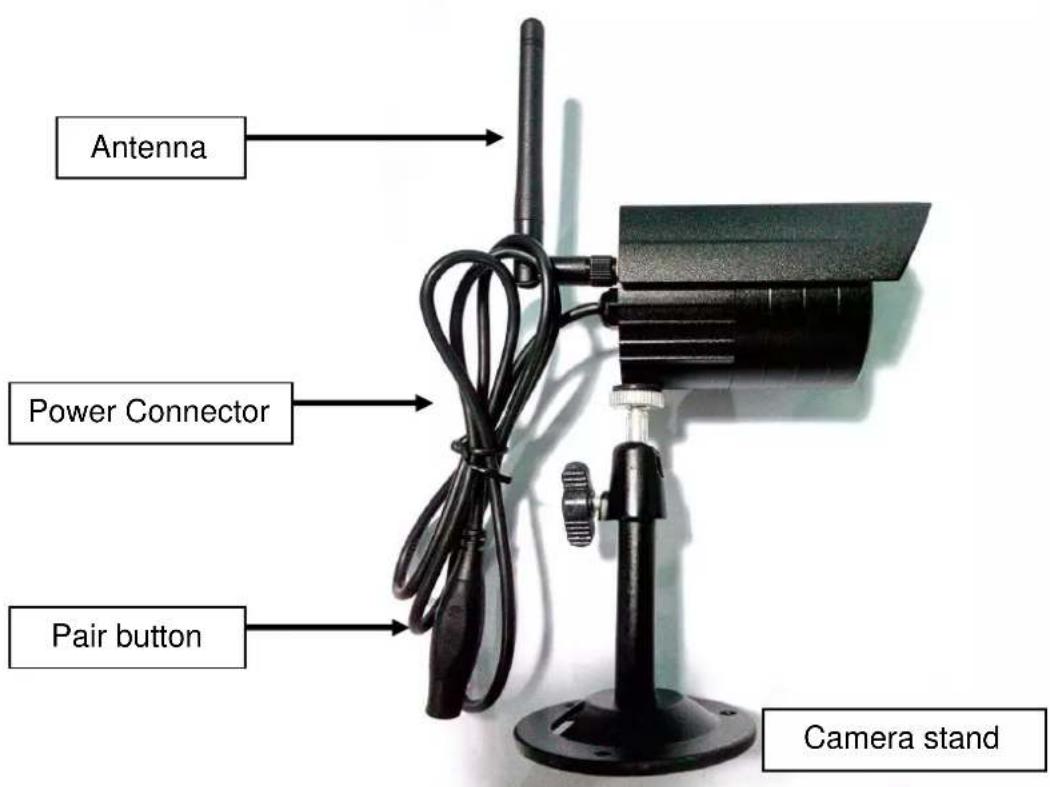
4. Side of the wireless camera (Descriptions from up to down)
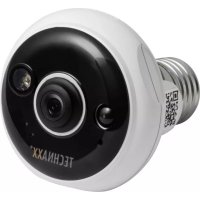
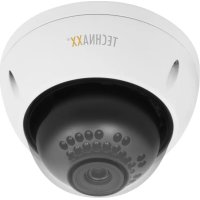
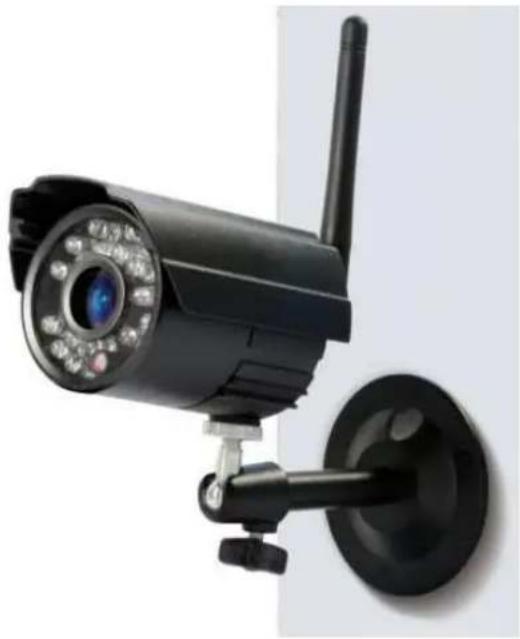
5. Front of the wireless camera with the IR night lights
6. Controlling the monitor
| Menu: Press Menu key to show Main Menu. | |
| Cam: Press Camera key to change channels. | |
| Screen: Press Screen key to show 4 video same time, press it again, video auto to show one by one, press it again to enlarge one of 4 video. | |
| Rec: Press Video Record key to record a video, press it again to stop recording. | |
| Press OK key (round key in the middle) to confirm the selection. | |
| Press UP / DOWN / LEFT / RIGHT navigation key (the keys with the arrows) to select the mode | |
| Volume (VOL+ / VOL-): To increase the Volume press on the upper button (+), to decrease the volume press on the lower button (-). |
7. Charging the receiver
Plug the Mini USB cable (included) into the Mini USB slot of the receiver. Then connect the USB port to the USB slot of a PC or an USB 12V/1A charging adapter (included). Charging time is approx. 3-4 hours. While loading, the RED LED lights continuously. When the receiver is fully loaded, the RED LED turns off.
8. MAIN MENU
Press the Menu key to display the main menu, and the below picture is shown on the wireless digital video receiver display with the different modes you can select.

Playback - Record - Select Camera - Contrast/Brightness Recording schedule - Motion Detection - Settings - Exit
Connect the 5VDC power adapter to the camera, connect the 12V/1A DC power adapter to the receiver and turn on the receiver (has a built-in battery). Press "Pair Code" at the wireless camera power connector to pair the camera to the receiver. When the connection is established you see in the background of the Main Menu the motion the camera is focused on.
8.1.Playback Mode
| Press Menu key to display the main menu. Press LEFT or RIGHT navigation key to select the “Playback Mode”. Press OK key to enter it. Attention:Playback mode can be selected only if a MicroSD card is inserted! If files are saved in different folders, select the file you want to playback. | |
| Press OK key to enter and then select the file to play. Press Menu key again to Exit. |
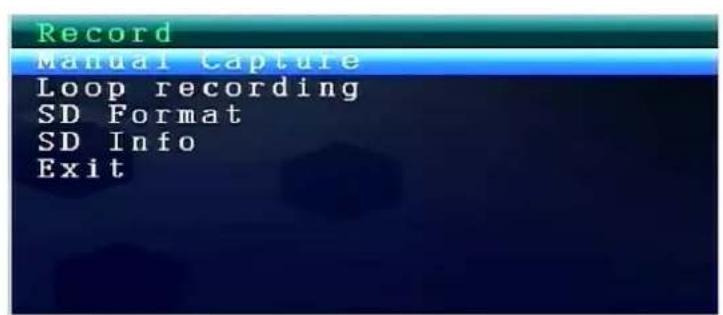
8.2. Record Mode
| Press Menu key to display the main menu. Press LEFT or RIGHT navigation key to select the “Record Mode”. Press OK key to enter it. Then below settings are shown: |
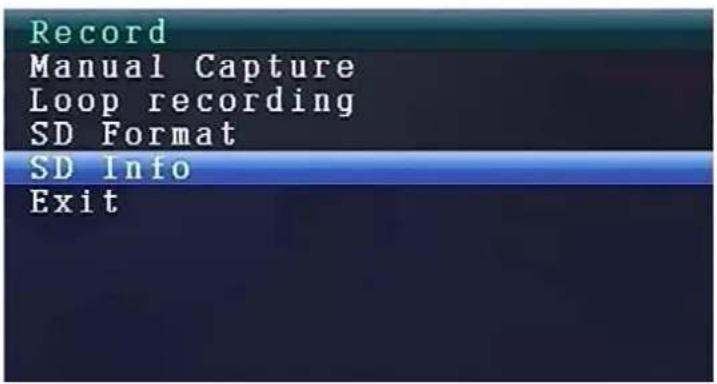
Manual Capture
Press UP or Down navigation key to select "Manual Capture".
Press OK key to confirm.
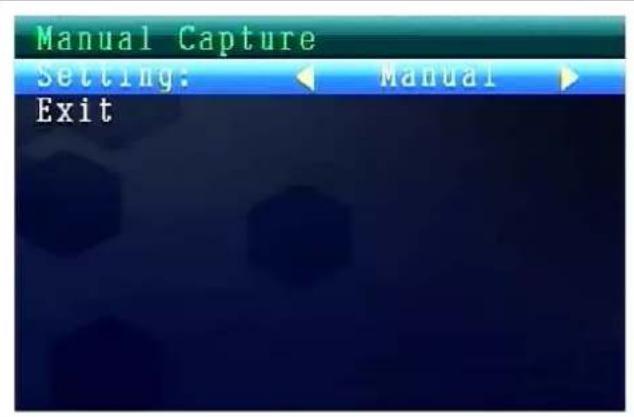
Manual Capture
Now you see different methods to record. Use the LEFT or RIGHT navigation key to select: Manual, Take 1 photo, Take 3 photos, Take 5 photos, 5s video, 10s video, 30s video, 1 Min video. Press OK button to confirm the selection. Select Exit with the UP/DOWN navigation key to go back to the Record Mode.
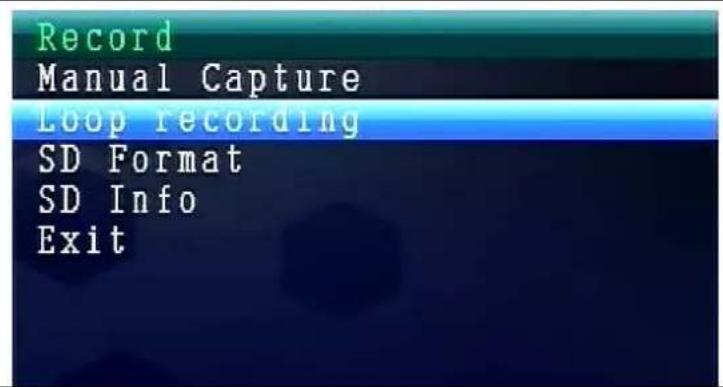
Loop recording
Press UP or Down navigation key to select "Loop Recording".
Press OK key to confirm.
Loop recording
Use the LEFT or RIGHT navigation key to select ON or OFF.
Press OK button to confirm the selection.

Select Exit with the UP/DOWN navigation key to go back to the Record Mode.
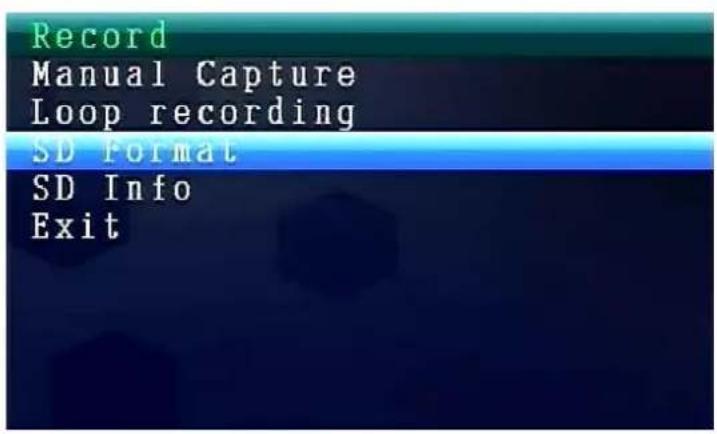
SD Format
Press UP or Down navigation key to select "SD Format". Press OK key to confirm.
The Monitor has a MicroSD card slot for saving recorded files. The installed software supports cards up to 32GB. With 32GB it is possible to record for up to 7 days continuously in "low" quality.
SD Format
Use the UP or DOWN navigation key to select NO or YES. If select YES, it will format all files on MicroSD card. Press OK button to confirm the selection.

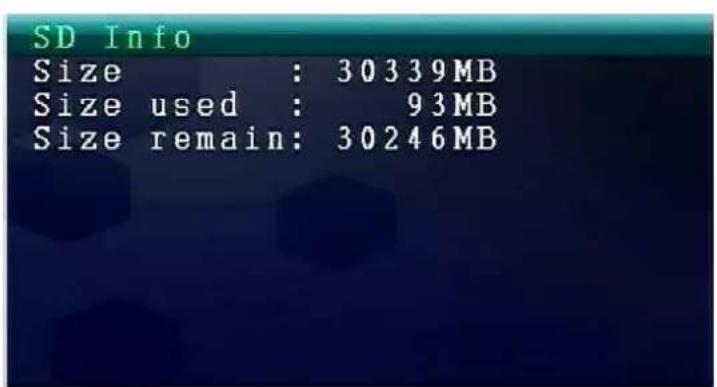
SD Info
Press UP or Down navigation key to select "SD Info".
Press OK key to confirm.
SD Info
Then the SD Information is shown.
Press OK key to go back to Record Mode.
8.3. Select Camera Mode

Press Menu key to display the main menu.
Press LEFT or RIGHT navigation key to select the "Select Camera Mode". Press OK key to enter it.
Then below settings are shown:
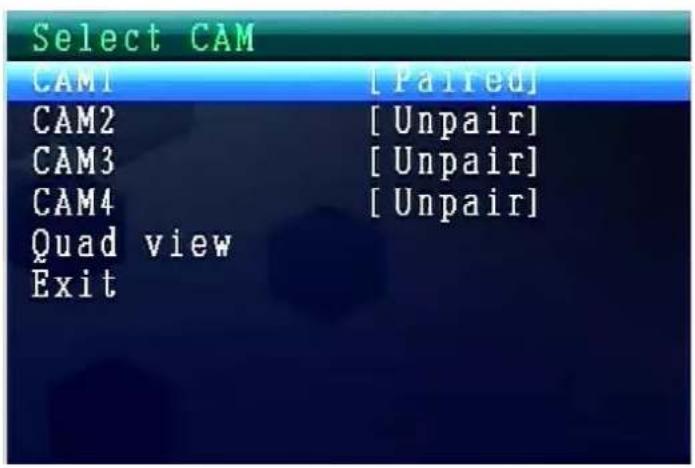
Select CAM
Press UP or Down navigation key to select: CAM1, CAM2, CAM3, CAM4, Quad view, Exit
Press OK key to confirm the selection.
Select Exit with the UP/DOWN navigation key to go back to the Main Menu.
8.4. Contrast / Brightness Mode

Press Menu key to display the main menu.
Press LEFT or RIGHT navigation key to select the "Contrast/Brightness Mode". Press OK key to enter it.
Then below settings are shown:
Contrast / Brightness
Press UP or Down navigation key to select "Contrast". With the LEFT or RIGHT navigation key you can choose between a value range from 1-9. Press OK key to confirm the selection.
Select Exit with the UP/DOWN navigation key to go back to the Main Menu.

Contrast / Brightness
Press UP or Down navigation key to select "Brightness". With the LEFT or RIGHT navigation key you can choose between a value range from 0-9.
Press OK key to confirm the selection.
Select Exit with the UP/DOWN navigation key to go back to the Main Menu.

Setting the Sound Volume during operation
| Δ | UP button (VOL+) |
| DOWN button (VOL-) |
8.5. Recording Schedule Mode

Press Menu key to display the main menu.
Press LEFT or RIGHT navigation key to select the "Recording
Schedule Mode". Press OK key to enter it.
Then below settings are shown:
Recording Schedule
Press UP or Down navigation key to select "Enable". With the LEFT or RIGHT navigation key you can select ON or OFF.
If select ON, it will turn on auto Recording Schedule Mode. Press OK key to confirm the selection.
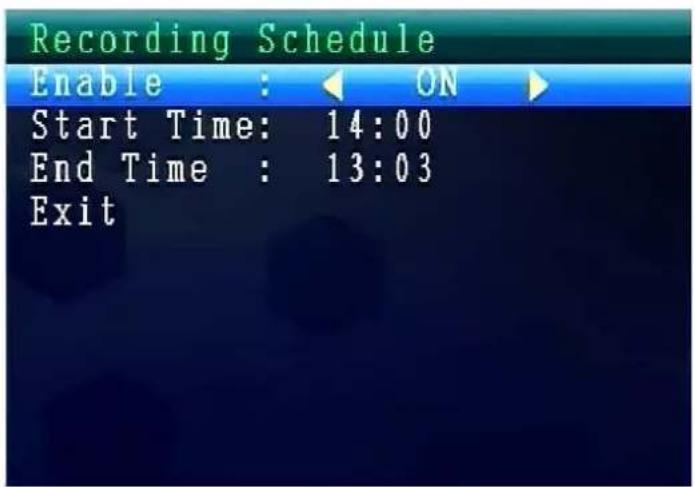
Press UP or Down navigation key to select "Start Time".
With the LEFT or RIGHT navigation key you can set the Recording Start Time.
Press OK key to confirm the setting.
Press UP or Down navigation key to select "End Time".
With the LEFT or RIGHT navigation key you can set the Recording End Time.
Press OK key to confirm the setting.
Select Exit with the UP/DOWN navigation key to go back to the Main Menu.
8.6. Motion Detection Mode

Press Menu key to display the main menu.
Press LEFT or RIGHT navigation key to select the "Motion
Detection Mode". Press OK key to enter it.
Then below settings are shown:
Motion Detection
Press UP or Down navigation key to select "Enable".
With the LEFT or RIGHT navigation key you can select ON or OFF.
If select ON, it will turn on auto Motion Detection Mode.
Press OK key to confirm the selection.
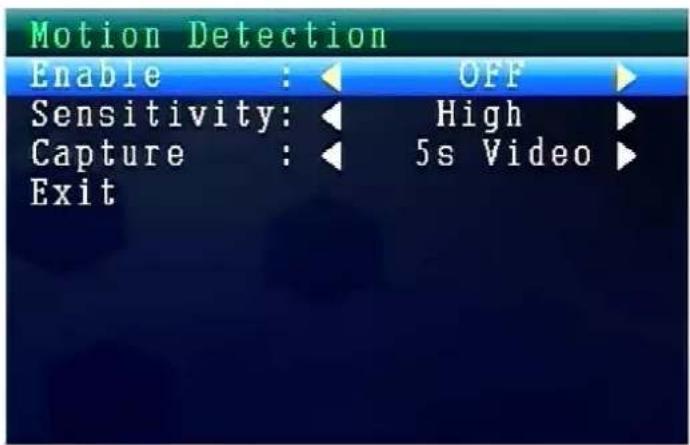
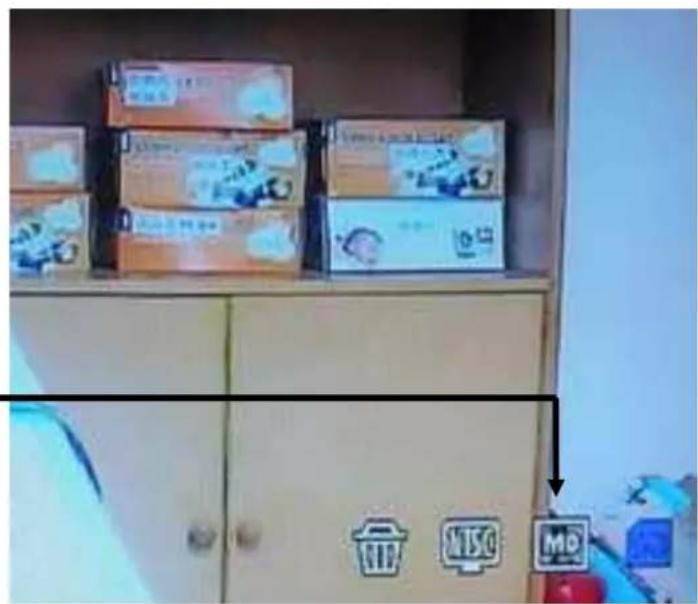
Motion Detection Icon
Press UP or Down navigation key to select "Sensitivity". With the LEFT or RIGHT navigation key you can select Hight/Standard/Low. Press OK key to confirm the selection.
Press UP or Down navigation key to select "Capture". With the LEFT or RIGHT navigation key to select: Take 1 photo, Take 3 photos, Take 5 photos, 5s video, 10s video, 30s video, 1 Min video. Press OK key to confirm the setting.
Select Exit with the UP/DOWN navigation key to go back to the Main Menu.
8.7. Setting Mode

Press Menu key to display the main menu.
Press LEFT or RIGHT navigation key to select the "Setting". Press OK key to enter it.
Then below settings are shown:
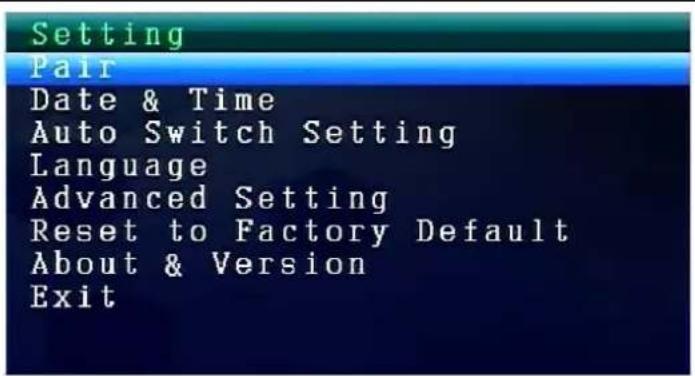
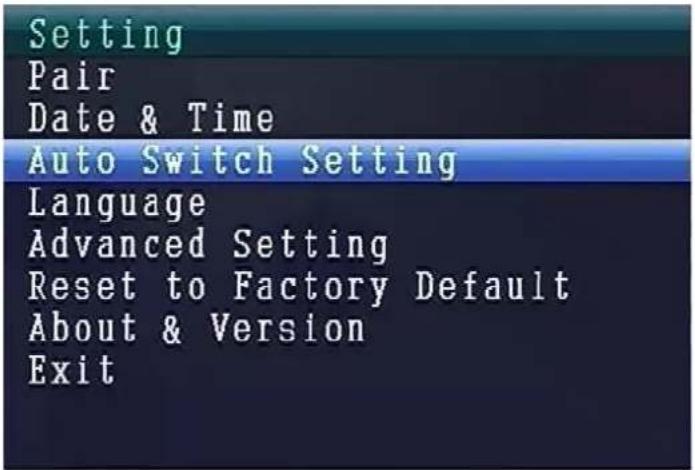
Setting
Press UP or Down navigation key to select "Pair" and press OK key to confirm the selection.
With the LEFT or RIGHT navigation key you can select Cameras.
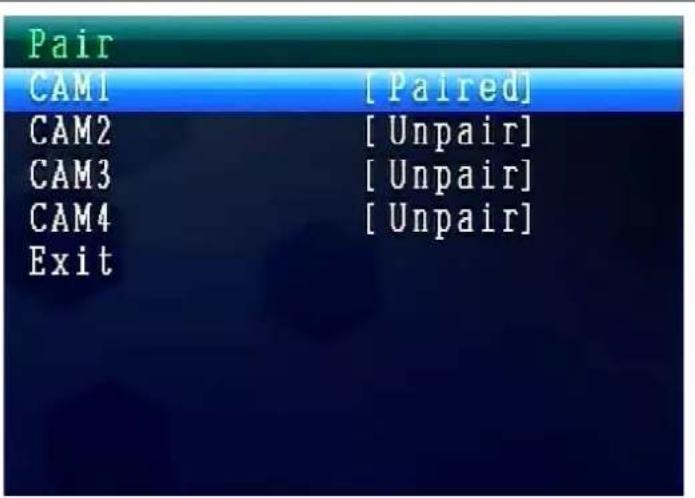
Pair
Select CAM1 and press OK key to pair with the camera. If succeed, you will see this picture.
With CAM2, CAM3, CAM4 paring procedure is the same.
Select Exit with the UP/DOWN navigation key to go back to the Main Menu.
Date & Time
Press UP or Down navigation key to select "Date & Time" and press OK key to confirm the selection.
With the LEFT or RIGHT navigation key you can select ON or OFF.
Select Exit with the UP/DOWN navigation key to go back to the Main Menu.
Setting
Pair
Date & Time
Auto Switch Setting
Language
Advanced Setting
Reset to Factory Default
About & Version
Exit
Date
With the UP or DOWN navigation key you can set the Date.
Press OK key to confirm the setting.
Select Exit with the UP/DOWN navigation key to go back to the Main Menu.
Date & Time
Date: 2014/06/15
Time: 04:26
Stamp: ON
Exit
Time
With the UP or DOWN navigation key you can set the Time.
Press OK key to confirm the setting. Select Exit with the UP/DOWN navigation key to go back to the Main Menu.
Date & Time
Date: 2014/06/19
Time: 22:54
Stamp: OFF
Exit
Date & Time Display
With the UP or DOWN navigation key you can set the Stamp.
Default setting is ON.
If select OFF, Date & Time will NOT be shown on the LCD.
Press OK key to confirm the setting.
Select Exit with the UP/DOWN navigation key to go back to the Main Menu.
Date & Time
Date: 2014/06/19
Time: 22:54
Stamp: OFF
Exit
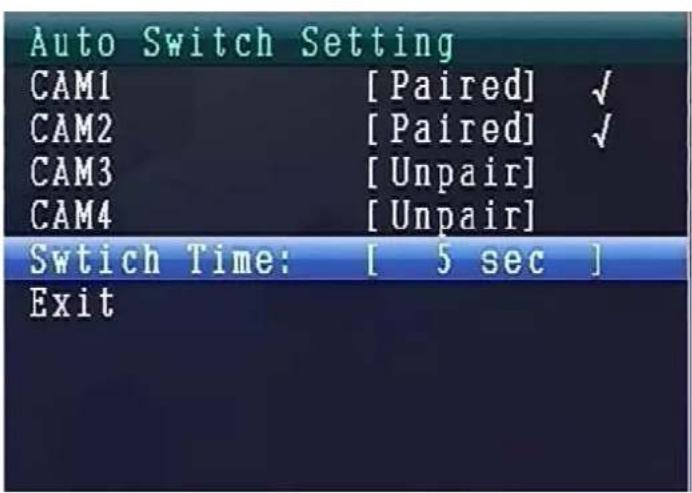
Auto Switch Setting
Press UP or Down navigation key to select "Auto Switch Setting of the cameras" and press OK key to enter and then press OK key to confirm the setting.
Under this mode, video can auto switch to show on the LCD.
Auto Switch Setting Mode
Press UP or Down navigation key to select "Switch Time". Default setting is 5 sec.
You can select: 5 sec, 10 sec, 30 sec, 1 min. Press OK key to confirm the selection.
Select Exit with the UP/DOWN navigation key to go back to the Main Menu.
LANGUAGE MODE (under Setting Mode)
Press UP or Down navigation key to select "Language". Press OK key to enter it.
With the LEFT or RIGHT navigation key you can select the desired language. Press OK key to confirm the selection.
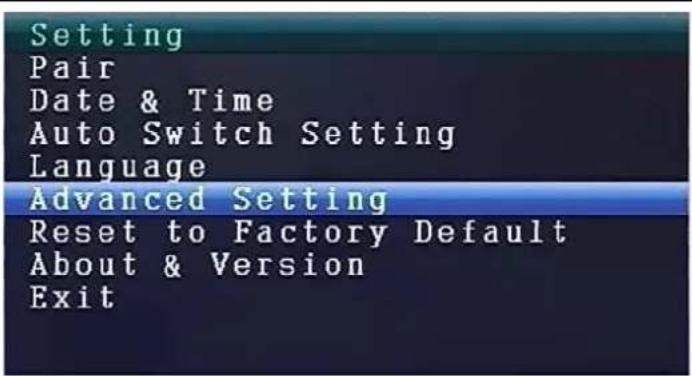
Advanced Setting
Press UP or Down navigation key to select "Advanced Setting". Press OK key to enter it.
Then below settings are shown:
Advanced Setting
Press UP or Down navigation key to select "Quality". Press LEFT or RIGHT navigation key to select HIGH or LOW. Press OK key to confirm the selection. Select Exit with the UP/DOWN navigation key to go back to the Main Menu.
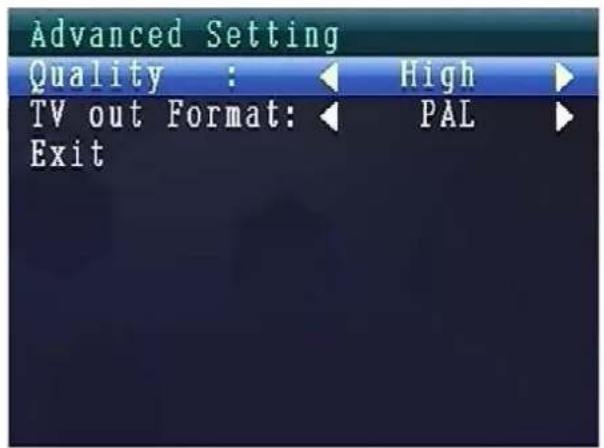
Advanced Setting
Press UP or Down navigation key to select "TV out Format". Default setting is NTSC. Press LEFT or RIGHT navigation key to select PAL or NTSC. Press OK key to confirm the selection. Select Exit with the UP/DOWN navigation key to go back to the Main Menu.

Reset to Factory Default
Press UP or Down navigation key to select "Advanced Setting".
Press OK key to enter it.
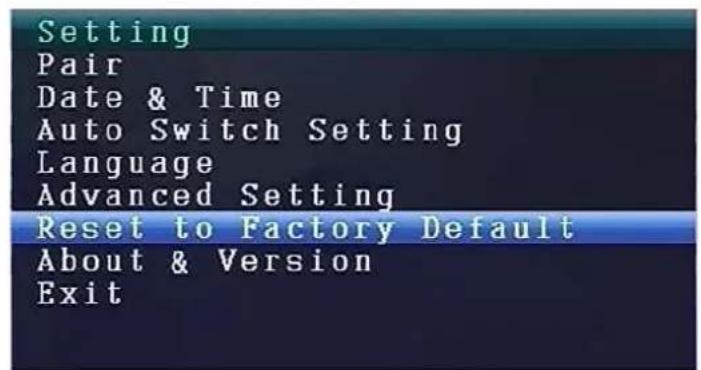
Reset to Factory Default
Press UP or Down navigation key to select NO or YES.

Sleep Mode
Press UP or Down navigation key to select "Sleep Mode".
Press OK key to enter it.
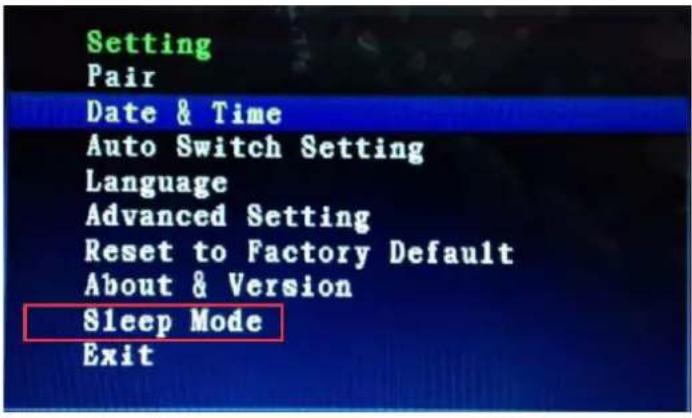
Sleep Mode
Press UP or Down navigation key to select "Enable".
With the LEFT or RIGHT navigation key you can select ON or OFF.
If select ON, it will turn on Auto
Sleep Mode. Select: 5, 15, 30, 45 seconds or 1 minute.
Press OK key to confirm the selection.

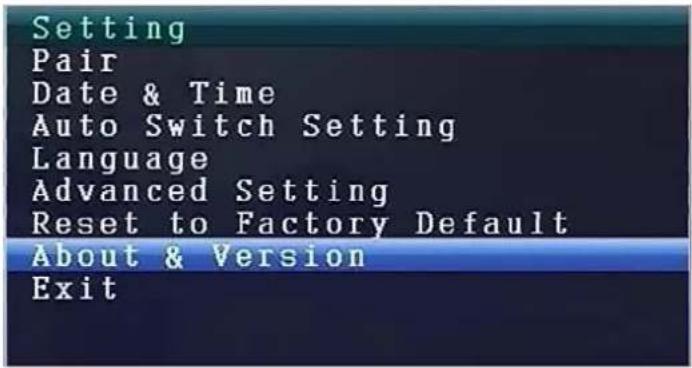
About & Version
Press UP or Down navigation key to select "About & Version".
Press OK key to enter it.
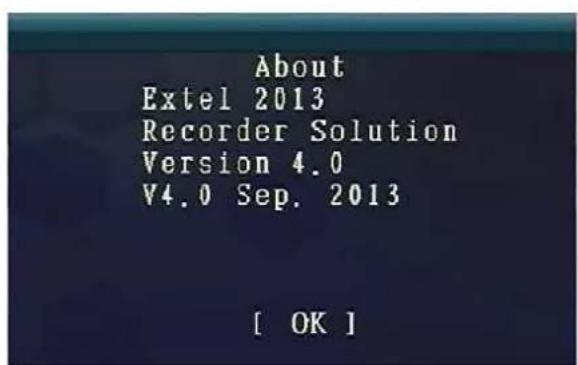
About & Version
Here you can see the Software Information.
Press OK key to go back to Setting Mode.
Select Exit with the UP/DOWN navigation key to go back to the Main Menu.
9. Signal Strength Indicators - Description

Perfect

Low

No signal
- Problem: No video Make sure, camera and monitor are in effective range.
11. Package Contents
Easy Security Camera Set TX-28, 1x Wireless camera, Wireless Video 7" TFT LCD Receiver, USB-to-Mini-USB-cable (for connection to a PC), Cinch cable, Power adapter for the camera, Power adapter for the receiver, Screws and dowels, User Manual
12. Technical Specifications CAMERA
| Channels 2400 – 2483.5 MHz | |
| Sensor 1/4" OV7725 CMOS | |
| Resolution | 420 TVL |
| Degree of protection | IP65 |
| Min. illumination | 0 LUX (IR on) |
| Ø Lens / Effective Pixel | Ø 6mm / 640 (H) x 480 (V) |
| S/N Ratio | More than 48 dB |
| Video Output | 1 Vp-p / 75 Ohm |
| Power supply | 5V / 1A |
| Operating temperature | approx. -5°C up to +45°C |
| Weight / Dimensions | 270 g / (L) 9,5 x (W) 6,8 x (H) 5,7 cm |
Wireless Receiver (Monitor) & Camera
| Frequency 2.4GHz / Band 2.4GHz |
| Radiated transmission power max. 80–100mW |
13. Technical Specifications WIRELESS RECEIVER (Monitor)
| Display 7" TFT LCD | |
| Video Format NTSC / PAL | |
| Compression Format MPEG-4 | |
| Video input / Video output 4CH wireless single / 1 composite output | |
| Audio input / Audio output 4CH wireless single / 1 composite output | |
| Frame rate | 640 x 480 VGA with 20fps |
| 320 x 240 QVGA with 25fps | |
| Memory card MicroSD card up to | 32GB |
| Transmission range ≥ 200m (open range) | |
| Power Built-in 1600mAh battery | 7.4V |
| Power supply DC 12V / 1A | |
| Operating temperature approx. 0°C up to +50°C | |
| Weight / Dimensions 395 g / (L) | 20,0 x (W) 12,0 x (H) 2,0 cm |
14. Important Safety Notice
Only use the DC CONVERTER provided. The manufacturer is not responsible for any losses caused by DC converter not provided by the manufacturer. Do not touch the DC converter with conductors (e.g. rings, etc.). Only use the socket match with the DC converter. Use of improper socket may cause electrical and fire damage.
BATTERY: Always fully (!) recharge the battery before use. It must be fully discharged before charge it again. Over charge and over discharge will shorten its life span. If the usage period of a fully charged battery will become shorter and shorter, you need to change it (its life will be shorten from the time it is being used).
Warnings
- Do not attempt to disassemble the device, it may result in short-circuit or even damage.
- Do not drop or shake the device, it may break internal circuit boards or mechanics
- Keep the device in dry and ventilated environment. Avoid high humidity and high temperature.
- Keep the device away from little children.
The device will be hot after using for too long time. This is normal. - Please use the accessory provided by our factory.
Appendix: The installation of "My Secure"
15. Connecting the Camera Set TX-28 via "My Secure"
Connect the monitor of the TX-28 with a computer/notebook via the included
Mini-USB Kabel (Mini-USB to the receiver, USB to your computer).
Install the SIPCam software from the included CD-ROM and follow the installation instructions on the screen. After installation is completed, this icon is shown on your desktop.

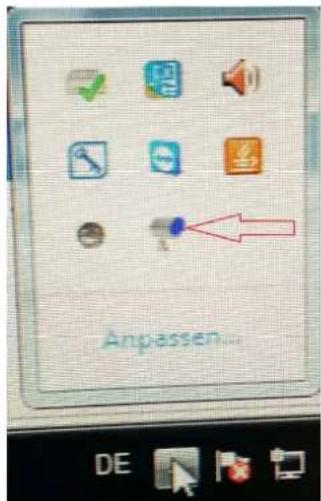
Double-click on the icon and run the SIPCam. In the hidden icons [right hand side in the below task bar] you find the icon for SIPCam (see picture). Click with the right mouse button on the icon. Then select "Option" (see picture).

Due to further developments, find upates from „SIPCam“ at this link: www.technaxx.de/support
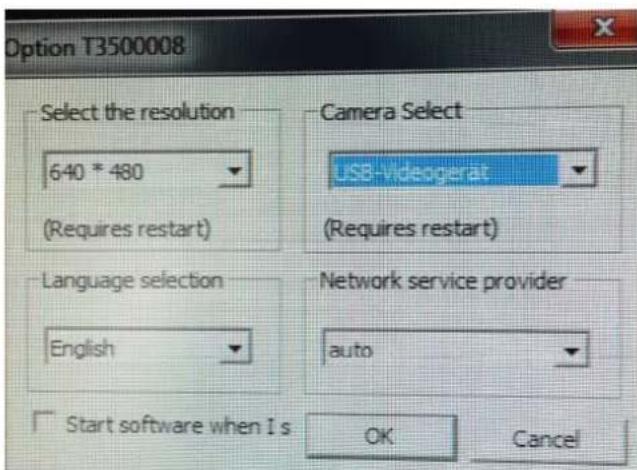
Choose under "Camera Select" the "USB Video device" and click on the "OK" button. When you already installed the Technaxx App "My Secure", you can login with the Cam ID/User and Login Password (both you can find on the monitor back side).
Install "My Secure" on your computer or notebook. You can find the software for „My Secure“ on the included CD-ROM or at this link: www.technaxx.de/support. Due to further developments, find upates from „My Secure“ at this link:
Put the installation CD in the CD-slot on the computer/notesbook. Follow the installation process on the screen to install „My Secure“.
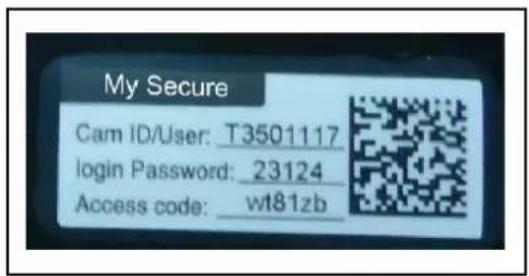
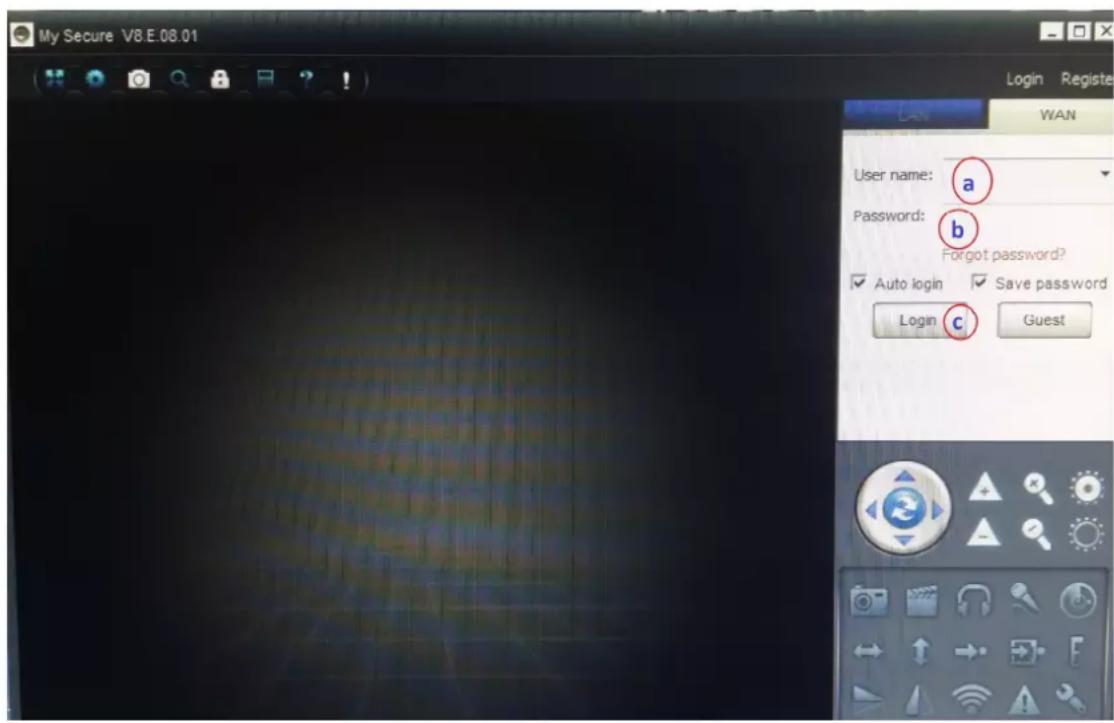
After installation is completed, "My Secure" starts automatically. Click on the "WAN" button and input Cam ID/User and Login Password (both you can find on the monitor back side). Then click on the Login button.
For Android, iPhone or another iOS Smartphone, search and download "My Secure" in the Google Play store and Apple APP store. Follow the installation process on the display of your Smartphone.
The user manual for the „My Secure App“ you can find here:
Go on this link to download the latest software.
ATTENTION: When you want to follow up watching the Camera Set TX-28 via WLAN, the connection (with included Mini USB cable) between the Camera Set TX-28 and your computer/notebook must be active all the time.
ATTENTION: There must always be available an existing wireless network.
Easy Security Camera Set TX-28
Contrast / Brightness
(Contraste / Luminosite)
Contrast / Brightness
Date & Time (Date & Heure)
Reset to Factory Default
About & Version
Exit
Auto Switch Setting Mode
Reset to Factory Default
About & Version
Exit
Advanced Setting
Reset to Factory Default
Option(O)...
Current Access to the User(V)...
Exit(X)
Contrast / Brightness
Contrast / Brightness
Reset to Factory Default
About & Version
Exit
Date (Data)
Reset to Factory Default
About & Version
Exit
Auto Switch Setting Mode
Reset to Factory Default
About & Version
Exit
Advanced Setting
Reset to Factory Default
Ricevitore wireless (Monitor) & Telecamera
Option(O)...
Current Access to the User(V)...
Exit(X)
Contrast / Brightness
Contrast / Brightness
Reset to Factory Default
About & Version
Exit
Date (Datum)
m = 311
1
Auto Switch Setting
Setting
Pair
Date & Time
Auto Switch Setting
Language
Advanced Setting
Reset to Factory Default
About & Version
Exit
Auto Switch Setting Mode
Setting
Pair
Date & Time
Auto Switch Setting
Language
Advanced Setting
Reset to Factory Default
About & Version
Exit
Advanced Setting
De standardinstelling is NTSC.