40.610RBL - Lawn mower Beper - Free user manual and instructions
Find the device manual for free 40.610RBL Beper in PDF.
| Brand | Beper |
| Model | 40.610RBL |
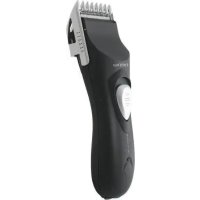
| Product type | Hair clipper |
| Power supply | 220-240 V ~ 50/60 Hz |
| Power | 10 W |
| Cutting lengths | 3, 6, 9, 12 mm (with combs) |
| Blade material | Stainless steel |
| Length adjustment | Progressive adjustment notch |
| Included accessories | 4 cutting combs, 1 styling comb, 1 pair of scissors, 1 oil bottle, 1 cleaning brush |
| Use | Dry hair only, household use |
| Cleaning | Brush after each use, oil the blades |
| Safety | Do not use in bath or shower, do not immerse, keep out of reach of children |
| Warranty | 24 months |
| Switch | On/off (I/O) |
| Hanging ring | Yes |
| Lubricating oil | Mineral oil (included) |
| Blade maintenance | Unscrew, clean, realign teeth |
| After-sales service | Contact the retailer or importer, email: assistenza@beper.com |
| Environmental compliance | Directive 2011/65/EU, recyclable product |
Frequently Asked Questions - 40.610RBL Beper
User questions about 40.610RBL Beper
0 question about this device. Answer the ones you know or ask your own.
Ask a new question about this device
Download the instructions for your Lawn mower in PDF format for free! Find your manual 40.610RBL - Beper and take your electronic device back in hand. On this page are published all the documents necessary for the use of your device. 40.610RBL by Beper.
USER MANUAL 40.610RBL Beper
MANUEL D'INSTRUCTIONS
For further information and/or for instructions for use in other languages, please visit: beper.com

Fig. 1
Fig. 2
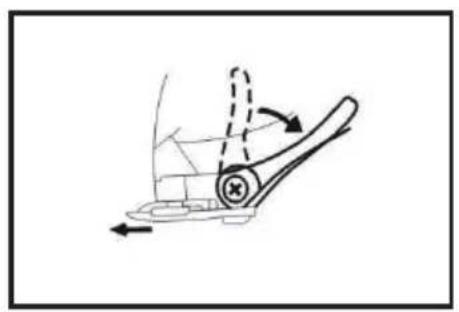
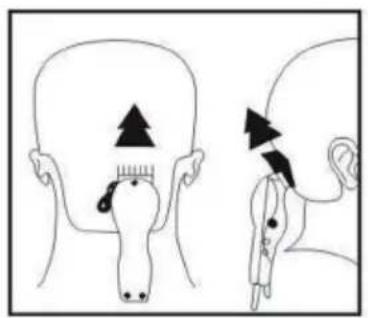
Fig. 3
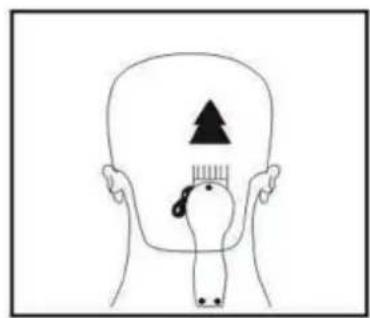
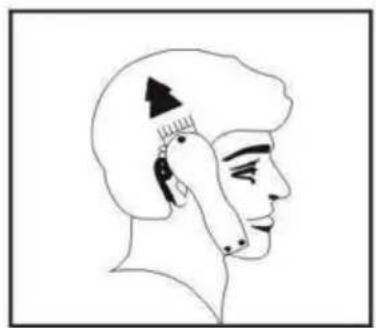
Fig. 4
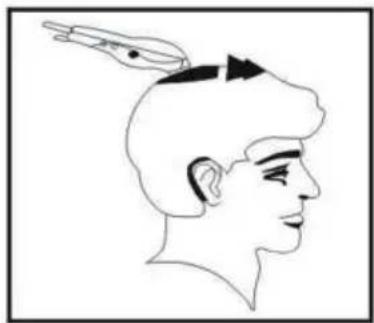
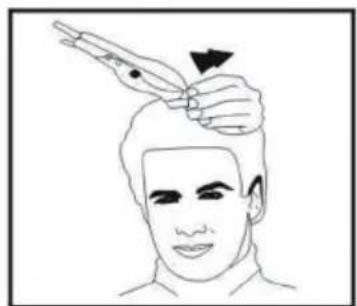
Fig. 5
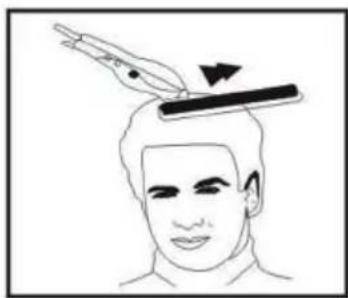
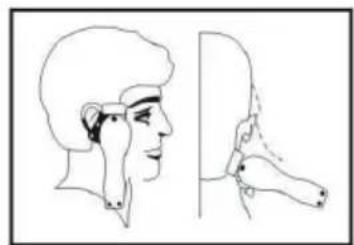
Fig. 6
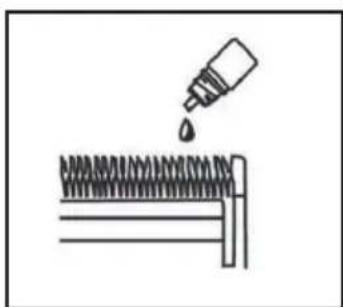
Fig. 7
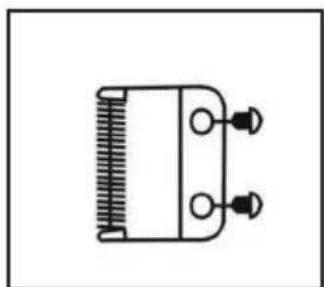
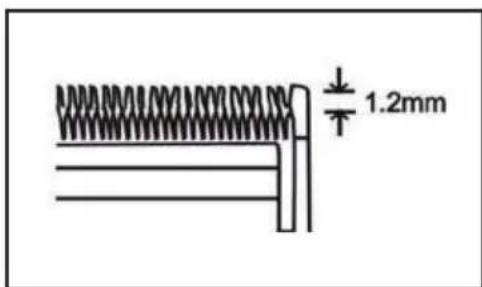
Fig. 8 Fig. 9
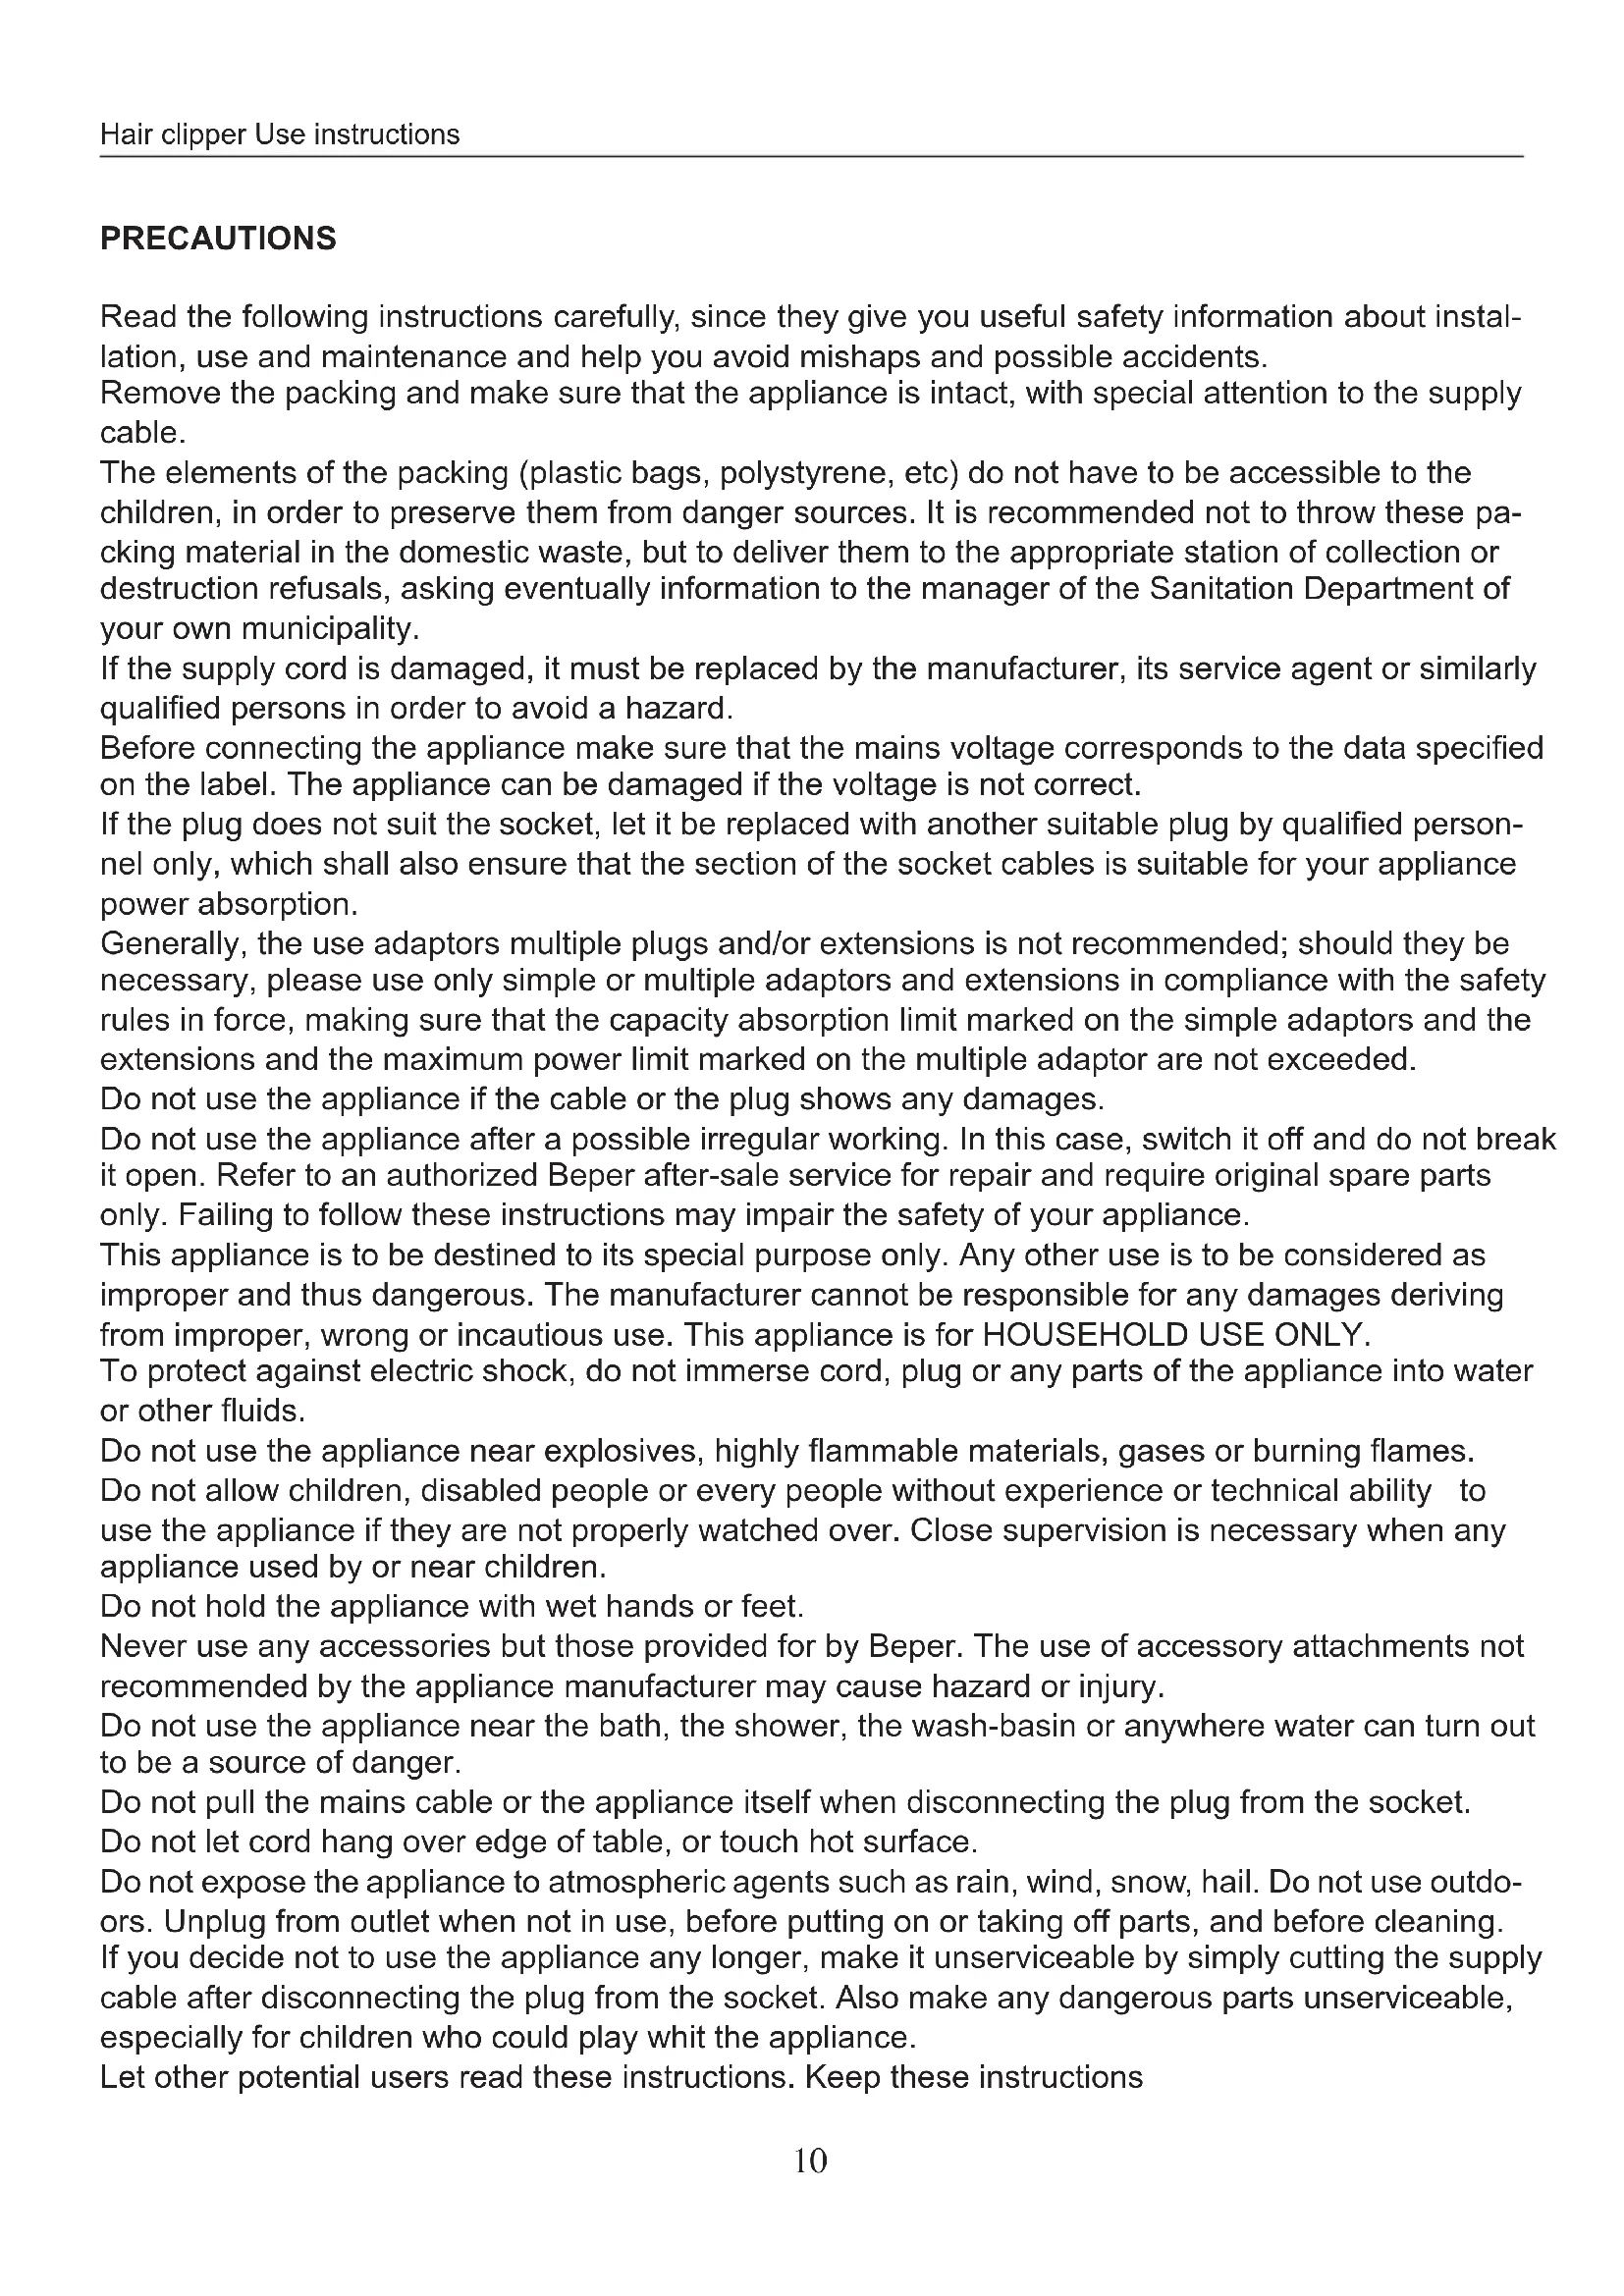
AVVERTENZE GENERALI
LEGGERE QUESTE ISTRUZIONI PRIMA DI USARE L'ARTICOLO.
Read the following instructions carefully, since they give you useful safety information about installation, use and maintenance and help you avoid mishaps and possible accidents.
Remove the packing and make sure that the appliance is intact, with special attention to the supply cable.
The elements of the packing (plastic bags, polystyrene, etc) do not have to be accessible to the children, in order to preserve them from danger sources. It is recommended not to throw these packing material in the domestic waste, but to deliver them to the appropriate station of collection or destruction refusals, asking eventually information to the manager of the Sanitation Department of your own municipality.
If the supply cord is damaged, it must be replaced by the manufacturer, its service agent or similarly qualified persons in order to avoid a hazard.
Before connecting the appliance make sure that the mains voltage corresponds to the data specified on the label. The appliance can be damaged if the voltage is not correct.
If the plug does not suit the socket, let it be replaced with another suitable plug by qualified personnel only, which shall also ensure that the section of the socket cables is suitable for your appliance power absorption.
Generally, the use adaptors multiple plugs and/or extensions is not recommended; should they be necessary, please use only simple or multiple adaptors and extensions in compliance with the safety rules in force, making sure that the capacity absorption limit marked on the simple adaptors and the extensions and the maximum power limit marked on the multiple adaptor are not exceeded.
Do not use the appliance if the cable or the plug shows any damages.
Do not use the appliance after a possible irregular working. In this case, switch it off and do not break it open. Refer to an authorized Beper after-sale service for repair and require original spare parts only. Failing to follow these instructions may impair the safety of your appliance.
This appliance is to be destined to its special purpose only. Any other use is to be considered as improper and thus dangerous. The manufacturer cannot be responsible for any damages deriving from improper, wrong or incautious use. This appliance is for HOUSEHOLD USE ONLY.
To protect against electric shock, do not immerse cord, plug or any parts of the appliance into water or other fluids.
Do not use the appliance near explosives, highly flammable materials, gases or burning flames. Do not allow children, disabled people or every people without experience or technical ability to use the appliance if they are not properly watched over. Close supervision is necessary when any appliance used by or near children.
Do not hold the appliance with wet hands or feet.
Never use any accessories but those provided for by Beper. The use of accessory attachments not recommended by the appliance manufacturer may cause hazard or injury.
Do not use the appliance near the bath, the shower, the wash-basin or anywhere water can turn out to be a source of danger.
Do not pull the mains cable or the appliance itself when disconnecting the plug from the socket.
Do not let cord hang over edge of table, or touch hot surface.
Do not expose the appliance to atmospheric agents such as rain, wind, snow, hail. Do not use outdoors. Unplug from outlet when not in use, before putting on or taking off parts, and before cleaning. If you decide not to use the appliance any longer, make it unserviceable by simply cutting the supply cable after disconnecting the plug from the socket. Also make any dangerous parts unserviceable, especially for children who could play whit the appliance.
Let other potential users read these instructions. Keep these instructions
INSTRUCTIONS FOR USE
Before first use, please ensure that the wattage and mains voltage correspond to the instructions on the rating label.
This cut clipper has been manufactured only for household use and cannot be used be by professionals.
This cut clipper has been manufactured only for cutting natural hair.
Before using this cut clipper check that the blade alignment is correct.
Keep out of the reach of children.
Do not try to open the cut clipper or any parts of it.
Keep the cut clipper away from heated surfaces. Do not use this appliance while bathing or in a shower.
Do not put or hook the cut clipper where it could fall and finish in the washbasin. Do not place the appliance on any surface while it is operating.
Never leave the appliance unattended as long as the power plug is connected with the power outlet.
Do not let the cut clipper without supervision if plugged.
Do not dip the engine, supply cord or plug into water or other liquids.
When the cut clipper is on, do not touch parts in movement of if there are hot, do not try to put or take off accessories.
Use only provided accessories.
A regular cleaning of this appliance will keep it intact as long as possible. Before cleaning, always unplug the supply cord.
Do not use if the cut clipper is damaged ; contact directly the provider or assistance centre.
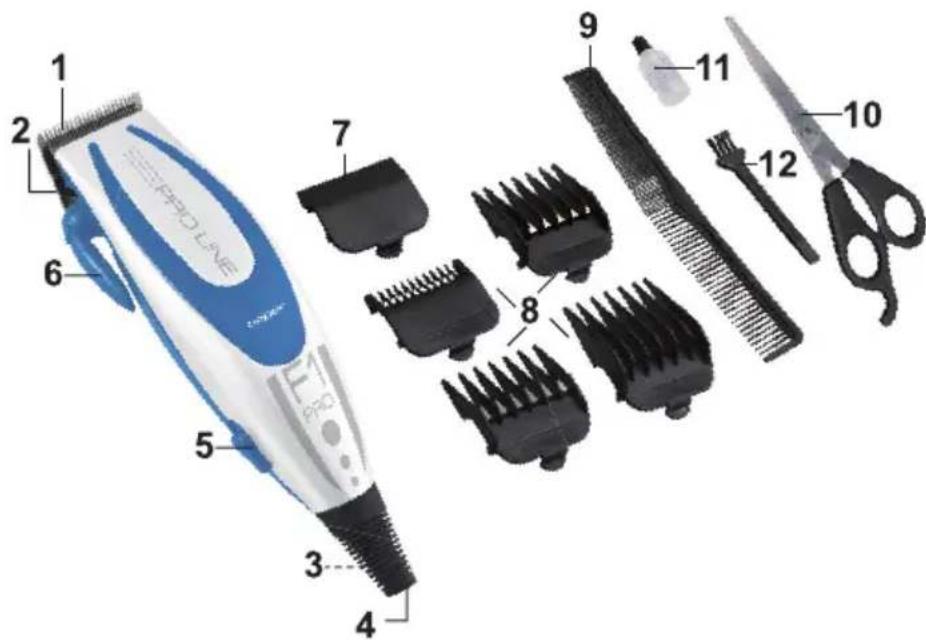
PARTS AND ACCESSORIES Fig.1
1 - Steel blades
2 - Base support of attachment comb
3 - Attachment ring
4 - Power cord
5-Switch on/off I/0
6-Lever
7- Blade protection
8 - Attachment comb (3-6-9-12 mm)
9-Comb
10 - Scissors
11-Oil
12 - Brush
USE INSTRUCTIONS
NOTICE
For the first use of the cut clipper, you have to cut a little bit hair.
Before starting hair cut :
- Inspect the clipper, making sure that it is free of oil between the cutting blade teeth and turn the unit on to distribute the oil and to make sure it is running smoothly;
- Place a towel around the neck and shoulders of the person having the haircut;
- Seat the person so their head is approximately at your eye level. This allows ease of visibility while cutting and a relaxed control of the unit;
- Before cutting always first comb the hair so it is tangle free and as it is naturally worn;
- Cut the hair in a relaxed and slow manner. Use short stroked only to work gradually over the entire head;
- Always take off a little hair at a time, you can always trim off additional hair later;
- As you work, comb the hair frequently back into the style to which you are cutting;
- When cutting with this hair clipper it is better to leave the hair dry, not wet.
USE
Take off the blade protection (7) and insert completely the attachment comb (8), and choose the right size.
- Attachment Comb #1 leaves 3mm (1/8 inch)hair length.
- Attachment Comb #2 leaves 6mm (1/4 inch) hair length.
- Attachment Comb #3 leaves 9mm (3/8 inch)hair length.
- Attachment Comb #4 leaves 12mm (1/2 inch)hair length
Plug the cord and put the switch on I (5).
Hair must be clean, dry and combed. For the first use of this appliance, you have to start from the highest length of hair, and then reduce gradually in order to prevent cutting more hair than requested. For cutting, hold the clipper comfortable in your hand and hold lightly against the head with the comb teeth pointing upward. Gradually and slowly lift the clipper through the hair, trimming just a little a time and often comb hair in order to obtain the requested style
The lever (6) is conveniently located near your thumb (if your're right-handed) so it can easily be adjusted while the clipper is in your hand
The lever adds versatility to your clipper by allowing you to gradually change the closeness of your cut without an attachment comb (8).
When the lever (6) is in the uppermost position, the blades will give you the closest cut and leave the hair very short. Pushing the lever downward gradually increases the cutting length
In addition, if extremely heavy hair cutting has jammed the blades, it will help you remove hair that has become wedged between the two blades without removing the blades. Fig.2
After using the cut clipper, always switch off the appliance with the button on/off on 0 (5) and unplug the power cord. Take off the attachment comb and put the blade protection (7) after cleaning.
CUT EXAMPLE
Step 1
Attach comb attachment 3mm or 6mm.
Starting at the centre of the head at the base of the neck. Gradually and slowly lift the clipper, working upwards and outwards, through the hair, trimming just a little a time. Continue to cut the back area from the bottom of the neck .Fig.3
Step 2
Charge to the nest longest comb attachment 9mm or 12mm and cut the back of the head.
Step 3
Charge to one of the shorter combs 3mm or 6mm, trim sideburns, i.e. the hair directly in front of the ears. Then change one of the linger combs, 9mm or 12mm, and continue to cut to the top of the head. Fig.4
Step 4
Using comb attachment 9mm or 12mm, cut top of head from back to front against the direction in which the hair normally grows; comb attachments 3 mm or 6mm are used to achieve a close crew cut or short cut
For longer hair on top, use the comb provided and lift hair on the top of the head. Cut over the comb, with the hair lifted or hold the hair between the fingers to lift it and cut it to desired length. Fig.5
Step 5
Finally, use the taper lever without an attachment comb for close trimming around the base of the neck, the sides of the neck and the ears. Fig.6
CLEANING
For clearing the appliance, always unplug the cord.
Take off hair from the cut clipper, after every use, with the provided brush (12) and oil the blades with a drop of provided oil (11). Use only mineral oil, as the provided oil; you can also use oil used for sewing machine.
Do not use hair oil, grease, oil mixed with kerosene or any solvent. Fig.7
Clean the other parts of the curt clipper with a wet cloth.
The blades (1) have been aligned and oiled in factory. To maintain your clipper in peak condition, the blades should be oiled every few haircuts and could be useful to make a new alignment.
Unscrew and take off screws. Fig.8
To realign the blades, simply match the upper and bottom blades teeth up. Point for point. (End of top blade teeth should be approximately 1.2mm back from bottom blade. Compare your clipper blades with the sketch.
Screw firmly the screws. Fig.9
TECHNICAL DATA
Power 10W
Power supply 220-240V ~ 50/60Hz
For any improvement reasons, Beper reserves the right to modify or improve the product without any notice.
The European directive 2011/65/EU on Waste Electrical and Electronic Equipment (WEEE), requires that old household electrical appliances must not be disposed of in the normal unsorted municipal waste stream. Old appliances must be collected separately in order to optimize the recovery and recycling of the materials they contain, and reduce the impact on human health and the environment. The crossed out "wheeled bin" symbol on the product reminds you of your obligation, that when you dispose of the appliance, it must be separately collected.
This appliance has been checked in the factory. From the date of original purchase a 24 month guarantee applies to material and production defects. The purchase receipt and the guarantee certificate must be submitted together in case of claim to guarantee.
The guarantee is valid only with a guaranty certificate and proof of purchase (fiscal receipt) indicating the date of purchase and the model of the appliance
For any technical assistance, please contact directly the seller or our head office in order to preserve the appliance's efficiency and NOT TO void the guarantee. Any intervention on this appliance by non-authorized persons will automatically void the guarantee.
Guarantee conditions
If the appliance shows defects as a result of faulty material and/or production during the period of guarantee, we guarantee repair free of charge on condition that:
- The appliance has been used properly and for the purpose for which it has been intended.
- The appliance has not been tampered with, otherwise it is not maintainable.
- The purchase receipt shall be presented.
- The appliance showing a fair wear and tear shall not be covered by this guarantee.
Therefore, any part that could be accidentally broken or having visible signs of use in consumable products (such as lamps, batteries, heating elements...) the aesthetic parts are excluded from the guarantee, and any defect whatsoever resulting from non-respect of the rules for use, negligence in usage and/or maintenance of the appliance, carelessness, wrong or improper installation, damage during transport and any other damage not attributable the supplier.
For every defect that could not be repaired within the guarantee period, the appliance will be replaced free of charge.
In any case, if the part to be replaced for defect, breakage or malfunction is an accessory and/or a detachable part of the product, Beper reserves the right to replace only the very part in question and not the entire product
Technical assistance
Even after the guarantee period we will always pay attention to repairs for defected appliances. For technical assistance and/or repairs after the guarantee period you can directly contact the below address: