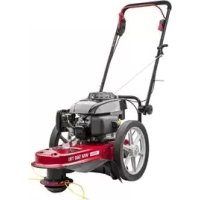
WM 560 TRI - Lawn mower Güde - Free user manual and instructions
Find the device manual for free WM 560 TRI Güde in PDF.



| Brand | Güde |
| Model | WM 560 TRI |
| Product type | Lawn mower |
| Engine | Petrol 4-stroke OHV |
| Engine power | 2.1 kW / 2.8 HP |
| Displacement | 160 cm³ |
| Engine speed | 2800 rpm |
| Cutting width | 560 mm |
| Cutting height adjustment | Yes (manual) |
| Fuel type | Unleaded petrol / E10 |
| Tank capacity | 0.78 L |
| Weight | 31 kg |
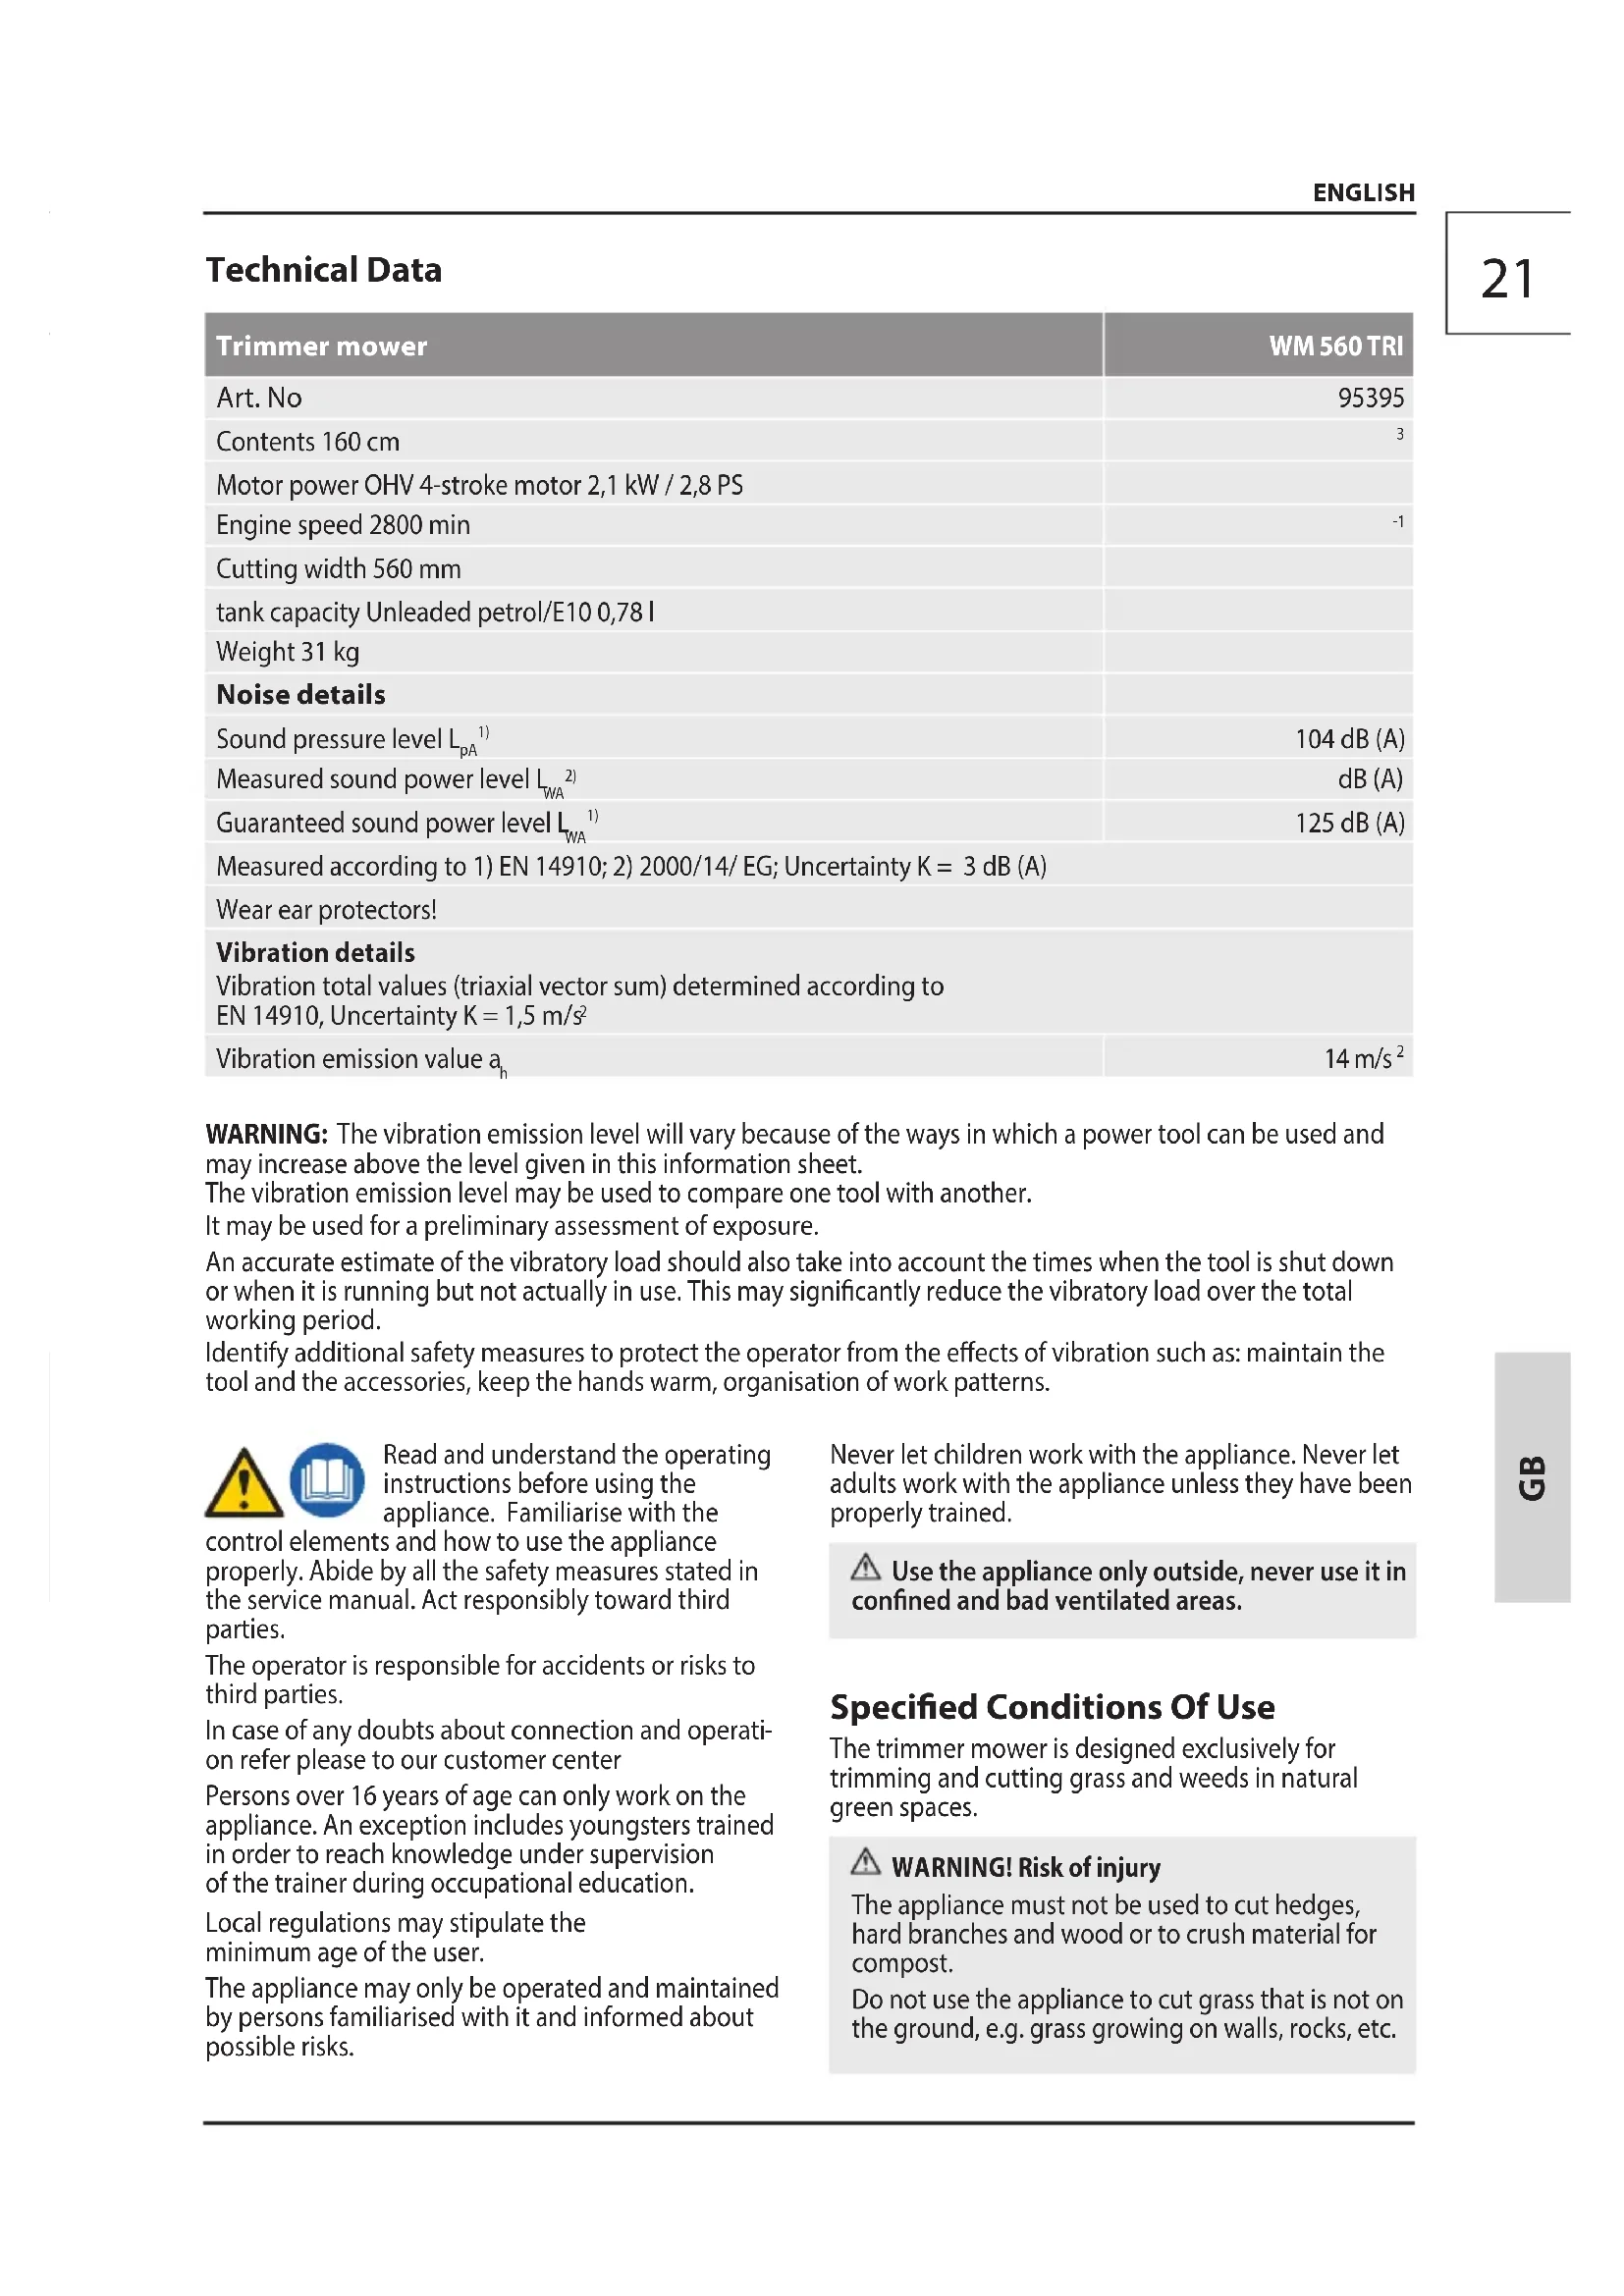
| Sound pressure level (LpA) | 104 dB(A) |
| Guaranteed sound power level (LWA) | 125 dB(A) |
| Vibration emission value (ah) | 14 m/s² |
| Vibration uncertainty | K = 1.5 m/s² |
| Minimum safety distance | 15 m |
| Hearing protection required | Yes |
| Starting type | Recoil starter |
| Regular maintenance | Check oil, air filter, spark plug |
| Warranty (non-professional use) | 24 months |
| Order number | 95395 |
Frequently Asked Questions - WM 560 TRI Güde
User questions about WM 560 TRI Güde
0 question about this device. Answer the ones you know or ask your own.
Ask a new question about this device
Download the instructions for your Lawn mower in PDF format for free! Find your manual WM 560 TRI - Güde and take your electronic device back in hand. On this page are published all the documents necessary for the use of your device. WM 560 TRI by Güde.
USER MANUAL WM 560 TRI Güde
natural_image
Red and silver lawn mower with attached black frame, no visible text or symbols on the device body
WM 560 TRI
95395
GÜDE GmbH & Co. KG
Birkichstrasse 6
74549 Wolpertshausen
Deutschland


ENGLISH Please read the instructions carefully before starting the machine.
natural_image
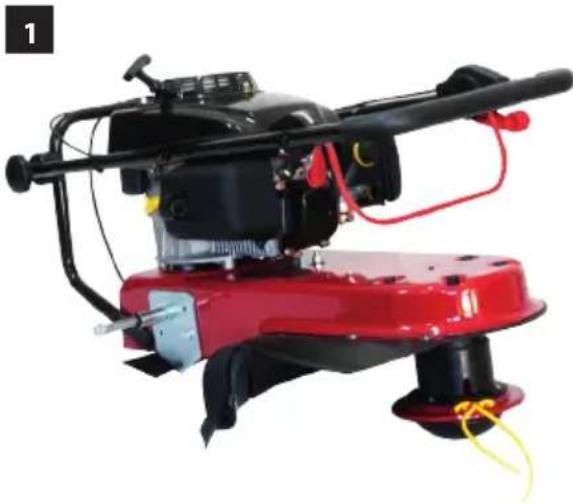
Red and black manual tiller machine with attached wiring and a yellow cable (no visible text or symbols)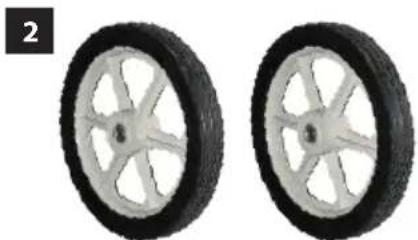
natural_image
Two identical car wheel rim wheels shown side by side, no text or symbols visible
natural_image
Four parallel yellow curved lines on white background, no text or symbols present| D | Montage | SLO | Montaža |
| GB | Assembly | HR | Montaža |
| F | Assemblage | BG | Монтаж |
| I | Montaggio | RO | Montaj |
| NL | Montage | ||
| CZ | Montáž | ||
| SK | Montáž | ||
| H | Szerelés |
1
| D | Inbetriebnahme | SLO | Uvedba v pogon |
| GB | Starting-up the machine | HR | Puštanje u rad |
| F | mise en service | BG | Пускане в действие |
| I | Messa in funzione | RO | Punerea în funcțiune |
| NL | Inbedrijfstelling | ||
| CZ | Uvedení do provozu | ||
| SK | Uvedenie do prevádzky | ||
| H | Üzembe helyezés |
2
| DE | Mähanweisungen | SI | Napotki za košnjo |
| GB | Cutting instructions | HR | Upute za sječenje |
| FR | Consignes de tonte | BG | Инструкции за сечене |
| IT | Istruzioni per taglio | RO | Instrucțiuni pentru cosit |
| NL | Aanwijzingen voor het maaien | ||
| CZ | Pokyny k sečení | ||
| SK | Pokyny na kosenie | ||
| HU | Utasítás kaszáláshoz |
3
| DE | Betrieb | SI | Delovanje |
| GB | Operation | HR | Rad |
| FR | Fonctionnement | BG | Pábota |
| IT | Esercizio | RO | Functionare |
| NL | Gebruik | ||
| CZ | Provoz | ||
| SK | Prevádzka | ||
| HU | Üzemeltetés |
4
| DE | Reinigung / Wartung | SI | Čiščenje / Vzdrževanje |
| GB | Cleaning / Maintenance | HR | Čiščenje / Održavanje |
| FR | Nettoyage / Entretien | BG | Чистене / Поддръжка |
| IT | Pulizia / Manutenzione | RO | Curățare / Întreținere |
| NL | Schoonmaken / Onderhoud | ||
| CZ | Čištění / Údržba | ||
| SK | Čistenie / Údrzba | ||
| HU | Tisztítás / Karbantartás |
5
| 1 | DE Montage | SI Montaža |
| GB Assembly | HR Montaža | |
| FR Montage | BG Монтаж | |
| IT Montaggio | RO Montaj | |
| NL Montage | ||
| CZ Montáž | ||
| SK Montáž | ||
| HU Szerelés |


natural_image
Red lawn mower with attached motors and wheels, shown in a mechanical assembly (no text or symbols visible)DE Ölstand kontrollieren
GB Oil level inspection
GB Check the oil level whenever the appliance is to be put into operation. Add engine oil if necessary. Check the oil level whenever the appliance is to be put into operation. Add engine oil if necessary.
natural_image
Illustration of a red and black lawn mower with a green checkmark indicating inspection or status (no text or symbols)2

natural_image
Close-up of a mechanical device with visible components and wiring (no text or symbols)
natural_image
Yellow 3D object with arrow pointing upward, next to a gray block (no text or symbols)| 2 | DE Ölstand kontrollierenGB Oil level inspectionFR Contrôle du niveau d'huileIT Controllo livello d'olioNL Oliepeil controlerenCZ Kontrola stavu olejeSK Kontrola stavu olejaHU Olajszint ellenőrzése | SI Kontrola stanja oljaHR Kontrola razine uljaBG Контрол на състоянието на маслотоRO Verificarea stării uleiului |


natural_image
Illustration of a hand holding a small object with a yellow dropper above it, labeled '3' in the top-left corner (no other text or symbols)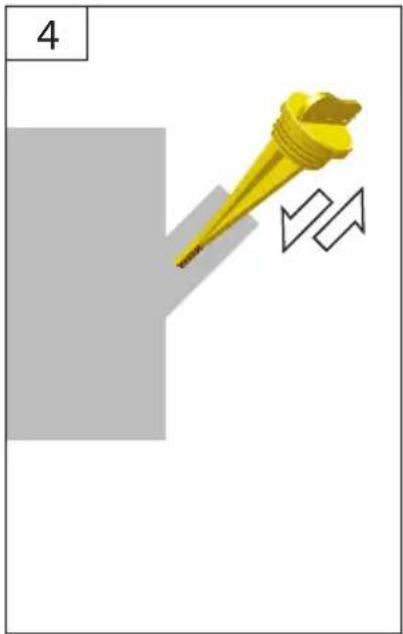
natural_image
3D illustration of a yellow conical tool interacting with a gray block and white zigzag arrow (no text or symbols)

natural_image
3D diagram of a yellow mechanical component with directional arrows and a gray Y-shaped base, no text or symbols present
DE Ölstand kontrollieren
GB Oil level inspection
GB To ensure quality, every piece of equipment is subject to a test operation and filled with motor oil. Oil is drained before transport; however, there can be some motor oil remains on the dip stick. Please check carefully the oil level and add motor oil again.
natural_image
3D diagram of a lock mechanism with a circular component and directional arrow (no text or symbols)

natural_image
Hand pressing a white object onto a black cylindrical object (no text or symbols visible)
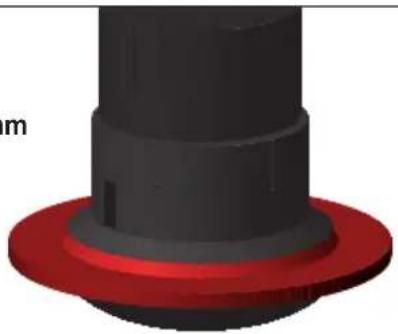
GB Cutting height setting
natural_image
Close-up of a red WM 560 TRI engine component with yellow wiring (no visible text or symbols)1

natural_image
3D mechanical assembly diagram showing a red flange with a key inserted into a black cylindrical component (no text or symbols)2
38 - 76 mm

natural_image
3D rendered mechanical component with black and red layers (no text or symbols)3

natural_image
3D diagram of a mechanical assembly with a rotating component and a lock, no text or symbols present
natural_image
Close-up of a red and black robotic brush head with visible blue and black components (no text or symbols)38 - 76 mm

DE Mähanweisungen
GB Cutting instructions
FR Consignes de tonte
IT Istruzioni per taglio
NL Aanwijzingen voor het maaien
CZ Pokyny k sečení
SK Pokyny na kosenie
HU Utasítás kaszáláshoz
SI Napotki za košnjo
HR Upute za sječenje
BG Инструкции за сечене
RO Instructiuni pentru cosit



natural_image
Illustration of a person using a lawn power tool to cut a slope, with grass and a red diagonal line crossing (no text or symbols)DE Betrieb - START
GB Operation - START
GB Operation - START
natural_image
Close-up of a black and red bicycle mount架 (no text or symbols visible)ON


natural_image
Close-up of a red WM 560 TRI robotic arm with motion lines indicating movement (no text or symbols on the device itself)OFF

natural_image
Diagram showing a mechanical or electrical component with red and black parts, no text or symbols present
natural_image
Close-up of a red WM 560 TRI robotic arm with yellow wiring (no visible text or symbols)5

natural_image
Close-up of a black bicycle support structure with red and black components, no visible text or symbols

GB Cleaning / Maintenance
natural_image
Red WM 560 TRI motorcycle base with visible suspension and yellow wiring (no text or symbols)
natural_image
3D diagram of a mechanical component with red base and yellow wire, no text or symbols present
natural_image
Illustration of a yellow ribbon tied around a black cylindrical object with red base (no text or symbols)
natural_image
Illustration of a hand holding a red hat with yellow rope tied to a black top (no text or symbols)

| 5 | DE Reinigung / WartungGB Cleaning / MaintenanceFR Nettoyage / EntretienIT Pulizia / ManutenzioneNL Schoonmaken / OnderhoudCZ Čištění / ÚdržbaSK Čistenie / ÚdrzbaHU Tisztítás / Karbantartás | SI Čiščenje / VzdrževanjeHR Čiščenje / OdržavanjeBG Чистене / ПоддръжкаRO Curățare / Întreținere |


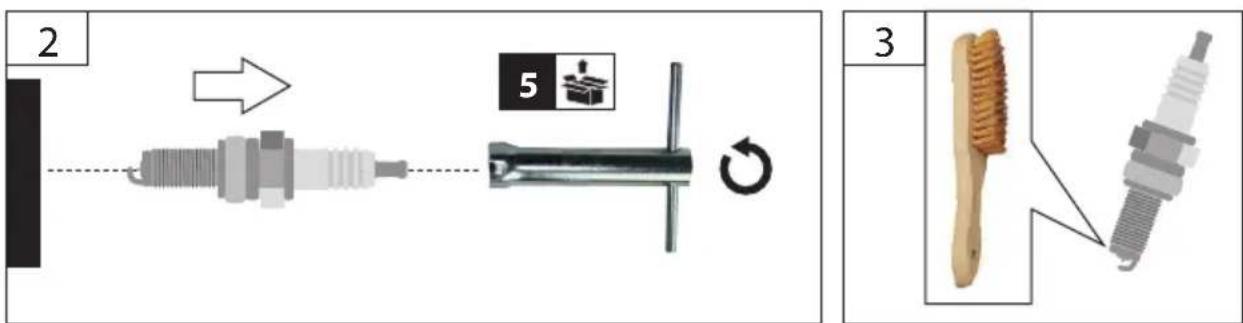
DE Zündkerze
SI Vžigalna svečka
GB Spark plug


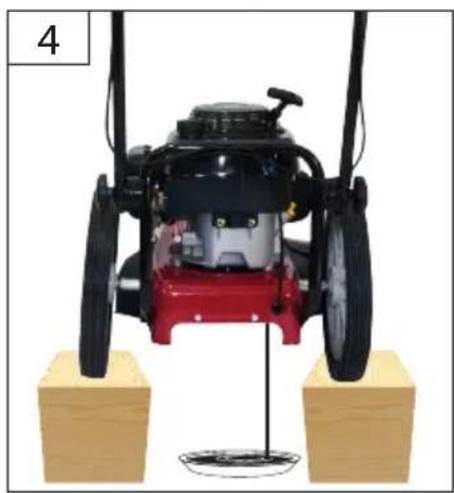
| 5 | DE Ölwechsel | SI Menjava olja |
| GB Oil change | HR Zamjena ulja | |
| FR Remplacement d'huile | BG Смяна на маслото | |
| IT Cambio dell'olio | RO Înlocuirea uleiului | |
| NL Olieverversing | ||
| CZ Výměna oleje | ||
| SK Výmena oleja | ||
| HU Olajcsere |


natural_image
Mechanical assembly diagram showing a red tractor pressing a red base with a downward arrow, supported by wooden blocks (no text or symbols)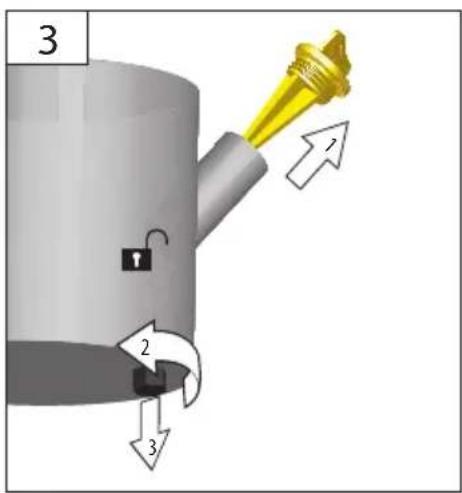
natural_image
Mechanical device with red and black components mounted on wooden blocks, no visible text or symbols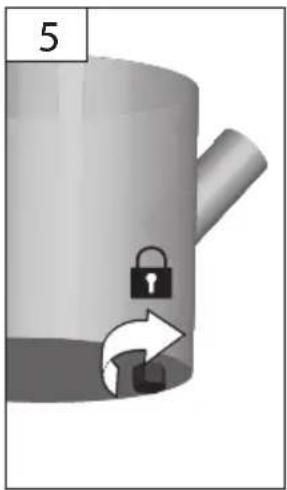
natural_image
3D illustration of a kettle with a lock and directional arrow, no text or symbols present

natural_image
3D illustration of a yellow conical tool emitting powder from a pipe, with a separate arrow symbol nearby (no text or labels)
DE Luftfilter
GB Air filter
FR Filtre à air
IT Filtro d'aria
NL Luchtfilter
CZ Vzduchový filtr
SK Vzduchový filter
HU Levegőszűrő
SI Zračni filter
HR Zračni filtar
BG Въздушен филтър
RO Filtru de aer


natural_image
Red and silver lawn mower with visible frictioners and a black engine (no text or symbols)
natural_image
Close-up of a mechanical component with a yellow and green adhesive layer, showing a black base and a white arrow pointing to a yellow block (no text or symbols visible)
GB Paper filter to be cleaned with compressed air only! Never use water!
natural_image
Close-up of a mechanical component with a yellow foam block and green gasket, showing a white arrow pointing to a component (no text or symbols visible)
Technische Daten
WARNING: The vibration emission level will vary because of the ways in which a power tool can be used and may increase above the level given in this information sheet.
The vibration emission level may be used to compare one tool with another.
It may be used for a preliminary assessment of exposure.
An accurate estimate of the vibratory load should also take into account the times when the tool is shut down or when it is running but not actually in use. This may significantly reduce the vibratory load over the total working period.
Identify additional safety measures to protect the operator from the effects of vibration such as: maintain the tool and the accessories, keep the hands warm, organisation of work patterns.


Read and understand the operating instructions before using the appliance. Familiarise with the
control elements and how to use the appliance properly. Abide by all the safety measures stated in the service manual. Act responsibly toward third parties.
The operator is responsible for accidents or risks to third parties.
In case of any doubts about connection and operation refer please to our customer center
Persons over 16 years of age can only work on the appliance. An exception includes youngsters trained in order to reach knowledge under supervision of the trainer during occupational education.
Local regulations may stipulate the minimum age of the user.
The appliance may only be operated and maintained by persons familiarised with it and informed about possible risks.
Never let children work with the appliance. Never let adults work with the appliance unless they have been properly trained.

Use the appliance only outside, never use it in confined and bad ventilated areas.
Specified Conditions Of Use
The trimmer mower is designed exclusively for trimming and cutting grass and weeds in natural green spaces.

WARNING! Risk of injury
The appliance must not be used to cut hedges, hard branches and wood or to crush material for compost.
Do not use the appliance to cut grass that is not on the ground, e.g. grass growing on walls, rocks, etc.
Do not use this product in any other way as stated for normal use. Not observing general regulations in force and instructions from this manual does not make the manufacturer liable for damages.
Residual risks

Risk of injury
Be careful to avoid injury by the cutting tools. Kickback can lead to casualties.
Always have your arms and legs in safe distance from the cutting mechanism, in particular after turning the engine on.
Never touch under the housing body when the engine is running. Wear gloves!
After the appliance is turned off, the cutting head keep rotating for a couple of seconds. Keep your arms and legs in safe distance.

Thrown-off stones or soil may lead to uries.
Before mowing, check the area to be mowed for any undesirable objects.
Wear safety goggles when working.

Danger of burns!
Some parts of the appliance get too hot when the appliance is operated. Do not touch any hot parts, e.g. engine and muffler.
Contacting hot parts of the unit may cause burns. Let the unit cool down after its operation is over.

Risk of poisoning!
Exhaust gases, fuel and lubricants are toxic. Inhaling exhaust gases may be fatal!
Do not operate the unit in closed spaces where dangerous carbon monoxide gases may accumulate.

Risk of explosion!
Petrol and petrol vapours are highly flammable, explosive.
Do not work with the unit in an environment with a risk of explosion where there are flammable liquids, gases or dust.
Never operate the unit near highly flammable materials.

Risk of fire!
Fuel is highly flammable.
Prohibited smoking and open fire using.
Do not store any fuel near the unit.
Keep the fuel in suitable containers only.
The appliance may only be refuelled outdoors and not near open fire or burning cigarettes.
Refuel before starting the appliance. If the engine is running or still hot, it must not be refuelled or the tank cover opened.
After use, let the unit cool down for at least 10 minutes before refuelling.
Make sure the fuel does not overflow. If the fuel overflows, the engine must not be started. Remove any dirt from the appliance and prevent any attempt at ignition until fuel fumes have evaporated.
Replace all fuel tank and container caps securely.
Fuel tank to be emptied outdoors only.
Never keep the unit with petrol in the tank inside a building where petrol vapours could get in contact with open fire or sparks.
Do not store the appliance in enclosed places just after being switched off but let it cool down outdoors instead.
When the appliance is not going to be used for a long time, store it with an empty tank.
Even when the device is used properly and all safety regulations are complied with, there still may be some residual risks.
- Cutting injury
- Hearing damage
A longer stay in the immediate vicinity of the running unit may cause hearing damage. Wear ear protectors! - Damage to health arising from vibrations to hand and arms if the device is used for a long time or if the device is not guided and evaluated properly.
Emergency procedure
Conduct a first-aid procedure adequate to the injury and summon qualified medical attendance as quickly as possible. Protect the injured person from further harm and calm them down. If you seek help, state the following pieces of information: 1. Accident site, 2.
Accident type, 3. Number of injured persons, 4. Injury type(s)
Symbols

WARNING! CAUTION!

Switch the engine off and remove the socket plug before any work on the engine.

Read the operating instructions to reduce the risk of injury.

Wear eye protective goggles! Wear ear protectors!

Depending on application, use face shield, safety goggles or safety glasses.

Wear safety cut through resistant shoes with safety sole and steel toe!

Wear gloves!

Do not let other persons get near due to foreign objects being thrown off. Minimum safe distance is 15 m.


Warning against hot surfaces! Danger of burns!

Warning against dangerous electric voltage
Warning about inflammable substances

Warning against cutting injury

Risk of poisoning! Use the appliance only outside, never use it in confined and bad ventilated areas.


Never mount any metal cutting elements.
Prohibited smoking and open fire using.
Switch off the engine before any work on it.
Refuel the engine only when switched off.

Keep the machine out of reach of children.

Keep dry at all times.. Never expose tool to rain.

CE marking
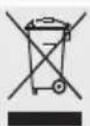
Any damaged or disposed devices must be delivered to appropriate collection centres.
Safety Instructions
Keep children and other persons including animals in a safe distance when using the appliance. Minimum safe distance is 15 m.
Wear suitable protective clothing such as sturdy shoes with non-slip sole, robust long trousers, gloves, safety glasses and hearing protection!
Do not wear loose clothing or jewels. Hear, clothing and gloves must be out of reach of moving parts as they could get caught by the rotating parts. Do not use the appliance when barefooted or in open sandals.
Do not use the appliance if you are tired, ill, under influence of drugs, alcohol drinks or medicaments. Use the appliance in broad daylight or in a well-lit environment.
Avoid operating the equipment in wet grass, where feasible;
Check carefully the terrain where the appliance is being used and remove any items that could get caught and be thrown away.
⚠️ Check all screw and plug-in connections and protective equipment if firm and tightened properly and whether all moving parts are running smooth whenever the appliance is to be put into operation. Check the cutting equipment function. Cutting units should only be replaced in pairs.
The protective equipment on the appliance is strictly prohibited to be disassembled, changed, used in conflict with the designation and it is prohibited to attach any protective equipment of other manufacturers.
The appliance must not be used if damaged or safety equipment is defective. Replace any worn-out and damaged parts.
Do not overreach. Keep proper footing and balance at all times.
When working, keep the appliance firmly with both hands and with a distance from your body.
Turn the appliance on only when in a normal working position. Do not incline the appliance when being started.
Keep all body parts away from the cutting unit. Do not attempt to remove cut material or hold material to be cut when the trimmer mower is running. Only remove jammed cut material when the equipment is switched off.
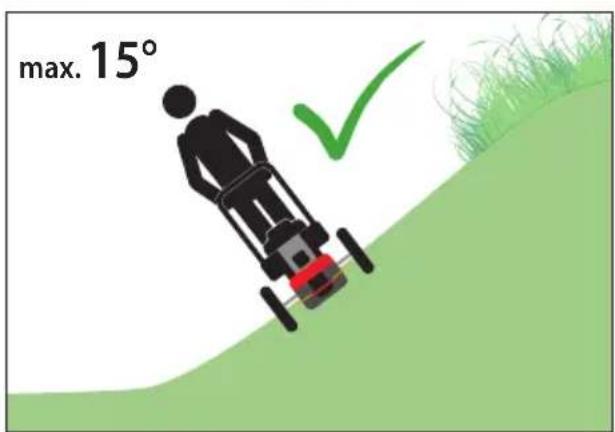
Make sure your posture is safe, especially on slopes. Do not cut on too steep slopes. Be particularly careful when changing travelling direction on slopes.
Do not race when working with the appliance. Walk slowly and cautiously.
Pay maximum attention when turning around and pulling the appliance to you.
Be careful when going backwards – risk of tripping!
Never cross any gravel roads or paths with the running appliance. Switch the mower off whenever carrying or inclining it or when being outside a grass area. Wait until all rotating parts have stopped.
Do not start the engine before your feet are in a safe distance from the cutting tools.
Stop the engine % and disconnect the spark plug wire, make sure that all moving parts have come to a complete stop and, where a key is fitted remove the key:
- To remove a blockage
- Before inspecting, cleaning, servicing or carrying out any other work
• After striking a foreign body
• whenever you leave the lawnmower
- before refuelling
The ON/OFF switch and safety switch must not be locked.
Machine to be stored in a dry place.
Maintenance

Switch the engine off and remove the socket plug before any work on the engine. Wait until all rotating parts have stopped and the nce has cooled down.
Repairs and works specified in these Instructions may only be performed by qualified authorised staff.
Use only original accessories and original spare parts.
Replace any defective muffler.
Do not change the controlled engine setting and do not rev the engine up.
Keep the appliance, especially the tank and engine, clean at all times. Do not clean the plastics with solvents, flammable or toxic fluids. For cleaning, use a damp cloth only.
Only a regularly maintained and treated appliance can serve as a satisfactory aid. Insufficient maintenance and care can lead to unforeseen accidents and injuries.
If necessary, a list of spare parts can be found at www.guede.com.
Guarantee
Warranty period of 12 months applies to commercial use and 24 months applies to private use and commences on the day of purchase of the device.
The guarantee solely covers inadequacies caused by material defect or manufacturing defect. Original payment voucher with the sales date needs to be submitted for any claim in the guarantee period.
The guarantee does not cover any unauthorised use such as appliance overloading, use of violence, damage as a result of any unauthorised interference or caused by foreign items. Failing to follow the operating and assembly instructions and common wear are also not included in the guarantee.
Important information for the customer
Please be sure to know that returning the product in or after the warranty period must be made in the original packaging.
Service
Do you have any technical questions? Any claim? Do you need any spare parts or operating instructions? We will quickly help you and without needles bureaucracy at our web pages at www.guede.com in the Servicing part. Please help us be able to help you. In order to identify your device in case of claim we need the serial No., product No. and year of production. All this data can be found on the type label.
Tel.: +49 (0) 79 04 / 700-360
Fax: +49 (0) 79 04 / 700-51999
E-Mail: support@ts.guede.com
Inspection and maintenance plan
| Regular servicing period Before any start-up | After every take out of service | After 1 month | After 12 months | After 24 months | |
| Air filter Inspection | ✓ | ||||
| Change | ✓ | ||||
| Spark plug Inspection Clean | ✓ | ||||
| Change | ✓ | ||||
| Thread Clean | ✓ | ||||
Failure removal
| Failures | Causes | Removal |
| Engine does not start | Lack of fuel Add some fuel | |
| Choke has not been used Use the choke | ||
| Wrong fuel, storing without petrol tank being drained | Drain the fuel tank and carburettor.Add fresh petrol. | |
| Sooted spark plug (carbon residues on electrodes), electrodes distance too big | Clean the spark plug, check the plug thermal value, possibly change the plug, set the electrodes distance to 0.6-0.7 mm | |
| The spark plug is wet from petrol (oversaturated engine). | Dry the spark plug out and refit it. | |
| The motor does not develop maximum power | Sooted spark plug (carbon residues on electrodes), electrodes distance too big | Clean the spark plug, check the plug thermal value, possibly change the plug, set the electrodes distance to 0.6-0.7 mm |
| Dirty air filter Clean or replace the air filter | ||
Never use the appliance when barefooted or in light sandals.
Wear protective gloves if necessary.
WAARSCHUWING! OPGELET!

Translation of the EC-Declaration of Conformity
We, hereby declare the conception and construction of the below mentioned appliances correspond - at the type of construction being launched - to appropriate basic safety and hygienic requirements of EC Directives.
In case of any change to the appliance not discussed with us the Declaration expires.
Notified Body Name: No: Adress:
Type Ex. Cert.-No.:
97/68/EC_2010/26/EC
Emission No.: e11*97/68SA*2010/26*0829*02(II)
2000/14/EC_2005/88/EC




- WM 560 TRI
- Specified Conditions Of Use
- WARNING! Risk of injury
- Residual risks
- Risk of injury
- Be careful to avoid injury by the cutting tools. Kickback can lead to casualties.
- Thrown-off stones or soil may lead to uries.
- Danger of burns!
- Risk of poisoning!
- Risk of explosion!
- Risk of fire!
- Fuel is highly flammable.
- Emergency procedure
- Symbols
- Safety Instructions
- Be careful when going backwards – risk of tripping!
- Maintenance
- Guarantee
- Important information for the customer
- Service
- Inspection and maintenance plan
- Translation of the EC-Declaration of Conformity
Brand : Güde
Model : WM 560 TRI
Category : Lawn mower