USER MANUAL HD7762/00 PHILIPS
Always here to help you
Register your product and get support at
www.philips.com/welcome
HD7762


1 Introduction 18
2 General description 18
3 Important 20
3.1 Danger 20
3.2 Warning 20
3.3 Caution 20
3.4 Electromagnetic fields (EMF) 21
4 Before first use 21
4.1 Setting the clock 21
4.2 Flushing the appliance 21
5 Using the appliance 23
5.1 Filling the water reservoir 23
5.2 Using coffee beans 23
5.3 Using pre-ground coffee 26
5.4 Setting the timer 27
5.5 Drip stop function 28
6 Cleaning and maintenance 28
6.1 Cleaning after every use 28
6.2 Cleaning the coffee bean chute 29
6.3 D escaling the coffeemaker 30
7 Ordering accessories 31
8 Environment 32
9 Guarantee and support 32
10 Troubleshooting 32
1 Introduction
Congratulations on your purchase and welcome to Philips! To fully benefit from the support that Philips offers, register your product at
www.philips.com/welcome.
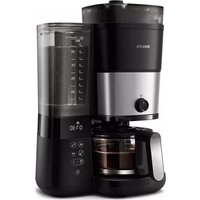
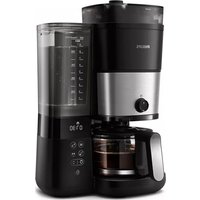
2 General description
1 Filter basket
2 Filter basket holder
3 Water level indicator
4 Water reservoir lid
5 Bean container lid
6 Container selector
7 Coarseness knob
8 Duo coffee bean container
9 Lid of coffee bean chute
10 Coffee bean chute ejector
11 Water filling hole
12 Display
A Pre-ground coffee icon
B Number of cups
C Coffee cup icon
D Strength select coffee bean icon
E Strength select button
F Timer button
G Hour indication
H Minute indication
Timericon
13 On/off button
14 Glass jug lid
15 Glass jug
16 Cleaning brush

3 Important
Read this user manual carefully before you use the appliance and save it for future reference.
3.1 Danger
- Never immerse the appliance in water or any other liquid, nor rinse it under the tap.
3.2 Warning
3.3 Caution
- Do not place the appliance on a hot surface and prevent the mains cord from coming into contact with hot surfaces.
- Unplug the appliance if problems occur during grinding or brewing and before you clean it.
- Do not move the appliance while it is operating.
- The appliance becomes hot during use. Let the appliance cool down before you store it.
During brewing, the lower part of the appliance and the bottom of the jug become hot.
After you have unpacked the appliance, make sure it is complete and undamaged. If in doubt, do not use the appliance but contact the Consumer Care Centre in your country.
- This appliance is intended for normal household use only. It is not intended for use in environments such as staff kitchens of shops, offices, farms or other work environments. Nor is it intended to be used by clients in hotels, motels, bed and breakfasts and other residential environments.
3.4 Electromagnetic fields (EMF)
This Philips appliance complies with all standards regarding electromagnetic fields (EMF). If handled properly and according to the instructions in this user manual, the appliance is safe to use based on scientific evidence available today.
4 Before first use
4.1 Setting the clock
1 Put the mains plug in the wall socket.
00:00 flashes on the display to indicate that you have to set the clock time.
2 Turn the knob to set the hour.

3 Press in the centre of the knob to confirm the hour.

The minutes start to flash to indicate that you have to set the minutes.
4 Turn the knob to set the minutes.

Press in the centre of the knob to confirm the minutes.

The display shows the set clock time. The coffeemaker is ready for use.
4.2 Flushing the appliance
You need to flush the coffeemaker once before first use.
1 Open the water reservoir lid. Fill the water reservoir with fresh cold water up to the 8-cup indication.

Note:
Do not put coffee beans or ground coffee in the appliance.
2 Close the water reservoir lid.
3 Put the jug in the appliance.

4 Press the on/off button.

The display lights up.
5 Press the strength select button.

6 Turn the knob to choose the pre-ground coffee setting.

The pre-ground coffee icon lights up.
Press in the centre of the knob to confirm. Then press in the centre of the knob again to start the flushing process.

8 Let the appliance operate until the flushing process has been completed.
9 Empty the jug.
5 Using the appliance
5.1 Filling the water reservoir
1 Open the water reservoir lid and fill the water reservoir with the required amount of cold water.

When you open the water reservoir lid, there are indications for 2 to 10 cups on the inside of the appliance. You can use these indications to determine how much water to put in the water reservoir:

Note:
Do not fill the water reservoir beyond the 10-cup indication.
5.2 Using coffee beans
Warning:
Always keep the water reservoir lid closed when you fill the coffee bean container with coffee beans. Otherwise coffee beans can fall into the water reservoir and block up the water inlet.
1 Remove the coffee bean container lid.

2 Fill the duo coffee bean container with coffee beans. You can fill the duo coffee bean container with two different types of coffee beans. Make sure there are enough coffee beans in the container for the amount of coffee you want to brew.


Note:
Always make sure the coffee bean container is at least half full.

Warning:
To prevent the grinder from jamming, do not use unroasted or caramelised beans. We advise to use coffee beans instead of espresso beans as this may cause damage.
3 To open the filter basket holder, pull at its tab on the right side of the coffeemaker.

Take a paper filter (type 1x4 or no. 4) and fold the sealed edges to prevent tearing and folding. Place the paper filter in the filter basket.

5 Close the filter basket holder.
Put the jug in the appliance.

7 Turn the coarseness knob to select the desired type of grind (from fine to coarse).

Tip:
The coarseness knob allows you to choose between nine different settings. We preselected 3 optimal settings but you can also choose any setting in between the icons. We advise you to experiment with the different grind settings to find out which setting you prefer.
Turn the container selector to choose between the two types of coffee beans.

A Warning:
Whenever you switch between coffee bean containers or coffee beans, there will always be traces of coffee left of the previously ground type of coffee beans. Clean the coffee bean chute after you switch to a new type of coffee bean to prevent this.
Note:
Depending on your taste, you can either select one of the two types of coffee beans or a mix of both types.
9 Press the on/off button on the front of the appliance.

The number of cups starts to flash.
10 To select the number of cups, turn the knob until the desired number of cups appears on the display.


Note:
Make sure that the number of cups you select with the 2-10 cups button is consistent with the amount of water in the water reservoir. Please keep in mind that the coffeemaker uses all the water in the water reservoir. If you select a number of cups that is smaller than the amount of water, the coffee becomes weaker than you intended.
Press in the centre of the knob to confirm the number of cups.
12 Press the strength select button.

The coffee bean icons start to flash.
13 Turn the knob to select the desired coffee strength (mild: 1 bean, medium: 2 beans or strong: 3 beans).

- The display shows the selected coffee strength.

Tip:
We advise you to experiment with the amount of water to find out which strength you prefer. If you select a number of cups that is higher than the amount of water, the coffee becomes stronger. If you select a number of cups that is smaller than the amount of water, the coffee becomes weaker.
14 Press in the centre of the knob to confirm, Then press in the centre of the knob again to start the brewing process.

- The grinder grinds the required amount of coffee beans.
15 Wait until the coffeemaker has stopped brewing before you remove the jug.

Note:
After brewing, coffee drips from the filter basket for several seconds.
5.3 Using pre-ground coffee
If you want to use pre-ground coffee instead of coffee beans, follow the steps below.
1 Open the water reservoir lid and fill the water reservoir with the required amount of cold water.

To open the filter basket holder, pull at its tab on the right side of the coffeemaker.

3 Take a paper filter (type 1x4 or no. 4) and fold the sealed edges to prevent tearing and folding. Place the paper filter in the filter basket.

Put pre-ground coffee in the paper filter.

Note:
You can adjust the strength of the coffee to your own personal taste. For a medium-strong cup of coffee, use one measuring spoon (approximately 6g) of ground coffee for each cup (120ml). For stronger coffee, use 1.5 measuring spoons of ground coffee for each cup of coffee.
5 Close the filter basket holder.
Put the jug in the appliance.

7 Press the on/off button.

The display lights up.
Press the strength select button.

9 Turn the knob to choose the pre-ground coffee setting.

The pre-ground coffee icon lights up.
10 Press in the centre of the knob to confirm. Then press in the centre of the knob again to start the brewing process.

Wait until the coffeemaker has stopped brewing before you remove the jug.

Note:
After brewing, coffee drips from the filter basket for several seconds.
5.4 Setting the timer
The timer enables you to program the time at which you want the brewing process to start.
Press the timer button.

- On the display 00:00 flashes to indicate that you have to set the timer.
2 Turn the knob to set the hour.

3 Press in the centre of the knob to confirm the hour.

The minutes starts to flash to indicate that you have to set the minutes.
4 Turn the knob to set the minutes.

Press in the centre of the knob to confirm the minutes.

- The timer is set and the brewing process will start at the preset time.
5.5 Drip stop function
The drip stop function enables you to remove the jug from the coffeemaker before the brewing process is finished. When you remove the jug, the drip stop stops the flow of coffee into the jug.
Note:
The brewing process does not stop when you remove the jug. If you do not put the jug back into the appliance within 20 seconds, the filter basket overflows.
6 Cleaning and maintenance
6.1 Cleaning after every use
A Warning:
Never immerse the appliance in water or any other liquid, nor rinse it under the tap.
Press the on/off button on the front of the appliance to switch off the appliance.

2 Remove the mains plug from the wall socket.
3 Wipe the outside of the coffeemaker with a damp cloth.

4 Clean the filter basket and the jug in the dishwasher or with hot water and some washing-up liquid.
6.2 Cleaning the coffee bean chute
Whenever you switch between coffee bean containers or coffee beans, there will always be traces left of the previously ground type of coffee beans that can affect the taste of your coffee. Clean the coffee bean chute every 1 to 2 weeks or whenever you switch between coffee bean containers to prevent freshly ground coffee and traces in the coffee bean chute from mixing together. After you switch to a new type of coffee beans, follow the steps below to ensure optimal taste.
Press the on/off button on the front of the appliance to switch off the appliance.

2 To open the filter basket holder, pull at its tab on the right side of the coffeemaker.

3 Take a paper filter (type 1x4 or no. 4) and fold the sealed edges to prevent tearing and folding. Place the paper filter in the filter basket.

4 Close the filter basket holder.
5 Insert the flat end of the cleaning brush handle into the lock of the coffee bean chute and press it down.


Note:
If you want to clean the coffee bean chute quickly by brush only, please continue with step 7. If you want to prevent ground coffee traces from affecting the taste of your new coffee beans, please continue with step 6.
6 Press and hold the strength select button for 4 seconds.

The grinder starts cleaning itself.
When the grinder has stopped cleaning, use the cleaning brush to brush ground coffee residues into the lower part of the chute.

- The ground coffee residues fall into the filter basket.
A Warning:
Do not drop the brush in the coffee bean chute.
8 Close the lid of the coffee bean chute.
9 Remove the paper filter with the ground coffee residues and throw it away.
6.3 Dscaling the coffeemaker
Descale the coffeemaker when you notice excessive steaming or when the brewing time increases. It is advisable to descale it every two months. Only use white vinegar to descale, as other products may cause damage to the coffeemaker.
Warning:
Never use vinegar with an acetic acid content of 8% or more, natural vinegar, powder descalers or tablet descalers to descale the appliance, as this may cause damage.
1 Open the water reservoir lid.
2 Fill the water reservoir with 8 cups of white vinegar (4% acetic acid) and 2 cups of water.

3 Place a paper filter (no. 4) in the filter basket and close the filter basket holder.

Put the empty jug in the appliance.

5 Put the mains plug in the wall socket.
6 Press the on/off button on the front of the appliance to switch on the appliance.

The display lights up.
7 Press the strength select button and turn the knob to choose the pre-ground coffee setting.

Press in the centre of the knob to confirm. Then press in the centre of the knob again to start the brewing process.

Wait until half of the vinegar-water solution has flowed into the jug. Then press the on/off button to stop the brewing process and let the solution act for at least 15 minutes.

10 Press the on/off button to switch the coffeemaker back on.

Press in the centre of the knob twice to let the appliance complete the brewing process.

12 Empty the jug and throw away the paper filter.
13 Fill the water reservoir with cold water and press in the centre of the knob twice to start another brewing process. Let the coffeemaker complete the entire brewing process and empty the jug.
14 Repeat step 13 until the water no longer tastes or smells like vinegar.
15 Clean the filter basket and the jug in the dishwasher or with hot water and some washing-up liquid.
16 Press the on/off button on the front of the appliance to switch off the appliance.
7 Ordering accessories
To buy accessories or spare parts, visit www.shop.philips.com/service or go to your Philips dealer. You can also contact the Philips Consumer Care Centre in your country (see the worldwide guarantee leaflet for contact details).
8 Environment
- Do not throw away the appliance with the normal household waste at the end of its life, but hand it in at an official collection point for recycling. By doing this, you help to preserve the environment.

13/14
9 Guarantee and support
If you need information or support, please visit www.philips.com/support or read the separate worldwide guarantee leaflet.
10 Troubleshooting
This chapter summarises the most common problems you could encounter with the appliance. If you are unable to solve the problem with the information below, visit www.philips.com/support for a list of frequently asked questions or contact the Consumer Care Centre in your country.
The appliance does not work.
- Put the mains plug in the wall socket and press the on/off button on the front of the appliance to switch on the appliance.
- Make sure that the voltage indicated on the appliance corresponds to the local mains voltage.
- Fill the water reservoir with water.
- Close the lid of the coffee bean chute.
When I use the grinder, the coffee is too weak.
- Make sure the number of cups you select with the 2-10 cups button is consistent with the amount of water in the water reservoir. Please keep in mind that the coffeemaker uses all the water in the water reservoir.
- Use the strength select button to set the coffee strength to 'strong'.
- When you use coffee beans, make sure you do not press the pre-ground coffee button, as this switches off the grinder.
- Use coffee beans of a stronger blend or flavour.
- Make sure the selected number of cups is consistent with the amount of water in the water reservoir.
When I use pre-ground coffee, the coffee is too weak.
- Make sure the amount of pre-ground coffee in the filter is consistent with the amount of water in the water reservoir. Please keep in mind that the appliance uses all the water in the water reservoir.
- Use ground coffee of a stronger blend or flavour:
- To increase the coffee strength, increase the amount of pre-ground coffee or decrease the amount of water.
The filter overflows when I remove the jug from the appliance while it is brewing coffee.
- If you remove the jug for more than 20 seconds during the brewing process, the drip stop causes the filter basket to overflow. Also note that the coffee does not reach its full taste before the end of the brewing process. Therefore we advise you not to remove the jug and pour out the coffee before the end of the brewing process.
The appliance continues to drip long after the brewing process has ended.
- The dripping is caused by condensation of steam. It is completely normal that the appliance drips for some time.
- If the dripping does not stop, the drip stop may be clogged. To clean the drip stop, pull at the tab of the filter basket holder on the right side of the coffeemaker to open the holder. Take out the filter basket. Then rinse the filter basket and the drip stop under the tap.
- If you remove the jug for more than 20 seconds during the brewing process, the drip stop causes the filter basket to overflow.
The coffee is not hot enough.
- Preheat the jug with hot water before you start brewing coffee.
- The coffee in the jug cools down faster if you brew only a few cups. The coffee stays hot longer if you brew 10 cups, which is a full jug.
- Use thin-walled cups, because they absorb less heat from the coffee than thick-walled cups.
- Do not use milk that comes directly out of the fridge.
- Descale the appliance. See section 'Dscaling the coffeemaker' in chapter 'Cleaning and maintenance'.
The appliance does not start cleaning the coffee bean chute.
- Make sure the appliance is connected to the mains.
- Make sure the lid of the coffee bean chute is opened before pressing and holding the strength select button for 4 seconds.
- Press and hold the strength select button for 4 seconds until the grinder starts cleaning itself.
The appliance works but makes a beeping sound.
- Please check if the lid of the coffee bean chute is properly closed.
Table des matières
7 Commanded accessoires