
GS270 - Browser DANEW - Free user manual and instructions
Find the device manual for free GS270 DANEW in PDF.
| Product type | GPS Navigator |
| Brand | Danew |
| Model | GS270 |
| Screen | Touchscreen with calibration |
| Battery | Rechargeable lithium-ion |
| Charging time (first use) | 8 hours for the first 3 cycles |
| Charging time (normal) | 3 hours for a full charge |
| Power supply | Connection to power source (mains adapter or cigarette lighter) |
| Main functions | GPS navigation, main menu, system menu, settings (language, brightness, power saving), standby mode, screen calibration, USB function (storage and synchronization) |
| USB port | Yes, for connection to a computer (USB drive mode or synchronization) |
| Screen calibration | Press 5 times on the cross until it disappears |
| Standby mode | Brief press on the ON/OFF button |
| Languages | Multilingual (configurable in settings) |
| Maintenance | Do not expose to sunlight; charge fully every 2 to 3 months if not used for a long time |
| Safety | Do not operate while driving; do not obstruct the driver's view or airbags; do not use for precise measurements |
| Spare parts and repairability | Contact the retailer or technical service for a damaged battery |
| User manual | Available in PDF format at notice-facile.com |
Frequently Asked Questions - GS270 DANEW
User questions about GS270 DANEW
0 question about this device. Answer the ones you know or ask your own.
Ask a new question about this device
Download the instructions for your Browser in PDF format for free! Find your manual GS270 - DANEW and take your electronic device back in hand. On this page are published all the documents necessary for the use of your device. GS270 by DANEW.
USER MANUAL GS270 DANEW
Please read this manual before you start using this device
Thanks for purchasing our product. Please read this manual carefully before starting to use this device. When you use this device, you are supposed to learn well of this product.
The information in this manual has been verified for its accuracy. But no liability will be applied for the correctness of mapping data of navigation, technical and/or editorial interpretation or illustration, or the printing and translation of this manual, nor liable for any consequence or incidental damages caused by using this manual.
This device is a complicated technical product consisting of OS and third party software. The manufacturer has paid sufficient attention to and fulfill its duty in its hardware manufacture processing and in development and/or application of the software so as to ensure the device work properly. If there is any malfunction or defective of the device, the manufacturer will provide a warranty for the congenital quality problem, but not covering for any loss or damage of property, or any consequence caused by or related to using this device.
The navigation software and mapping data is provided by a third party. Its copyright is protected by laws. A User can only use on this device, any copying or application of the software for other purpose is not allowed.
- No explicit and/or implicit guarantee or assurance will be applicable for the validity, integrity, correctness, accuracy of mapping data for navigation used on this device, nor liability for any loss, damage, and/or any consequence caused by or related to defective mapping data or software used on this device.
The copyright of this manual is owned by the company and protected by laws. Any copy or translation of whole or part of its content, including words, figures, signs, phonetic index, etc., is only allowed for the individual customer's reference, but not for public circulation, or other legal and/or commercial purpose. The company reserves the right for final interpretation of this manual.
Catalog
Function Description
- Illustrations on screen display 3
Battery
Battery Status Icon 4
- Charging 4
Power On/OFF the device
Power On the device 5
Sleeping mode 5
Power Off 5
Function & Operation
System Setting 6
Language Setting 6
Backlight setting 7
Power Management 7
8
USB 9
Services
Troubleshooting 10
Function Description
Illustrations on screen display:
System UI

On this menu click on «Settings» button to enter the function settings page.
Click on «GPS» to launch the navigation software.
Click on «Multimedia» to enter on the multimedia menu.
Secondary UI

In this interface, click the icons on the screen to enter the corresponding functions
Battery
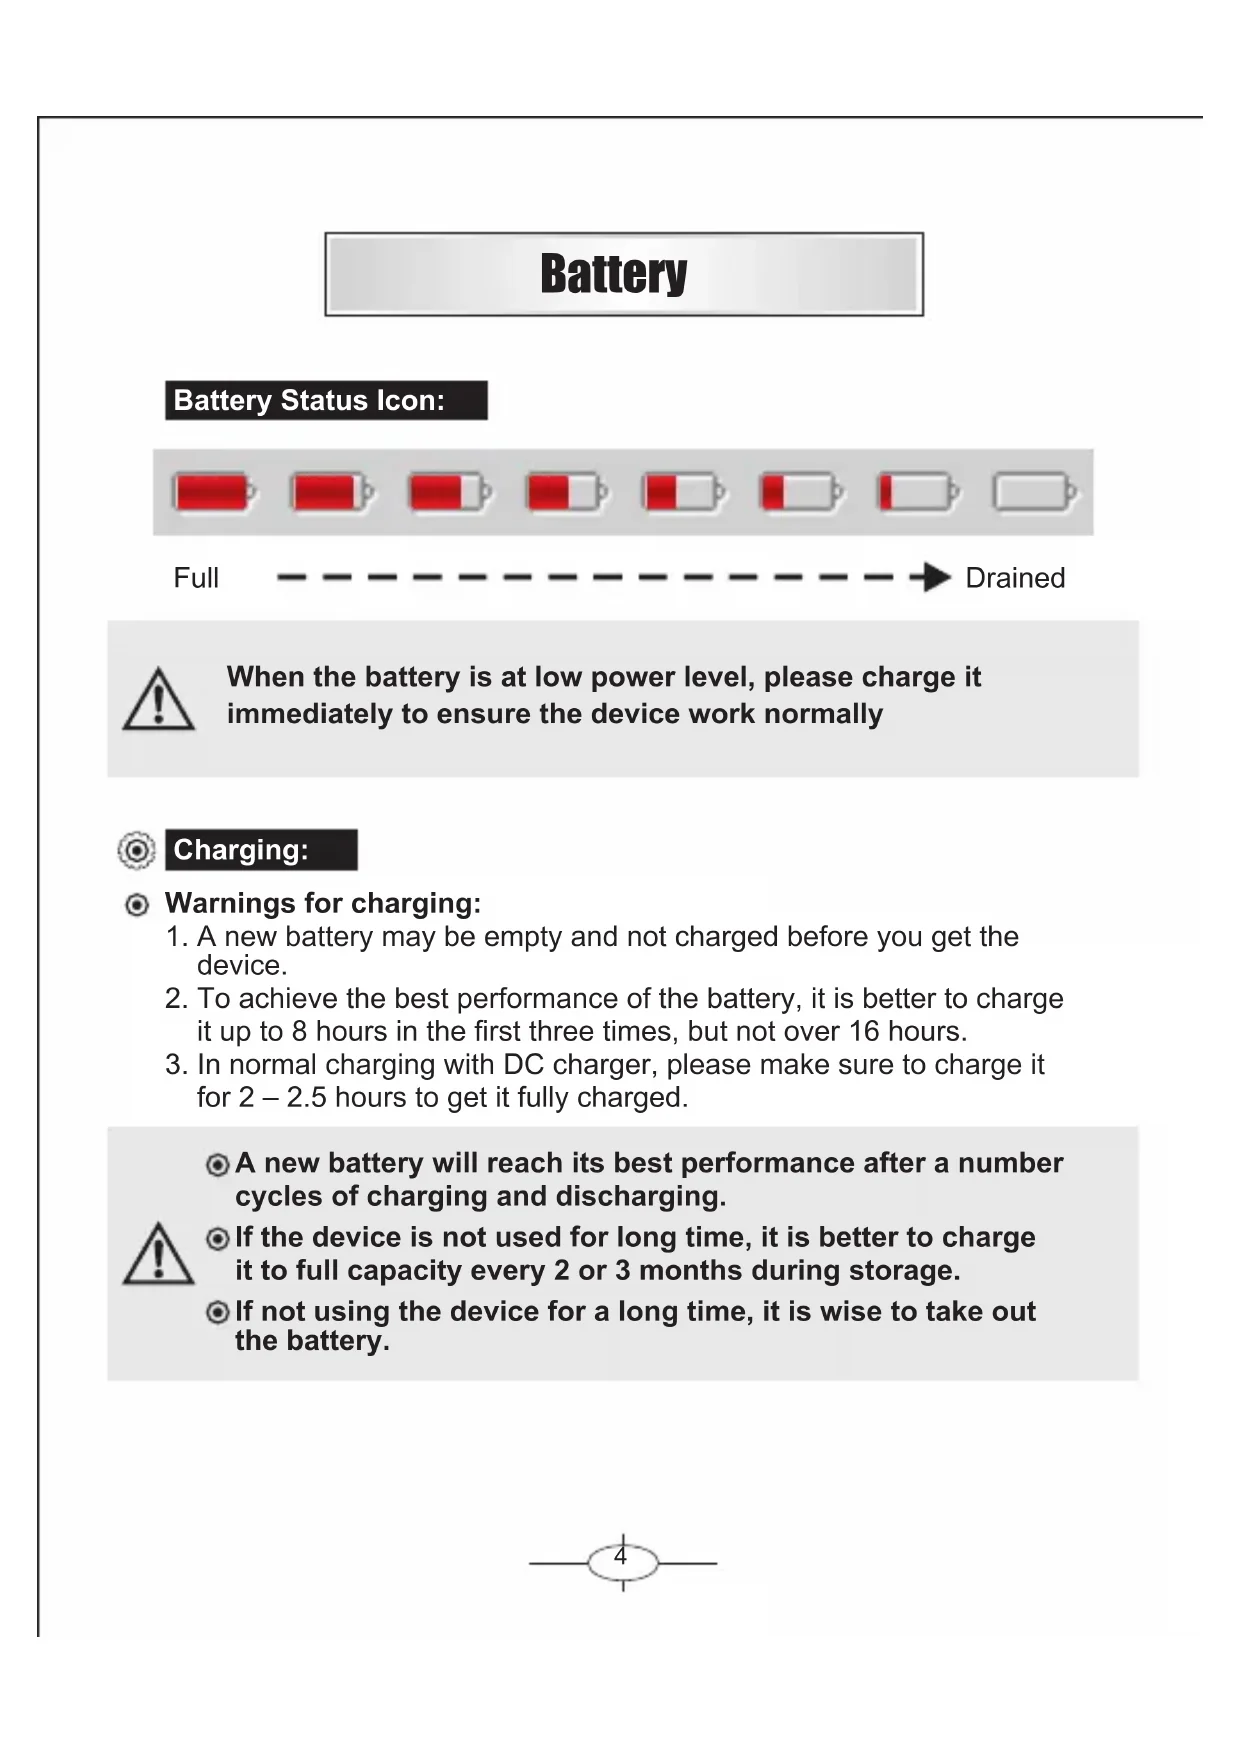
Battery Status Icon:


When the battery is at low power level, please charge it immediately to ensure the device work normally

Charging:
Warnings for charging:
- A new battery may be empty and not charged before you get the device.
- To achieve the best performance of the battery, it is better to charge it up to 8 hours in the first three times, but not over 16 hours.
- In normal charging with DC charger, please make sure to charge it for 2 - 2.5 hours to get it fully charged.

- A new battery will reach its best performance after a number of cycles of charging and discharging.
- If the device is not used for long time, it is better to charge it to full capacity every 2 or 3 months during storage.
- If not using the device for a long time, it is wise to take out the battery.
Function & Operation
Power On the device
In power off status, slide the power switch to "ON" position to turn on the device, then the OSD will be displayed on screen.
Sleeping & Power -off
In power-on mode, press the power button on the device for 3-5 seconds then the sleeping mode or confirmation for power-off screen will display as follows:
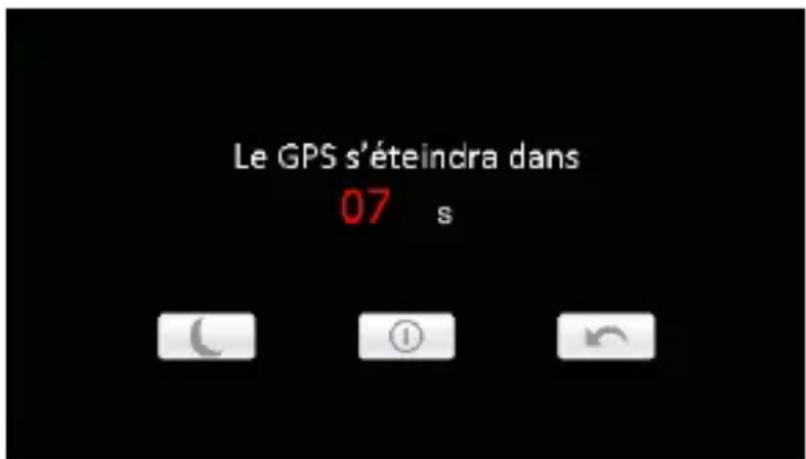
In this UI click the button will be in sleeping mode, click the button
① will power off; click the button to exit the UI and back to normal operation.
Waking -up from the sleeping
When in sleeping mode, a short press on the power-on button of the device will wake up the system.

When in sleeping mode, all the procedure in operation will pause but will back to normal status after waking up.
Function & Operation
System Setting
This is for system setting to change default setting of the system to your personal preference.
Operation:
On system main menu, click icon to enter into system setting. Screen display is shown as the illustration below:
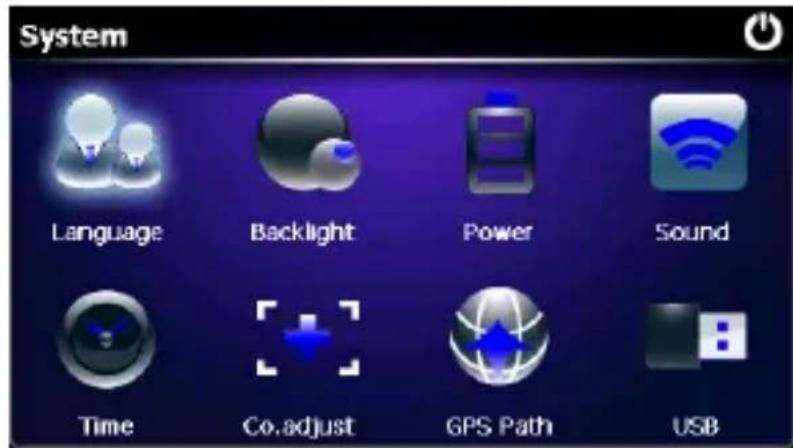
In system setting, there 8 items for setting, click directly each item to change setting for it. Details will be described below.
Language Setting
This is for setting of system language, screen display is shown as the illustration below:
Click the icons of the corresponding language in this interface or choose the interface project, the system will save the setup automatically when the
setup is closed, and return to the previous menu. (The system will be required to restart after the interface project is changed.)
Function & Operation
Backlight setting
This is for changing backlight brightness of the device screen display, and time to start screen saver when no operation on the device. Screen display is shown as the illustration below:
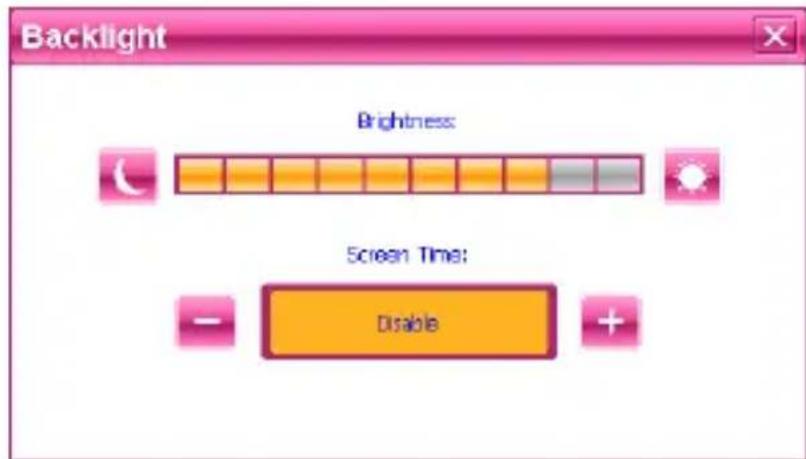
Then, drag the slide block to set. Select No Screen Saver, then the screen saver will be disabled. After setting, close the current window to save.
Power Management
This is for setting auto power off and/or power saving mode, and time to start power off and/or power saving when no operation on the device.
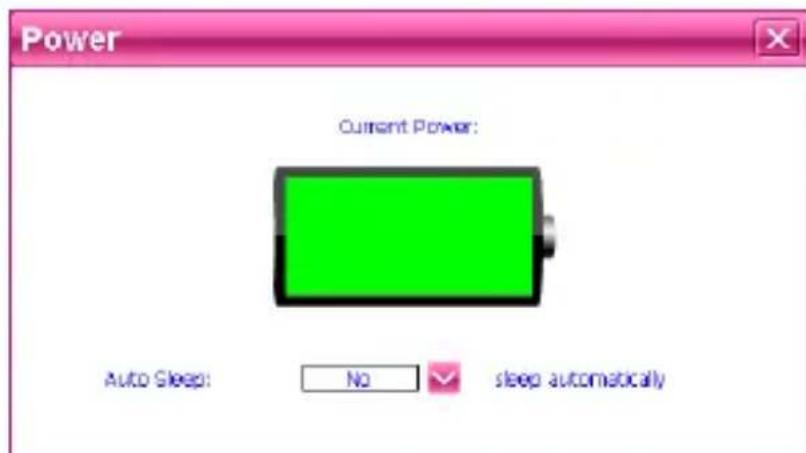
In drag menu to select time, select "No" for disabling this feature. After setting, close the current window to save.
Function & Operation
Coordinates Calibration
This is for calibrating the stylus coordinates on touch screen. After entering into this UI, screen display is shown as the illustration below:
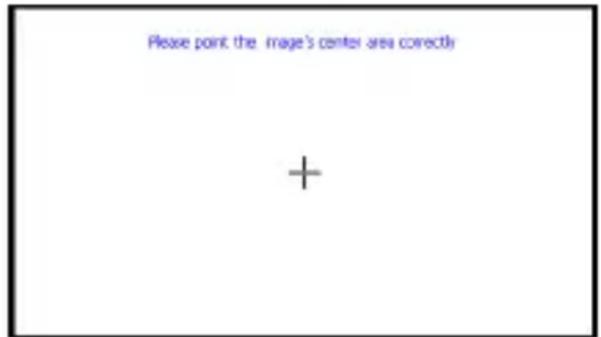
On this UI, use stylus to tap at the center of the cross, then tap on other crosses which will move after each tapping until finish and "Touch Screen Calibration Completed" is shown.
Function & Operation
USB
This is to set the mode when the USB interface of the device is connected to the computer, in which "MASS STORAGE" is to set the device as a memory, and "ACTIVESYNC" is to use the device for program debug. Pictures are shown as below:
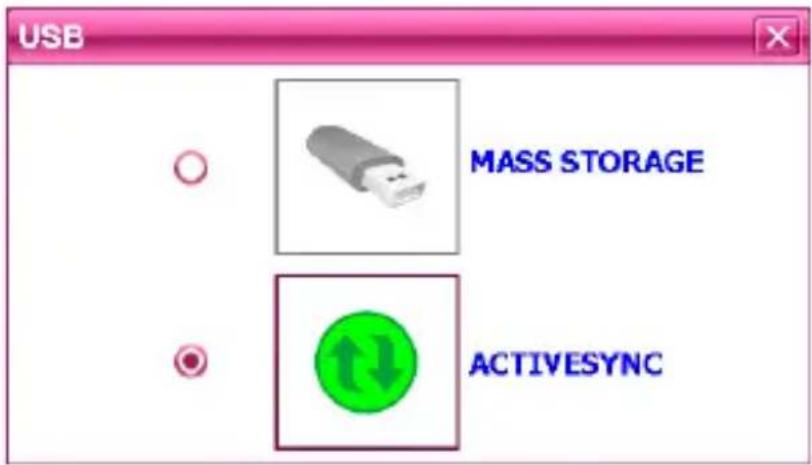
Click the desired connection mode and close the window to save the chosen mode.
Services
Troubleshooting
| No. | Fault | Possible Cause | Solutions |
| No power on | Battery drained (The screen has no further display after a blink when pressing power on button.) | Please refer to the description of battery charging in this manual, only use the enclosed charger to charge the device. | |
| Dead Unit | The start interface stays on the screen for long time without changing. | Take out the battery, then put it back, start the device again. | |
| No display of the screen, or display on screen is frozen as any button is pressed. | Press and hold the power on button for 5 seconds, then release it to power on. | ||
| Take out the battery, then put it back, start the device again. | |||
| Error in upgrade | Dead or frozen during upgrade, display on the screen is frozen and no button works. | This fault can only be fixed by the manufacturer. Please return for repair. | |
| Impossible to recharge | During charging, the green LED indicator of the device has no light or no charging sign displayed on the screen. | If the charger is connected properly and powered. | |
| Charger is damaged. | |||
| Battery is damaged or full charged. | |||
| It is normal when the green LED is lit on but the charging sign is not on the screen at the same time during charging. |


- Please read this manual before you start using this device
- Catalog
- Function Description
- Battery
- Power On/OFF the device
- Function & Operation
- Services
- Illustrations on screen display:
- System UI
- Secondary UI
- Battery Status Icon:
- Charging:
- Warnings for charging:
- Power On the device
- Sleeping & Power -off
- Waking -up from the sleeping
- System Setting
- Operation:
- Language Setting
- Backlight setting
- Power Management
- Coordinates Calibration
- USB
Brand : DANEW
Model : GS270
Category : Browser