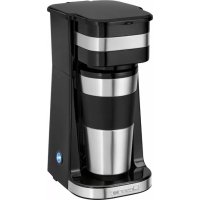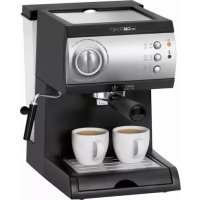
ES 3584 - Coffee machine CLATRONIC - Free user manual and instructions
Find the device manual for free ES 3584 CLATRONIC in PDF.



Frequently Asked Questions - ES 3584 CLATRONIC
User questions about ES 3584 CLATRONIC
0 question about this device. Answer the ones you know or ask your own.
Ask a new question about this device
Download the instructions for your Coffee machine in PDF format for free! Find your manual ES 3584 - CLATRONIC and take your electronic device back in hand. On this page are published all the documents necessary for the use of your device. ES 3584 by CLATRONIC.
USER MANUAL ES 3584 CLATRONIC
natural_image
Exterior view of a CMTRONC coffee machine with two white cups on the back (no visible text or symbols)DEUTSCH
Inhalt
Overview of the Components ...... Page 3
Instruction Manual Page 50
Technical Data Page 57
Disposal Page 57
NEDERLANDS
Inhoud
natural_image
Hand holding a kitchen brush applying powder to a control panel (no visible text or symbols)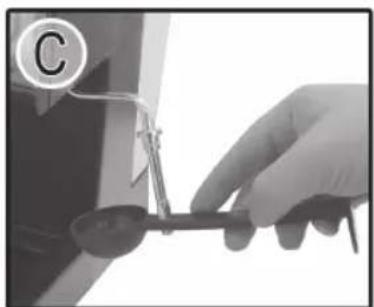
natural_image
Close-up of a hand holding a small object with a tool, no visible text or symbolsBedienungsanleitung
Drukknoppen (8/9/12)....17
⚠ WAARSCHUWING: Belangrijk!
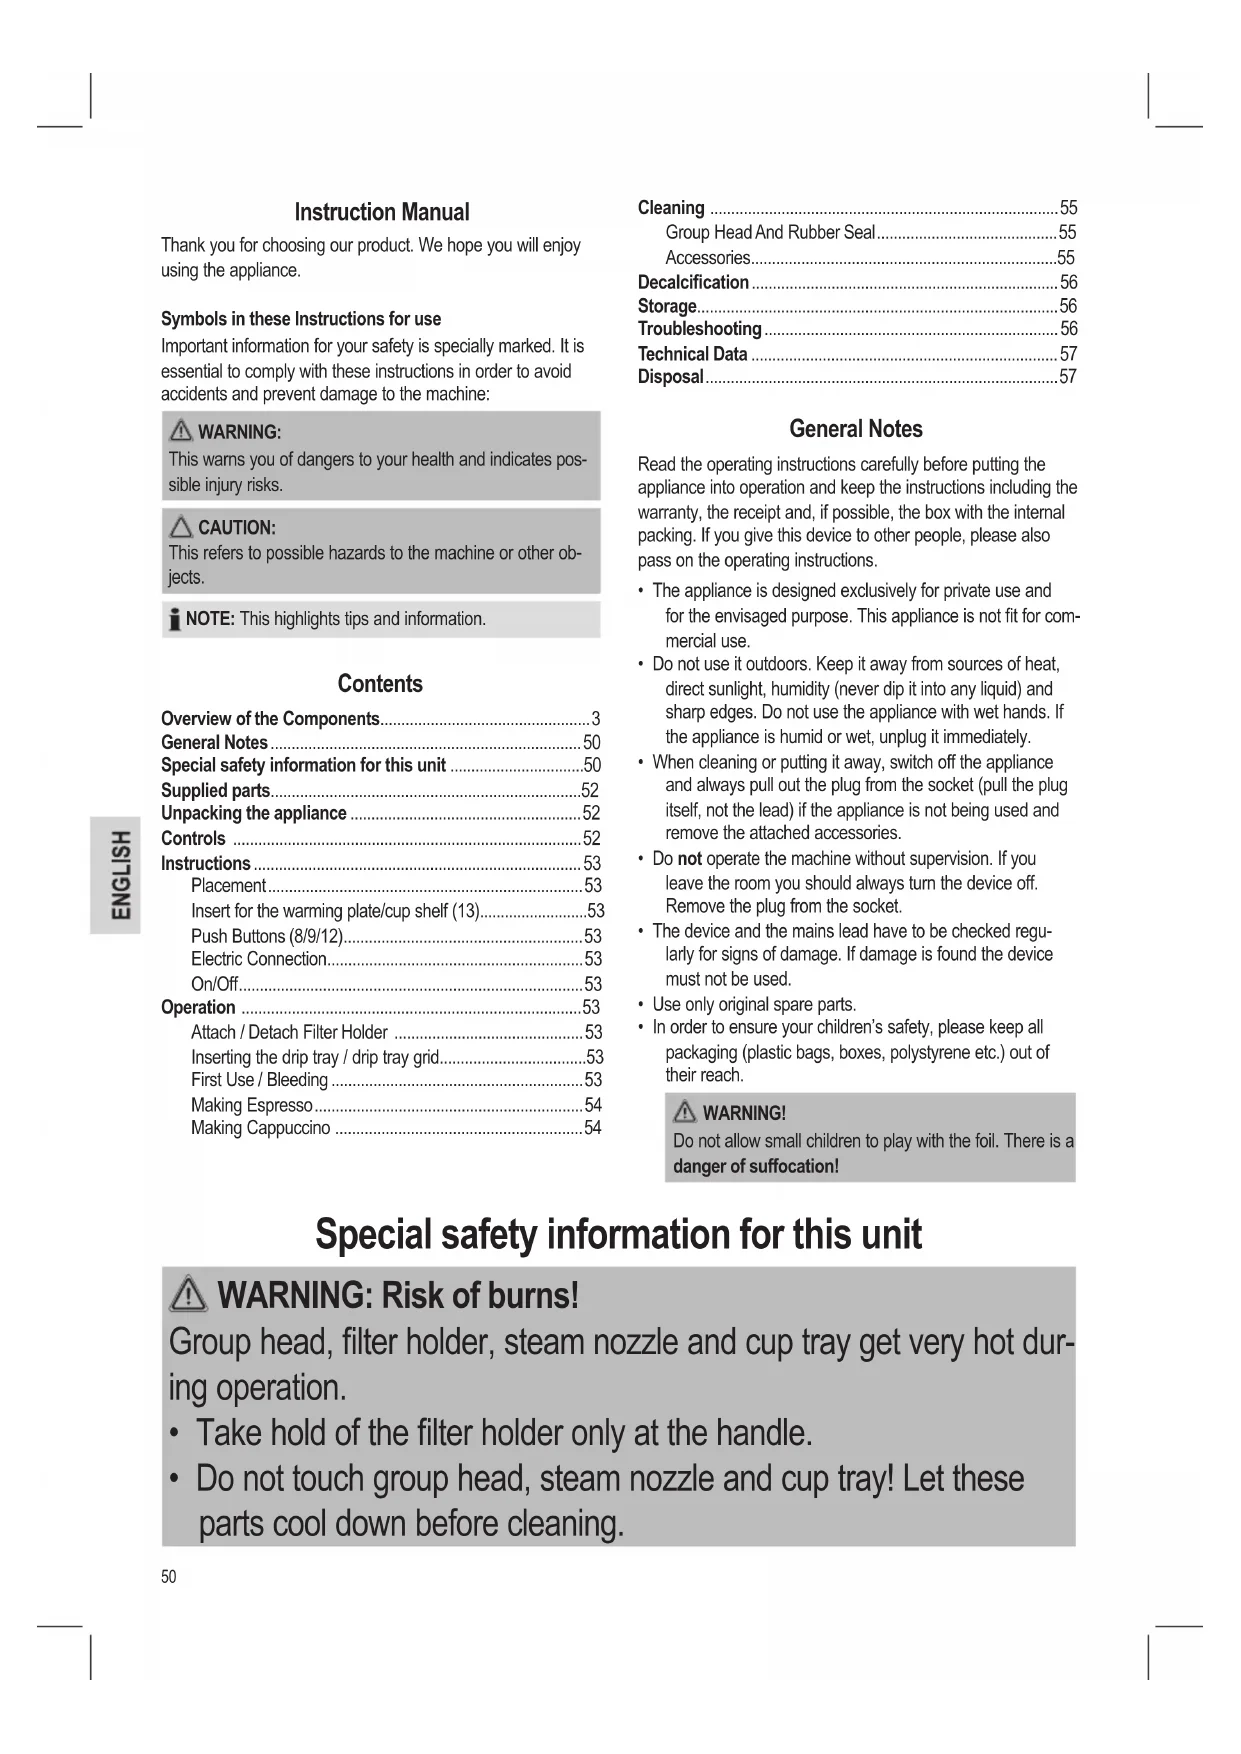
Thank you for choosing our product. We hope you will enjoy using the appliance.
Symbols in these Instructions for use
Important information for your safety is specially marked. It is essential to comply with these instructions in order to avoid accidents and prevent damage to the machine:

WARNING:
This warns you of dangers to your health and indicates possible injury risks.

CAUTION:
This refers to possible hazards to the machine or other objects.

NOTE: This highlights tips and information.
Contents
Overview of the Components....3
General Notes 50
Special safety information for this unit ....50
Supplied parts....52
Unpacking the appliance ....52
Controls 52
Instructions 53
Placement....53
Insert for the warming plate/cup shelf (13)....53
Push Buttons (8/9/12)....53
Electric Connection....53
On/Off....53
Operation 53
Attach / Detach Filter Holder 53
Inserting the drip tray / drip tray grid....53
First Use / Bleeding 53
Making Espresso....54
Making Cappuccino 54
Cleaning 55
Group Head And Rubber Seal....55
Accessories....55
Decalcification 56
Storage....56
Troubleshooting 56
Technical Data 57
Disposal....57
General Notes
Read the operating instructions carefully before putting the appliance into operation and keep the instructions including the warranty, the receipt and, if possible, the box with the internal packing. If you give this device to other people, please also pass on the operating instructions.
- The appliance is designed exclusively for private use and for the envisaged purpose. This appliance is not fit for commercial use.
- Do not use it outdoors. Keep it away from sources of heat, direct sunlight, humidity (never dip it into any liquid) and sharp edges. Do not use the appliance with wet hands. If the appliance is humid or wet, unplug it immediately.
- When cleaning or putting it away, switch off the appliance and always pull out the plug from the socket (pull the plug itself, not the lead) if the appliance is not being used and remove the attached accessories.
- Do not operate the machine without supervision. If you leave the room you should always turn the device off. Remove the plug from the socket.
- The device and the mains lead have to be checked regularly for signs of damage. If damage is found the device must not be used.
- Use only original spare parts.
- In order to ensure your children's safety, please keep all packaging (plastic bags, boxes, polystyrene etc.) out of their reach.

WARNING!
Do not allow small children to play with the foil. There is a danger of suffocation!
Special safety information for this unit

WARNING: Risk of burns!
Group head, filter holder, steam nozzle and cup tray get very hot during operation.
• Take hold of the filter holder only at the handle.
- Do not touch group head, steam nozzle and cup tray! Let these parts cool down before cleaning.

WARNING: Risk of burns!
- Do not point the steam jet towards yourself or other persons. Place a container under the steam nozzle (4).

WARNING:
Ensure that no humidity enters the casing. Risk of electric shock.

CAUTION:
- Fill the water tank (2) only with cold water.
- Only use potable water. Do not use carbonated water (sparkling mineral water).
- Ensure that the filter holder (16) is secure and properly locked during operation, since this appliance works under pressure.
- Use the appliance only on a level work surface.
- Only use the appliance when water is filled into the water container.
- Do not move the appliance when it is in operation.
- This appliance can be used by children aged from 8 years and above if they have been given supervision or instruction concerning the safe use of the appliance understand the hazards involved.
- Cleaning and maintenance by the user shall not be made by children unless they are older 8 years and supervised.
- Keep the appliance and its cord out of reach of children less than 8 years.
• Children shall not play with the appliance.
- Appliances can be used by persons with reduced physical, sensory or mental capabilities or lack of experience and knowledge if they have been given supervision or instruction concerning use of the appliance in a safe way and if they understand the hazards involved.
- Do not try to repair the appliance on your own. Always contact an authorized technician. To avoid the exposure to danger, always have a faulty cable be replaced only by the manufacturer, by our customer service or by a qualified person and with a cable of the same type.
- This appliance is intended to make espresso and cappuccino.
- Only use the appliance in a dry, indoor area. It is intended for domestic use and similar areas of use such as e.g.
- In staff kitchens in shops, offices and other commercial areas. It is not intended for use in farm accommodation or Bed & Breakfast establishments or by guests in hotels, motels and other accommodation facilities.

CAUTION:
The appliance must not be immersed in water for cleaning. Refer to the instructions provided in the chapter “Cleaning”.
Supplied parts
1 Espresso machine
1 Removable water tank
1 Attachable steam pipe
1 Steam nozzle cover
1 Filter holder
1 1-cup filter insert
1 2-cup filter insert
1 Drip tray grid
1 Drip tray
1 Measuring spoon / tamper / spanner
1 Insert (cup shelf)
Unpacking the appliance
- Remove the packaging of the appliance.
- Remove all packaging material such as plastic film, filler material, cable ties and box packaging.
- Check that all the parts are in the box.

NOTE:
There may still be dust or production residues on the appliance. We recommend that you clean the appliance as described under "Cleaning".
Controls
Figure A
1 Water tank lid
2 Removable water tank
3 Steam control knob
4 Steam nozzle with cover
5 Drip tray compartment
6 Drip tray
7 Drip tray grid
8 push button (Pump/Standby)
9 push button (Steam/Espresso)
10 Heater indicator lamp
11 Status indicator lamp ①
12 push button (On/Off)
13 Insert (Warming plate / cup tray)
14 Filter insert for 1 cup
15 Filter insert for 2 cups
16 Filter holder
17 Filter safeguard
18 Measuring spoon / tamper / spanner (1 part, 3 functions)
Instructions
Placement
- Place the appliance on a stable and level surface.
- Due to rising heat and vapours do not operate the appliance under wall cabinets.
- Do not place the appliance in close proximity to a gas or electric stove or any other heat source.
Insert for the warming plate/cup shelf (13)
Place the insert in the notch at the top of the appliance.
Push Buttons (8/9/12)
These push buttons have the following functions when locked in place or disengaged:
| Switch Engaged Disengaged | ||
| 8 | (Pump) | (Standby) |
| 9 | (Steam) (Espresso) | |
| 12 ON OFF | ||
Electric Connection
- Ensure that your mains power corresponds with the specifications of the appliance. The specifications are printed on the type label.
- Check the push button settings! Push buttons (8/9/12) must be disengaged.
- Connect the mains cable to a properly installed and earthed wall outlet.
On / Off
- Engage push button (12) in ON position to switch the appliance on. The status indicator lamp ^① lights up. The appliance starts heating up. The warming plate (13) heats up.
- The Indicator lamp lights up as soon as the necessary brewing temperature is reached.
i NOTE:
The indicator lamp turns on and off during operation. This is normal and indicates that the temperature is thermostat-controlled and maintained.
- Disengage push button (12) in OFF position to switch the appliance off. Then disconnect the mains plug from the socket.
Operation
WARNING: Important!
Before use, always check the button settings! The buttons (8/9/12) must be in the off position, before connecting the appliance to a properly installed earthed socket!
Attach / Detach Filter Holder
- Hold the handle at the left edge of the appliance to attach the filter holder (see Fig. B on page 3). Insert the three guide tabs in the group head recesses. With the handle pull the filter holder to the right hand side to the middle of the appliance. Ensure that the filter holder is well secured in the group head.
- Pull the filter holder to the left to detach from the group head.
WARNING: Danger of burns!
After brewing the metal parts of filter holder and filter insert are hot.
Inserting the drip tray / drip tray grid
- Slide the drip tray for the residual water (6) into the compartment (5).
- Place the drip tray grid (7) onto the compartment as a cover. The recessed edge must face the appliance housing.
First Use / Bleeding
CAUTION:
Bleed the appliance before first use and after a longer period of non-use. Do not use coffee grounds during this process!
- Make sure that the drip tray (6) and the drip tray grid (7) are inserted.
- Fill the water tank with clean, fresh water to the MAX marking. Close the lid again.
- Remove the filter holder (16) from the group head.
- Engage push button (12) in ON position to switch the appliance on. The status indicator lamp (11) lights up. The appliance starts heating up. The warming plate (13) heats up.
- Swivel out the steam nozzle (4). Ensure that the steam pipe is properly attached.
- Place a suitable container (heat-resistant / approx. 500 ml) under the steam nozzle.
- Turn the steam control knob (3) all the way towards "m".
- Press push button (8) to turn on the pump. Pumping starts.
- Turn off the pump after water is evenly emitted from the steam nozzle. Push button (8) is in position.
- Close the steam control knob towards "
- Empty the container and place it under the group head.
- Press push button (8) to turn on the pump. The water flow starts. Let all water from the water tank run through. Turn off the pump to empty the container.
WARNING: Danger of burns!
The water inside the container is hot.
- You have now finished the bleeding process. Fill the water tank to the MAX marking. Repeat points 6 through 12 twice to clean the appliance on the inside. Let more water flow through the steam nozzle. Now the appliance is ready to use.
Making Espresso
- Press the ON/OFF switch to switch the appliance on. The status indicator lamp ① lights up. The appliance starts heating up. The warming plate (13) heats up.
i NOTE:
Use the warming plate to pre-heat your cup(s).
-
Make sure that the drip tray (6) and the drip tray grid (7) are inserted.
-
Fill the water tank with the desired amount of clean, fresh water. The water level must be between the MIN and MAX markings. Close the lid again.
-
Select a filter insert (14/15). Place the insert in the filter holder. Ensure that the filter safeguard is not upright.
-
Fill the filter insert with espresso grounds. Use the supplied measuring spoon (18). Observe the MAX marking in the filter insert. Spread the espresso grounds evenly and push down slightly with the tamper (18). Clean the edge of the filter holder.
-
Attach the filter holder to the group head. Ensure that the filter holder is properly attached in the group head.
-
The necessary brewing temperature is reached as soon as the indicator lamp lights up. Place your pre-heated cup(s) under the group head exactly on the two holes you can see in the drip tray grid.
-
Press the push button to ⏻ position. The hot water is forced through the filter.
i NOTE:
This process does not end automatically!
-
Stop the brewing process by turning off the pump when the desired amount of espresso is in your cup(s): Press push button (8) to 🔒 position.
-
Remove the cup(s).
i NOTE:
Remove the filter holder every time after making espresso. In this way you extend the lifetime of the group head's rubber seal.
-
Remove the filter holder from the group head.
-
Empty and refill the filter to brew another cup of espresso:
WARNING:
Metal parts of filter holder and filter insert are hot.
a) Flap the filter safeguard (17) up. Push the filter safeguard with your thumb towards the filter insert while turning the filter holder around (see Fig.).
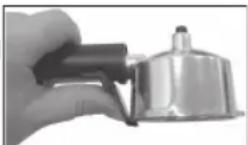
b) Tap the coffee grounds out of the filter insert. Use a spoon, if necessary. Rinse the remaining coffee grounds with hot water out of the filter insert.
- To prepare the next cup/cups of espresso, proceed as described above.
Making Cappuccino
Generally cappuccino consists of one-third coffee, one-third hot milk and one-third frothed milk.
The milk froth should not be firm enough to be shaped with a spoon. It should be creamy, such as not completely whipped cream, of a viscous texture.
For the preparation you need in addition
- a larger, bellied cup (approx. 180 ml), in which you make the espresso,
- a small frothing jug with spout (e.g. 0.3 l),
- a small, heat-resistant container,
• cold milk with at least 3.5% fat content.
To make cappuccino you first have to make the espresso.
Follow the instructions under "Making Espresso" points 1 through 11.
Froth the milk as follows:
WARNING: Danger of scalding!
Escaping steam can cause injuries. During the heating process hot steam/water can escape from group head and/or steam nozzle!
- Ensure that the steam control knob (3) is set to “ ” position before activating the steam function.
-
Do not direct the steam nozzle towards persons.
• Always place a container under the steam nozzle (4). -
Ensure that push button (8) is in 🔒 position.
- Swivel out the steam nozzle (4). Ensure that the steam pipe is properly attached. Attach the steam nozzle cover all the way on the steam nozzle.
- Place a heat-resistant container under the steam nozzle.
- Fill the jug half with cold milk.
- Press push button (9) to ⏻ position. Wait until the indicator lamp lights up.
- Briefly open the steam control knob (3) towards "every time before using the frothing function to drain collected condensate. The appliance is ready to use if only steam escapes.
- Place your milk jug with the milk under the steam nozzle.
- Lift the jug so that the steam nozzle sits just under the milk surface.
i NOTE:
Do not place the steam nozzle in the centre of the jug but close to the inner wall. This position is important for the milk to get into whirling motion. We recommend using the spout as guide for the steam nozzle.
- Slowly open the steam control knob (3) towards "until the desired amount of steam is set. Slightly move the jug up and down. Close the steam control knob towards "after the milk has frothed to the desired volume (approx. 50%).
i NOTE:
- To further heat up the milk insert the steam nozzle all the way to the bottom of the jug. Ensure that the milk does not start boiling. In this case the foam will collapse.
-
The water is no longer hot enough if the indicator lamp (10) turns off during frothing. Turn the steam control knob towards Wait until the indicator lamp lights up again. Now continue frothing the milk.
-
To remove the last coarse air bubbles knock the milk jug after frothing carefully on the tabletop (as if you would set it down a bit hard). Swivel the milk jug slightly around. This
helps to mix the foam after frothing. Now waste no time. Pour the frothed milk slowly into the espresso.
- Swivel the milk jug slightly around while pouring the frothed milk slowly into the espresso.
i NOTE:
- With a few artful movements you can draw designs into the foam.
-
Sprinkle cocoa powder or cinnamon to taste on the foam.
-
IMPORTANT: Clean the steam nozzle immediately after every use! When closing the steam control knob a vacuum is created within seconds, which draws some milk into the steam nozzle. Place your heat-resistant container under the steam nozzle. Open the steam control knob briefly for a shot of steam to flush milk residue out of the steam nozzle. Wipe the steam nozzle with a damp cloth.
- Press push button (9) to ▽ position to turn the steam function off.
Cleaning
WARNING:
- Before cleaning, always remove the mains plug and wait until the device has cooled down.
- Do not immerse the device in water. Otherwise this might result in an electric shock or fire.
- The steam nozzle is hot immediately after use!
CAUTION:
- Do not use a wire brush or any abrasive items.
- Do not use any acidic or abrasive detergents.
- Clean the casing with a slightly damp cloth without detergents.
Group Head and Rubber Seal
Wipe group head and rubber seal with a damp cloth. Use a soft nylon brush to remove stubborn residues. Dry with a soft cloth.
Accessories
Wash filter holder, filter inserts, drip tray grid, drip tray, measuring spoon, water tank, steam nozzle pipe and steam nozzle cover in warm sudsy water. Use a soft nylon brush, if necessary. Rinse with clean water. Dry all parts with a soft cloth.
CAUTION:
These parts are not dishwasher-safe. Heat and aggressive detergents can cause distortion and decolouration.
Water Tank
- Open the lid to remove the water tank. Pull the tank with both hands up and out. Replace the tank after cleaning and drying.
i NOTE:
The water tank has two hooks.
- Hook the water tank into the two eyelets of the appliance.
- Press the water tank slightly down for the valve to open.
Steam Nozzle
Clean steam nozzle, attached pipe and cover immediately after use. Dry milk residue is difficult to clean.
- Remove the cover. Use the small grip. Turn slightly for easy removal. Use a damp cloth to hold the steam nozzle with one hand!
- Use the spanner (18) to remove the small pipe from the steam nozzle. See Fig. C on page 3. Turn the spanner clockwise.
-
Leave pipe and cover for some time in the warm sudsy water. In this way milk residue is easily removed.
-
Wipe the steam nozzle on the appliance with a damp cloth.
i NOTE:
Fill a container with hot water to remove dry residue. Place the container under the steam nozzle, so that it is submerged.
- After cleaning replace pipe and cover on the steam nozzle. Place a heat-resistant empty container under the steam nozzle. Operate the appliance as instructed under "Making Cappuccino" points 5 and 6. After cleaning the steam nozzle is again ready to use.
Decalcification
Scale deposits put the functionality of your appliance at risk. It is necessary to decalcify the appliance regularly. The intervals depend on use frequency and water hardness.
Decalcify with a commercial decalcifier for coffee machines.
- Dose as instructed on the packaging or on the instruction leaflet.
- Operate the appliance as instructed for making espresso until the tank is empty. Let the solution flow through the group head (without filter holder).
WARNING:
- Rinse the water tank and let one full tank fresh water flow through the group head to rinse out the decalcifier residues.
- Do not use this water for making espresso.
Storage
- Clean the appliance as instructed. Let the accessories dry completely.
• We recommend that you keep the appliance in the original packaging if the appliance will be not used for long periods. - Always keep the appliance out of the reach of children in a dry, well ventilated place.
Troubleshooting
| Problem Possible cause Solution | ||
| The appliance does not function. | The appliance has no power supply. | Test the socket with another appliance. |
| Plug in the mains plug correctly. | ||
| Check the main circuit breaker. | ||
| The appliance is faulty. | Contact our service center or a specialist. | |
| Problem Possible cause Solution | ||
| No coffee output. | Switch the appliance off! | |
| The water tank is empty. | Fill the water tank with fresh water. | |
| The water tank is not properly attached; the valve is not open. | Press the tank slightly down for the valve to open. | |
| The holes in the filter holder and the group head outlet are blocked. | Clean filter holder, filter and group head outlet. | |
| Air entrapped in the heating circuit. | Generate steam as instructed under “Making Cappuccino”. Open the steam control knob all the way towards “♡”. | |
| The coffee grounds are too fine or compressed too much. | Loosen the coffee grounds. Spread it evenly and only slightly compress with the tamper. | |
| Scale deposits in the appliance. | Decalcify the appliance as instructed. | |
| The pump is noisy. | Switch the appliance off. | |
| The water tank is empty. | Fill the water tank with fresh water. | |
| The water tank is not properly attached; the valve is not open. | Press the tank slightly down for the valve to open. | |
| Air entrapped in the water circuit. | Bleed the appliance as instructed under “First Use/Bleeding”. | |
| Espresso escapes at the filter holder edge. | Stop the brewing process! | |
| The filter holder is not properly attached or is not enough closed. | Attach the filter holder properly as instructed under “Attach / Detach Filter Holder”. | |
| Too much coffee grounds in the filter insert. | Remove excess coffee grounds. Observe the MAX marking in the filter insert. | |
| Coffee grounds residues on the rubber seal of the group head. | Switch the appliance off and let it cool down.Clean the rubber seal as instructed. | |
| Espresso is too cold. | The cups were not pre-heated. | Rinse the cups with hot water. |
| Indicator lampdoes not light up during the brewing process. | Wait until the indicator lamp lights up. | |
| Coffee crema is slightly discoloured (coffee runs out fast). | The coffee grounds are too coarse or are not evenly spread. | Use the supplied tamper. |
| Too little coffee grounds in the filter insert. | Fill coffee grounds only to MAX marking in the filter insert. | |
| Coffee crema is dark discoloured (coffee runs out slowly). | The coffee grounds are too fine or compressed too much. | Loosen the coffee grounds. Spread it evenly and only slightly compress with the tamper. |
| Too much coffee grounds in the filter insert. | Use less coffee grounds. Observe the MAX marking in the filter insert. | |
| No crema on the espresso. | The espresso grounds are not suitable. | Change the brand, if necessary. |
| The milk does not froth. | The milk is not suitable. | Use milk with at least 3.5 % fat content. |
| The milk is not cold enough. | Use refrigerated milk. | |
| The steam nozzle is dirty. | Clean the steam nozzle as instructed. | |
Technical Data
Model: ES 3584
Power supply: 230 V\~, 50 Hz
Power consumption: 1050 W
Capacity: 1.5 Liter
Protection class:....I
Pressure: 15 bar
Net weight:......approx. 3.1 kg
The right to make technical and design modifications in the course of continuous product development remains reserved.
This device has been tested according to all relevant current CE guidelines, such as electromagnetic compatibility and low voltage directives, and has been constructed in accordance with the latest safety regulations.
Disposal
Meaning of the "Wheelie Bin" Symbol
Take care of our environment, do not dispose of electrical appliances via the household waste.
Dispose of obsolete or defective electrical appliances via municipal collection points.
Please help to avoid potential environmental and health impacts through improper waste disposal.
You contribute to recycling and other forms of utilization of old electric and electronic appliances.
Your municipality provides you with information about collecting points.
Instrukcja obsługi
CTC Clatronic Sp. z o.o