B 200 eco - Humidifier TROTEC - Free user manual and instructions
Find the device manual for free B 200 eco TROTEC in PDF.
Frequently Asked Questions - B 200 eco TROTEC
User questions about B 200 eco TROTEC
0 question about this device. Answer the ones you know or ask your own.
Ask a new question about this device
Download the instructions for your Humidifier in PDF format for free! Find your manual B 200 eco - TROTEC and take your electronic device back in hand. On this page are published all the documents necessary for the use of your device. B 200 eco by TROTEC.
USER MANUAL B 200 eco TROTEC
Overview of contents
- Safety notes B-1
- Introduction. B-1
- Assembly, controls & operation . . . B - 2
- Operation B-4
05.Care and maintenance B-4
06.Summer storage. B-5 - Accessories.. B-5
08.Guarantee. B-5
09.Declaration B-6
This publication replaces all previous announcements. No part of this publication may be reproduced, processed using electronic systems, replicated or distributed in any form, without our written authorisation. Subject to technical changes. All rights reserved. Names of goods are used without guarantee of free usage keeping to the manufacturer's syntax. The names of goods used are registered and should be considered as such. We reserve the right to modify design in the interest of on-going product improvement, such as shape and colour modifications. The scope of delivery may vary from that in the product description. All due care has been taken in compiling this document. We accept no liability for errors or omissions. © TROTEC®
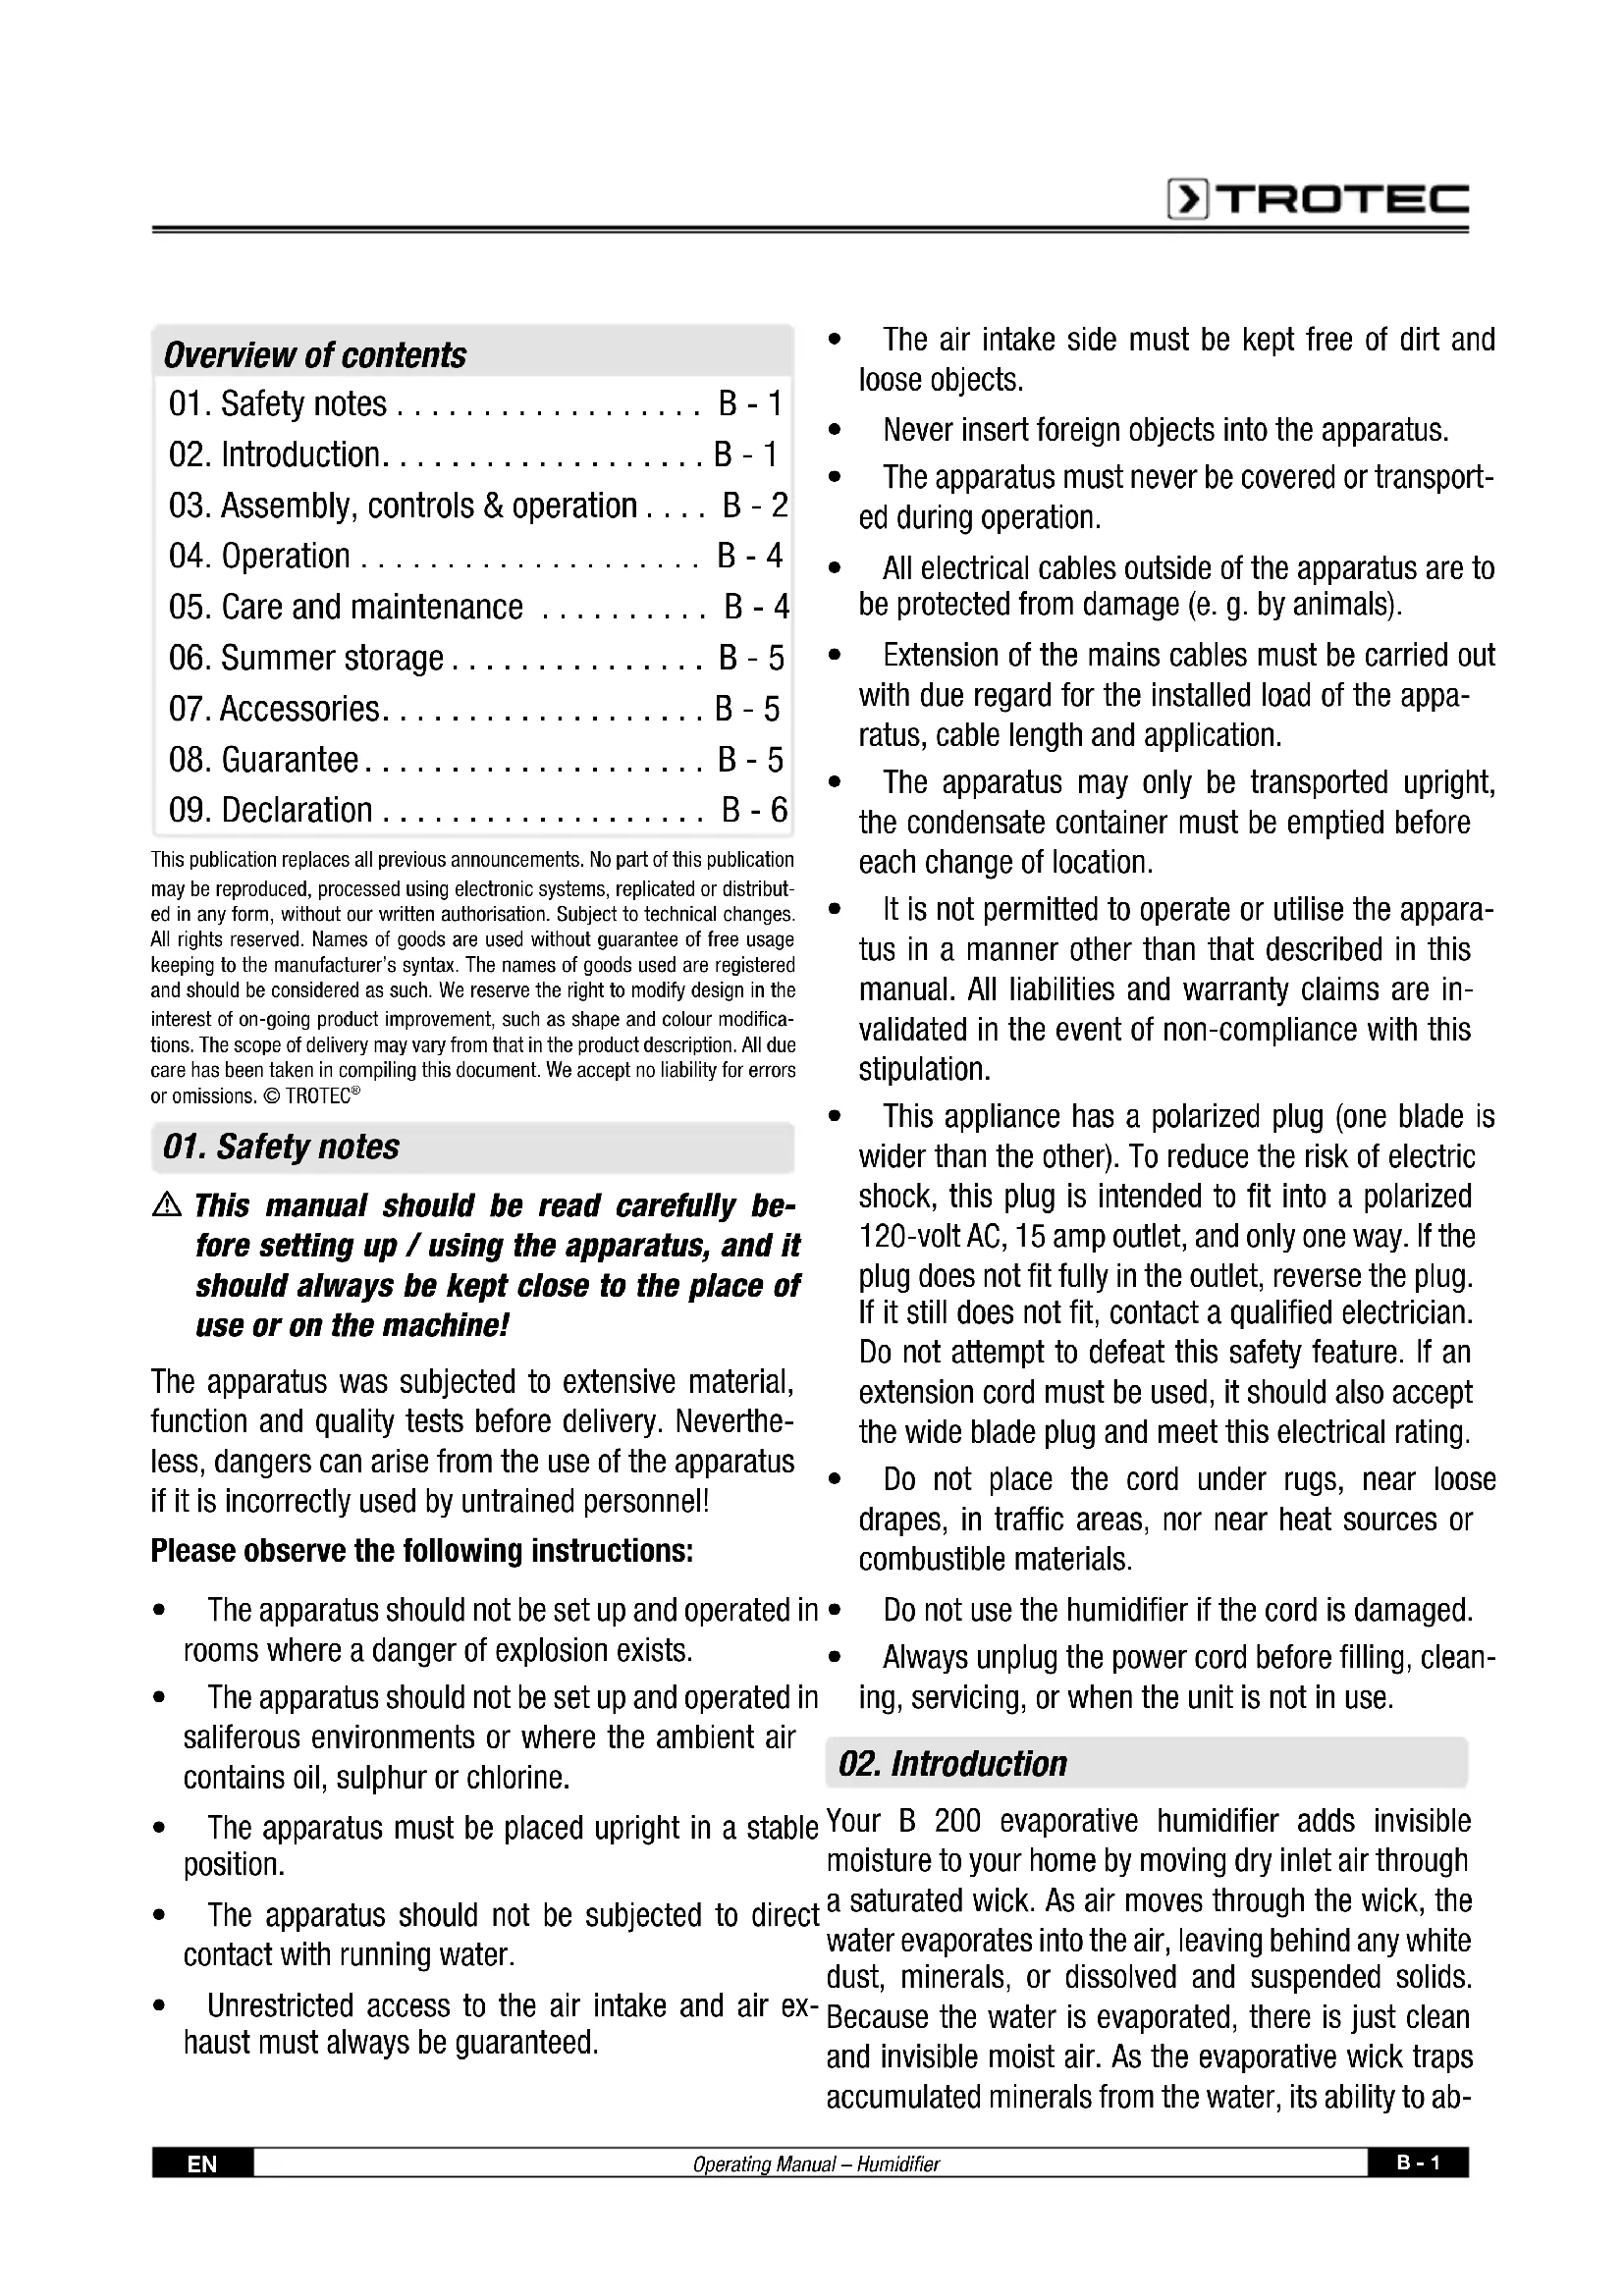
01. Safety notes
This manual should be read carefully before setting up / using the apparatus, and it should always be kept close to the place of use or on the machine!
The apparatus was subjected to extensive material, function and quality tests before delivery. Nevertheless, dangers can arise from the use of the apparatus if it is incorrectly used by untrained personnel!
Please observe the following instructions:
- The apparatus should not be set up and operated in rooms where a danger of explosion exists.
- The apparatus should not be set up and operated in saliferous environments or where the ambient air contains oil, sulphur or chlorine.
- The apparatus must be placed upright in a stable position.
- The apparatus should not be subjected to direct contact with running water.
-
Unrestricted access to the air intake and air exhaust must always be guaranteed.
-
The air intake side must be kept free of dirt and loose objects.
- Never insert foreign objects into the apparatus.
The apparatus must never be covered or transported during operation. - All electrical cables outside of the apparatus are to be protected from damage (e. g. by animals).
- Extension of the mains cables must be carried out with due regard for the installed load of the apparatus, cable length and application.
- The apparatus may only be transported upright, the condensate container must be emptied before each change of location.
It is not permitted to operate or utilise the apparatus in a manner other than that described in this manual. All liabilities and warranty claims are invalidated in the event of non-compliance with this stipulation. - This appliance has a polarized plug (one blade is wider than the other). To reduce the risk of electric shock, this plug is intended to fit into a polarized 120-volt AC, 15 amp outlet, and only one way. If the plug does not fit fully in the outlet, reverse the plug. If it still does not fit, contact a qualified electrician. Do not attempt to defeat this safety feature. If an extension cord must be used, it should also accept the wide blade plug and meet this electrical rating.
- Do not place the cord under rugs, near loose drapes, in traffic areas, nor near heat sources or combustible materials.
- Do not use the humidifier if the cord is damaged.
- Always unplug the power cord before filling, cleaning, servicing, or when the unit is not in use.
02. Introduction
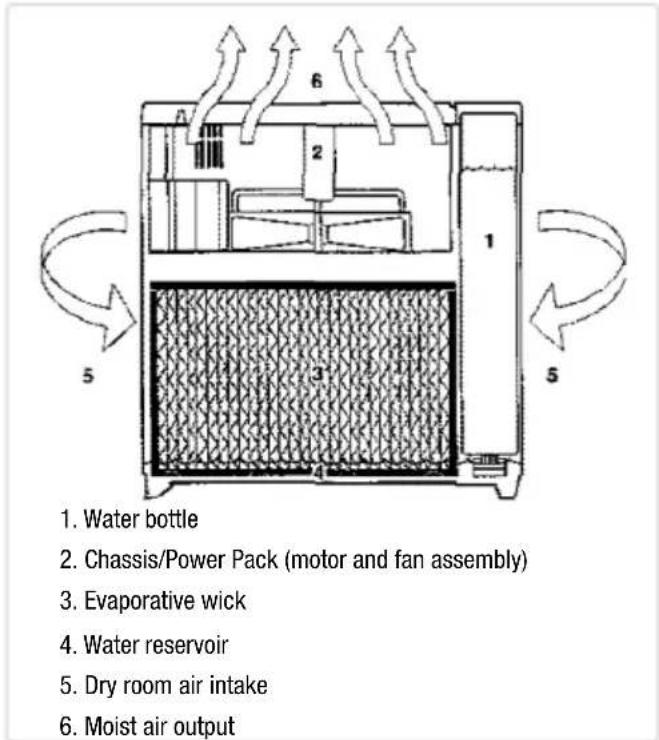
Your B 200 evaporative humidifier adds invisible moisture to your home by moving dry inlet air through a saturated wick. As air moves through the wick, the water evaporates into the air, leaving behind any white dust, minerals, or dissolved and suspended solids. Because the water is evaporated, there is just clean and invisible moist air. As the evaporative wick traps accumulated minerals from the water, its ability to ab
sorb and evaporate water decreases. We recommend changing the wick at the beginning of every season. In hard water areas, more frequent replacement may be necessary to maintain your humidifier's efficiency. Use only Trotec brand replacement wicks and chemicals.
To order parts, wicks and chemicals call +49 2452-962-200.
The B 200 humidifiers use Model 1045. Only the B 200 evaporative wick guarantees the certified output of your humidifier. Use of wicks other than Trotec brand will void your warranty as well as the certification of output and may reduce the output of your humidifier.
Dry air is drawn into the humidifier through the back and moisturised as it passes through the evaporative wick. It is then fanned out into the room.
Do NOT position the unit directly in front of a hot air duct or radiator. Do NOT place on soft carpet.
03. Assembly, Controls & Operation
- Remove the two poly-foam inserts from the top of the humidifier.
- Lift off the water bottle cover (left-hand side). Remove the water bottle, lift off the chassis/power pack and then remove the humidifier cabinet from the carton.
-
Remove the evaporative wick, float assembly (black rod with white float), and all of the remaining packaging materials from the cabinet. Check to see that you have all of the following items removed from the boxes accessory kit and cabinet before discarding the packaging:
-
Filler hose
Caster kit
Bacterial treatment sample
Water bottle with cap - Optional AirCare Filter (purchased separately)
Filling information
- Your humidifier is equipped with one water bottle. When both the water bottle and reservoir have emptied, the humidifier fan will automatically shut off, but will start again automatically when the water bottle and reservoir are refilled.
- When the bottle is being filled for the first time and the wick is still dry, it will take approximately 20 minutes to drain the bottle into the reservoir. After the bottle has emptied, it should be refilled again to obtain maximum running time.
- When refilling the bottle and the wick is still wet, it will take approximately 12 minutes to refill the reservoir. At this time, you should refill the bottle for maximum running time.
Casters
- Turn the emptied cabinet upside down. Insert each caster stem into the four caster holes on each corner of the humidifier bottom. The casters should fit snugly and be inserted until the stem shoulder reaches the cabinet surface. Do not force.
- Turn the cabinet right side up.
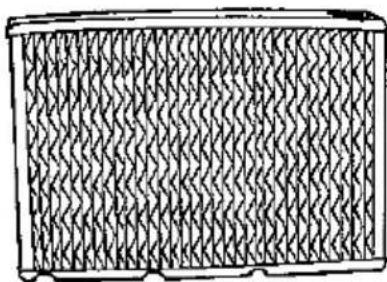
Evaporative Wick
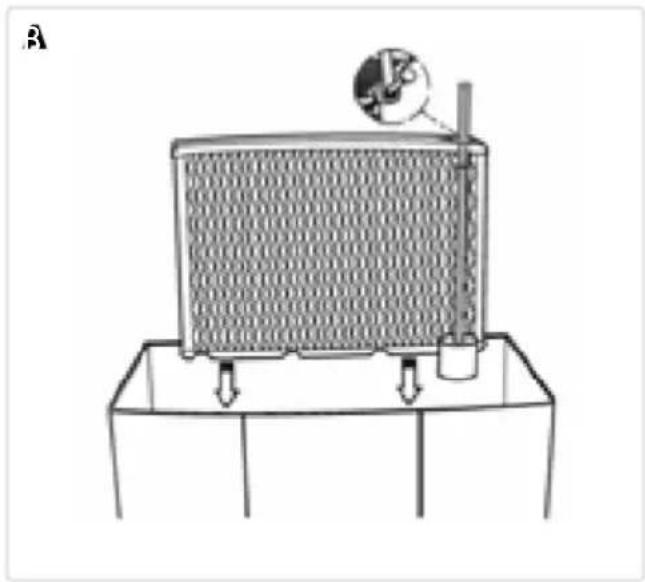
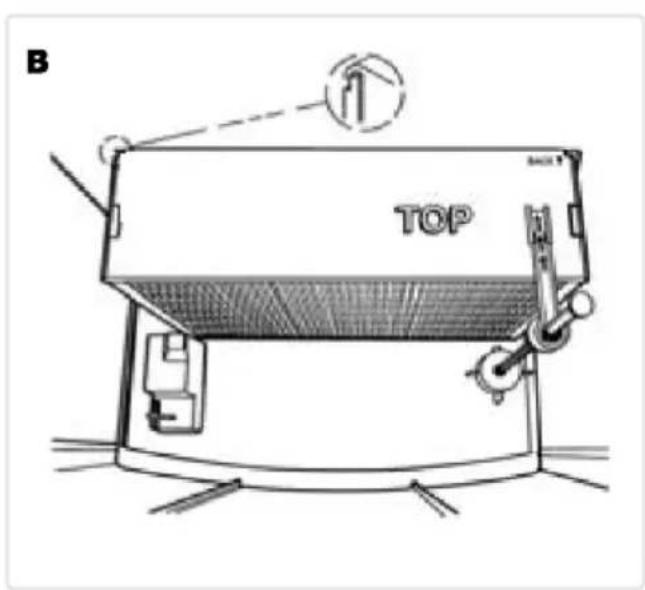
- When placing the wick back into the humidifier, the rod and float assembly must also be reattached. Insert the top of the float rod through the hole on the extended wick retainer (attached to the top of the wick frame). (A). Holding the float in place, lower the wick and float assembly together into the cabinet. The wick has a mounting rib on the top edge which hooks over a rib at the inside back of the cabinet. NOTE: The float rod retainer must be extended prior to inserting the float rod. The white float must be positioned into the pocket in the bottom of the cabinet. (B).
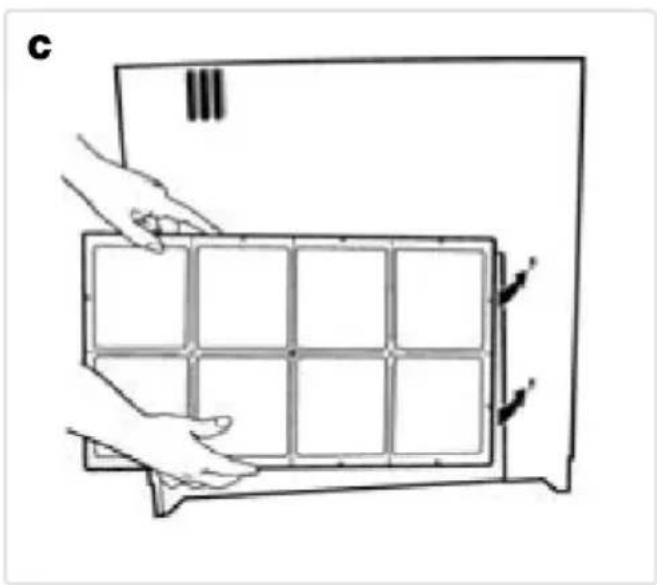
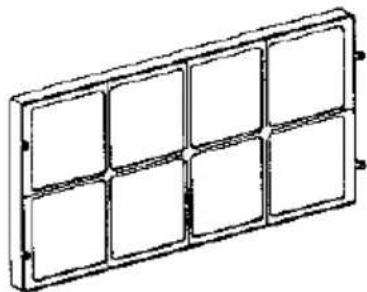
Air Cleaning Filter (optional)
- The AirCare filter has four tangs that engage into four keyhole slots that mount the AirCare filter onto the outside of the back of the cabinet. (C).
Chassis/Power Pack
-
Place the chassis/power pack unit into the cabinet, so it fits without tipping or rocking.
-
Fill the bottle water. If you only have softened water available in your home, you can use it, but you will notice a build-up of minerals on the wick much sooner. The bottle holds 2.5 gallons. When filling, be careful not to pressurize it by overfilling. Bottle damage can result from this. A fill hose is provided with your humidifier which will fit most faucets. Place the water bottle into the left side of the humidifier with the valve cap end down, so that the groove in the water bottle faces the inside. (D). Replace the water bottle cover.
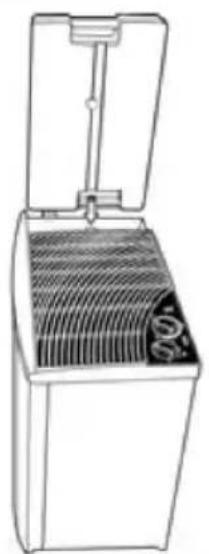
D
We recommend using B 200 Bacteriostat treatment when you refill the water bottle to eliminate bacterial growth. Add bacteriostat according to the instructions on the bottle and then tighten the valve cap on your water bottle.
For optimum running time, fill the water bottle, tighten the cap, and place inside unit, allowing it to completely drain into the water reservoir. Then refill the bottle and replace in the cabinet. Do not fill the reservoir bucket, as overfilling will result in water damage. Use only the bottle provided.
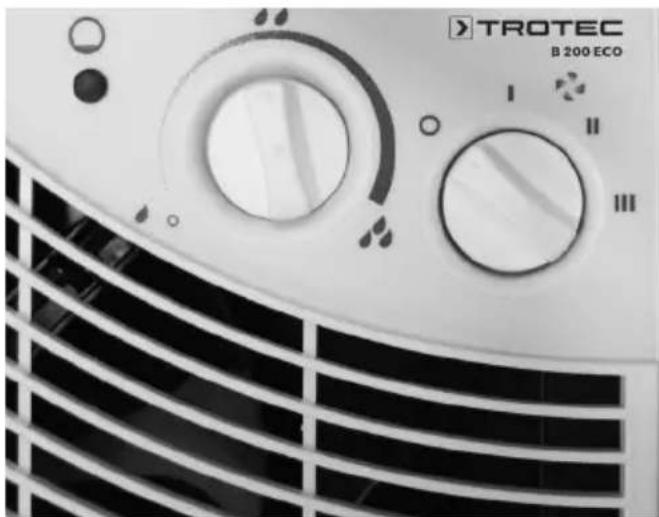
04. Operation
- Plug cord into wall receptacle. Your humidifier is now ready for use. The humidifier should be placed at least FOUR inches away from any walls and away from heat registers. Unrestricted airflow into the unit will result in the best efficiency and performance.
- The B 200 allows you to use the low setting for the quietest operation.
-
All models have an automatic humidistat. The humidistat will turn the humidifier on when the relative humidity in your home is below the humidistat setting and will turn the humidifier off when the relative humidity reaches the humidistat setting. For initial operation, set the humidistat at its midpoint "two-droplet" setting and adjust up or down from there to achieve the desired humidity level.
-
The refill light will indicate when the unit is completely out of water. The motor will also shut off. To refill, see Step 9.
When excessive condensation exists, a lower speed setting is recommended.
Disconnect power before filling, cleaning or servicing unit. Keep grille dry at all times.
Optional AirCare® Filter
The first stage of the air filter is a high-efficiency, electrostatically charged filter media which traps dust, pollen, and airborne pollutants. The second stage is an activated carbon media which absorbs odors from cooking, pets, or tobacco smoke. We recommend replacing the AirCare filter at least once a year and more often if necessary. When the white filter media is coated with a layer of dust and dirt, it is time to replace the AirCare filter. The certified water output of your humidifier will be reduced when using the AirCare filter. AirCare filters are optional and are not required for normal operation of the humidifier.
05. Care and Maintenance
Cleaning your humidifier regularly helps eliminate odors and bacterial and fungal growth. Ordinary household bleach is a good disinfectant and can be used to wipe out the humidifier base and bottle/reservoir after cleaning. We recommend cleaning your humidifier at least once every two weeks to maintain optimum environmental conditions for your home.
We also recommend using B 200 Secosan Stick 50 each time you refill your humidifier to eliminate bacterial growth. Add bacteriostat according to the instructions on the bottle.
- Turn off unit completely counterclockwise and unplug from outlet.
- Lift out the water bottle and the power pack.
- Carry bottle and base to cleaning basin. Lift wick with float assembly from the base allowing the water to drain and remove float assembly from wick. Rinse wick under freshwater only. Do not use soap, detergent, or any other cleaners on the wick. Leave in sink to drain.
Removing Scale
- Empty the water from the reservoir and water bottle. Fill both reservoir and water bottle 12 full with water and add 8 oz. (1 cup) of undiluted vinegar to each. Let stand 20 minutes. Then empty solution.
- Dampen a soft cloth with undiluted white vinegar and wipe out reservoir to remove scale. Rinse the water bottle and reservoir thoroughly with fresh water to remove scale and cleaning solution before disinfecting.
Disinfecting Unit
- Fill the water bottle and reservoir 12 full with water and add 1 teaspoon of bleach to each. Wet all surfaces on water bottle and cabinet. Let solution stay for 20 minutes, then rinse with water until bleach smell is gone. Dry with clean cloth. The outside of the unit and water bottle may be wiped down with a soft cloth dampened with fresh water.
- Refill unit and reassemble per assembly instructions.
06. Summer Storage
- Clean unit as outlined in Care & Maintenance section.
- Discard used wick and any water in the reservoir or bottle and allow to dry thoroughly before storage. Do not store with water inside reservoir or bottle.
- Do not store unit in an attic or other high-temperature area.
- Install new filter at beginning of season.
07. Accessories
Evaporative Wick (Model 1045)
Optional AirCare® Filter (Model 1051)
08. Guarantee
The B 200 humidifier warranty covers defects in materials and workmanship for a period of one year from date of retail purchase. This warranty applies only to the original purchaser of the product. Within the first 12 months from the date of purchase, B 200 will repair or replace, at its discretion, any defective part of the humidifier covered by this warranty. This warranty gives you specific legal rights, and you may also have other rights which vary from state to state or province to province. This warranty does not cover damage resulting from misuse or abuse of the humidifier, accidents or alterations to the product, commercial use or damage during shipment. Misuse includes malfunctions caused by negligence in cleaning or parts fouled with mineral deposits due to hard-water conditions. Alterations to the product include the substitution of non-B 200 brand components including, but not limited to, wicks.
TROTEC
CE Declaration of Conformity
The Manufacturer: TROTEC GmbH & Co. KG
Grebbener Straße 7
D-52525 Heinsberg
hereby declares that the humidifier as described below is in conformity with EU guidelines as stated herein with respect to its conception and construction, as well as the type of model placed on the market.
Important Notice:
Any improper use, installation, servicing etc. or any alterations carried out by any other persons on the factory-made appliance render this declaration null and void.
Type of model: mobile humidifier
Series:
B
200
Applicable regulations: MA-RL 89/392/EWG Machine Guidelines (98/37/EG)
NS-RL 73/23/EWG Voltage Guidelines
EMV-RL 89/336/EWG EMV Directive
ElektroG-RL 2002/96/EG Electrical and Electronic Law
(2003/108/EG)
Applied Norms: EN 292-1; EN 292-2, EN 294; EN 349, EN 60204-1;
Heinsberg, 07 April 2009
Dispositions applicable: Directive Machines MA-RL 89/392/EWG (98/37/EG)
Directive Basse tension NS-RL 73/23/EWG