SNEPP ALU 50017 - Luggage racks Pro-User - Free user manual and instructions
Find the device manual for free SNEPP ALU 50017 Pro-User in PDF.
| Product type | Roof luggage carrier (roof bars) |
| Brand | Pro-User |
| Model | SNEPP ALU 50017 |
| Material | Aluminum (oval profile) |
| Profile dimensions | 28.2 x 47.9 mm |
| Bar length | Approximately 120 cm |
| Net weight | 3.2 kg |
| Maximum load | 75 kg / 90 kg (depending on vehicle) |
| Minimum rail height | 30 mm |
| Maximum rail thickness | 58 mm |
| Maximum rail spacing (center) | Up to 1.07 m |
| Recommended distance between supports | Approximately 70 cm |
| Recommended maximum speed | 120 km/h |
| Warranty | 2 years (normal use) |
| Maintenance | Clean after use, check fastenings regularly |
| Approval | For vehicles with roof rails |
| Included accessories | Key, Allen key, mounting brackets |
Frequently Asked Questions - SNEPP ALU 50017 Pro-User
User questions about SNEPP ALU 50017 Pro-User
0 question about this device. Answer the ones you know or ask your own.
Ask a new question about this device
Download the instructions for your Luggage racks in PDF format for free! Find your manual SNEPP ALU 50017 - Pro-User and take your electronic device back in hand. On this page are published all the documents necessary for the use of your device. SNEPP ALU 50017 by Pro-User.
USER MANUAL SNEPP ALU 50017 Pro-User
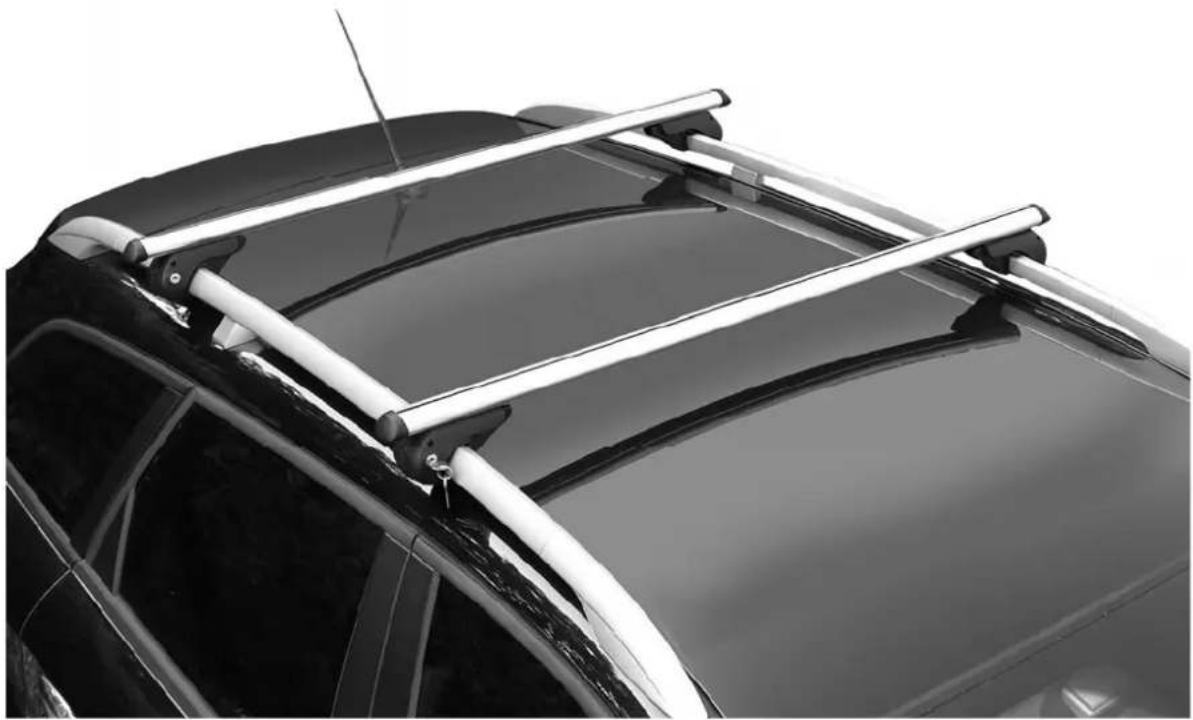
ALLESDRAGER RELINGTRÄGER ROOF BAR BARRES DETOIT
| I | n | h | o | u | d | s | o | p | g | a | v | e |
| • | I | n | t | r | o | d | u | c | t | i | e | |
| • | D | e | m | o | n | t | a | g | e | |||
| • | Belangrijke | instructies | 5 | |||||||||
| • | Technische | gegevens | 6 | |||||||||
| • | O | n | d | e | r | h | o | u | d | |||
| • | G | a | r | a | n | t | i | e | ||||
Dear Consumer, thank you for having chosen a Pro-User product. This accessory has been designed, constructed and tested carefully, in compliance with all the stringent standards in force.
Please read the following information carefully for your safety and that of all travellers.
Always comply with the laws in force in the country of use.
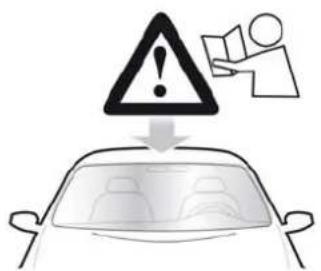
Preserve this booklet, specifically, the Installation Manual of your accessory in your car. Read the Instruction Manual carefully before assembling and fitting the accessory as well loading.
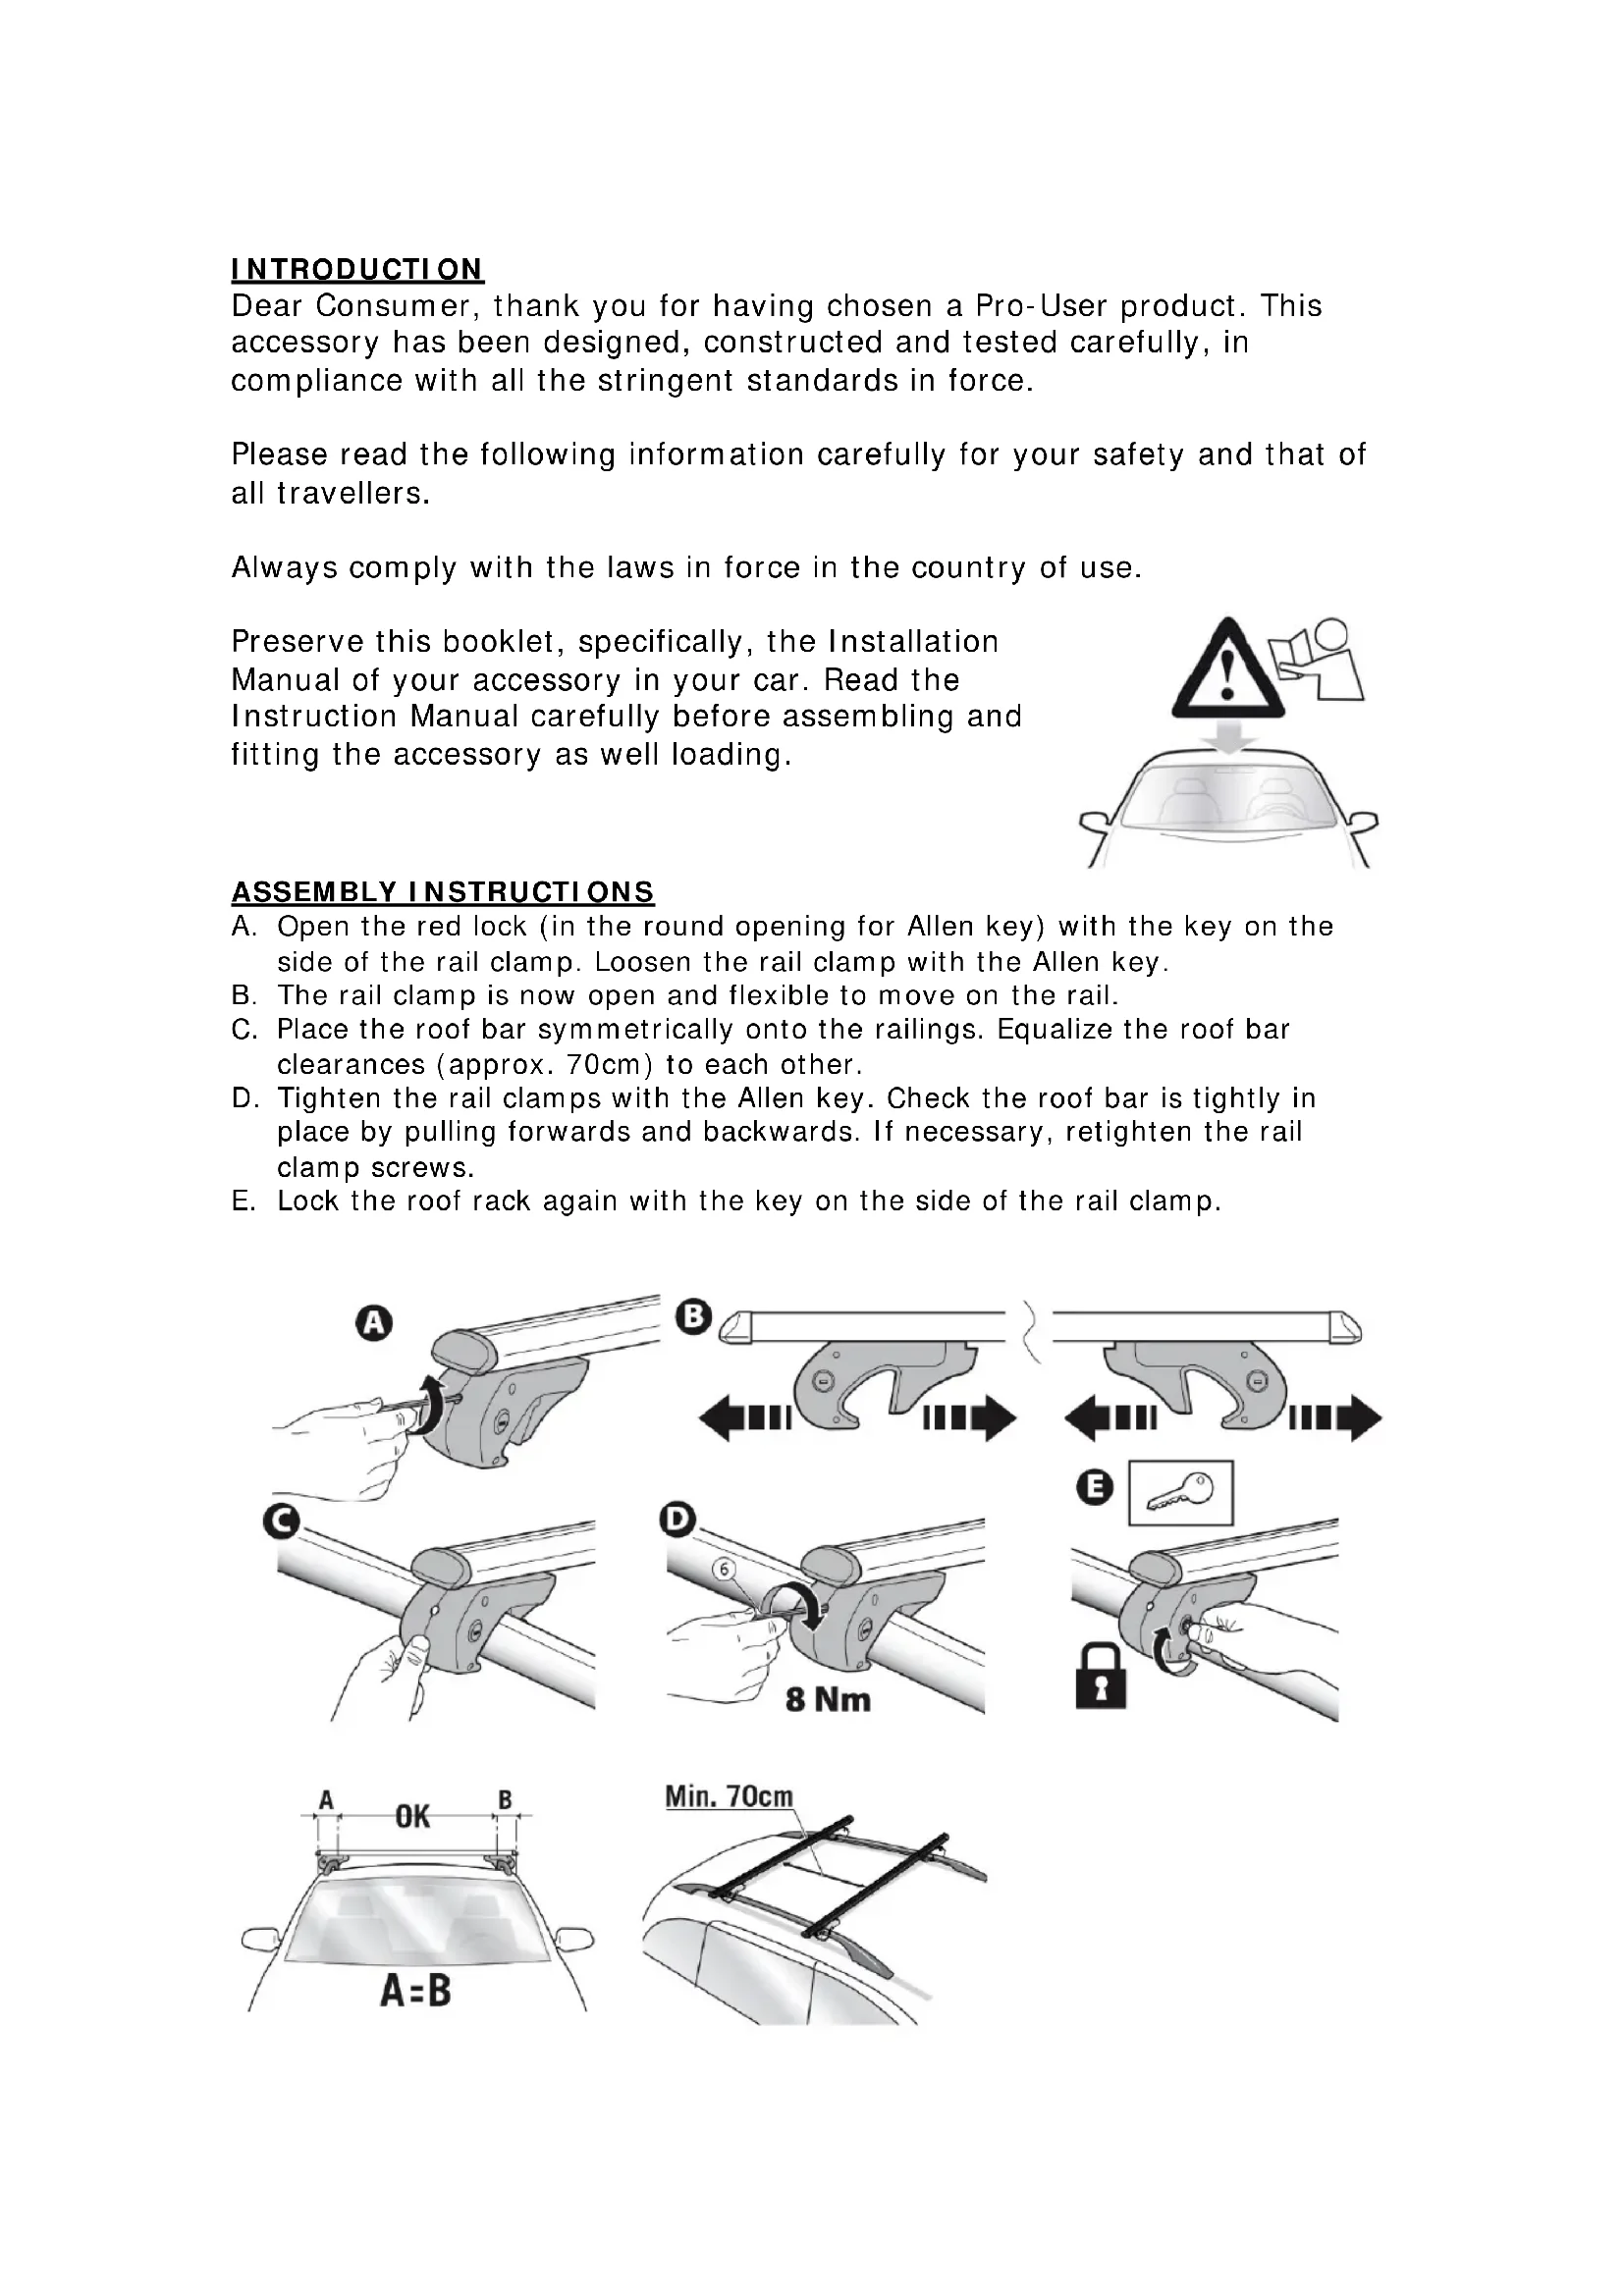
ASSEMBLY INSTRUCTIONS
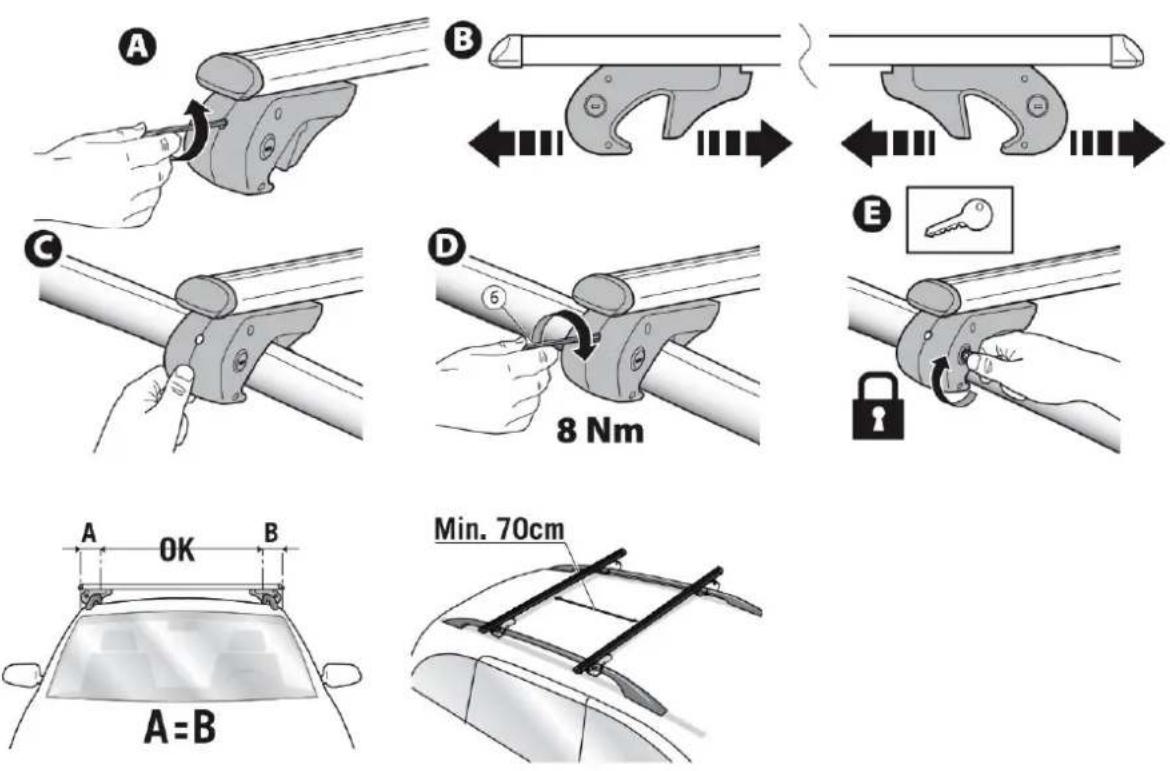
A. Open the red lock (in the round opening for Allen key) with the key on the side of the rail clamp. Loosen the rail clamp with the Allen key.
B. The rail clamp is now open and flexible to move on the rail.
C. Place the roof bar symmetrically onto the railings. Equalize the roof bar clearances (approx. 70cm) to each other.
D. Tighten the rail clamps with the Allen key. Check the roof bar is tightly in place by pulling forwards and backwards. If necessary, retighten the rail clamp screws.
E. Lock the roof rack again with the key on the side of the rail clamp.
IMPORTANT INFORMATION
You are entirely responsible for your safety and that of others if your vehicle is being used for transport. The manufacturer does not assume any responsibility for possible damage caused to objects or persons due to incorrect assembly of the accessory, or excessive speed or irregular driving. Anyone else using your car with this accessory installed on it must be informed of these instructions. Do not modify or tamper with the accessory in any case whatsoever; the manufacturer shall not accept liability for damage to objects or persons.
-
This roof bar is only suitable for cars with railings on the roof.
-
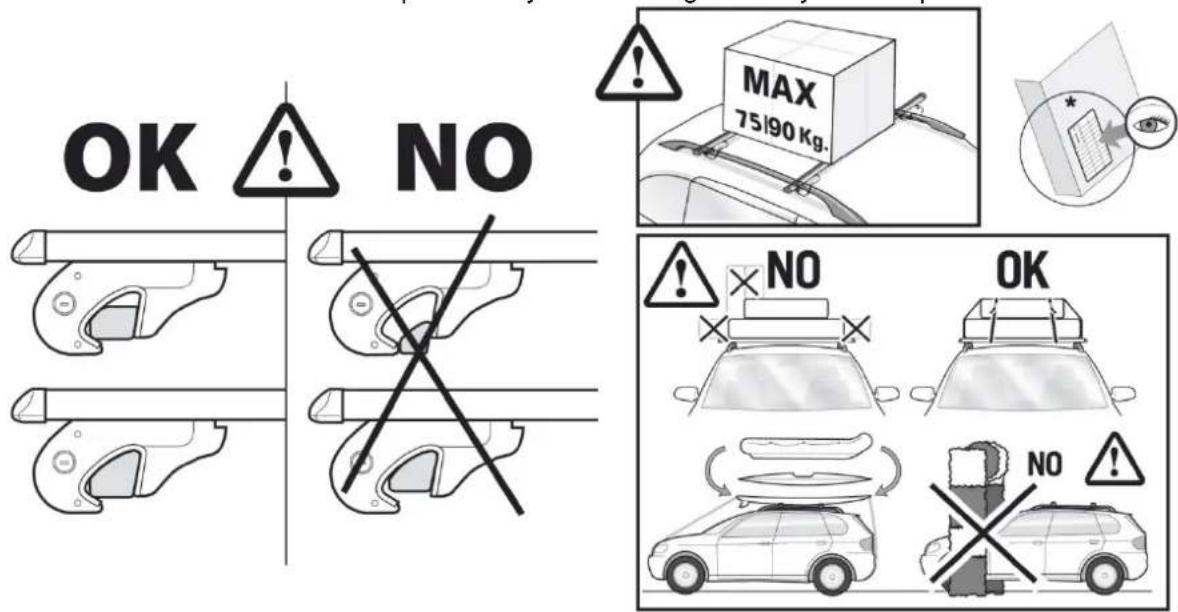
Please make sure you comply with the maximum permissible roof load for your car.
-
Fasten the load with suitable means (e.g. reliably secure using belts, lashes or similar).
-
Strictly observe the assembly instructions to ensure the roof bar is assembled properly and functions correctly!
-
To avoid damage to the roof of the car, two people are required to assemble and remove the roof bar!
-
When assembling, ensure that the brackets do not protrude over the edge of the car roof. Also, ensure that the clearance between the two bars should be at least 70cm , unless otherwise specified by the manufacturer of your car.
-
Ensure that the load is distributed evenly with the lowest point of gravity and do not exceed the maximum roof load specified by the car manufacturer.
-
The permitted load comprises the deadweight of the roof bar of 3,2kg and the actual load itself up to a maximum of 75kg / 90kg (unless otherwise specified by the car manufacturer).
-
The luggage shouldn't protrude over the loading surface.
-
When transporting long loads, also attach the front end of the load to the car bumper. Adjust your speed accordingly when driving.
-
Before each journey, after a short drive and at least every 300km , check that the roof bar is tightly in place.
-
For reasons of safety and to save fuel costs, the roof bar should be dismantled when not needed.
-
Notice that your vehicle's driving behaviour changes when the load carrier is loaded (side wind sensitivity, curves and braking). Adjust your speed
accordingly (max 120km/h). Try to avoid sudden braking and steering movements.
- Check the roof rack before use if there is any damage. Damaged or worn parts need to be replaced immediately. Only use original replacement parts.
- Do not make any modifications on the roof rack. This can be very dangerous.
In case of defects or problems please contact your Pro-User supplier.
TECHNICAL DATA
Oval profile (aluminium): 28,2× 47,9mm
Min. rail height: 30mm
Max. roof rail thickness: 58mm
Bar lengths: ca. 120cm
Max. rail spacing: up to 1,07m centre
Own weight: 3,2kg
Load capacity: 75kg / 90kg (depending on type of car)
MAINTENANCE
- Check the roof rack regular if there is any damage. Damaged or worn parts need to be replaced immediately. Use only original replacement parts.
- In case of accidental fall of the accessory, check immediately to make sure there is no damage such as cracks, or visible dents that would affect the correct working of the accessory. In such cases, replace the damaged part or the accessory.
- Always store the roof rack clean and dry after use. If necessary spray with the water hose to remove mud and other filthy stuff.
- The nuts and bolts of the roof rack need to be checked regular, if necessary tighten them again.
GUARANTEE
This product is covered by a 2 year guarantee. Please note that our guarantee covers reasonable use of the roof rack, it does NOT cover any damage caused by misuse. This also applies to a malfunction or failure of the roof rack that has been caused by poor or incorrect installation. To ensure the validity of the guarantee please carry out maintenance in accordance with the maintenance section. We reserve the right to make a call out and/or repair charge for any work required to be undertaken to rectify faults that are outside of the company's control i.e. incorrect or poor fitting, misuse, accidental damage, etc.