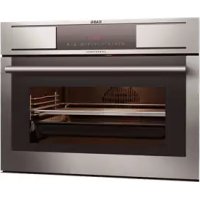
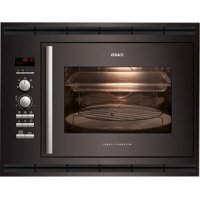
BE6915001M - Four AEG - Free user manual and instructions
Find the device manual for free BE6915001M AEG in PDF.
Download the instructions for your Four in PDF format for free! Find your manual BE6915001M - AEG and take your electronic device back in hand. On this page are published all the documents necessary for the use of your device. BE6915001M by AEG.
USER MANUAL BE6915001M AEG
Thank you for choosing this AEG product. we have created it to give you impeccable performance for many years, with innovative technologies that help make life simpler – features you might not nd on ordinary appliances. Please spend a few minutes reading to get the very best from it. Visit our website for: Get usage advice, brochures, trouble shooter, service information: www.aeg.com Register your product for better service: www.aeg.com/productregistration Buy Accessories, Consumables and Original spare parts for your appliance: www.aeg.com/shop
CUSTOMER CARE AND SERVICE
We recommend the use of original spare parts. When contacting Service, ensure that you have the following data available. The information can be found on the rating plate. model, PNC, Serial Number. Warning / Caution-Safety information General information and tips Environmental information Subject to change without notice. 3172742-002 In-Fr. (AEG) 17/10/14 09:49 Página 21. SAFETY INFORMATION ENGLISH 3 Before the installation and use of the appliance, carefully read the supplied instructions. The manufacturer is not responsible if an incorrect installation and use causes injuries and damages. Always keep the instructions with the appliance for future reference.
1.1 Children and vulnerable people safety
- This appliance can be used by children aged from 8 years and above and persons with reduced physical, sensory or mental capabilities or lack of experience and knowledge if they have been given supervision or instruction concerning use of the appliance in a safe way and understand the hazards involved.
- Do not let children play with the appliance.
- Keep all packaging away from children.
- Keep children and pets away from the appliance when it operates or when it cools down. Accessible parts are hot.
- If the appliance has a child safety device, we recommend you activate it.
- Cleaning and user maintenance shall not be made by children without supervision.
- Children of less than 3 years should be kept away unless continuously supervised.
- Only a quali ed person must install this appliance and replace the cable.
- Internally the appliance becomes hot when in operation. Do not touch the heating elements that are in the appliance. Always use oven gloves to remove or put in accessories or ovenware.
- Before maintenance cut the power supply. 3172742-002 In-Fr. (AEG) 17/10/14 09:49 Página 34 www.aeg.com
- Ensure that the appliance is switched off before replacing the lamp to avoid the possibility of electric shock.
- Do not use a steam cleaner to clean the appliance.
- Do not use harsh abrasive cleaners or sharp metal scrapers to clean the glass door since they can scratch the surface, which may result in shattering of the glass.
- If the supply cord is damaged, it must be replaced by the manufacturer, its Authorised Service Centre or similarly quali ed persons in order to avoid a hazard.
- To remove the shelf supports rst pull the front of the shelf support and then the rear end away from the side walls. Install the shelf supports in the opposite sequence.
- Only use the core temperature sensor recommended for this appliance.
WARNING Only a quali ed person must install this appliance.
- Remove all the packaging.
- Do not install or use a damaged appliance.
- Obey the installation instruction supplied with the appliance.
- Always be careful when you move the appliance because it is heavy. Always wear safety gloves.
- Do not pull the appliance by the handle.
- Keep the minimum distance from the other appliances and units.
- Make sure that the appliance is installed below and adjacent safe structures.
- The sides of the appliance must stay adjacent to appliances or to units with the same height.
2.2 Electrical connection
WARNING Risk of fire and electrical shock.
- All electrical connections should be made by a quali ed electrician.
- The appliance must be earthed.
- Make sure that the electrical information on the rating plate agrees with the power supply. If not contact an electrician.
- Always use a correctly installed shockproof socket.
- Do not use multi-plug adapters and extension cables.
- Make sure not to cause damage to the mains plug and to the mains cable. Should the mains cable need to be replaced, this must be carried out by our Authorised Service Centre.
- Do not let mains cables to come in touch with the appliance door, specially when the door is hot.
- The shock protection of live and insulated parts must be fastened in such a way that it cannot be removed without tools. 3172742-002 In-Fr. (AEG) 17/10/14 09:49 Página 4ENGLISH 5
- Connect the mains plug to the mains socket only at the end of the installation. Make sure that there is access to the mains plug after the installation.
- If the mains socket is loose, do not connect the mains plug.
- Do not pull the mains cable to disconnect the appliance. Always pull the mains plug.
- Use only correct isolation devices: line protecting cut-outs, fuses (screw type fuses removed from the holder), earth leakage trips and contactors.
- The electrical installation must have an isolation device which lets you disconnect the appliance from the mains at all poles. The isolation device must have a contact opening width of minimum 3 mm.
- This appliance complies with the E.E.C. Directives.
WARNING Risk of injury, burns and electrical shock or explosion.
- Use this appliance in a household only.
- Do not change the speci cation of this appliance.
- Make sure that the ventilation openings are not blocked.
- Do not let the appliance stay unattended during operation.
- Deactivate the appliance after each use.
- Be careful when you open the appliance door while the appliance is in operation. Hot air can release.
- Do not operate the appliance with wet hands or when it has contact with water.
- Do not apply pressure on the open door.
- Do not use the appliance as a work surface or as a storage surface.
- Open the appliance door carefully. The use of ingredients with alcohol can cause a mixture of alcohol and air.
- Do not let sparks or open ames tocome in contact with the appliance when you open the door.
- Do not put ammable products or items that are wet with ammable products in, near or on the appliance. WARNING Risk of damage to the appliance.
- To prevent damage or discoloration to the enamel: – do not put ovenware or other objects in the appliance directly on the bottom. – do not put aluminium foil directly on the bottom of the appliance. – do not put water directly into the hot appliance. – do not keep moist dishes and food in the appliance after you finish the cooking. – be careful when you remove or install the accessories.
- Discoloration of the enamel has no effect on the performance of the appliance. It is not a defect in the sense of the warranty law.
- Use a deep pan for moist cakes. Fruit juices cause stains that can be permanent.
- This appliance is for cooking purposes only. It must not be used for other purposes, for example room heating.
- Always cook with the oven door closed.
2.4 Care and cleaning
WARNING Risk of injury, re, or damage to the appliance.
- Before maintenance, deactivate the appliance and disconnect the mains plug from the mains socket.
- Make sure the appliance is cold. There is the risk that the glass panels can break.
- Replace immediately the door glass panels when they are damaged. Contact the Service.
- Be careful when you remove the door from the appliance. The door is heavy!
- Clean regularly the appliance to prevent the deterioration of the surface material. 3172742-002 In-Fr. (AEG) 17/10/14 09:49 Página 56 www.aeg.com
- Remaining fat or food in the appliance can cause re.
- Clean the appliance with a moist soft cloth. Only use neutral detergents. Do not use abrasive products, abrasive cleaning pads, solvents or metal objects.
- If you use an oven spray, obey the safety instructions on the packaging.
- Do not clean the catalytic enamel (if applicable) with any kind of detergent.
- The type of light bulb or halogen lamp used for this appliance is only for household appliances. Do not use it for house lighting. WARNING Risk of electrical shock.
- Before replacing the lamp, disconnect the appliance from the power supply.
- Only use lamps with the same specications.
WARNING Risk of injury or suffocation.
- Disconnect the appliance from the mains supply.
- Cut off the mains cable and discard it.
- Remove the door catch to prevent children and pets to get closed in the appliance 3172742-002 In-Fr. (AEG) 17/10/14 09:49 Página 6ENGLISH 7
- Pizza stone To cook pizzas in a traditional way.
- Core temperature sensor To measure how far the food is cooked.
- Telescopic runners For shelves and trays.
- Inner grid To use together with the roasting pan. Baking tray For cakes and biscuits Grill- /Roasting pan To take and roast or as a pan to collect fat 3172742-002 In-Fr. (AEG) 17/10/14 09:49 Página 78 www.aeg.com
Electronic timer Function indicator Function selector Temperature indicator Temperature selector Start Guide accompanying this manual on how to do this.
- Cool the oven with the door open so that it ventilates and no odours remain inside it.
- Once cold, clean the oven and accessories. During this first operation, smoke and smells will be produced. The kitchen should therefore be well ventilated. There may be traces of grease and other substances in the oven as a result of its manufacturing process. These should be removed by means of the following procedure:
- Remove all of the packaging from your oven, including the protective plastic, if any.
- Turn the oven to setting , or else place it on the defect settingt , at 200ºC, for 1 hour. Consult the Quick
3172742-002 In-Fr. (AEG) 17/10/14 09:49 Página 8ENGLISH 9 clean and free of obstacles when plugging in the oven. If the clock does not respond correctly when you touch the glass, unplug the oven for a few seconds and then plug it in again. Doing this causes the sensors to adjust automatically so that they will react once more to fingertip control. CAUTION The electronic clock features Touch- Control technology. To operate, simply touch the glass control symbols with your fingertip. The touch control sensitivity continuously adapts to ambient conditions. Make sure the glass surface of the control panel is
6.1 Setting the time on the
6.2 Manual Operation
The oven is ready to be used when the clock has been set. Select a cooking function and a temperature. When you begin cooking, temperature indicator lights up to indicate that the When the oven is connected to the power network, AUTO (A) and the gures on the timer will ash. Set the current time of day as follows: 1 Press in the and buttons simultaneously till you hear a beep. A point (C) between the gures of the timer will start ashing. 2 Set the correct time of day using the and buttons. You will hear a beep conrming the time selected. The heat symbol (B) stays lit. IMPORTANT The time can be changed whenever you like; follow the instructions above to do so. oven is heating the contents; the indicator goes out when the selected temperature is reached. Set the controls to to turn the oven off.
Oven function Application Off position Cooking Conventional with fan Grilling Fast Grilling Grillingl with fan True fan cooking Pizza Setting Lower element Grill and Lower element Defrost Switch off oven It is used for sponges and cakes where the heat received must be uniform to achieve a spongy texture. Appropriate for roasts and cakes. The fan spreads the heat uniformly inside the oven. For preparing dishes with supercial roasting. It allows the outer layer to be browned without affecting the inside of the food. Ideal for at food, such as steaks, ribs, sh, toast. Allows greater surfaces to be prepared, than with the grill, together with higher power reducing the time required for browning of the food. Allows uniform roasting at the same time as surface browning. Ideal for grills. Special for large volume pieces, such as poultry, game etc. It is recommended to put the item on a rack with a tray beneath to collect the stock and juices. The fan distributes the heat produced by an element located at the rear of the oven. Due to the uniform heat distribution, it allows roasting and baking to take place at two heights at the same time. This cooking mode allows defrosting of food. To do this, set the temperature selector to position. To bake food on 1 shelf position for a more intensive browning and a crispy bottom. Set the temperature to 220º during 24 min. to preheat the oven. Heats only from beneath. Suitable for heating dishes and raising pastry and similar. Special for roasts. It can be used for any piece, whatever its size. To defrost frozen food. CAUTION While using the Grilling, Fast Grilling or Grilling with fan, the door must be kept closed. NOTE The pilot light remains on in any cooking function. 3172742-002 In-Fr. (AEG) 17/10/14 09:49 Página 10ENGLISH 11
6.4 Functions of the Electronic
Clock The timer has different functions: Clock timer
- This timer will give off an acoustic signal after the time period has expired. The oven does not have to be in use for this to happen. Baking time
- When the baking time set has elapsed, the oven will switch off automatically. End time
- When the end time set has elapsed, the oven will switch off automatically. IMPORTANT Baking time and end time
- When the end time set has elapsed, the oven will switch off automatically. The baking time set determines when the oven will be switched on. This function is used to automatically switch the oven on and off. The switch-on time of the oven is calculated by inputting an end time and the baking time required.
6.5 Changing the timer pitch
1 Simultaneously press the buttons and . A point of light will flash between the figures on the timer. 2 Press the time button (D). The indicator ton1 will appear on the timer screen. 3 Repeatedly pressing the button will change the pitch of the clock timer.
6.6 Setting the time on a clock
timer 1 Hold the time button (D) for a few moments till the timer symbol between the figures on the timer starts flashing. 2 Set the alarm time of the clock timer using the and buttons. You will hear a beep and the display will show the current time. The clock timer is programmed. An acoustic signal will go off after the time set has elapsed and the timer symbol (E) will begin flashing. 3 Press any key to switch off the acoustic signal. The timer symbol continues to flash. 4 Hold the time button in for a few moments to end the clock timer function. 3172742-002 In-Fr. (AEG) 17/10/14 09:49 Página 1112 www.aeg.com the time button (A) in for a few moments till the AUTO symbol starts flashing. You can then change the baking time by pressing or buttons. You will hear a beep confirming the change. IMPORTANT You can check the time remaining on the clock timer whenever you wish by holding the time button (D) in for a few moments till the clock symbol starts flashing. You can then change the time selected by pressing the and buttons. You will hear a beep confirming the change.
6.7 Setting a baking time
1 Hold the time button (D) in for a few moments till you hear a beep. If the time button (D) is then pressed again, the word time appears in the display. 2 Set the baking time using the and buttons. You will hear a beep, the current time appears and the AUTO symbol stays lit. When the baking time has elapsed, the oven will switch off automatically. 3 Set a baking function and temperature. After the baking time has elapsed, the oven is switched off and an acoustic signal goes off. 4 Press any key to switch off the acoustic signal. The oven remains switched off and the AUTO symbol flashes. 5 Hold the time button (A) in for a few moments till you hear a beep to end the function. Turn the oven function knob and temperature knob to the off position to switch the oven off. You can check the baking time remaining whenever you wish by holding IMPORTANT Hold the time button (D) in for a few moments to end the baking time function.
6.8 Setting an end time
1 Hold the time button (D) in for a few moments till you hear a beep. 2 Press the time button (D) again till the word End appears in the display. 3 Set the end time using the and buttons. You will hear a beep, the current time appears and the AUTO symbol stays lit. When the end time is reached, the oven will switch off automatically. 4 Set a baking function and temperature. If the end time is reached, the oven is switched off and an acoustic signal goes off. 5 Press any key to switch off the acoustic signal. The oven remains switched off and the AUTO symbol flashes. 6 Hold the time button (D) in for a few moments till you hear a beep to end the function. Turn the oven function knob and temperature knob to the off position to switch the oven off. 3172742-002 In-Fr. (AEG) 17/10/14 09:49 Página 12ENGLISH 13 PLEASE NOTE The time at which the baking process starts is the end time minus the baking time. For example: the end time is set to 5:00 PM and the baking time is 2 hours. In that case the oven will switch on at 3:00 PM! The oven will be switched off and an acoustic signal will go off once the baking time programmed has elapsed. 6 Press any key to switch off the acoustic signal. The oven remains switched off and the AUTO symbol flashes. 7 Hold the time button (D) in for a few moments till you hear a beep to end the function. Turn the oven function knob and temperature knob to the off position to switch the oven off. You can check the baking process whenever you wish by holding the time button (D) in for a few moments. IMPORTANT An end time can still be set while the oven is in use. Follow the instructions above to do so (in that case the oven function and temperature do not have to be reset). You can check the end time of the baking process whenever you wish by holding the time button (A) in for a few moments. If you want to change the end time, you should cancel the function by simultaneously pressing the and buttons. Then set an end time again.
6.9 Setting baking time and
end time 1 Hold the time button (D) in for a few moments till you hear a beep. If the time button (D) is then pressed again, the word time appears in the display. 2 Set the baking time using the and buttons. 3 Press the time button (D) again till the word End appears in the display. 4 Set the end time with the and buttons. You will hear a beep, the current time appears and the AUTO symbol stays lit. 5 Set a baking function and temperature. The oven remains switched off, with the AUTO symbol in the display. The oven has been programmed. The oven starts when the baking process should begin and bakes for the baking time set. The AUTO symbol and the baking symbol are lit in the display. 3172742-002 In-Fr. (AEG) 17/10/14 09:49 Página 1314 www.aeg.com
temperature sensor 1 Place the meat to be roasted with the Core temperature sensor in it in the oven. 2 Remove the cover from the connection point at the top right of the oven and insert the plug of the probe into the connection point. 3 As soon as the Core temperature sensor is connected to the oven you see the temperature measured by the probe on the left in the display and the temperature selected standard for the probe (80º C) on the right. The display alternately shows the current time of day and the temperature set and the temperature measured by the probe. PLEASE NOTE When the power is interrupted, the programming of the timer is deleted and the figures 00:00 appear in the display. Set the current time of day and programme the timer again.
6.10 Setting the Core
temperature sensor The Core temperature sensor measures the temperature in the meat to be roasted. The oven switches off automatically when the probe detects a preselected temperature. Roasting with the Core temperature sensor provides an optimum roasting result regardless of the type of meat or fish to be roasted.
- Only use the original Core temperature sensor that comes with the oven.
- Insert the probe in the meat before starting roasting.
- Insert the probe in one side of the meat to be roasted, so that the point ends up in the middle of the meat.
- Insert the probe in the meat all the way to the handle.
- We recommend turning the meat halfway the process. Take this into account when inserting the probe.
- The point of the probe should not touch any bones or fat zones. Neither should it end up in a hollow zone, as may be the case for poultry. If you wish to change the programming, you should cancel the function by simultaneously pressing the and buttons. Then set the baking time and an end time again. IMPORTANT If the Core temperature sensor measures very low temperatures (for very cold products), the display shows 30ºC. If the Core temperature sensor measures very high temperatures, the display shows 99ºC. An acoustic signal goes off if the probe is not connected properly. 4 Simultaneously press the buttons and . 3172742-002 In-Fr. (AEG) 17/10/14 09:49 Página 14ENGLISH 15 9 Set the operating buttons of the oven to the off position and remove the Core temperature sensor. 10 The perfectly roasted meat can now be served. PLEASE NOTE When roasting with the Core temperature sensor you access the programming functions of the timer such as the clock timer, by holding the time button in for a few moments. The temperatures of the probe are always displayed on the timer screen.The clock timer is set when the timer symbol lights up. 5 Press the time button (D) twice. 6 Set the desired temperature for the inside of the meat using the and buttons (see the table). Hold the buttons in for a few moments the first time. Then quickly press them repeatedly. 7 Set a baking function and roasting temperature. When the probe senses the temperature you selected in the meat to be roasted, the oven switches off and you will hear an acoustic signal. 8 Press any key to switch off the acoustic signal. Roast Probe temperature Remarks Roast beef 35 - 40° C Rare Roast beef 45 - 50° C Medium Roast beef 55 - 60° C Well-done Leg of lamb 65 - 70° C Shank 80 - 85° C Loin (section) 65 - 70° C Ham 80 - 85° C Chicken 75 - 80° C Roast turkey 80 - 85° C Your oven will come supplied with the following oven furniture: (A) Oven shelf (B) Enamelled deep baking tray The numbers 1 – 5, indicate the different shelf positions that you can utilise within the oven. You should use the shelf position(s) that you find are best suited to your personal cooking preferences. Insert the oven shelf and deep baking tray between the 2 side rails at any position (1 to 5) on both sides. The oven shelf has safety stops to prevent accidental withdraw. After engaging the oven shelf into the side rails, as you push the oven shelf into the oven, lift the front of the shelf slightly to bypass the stops and allow the oven shelf to slide fully into the rails. To remove the oven shelf, gently pull the oven shelf outwards. When the shelf stops, lift the front slightly to bypass the safety stops and then completely withdraw the oven shelf from the oven. When installed correctly, the shelf and tray should be horizontal and not on an angle.
3172742-002 In-Fr. (AEG) 17/10/14 09:49 Página 1516 www.aeg.com Make sure you push back the telescopic runners fully in the appliance before you close the oven door.
7.2 Telescopic Runners
Keep the installation instructions for the telescopic runners for future use. With telescopic runners you can put in and remove the shelves more easily. CAUTION Do not clean the telescopic runners in the dishwasher. Do not lubricate the telescopic runners. 1 Pull out the right and left hand telescopic runners. 2 Put the wire shelf on the telescopic runners and carefully push them into the appliance.
- To cook any food, insert the tray or grill in the side rails in the oven.
- Do not place containers or food on the bottom surface of the oven. Always use the trays and grill.
- Do not pour water on the bottom surface of the oven when in use; this may damage the enamel.
- Open the oven door as little as possible during cooking. This will reduce power consumption.
- It is normal for condensation to occur on the oven door when cooking dishes with a high liquid content.
- Clean the oven interior to remove traces of grease or food, which could later give off smoke and odours and cause stains to appear.
8.1 General information
- The oven must always be operated with the door closed.
- The manufacturer takes no responsibility for any use of the oven other than for the home preparation of food.
- Do not store oil, fats or inflammable materials inside the oven. This may be dangerous if the oven is turned on.
- Do not lean or sit on the open oven door. You could damage it, as well as endanger your own safety.
- Do not cover the bottom of the oven with aluminium foil as this may affect cooking performance and damage the enamel inside the oven and the interior of your kitchen unit.
- Wait until the oven is cold.
- In other oven models, push the rod of the grill element (B) with both hands until it is released from the upper fastening point. CAUTION Disconnect the appliance from mains power supply before any operation.
9.1 Cleaning the Oven Interior
1 Easy-to-clean enamel ovens Use nylon brushes or sponges with warm soapy water to clean enamelled surfaces such as the bottom of the oven. Clean when the oven is cold. Use oven-cleaning products only on enamelled surfaces and always follow the manufacturer’s instructions. 2 Ovens coated in special enamel adapted to other cleaning systems Please consult the Specifications Sheet for your oven. CAUTION Do not clean the oven interior with steam or pressurised water cleaning equipment. Do not use metal scouring pads, wire brushes or any utensil that can scratch the enamel.
9. CARE AND CLEANING
3172742-002 In-Fr. (AEG) 17/10/14 09:50 Página 1920 www.aeg.com 4 Holding the door at the sides with both hands, raise and remove the door from the oven until the hinges (G) have been completely removed. To mount the door, proceed in reverse order. CAUTION Do not remove the safety pins at any time since the hinge is taut and may cause injury. It would also be impossible to mount the door without the pins being in place. To mount the door, hold it with both hands and insert the hinges in the appropriate openings in the front of the oven. Slowly open the door until it is fully open.
9.4 Cleaning the Large Inner
CAUTION Be very careful when removing the inner glass, as the oven door will close.
- Turn the element round and clean the upper part of the oven.
- Finally, return the grill element to its original position. CAUTION For your own safety, never turn the oven on with-out the rear panel in position since this protects the fan.
9.2 Cleaning the Oven
Exterior and Accessories Clean the outside of the oven and accessories with warm soapy water or with a mild detergent. Take great care when cleaning stainless steel surfaces. Use only sponges or cloths that do not scratch.
9.3 Cleaning the Oven Door
Do not use metal scouring pads, wire brushes or commercially available or abrasive powder cleansers to clean the oven door as they could scratch the surface and cause the glass to break. In some oven models the door may be removed to make them easier to clean, by proceeding as follows: 1 Open the door. 2 Turn the two clamps (F) right round.
3 Close the door until it fits in the two clamps.
3172742-002 In-Fr. (AEG) 17/10/14 09:50 Página 20ENGLISH 21 5 The inside glass panels will now be loose and can be easily cleaned with window cleaning liquid and a soft cloth. WARNING If the door has not been blocked with the clamp (N), please take care when removing the inside glass panels as the oven door will close. 6 Once clean, return the glass panels in the same order so that the word TERMOGLASS can be read. 7 Replace the upper clasp of the door, making sure that the side tabs fit in point 1.
9.5 Changing the Oven Light
bulb CAUTION First make sure the oven is unplugged before proceeding to change the bulb. WARNING Ensure that the appliance is switched off before replacing the lamp to avoid the possibility of electric shock. The replacement bulb must be resistant to temperatures up to 300ºC. You can order one from the Technical Assistance Service.
- Loosen the lens from the lampholder with the help of the appropriate tool. Instructions to remove / replace inside glass panels. 90 cm oven 1 Open the oven door. 2 Fully rotate the two clamps (N) to stop the door from closing. 3 Squeeze point 1 located on the upper part of both sides of the oven door. 4 Continue squeezing point 1 and pull out the upper clasp of the door.
- Replace the lens, making sure it fits in the correct position without forcing it.
- It should only come on while the oven is heating up to the temperature selected. Oven smoking during use
- Normal during first use.
- Clean the oven regularly.
- Reduce the amount of grease or oil in the tray.
- Do not use temperatures higher than those indicated in the cooking chart. The expected cooking results are not achieved Check the cooking chart for guidance on how your oven operates. CAUTION If these problems persist despite these tips, contact Technical Service. The oven stops working
- Check the power connection.
- Check the fuses and the circuit breaker for your installation.
- Make sure the timer is either in the manual or programmed setting.
- Check the position of the function and temperature setting. The light inside the oven does not go on
- Check that it has been properly inserted according to the Instruction Manual. The heating pilot light does not turn on
- Select a temperature.
- To unpack the oven, pull on the tab located at the bottom of the box and hold it by the side handles, never by the oven door handle.
- The opening in the kitchen unit must be that indicated on the diagram. The minimum size of the unit base must be 550 mm. This information is exclusively for the installer, who is responsible for the oven’s assembly and electrical connection. If you install the oven yourself, the manufacturer will not accept liability for possible damage.
11.1 Prior to Installation
Please refer to electrical safety instructions on page 3 of this manual before installation.
For all ovens. after the power has been connected: 1 Position the oven inside the unit and en-sure that the power cable is not trapped or in contact with parts of the oven that heat up. 2 Anchor the oven to the unit with the screws supplied, screwing them into the unit through the holes that can be seen when the door is open. 3 Make sure that the body of the oven is not in contact with the walls of the unit and that there is a separation of at least 2 mm with the adjacent units.
11.4 Technical information
If the appliance does not work, inform Technical Service of the kind of problem you are experiencing and give the: 1 Serial Number (S-No) 2 Model of Appliance (Mod.) You will find this information engraved on the identification plate. This plate is on the bottom of the oven and can be seen when open-ing the door.
- Disconnection from the electrical supply must be allowed after the oven is in the installed position.
- With built-in multifunction ovens, the rear of the unit, corresponding to the shaded area (A), must have nothing projecting out (unit reinforcement, pipes, sockets, etc.).
- The adhesive used in the plastic lining the kitchen units must be able to withstand temperatures over 85ºC.
11.2 Electrical Connection
The installer must ensure that:
- The mains power voltage and frequency correspond to what is marked on the identification plate.
- The wiring system can withstand the maximum power marked on the identification plate.
- After connecting the power, check that all electrical parts of the oven are working correctly.
3172742-002 In-Fr. (AEG) 17/10/14 09:50 Página 2324 www.aeg.com – When the cooking duration is longer than 30 minutes, reduce the oven temperature to minimum, 3 - 10 minutes before the end of the cooking time, depending on the duration of the cooking. The residual heat inside the oven will continue to cook. – Use the residual heat to warm up other foods.
- Cooking with fan - when possible, use the cooking functions with fan to save energy.
- Keep food warm - if you want to use the residual heat to keep the meal warm, choose the lowest possible temperature setting.
12.1 Product Fiche and information according to EU 65-66/2014
EN 60350-1 - Household electric cooking appliances - Part 1: Ranges, ovens, steam ovens and grills - Methods for measuring performance.
The appliance contains features which help you save energy during everyday cooking.
- General hints – Make sure that the oven door is closed properly when the appliance operates and keep it closed as much as possible during the cooking. – Use metal dishes to improve the energy saving. – When possible, put the food inside the oven without heating it up.
12. ENERGY EFFICIENCY
Supplier's name Model identication Energy Efciency Index Energy efciency class Energy consumption with a standard load, conventional mode Energy consumption with a standard load, fan-forced mode Number of cavities Heat source Volume Type of oven Built-In Mass AEG BE6915001M 102,3
Electricity 77 l Oven BE6915001M EU 53 kg BE6915001M SA/UK 51 kg 3172742-002 In-Fr. (AEG) 17/10/14 09:50 Página 24ENGLISH 25 be taken to an electrical and electronic equipment collection point for recycling. In this way, any negative consequences for the environment and public health from incorrect handling can be avoided. Contact your local council, household waste disposal service or the establishment you bought the product from for more information on recycling the appliance. The packaging is made from totally recyclable materials which can be put to other uses. Consult your local council regarding the neces-sary procedures for disposing of these materials. CAUTION The symbol on the product or packaging indicates that this appliance cannot be disposed of as normal household waste. It should