GCH 970 NA1TS - Tumble drier CANDY - Free user manual and instructions
Find the device manual for free GCH 970 NA1TS CANDY in PDF.
Questions des utilisateurs sur GCH 970 NA1TS CANDY
0 question sur cet appareil. Repondez a celles que vous connaissez ou posez la votre.
Poser une nouvelle question sur cet appareil
Download the instructions for your Tumble drier in PDF format for free! Find your manual GCH 970 NA1TS - CANDY and take your electronic device back in hand. On this page are published all the documents necessary for the use of your device. GCH 970 NA1TS by CANDY.
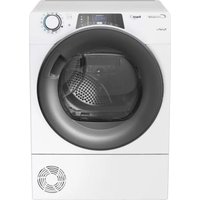
USER MANUAL GCH 970 NA1TS CANDY
Heat Pump Tumble Dryer English
DutchEN 2 Introduction Delivery Information Safety Reminders Use Installation The Laundry Ventilation Environmental Issues Gias Service Electrical Requirements Adjusting the Feet Drain Hose Kit: Fitting Instructions Preparing the Load Clothes Preparation Do Not Tumble Dry Energy Saving Sorting the Load Drying Guide Controls and Indicators Selecting the Programme Door and Filter Opening the Door Filter Filter Care Indicator To Clean the Condenser Filter Water Container To Remove the Container Operation Delay Start Function Cancelling and Resetting the Programme Cleaning and Routine Maintenance Cleaning the Dryer Technical Specifications Troubleshooting Customer Service Spares Gias Service INDEX
15INTRODUCTION Use SAFETY REMINDERS ●This machine should only be used for its intended purpose as described in this manual. Ensure that the instructions for installation and use are fully understood before operating the appliance. ● Do not touch the appliance when hands or feet are damp or wet. ● Do not lean on the door when loading the machine or use the door to lift or move the machine. ●Do not allow children to play with the machine or its controls. ● WARNING Do not use the product if the fluff filter is not in position or is damaged; fluff could be ignited. ● WARNING Where the hot surface symbol is located the temperature rise during operation of the tumble dryer may be in excess of 60 degrees C. ● Remove the plug from the electricity supply. Always remove the plug before cleaning the appliance. ● Do not continue to use this machine if it appears to be faulty. ● Lint and fluff must not be allowed to collect on the floor around the outside of the machine. ● The drum inside may be very hot. Always allow the dryer to complete the cool down period before removing the laundry. ● The final part of a tumble dryer cycle occurs without heat (cool down cycle) to ensure that the items are left at a temperature that ensures that the items will not be damaged. ● Maximum load drying weight: refer to energy label 7 kg. ●The tumble dryer is not to be used if industrial chemicals have been used for cleaning. ● WARNING: Never stop a tumble dryer before the end of the drying cycle unless all items are quickly removed and spread out so that the heat is dissipated.
EN 4DRAIN HOSE KIT: FITTING INSTRUCTIONS
WARNING! Switch off and remove the tumble dryer plug from the electricity supply before carrying out any work. Fit the Kit as Follows: 1 . U n s c r e w a n d remove the 3 screws, at the rear of the machine, retaining the worktop trim.
worktop trim and the worktop surface by carefully sliding it towards the rear of the machine.
container is situated at the right-hand side of the machine (viewed from the rear). A grey hose connects to the bridge above the water container. Using pliers, r e m o v e t h e p i p e retaining clip from the bridge.
4. Pull the hose off the
5. Attach the hose from
the kit, using the connector and pipe clips supplied, to the hose removed from the bridge connection.
6. Take off the water
container cover from the rear of the machine by removing the two screws and unclipping the cover.
7. Break off the tab on
the side of the cover and replace the cover on the machine, refit the screws. You should now have revealed a hole in the back of the cabinet next to the Cover.
8. Feed the drain hose
through the hole in the cabinet.
9. Locate the grey pipe
in the cutout of the tray and secure the pipe assembly to the bridge with the plastic tie.
10. Carefully slide the
worktop back into position ensuring that the hose is not trapped a n d r e p l a c e t h e worktop rear trim with the 3 screws.
drain hose to the waste water pipe. Make sure that the new hose does not kink when pushing the tumble dryer into position. Ensure that the guidelines, as shown, are followed when routing the new external hose.
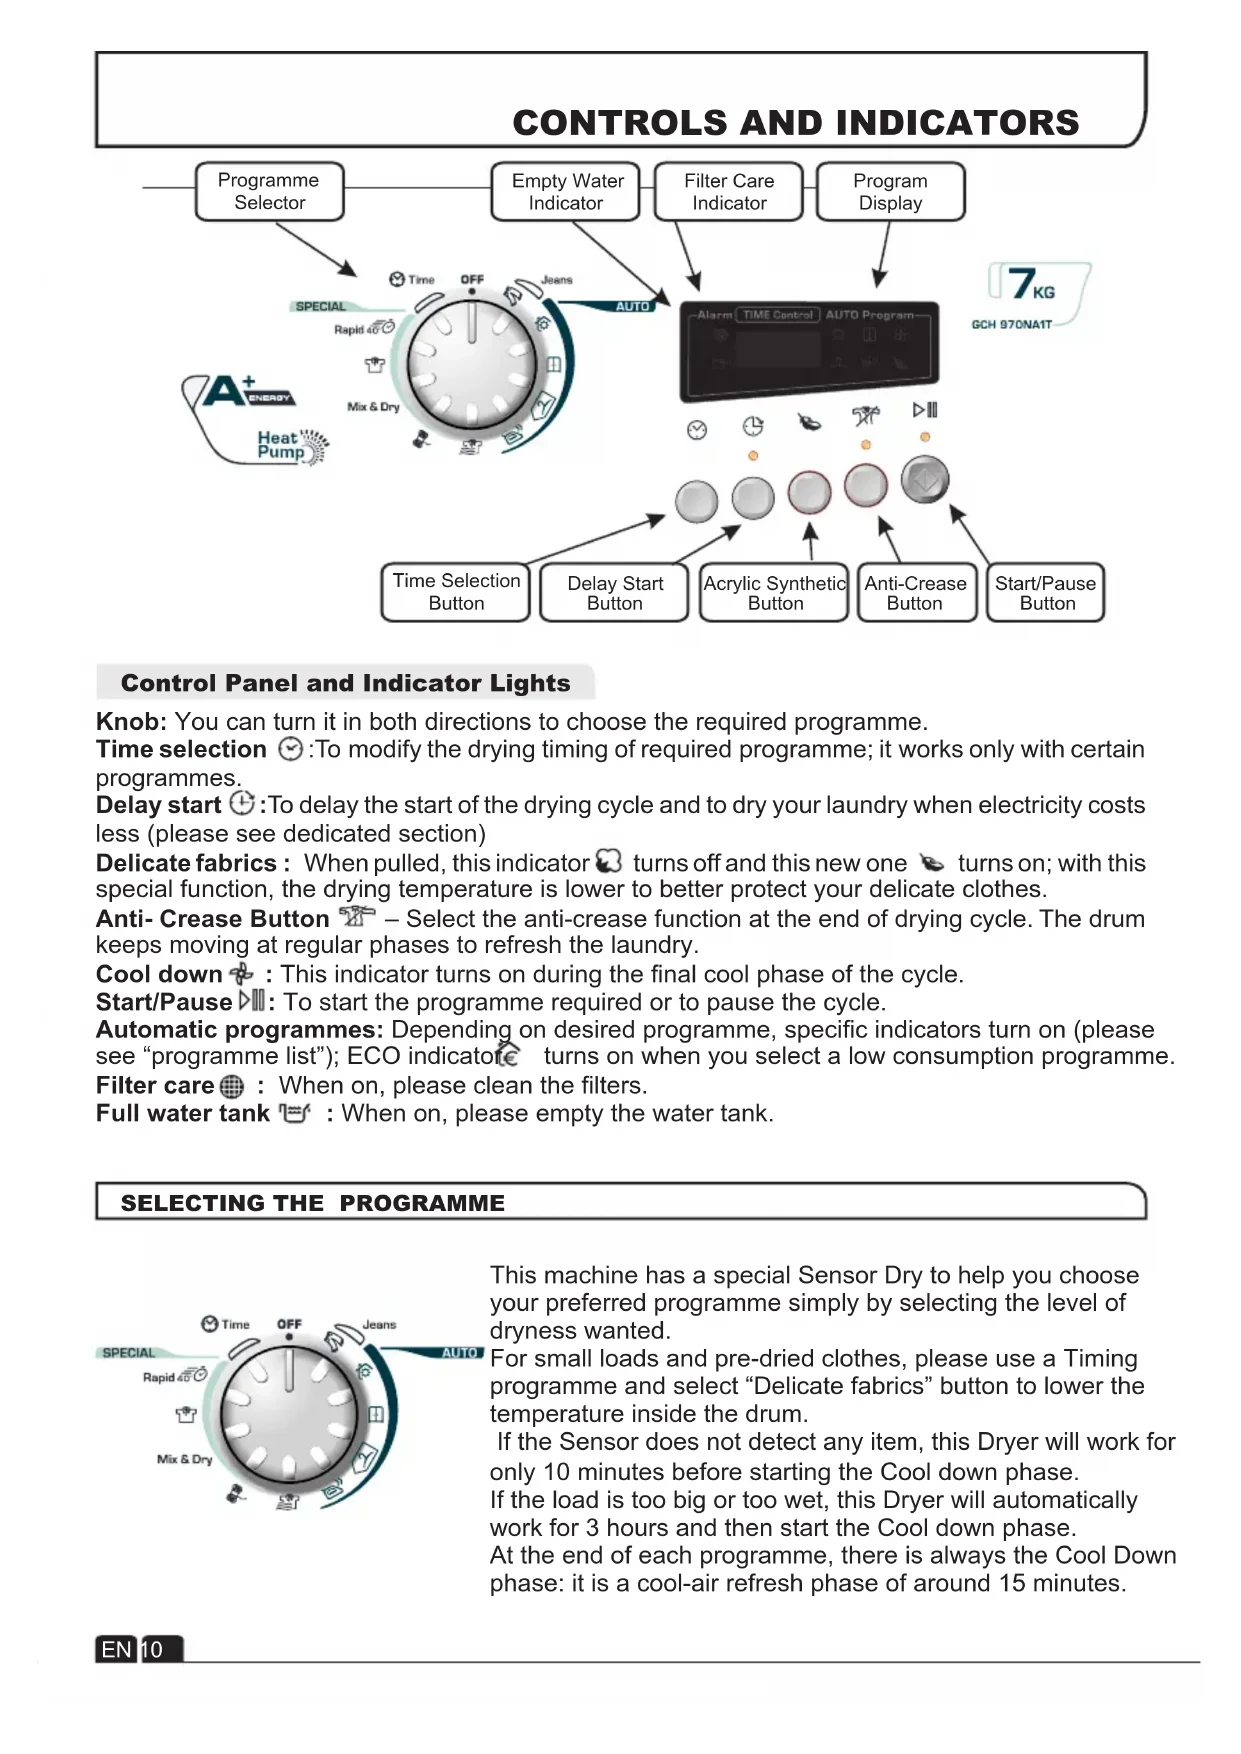
waste water container switch the machine ON (and press the 'START' button on electronic models) to commence w i t h t h e d r y i n g program. To avoid having to empty the water container after each drying cycle, the water normally collected during the drying cycle can be discharged directly to a waste water drain pipe (the same drainage system as household sinks).Water Bye-Laws prohibit connection to a surface water drain. The waste water drain pipe system should be located adjacent to the tumble dryer. xThe kit is composed: 1 hose, 1 straight hose connector, 1 pipe clip and 1 plastic tie. EN 8This machine has a special Sensor Dry to help you choose your preferred programme simply by selecting the level of dryness wanted. For small loads and pre-dried clothes, please use a Timing programme and select “Delicate fabrics” button to lower the temperature inside the drum. If the Sensor does not detect any item, this Dryer will work for only 10 minutes before starting the Cool down phase. If the load is too big or too wet, this Dryer will automatically work for 3 hours and then start the Cool down phase. At the end of each programme, there is always the Cool Down phase: it is a cool-air refresh phase of around 15 minutes.
CONTROLS AND INDICATORS
Control Panel and Indicator Lights
SELECTING THE PROGRAMME
Knob: You can turn it in both directions to choose the required programme. Time selection :To modify the drying timing of required programme; it works only with certain programmes. Delay start :To delay the start of the drying cycle and to dry your laundry when electricity costs less (please see dedicated section) Delicate fabrics : When pulled, this indicator turns off and this new one turns on; with this special function, the drying temperature is lower to better protect your delicate clothes. Anti- Crease Button – Select the anti-crease function at the end of drying cycle. The drum keeps moving at regular phases to refresh the laundry. Cool down : This indicator turns on during the final cool phase of the cycle. Start/Pause : To start the programme required or to pause the cycle. Automatic programmes: Depending on desired programme, specific indicators turn on (please see “programme list”); ECO indicator turns on when you select a low consumption programme. Filter care : When on, please clean the filters. Full water tank : When on, please empty the water tank. Filter Care Indicator Program Display Start/Pause Button Delay Start Button Empty Water Indicator Programme Selector Time Selection Button Acrylic Synthetic Button Anti-Crease Button
EN 10SELECTING THE PROGRAMME
PROGRAMME Wool Mix & Dry Rapid 40 Min. Shirts Time Jeans No Crease Iron Dry Perfect Home Store Dry Hang Dry IDEAL FOR Leave clothes slightly damp to allow easier ironing. Time: around 1h and 50 min. Clothes you don’t need to iron, but just hang after the drying cycle. Time: around 2h and 30 min. Clothes you want to fold and store without ironing, e.g. shirts in mixed fabrics, socks, baby clothes. Time: around 2h and 45 min. Clothes you want completely dryed, e.g. towels, bathrobes, table clothes or sheet. Time: around 3h. To soften your woollen clothes or to simply refresh them after a long time in the wardrobe. Time: 12 min. To dry mixed cotton and synthetic clothes: save time and no need to separate the washing and dry them in different cycles. Time: around 2h (max 4 kg). To dry shirts both cotton and synthetic fabrics. Time: 1h for 2kg of synthetic shirts (around 10 shirts); 1h and 20 min for 3 kg of cotton shirts (around 10 shirts). If you want to choose drying times, from 30 to 180 minutes. By selecting “20 min” you choose a “cool programme”, ideal to refresh clothes and to remove eventual smells. To dry up to 4 kg of Jeans (around 5 pairs). The programme works for around 2h, but timing can change according to the load and washing spin speed. Jeans programme can only be used for 100% cotton items, please do not mix colours nor dry jeans with embroideries or accessories. Clothes you just need to refresh. Good for items of clothing which have been left prior to ironing or if they have been dried outside or on radiators. This programme has a specific Anti-Crease function that relaxes fibres and makes easier ironing. Time: 9 min + 3 min cool down. For dry, refreshed and ready to dress clothes in onyl 40 minutes. Sensor system keeps under control the temperature to have always the best result. Max 2 kg. EN 11DOOR and FILTER Opening the Door Pull on handle to open the door. To restart the dryer, close the door and press . WARNING! When the tumble dryer is in use the drum and door may be VERY HOT. Never stop a tumble dryer before the end of the drying cycle unless all items are quickly removed and spread out so that the heat is dissipated. Filter Care Indicator Lights when the filter needs cleaning. Check and clean the main filter in the door and the condenser filters allocated in the bottom of the dryer,If the laundry is not drying check that the filter is not clogged. DO NOT USE WATER TO CLEAN THE FILTER. Filter IMPORTANT: To maintain the efficiency of the dryer check that the fluff filter is clean before each drying cycle. Do not operate the dryer without the filters. Clogged filters can increase the drying time and cause damage which may result in expensive repair costs. 1 . P u l l t h e f i l t e r upwards.
2. Open filter as shown.
3.Gently remove lint using a soft brush or your fingertips. 4 . S n a p t h e f i l t e r together and push back into place. To Clean the Condenser Filter 1 . R e m o v e t h e kickplate.
2. Turn the two locking
levers anti-clockwise and pull out the front cover.
3. Gently remove the
filter frame and clean any dust or fluff with a cloth from the filter. Do not use water to clean the filter.
4. Remove the sponge
gently from its place and then wash the sponge by holding it under a running tap turning it so to remove any dust or fluff.
5. Refit the front cover
ensuring it is in the c o r r e c t w a y ( a s indicated by the arrow) and pushed firmly into place. Lock the two levers by turning them clockwise.
6. Refit the kickplate.
1. Open the door and load the drum with
laundry. Ensure that garments do not hinder closure of the door.
2. Gently close the door pushing it slowly until
you hear the door 'click' shut.
3. Turn the Programme Selector dial to select
the required drying programme (see Programme Guide).
4. If drying synthetics, acrylics or delicate items,
press the button to reduce the heat level. The indicator will light up when the machine is in low heat setting. To deselect in the first few minutes of the programme, press the button , after this time reset the machine to change the setting.
5. Press the button. The dryer will start
automatically and the indicator above the button will be continuously lit.
6. If the door is opened during the programme to
check the laundry, it is necessary to press to recommence drying after the door has been closed.
7. When the cycle is nearing completion the
machine will enter the cool down phase, the clothes will be tumbled in cool air allowing the load to cool down.
8. Following the completion of the cycle the
drum will rotate intermittently to minimize creasing. This will continue until the machine is switched OFF or the door is opened. Do not open the door during the automatic programs in order to obtain a proper drying. The water removed from the laundry during the drying cycle is collected in a container inside the door of the dryer. When the container is full the indicator on the control panel will light, and the container MUST be emptied. However, we recommend that the container is emptied after each drying cycle. NOTE: Very little water will collect during the first few cycles of a new machine as an internal reservoir is filled first. To Remove the Container
1. Gently pull out the
t r a y u n t i l i t i s completely removed. Support the tray with both hands. When it is full the water container will weigh about 4kg.
2. Ti lt th e w at er
container to empty the water out through the rear hole. When emptyslide the water container back into position.
the cycle. NOTE: If you have the option of drainage near the dryer it is possible to use the discharge kit to provide a permanent drain for the water collected by the dryer. This will remove the need to empty the water tray. All the i n f o r m a t i o n f o r assembly of the kit is contained in the kit envelope. EN 13IMPORTANT Always switch off and remove the plug from the electricity supply before cleaning this appliance. For electrical data refer to the rating label on the front of the dryer cabinet (with the door open). Technical Specifications Cleaning the Dryer Drum capacity 115 litres Maximum load 7 kg Height 85 cm Width 60 cm Depth 60 cm Energy Label Band A + OPERATION ● Clean the filter and empty the water container after every drying cycle. ● Regularly clean the filters. ● After each period of use, wipe the inside of the drum and leave the door open for a while to allow circulation of air to dry it. ● Wipe the outside of the machine and the door with a soft cloth. ● DO NOT use abrasive pads or cleaning agents. ● To prevent the door sticking or the build up of fluff clean the inner door and gasket with a damp cloth after every drying cycle. WARNING! The Drum, door and load may be very hot.
CLEANING AND ROUTINE MAINTENANCE
Delay Start Function The Delay Start Function allows the user to delay the start of the drying cycle by 1 to 24 hours. When the function is first selected the display will show a delay of 1 hour, subsequent presses of the button will increase the delay with 1 hour steps. To commence the programme press and the appliance will complete the drying cycle at the end of this time. The indicator light will flash to indicate that the start delay is in progress. Cancelling and Resetting the Programme To cancel a programme press the button for 3 seconds. In the TIME CONTROL display 0:00 Light will flash to indicate that it has been reset. Note:Install and use the drain hose to discharge the condensing water. Information for Test Laboratory EN 61121 Programme Programme To Use -DRY COTTON -HANG DRY -IRON DRY