
Ellageo Plus BLL2 - Sewing machine BABY LOCK - Free user manual and instructions
Find the device manual for free Ellageo Plus BLL2 BABY LOCK in PDF.
User questions about Ellageo Plus BLL2 BABY LOCK
0 question about this device. Answer the ones you know or ask your own.
Ask a new question about this device
Download the instructions for your Sewing machine in PDF format for free! Find your manual Ellageo Plus BLL2 - BABY LOCK and take your electronic device back in hand. On this page are published all the documents necessary for the use of your device. Ellageo Plus BLL2 by BABY LOCK.
USER MANUAL Ellageo Plus BLL2 BABY LOCK
Instruction and Reference Guide Addendum
Model BLL2

FOR THE LOVE OF SEWING
To register your warranty and receive product updates and offers, register your Baby Lock machine on babylock.com/profile. If you have questions with registration, visit your Authorized Baby Lock Retailer.
Baby Lock Consumer Helpline: 800-313-4110
www.babylock.com
Contents
Introduction 2
Advanced Sewing Features 2
Additional Accessories 3
Advanced Functions 4
Pivoting 4
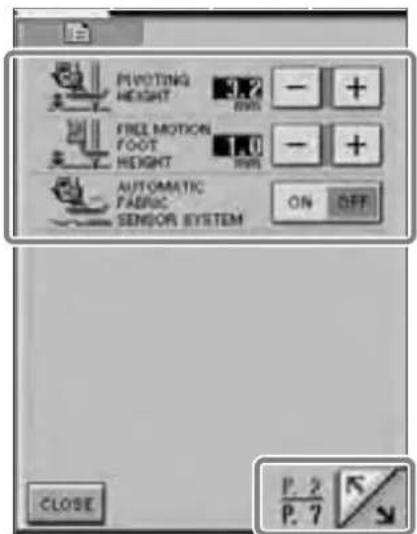
Automatic Fabric Sensor System (Automatic Presser Foot Pressure) 5
Free-motion Quilting 6
Using Free-motion Quilting Foot "C" 6
Using Free-motion Open Toe Quilting Foot "O" 7
Echo Quilting Using the Free-motion Echo Quilting Foot "E" 9
Measurements on the Bobbin Cover 10
Blind stitch foot 11
Use 11
Sewing 11
Narrow hemmer foot 12
Preparing to sew 12
Sewing 12
Hints 13
Cording foot (3 cord guide) 13
Use 13
Preparing to sew 13
Sewing 14
Machine Maintenance 14
Introduction
This manual provides additional information not described in the Operation Manual.
Be sure to read this information before using the machine.
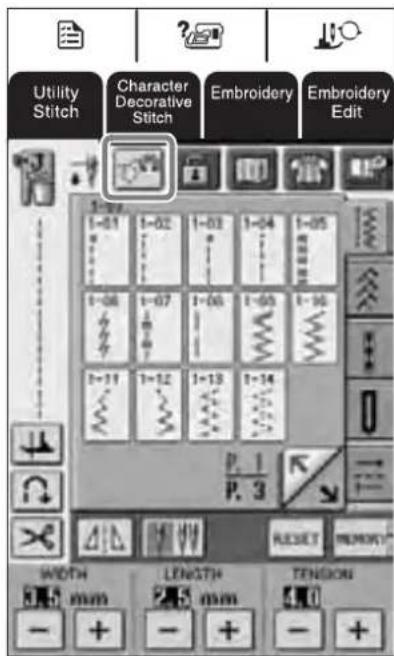
Advanced Sewing Features
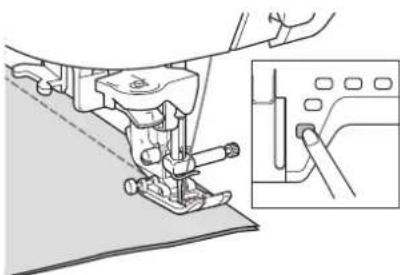
1. Pivoting
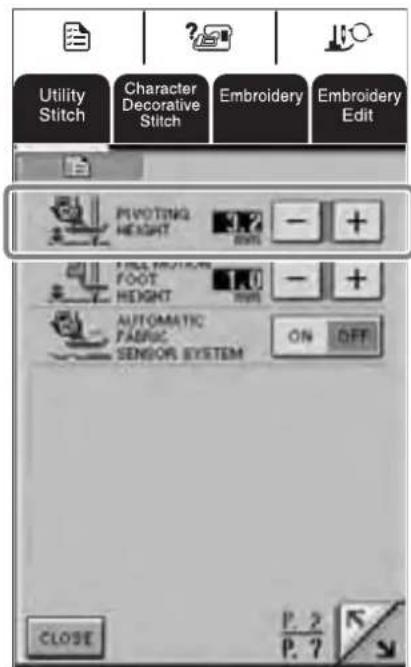
The function is useful when changing the sewing direction. The machine stops with the needle lowered (in the fabric) and the presser foot is automatically raised to an appropriate height when the "Start/Stop" button is pressed. From the settings screen, the presser foot can be adjusted to one of three heights (3.2 mm, 5.0 mm and 7.5 mm). Refer to page 4.
2. Free Motion Foot Height
When using the quilting foot "C" or the echo quilting foot "E", the height of the foot can be preset in the settings screen. Height of the presser foot can be increased for easy fabric guiding when sewing puffy and thick fabrics or decreased for better control of thin fabrics.
Refer to page 6, 9.
3. Automatic Fabric Sensor System
The thickness of the fabric is automatically detected and the presser foot pressure is automatically adjusted with an internal sensor while sewing, so the fabric can be fed smoothly. This function is useful for sewing over thick seams, or quilting with feed dogs raised. The Automatic Fabric Sensor System works continuously while sewing.
Refer to page 5.

Note
Due to the addition of the functions described above, please be aware that the actual screens may differ slightly from those shown in the Operation Manual.
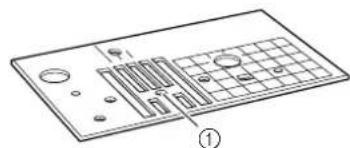
①
(2)

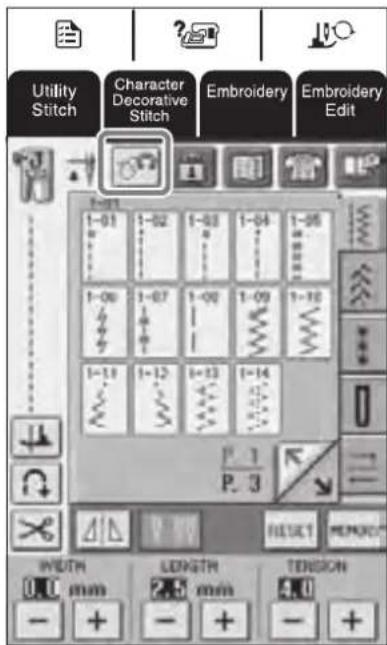
① Functions have been added to the second page of the settings screen.

has been added to the screens that appear after

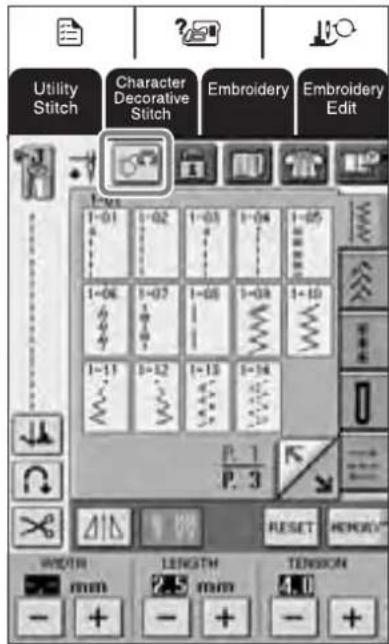
or Decorative is pressed.
Additional Accessories
1.2.3.4.
5.6.7.
| No. | Part Name | Part Code | Reference Page |
| 1 Free-motion quilting foot "C" XE0765-101 page 6 | |||
| 2 Free-motion open toe quilting foot "O" XE0767-001 page 7 | |||
| 3 Free-motion echo quilting foot "E" XE0766-001 page 9 | |||
| 4 Bobbin cover (with mark) (on machine) XE0715-001 page 10 | |||
| 5 Blind stitch foot (with guide) XA0059-001 page 11 | |||
| 6 Narrow hemmer foot XE0754-001 page 12 | |||
| 7 Cording foot (3 cord guide) XA6871-001 page 13 | |||
Advanced Functions
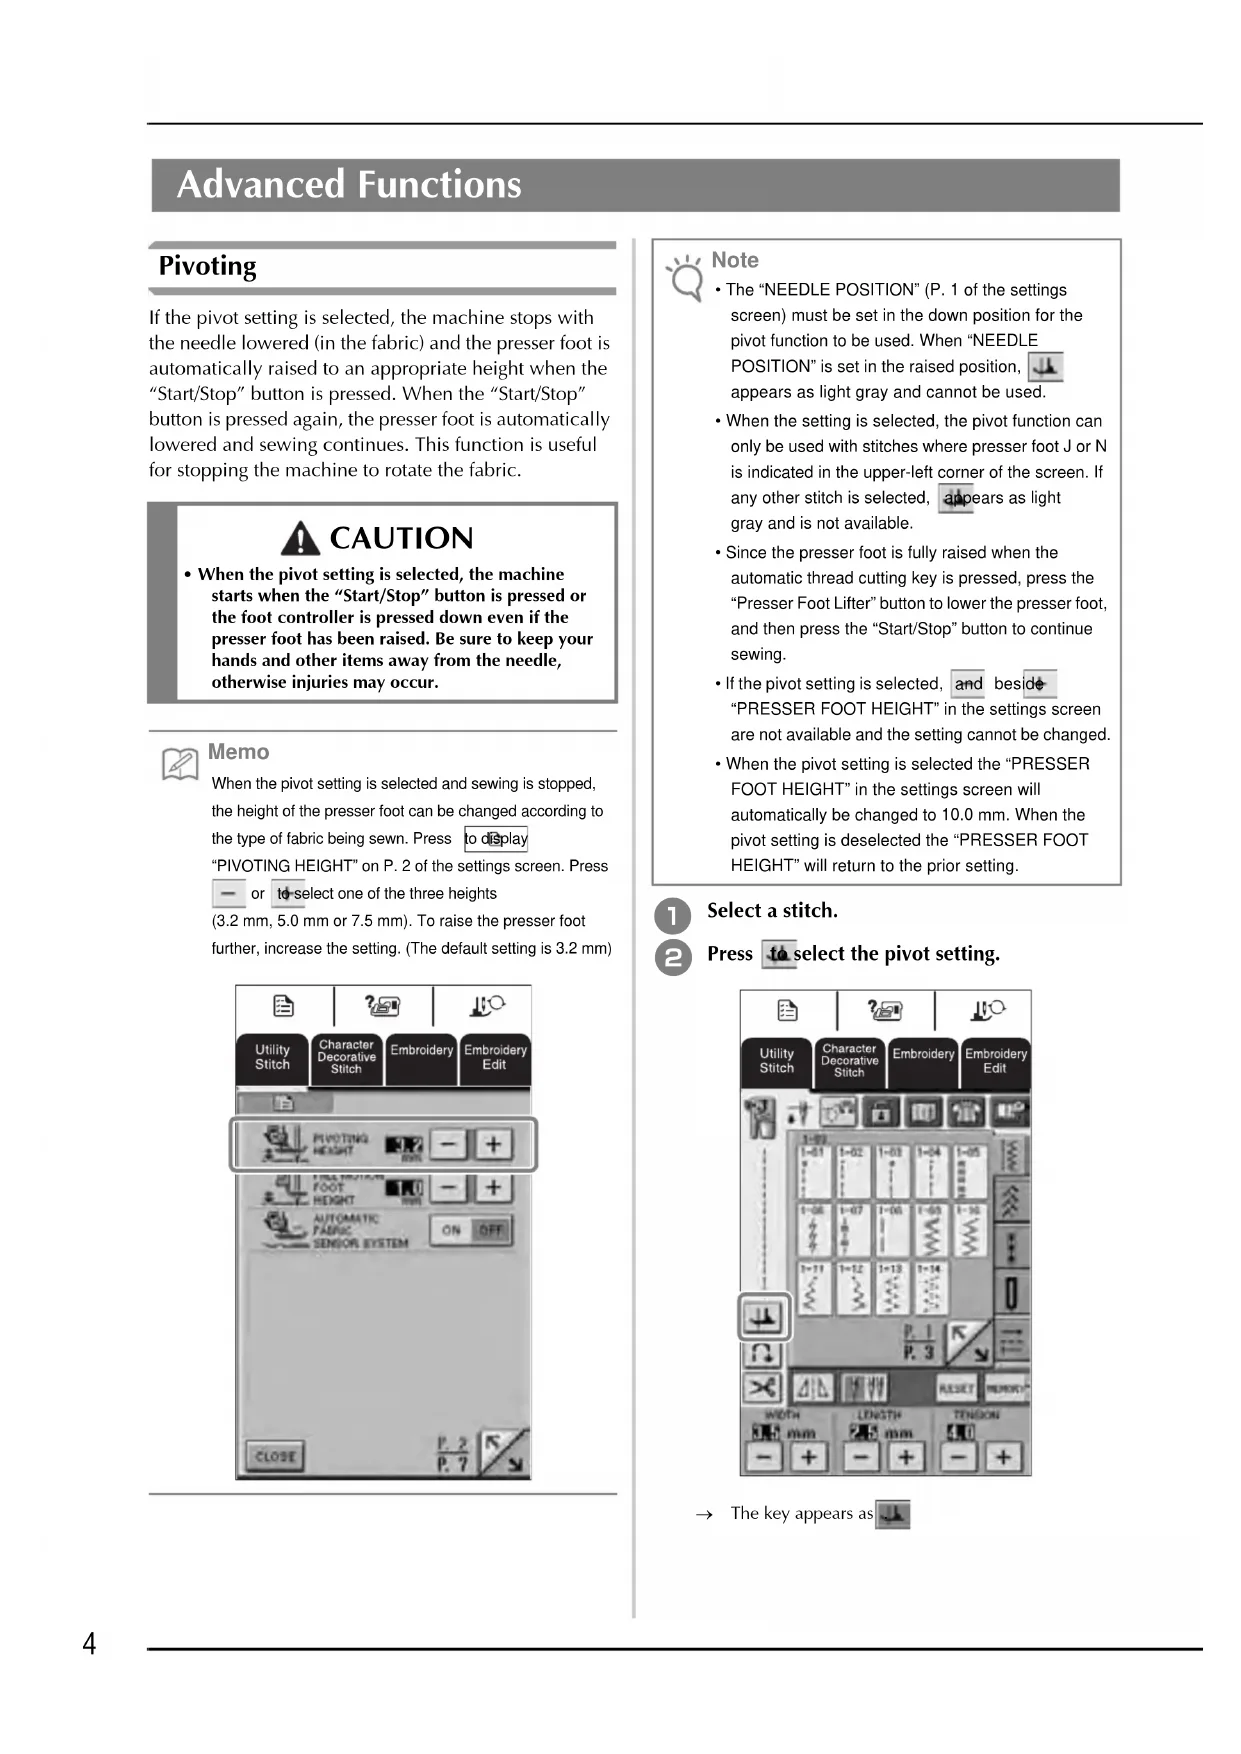
Pivoting
If the pivot setting is selected, the machine stops with the needle lowered (in the fabric) and the presser foot is automatically raised to an appropriate height when the "Start/Stop" button is pressed. When the "Start/Stop" button is pressed again, the presser foot is automatically lowered and sewing continues. This function is useful for stopping the machine to rotate the fabric.

CAUTION
- When the pivot setting is selected, the machine starts when the "Start/Stop" button is pressed or the foot controller is pressed down even if the presser foot has been raised. Be sure to keep your hands and other items away from the needle, otherwise injuries may occur.

Memo
When the pivot setting is selected and sewing is stopped, the height of the presser foot can be changed according to the type of fabric being sewn. Press to display "PIVOTING HEIGHT" on P.2 of the settings screen. Press or to select one of the three heights (3.2 mm, 5.0 mm or 7.5 mm). To raise the presser foot further, increase the setting. (The default setting is 3.2 mm)

Note
The "NEEDLE POSITION" (P.1 of the settings screen) must be set in the down position for the pivot function to be used. When "NEEDLE POSITION" is set in the raised position, appears as light gray and cannot be used.
- When the setting is selected, the pivot function can only be used with stitches where presser foot J or N is indicated in the upper-left corner of the screen. If any other stitch is selected, appears as light gray and is not available.
- Since the presser foot is fully raised when the automatic thread cutting key is pressed, press the "Presser Foot Lifter" button to lower the presser foot, and then press the "Start/Stop" button to continue sewing.
If the pivot setting is selected, and beside "PRESSER FOOT HEIGHT" in the settings screen are not available and the setting cannot be changed.
- When the pivot setting is selected the "PRESSER FOOT HEIGHT" in the settings screen will automatically be changed to 10.0mm . When the pivot setting is deselected the "PRESSER FOOT HEIGHT" will return to the prior setting.

Select a stitch.

Press to select the pivot setting.
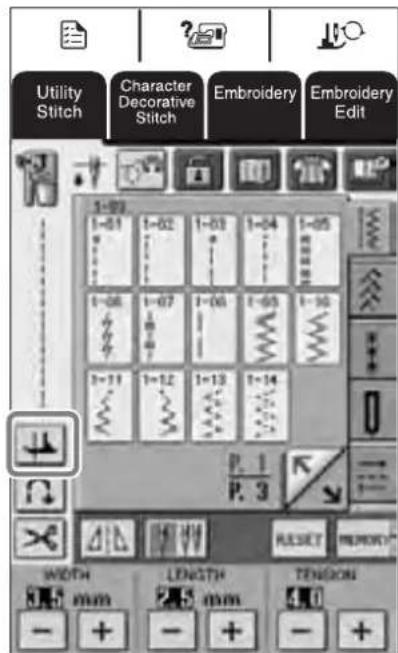
The key appears as

Place the fabric under the presser foot with the needle at the starting point of the stitching, and then press the "Start/Stop" button. The machine will begin sewing.

Memo
If you press the "Start/Stop" button to pause sewing, then press it again to continue.

Press the "Start/Stop" button to stop the machine at the point where the sewing direction changes.
The machine stops with the needle in the fabric, and the presser foot is automatically raised.

Rotate the fabric, and then press the "Start/Stop" button.
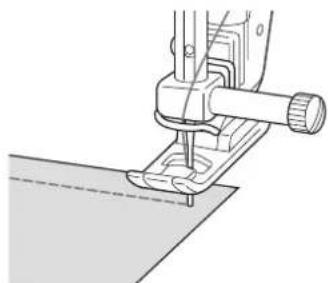
→ The presser foot is automatically lowered, and sewing continues.
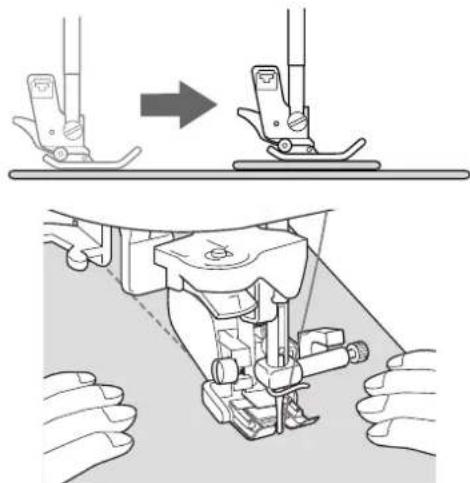
Automatic Fabric Sensor System (Automatic Presser Foot Pressure)

Note
Your machine is not shipped with this feature turned on. Please follow the instructions to activate this feature.
The thickness of the fabric is automatically detected and the presser foot pressure is automatically adjusted with an internal sensor while sewing, so your fabric is fed smoothly. The fabric sensor system works continuously while sewing. This function is useful for sewing over thick seams, or quilting.

Press
The settings screen appears.

Set "AUTOMATIC FABRIC SENSOR SYSTEM" to "ON".
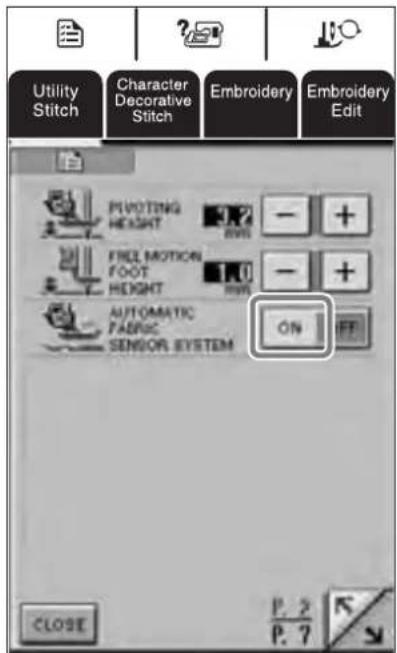

Press to return to the original screen.
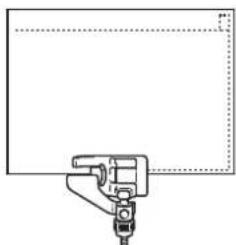
Free-motion Quilting
For free-motion quilting, use free-motion quilting foot "C" or free-motion open toe quilting foot "O" depending on the stitch that is selected, and set the machine to free-motion sewing mode. In this mode, the presser foot is raised to the necessary height for freemotion sewing.
We recommend attaching the foot controller and sewing at a consistent speed. You can adjust the sewing speed with the speed control slide on the machine.
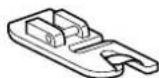
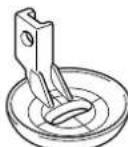
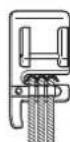
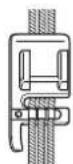
Using Free-motion Quilting Foot "C"
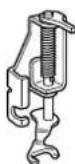
The free-motion quilting foot "C" is used for freemotion sewing using the straight stitch needle plate.
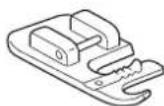
Free-motion quilting foot "C"

CAUTION
- With free-motion quilting, control the feeding speed of the fabric to match the sewing speed. If the fabric is moved faster than the sewing speed, the needle may break or other damage may result.
- When using free-motion quilting foot "C", be sure to use the straight stitch needle plate and sew with the needle in middle (center) needle position. If the needle is moved to any position other than the middle (center) needle position, the needle may break, which may result in injuries.

Memo
- When starting to sew, the internal sensor detects the thickness of the fabric, and the quilting foot is raised to the height specified in the machine settings screen. Press to display "FREE MOTION FOOT HEIGHT" on P.2 of the settings screen. Press or to select the height that the quilting foot is raised. Increase the setting by pressing for example, when sewing very stretchy fabric, so that it is easier to sew.

In order to sew with a balanced tension, it may be necessary to adjust the upper thread tension. Test with a sample piece of fabric that is similar to your chosen fabric.

Follow steps on page 56 through 57 of the machine's Operation Manual to attach the straight stitch needle plate.
① Single hole

Memo
Notice that this plate has a single hole.

Press to set the machine to free-motion sewing mode.
The key appears as and the quilting foot is raised to the necessary height for free-motion sewing.
3 Select any of the following stitches.
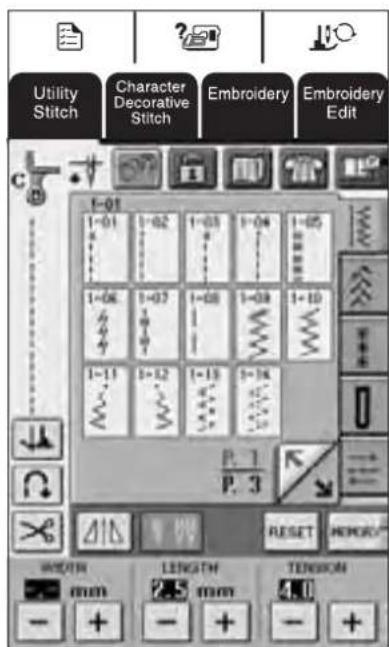
Free-motion quilting foot "C" is indicated in the upper-left corner of the screen.

Note
When selecting stitch 1-01, 1-02, 1-05, 1-07 the needle position will remain in the center.
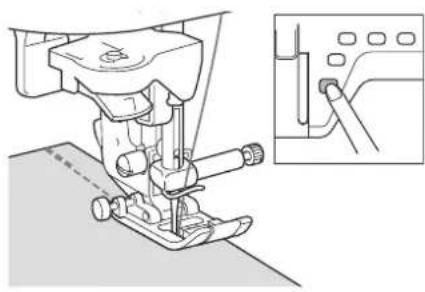
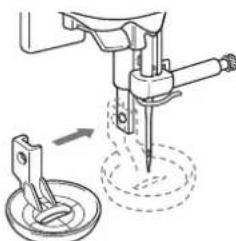
4 Remove the presser foot holder.
5 Attach free-motion quilting foot "C" at the front with the presser foot holder screw aligned with the notch in the quilting foot.
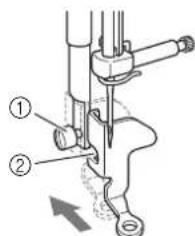
① Presser foot holder screw
②Notch

Note
Make sure that the quilting foot is attached properly and not slanted.
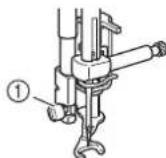
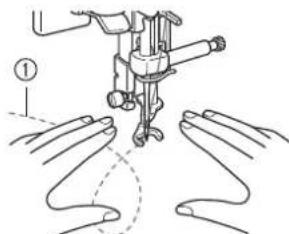
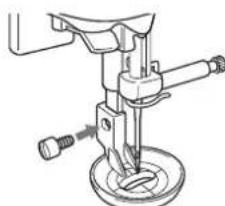
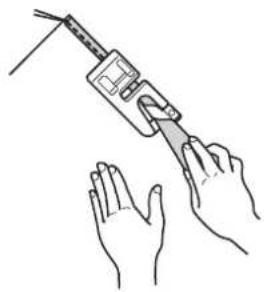
Hold the quilting foot in place with your right hand, and tighten the presser foot holder screw using the screwdriver with your left hand.
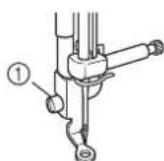
① Presser foot holder screw

CAUTION
- Be sure to tighten the screw securely with the screwdriver. Otherwise, the needle may touch the quilting foot, causing it to bend or break.
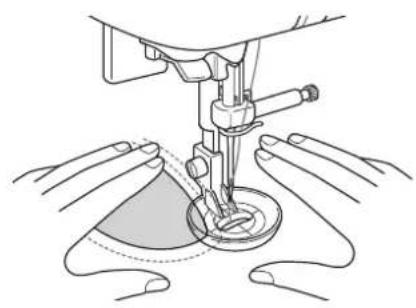
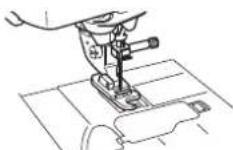
Lower the feed dog position switch to lower the feed dogs.
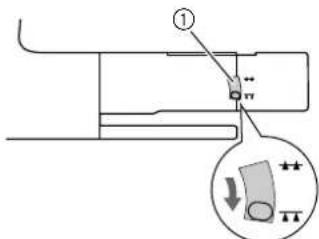
①Feed dog position switch (as seen from the rear of the machine)
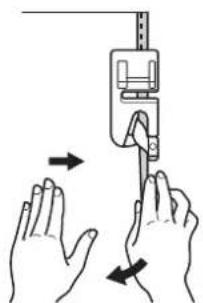
Use both hands to securely hold the fabric taut, and then move the fabric at a consistent pace in order to sew uniform stitches roughly 2.0-2.5 mm (approx. 1/16 - 3/32 inch) in length.
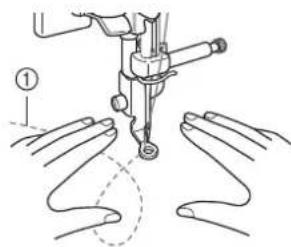
①Stitch
Press to cancel the free-motion sewing mode.

Memo
Do not be discouraged with your initial results. The technique requires practice.
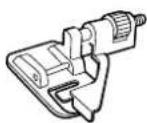
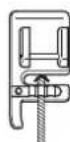
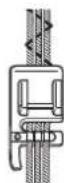
■Using Free-motion Open Toe Quilting Foot "O"
The free-motion open toe quilting foot "O" is used for free-motion quilting with zigzag or decorative stitches or for free-motion quilting of straight lines on fabric with an uneven thickness. Any stitch can be sewn with the free-motion open toe quilting foot "O".
Free-motion open toe quilting foot "O"

Note
Free-motion open toe quilting foot "O" can also be used with the straight stitch needle plate with stitches listed in "Using Free-motion Quilting Foot C" only. We recommend using free-motion open toe quilting foot "O" with free-motion sewing of fabrics of uneven thicknesses.

Memo
In order to sew with a balanced tension, it may be necessary to adjust the upper thread tension. Test with a sample piece of quilting fabric.
Press to set the machine to free-motion sewing mode.
The key appears as and the quilting foot is raised to the necessary height for free-motion sewing.

2 Select a stitch.
Free-motion open toe quilting foot "O" is indicated in the upper-left corner of the screen.

Note
If using straight stitch needle plate with the free-motion open toe quilting foot "O" then the letter "C" will be indicated in the upper-left corner of screen.
3 Remove the presser foot holder.
4 Attach free-motion open toe quilting foot "O" by positioning the pin of the quilting foot above the needle clamp screw and aligning the lower-left of the quilting foot and the presser bar.
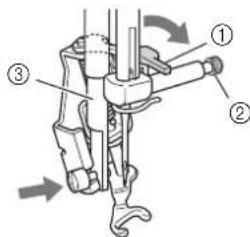
①Pin
② Needle clamp screw
③Pressbar
Note Make
Make sure that the quilting foot is attached properly and is not slanted.
Hold the quilting foot in place with your right hand, and tighten the presser foot holder screw using the screwdriver with your left hand.
① Presser foot holder screw

CAUTION
- Be sure to tighten the screw securely with the screwdriver. Otherwise, the needle may touch the quilting foot, causing it to bend or break.
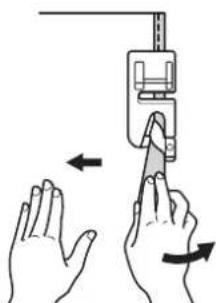
Use both hands to securely hold the fabric taut, and then move the fabric at a consistent pace in order to sew uniform stitches roughly 2.0-2.5 mm (approx. 1/16 - 3/32 inch) in length.
①Stitch
Press to cancel the free-motion sewing mode.
Memo No. 1
Do not be discouraged with your initial results. The technique requires practice.
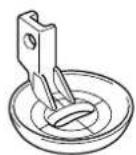
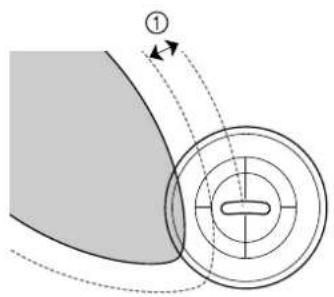
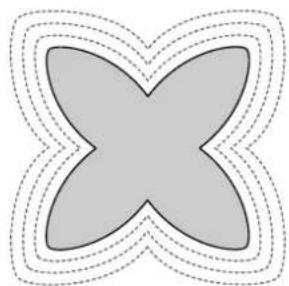
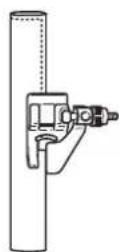
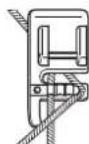
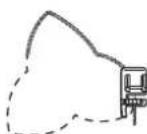
Echo Quilting Using the Free-motion Echo Quilting Foot "E"
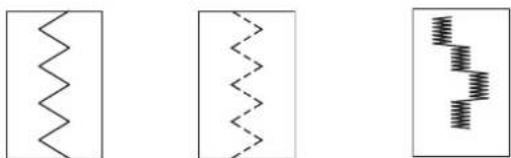
Sewing quilting lines at equal distances around a motif is called echo quilting. The quilting lines, which appear as ripples that echo away from the motif, are the distinguishing characteristic of this quilting style. Use the free-motion echo quilting foot "E" for echo quilting. Using the measurement on the presser foot as a guide, sew around the motif at a fixed interval.
We recommend attaching the foot controller and sewing at a consistent speed. Remember that you can also gain greater control by moving the horizontal speed dial to the medium location and using the foot controller.
Free-motion echo quilting foot "E" measurement
① 6 . 4 ~ m m approx.1/4 inch)
② 9 . 5 mmapprox.3/8 inch)

CAUTION
- With free-motion quilting, control the feeding speed of the fabric to match the sewing speed. If the fabric is moved faster than the sewing speed, the needle may break or other damage may result.

Memo
- When starting to sew, the internal sensor detects the thickness of the fabric, and the quilting foot is raised to the height specified in the machine settings screen. Press
to display "FREE MOTION FOOT HEIGHT" on P.2 of the settings screen. Press or to +
select the height that the quilting foot is raised. Increase the setting by pressing for example, when sewing very stretchy fabric, so that it is easier to sew.

- In order to sew with a balanced tension, it may be necessary to adjust the upper thread tension. Test with a sample piece of quilting fabric.
1
Press to set the machine to free-motion sewing mode.
The key appears as, and the quilting foot is raised to the necessary height for free-motion sewing.
2
Select
3
Remove the presser foot.
4
Remove the presser foot holder and the screw.
5
Position the free-motion echo quilting foot "E" on the left side of the presser bar with the holes in the quilting foot and presser bar aligned.
6
Tighten the screw.

Using the measurement on the quilting foot as a guide, sew around the motif.
① 6 . 4 ~ m m approx.1/4 inch)
Finished project

Press to cancel the free-motion sewing mode.
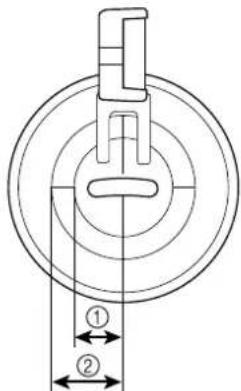
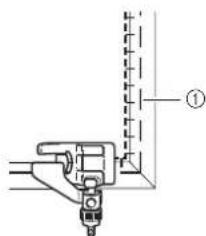
Measurements on the Bobbin Cover
The measurements on the bobbin cover are references for patterns with a middle (center) needle position. The measurements on the needle plate and the needle plate cover are references for stitches with a left needle position.
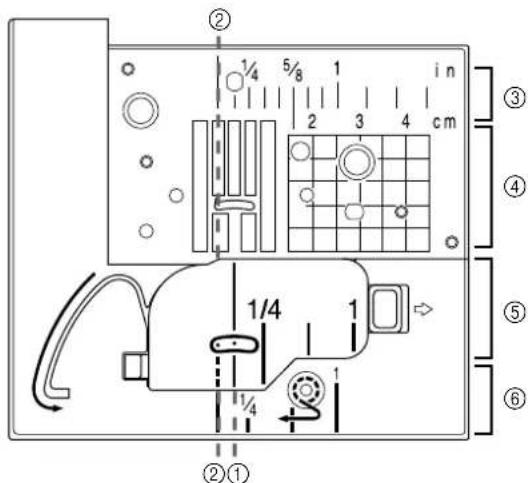
①For stitches with a middle (center) needle position
② For stitches with a left needle position
③Left needle position on the needle plate
④Left needle position on the needle plate
⑤ Middle (center) needle position on the bobbin cover
⑥Left needle position on the needle plate cover
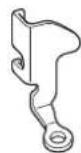
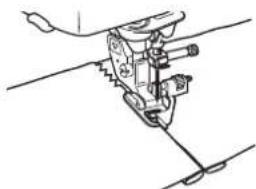
Blind stitch foot (with guide)
Use
This foot comes in handy not only for blindstitching, but also for sewing fabric edges and seams. Remove presser foot and attach snap-on blind stitch foot.
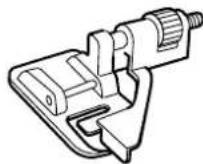
Blind stitch foot (with guide)
Sewing
Position needle the distance you wish it to be from the edge of the fabric and lower needle in that position.
Turn foot guide screw and carefully adjust to guide fabric.
① Basting
- When Sewing Seams
Select "Align position of foot guide to needle position and sew the desired width seam allowance.
- When Joining
1 Select desired top stitch. Examples (3, 4, 5)
Place cloth under foot so that foot guide is lined up between both edges of fabric.
3 Lower foot and sew.
- When Blindstitching


When using regular weight fabrics
When using heavyweight fabric
① Basting
②Sewing position
③Turn screw to adjust guide to folded hem.
④Guide
⑤Turn to front side
1 Front side
2 Reverse side
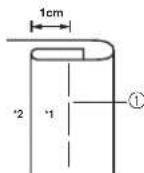
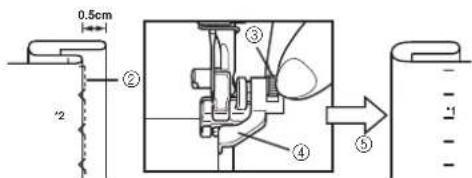
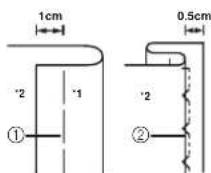
Narrow hemmer foot
This foot is designed to curl under a 3mm double hem while sewing a straight stitch.
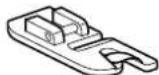
Narrow hemmer foot
Preparing to sew
1 Remove presser foot and attach snap-on narrow hemmer foot.
2 Select the straight stitch (center needle position).
3 Connect the foot controller so that both hands are free to guide the fabric.
Sewing
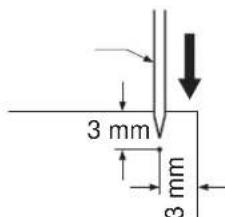
Position the fabric (reverse side facing up) under the presser foot. Lower the needle 3mm from the edges of the fabric, lower the presser foot, then sew 2 or 3 stitches.
2
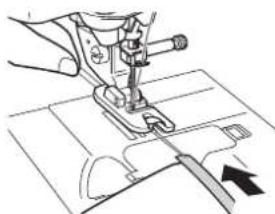
Raise the needle and the presser foot, then hold the ends of the upper thread and lower thread to prevent them from being pulled out of the fabric and pull the fabric out from the front of the presser foot.
3
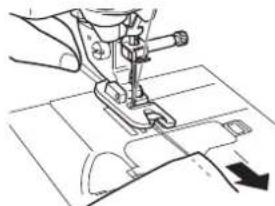
Holding both threads, pass them through the curled part of the presser foot and pull them toward the back of the presser foot. Wrap the fabric around the curled part of the presser foot in the same way. Position the edge of the fabric just behind the needle and lower the presser foot.
4
Without allowing the fabric to stick out from the right side of the presser foot, lightly pull on the thread while slowly sewing.

After sewing 2 to 3cm of the fabric, release the thread and guide the fabric from the front of the presser foot with your left hand. Keep a uniform amount of fabric wrapped around the presser foot curl until the seam is completed.
■Hints
- If too little fabric is wrapped around the curl and a threefold seam is not being sewn:
Pull the fabric held in your right hand to the left in order to increase the amount of fabric wrapped in the presser foot curl. At the same time, carefully guide the fabric to the right with your left hand.
- If too much fabric is wrapped around the curl and a wide threefold seam is being sewn:
Pull the fabric held in your right hand to the right in order to decrease the amount of fabric wrapped in the presser foot curl. At the same time, carefully guide the extra fabric to the left with your left hand.
Cording foot (3 cord guide)
Use
Embellish clothing and household linens with decorative threads.

Cording foot (3 cord guide)
Preparing to sew
Remove presser foot and attach snap-on cording foot.
- Suggested Stitches
Zigzag Stretch Zigzag Decorative Satin Stitch
- Zigzag stitch width
Triple Cording stretch
Select dotted zigzag stitch and sew at a maximum stitch width of 5mm
Single Cording
The zigzag stitch may be positioned in the center or right guide. Verify position of stitch and determine the appropriate guide to be followed. Set stitch width slightly greater than width of cording.
- Stitch Length
Select desired stitch length. Remember that the results will vary based on the stitch length you have selected.
- Foot control
Using your foot controller will help you to have both hands free for easier fabric handling.

Sewing
Feed cords, one by one, from the right side of the cording foot spring into their respective guides.
Draw cording under foot and extend the cord 4 - 5mm behind foot. When using 2 or 3 cords, be careful to make sure that cords are not trampled under the front of foot.
Place cloth under foot. Lower foot and sew.
Machine Maintenance
Your machine has been updated to display the following message when maintenance is suggested:
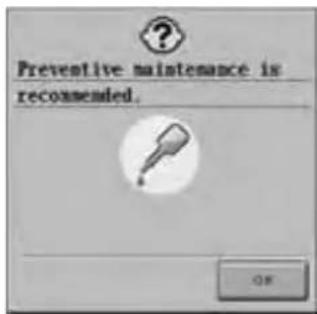
Once this message appears, it is recommended to take your machine to an Authorized BabyLock retailer or Service Center for a regular maintenance check. Although this message will disappear and the machine will continue to function once the OK key on the LCD screen is selected, the message will display several more times until the appropriate maintenance is performed.
Please take the time to arrange the maintenance your machine requires once this message appears. Such steps will help to ensure you receive continued, uninterrupted hours of machine operation for the future.
Table des matieres
Introduction 16