USER MANUAL RC660 Ricatech
text_image
RICATECH®
RC660 MOVE
natural_image
Red portable electronic device with earbuds and a music player, accompanied by earplands and a white cord (no visible text or symbols)
USER MANUAL
GEBRUIKERSHANDLEIDING
MODE D'EMPLOI
BEDIENUNGSANLEITUNG
Contents
- Safety instructions....
- Function overview......
- About battery....
- Button function......
- Basic operation......
- main menu....
- Music mode....
- Install(AMV/AVI) convert tool....
- Record mode....
- Voice mode ....
- FM mode....
- Picture....
- SYS Setup....
- TEXT......
- Game....
- USB disk function......
- Encrypt disk function......
- Upgrading....
- Troubleshooting......
- Specification......
1. The Safety Instructions
The manual contains important safety instructions and information of the device's proper usage. Make sure to read carefully and understand all the instructions to avoid accident.
Do not expose the device to extreme temperature (above 40^ C), especially in cars with shutting windows in summer.
Do not store in humid or dirty areas.
Avoid the device falling and bumping strongly. Do not make TFT screen suffer from violent shake; otherwise, TFT screen could be damaged or displayed abnormally.
Choose the suitable volume. Do not turn up the volume of the earphones too high while using it. If you feel ringing in your ears, stop using the device or turn the volume down.
Do not disassemble the device by yourself and do not wipe the surface of device with alcohol and benzene and thinners.
Do not use the device in areas where electronic devices is prohibited, such as in plane.
Do not use the device while driving an automobile or walking in the street, otherwise an accident may happen.
Our company reserves the right to improve the product so product's specification and design are subject to change without further notice.
2. Function Overview
● 1.5 inch true color screen
● Mass memory: 1GB/2GB /4GB /8GB optional
● Movie player, support AMV /AVI format
- Support various video formats convert to AMV/AVI format :RM /MOV /VOB /WMV /ASF /MPEG /DAT etc
- USB 2.0, fast download speed
- ID3 support, Lyrics display
- SP/LP digital recording function
● Electronic photo album
● FM Radio function
- Play mode: Repeat A-B, repeat one, repeat all, repeat catalog, follow read etc
- EQ modes: JAZZ, CLASSIC, ROCK, POP, NORMAL, SOFT, DBB
- No driver is needed above Win98, plug & play to the computer
● Built-in hi-capacity rechargeable Li-polymer battery
- Managing disk function: set two partitions by accessorial tool. One is normal disk, the other is security disk in which files could not be accessed freely.
- Save 40 radio channels and record them to recording file
3. About Battery
The player adopts a built-in Li-polymer battery with large capacity which is very safe in usage.
If battery power is low, the screen will display "low power" then will automatically power off.
Recharge your battery by connection to PC via USB cable or by charger.
The screen displays battery icon and impulse when recharging battery. The icon will indicate full when completing recharging.
The running time of battery depends on volume setting, playing files format, button operation, etc.
The user can set time of [power off] in Setting to save power.
When you don't use the device for a period of time, please push [ON] to [OFF] side
[ON/OFF]: power switch
[MENU]: enter menu and exit from sub-menu, confirm selection (under any status, hold [MENU] will enter main menu)
[>II]: play/stop, power on/off the player
[PRE] / [NEXT] : last/next, backward /forward
[VOL+] / [VOL-]: adjust volume, increase /decrease the volume
5. Basic operation
1) Power on: hold >II button for 3 seconds, the player will go to working condition.
2) Power off: hold [>II] (play/stop) button for three seconds, the player will be turned off.
Note: When battery power is low, it will automatically power off.
3) Adjusting volume:
With MP3 mode, AMV/AVI mode, Voice mode and FM mode, press [VOL-] or [VOL+] to decrease/increase the volume one step, while hold [VOL-] or [VOL+] button will decrease/increase continuously.
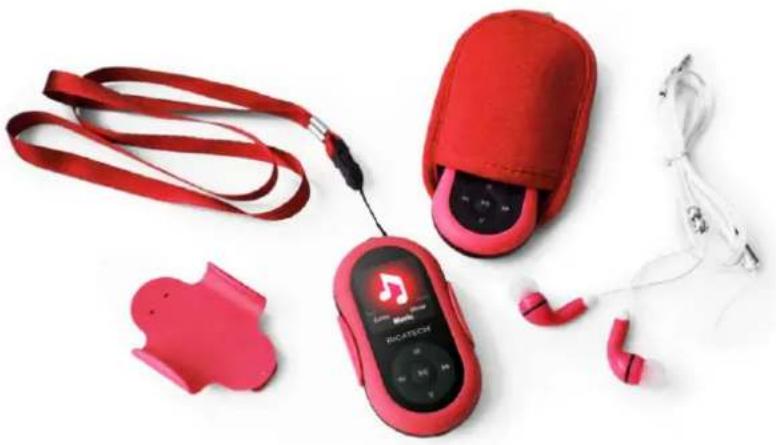
6. Main menu
Hold [MENU] to enter main menu, there are seven modes which can switch into each other by pressing [PRE] or [NEXT].

text_image
Text
Game
Music
Record Game
Movie
Music
Record
Voice Music
Movie
Record
FM Ru
Voice
Record

text_image
Movie
Record
Voice
Picture Record
FM Radii Voice
FM Radio
Setup Voice
Picture
FM Radio
Setup
Picture
Text
text_image
M Radio
Picture
SYS Setup
Game Picture
Text
Setup
Text
Music Setup
Game
Text
Music
Game
Movie
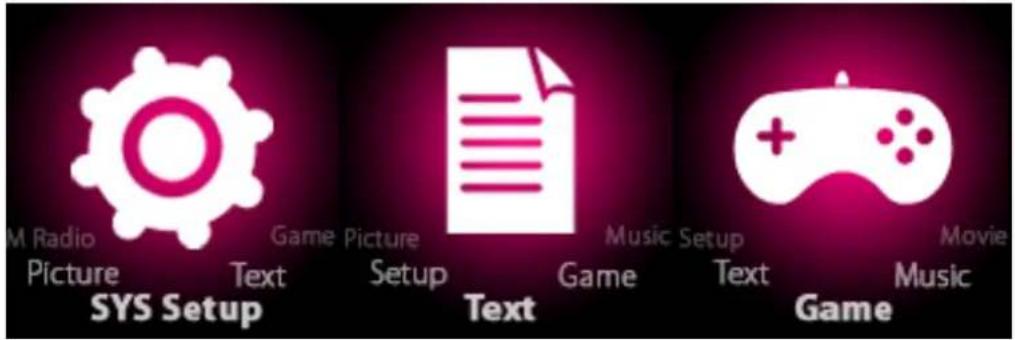
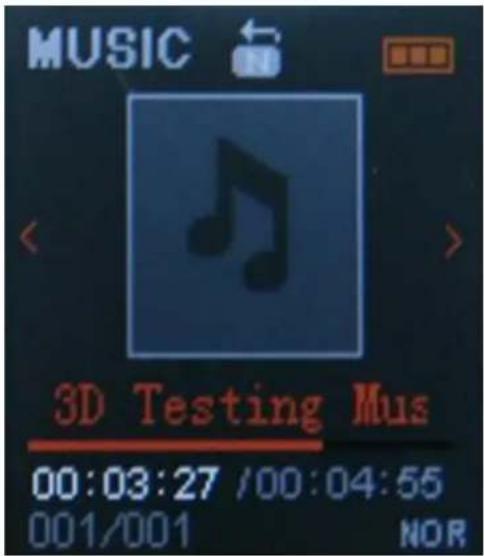
7. Music mode
text_image
MUSIC
3D Testing Mus
00:03:27 /00:04:55
001/001 NOR
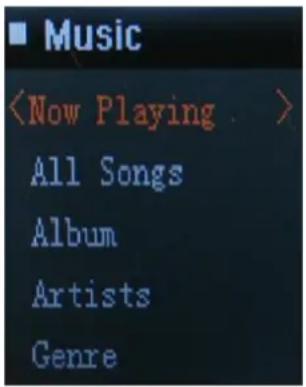
A. sub-menu under playing status (there's no sub-menu while playing AMV/AVI file)Select MUSIC mode in main menu, press [MENU] to confirm selection and then press PLAY/STOP [>II] button to play the song. While music playing, press [MENU] button to enter sub-menu:
text_image
Music
All Songs
Album
Artists
Genre
text_image
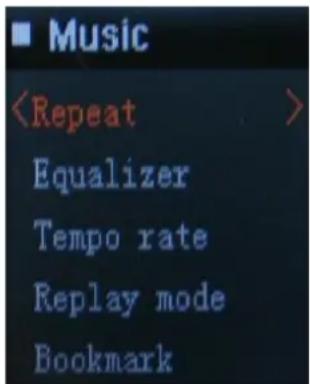
Music
Equalizer
Tempo rate
Replay mode
Bookmark
text_image
Music
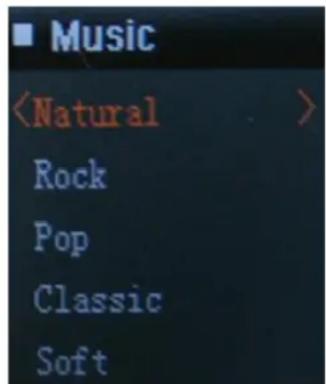
| Repeat | Normal, Repeat one; Folder; Repeat Folder; Repeat All; Random; Intro. |
| Equalizer | NATURAL,ROCK,POP,CLASSIC,SOFT, JAZZ, DBB |
| SRS WOW mode | SRS WOW, User Setting, Disable SRS |
| Tempo Rate | Moving to positive direction will fast tempo rate and moving to negative direction will slow tempo rate. The digit “0” means normal tempo rate. |
| Replay | A-B repeat, when “A” in the icon 📋links, swing [NEXT] to confirm start point, swing [NEXT] as “B” point . The player will replay from A to B according to the setting in the replay times. (Return to A-B replay mode by swing [PRE] button in such status). |
| Replay times | Set how many times the A-B point replay Maximum is 10 times (1-10) |
| Replay gap | set replay time gap between every replay |
| Exit | Exit from sub-menu |
The device displays lyrics whose name is the same as MP3 file. For example, music format's name is "song.mp3" and LRC file's name must be "song.lrc", and they should be also in the same folder.
If there is lyrics file along together with playing song, the round ball beside the "lyric" icon is green. Otherwise it is red.
B. sub-menu under stop status: (Under playing status with MP3 mode、AMV/AVI mode, press [>II] to stop playing, then press Mode button)
| Local folder | Indicate the folder of present playing file |
| Delete file | Delete the present playing song |
| Delete All | Delete All songs |
Delete file:

text_image
Music
Favourite
Local folder
Create Playli
Setting
Sub-menu interface, select "Delete file", choose the file you want to delete, confirm "Delete", then the screen shows below:

text_image
Music
Delete...
Make sure you have installed Windows media player 9.exe and DirectX9.0 before you install the software
1. Put CD drive into computer and open the driver.
2. Run Setup.exe to install the software, then restart the computer.
3. choose menu: start----program----mp3 player utilities --- AMV /AVI convert tool
4. There's a window appears, choose the file you want to convert, then choose the folder you want to put the new converted file, click "start converting"
9. Record mode:

text_image
RECORD
REC003-2009/01/1
00:00:03 /67:58:42
10:4V/64K
Press [MENU] button to select Record mode in main menu, then press [MENU] again enter into recording sub-menu.
| Local folder | Indicate the folder of present recording file |
| REC type: | Fine REC: WAV format, good voice quality;Long REC: ACT format, fair quality and longer recording time;Fine VOR: WAV format, good voice quality, will stop recording automatically when there is no sound detected;Long VOR: ACT format, fair quality, will stop recording automatically when there is no sound detected; |
| Exit | Exit form sub-menu |
After setting, press [>II] to start recording. In the meantime please note:
1. During recording, only [>II] (play/stop) and [MENU] can be effective.
2. press [>II] (play/stop) button shortly will save present recording file and start a new recording file
3. Ensure sufficient battery capacity during recording.
4. The player support 99 voice recording files storage in each directory. If the screen displays “out of space”, which indicates the current directory has already saved 99 voice recording files, the user need to change to a new directory.
10. Voice mode

text_image
VOICE
REC001 09/01/C
00:00:01 00:00:22
001/003
Main menu status, swing [PRE] or [NEXT] to select the Voice mode, then press [MENU] to confirm the selection, press [>II] to play the recording file. Press [>II] button to pause playback, swing [PRE] or [NEXT] button to select recording files.
Sub-menu while playing status:
| Repeat | Refers to “repeat” in music mode |
| Tempo rate | Refers to “tempo rate” in music mode |
| Replay | Refers to “replay” in music mode |
| Exit | Exit from sub-menu |
Sub-menu while stop status:
| Local folder | Indicate the folder of present recording file |
| Delete | Delete recording song |
| Delete All | Delete all recording files |
| exit | Exit from the sub-menu |
11. FM mode

text_image
< 93.9
87.5 108.0
FM Radio CH04
Under main menu, swing [PRE] or [NEXT] button to choose FM mode and press [MENU] to confirm. Press [>II] (play/stop) to save channel. If no channel is saved, you can look for channels by auto or manual searching. Press [MENU] again to get sub-menu as below:
| Save | Save currently tuned frequency; |
| Record | Record current preset channel; |
| Delete | delete current preset channel; |
| Delete All | delete all saved channels; |
| Auto Search | Auto search FM channel |
| Normal Band | Frequencies from 87.5MHz---108MHz; |
| Japan Band | frequencies from76.5MHz---90MHz; |
| Exit | exit from FM sub-menu |
Auto search: Holding [PRE] button or [NEXT] button for two seconds will tune frequency upward or downward until a radio station is located then it stop automatically.
Manual search: swing [PRE] or [NEXT] button to search channel upward or downward one-step
Notice: Normal band and Japan band can store 20 preset channels respectively.
12.Picture

text_image
Voice text
FM Radio Setup
Picture
Under main menu, swing [PRE] or [NEXT] button to select Photo mode, then press [MENU] to confirm, screen shows as below:

text_image
Photo
A BMP
2 JPG
3 BMP
Press [MENU] button again to enter sub-menu:
| local folder | choose the folder where picture is saved; |
| play set | manual play or auto play (there is a time gap for auto play from 1-10 seconds) |
| delete, | Delete picture; |
| Delete All | Delete all pictures |
| exit | Exit from sub-menu |
Press [>II] (play/stop) button to display the picture automatically or manually according to previous playing setting.
13. SYS Setup

text_image
Setup
LCD set
Language
Power off
Replay mode

text_image
Setup
Memory info
Firmware vers
Firmware upgr
Exit
| System Time | Press [MENU] to edit recording time. Swing [NEXT] button and the digit of year will increase; swing [VOL+] button to edit next digit, push [PRE] or [NEXT] button to adjust the digit. Press [MENU] to confirm the setting |
| LCD set | Always light10 Sec20 Sec30 Sec |
| Language | Simple Chinese, English, Trad Chinese, Japanese, French, German, Italian, Dutch, Portuguese, Spanish, Swedish, Czech, Denmark, Polish etc. |
| Power off | Off time: set self-power off time when the player is stopped and no button is pressed. The time unit is seconds. 0 means set off the function.Sleep time: set self-power off time after last key pressed, regardless of whether the player is active or stopped. The time unit is minutes. |
| Replay mode | Manual replay; auto replay |
| Online mode | Multi Drive; Normal only; Encrypted only |
| Memory info. | Check the memory size and the remaining memory |
| Firmware version | Display the player's firmware version |
| Firmware upgrade | Firmware can be upgraded via connection to PC |
| Exit | Exit from the sub-menu |
14. TEXT

text_image
Picture
Setup
Music
Game
Text
Enter TEXT mode by pressing Mode button, then you can read and edit the article in the device. The device only can recognize the article in "txt." Format.
Press [MENU] button again to enter sub-menu:
| local folder | choose the folder where picture is saved; |
| play set | manual play or auto play (there is a time gap for auto play from 1-10 seconds) |
| delete, | Delete picture; |
| Delete All | Delete all pictures |
| exit | Exit from sub-menu |
15. Game

text_image
Setup
Text
Game
Movie
Music
Enter Game function by pressing Mode button, then there's a game named MOVE BOX. Pressing [PRE], [NEXT], [VOL-], [VOL+] to move the pictures.
16. USB disk function
1) The player can be a large mobile storage device, supports 1GB/2GB/4GB memory
2) Above windows 98 no driver is required, plug and play to the computer
3) The player supports USB bus-powered and begins to charge when connecting to PC.
When connected to a computer, the screen will indicate three different modes while operating:
suspending& download &upload

natural_image
Computer monitor displaying a 3D coordinate system with letters Z and ZZ (no additional text or symbols)
17. Encrypt disk function
User can use the software to set partitions for USB disk. One is normal disk, the other is encrypted disk. (User can see two disk icons in computer. WINDOWS 2K need install SP4, otherwise, user only see one disk icon and selecting [normal only] or [encrypt only] from [online mode] of [system setting]. Encrypted disk would hide all
private data, others cannot access data without password.

text_image
MP3 Plyer Disk Tool
Format Partition and Encrypt
Partition
Disk total capacity 119 Mb
Setting encrypted disk capacity 22 Mb
Set username and password
Partition and Encrypt
Old username
Old password
New username
New password
New password confirm
Start Close Help

text_image
MP3 Flyer Disk Tool
Format Partition and Encrypt
Partition
Disk total capacity 119 Mb
Setting encrypted disk capacity 29 Mb
Success
Complete setting disk partition and password!
OK
Part
Ok
Old password
New username
New password
New password confirm
Start Close Help
Notice:
\*Data in encrypted disk cannot be readable in the player.
\*It is necessary for encrypted disk to input user name and password when connecting to computer.
\*Setting partitions will erase data, please backup data in advance. Combining disks would also erase data.
\*Please do not lose username and password. Otherwise, you cannot access encrypted disk. You can combine disks to cancel encrypted disk at risk of damaging data in encrypted one.
18. Upgrading
Use update tool installed in your computer to update and repair the damaged driver.
1) Connect player to the computer
2) Run the software: Start----program----MP3 Player Utilities ---- MP3 Player Upgrade Tool, click [choose new version firmware] button.

text_image
MP3 Player firmware upgrading tool
Device firmware information
Device name: S1 Mp3 Player
Productor: Wilson Co, Ltd.
Version: 3.0.36
Upgraded firmware information
Device name:
Productor:
Version:
Select new firmware file
Please select firmware file
Begin upgrading
Upgrade log
Close Help
3) Select the new firmware driver (from the drive CD or from the website of the supplier). Click [start] button to begin upgrading.

text_image
MP3 Player firmware upgrading tool
Device firmware information
Upgraded firmware information
열기
찾는 위치(0): Firmware

text_image
MP3 Player firmware upgrading tool
Device firmware information
Device name: S1 Mp3 Player
Producer: Wilson Co. Ltd.
Upgraded firmware information
Device name: S1 Mp3 Player
Producer: Wilson Co. Ltd.
4) When upgrading is successful, the display will indicate successfully upgraded.

text_image
zzzzzz
5. Find the icon of removable disk in [my computer]. Click the right button of mouse to select [format]. In formatting interface, select FAT system in [file system], then click [start] button to format disk. Notice: formatting disk would erase all the data and please backup data before formatting.
6.
19. Troubleshooting
If the player couldn't play properly, please use trouble-shooting guide to help you.
| Symptom | Solution |
| The player cannot work | 1. Please check the voltage of battery2. Make sure the power button is on3. Please check if volume is set to “0” or not and make sure that earphones are connected properly.4. Damaged music data will make noise in some extent; make sure there are files in the player.5. choose right FAT file system in dialogue when formatting disk. |
| The player cannot upload /download files; no disk icon in computer | Please check USB cable is correctly connected.Please properly re-install CD driver if under Win 98 |
| The player cannot record | Please check if memory is sufficient.Please check the battery voltage. |
| Strange characters are displayed | Please check if the correct language is selected. |
| FM radio signal is not clear | Readjust the position between player and earphone; earphone can be used as antenna to receive the signal |
If you had other difficulties in warranty period, please feel free contact our company to help you solve the problem.
| Item | Specification |
| Transferring data rate | USB2.0 |
| File formats supported | Music: MP1、MP2、MP3、WMA、 WAVRecord: WAVVideo support: AMV/AVI |
| FM frequency | 87.5MHz—108MHz |
| S/N rate | 85dB |
| The max output power | (L) 10mW+(R) 10mW (320hm) |
| Built-in memory | 1GB-8GB |
| Operating temperature | -5°C~40°C |
| Operating System | WINSE/ME/2K/XP,MacOS10.Linux2.4.2(Only WIN98 needs the CD driver) |
| Accessories | User Manual, Earphone, USB cable, Installation CD |
Specification and appearance are subject to change without further notice.
CUSTOMER SUPPORT
You can contact the Ricatech customer service when you have a question or a problem with your Ricatech product. You can contact us by telephone and email.
Email
For customer support by email, please sent a email to support@ricatech.com Please make sure that you mention the model number and serial number of the product, mention your name & address and describe your question or problem clearly.
Telephone
For customer support by telephone, please dial +32 3 3265694. One of our service staff will be ready to serve you.
For full procedure please visit the website of Ricatech at: www.ricatech.com
GEBRUIKERSHANDLEIDING
Inhoudsopgave
1. Veiligheidsinstructies....
2. Functieoverzicht......
21. Batterij......
22. Knopfuncties....
23. Algemene werking......
24. Hoofdmenu....
25. Muziekmodus....
26. Installeer (AMV/AVI) conversieprogramma......
27. Opnamemodus....
28. Spraakmodus....
29. FM-modus.....
30. Afbeelding....
31. SYS-instellingen....
32. TEKST....
33. Spel....
34. USB-schijffunctie ....
35. Versleutelde schijffunctie......
36. Upgraden......
37. Probleemoplossing......
38. Specificatie....
1. De veiligheidsinstructies
Deze handleiding bevat belangrijke veiligheidsinstructies en informatie met betrekking tot het juiste gebruik van dit apparaat. Om ongelukken te voorkomen dient u alle instructies aandachtig door te lezen en te begrijpen.
Stel het apparaat niet bloot aan extreme temperaturen (boven 40°C), in het bijzonder in de zomer in auto's met gesloten ramen.
Niet opbergen op vochtige of vuile plaatsen.
Voorkom vallen of hard stoten van het apparaat. Voorkom hard schudden van het TFT-scherm, anders kan het TFT-scherm beschadigd worden of de weergave abnormaal zijn.
Kies een geschikt volume. Stel het volume van de oortelefoon niet te hoog in gedurende het gebruik. Als uw oren gaan piepen, stop dan met het gebruik van het apparaat of verlaag het volume.
Demonteer het apparaat niet zelf en maak het oppervlak niet schoon met alcohol, benzeen of andere thinners.
Gebruik het apparaat niet op plaatsen waar het gebruik van elektronische apparaten niet is toegestaan, zoals in vliegtuigen.
Gebruik het apparaat niet tijdens het besturen van een voertuig of tijdens het lopen door straten, anders kunnen er ongelukken gebeuren.
Ons bedrijf behoudt zich het recht voor om het product te verbeteren, waardoor ontwerp en productspecificaties aan veranderingen onderhevig kunnen zijn zonder voorafgaande kennisgeving.
2. Functieoverzicht
● 1,5 inch ware-kleurenscherm
● Geheugengrootte: 1 GB/2 GB /4 GB /8 GB optioneel
- Videospeler, ondersteunt AMV/AVI-formaat
- Ondersteunt conversie van verschillende videoformaten naar AMV/AVI: RM /MOV /VOB /WMV /ASF /MPEG /DAT enz.
- USB 2.0, snelle downloadsnelheid
- ID3-ondersteuning, songtekstenscherm
- SP/LP digitale opnamefunctie
- Elektronisch fotoalbum
● FM-radiofunctie
- Afspeelmodus: herhaal A-B, herhaal één, herhaal alles, herhaal catalogus, vervolg lezen enz.
- EQ-modi: JAZZ, KLASSIEK, ROCK, POP, NORMAAL, ZACHT, DBB
- Geen drivers nodig vanaf Win98, plug & play op de computer
- Ingebouwde oplaadbare Li-polymeerbatterij met hoge capaciteit
- Schijfbeheerfunctie: instellen van 2 partities met accessoireprogramma. Een is de normale schijf, de andere is een beveiligde schijf waarin de bestanden niet vrij toegankelijk zijn.
- Opslaan van 40 radiokanalen en deze opnemen in een opnamebestand
3. Batterij
De speler heeft een ingebouwde Li-polymeerbatterij met hoge capaciteit welke zeer veilig in gebruik is.
Als de batterijspanning laag is, zal het scherm "lage spanning" weergeven en daarna automatisch worden uitgeschakeld.
Laad de batterij op door verbinding met een PC via USB-kabel of met een lader.
Het scherm geeft de batterij-icoon weer en knippert tijdens het opladen. De icoon geeft vol aan wanneer het opladen voltooid is.
De gebruiksduur van de batterij is afhankelijk van het ingestelde volume, het formaat van de afgespeelde bestanden, het gebruik van de knoppen enz.
De gebruiker kan een tijd voor [spanning uit] instellen bij Instellingen om energie te sparen.
Indien het apparaat gedurende een periode niet gebruikt wordt, drukt u [ON] naar de [OFF] zijde.
4. Knopfuncties:
[ON/OFF]: spanningsschakelaar
[MENU]: open menu en sluit submenu, bevestig selectie (onder iedere status wordt door [MENU] ingedrukt te houden het hoofdmenu geopend)
[>II]: afspelen/stoppen, speler aan-/uitzetten
[PRE]/[NEXT]: vorige/volgende, achteruit/vooruit
[VOL+] / [VOL-]: volume instellen, verhogen/verlagen van het volume
5. Algemene werking
1) Aan: knop [>II] (afspelen/stoppen) 3 seconden ingedrukt houden, de speler gaat naar werkende status.
2) Uit: knop [>II] (afspelen/stoppen) 3 seconden ingedrukt houden, de speler wordt uitgeschakeld.
Opmerking: als de batterijspanning laag is, wordt de speler automatisch uitgeschakeld.
3) Aanpassen volume:
Druk in MP3-modus, AMV/AVI-modus, spraakmodus en FM-modus op [VOL-] of [VOL+] om het volume met een stap te verlagen/verhogen; bij het ingedrukt houden van de [VOL-] of [VOL+] knop verlaagt/verhoogt het volume voortdurend.
Houd [MENU] ingedrukt om het hoofdmenu te openen, er zijn 7 modi waartussen u kunt wisselen door op [PRE] of [NEXT] te drukken.

text_image
Text
Game
Music
Record Game
Movie
Music
Record
Voice Music
Movie
Record
FM R
Voice
Record

text_image
Movie
Record
Voice
PictuRecord
FM Radii Voice
FM Radio
SetupVoice
Picture
FM Radio
Setup
Picture
text

text_image
M Radio
Picture
SYS Setup
Game Picture
Text
Setup
Text
Music Setup
Game
Text
Music
Game
Movie
7. Muziekmodus

text_image
MUSIC
3D Testing Mus
00:03:27 /00:04:55
001/001 NOR
A. submenu onder afspeelstatus (er is geen submenu tijdens het afspelen van AMV/AVI-bestanden) Selecteer MUZIEK-modus in het hoofdmenu, druk op [MENU] om de selectie te bevestigen en druk dan op de knop AFSPELEN/STOPPEN [>II] om het nummer af te spelen. Druk tijdens het afspelen van muziek op de [MENU] knop om het submenu te openen:

text_image
■ Music
All Songs

text_image
■ Music
Envelope

text_image
■ Music
Rash
| Herhalen | Normaal, Herhaal één; Map; Herhaal map; Herhaal alles; Willekeurige volgorde; Intro. |
| Equalizer | NATUURLIJK, ROCK, POP, KLASSIEK, ZACHT, JAZZ, DBB |
| SRS WOW-modus | SRS WOW, Gebruikersinstelling, SRS uitzetten |
| Tempo | Verschuiven naar positieve richting versnelt het tempo en verschuiven naar negatieve richting vertraagt het tempo. Het getal “0” betekent normaal tempo. |
| Opnieuw afspelen | A-B herhalen, als “A” in de icoon knippert, kies dan [NEXT] om het beginpunt te bevestigen, kies [NEXT] voor “B” punt. De speler zal opnieuw afspelen van A tot B volgens het aantal keer ingesteld voor opnieuw afspelen. (Ga terug naar de modus A-B opnieuw afspelen door de [PRE] knop te kiezen in deze status). |
| Aantal keer opnieuw afspelen | Stel in hoe vaak A-B wordt afgespeeld Maximum is 10 keer (1-10) |
| Interval opnieuw afspelen | Stel het tijdsinterval tussen het telkens opnieuw afspelen in |
| Exit (Verlaten) | Verlaten van het submenu |
Het apparaat geeft songteksten weer waarvan de naam dezelfde is als deze van het MP3-bestand. Als de muziekbestandsnaam bijvoorbeeld "song.mp3" is, moet de LRC-bestandsnaam "song.lrc" zijn, en de bestanden moeten ook in dezelfde map staan.
Als er een songtekstbestand bij het afgespeelde nummer hoort, is het bolletje naast de "songtekst"-icoon groen. Anders is het rood.
B. submenu onder stopstatus: (druk onder afspeelstatus in MP3-modus, AMV/AVI- modus op [>II] om het afspelen te stoppen, druk dan op de modusknop)
| Lokale map | Duidt de map van het huidige afspeelbestand aan |
| Verwijder bestand | Verwijdert het huidige afspeelnummer |
| Verwijder alles | Verwijdert alle nummers |
Verwijder bestand:

text_image
Music
Favourite
Local folder
Create Playli
Setting
Submenu-interface, selecteer "Verwijder bestand", kies het bestand u wilt verwijderen, bevestig met "Verwijderen", het scherm hieronder verschijnt:

text_image
Music
Delete...
8. Installeer (AMV/AVI) conversieprogramma:
Verzeker u ervan Windows media player 9.exe en DirectX9.0 geïnstalleerd te hebben, alvorens de software te installeren
5. Voer de CD-rom in de computer in en open de driver.
6. Start Setup.exe om de software te installeren, herstart daarna de computer.
7. Kies het menu: start----programma's----mp3 player utilities ---AMV /AVI convert tool
8. Als het scherm verschijnt, kiest u het te converteren bestand, kies daarna de map waar het nieuwe geconverteerde bestand moet komen, klik op "Start converteren"
9. Opnamemodus:

text_image
RECORD
REC003-2009/01/1
00:00:03 /67:58:42
WAV/64K
Druk op de [MENU] knop om de opnamemodus in het hoofdmenu te selecteren, druk daarna nogmaals op [MENU] om het opnamesubmenu te openen.
| Lokale map | Duidt de map van het huidige opnamebestand aan |
| REC-type: | Fijn REC: WAV-formaat, goede geluidskwaliteit;Lang REC: ACT-formaat, redelijke kwaliteit en langere opnametijd;Fijn VOR: WAV-formaat, goede geluidskwaliteit, zal automatisch stoppen indien er geen geluid wordt waargenomenLang VOR: ACT-formaat, redelijke geluidskwaliteit, zal automatisch stoppen indien er geen geluid wordt waargenomen; |
| Exit (Verlaten) | Verlaten van het submenu |
Druk na het instellen op [>II] om de opname te starten. Let in de tussentijd op het volgende:
1. Tijdens de opname werken alleen [>II] (afspelen/stoppen) en [MENU].
3. Kort op de knop [>II] (afspelen/stoppen) drukken zal het huidige opnamebestand opslaan en een nieuw opnamebestand starten
3. Zorg voor voldoende batterijcapaciteit tijdens het opnemen.
4. De speler ondersteunt opslag van 99 spraakopnamebestanden in elke directory. Als het scherm "out of space (te weinig ruimte)" weergeeft, duidt dat aan dat in de huidige directory al 99 spraakopnamebestanden zijn opgeslagen, de gebruiker dient naar een nieuwe directory te gaan.
10. Spraakmodus

text_image
VOICE
REC001 09/01/C
00:00:01 00:00:22
001/003
Kies in de hoofdmenustatus [PRE] of [NEXT] om de spraakmodus te selecteren, druk daarna op [MENU] om te selectie te bevestigen, druk op [>II] om het opnamebestand af te spelen. Druk op de [>II] knop om het afspelen te pauzeren, kies de [PRE] of [NEXT] knop om opnamebestanden te selecteren.
Submenu tijdens afspeelstatus:
| Herhalen | Ga naar “Herhalen” in muziekmodus |
| Tempo | Ga naar “Tempo” in muziekmodus |
| Opnieuw afspelen | Ga naar “opnieuw afspelen” in muziekmodus |
| Exit (Verlaten) | Verlaten van het submenu |
Submenu tijdens stopstatus:
| Lokale map | Duidt de map van het huidige opnamebestand aan |
| Verwijder | Verwijder het opgenomen nummer |
| Verwijder alles | Verwijder alle opnamebestanden |
| Exit (Verlaten) | Verlaten van het submenu |
11. FM-modus

text_image
< 93.9
87.5 108.0
FM Radio CH04
Kies in het hoofdmenu de [PRE] of [NEXT] knop om de FM-modus te kiezen en druk daarna op [MENU] om te bevestigen. Druk op [>II] (afspelen/stoppen) om het kanaal op te slaan. Indien geen kanaal is opgeslagen, kunt u zoeken naar kanalen door automatisch of handmatig te zoeken. Druk opnieuw op [MENU] om het onderstaande submenu te krijgen:
| Opslaan | Sla de huidige afgestemde frequentie op; |
| Opnemen | Neem het huidige ingestelde kanaal op; |
| Verwijder | Verwijder het huidige ingestelde kanaal; |
| Verwijder alles | Verwijder alle opgeslagen kanalen; |
| Automatisch zoeken | Automatisch zoeken naar FM-kanaal |
| Normale band | Frequenties van 87,5 Mhz---108 MHz; |
| Japanse band | Frequenties van 76,5 MHz---90 MHz; |
| Exit (Verlaten) | Verlaten van het FM-submenu |
Automatisch zoeken: de [PRE] knop of [NEXT] knop 2 seconden ingedrukt houden verlaagt of verhoogt de afgestemde frequentie totdat er een radiostation is gevonden, daarna stopt het zoeken automatisch.
Handmatig zoeken: kies de [PRE] of [NEXT] knop om stap voor stap omlaag of omhoog te zoeken naar een kanaal.
Opmerking: de normale band en Japanse band kunnen respectievelijk 20 vooringestelde kanalen opslaan.
12.Afbeelding

text_image
Voice text
FM Radio Setup
Picture
Kies in het hoofdmenu de [PRE] of [NEXT] knop om de fotomodus te selecteren, druk daarna op [MENU] om te bevestigen, het onderstaande scherm verschijnt:

text_image
Photo
A BMP
2 JPG
3 BMP
Druk opnieuw op [MENU] om het submenu te openen:
| Lokale map | Kies de map waar de afbeelding is opgeslagen; |
| Afspelen instellen | Handmatig afspelen of automatisch afspelen (er is een tijdsinterval voor automatisch afspelen van 1-10 seconden) |
| Verwijder | Verwijder de afbeelding; |
| Verwijder alles | Verwijder alle afbeeldingen |
| Exit (Verlaten) | Verlaten van het submenu |
Druk op de knop [>II] (afspelen/stoppen) om de afbeelding automatisch of handmatig weer te geven afhankelijk van de vorige afspeelinstelling.
13. SYS-instellingen

text_image
Setup
LCD set
Language
Power off
Replay mode

text_image
Setup
Memory info
Firmware vers
Firmware upgr
Exit
| Systeemtijd | Druk op [MENU] om de opnametijd te bewerken. Kies de [NEXT] knop om het cijfer voor jaar te verhogen; kies de [VOL+] knop om het volgende cijfer te bewerken, druk op de [PRE] of [NEXT] knop om het cijfer aan te passen. Druk op [MENU] om de instelling te bevestigen |
| LCD-instelling | Altijd opgelicht10 sec20 sec30 sec |
| Taal | Vereenvoudigd Chinees, Engels, Traditioneel Chinees, Japans, Frans Duits, Italiaans, Nederlands, Portugees, Spaans, Zweeds, Tsjechisch, Deens, Pools enz. |
| Power (stroom) uit | Uitschakeltijd: stelt de tijd voor zelfuitschakeling in wanneer de speler is gestopt en geen knop wordt ingedrukt. De tijdeenheid is seconden. 0 betekent dat de functie is uitgeschakeld.Sluimertijd: stelt de tijd voor zelfuitschakeling in na het indrukken van de laatste knop, ongeacht of de speler actief is of gestopt. De tijdeenheid is minuten. |
| Opnieuw afspelen-modus | Handmatig opnieuw afspelen; automatisch opnieuw afspelen |
| Onlinemodus | Multi Drive; Alleen normaal; Alleen versleuteld |
| Geheugeninfo rmatie | Controleer de grootte van het geheugen en het resterende geheugen |
| Firmwareversie | Geeft de firmwareversie van de speler weer |
| Firmware-upgrade | Firmware kan worden geügraded via verbinding met een PC |
| Exit (Verlaten) | Verlaten van het submenu |

text_image
Picture
Setup
Music
Game
Text
14. TEKST
Open de TEKST-modus door op de modusknop te drukken, daarna is het mogelijk het item te lezen en te bewerken in het apparaat. Het apparaat herkent alleen items in "txt."- formaat.
Druk opnieuw op [MENU] om het submenu te openen:
| Lokale map | Kies de map waar de afbeelding is opgeslagen; |
| Afspelen instellen | Handmatig afspelen of automatisch afspelen (er is een tijdsinterval voor automatisch afspelen van 1-10 seconden) |
| Verwijder | Verwijder de afbeelding; |
| Verwijder alles | Verwijder alle afbeeldingen |
| Exit (Verlaten) | Verlaten van het submenu |
15. Spel

text_image
Setup
Text
Music
Game
Open de spelfunctie door op de modusknop te drukken, dan is er een spel genaamd MOVE BOX. Druk op [PRE], [NEXT], [VOL-], [VOL+] om de afbeeldingen te verschuiven.
16. USB-schijffunctie
4) De speler kan een groot mobiel opslagmedium zijn, dat een geheugen van 1 GB/2 GB/4 GB ondersteunt
5) Geen drivers nodig vanaf Win98, plug & play op de computer
6) De speler ondersteunt het opladen via USB en begint met opladen wanneer er verbinding met een PC is.
Bij verbinding met een computer geeft het scherm 3 verschillende modi weer tijdens de werking:
aangesloten& download &upload

natural_image
Computer monitor displaying a stylized 3D letter 'Z' on its screen (no additional text or symbols)
17. Versleutelde schijffunctie
De gebruiker kan de software gebruiken om partities voor de USB-schijf in te stellen. Een is de normale schijf, de andere is de versleutelde schijf. (De gebruiker ziet twee schijficonen op de computer.) WINDOWS 2K dient SP4 geïnstalleerd te hebben, anders kan de gebruiker maar één schijficoon zien en moet hij [Alleen normaal] of [Alleen versleuteld] selecteren in [Onlinemodus] of [Systeeminstelling]. De versleutelde schijf verbergt alle privédata, anderen hebben geen toegang tot de data zonder wachtwoord.

text_image
MP3 Flyer Disk Tool
Format Partition and Encrypt
Partition
Disk total capacity 119 Mb
Setting encrypted disk capacity 22 Mb
Set username and password
Partition and Encrypt
Old username
Old password
New username
New password
New password confirm
Start Close Help

text_image
MP3 Player Disk Tool
Format Partition and Encrypt
Partition
Disk total capacity 119 Mb
Setting encrypted disk. capacity 29 Mb
Success
Complete setting disk partition and password!
OK
Part
Ok
Old password
New username
New password
New password confirm
Start Close Help
Opmerking:
\* Data op de versleutelde schijf zijn niet leesbaar op de speler.
\*Bij verbinding met een computer is het noodzakelijk gebruikersnaam en wachtwoord te geven voor de versleutelde schijf.
\*Door het instellen van partities worden data verwijderd, a.u.b. eerst reservekopie maken. Samenvoeging van schijven verwijdert eveneens data.
\*Gebruikersnaam en wachtwoord niet verliezen. Anders is toegang tot de versleutelde schijf niet mogelijk. Door samenvoeging van schijven is het ongedaan maken van de versleutelde schijf mogelijk, met het risico van beschadiging van de data op de versleutelde schijf.
18. Upgraden
Gebruik het updateprogramma op de computer om de beschadigde driver te updaten en te repareren.
5) Verbind de speler met de computer
6) Open de software: Start----programma's----MP3 Player Utilities ---- MP3 Player Upgrade Tool, klik op de knop [Kies nieuwe firmwareversie].

text_image
MP3 Player firmware upgrading tool
Device firmware information
Device name: S1 Mp3 Player
Producer: Wilson Co, Ltd.
Version: 3.0.36
Upgraded firmware information
Device name:
Productor:
Version:
Select new firmware file
Please select firmware file
Begin upgrading
7) Selecteer de nieuwe firmware driver (vanaf de CD-rom of de website van de leverancier). Klik op de [start] knop om de upgrade te starten.

text_image
MP3 Player firmware upgrading tool
Device firmware information
Upgraded firmware information
열기
찾는 위치(I): Firmware
ITN04BK-7.bin
파일 이름(N): ITN04BK-7.bin
파일 합석(I): Firmware image file (*.fw;*.bin)
열기(O)
최소
Close Help

text_image
MP3 Player firmware upgrading tool
Device firmware information
Device name: S1 Mp3 Player
Producer: Wilson Co. Ltd.
Version: 3.0.39
Upgraded firmware information
Device name: S1 Mp3 Player
Producer: Wilson Co. Ltd.
Version: 3.0.36
Select new firmware file
Complete firmware upgrading
Begin upgrading
Upgrade bg
mu416k+ v1.0 040918.bjC 2004-09-18 20:11 V3.0.36 Success
Close Help
8) Als de upgrade succesvol is, zal het scherm succesvol geügraded aangeven.

text_image
z z z z
□
5. Zoek de icoon van de verwisselbare schijf in [Deze computer]. Klik met de rechtermuisknop om [Formatteren] te selecteren. Selecteer in het formatteervenster FAT-systeem bij [Bestandssysteem], klik daarna op de [start] knop om de schijf te formatteren. Opmerking: door het formatteren van de schijf worden alle data verwijderd, a.u.b. eerst een reservekopie maken alvorens te formatteren.
19. Probleemoplossing
Als de speler niet goed kan afspelen, gebruik dan de probleemoplossing als hulp.
| Symptoom | Oplossing |
| De speler werkt niet | 1. Controleer de batterijspanning.2. Zorg ervoor dat de knop op aan staat.3. Controleer of het volume wel of niet op “0” is ingesteld and zorg ervoor dat de oortelefoon goed is aangesloten.4. Beschadigde muziek zal in zekere mate voor lawaai zorgen; zorg dat er bestanden op de speler staan.5. Kies rechts FAT-bestandssysteem in het dialoogvenster bij het formatteren van de schijf. |
| De speler kan geen bestanden uploaden/downloaden; geen schijficoon op computer | Controleer of de USB-kabel goed is aangesloten.Op de juiste wijze de driver op de CD opnieuw installeren bij WIN98 of lager. |
| De speler kan niet opnemen | Controleer op voldoende geheugen.Controleer de batterijspanning. |
| Vreemde tekens worden weergegeven | Controleer of de juiste taal is ingesteld. |
| FM-radiosignaal is niet duidelijk | Pas de positie tussen de speler en de oortelefoon opnieuw aan; de oortelefoon kan als antenne gebruikt worden om het signaal te ontvangen |
Indien er andere problemen zijn tijdens de garantieperiode, neem dan contact op met ons
| Onderdeel. | Specificatie. |
| Dataoverdrachtsnelheid. | USB2.0. |
| Compatibele bestandsformaten. | Muziek: MP1, MP2, MP3, WMA, WAV.Opname: WAV.Video-ondersteuning: AMV/AVI. |
| FM-frequentie. | 87,5 MHZ—108 MHZ. |
| S/N-waarde. | 85 dB. |
| Maximaal uitgangsvermogen. | (L) 10 mW +(R) 10 mW (320 ohm). |
| Intern geheugen. | 1GB-8 GB. |
| Bedrijfstemperatuur. | -5°C~40°C |
| Besturingssysteem. | WINSE/ME/2K/XP,MacOS10.Linux2.4.2.(Alleen WIN98 vereist CD-driver). |
| Accessoires. | Gebruikershandleiding, oortelefoon, USB-kabel, installatie-CD. |
bedrijf om
de
problemen
te
verhelpen.
20.
Specifica
tie
Specificaties en uiterlijk zijn onderhevig aan veranderingen zonder voorafgaande kennisgeving.
KLANTENONDERSTEUNING
U kunt contact opnemen met Ricatech klantenservice als u een vraag of een probleem heeft met uw Ricatech product. U kunt contact met ons opnemen per telefoon en e-mail.
E-mail
Voor klantenondersteuning per e-mail, gelieve een e-mail te sturen naar support@ricatech.com. Zorg ervoor dat u het modelnummer en het serienummer van het product vermeldt, onder vermelding van uw naam & adres en een duidelijke omschrijving van uw vraag of probleem.
Telefoon
Voor telefonische klantenondersteuning belt u naar +32 3 3265694. Een van onze servicemedewerkers zal u dan te woord staan.
Voor de volledige procedure kunt u terecht op de website van Ricatech: www.ricatech.com
MODE D'EMPLOI
Table des matières
1. Instructions de
sécurité....
2. Aperçu des fonctions......
39. A propos de la batterie......
40. Fonctions des boutons....
41. Fonctionnement de base....
42. Menu
principal......
43. Mode musique....
44. Installation de l'outil de conversion (AMV/AVI)
45. Mode
enregistrement......
46. Mode vocal ....
47. Mode FM....
48. Image....
49. Configuration
SYS....
50. Texte......
51. Jeu....
52. Fonction disque
USB......
53. Fonction cryptage de disque....
54. Mise à
niveau......
55. Dépannage....
56. Spécifications....
1. Instructions de sécurité
Ce manuel comporte des instructions de sécurité importantes et des informations sur l'utilisation correcte de l'appareil. Assurez-vous de lire attentivement et de bien comprendre toutes les instructions afin d'éviter les accidents.
N'exposez pas l'appareil à des températures extrêmes (supérieures à 40°C), en particulier dans des voitures fermées en été.
Ne stockez pas l'appareil dans des endroits humides ou sales.
Evitez de laisser tomber l'appareil ou de lui infliger de forts chocs. N'infligez pas de secousses violentes à l'écran TFT : des dommages ou un affichage anormal pourraient en résulter.
Sélectionnez le volume approprié. Lors de l'utilisation, ne réglez pas le volume des écouteurs à un niveau trop élevé. Si vous ressentez des acouphènes, arrêtez d'utiliser l'appareil, ou baissez le volume du son.
Ne démontez pas l'appareil vous-même, et n'essuyez pas sa surface avec de l'alcool, du benzène ou des dissolvants.
N'utilisez pas l'appareil dans des endroits où les dispositifs électroniques sont interdits, comme par exemple dans les avions.
N'utilisez pas l'appareil lorsque vous conduisez un véhicule ou que vous marchez dans la rue : des accidents pourraient se produire.
Notre société se réserve le droit d'apporter des améliorations à cet appareil. En conséquent, les spécifications et la conception de l'appareil pourraient changer sans préavis.
2. Aperçu des fonctions
- Ecran 1,5" en vraies couleurs
- Mémoire de masse : 1 Go / 2 Go / 4 Go / 8 Go (option)
- Lecteur de films, supporte les formats AMV/AVI
- Supporte divers formats vidéo convertis au format AMV/AVI : RM / MOV / VOB / WMV / ASF / MPEG / DAT etc.
- USB 2.0, vitesse de téléchargement élevée
● Support ID3, affichage des paroles
- Fonction d'enregistrement numérique SP / LP
- Album photo électronique
- Fonction radio FM
- Mode de lecture : répétition A-B, répétition une piste, répétitions toutes pistes, répétition dossier, lecture à la suite, etc.
- Modes EQ : JAZZ, CLASSIC, ROCK, POP, NORMAL, SOFT, DBB
- Aucun pilote requis au-dessus de Win98, fonctionne sur l'ordinateur par Plug & Play
- Batterie Li-Po intégrée rechargeable à haute capacité
- Gestion de la fonction disque : deux partitions effectuées par outil accessoire. L'une est le disque normal, l'autre est un disque de sécurité, sur lequel l'accès aux fichiers est limité.
- Possibilité de marquer 40 stations de radio et de les enregistrer dans le fichier d'enregistrement
3. A propos de la batterie
L'appareil est équipé d'une batterie Li-Po intégrée avec une forte capacité de charge, qui est d'une utilisation très sûre.
Si la charge de la batterie est faible, le message « batterie faible » s'affichera à l'écran, puis l'appareil s'arrêtera automatiquement.
Rechargez votre batterie en branchant l'appareil à votre PC au moyen du câble USB, ou en utilisant un chargeur.
Une icône de batterie s'affiche à l'écran et clignote pendant le chargement de la batterie. L'icône indiquera une batterie pleine lorsque le chargement sera terminé.
La durée de vie de la batterie dépend du réglage du volume, du format des fichiers lus, de l'utilisation des boutons etc.
L'utilisateur peut déterminer le moment de la [mise hors tension] dans les Réglages afin d'économiser la batterie.
Lorsque vous n'utilisez pas l'appareil pendant une certaine période, veuillez poussez le bouton de [MARCHE] sur [ARRET]
4. Fonctions des boutons
[MARCHE/ARRET] : bouton de mise en marche / arrêt
[MENU] : entrer dans le menu et sortir des sous-menus, confirmer une sélection (dans toute configuration, un appui long sur [MENU] donnera accès au menu principal)
[>II] : lecture/stop, mise en marche / arrêt du lecteur
[PRE] / [SUIV] : précédent/suivant, arrière/avant
[VOL+] / [VOL-] : réglage du volume sonore, augmentation/diminution du volume
5. Fonctionnement de base
1) Mise en marche : appuyez pendant 3 secondes sur le bouton [>II] (lecture/stop), ce qui mettra le lecteur en marche.
2) Arrêt : appuyez pendant 3 secondes sur le bouton [>II] (lecture/stop), ce qui arrêtera le lecteur.
Remarque : lorsque la batterie est faible, l'appareil s'arrête automatiquement.
3) Réglage du volume :
En mode MP3, AMV/AVI, vocal et FM, appuyez sur [VOL-] ou [VOL+] pour diminuer/augmenter le volume d'un cran, ou faites un appui long sur [VOL-] ou [VOL+] pour diminuer/augmenter le volume de façon continue.
Faites un appui long sur [MENU] pour accéder au menu principal : il comporte sept modes auxquels vous pouvez accéder en appuyant sur [PRE] ou [SUIV].

text_image
Text
Game
Music
Record Game
Movie
Music
Music
Record
Voice Music
Movie
Music
Record
FM Ra
Voice

text_image
Movie
Record
Voice
PictuRecord
FM Radii
Voice
FM Radio
SetupVoice
Picture
FM Radio
Setup
Text
Picture

text_image
M Radio
Picture
SYS Setup
Game Picture
Text
Setup
Text
Music Setup
Game
Text
Music
Game
Movie
7. Mode musique

text_image
MUSIC
3D Testing Mus
00:03:27 /00:04:55
001/001 NOR
A. Sous-menu en cours de lecture (pas de sous-menu pendant la lecture de fichiers AMV/AVI). Sélectionnez le mode MUSIQUE dans le menu principal, appuyez sur [MENU] pour confirmer la sélection, puis appuyez sur le bouton LECTURE/STOP [>II] pour lire la piste. En cours de lecture, appuyez sur le bouton [MENU] pour accéder au sous-menu :

text_image
Music
All Songs
Album
Artists
Genre

text_image
Music
Equalizer
Tempo rate
Replay mode
Bookmark

text_image
Music
| Répétition | Normal, répétition une piste, dossier, répétition dossier, répétition toutes pistes, aléatoire, intro. |
| Egaliseur | NATURAL, ROCK, POP, CLASSIC, SOFT, JAZZ, DBB |
| Mode SRS WOWTempo | SRS WOW, paramètres utilisateur, désactiver SRSUn déplacement dans le sens positif permet d'accélérer le tempo, et un déplacement dans le sens négatif permet de le ralentir. Le chiffre « 0 » indique un tempo normal. |
| Relecture | Répétition A-B, lorsque « A » clignote dans l'icône , actionnez [SUIV] pour confirmer le point de départ, puis actionnez [SUIV] pour le point « B ». Le lecteur rejoue la piste du point A au point B conformément aux paramètres définis pour le minutage de relecture. (Le retour au mode de relecture A-B se fait par action sur [PRE] dans cette configuration). |
| Minutage de relecture | Permet de déterminer combien de fois la piste sera relue entre les points A et B. Le maximum est de 10 fois (1-10) |
| Intervalle de relecture | Permet de définir l'intervalle entre deux relectures |
| Quitter | Permet de quitter le sous-menu |
L'appareil affiche les paroles portant le même nom que le fichier MP3. Par exemple, si le nom du fichier musical est « song.mp3 », le nom du fichier de paroles doit être « song.lrc » et ils doivent de plus se trouver dans le même dossier.
S'il existe un fichier de paroles correspondant à la piste en cours de lecture, le cercle situé près de l'icône « paroles » est vert. Si ce n'est pas le cas, il est rouge.
B. Sous-menu en configuration « stop » (en cours de lecture en mode MP3 ou AMV/AVI, appuyez sur [>II] pour stopper la lecture, puis appuyez sur le bouton Mode)
| Dossier local | Indique le dossier dans lequel se trouve le fichier en cours de lecture |
| Supprimer fichier | Permet de supprimer la piste en cours de lecture |
| Supprimer tous | Permet de supprimer toutes les pistes |
Supprimer fichier :

text_image
Music
Favourite
Local folder
Create Playli
Setting
Dans l'interface du sous-menu, sélectionnez « Supprimer fichier », choisissez le fichier que vous souhaitez supprimer, confirmez « Supprimer ». L'écran affiche alors le message suivant :

text_image
Music
Delete...
8. Installation de l'outil de conversion (AMV/AVI) :
Assurez-vous d'avoir installé Windows Media Player 9.exe et DirectX 9.0 avant d'installer le logiciel
9. Insérez le CD dans l'ordinateur et ouvrez le pilote.
10. Exécutez Setup.exe pour installer le logiciel, puis redémarrez l'ordinateur.
11. Sélectionnez le menu Démarrer – Programmes – Utilitaires lecteur mp3 – Outil de conversion AMV/AVI
12. Dans la fenêtre qui apparaît, choisissez le fichier que vous souhaitez convertir, puis choisissez le dossier dans lequel vous souhaitez mettre le nouveau fichier converti, et enfin cliquez sur « Démarrer conversion »
9. Mode enregistrement :

text_image
RECORD
REC003-2009/01/1
00:00:03 /67:58:42
00:00:03 67:58:42
Appuyez sur le bouton [MENU] pour sélectionner le mode Enregistrement dans le menu principal, puis appuyez à nouveau sur [MENU] pour accéder au sous-menu d'enregistrement.
| Dossier local | Indique le dossier dans lequel se trouve le fichier d'enregistrement |
| Type d'enregistrement (REC) | REC fin : format WAV, bonne qualité de voixREC long : format ACT, qualité correcte et temps d'enregistrement plus longVOR fin : format WAV, bonne qualité de voix, arrête automatiquement l'enregistrement si aucun son n'est détectéVOR long : format ACT, qualité correcte, arrête automatiquement l'enregistrement si aucun son n'est détecté |
| Quitter | Permet de quitter le sous-menu |
Après le réglage des paramètres, appuyez sur [>II] pour commencer à enregistrer. Veuillez prendre note des remarques suivantes :
1. Durant l'enregistrement, seuls les boutons [>II] (lecture/stop) et [MENU] fonctionnent.
4. Un appui court sur le bouton [>II] (lecture/stop) permet de sauvegarder le fichier en cours d'enregistrement et de commencer l'enregistrement d'un nouveau fichier
3. Assurez-vous que la batterie soit suffisamment chargée pour les enregistrements.
4. Le lecteur peut stocker 99 fichiers d'enregistrements vocaux dans chaque répertoire. Si le message « Manque d'espace » s'affiche à l'écran, indiquant que
le répertoire actuel comporte déjà 99 fichiers d'enregistrements vocaux, l'utilisateur doit changer pour un nouveau répertoire.
10. Mode vocal

text_image
VOICE
REC001 09/01/C
00:00:01 00:00:22
001/003
Dans le menu principal, actionnez [PRE] ou [SUIV] pour sélectionner le mode Vocal, puis appuyez sur [MENU] pour confirmer la sélection, et enfin sur [>II] pour lire le fichier d'enregistrement. Appuyez sur le bouton [>II] pour interrompre la lecture, actionnez le bouton [PRE] ou [SUIV] pour sélectionner les fichiers d'enregistrement.
Sous-menu en cours de lecture :
| Répétition | Désigne la « répétition » en mode musique |
| Tempo | Désigne le « tempo » en mode musique |
| Relecture | Désigne la « relecture » en mode musique |
| Quitter | Permet de quitter le sous-menu |
| Dossier local | Indique le dossier dans lequel se trouve le fichier d'enregistrement |
| Supprimer | Permet de supprimer la piste enregistrée |
| Supprimer tous | Permet de supprimer tous les fichiers d'enregistrement |
| Quitter | Permet de quitter le sous-menu |
11. Mode FM

text_image
< 93.9
87.5 108.0
FM Radio CH04
Dans le menu principal, actionnez le bouton [PRE] ou [SUIV] pour sélectionner le mode FM et appuyez sur [MENU] pour confirmer. Appuyez sur [>II] (lecture/stop) pour marquer une station. Si aucune station n'est marquée, il vous est possible d'en rechercher une automatiquement ou manuellement. Appuyez à nouveau sur [MENU] pour parvenir au sous-menu suivant :
| Marquer | Permet de marquer la fréquence sélectionnée actuellement |
| Enregistrer | Permet d’enregistrer la station prédéfinie actuelle |
| Supprimer | Permet de supprimer la station prédéfinie actuelle |
| Supprimer tous | Permet de supprimer toutes les stations marquées |
| Recherche auto | Recherche automatique de station FM |
| Bande normale | Fréquences comprises entre 87,5 MHz et 108 MHz |
| Bande japonaise | Fréquences comprises entre 76,5 MHz et 90 MHz |
| Quitter | Permet de quitter le sous-menu FM |
Recherche auto : appuyez pendant deux secondes sur le bouton [PRE] ou [SUIV] pour rechercher les fréquences supérieures ou inférieures jusqu'à ce qu'une station de radio soit localisée. A ce moment, la recherche s'arrêtera automatiquement.
Recherche manuelle : actionnez le bouton [PRE] ou [SUIV] pour chercher par paliers une station supérieure ou inférieure
Remarque : la bande normale et la bande japonaise peuvent stocker chacune 20 stations prédéfinies.
12. Image

text_image
Voice text
FM Radio Setup
Picture
Dans le menu principal, actionnez le bouton [PRE] ou [SUIV] pour sélectionner le mode Photo et appuyez sur [MENU] pour confirmer. L'écran suivant s'affiche :

text_image
Photo
A BMP
2 JPG
3 BMP
Appuyez à nouveau sur le bouton [MENU] pour accéder au sous-menu :
| Dossier local | Permet de sélectionner le dossier où l’image sera stockée |
| Paramètres de lecture | Lecture manuelle ou lecture auto (pour la lecture auto, il existe un intervalle de 1 à 10 secondes) |
| Supprimer | Permet de supprimer l’image |
| Supprimer tous | Permet de supprimer toutes les images |
| Quitter | Permet de quitter le sous-menu |
Appuyez sur le bouton [>II] (lecture/stop) pour afficher l'image automatiquement ou manuellement, conformément aux paramètres de lecture définis précédemment.
13. Configuration SYS

text_image
Setup
LCD set
Language
Power off
Replay mode

text_image
Setup
Memory info
Firmware vers
Firmware upgr
Exit
| Heure du système | Appuyez sur [MENU] pour éditer la date d'enregistrement.Actionnez le bouton [SUIV] pour augmenter le chiffre de l'année. Actionnez le bouton [VOL+] pour éditer le chiffre suivant, puis appuyez sur le bouton [PRE] ou [SUIV] pour régler le chiffre. Appuyez sur [MENU] pour confirmer le réglage |
| Réglage LCD | Toujours allumé10 s.20 s.30 s. |
| Langue | Chinois simplifié, anglais, chinois traditionnel, japonais, français, allemand, italien, néerlandais, portugais, espagnol, suédois, tchèque, danois, polonais, etc. |
| Arrêt | Minutage d'arrêt : permet de définir le minutage pour arrêt automatique lorsque le lecteur est arrêté et qu'aucun bouton n'est utilisé. Se définit en secondes. 0 signifie que cette fonction est désactivée.Minutage de veille : permet de définir le minutage pour arrêt automatique après la dernière utilisation d'un bouton, que le lecteur soit en cours de lecture ou arrêté. Se définit en minutes. |
| Mode relecture | Relecture manuelle, relecture automatique |
| Mode en-ligne | Multi-pilote, Normal seulement, Crypté seulement |
| Infos mémoire | Permet de vérifier la taille de la mémoire et la mémoire restante |
| Version micrologiciel | Permet d'afficher la version du micrologiciel du lecteur |
| Mise à niveau micrologiciel | Le micrologiciel peut être mis à niveau par connexion à un PC |
| Quitter | Permet de quitter le sous-menu |
14. TEXTE
Accédez au mode TEXTE en appuyant sur le bouton Mode. Vous
pourrez alors lire et éditer des articles sur l'appareil. L'appareil ne reconnaît
que les textes au format « .txt » .
Appuyez à nouveau sur le bouton [MENU] pour accéder au sous-menu :
| Dossier local | Permet de sélectionner le dossier où l’image sera stockée |
| Paramètres de lecture | Lecture manuelle ou lecture auto (pour la lecture auto, il existe un intervalle de 1 à 10 secondes) |
| Supprimer | Permet de supprimer l’image |
| Supprimer tous | Permet de supprimer toutes les images |
| Quitter | Permet de quitter le sous-menu |
15. Jeu

text_image
Setup
Text
Game
Movie
Music
Accédez à la fonction Jeu en appuyant sur le bouton Mode. Il existe un jeu nommé MOVE BOX. Appuyez sur [PRE], [SUIV], [VOL-] et [VOL+] pour déplacer les images.
16. Fonction disque USB
7) Le lecteur peut être utilisé comme dispositif de stockage volumineux, qui peut contenir 1 Go / 2 Go / 4 Go de mémoire
8) Aucun pilote requis au-dessus de Windows 98, fonctionne sur l'ordinateur par Plug & Play
9) Le lecteur supporte la fonction USB alimentée par bus, et commence à charger dès qu'il est connecté au PC.
Lors de la connexion à un ordinateur, l'écran indique trois modes différents lors de son fonctionnement :
attente & téléchargement & chargement

natural_image
Computer monitor displaying a stylized 3D letter 'Z' on its screen (no additional text or symbols)
17. Fonction cryptage de disque
L'utilisateur peut utiliser le logiciel pour déterminer des partitions sur le disque USB. L'une est le disque normal, l'autre le disque crypté. (L'utilisateur voit deux icônes de disque sur l'ordinateur. Il est nécessaire d'installer SP4 pour Windows 2000, sinon l'utilisateur ne verra qu'une icône de disque et sélectionnera [normal seulement] ou [crypté seulement] dans le [mode en-ligne] des [réglages système]. Le disque crypté cache toutes les données privées, auxquelles personne ne peut accéder sans mot de passe.

text_image
MP3 Plyer Disk Tool
Format Partition and Encrypt
Partition
Disk total capacity 119 Mb
Setting encrypted disk capacity 22 Mb

text_image
MP3 Player Disk Tool
Format Partition and Encrypt
Partition
Disk total capacity 119 Mb
Setting encrypted disk capacity 29 Mb
Remarque :
\* Les données du disque crypté ne peuvent être lues par le lecteur.
\* Lors de la connexion à un ordinateur, il est nécessaire d'entrer le nom d'utilisateur et le mot de passe pour le disque crypté.
\* La création des partitions entraînera la suppression des données, veuillez sauvegarder vos données auparavant. La combinaison des deux disques entraînera également la suppression des données.
\* Veuillez conserver précieusement votre nom d'utilisateur et votre mot de passe. Sans eux, vous ne pourrez pas accéder au disque crypté. Il vous est possible de combiner les disques afin de supprimer le disque crypté, mais vous risquez d'endommager les données qui s'y trouvent stockées.
18. Mise à niveau
Utilisez l'outil de mise à niveau installé sur votre ordinateur pour mettre à niveau et réparer le pilote endommagé.
9) Connectez le lecteur à l'ordinateur
10) Exécutez le logiciel : Démarrer – Programmes – Utilitaires lecteur MP3 – Outil de mise à niveau du lecteur MP3. Cliquez sur le bouton [Choisir micrologiciel nouvelle version].

text_image
MP3 Player firmware upgrading tool
Device firmware information
Device name: S1 Mp3 Player
Productor: Wilson Co, Ltd.
Version: 3.0.36
Upgraded firmware information
Device name:
Productor:
Version:
Select new firmware file
Please select firmware file
Begin upgrading
Upgrade log
Close Help
11) Sélectionnez le pilote du nouveau micrologiciel (à partir du CD pilote ou du site Internet du fournisseur). Cliquez sur le bouton [Démarrer] pour commencer la mise à
niveau.

text_image
MP3 Player firmware upgrading tool
Device firmware information
Upgraded firmware information
열기
찾는 위치(I): Firmware
ITN048K-7.bin
파일 이름(N): ITN048K-7.bin
파일 향식(T): Firmware image file(*.tw;*.bin)
열기(O)
최소
Close Help

text_image
MP3 Player firmware upgrading tool
Device firmware information
Device name: S1 Mp3 Player
Producer: Wilson Co. Ltd.
Version: 3.0.39
Upgraded firmware information
Device name: S1 Mp3 Player
Producer: Wilson Co. Ltd.
Version: 3.0.36
Select new firmware file
Complete firmware upgrading
Begin upgrading
Upgrade bg
mu416k+ v1.0 040918.bjC 2004-09-18 20:11 V3.0.36 Success
Close Help
12) Lorsque la mise à niveau est terminée avec succès, un message l'annonçant sera affiché.

text_image
z z z z
z z z z
5. Trouvez l'icône du disque pouvant être retiré dans [mon ordinateur]. Cliquez sur le bouton droit de la souris pour sélectionner le [format]. Dans l'interface de formatage, sélectionnez le système FAT dans [système de fichiers], puis cliquez sur le bouton [démarrer] pour formater le disque. Remarque : le formatage du disque peut supprimer toutes les données. Veuillez les sauvegarder avant le formatage.
19. Dépannage
Si le lecteur ne fonctionne pas correctement, veuillez vous servir de ce guide de dépannage.
| Symptôme | Solution |
| Le lecteur ne fonctionne pas | 1. Vérifiez la tension de la batterie2. Assurez-vous que le bouton de marche/arrêt est sur « marche »3. Vérifiez que le volume ne soit pas réglé sur « 0 », et que les écouteurs soient correctement branchés.4. Des données musicales endommagées peuvent dans une certaine mesure faire des bruits parasites ; vérifiez les fichiers contenus dans le lecteur.5. Choisissez le système de fichiers FAT adéquat dans la boîte de dialogue lors du formatage du disque. |
| Le lecteur ne peut pas télécharger de fichiers ; aucune icône de disque ne s'affiche sur l'ordinateur | Vérifiez que le câble USB soit correctement connecté.Si vous êtes sous Win 98, réinstallez correctement le pilote CD |
| Le lecteur n'enregistre pas | Vérifiez qu'il y a suffisamment d'espace mémoireVérifiez la tension de la batterie |
| Des caractères étranges s'affichent | Vérifiez que la bonne langue est sélectionnée. |
| Le signal radio FM n'est pas clair | Réajustez la position du lecteur et de l'écouteur : l'écouteur peut servir d'antenne pour recevoir le signal |
Si vous rencontrez d'autres difficultés durant la période de garantie, n'hésitez pas à nous contacter. Nous serons ravis de vous aider à résoudre votre problème.
20. Spécification
| Elément | Spécification |
| Taux de transfert des données | USB 2.0 |
| Formats de fichiers supportés | Musique: MP1, MP2, MP3, WMA, WAV.Enregistrement: WAV Vidéo: AMV/AVI |
| Fréquence FM | 87,5 MHz — 108 MHz |
| SNR. | 85 dB |
| Puissance émise maximum. | (L) 10 mW + (R) 10 mW (320hm) |
| Mémoire intégrée | 1 Go – 8 Go |
| Température de fonctionnement | -5°C~40°C |
| Système d’exploitation | WINSE / ME / 2K / XP, Mac OS10. Linux 2.4.2(Pilote CD requis pour WIN 98 uniquement) |
| Accessoires. | Mode d’emploi, écouteurs, câble USB, CD d’installation |
Les spécifications et l'aspect peuvent faire l'objet de modifications sans préavis.
SERVICE CONSOMMATEUR
Vous pouvez contacter le service consommateur de Ricatech si vous avez une question ou un problème avec votre produit Ricatech. Contactez-nous par téléphone ou par courriel.
Courriel
Pour une assistance par courriel, envoyez-nous un courriel à l'adresse support@ricatech.com. Assurez-vous de bien nous communiquer le numéro de modèle et le numéro de série de l'appareil, vos nom et adresse ainsi qu'une
description claire de votre problème ou votre question.
Téléphone
Pour contacter le service consommateur par téléphone, composez le +32 3 3265694. Un membre de notre personnel se tiendra à votre service.
Pour toutes les procédures, rendez vous sur le site web de Ricatech : www.ricatech.com
BEDIENUNGSANLEITUNG
Inhalt
1. Sicherheitsanweisungen....
2. Funktionsübersicht....
57. Über den Akku....
58. Tastenfunktion....
59. Grundbedienung....
60. Hauptmenü....
61. Musikmodus....
62. Installierung des (AMV/AVI) Umwandlungshilfsprogramms......
63. Aufnahmemodus....
64. Sprachmodus....
65. FM-Modus....
66. Bild....
67. SYS-Einrichtung......
68. TEXT......
69. Spiel....
70. USB-Discfunktion....
71. Verschlüsselungs-Discfunktion......
72. Nachrüsten....
73. Fehlerbehebung....
74. Spezifikation....
1. Die Sicherheitsanweisungen
Dieses Handbuch enthält wichtige Sicherheitsanweisungen und Informationen für den richtigen Umgang mit dem Gerät. Stellen Sie sicher, dass Sie alle Anweisungen sorgfältig gelesen und verstanden haben, um Unfälle zu vermeiden.
Setzen Sie das Gerät keinen extremen Temperaturen aus (über 40 °C), besonders in Autos mit geschlossenen Fenstern im Sommer.
Bewahren Sie es nicht an feuchten oder schmutzigen Orten auf.
Vermeiden Sie, dass das Gerät herunterfällt oder irgendwo stark aufschlägt. Der TFT-Bildschirm darf nicht stark erschüttert werden; sonst könnte der TFT-Bildschirm beschädigt werden oder unnormal anzeigen.
Wählen Sie die geeignete Lautstärke. Drehen Sie die Lautstärke der Kopfhörer nicht zu hoch auf, während Sie sie verwenden. Wenn Sie ein Klingeln in Ihren Ohren wahrnehmen, hören Sie auf das Gerät zu verwenden oder drehen Sie die Lautstärke runter.
Nehmen Sie das Gerät nicht selbst auseinander und wischen Sie die Oberfläche des Gerätes nicht mit Alkohol und Benzol und Verdünnern ab.
Verwenden Sie das Gerät nicht an Orten, wo die Verwendung von
elektronischen Geräten verboten ist, wie zum Beispiel im Flugzeug.
Verwenden Sie das Gerät nicht beim Auto fahren oder beim Laufen auf der Straße, sonst könnte ein Unfall passieren.
Unsere Firma behält sich das Recht vor, das Produkt zu verbessern, so dass sich die Spezifikation und das Design des Produktes jederzeit ohne vorige Ankündigung ändern können.
2. Funktionsübersicht
● 1,5 Zoll farbechter Bildschirm
● Massenspeicher: 1 GB/2GB /4GB /8GB optional
● Movie-Player, unterstützt AMV-/AVI-Format
- Unterstützt verschiedene Videoformate die in das AMV-/AVI-Format umgewandelt wurden: RM/MOV/VOB/MWV/ASV/MPEG/DAT usw.
- USB 2.0, schnelle Geschwindigkeit beim Herunterladen
- ID3-Unterstützung, Liedtextanzeige
- SP/LP digitale Aufnahmefunktion
- Elektronisches Fotoalbum
● FM-Radiofunktion
- Abspielmodus: A-B wiederholen, einmal wiederholen, alle wiederholen, Katalog wiederholen, nach dem Lesen usw.
- EQ-Modi: JAZZ, KLASSIK, ROCK, POP, NORMAL, SOFT, DBB
- Kein Treiber notwendig außer für Win98 und ältere Versionen, funktioniert beim Computer mit Plug & Play
- Eingebauter leistungsstarker wiederaufladbarer Lithium-Polymer-Akku
- Verwalten der Discfunktion: stellen Sie zwei Partitionen mit einem zusätzlichen Hilfsprogramm ein. Eine ist die normale Disc, die andere ist die Sicherheitsdisc, bei der die Dateien nicht frei zugänglich sind.
- Speichern Sie 40 Radiokanäle und speichern Sie sie in der Aufnahmedatei
3. Über den Akku
Der Player nimmt einen eingebauten Lithium-Polymer-Akku mit hoher Kapazität an, der in der Verwendung sehr sicher ist.
Wenn der Akku schwach ist, zeigt der Bildschirm „geringe Energie“ an und schaltet sich anschließend automatisch aus.
Laden Sie Ihren Akku wieder auf, indem Sie ihn an den Computer via USB-Kabel oder an das Ladegerät anschließen.
Der Bildschirm zeigt das Batteriesymbol und den Impuls an, wenn der Akku aufgeladen wird. Das Symbol gibt an, wann der Ladevorgang abgeschlossen ist.
Die Laufzeit des Akkus hängt von der Lautstärkeeinstellung, dem
Abspieldateiformaten, dem Tastenbetrieb, usw. ab.
Der Benutzer kann die Zeit von [Ausschalten] in der Einstellung festlegen, um Strom zu sparen.
Wenn Sie das Gerät für längere Zeit nicht verwenden, drücken Sie bitte [ON] zur [OFF] Seite hin
4. Tastenfunktion:
[ON/OFF]: Netzschalter
[MENU]: Gehen Sie in das Menü und beenden Sie es vom Untermenü aus, bestätigen Sie die Auswahl (unter irgendeinem Status, halten Sie [MENU] gedrückt, um zum Hauptmenü zu gelangen)
[>II]: abspielen/stopp, Player ein-/ausschalten
[PRE] / [NEXT] : letzte/nächste, rückwärts /vorwärts
[VOL+] / [VOL-]: stellen Sie die Lautstärke ein, erhöhen/verringern Sie die Lautstärke
5. Grundbedienung
1) Eingeschaltet: halten Sie die Taste [>II](abspielen/stopp) für 3 Sekunden gedrückt, der Player geht in den Arbeitszustand über.
2) Ausgeschaltet: halten Sie die Taste [>II] (abspielen/stopp) für drei Sekunden gedrückt, der Player wird ausgeschaltet.
Hinweis: Wenn die Akkuleistung niedrig ist, schaltet es sich automatisch aus.
3) Lautstärke einstellen:
Beim MP3-Modus, AMV/AVI-Modus, Sprachmodus und FM-Modus, drücken Sie [VOL-] oder [VOL+], um die Lautstärke um eine Stufe zu verringern/erhöhen, während das Gedrückt Halten der Taste [VOL-] oder [VOL+] die Lautstärke kontinuierlich verringert/erhöht.
6. Hauptmenü
Halten Sie [MENU] gedrückt, um ins Hauptmenü zu gelangen, es gibt sieben Modi, zu denen durch Drücken von [PRE] oder [NEXT] umgeschaltet werden kann.

text_image
Text
Game
Music
Record Game
Movie
Music
Record
Voice Music
Movie
Record
FM R
Voice
Record

text_image
Movie
Record
Voice
PictuRecord
FM Radii Voice
FM Radio
SetupVoice
Picture
FM Radio
Setup
Picture
Text

text_image
M Radio
Picture
SYS Setup
Game Picture
Text
Setup
Text
Music Setup
Game
Text
Music
Game
Movie
7. Musikmodus

text_image
MUSIC
3D Testing Mus
00:03:27 /00:04:55
001/001 NOR
Untermenü-Beschreibung:
A. Untermenü unter dem Abspielstatus (beim Abspielen der AMV-/AVI-Datei gibt es kein Untermenü) Wählen Sie den MUSIK-Modus im Hauptmenü, drücken Sie [MENU], um die Auswahl zu bestätigen, drücken Sie anschließend die Taste ABSPIELEN/STOPP [>II], um das Lied abzuspielen. Drücken Sie während Musik abgespielt wird die Taste [MENU], um zum Untermenü zu gelangen:

text_image
■ Music
All Songs
Album
Artists
Genre

text_image
Music
Equalizer
Tempo rate
Replay mode
Bookmark

text_image
■ Music
| Wiederholen | Normal, einmal wiederholen; Ordner; Ordner wiederholen; alle wiederholen; Zufall; Intro. |
| Equalizer | NATUR,ROCK,POP,KLASSIK,SOFT, JAZZ, DBB |
| SRS WOW-Modus | SRS WOW, Benutzereinstellung, SRS deaktivieren |
| Geschwindigkeitsrate | Die Bewegung zur positiven Richtung hin beschleunigt die Geschwindigkeitsrate und die Bewegung zur negativen Richtung hin verlangsamt die Geschwindigkeitsrate. Die Zahl „0“ bedeutet normale Geschwindigkeitsrate. |
| Wiederholung | A-B-Wiederholung, wenn „A“ im Symbol blinkt, drehen Sie [NEXT], um den Startpunkt zu bestätigen, drehen Sie [NEXT] als „B“ Punkt. Der Player wiederholt von A bis B entsprechend der Einstellung bei den Wiederholungszeiten. (Kehren Sie zum A-B-Wiederholungsmodus zurück, indem Sie in diesem Status die Taste [PRE] drehen). |
| Wiederholungszeiten | Legen Sie fest, wie oft der A-B-Punkt wiederholt werden soll; Maximal 10 Mal (1-10) |
| Wiederholungsabstand | Legen Sie den Wiederholungszeitabstand zwischen jeder Wiederholung fest |
| Beenden | Vom Untermenü aus beenden |
Das Gerät zeigt Liedtexte mit dem gleichen Namen wie die MP3-Datei an. Zum Beispiel, der Name des Musikformats ist „Lied.mp3“ und der Name der LRC-Datei muss „Lied.lrc“ lauten, und sie sollten beide im gleichen Ordner sein. Wenn es eine Liedtextdatei zusammen mit dem abgespielten Lied gibt, wird der runde Ball neben dem Symbol „Liedtext“ grün. Sonst ist er rot.
B. Untermenü unter Stoppstatus: (Unter dem Abspielstatus mit MP3-Modus, AMV-/AVI-Modus, drücken Sie [>II], um das Abspielen zu beenden, drücken Sie anschließend die Modustaste)
| Lokaler Ordner | Kennzeichen Sie den Ordner der aktuell abgespielten Datei |
| Datei löschen | Löschen Sie das aktuell abgespielte Lied |
| Alle löschen | Löschen Sie alle Lieder |
Datei löschen:

text_image
Music
Favourite
Local folder
Create Playli
Setting
Untermenü-Berührungsfläche, wählen Sie „Datei löschen“, wählen Sie die zu löschende Datei, bestätigen Sie „Löschen“, anschließend wird der untere Bildschirm angezeigt:

text_image
Music
Delete...
8. Installierung des (AMV/AVI) Umwandlungshilfsprogramms:
Stellen Sie sicher, dass Sie Windows Media Player 9.exe und DirectX9.0 installiert haben, bevor Sie die Software installieren
13. Legen Sie die CD in den Computer ein und öffnen Sie den Treiber.
14. Führen Sie die Setup.exe aus, um die Software zu installieren, starten Sie anschließend den Computer neu.
15. Wählen Sie das Menü: Start----Programm----mp3 Player
Dienstprogramme --- AMV-/AVI-Umwandlungshilfsprogramm
16. Ein Fenster wird eingeblendet, wählen Sie die Datei, die Sie umwandeln möchten, wählen Sie anschließend den Ordner aus, in den Sie die neue umgewandelte Datei ablegen möchten, klicken Sie auf „Umwandlung starten“
9. Aufnahmemodus:

text_image
RECORD
REC003-2009/01/1
00:00:03 /67:58:42
10:00:04 K
Drücken Sie die Taste [MENU], um den Aufnahmemodus im Hauptmenü auszuwählen, drücken Sie anschließend [MENU] erneut, um zum Aufnahmeuntermenü zu gelangen.
| Lokaler Ordner | Kennzeichen Sie den Ordner der aktuellen Aufnahmedatei |
| Aufnahmetyp: | Feine Aufnahme: WAV-Format, gute Stimmqualität;Lange Aufnahme: ACT-Format, durchschnittliche Qualität und längere Aufnahmezeit;Feine Stimmaufnahme: WAV-Format, gute Stimmqualität, hört automatisch mit der Aufnahme auf, wenn kein Ton erkannt wird;Lange Stimmaufnahme: ACT-Format, durchschnittliche Stimmqualität, hört automatisch mit der Aufnahme auf, wenn kein Ton erkannt wird; |
| Beenden | Vom Untermenü aus beenden |
Drücken Sie nach der Einstellung [>II], um mit der Aufnahme zu beginnen. Bitte beachten Sie in der Zwischenzeit:
1. Während der Aufnahme, kann nur [>II] (abspielen/stopp) und [MENU] wirksam sein.
5. durch kurzes Drücken der Taste [>II] (abspielen/stopp), wird die aktuelle Aufnahmedatei gespeichert und eine neue Aufnahmedatei gestartet
3. Sorgen Sie während der Aufnahme für eine ausreichende Akkukapazität.
4. Der Player unterstützt 99 Sprachaufnahme-Dateispeicherungen in jedem Verzeichnis. Wenn der Bildschirm „kein Platz mehr“ anzeigt, was darauf hinweist, dass das aktuelle Verzeichnis bereits 99 Sprachaufnahmedateien gespeichert hat, muss der Benutzer zu einem neuen Verzeichnis wechseln.
10. Sprachmodus

text_image
VOICE
REC001 09/01/C
00:00:01 00:00:22
001/003
Hauptmenüstatus, drehen Sie [PRE] oder [NEXT], um den Sprachmodus auszuwählen, drücken Sie anschließend [MENU], um die Auswahl zu bestätigen, drücken Sie [>II], um die Aufnahmedatei abzuspielen. Drücken Sie die Taste [>II], um die Wiedergabe anzuhalten, drehen Sie die Taste [PRE] oder [NEXT], um die Aufnahmedateien auszuwählen.
Untermenü während des Abspielstatus:
| Wiederholen | Bezieht sich auf „wiederholen“ im Musikmodus |
| Geschwindigkeitsrate | Bezieht sich auf „Geschwindigkeitsrate“ im Musikmodus |
| Wiederholung | Bezieht sich auf „wiederholen“ im Musikmodus |
| Beenden | Vom Untermenü aus beenden |
Untermenü während des Stoppstatus:
| Lokaler Ordner | Kennzeichen Sie den Ordner der aktuellen Aufnahmedatei |
| Löschen | Aufnahmelied löschen |
| Alle löschen | Alle Aufnahmedateien löschen |
| beenden | Vom Untermenü aus beenden |
11. FM-Modus

text_image
< 93.9 MHz >
87.5 108.0
FM Radio CH04
Unter Hauptmenü, drehen Sie die Taste [PRE] oder [NEXT], um den FM-Modus zu wählen und drücken Sie [MENU], um zu bestätigen. Drücken Sie [>II] (abspielen/stopp), um den Kanal zu speichern. Wenn kein Kanal gespeichert wird, können Sie mit der automatischen oder manuellen Suche nach Kanälen suchen. Drücken Sie erneut [MENU],
um wie unten zu den Untermenüs zu gelangen:
| Speichern | Speichern Sie die aktuell eingestellte Frequenz; |
| Aufnehmen | Nehmen Sie den aktuell voreingestellten Kanal auf; |
| Löschen | Löschen Sie den aktuell voreingestellten Kanal; |
| Alle löschen | Löschen Sie alle gespeicherten Kanäle; |
| Automatische Suche | Automatische Suche nach FM-Kanal |
| Normales Band | Frequenzen von 87,5 MHz---108 MHz; |
| Japanisches Band | Frequenzen von 76,5 MHz---90 MHz; |
| Beenden | Vom FM-Untermenü aus beenden |
Automatische Suche: Beim Gedrückt Halten der Taste [PRE] oder [NEXT] für zwei Sekunden wird die Frequenz nach oben oder unten eingestellt, bis ein Radiosender erkannt wird, dann wird automatisch aufgehört.
Manuelle Suche: Drehen Sie die Taste [PRE] oder [NEXT], um den Kanal mit einer Stufe nach oben oder unten zu suchen
Hinweis: Das normale Band und das japanische Band können jeweils 20 voreingestellte Kanäle speichern.
12. Bild

text_image
Voice text
FM Radio Setup
Picture
Unter Hauptmenü, drehen Sie die Taste [PRE] oder [NEXT], um den Fotomodus zu wählen, drücken Sie anschließend [MENU], um zu bestätigen, der Bildschirm wird wie folgt angezeigt:

text_image
Photo
A BMP.
2 JPG
3 BMP
Drücken Sie erneut die Taste [MENU], um zum Untermenü zu gelangen:
| lokaler Ordner | wählen Sie den Ordner, wo das Bild gespeichert ist; |
| Abspieleinstellung | manuelles Abspielen oder automatisches Abspielen (es gibt einen Zeitabstand für das automatische Abspielen von 1-10 Sekunden) |
| Löschen, | Bild löschen; |
| Alle löschen | Alle Bilder löschen |
| beenden | Vom Untermenü aus beenden |
Drücken Sie die Taste [>II] (abspielen/stopp), um das Bild automatisch oder manuell entsprechend der vorigen Abspieleinstellung anzuzeigen.
13. SYS-Einrichtung

text_image
Setup
LCD set
Language
Power off
Replay mode

text_image
Setup
Memory info
Firmware vers
Firmware upgr
Exit
| Systemzeit | Drücken Sie [MENU], um die Aufnahmezeit zu bearbeiten. Drehen Sie die Taste [NEXT] und die Jahreszahl erhöht sich; drehen Sie die Taste [VOL+], um die nächste Zahl zu bearbeiten, drücken Sie die Taste [PRE] oder [NEXT], um die Zahl anzupassen. Drücken Sie [MENU], um die Einstellung zu bestätigen |
| LCD-Einstellung | Immer Licht10 Sek20 Sek30 Sek |
| Sprache | Vereinfachtes Chinesisch, Englisch, Traditionelles Chinesisch, Japanisch, Französisch, Deutsch, Italienisch, Holländisch, Portugiesisch, Spanisch, Schwedisch, Tschechisch, Dänisch, Polnisch usw. |
| Ausschalten | Auszeit: stellen Sie die Selbstausschaltzeit ein, wenn der Player angehalten wird und keine Taste gedrückt wird. Die Zeiteinheit ist in Sekunden. 0 bedeutet Ausschalten der Funktion.Ruhezeit: stellen Sie die Selbstausschaltzeit ein, nachdem die letzte Taste gedrückt wird, egal ob der Player aktiv ist oder gestoppt wurde. Die Zeiteinheit ist in Minuten. |
| Wiederholungsmodus | Manuelle Wiederholung; automatische Wiederholung |
| Online-Modus | Multi Drive; nur normal; nur verschlüsselt |
| Speicherinfo. | Überprüfen Sie die Speichergröße und den verbleibenden Speicher |
| Firmware-Version | Zeigen Sie die Firmware-Version des Players an |
| Firmware-Aktualisierung | Die Firmware kann via der Verbindung zum Computer aktualisiert werden |
| Beenden | Vom Untermenü aus beenden |
TEXT
Geben Sie den TEXT-Modus durch Drücken der Modus-Taste ein,
anschließend können Sie den Artikel im Gerät lesen und bearbeiten.
Das Gerät kann den Artikel nur im „txt.“ Format erkennen.
Drücken Sie erneut die Taste [MENU], um zum Untermenü zu gelangen:
| lokaler Ordner | wählen Sie den Ordner, wo das Bild gespeichert ist; |
| Abspieleinstellung | manuelles Abspielen oder automatisches Abspielen (es gibt einen Zeitabstand für das automatische Abspielen von 1-10 Sekunden) |
| Löschen, | Bild löschen; |
| Alle löschen | Alle Bilder löschen |
| beenden | Vom Untermenü aus beenden |
15. Spiel

text_image
Setup
Text
Music
Game
Gelangen Sie durch Drücken der Modus-Taste zur Spielfunktion, anschließend erscheint ein Spiel namens MOVE BOX. Drücken Sie [PRE], [NEXT], [VOL-], [VOL+], um die Bilder zu bewegen.
16. USB-Discfunktion
10) Der Player kann als großes mobiles Speichergerät fungieren, das 1GB/2GB/4GB Speicher unterstützt
11) Bei Windows-Versionen die aktueller als Win98 sind, ist kein Treiber erforderlich, funktioniert beim Computer mit Plug & Play
12) Der Player wird über den USB-Bus betrieben und beginnt mit dem Ladevorgang, wenn er an den Computer angeschlossen wird.
Wenn das Gerät an einen Computer angeschlossen ist, kennzeichnet der Bildschirm während des Betriebs drei verschiedene Modi:
unterbrechen & herunterladen &hochladen

natural_image
Computer monitor displaying a stylized 3D letter 'Z' on its screen (no additional text or symbols)
17. Verschlüsselungs-Discfunktion
Der Benutzer kann die Software verwenden, um Partitionen für die USB-Disc einzustellen. Eine ist die normale Disc, die andere ist die verschlüsselte Disc. (Der Benutzer kann zwei Discsymbole im Computer sehen.) WINDOWS 2000 muss SP4 installiert haben, sonst kann der Benutzer nur ein Discsymbol sehen und er muss [normal only] (nur normal) oder [encrypt only] (nur verschlüsselt) vom [online mode] (Online-Modus) der [system setting] (Systemeinstellung) auswählen. Eine verschlüsselte Disc würde alle privaten Daten ausblenden, andere können ohne ein Passwort nicht auf die Daten zugreifen.

text_image
MP3 Plyer Disk Tool
Format Partition and Encrypt
Partition
Disk total capacity 119 Mb
Setting encrypted disk capacity 22 Mb
Set username and password
Partition and Encrypt
Old username
Old password
New username
New password
New password confirm
Start Close Help

text_image
MP3 Flyer Disk Tool
Format Partition and Encrypt
Partition
Disk total capacity 119 Mb
Setting encrypted disk capacity 29 Mb
Success
Complete setting disk partition and password!
OK
Part
Obl
Dis-password
New username
New password
New password confirm
Start Close Help
Hinweis:
\* Daten in der verschlüsselten Disc sind im Player nicht lesbar.
\*Bei der verschlüsselten Disc muss ein Benutzername und ein Passwort eingegeben werden, wenn an einen Computer angeschlossen wird.
\*Beim Einrichten der Partitionen werden alle Daten gelöscht, sichern Sie bitte im Voraus Ihre Daten. Das Zusammenfügen von Discs würde ebenfalls die Daten löschen.
\*Bitte verlieren Sie nicht den Benutzernamen und das Passwort. Sonst können Sie nicht auf die verschlüsselte Disc zugreifen. Sie können Discs zusammenfügen, um eine verschlüsselte Disc zu beenden, mit dem Risiko, dass Daten in der verschlüsselten Disc beschädigt werden.
18. Nachrüsten
Verwenden Sie das Nachrüstungshilfsprogramm, das in Ihrem Computer installiert ist, um den beschädigten Treiber zu aktualisieren und zu reparieren.
13) Verbinden Sie den Player mit dem Computer
14) Lassen Sie die Software laufen: Start---Programm----MP3 Player Dienstprogramme ---- MP3 Player Nachrüstungshilfsprogramm, klicken Sie auf die Taste [choose new version firmware] (neu Versionsfirmware wählen).

text_image
MP3 Player firmware upgrading tool
Device firmware information
Device name: S1 Mp3 Player
Productor: Wilson Co, Ltd.
Version: 3.0.36
Upgraded firmware information
Device name:
Productor:
Version:
Select new firmware file
Please select firmware file
Begin upgrading
Upgrade log
Close Help
15) Wählen Sie den neuen Firmware-Treiber (von der CD oder von der Webseite des Anbieters). Klicken Sie auf die Taste [Start], um mit dem Nachrüsten zu beginnen.

text_image
MP3 Player firmware upgrading tool
Device firmware information
Upgraded firmware information
열기
찾는 위치(I): Firmware
ITN048K-7.bin
파일 이름(N): ITN048K-7.bin
파일 향식(T): Firmware image file(*.tw;*.bin)
열기(O)
취소
Close Help

text_image
MP3 Player firmware upgrading tool
Device firmware information
Device name: S1 Mp3 Player
Productor: Wilson Co. Ltd.
Version: 3.0.39
Upgraded firmware information
Device name: S1 Mp3 Player
Productor: Wilson Co. Ltd.
Version: 3.0.36
Select new firmware file
Complete firmware upgrading
Begin upgrading
Upgrade bg
mu416k+ v1.0 040918.bjC 2004-09-18 20:11 V3.0.36 Success
Close Help
16) Wenn das Nachrüsten erfolgreich war, kennzeichnet die Anzeige die erfolgreiche Nachrüstung.

text_image
z z z z
C#M
5. Finden Sie das Symbol der Wechselplatte unter [my computer] (mein Computer). Klicken Sie auf die rechte Maustaste, um [format] (formatieren) auszuwählen. Wählen Sie bei der Formatierungsberührungsfläche FAT-System unter [file system] (Dateisystem), klicken Sie anschließend auf die Taste [Start], um die Disc zu formatieren. Hinweis: Beim Formatieren der Disc werden alle Daten gelöscht, sichern Sie bitte alle Daten vor dem Formatieren.
19. Fehlerbehebung
Wenn der Player nicht richtig abspielen konnte, verwenden Sie bitte die Fehlerbehebungshilfe.
| Anzeichen | Lösung |
| Der Player funktioniert nicht | 1. Bitte überprüfen Sie die Akkuspannung2. Vergewissern Sie sich, dass das Gerät eingeschaltet ist3. Bitte überprüfen Sie, ob die Lautstärke auf „0“ eingestellt ist und achten Sie darauf, dass die Kopfhörer richtig angeschlossen sind.4. Beschädigte Musikdaten erzeugen zum Teil Rauschen; achten Sie darauf, dass Dateien im Player sind.5. Wählen Sie das richtige FAT-Dateisystem im Dialog, wenn Sie die Disc formatieren. |
| Der Player kann keine Dateien hoch-/herunterladen; kein Discsymbol im Computer | Bitte überprüfen Sie, ob das USB-Kabel richtig angeschlossen ist.Bitte installieren Sie den CD-Treiber erneut, falls Sie Win98 verwenden |
| Der Player kann nicht aufnehmen | Bitte überprüfen Sie, ob genügend Speicher vorhanden ist.Bitte überprüfen Sie die Akkuspannung. |
| Seltsame Zeichen werden angezeigt | Bitte überprüfen Sie, ob die richtige Sprache ausgewählt wurde. |
| Das FM-Radiosignal ist nicht deutlich | Positionieren Sie die Position zwischen Player und Kopfhörer neu; der Kopfhörer kann als Antenne verwendet werden, um das Signal zu empfangen |
Wenn Sie im Garantiezeitraum andere Schwierigkeiten hatten, wenden Sie sich bitte an unsere Firma, damit wir Ihnen helfen können, das Problem zu beheben.
| Artikel | Spezifikation |
| Übertragungsdatenrate | USB2.0 |
| Unterstützte Dateiformate | Musik: MP1、MP2、MP3、WMA、WAVAufnahme : WAVVideounterstützung: AMV/AVI |
| FM-Frequenz | 87,5 MHz—108 MHz |
| S/N Rate | 85 dB |
| Die maximale Ausgabeleistung | (L) 10 mW+(R) 10 mW (320 hm) |
| Eingebauter Speicher | 1GB-8GB |
| Betriebstemperatur | -5°C~40°C |
| Betriebssystem | WINSE/ME/2000/XP,MacOS10.Linux2.4.2(Nur WIN98 benötigt den CD-Treiber) |
| Zubehör | Bedienungsanleitung, Kopfhörer, USB-Kabel Installations-CD |
20. Spezifikation
Spezifikation und Aussehen können jederzeit ohne Vorankündigung geändert werden.
KUNDENBETREUUNG
Sollten Sie eine Frage haben oder ein Problem mit Ihrem Ricatech-Produkt auftauchen, können Sie den Ricatech-Kundenservice kontaktieren. Sie können uns per Telefon und E-Mail erreichen.
E-Mail
Senden Sie uns für die Kundenbetreuung per E-Mail bitte eine E-Mail an support@ricatech.com. Achten Sie bitte darauf, dass Sie Ihre Modellnummer und die Seriennummer des Produkts angeben, teilen Sie uns außerdem Ihren Namen & Ihre Adresse mit und beschreiben Sie Ihre Frage oder Problem deutlich.
Telefon
Für Kundenbetreuung per Telefon wählen Sie bitte +32 3 3265694. Ein Mitarbeiter aus unserem Serviceteam wird Ihnen gern behilflich sein.
Besuchen Sie für ein vollständiges Verfahren die Webseite von Ricatech unter:www.ricatech.com