TA2618 - Toaster CLATRONIC - Free user manual and instructions
Find the device manual for free TA2618 CLATRONIC in PDF.
| Product type | 2-slot toaster |
| Brand | Clatronic |
| Model | TA2618 |
| Power supply | 230 V ~ 50 Hz |
| Power | Approx. 850 W |
| Dimensions (approx.) | 28 x 16 x 18 cm |
| Weight (approx.) | 1.2 kg |
| Material | Plastic and metal |
| Browning control | Thermostat with 6 levels |
| Functions | Toasting, defrost, emergency stop (STOP) |
| Pastry rack | Removable, attaches on top |
| Crumb tray | Removable, easy to clean |
| Safety | Automatic shut-off, do not immerse, hot surface |
| Cleaning | Exterior with damp cloth, removable crumb tray |
| Warranty | 24 months |
| Included accessories | Pastry rack |
Frequently Asked Questions - TA2618 CLATRONIC
User questions about TA2618 CLATRONIC
0 question about this device. Answer the ones you know or ask your own.
Ask a new question about this device
Download the instructions for your Toaster in PDF format for free! Find your manual TA2618 - CLATRONIC and take your electronic device back in hand. On this page are published all the documents necessary for the use of your device. TA2618 by CLATRONIC.
USER MANUAL TA2618 CLATRONIC
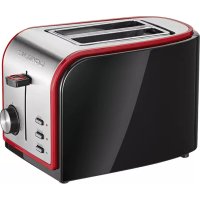
natural_image
White CMTRONC toaster with a flat top and handle, no visible text or symbols on the device itself.TA 2618
Inhalt
Inhoud • Inhold • Sommaire • Indice • Índice • Indice
Contents • Spis treści • Obsah • Tartalom • Содержание
D Übersicht Bedienelemente . . . . . . . . . . . . . . . . . . . . . . . . . . . . . . . . . . . . . . . . . . . . . . . . . . . . . . . . . . . . . . . . . . . . . . . . . . . . . . . . .
General safety instructions
GB
- Before commissioning this device please read the instruction manual carefully.
- Please keep these instructions, the guaranty certificate, the sales receipt and, if possible, the carton with the inner packaging!
- The device is intended exclusively for private and not for commercial use!
- Always remove the plug from the socket whenever the device is not in use, when attaching accessory parts, cleaning the device or whenever a disturbance occurs. Switch off the device beforehand. Pull on the plug, not on the cable.
- In order to protect children from the dangers of electrical appliances, never leave them unsupervised with the device. Consequently, when selecting the location for your device, do so in such a way that children do not have access to the device. Take care to ensure that the cable does not hang down.
- Test the device and the cable regularly for damage. If there is damage of any kind, the device should not be used.
- Do not repair the device yourself, but rather consult an authorised expert.
- For safety reasons a broken or damaged mains lead may only be replaced by an equivalent lead from the manufacturer, our customer service department or a similar qualified person.
- Keep the device and the cable away from heat, direct sunlight, moisture, sharp edges and suchlike.
- Never use the device unsupervised! Switch off the device whenever you are not using it, even if this is only for a moment.
- Use only original accessories.
- Do not use the device outdoors ^* .
- Under no circumstances must the device be placed in water or other liquid, or come into contact with such ^ . Do not use the device with wet or moist hands ^ .
- Should the device become moist or wet, remove the mains plug from the socket immediately ^* . Do not reach into the water.
- Use the device only for the intended purpose.
*) Please note the following „Special safety instructions...“.
Special safety information for this unit
- Always watch the unit while it is being used! (Very dry bread can start to burn when being toasted!)
- The metal parts get hot. DANGER OF BURNS! Only hold it by the handles.
- Do not poke into the grilling area with knives or forks, etc.
- Do not set up the unit next to inflammable objects (e.g. curtains, wood, etc.)
- Do not lay the food to be toasted directly on the toaster, but always lift up the toasting top before toasting.
GB
Before Initial Use
In order to remove the protective layer on the heating coil you should operate the machine approximately three times when it is empty. Please select the maximum level of browning. Any smoke or smells produced during this procedure are normal. Please ensure sufficient ventilation.
Operation
Overview of the Components
1 Toast slot 5 STOP key
2 Slide lever 6 Crumble tray
3 Browning level selector 7 Bread roll accessory
4 Thawing function 8 Bread roll accessory locking device
- Only connect the unit to a properly installed and earthed power socket (230 volts, 50 Hz).
- Set the desired level of toasting with the selector (3). In case of doubt, choose another setting and repeat the procedure.
- Insert 1 slice of bread per toasting slot (1) and push down the slide with the lever (2) until it clicks into place.
- The unit starts to toast and switches off automatically at the end. The slide pops up automatically.
- To mount the bread roll accessory the locking device for the toasting accessory (8) on the upper right hand of the appliance must be pushed in. To resume the original position pull it out.
- In order to interrupt the toasting in advance, press the STOP button (5).
- Let the appliance cool down before putting it away or cleaning it.
Thawing Function
The thawing function is used to preheat the bread and to toast it later on thus increasing the toasting time.
Insert the slice of bread in the toast slot (1) (1 slice for each slot). Turn the browning level selector (3) to the desired browning level and pull down the lever (2) until it snaps into place. Press the thawing function (4). When the toasting is over, the slice pops up. To interrupt the toasting beforehand press the STOP key (5).
Cleaning
- Pull the mains plug out of the mains socket before you clean the unit and allow the unit to cool down.
- Only use a slightly damp cloth to clean the outside of the unit.
- Do not use abrasive or aggressive cleaners.
- Pull the crumb tray (6) out, remove any bits of bread and put the tray back in.
This appliance conforms with the CE directives for radio interference suppression and low-voltage safety and has been built to meet current safety requirements. Subject to technical changes without prior notice!
GB
Warranty
We undertake to guarantee the appliance sold by our company for 24 months as of the date of purchase (cash receipt).
During the life of the warranty we shall provide for the repair or replacement of the appliance owing to material or manufacturing defects absolutely free of charge.
Proof for the warranty is provided by the purchase document. The replacement and repair will not be performed free of charge without this proof of purchase.
Should the warranty be valid, please consign the complete appliance in its original packing together with the cash receipt to your local dealer.
You are not entitled to the replacement of the appliance owing to broken glass parts and faulty accessories. However, said parts will be replaced free of charge. In this case only the faulty accessory needs to be ordered without sending back the whole appliance!
The cleaning, servicing and replacement of wear parts are not covered by this warranty and hence are to be paid for.
The warranty is terminated in case of handling on the part of Third parties.
After the warranty
Once the warranty has expired, repairs can be carried out by specialized technicians or repair services against the payment of the service.