DO8139 - Fan DOMO - Free user manual and instructions
Find the device manual for free DO8139 DOMO in PDF.
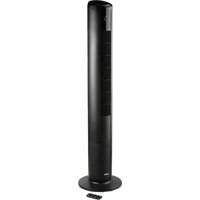
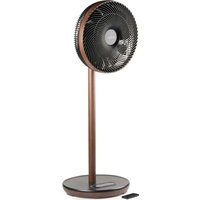
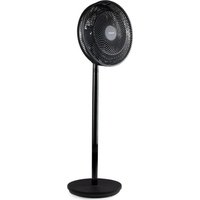
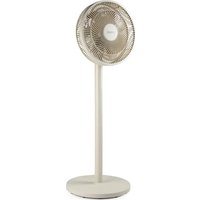
| Product type | Pedestal fan |
| Brand | DOMO |
| Model | DO8139 |
| Number of speeds | 3 (low, medium, high) |
| Control | Buttons on control panel |
| Oscillation | Yes, with oscillation button |
| Adjustable tilt | Yes, manual |
| Power supply | Mains 220-240 V ~ 50/60 Hz |
| Power consumption | 45 W (estimated) |
| Warranty | 2 years |
| Blade material | Plastic |
| Grille type | Double grille with fixing clip |
| Mounting | On stand, with fixing screw |
| Maintenance | Damp cloth and mild detergent |
| Safety | Do not immerse; do not use with external timer |
| Spare parts | Available on the Domo webshop |
| Use | Household |
| Recycling | Compliant with WEEE directive |
Frequently Asked Questions - DO8139 DOMO
User questions about DO8139 DOMO
0 question about this device. Answer the ones you know or ask your own.
Ask a new question about this device
Download the instructions for your Fan in PDF format for free! Find your manual DO8139 - DOMO and take your electronic device back in hand. On this page are published all the documents necessary for the use of your device. DO8139 by DOMO.
USER MANUAL DO8139 DOMO
natural_image
Black and white photo of a standard office desk fan with mesh grille and 'DOMO' logo on the front (no additional text or symbols)DO8139
PRODUCT OF LINEA 2000
GARANTIEVOORWAARDEN
CONDITIONS DE GARANTIE
This appliance has a two year warranty period. During this period the manufacturer is responsible for any failures that are the direct result of construction failure. When these failures occur the appliance will be repaired or replaced if necessary. The warranty will not be valid when the damage to the appliance is caused by wrong use, not following the instructions or repairs executed by a third party. The guarantee is issued with the original till receipt. All parts, which are subject to wear, are excluded from the warranty.
If your device breaks down within the 2-year warranty period, you can return the device together with your receipt to the shop where you purchased it.
CONDICIONES DE GARANTÍA
RECYCLAGE-INFORMATIE
natural_image
Recycling symbol composed of three chasing arrows forming a triangle (no text or labels)RECYCLING INFORMATIONEN
RECYCLING INFORMATION
This symbol on the product or on its packaging indicates that this product may not be treated as household waste. Instead it must be brought to the applicable collection point for recycling of electrical and electronic equipment. By ensuring this product is disposed of correctly, you will help prevent potential negative consequences for the environment and human health, which could otherwise be caused by inappropriate waste handling of this product. For more detailed information about recycling of this product, please contact your local city office, your household waste disposal service or the shop where you purchased the product. The packaging is recyclable. Please treat the packaging ecologically.
natural_image
Symbol of a trash bin crossed with no text or numbers, representing waste sorting or disposal (no text present)INFORMACE O RECYKLACI ODPADU
natural_image
Recycling symbol composed of three chasing arrows forming a triangle (no text or labels)INFORMÁCIE O RECYKLÁCIU ODPADU
From now on, accessories and parts of Domo appliances can also be ordered online from the Domo webshop*:
http://webshop.domo-elektro.be
You can reach the webshop through the Domo website as well: www.domo-elektro.be. The accessories and parts can also still be obtained at the store where you bought the appliance.
CZ
If the power supply cord is damaged, it must be replaced by the manufacturer, its service agent or a similarly qualified person in order to avoid a hazard.
text_image
1 6 3 2 4 6 5 7 8 12 10 9 11 ded from www.vandeBEVESTIGING VAN DE VOET EN HET MOTORGEDEELTE
natural_image
Cross-sectional diagram of a mechanical component with labeled parts (no text or symbols beyond label)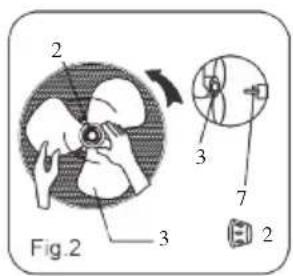
text_image
2 Fig.2 3 3 7 2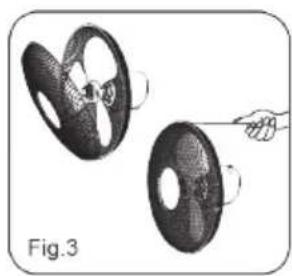
natural_image
Illustration of two mechanical components with a hand holding a pin, labeled Fig.3 (no text or symbols on the components themselves)GEBRUIK
text_image
Exploded view diagram of a mechanical device with numbered parts for identificationASSEMBLAGE DU PIED ET DU MOTEUR
natural_image
Cross-sectional diagram of a device showing internal components and part number 4 (no text or symbols present)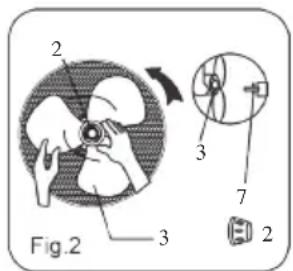
text_image
2 3 Fig.2 3 7 2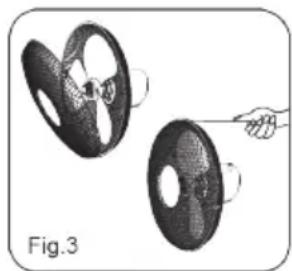
natural_image
Illustration of a hand holding a circular object with a head, next to a larger circular object (no text or symbols)UTILISATION
natural_image
Cross-sectional diagram of a mechanical component with labeled parts (no text or symbols beyond label)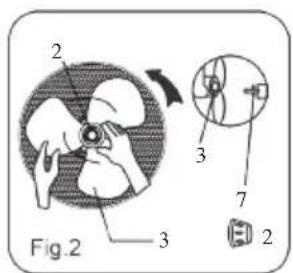
text_image
2 3 Fig.2 3 7 2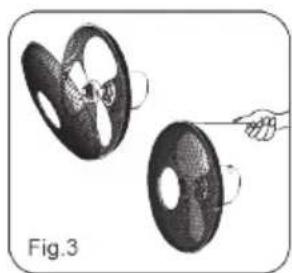
natural_image
Illustration of a car steering wheel with a hand pulling the wheel (no text or symbols)GEBRAUCH
This appliance may be used by children from the age of 8 and up, and also by persons with a physical or sensory limitation, as well as mentally limited persons or persons with a lack of experience and knowledge. But only on the condition that these persons have received the necessary instructions on how to use this appliance in a safe way and know the dangers that can occur by using this appliance.
Children cannot be allowed to play with the appliance. Maintenance and cleaning of the appliance may not be done by children, unless they are older than 8 years old and are under supervision. Keep the appliance out of reach of children younger than 8 years old.
This appliance is suitable to be used in a household environment and in similar surroundings such as:
- Kitchen for personnel of shops, offices or other similar professional surroundings
- Farms
- Hotel or motel rooms and other surroundings with a residential character
- Guest rooms or similar
Attention: This appliance cannot be used with an external timer or a separate remote control.
- Read all instructions before use.
- Before use, check if the voltage stated on the appliance corresponds with the voltage of the power net at your home.
- Do not let the cord hang on a hot surface or on the edge of a table or counter top.
- Never use the appliance when the cord or plug is damaged, after malfunction or when the appliance itself is damaged. In that case, take the appliance to the nearest qualified service center for check-up and repair.
- Close supervision is necessary when the appliance is used near or by children.
- The use of accessories that are not recommended or sold by the manufacturer can cause fire, electrical shock or injuries.
- Unplug the appliance when it is not in use, before assembling or disassembling any parts and before cleaning the appliance. Put all buttons and knobs into the ‘off’ position and unplug the appliance by grasping the plug. Never unplug by pulling the cord.
- Do not leave a working appliance unattended.
- Never place this appliance near a gas stove or electrical stove or in a place where it may come into contact with a warm appliance.
- Do not use the appliance outdoors.
- Only use the appliance for its intended use.
-
Always use the appliance on a steady, dry and level surface.
-
Only use the appliance for domestic use. The manufacturer can not be held responsible for accidents that result from improper use of the appliance or not following the instructions described in this manual.
- All repairs should be carried out by the manufacturer or its aftersales service.
- Never immerse the appliance, the cord or the plug in water or any other liquid.
- Make sure that children do not touch the cord or appliance.
- Keep the cord away from sharp edges and hot parts or other heat sources.
- Before use, remove all packaging materials and any promotional stickers.
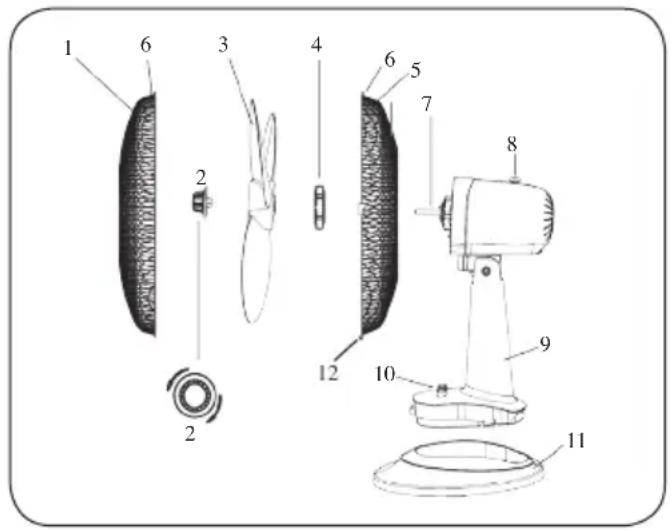
PARTS
- Front grill
- Spinner
- Fan blades
- Plastic screw
- Rear grill
- Screw for fastening rear grill
- Motor drive
- Oscillation button
- Motor
- Control Panel
- Base
- Attaching clip
text_image
Exploded view diagram of a mechanical device with numbered parts for identificationFASTENING THE BASE AND THE MOTOR
Remove the screw from the base of the fan.
Place the motor on the base and push it down until it clicks.
Use the screw to fasten the motor and the base to each other.
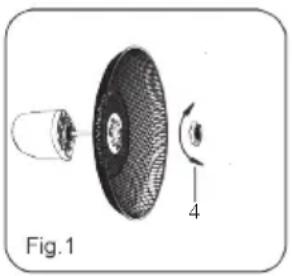
FASTENING THE GRILL AND THE FAN BLADES
Remove the spinner from the motor drive (or remove it from the packaging). Loosen the plastic screw from the motor drive. Position the grill behind the motor drive and use the plastic screw to fasten the grill. (Fig. 1)
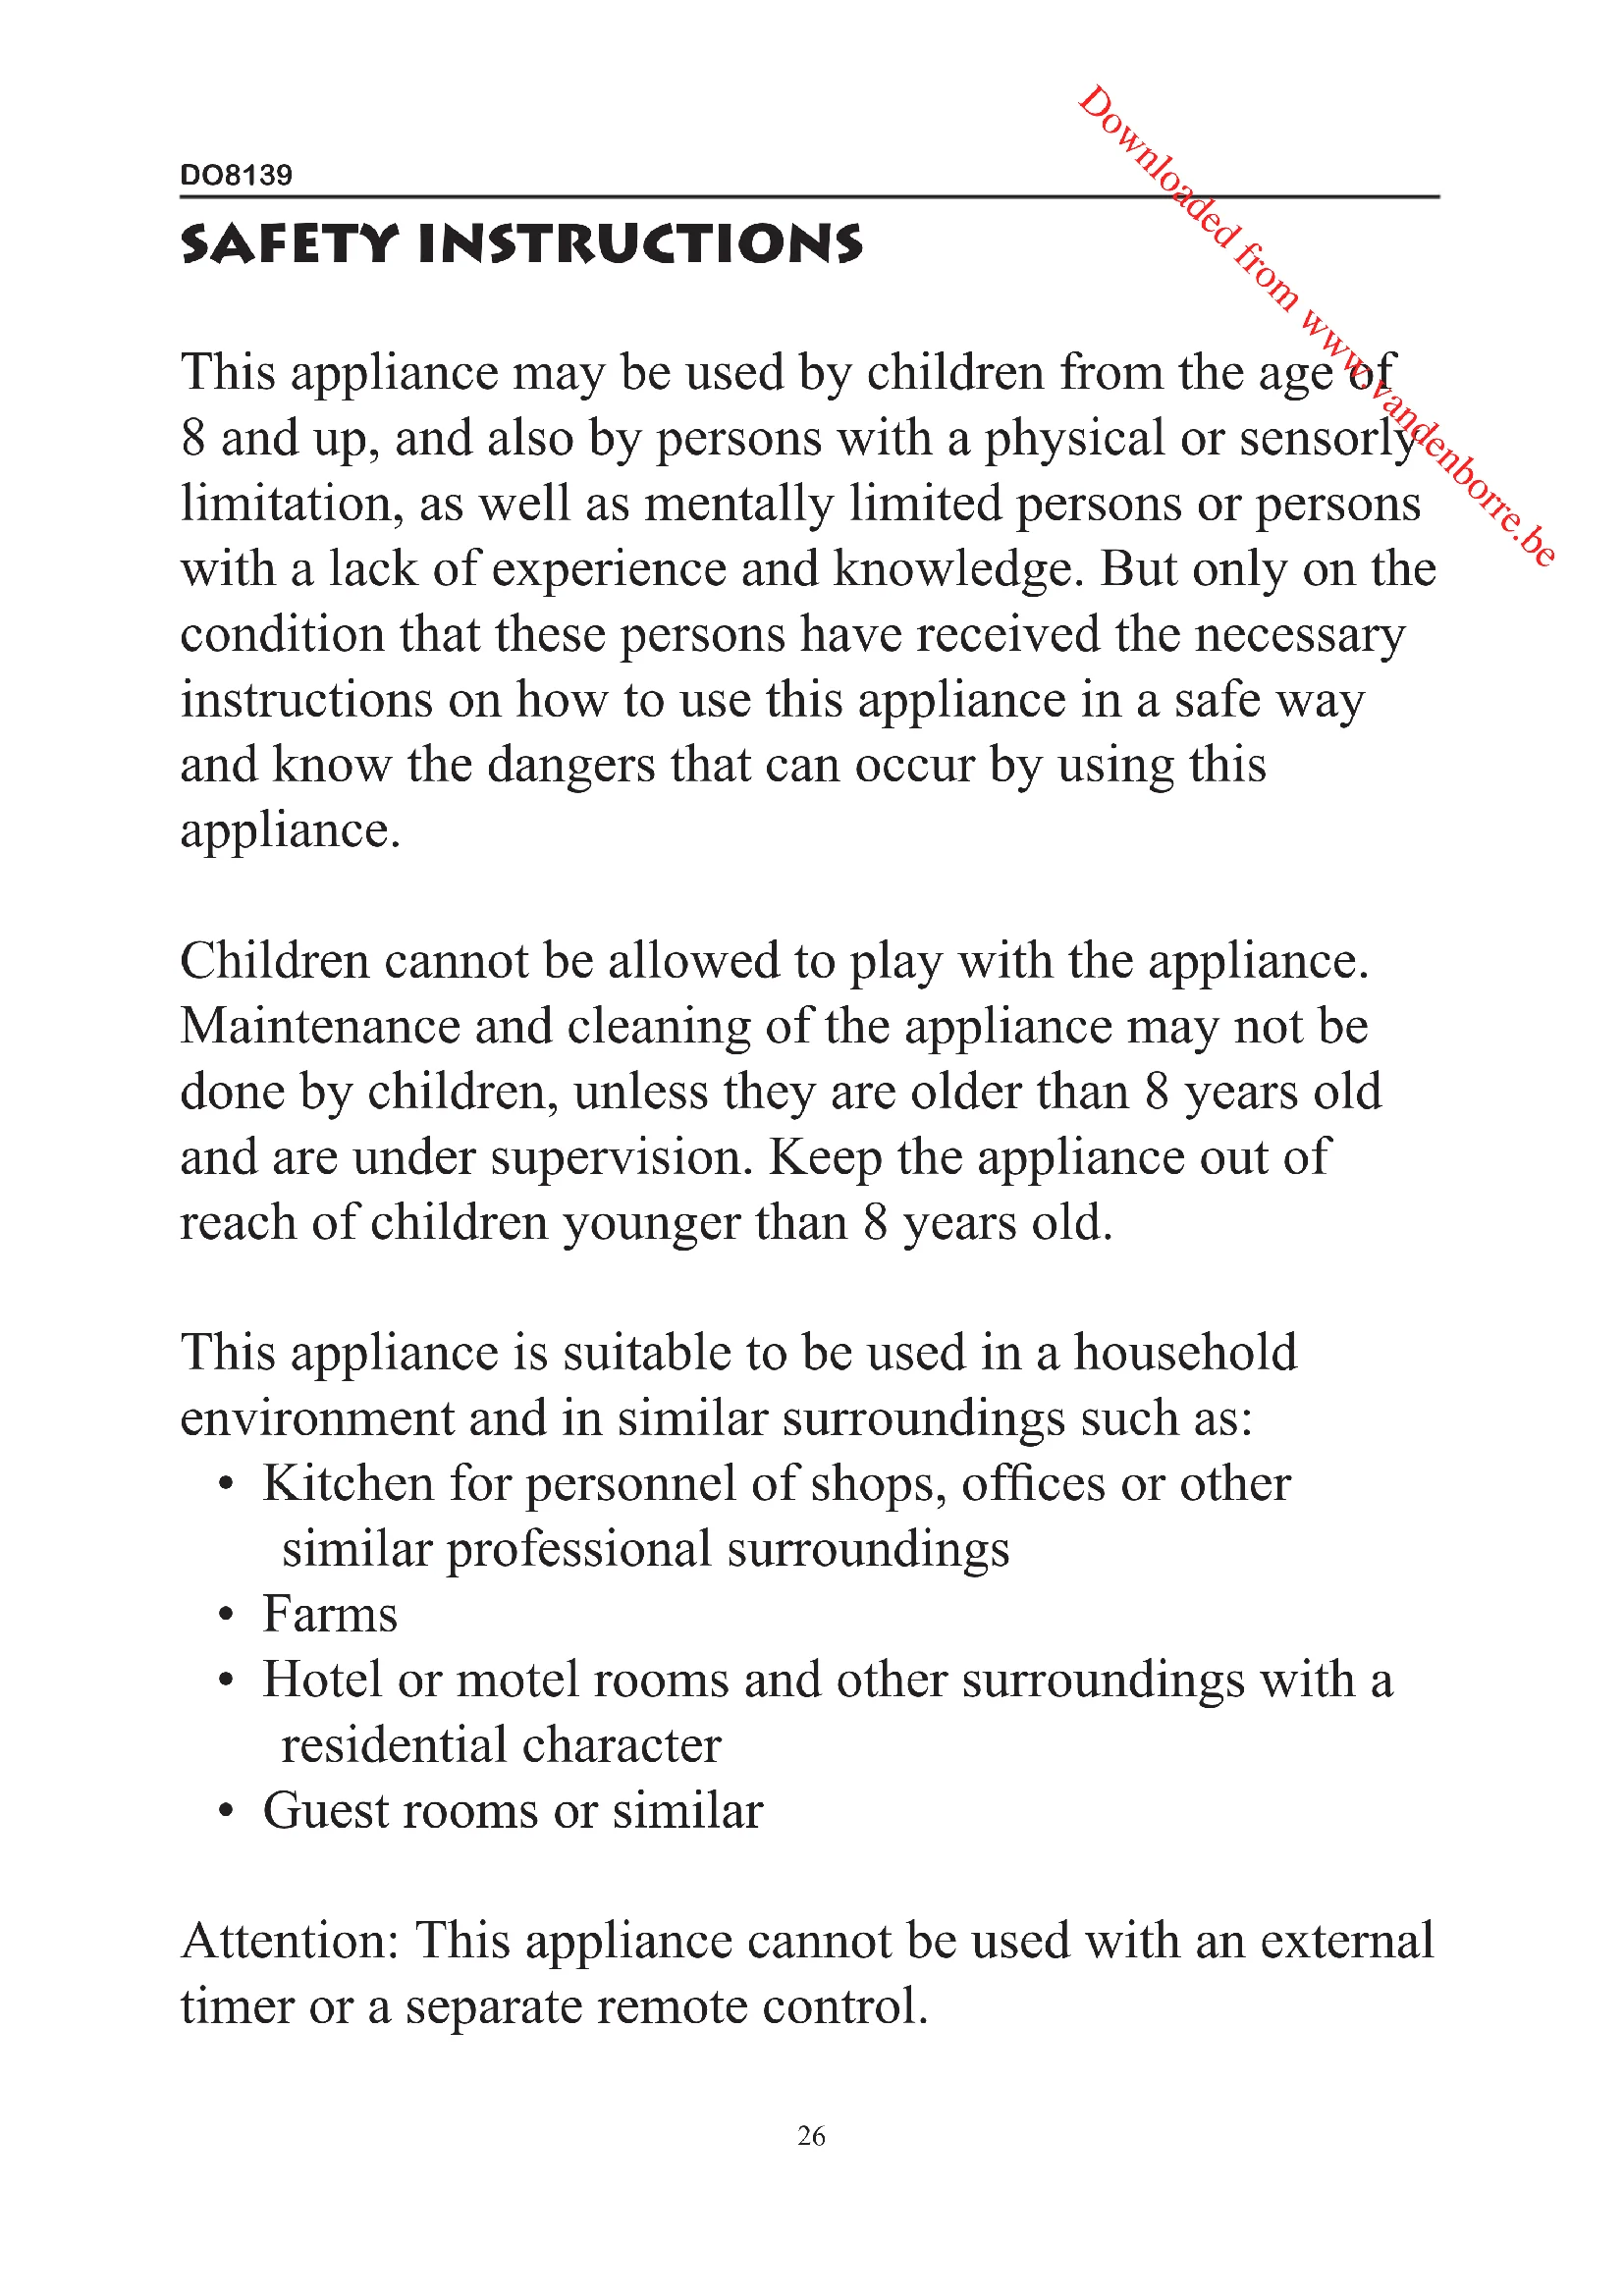
Place the fan blades on the motor drive. Make sure the pin on the motor drive fits perfectly behind the fan blades (Fig. 2). Use the spinner to fasten the fan blades on the motor drive.
Position the front grill on the rear grill and fasten them together with the help of the attaching clip. Finally, use the screw at the top of the rear grill to fasten both halves of the grill together firmly. (Fig. 3)
natural_image
Cross-sectional diagram of a mechanical component, showing internal structure and part number 4 (no text or symbols present)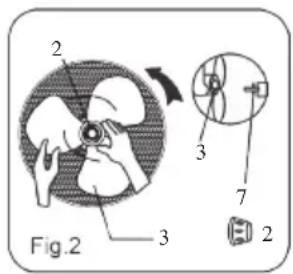
text_image
Fig.2 2 3 3 7 2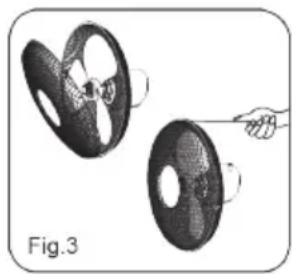
natural_image
Illustration of two mechanical components with a hand holding a pointer, labeled Fig.3 (no text or symbols on the components themselves)INSTRUCTIONS
Speed regulation with the help of the 4 buttons on the control panel.
0: off
1: low speed
2 : medium speed
3: high speed
To allow the fan to oscillate, push in the oscillation button. To stop the fan from oscillating, pull the button up.
To direct the ventilation up or down, push down or pull up gently on the grill to adjust the direction up or down.
MAINTENANCE
This fan requires very little maintenance. Never try to repair the fan yourself. If it is defective, have it checked and/or repaired by a qualified person.
Prior to assembling the fan or cleaning it, remove the plug from the outlet.
Keep the rear grill free of dust and other substances in order to allow free circulation of the air around the motor. Do not disassemble the fan to remove dust from the motor.
You may clean the exterior of the machine with a soft moist cloth and a mild detergent. Carefully dry the machine afterwards.
Never use corrosive or abrasive products to clean the machine.
Make sure that no water gets into the motor of the machine.
PRECAUCIONES IMPORTANTES
text_image
Exploded view diagram of a mechanical device with numbered parts for identificationnatural_image
Cross-sectional diagram of a mechanical component with labeled parts (no text or symbols beyond label)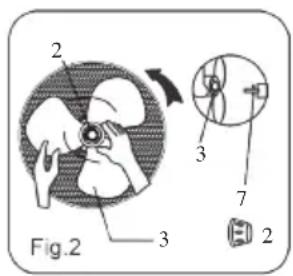
text_image
Fig.2 2 3 3 7 2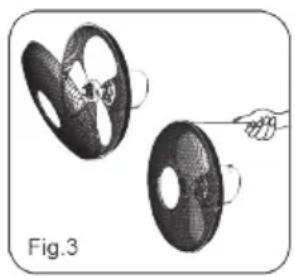
natural_image
Illustration of two mechanical components with a hand holding a pin, labeled Fig.3 (no text or symbols on the components themselves)Uso
text_image
Exploded diagram of a mechanical device with numbered parts for identificationSESTAVENÍ PODSTAVCE A MOTORU
natural_image
Diagram of a device showing internal components with labeled parts (no text or symbols beyond label)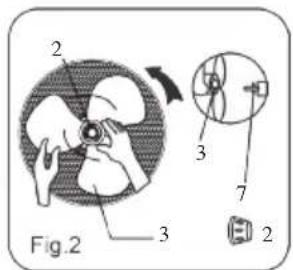
text_image
2 3 Fig.2 3 7 2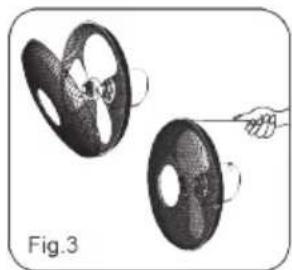
natural_image
Illustration of two mechanical components with a hand pointing to them, labeled Fig.3 (no text or symbols on the components themselves)NÁVOD POUŽITÍ
text_image
Exploded view diagram of a mechanical device with numbered parts for identificationZOSTAVENIE PODSTAVCA A MOTORA
natural_image
Cross-sectional diagram of a mechanical component with labeled parts (no text or symbols beyond label)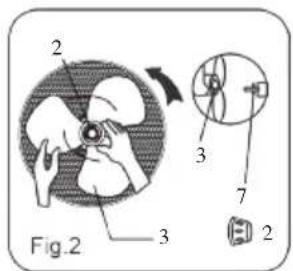
text_image
2 3 Fig.2 3 7 2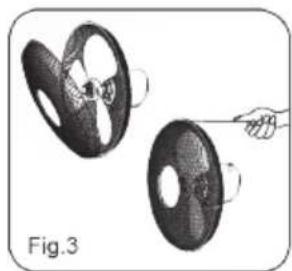
natural_image
Illustration of a car steering wheel being held by a hand, labeled Fig.3 (no text or symbols on the diagram itself)NÁVOD POUŽITIE
Ventilátor pripojte k sieti
Downloaded from www.vandenborre.be
DOMOWebshop
BESTEL
de originele Domo-accessoires en -onderdelen online via:
COMMANDEZ
natural_image
Two cylindrical milk dropers on a white surface, no text or symbols visible
natural_image
Three product photos: cardboard sheets, a clear glass coffee maker, and a white rectangular container (no text or symbols visible)of scan hier:
ou scannez ici:
oder hier scannen:
or scan here: