6643 - Sewing machine JOCCA - Free user manual and instructions
Find the device manual for free 6643 JOCCA in PDF.
User questions about 6643 JOCCA
0 question about this device. Answer the ones you know or ask your own.
Ask a new question about this device
Download the instructions for your Sewing machine in PDF format for free! Find your manual 6643 - JOCCA and take your electronic device back in hand. On this page are published all the documents necessary for the use of your device. 6643 by JOCCA.
USER MANUAL 6643 JOCCA
natural_image
White and purple sewing machine with JOCCA branding (no visible text or symbols on body)ES Manual de instrucciones
P Manual de instruções
E Instructions manual
F Manuel d'instructions
JOCCA
QUALIMAX INTERNATIONAL Tel. 902 42 00 00
DESCRIPCIÓN/DESCRIÇÃO/DESCRIPTION/DESCRIPTION
text_image
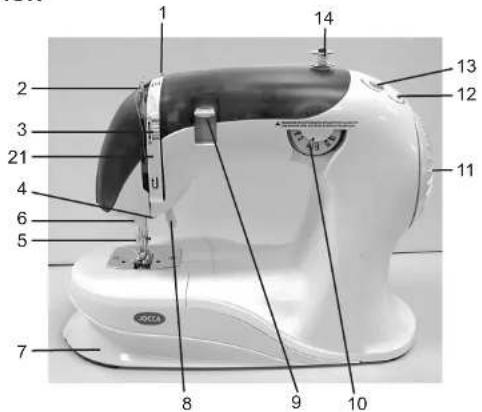
1 2 3 4 5 6 7 8 9 10 11 12 13 14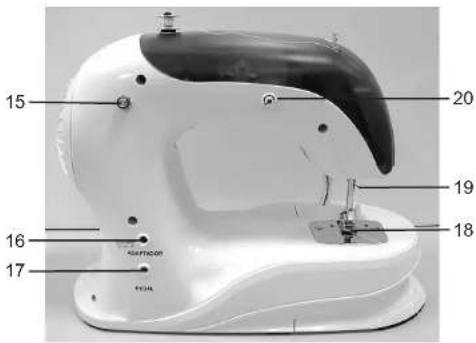
text_image
15 20 19 18 16 17 AMFICOR TOMA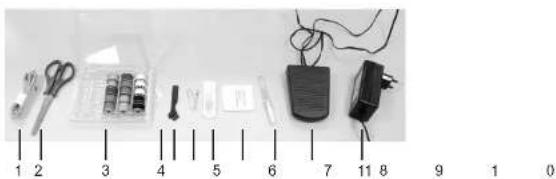
text_image
1 2 3 4 5 6 7 8 9 1 0 11 8ES-3
MÁQUINA DE COSER
natural_image
Close-up of a sewing machine needle stitching on a workbench, showing mechanical components and a rotation arrow (no text or symbols visible)natural_image
Close-up of a sewing machine needle being adjusted, showing the needle being inserted (no text or symbols visible)6-ES ES-7
CÓMO SACAR EL BRAZO LIBRE
natural_image
Close-up of a sewing machine needle with a hand operating the base (no visible text or symbols)

natural_image
Close-up of a hand holding a small electronic component with wires, possibly a thin wire or cable (no visible text or symbols)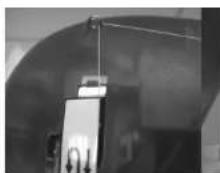
natural_image
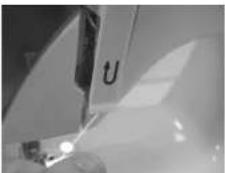
Close-up of a sewing machine needle with a U-shaped tool inserted (no visible text or symbols)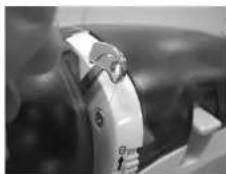

CÓMO CAMBIAR LA BOBINA DEL HILO INFERIOR
natural_image
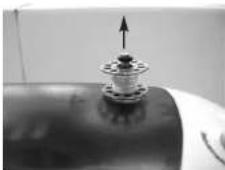
Close-up of a white mechanical device with a black handle and arrow indicating direction (no visible text or symbols)
natural_image
Close-up of a mechanical device with internal components and a circular component (no visible text or symbols)
natural_image
Close-up of a hand inserting a small mechanical component into a housing (no visible text or symbols)8-ES ES-9
natural_image
Close-up of a hand holding a metallic mechanical component (no visible text or symbols)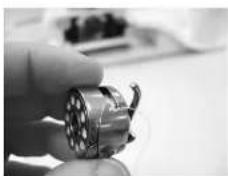
natural_image
Close-up of a hand holding a small metallic cylindrical component (no visible text or symbols)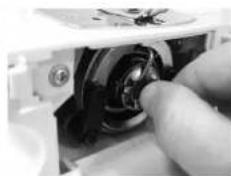
natural_image
Close-up of a hand turning a button into a device (no visible text or symbols)CÓMO LEVANTAR EL HILO INFERIOR
natural_image
Close-up of a sewing machine needle with a paperclip and arrow indicating fabric direction (no text or symbols visible)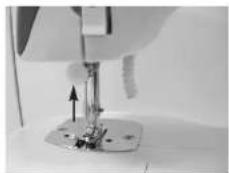
natural_image
Close-up of a sewing machine needle and foot (no visible text or symbols)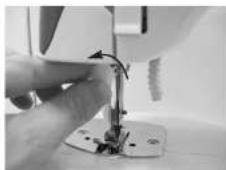
natural_image
Close-up of a hand operating a sewing machine needle with a small mechanical component (no visible text or symbols)
natural_image
Close-up of a mechanical component with an arrow pointing to a shaft (no visible text or symbols)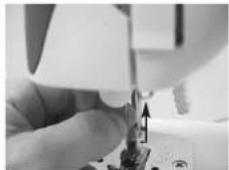
natural_image
Close-up of a hand using a sewing machine to press or install a component (no visible text or symbols)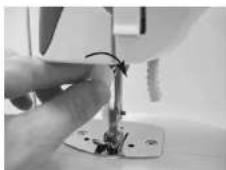
natural_image
Close-up of a hand operating a sewing machine needle (no visible text or symbols)10-ES ES-11
natural_image
Close-up of a hand holding a mechanical component with a black arrow pointing to a section (no visible text or symbols)CÓMO COSER BOTONES
natural_image
Close-up of a sewing machine needle stitching on a workbench, showing mechanical components and a rotation arrow (no text or symbols visible)natural_image
Close-up of a sewing machine needle being adjusted, showing the mechanism and stitching (no text or symbols visible)COMO MONTAR O BRAÇO LIVRE
natural_image
Close-up of a white electronic device with a black handle and a small screen, showing a downward arrow (no visible text or symbols)COMO INTRODUZIR A LINHA SUPERIOR
natural_image
Close-up of a sewing machine needle stitching fabric, showing needle and base (no text or symbols visible)
18-P P-19
COMO TROCAR A BOBINA DA LINHA INFERIOR
natural_image
Close-up of a white electronic device with a black lever and arrow indicator (no visible text or symbols)
natural_image
Close-up of a white electronic device with a circular component and mechanical parts, no visible text or symbols.
natural_image
Close-up of a hand holding a mechanical component with a black arrow pointing to it (no visible text or symbols)
COMO LEVANTAR A LINHA INFERIOR
natural_image
Close-up of a sewing machine needle with a curved arrow indicating motion (no text or symbols visible)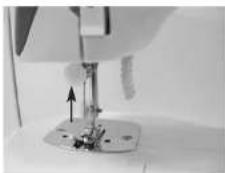
natural_image
Close-up of a sewing machine needle and foot (no visible text or symbols)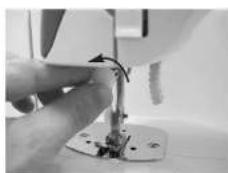
natural_image
Close-up of a hand operating a sewing machine needle on a workbench (no visible text or symbols)
natural_image
Close-up of a mechanical component with an arrow pointing to a cylindrical feature (no visible text or symbols)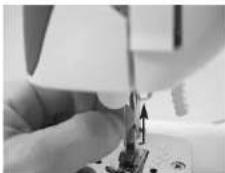
natural_image
Close-up of a hand using a sewing machine to adjust or install a small electronic component (no visible text or symbols)
natural_image
Close-up of a hand using a sewing machine to press or install a component (no visible text or symbols)SELECÇÃO MODO PONTO
natural_image
Close-up of a hand holding a small black object against a metallic background (no visible text or symbols)COMO COSER BOTÕES
JOCCA thanks you for the trust placed in the purchase of our product and we are certain that you will always be satisfied with any of our products.
PRODUCT DESCRIPTION
- Guide 1.
- Bobbin winding button.
- Thread pulling bar.
- Bobbin spindle.
- Thread tension dial. 15.Winding press dial.
- Guide 2. 16.DC jack.
- Presser foot adjustment screw. 17. Foot controller socket.
- Presser needle adjustment screw. 18.Holding cloth.
- Extractable arm. 19. Guide 3.
- Presser foot lifting lever. 20.Bobbin threader.
- Reverse button sewing.
- Tension disc.
- Stitch selector.
- Handwheel.
12.ON/OFF pilot light.
ACCESSORIES INCLUDED
- Tape measure.
- Buttonhole foot plate.
2.Scissors. 8.Button needle plate.
3.15 assorted colour bobbins. 9.Buttonhole cutter.
4.Thread. 10.Pedal. - Brush.
-
Current adaptor.
-
4 spare needles.
SAFETY WARNINGS
-These instructions are very important. Please read this instructions manual carefully before using the appliance and keep it at hand to refer to it at any time.
-JOCCA declines any responsibility for the improper use of the product, or any other use that is not described in this manual.
-Before using the product for the first time, unpack the product and check that it is in perfect conditions. If not, do not use the appliance and contact JOCCA, as the guarantee covers any damage from origin or manufacturing defects.
-This product is only indicated for domestic use. Do not use the appliance outdoors. Never leave the appliance exposed to climatic agents such as rain, snow, sun, etc...
-This appliance is intended to be used only by adults. Do not allow people not accustomed to this kind of appliances, handicapped people or children to use this item.
-Before connecting the appliance to the mains, check that the cable and plug are in perfect conditions. Also check that the voltage indicated on the appliance is valid
26-E
for your electrical installation.
-If you detect that the power supply cable, the plug or the adaptor are damaged or have fallen into water or any other liquid, do not use the appliance, replace the cable, the plug, or the adaptor. Go directly to the authorised JOCCA technical service where they will replace it correctly for you.
-Never leave the appliance cable hanging.
-Do not immerse the appliance or any part of it in water or any other liquid.
-Do not pull the cable to unplug the appliance from the mains, always pull from the plug.
-If your appliance has been dropped or fallen into water or any other liquid do not use it or try to repair it. Take it to the JOCCA technical service.
-For your safety and for the appliance to work correctly, always use JOCCA spare parts and accessories.
-We advise against the use of adapters, plugs and/or extension cables. If these elements are essential, only use single or multiple adapters and extension cables that respect the applicable safety standards, making sure that the power limit indicated on the adapter and/or the extension cable is not surpassed.
-Do not move the appliance when it is in use.
-This machine should be used on a dry horizontal flat surface.
-Completely un roll the power cable to avoid overheating.
-This appliance will be completely switched off when it is unplugged from the mains.
-When you use this machine pay a lot attention to the needle and hand wheel, never push the bobbin or needle.
WARNING: Switch the machine off and unplug the adapter in the following cases:
- Whilst you are carrying out activities such as threading, changing needle or changing bobbin.
- Whilst you are changing parts or preparing the fabric.
- If you finish using it.
- During a cut in electricity supply.
INSTRUCTIONS FOR USE
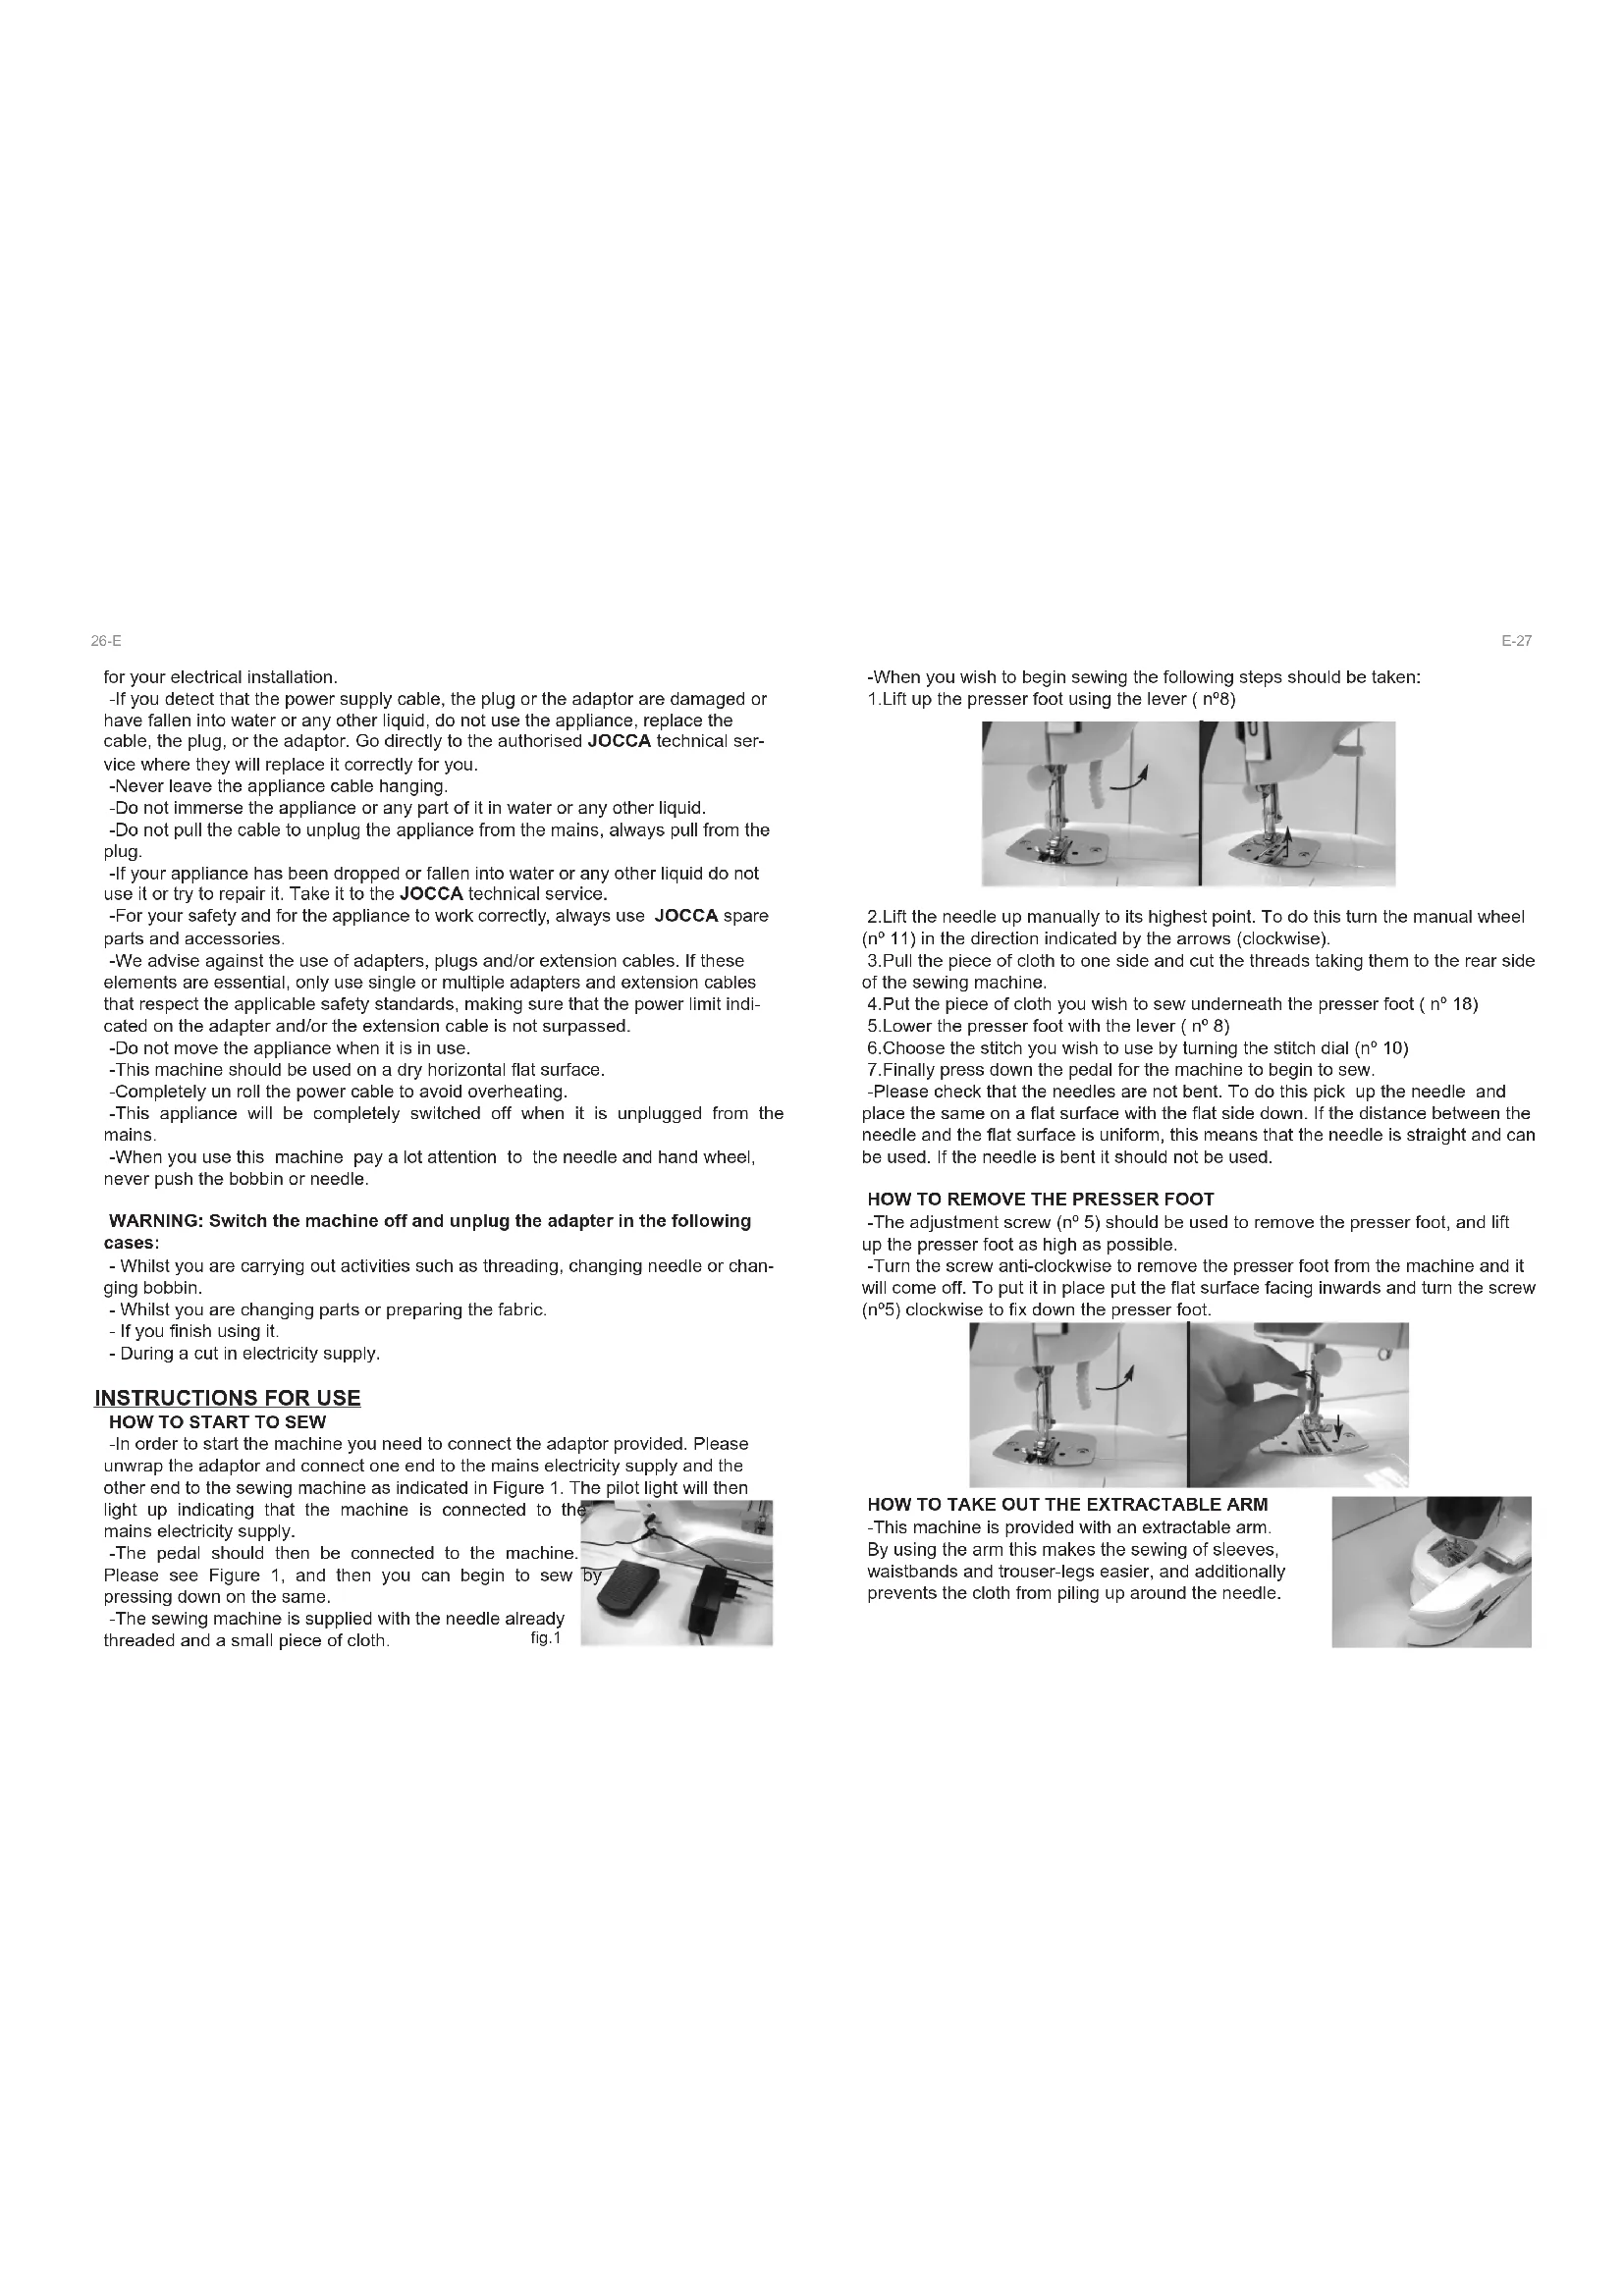
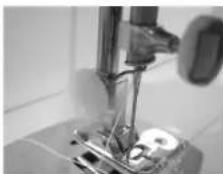
HOW TO START TO SEW
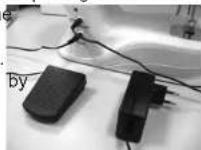
-In order to start the machine you need to connect the adaptor provided. Please unwrap the adaptor and connect one end to the mains electricity supply and the other end to the sewing machine as indicated in Figure 1. The pilot light will then
light up indicating that the machine is connected to the mains electricity supply.
-The pedal should then be connected to the machine. Please see Figure 1, and then you can begin to sew pressing down on the same.
-The sewing machine is supplied with the needle already threaded and a small piece of cloth. fig.1
E-27
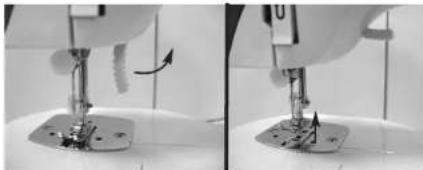
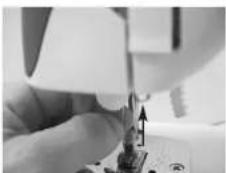
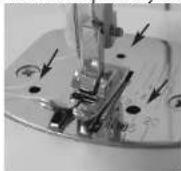
-When you wish to begin sewing the following steps should be taken: 1. Lift up the presser foot using the lever ( n°8)
natural_image
Two-panel black-and-white photo showing a sewing machine needle being adjusted, with no visible text or symbols.-
Lift the needle up manually to its highest point. To do this turn the manual wheel (n° 11) in the direction indicated by the arrows (clockwise).
-
Pull the piece of cloth to one side and cut the threads taking them to the rear side of the sewing machine.
-
Put the piece of cloth you wish to sew underneath the presser foot ( n° 18)
-
Lower the presser foot with the lever ( n° 8)
-
Choose the stitch you wish to use by turning the stitch dial (n° 10)
-
Finally press down the pedal for the machine to begin to sew.
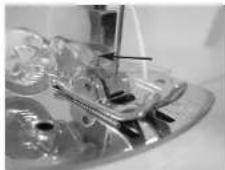
-Please check that the needles are not bent. To do this pick up the needle and place the same on a flat surface with the flat side down. If the distance between the needle and the flat surface is uniform, this means that the needle is straight and can be used. If the needle is bent it should not be used.
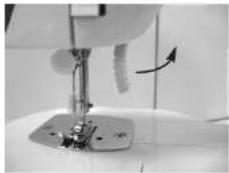
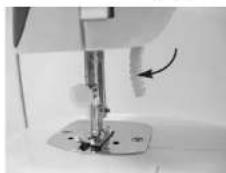
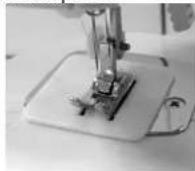
HOW TO REMOVE THE PRESSER FOOT
-The adjustment screw (n° 5) should be used to remove the presser foot, and lift up the presser foot as high as possible.
-Turn the screw anti-clockwise to remove the presser foot from the machine and it will come off. To put it in place put the flat surface facing inwards and turn the screw (n°5) clockwise to fix down the presser foot.
natural_image
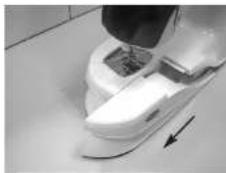
Close-up of a sewing machine needle being adjusted, showing the needle being inserted (no text or symbols visible)HOW TO TAKE OUT THE EXTRACTABLE ARM
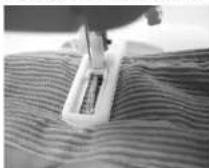
-This machine is provided with an extractable arm. By using the arm this makes the sewing of sleeves, waistbands and trouser-legs easier, and additionally prevents the cloth from piling up around the needle.
28-E E-29
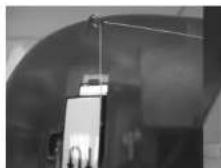
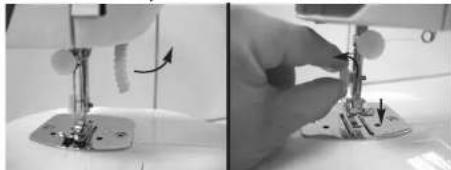
HOW TO THREAD THE UPPER THREAD
-Before any threading operation please ensure that the machine is disconnected from the mains electricity supply.
-To start to thread the upper thread please take the following steps:
-
Lift up the presser foot by means of the lever (n° 8)
-
Lift the needle up manually to its highest point. To do this turn the manual wheel (n° 11) in the direction indicated by the arrows (clockwise).
-
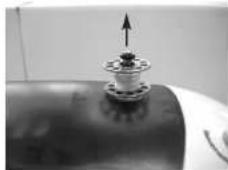
Put in place the bobbin that you wish to use in the bobbin slot (n° 14). If you wish to use larger bobbins pull up the bobbing slot and this will enlarge in order to hold larger bobbins.
-
One the bobbin is in place, pull on the end of the thread and thread it through guide 1 (n°1).
-
Thread the thread through as indicated by the arrows. Firstly under the right hand side of the tension disc ( n^o 21) and when reaching the rim lift the thread up through the left hand side of the tension disc ( n^o 21) until reaching the shuttle lever ( n^o 2) and hook up the thread to the same.
-
Then thread downwards until reaching guide 2 (n° 4)
-
Finally thread the needle. The needle threader can be used for this purpose and the needle must always be threaded from front to back.
Please see the illustration for threading the needle.
natural_image
Close-up of a sewing machine needle and foot, showing mechanical components and a curved arrow indicating motion (no text or symbols visible)
natural_image
Close-up of a metallic cylindrical component with an upward arrow indicator (no text or symbols visible)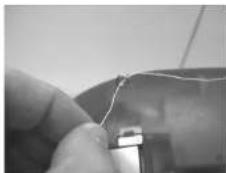
natural_image
Close-up of a hand holding a small electronic component with wires, possibly a connector or sensor (no visible text or symbols)
natural_image
Close-up of a mechanical component with a U-shaped tool inserted, no visible text or symbols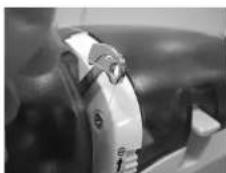
natural_image
Close-up of a white automotive component with a handle and circular head (no visible text or symbols)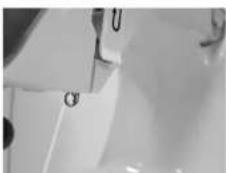
natural_image
Close-up of a white surface with a small circular mark and a small letter 'C' at the edge (no readable text or symbols)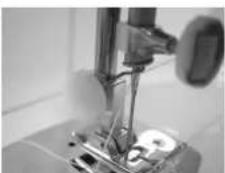
natural_image
Close-up of a sewing machine needle stitching a metal sheet (no visible text or symbols)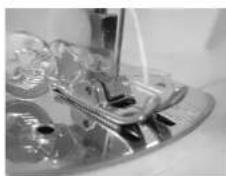
natural_image
Close-up of a sewing machine needle stitching metal components on a circular base (no visible text or symbols)HOW TO CHANGE THE LOWER THREAD BOBBIN
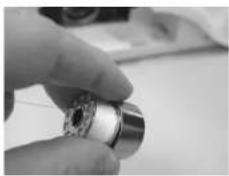
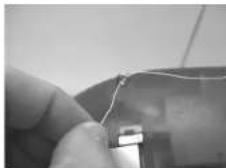
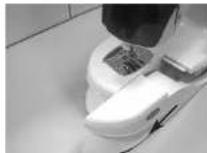
-The thread bobbin is located inside the lower spool, and at the same time this is to be found underneath the needle. To access the same the following steps should be taken:
- Slide forwards the lower arm of the machine towards the left and you will find a little compartment.
2.Open the compartment by using the side rim and pull it towards you. One the compartment is open you will see the spool.
-
Pull the spool towards you by means of the central rim, pick up the bobbin that you wish to use, and then put it on the inside of the spool holding one end of the thread with your hand.
-
Then thread through the notch until it comes through the lower slot of the spool.
-
Once the bobbin is in place in the spool and with the thread correctly threaded as indicated in the previous section, place the spool with the bobbin inside the compartment. There is only once way to place it, and this is with the outlet facing upwards.
natural_image
Close-up of a white sewing machine with a black handle and arrow indicating fabric or sewing (no visible text or symbols)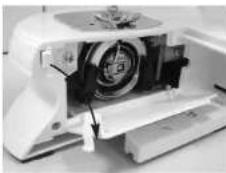
natural_image
Close-up of a mechanical device with a circular component and a small attached part, no visible text or symbols.
natural_image
Close-up of a hand turning a mechanical component with a metallic knob (no visible text or symbols)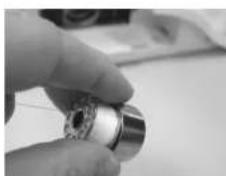
natural_image
Close-up of a hand holding a metallic mechanical component (no visible text or symbols)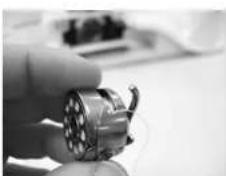
natural_image
Close-up of a hand holding a metallic mechanical component (no visible text or symbols)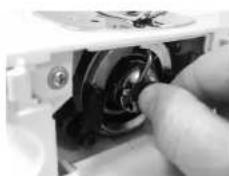
natural_image
Close-up of a hand pressing a button on a mechanical component (no visible text or symbols)30-E E-31
HOW TO LIFT UP THE LOWER THREAD
-This sewing machine lifts up the thread manually, and this is very easily done by taking the following steps:
- Hold the upper thread with your left hand
- Using your right hand turn the manual wheel (n° 11) in the direction indicated by the arrows (clockwise) for the needle to make a complete cycle (go down/go up completely) and when the needle is in the lower position it will take up the lower thread and lift it up to the highest position.
3.Once the needle is in its highest position take hold of the lower thread in your hand and pull both threads (upper and lower) towards the back part of the machine. - The sewing machine is now ready to start sewing again.
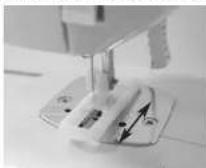
HOW TO ADJUST THE THREAD TENSION
-If you see that when you are sewing the seams are not tight and the thread knots up frequently, this means that the thread tension must be checked.
-For proper sewing the tension of both the upper and the lower thread must be the same, and there is a dial provided for this purpose (n° 3) to adjust the upper tension more or less required and also to adjust the tension of the lower thread. The lower spool has a screw to adjust the thread tension. Please s
-The thread tension depends on a series of circumstances, on the type of needle, on the type of cloth, on the type of stitch and consequently in order to check the correct thread tension trial stitching must be made and an adjustment made in accordance with the result.
-To know whether the tension is correct, the seam must be like in the following illustration a.
Examples of incorrect thread tension
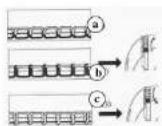
- Upper thread tension too high (or lower thread too low), image b. - Upper thread tension too low (or lower thread too high), image c
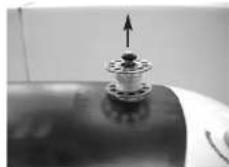
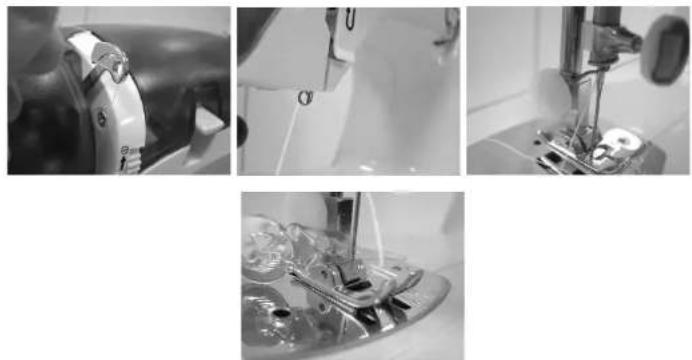
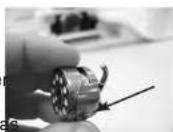
HOW TO LOAD AN EMPTY SPOOL
-When the lower spool no longer has any thread left, you have an automatic option to load it by taking the following steps:
- Pick up the empty spool and put it on the spool spindle (n° 20)
- Take hold of the end of the upper bobbin thread in the bobbin peg (n° 14) and thread through the pressure selector (n° 15) until you reach the empty spool which
is located on the spool spindle (n° 20), take hold of the empty spool and wind the thread around the same a couple of times.
- Finally press the winding button (n° 13) to start to fill the bobbin with thread. When you have reached the amount you require, press the button again (n° 13) to stop and cut the thread
NEEDLE CHANGE
-If the needle breaks you will need to change this to be able to carry on sewing. For this please take the following steps:
- Disconnect the machine from the mains electricity supply.
- Lower the presser foot by means of the lever ( n^0 8)
- Lift the needle up manually to its highest point. To do this turn the manual wheel (n° 11) in the direction indicated by the arrows (clockwise).
- Turn the needle adjustment screw (n° 5), towards the left and the needle will come out.
-
To put a new needle in place, please make sure that the flat part of the needle is facing the back part of the machine.
-
Take hold of the needle between your thumb and forefinger and push the needle up to the very end.
-
Finally tighten down the adjustment screw (n°5) towards the right to ensure that the needle is fully tight and in place.
natural_image
Close-up of a sewing machine needle with a curved arrow indicating motion (no visible text or symbols)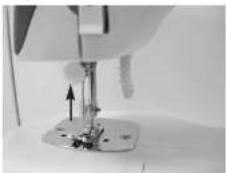
natural_image
Close-up of a sewing machine needle stitching a metal base, showing mechanical components and motion arrows (no text or symbols visible)
natural_image
Close-up of a hand using a sewing machine to press or adjust a component (no visible text or symbols)
natural_image
Close-up of a hand using a sewing machine to press or adjust a component (no visible text or symbols)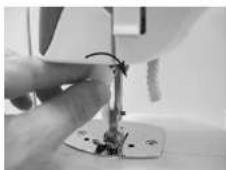
natural_image
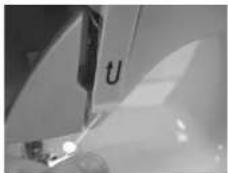
Close-up of a hand operating a sewing machine needle (no visible text or symbols)STITCHING MODE SELECTION-
The stitching you require is selected by turning the stitching dial ( n^o 10) to the right or to the left. Please ensure that the needle is in its highest position before attempting to turn the stitch selector dial.
WARNING: If the needle is not in its highest position it can easily break.
32-E E-33
TYPES OF STITCHES
This machine has 13 different types of stitching.
a.Stitching to the right
b.Stitching to the left
c.Whipstitch
d.Zigzag stitching
e.Normal stitching (short, medium, long)
f.Buttonholes
a. WW
W
d.
C.
e.
f. 3 4 1
REVERSE STITCHING BUTTON
-If you hold this button down the machine will stitch backwards which is ideal for reinforcing seams.
HOW TO SEW ON BUTTONS
-To sew on buttons you will need to put in place the button accessory that is provided (n° 8) which locks down to the lower plate by means of the 3 pivots.
-Once in place you must pull up the lower thread as indicated in previous sections. -Then you put the button that you wish to sew down on the cloth and tack down the button by hand to prevent it from moving.
-Place the cloth with the button underneath the presser foot and select the stitching.

-Lower the presser foot downwards and lower the needle down manually with the manual wheel in order to ensure that the needle coincides with the holes in the
button. Once you have checked that the needle coincides with the two holes in the button, press down the pedal to begin to sew the button on automatically.
-If the button has 4 holes the operation has to be repeated by turning the cloth around 90 degrees.
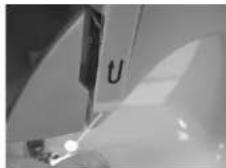
HOW TO SEW BUTTONHOLES
-To make buttonholes you have to use the stitching indicated below and also the buttonhole presser foot. To do this you have to substitute the normal presser foot with the special buttonhole presser foot. To do this the section HOW TO REMOVE THE PRESSER FOOT has to be followed.
- To start, please mark the length of the buttonhole on the cloth with a pencil.
- Put the marked cloth under the presser foot with the buttonhole mark facing you.
-
Move the presser foot slide guide (A) towards you in such a way as the upper mark (B) of the guide coincides with the buttonhole starting mark that has been marked on the cloth.
-
Select the buttonhole stitching with the stitching selector dial and sew forwards until you reach the buttonhole mark.
-
Select the buttonhole stitching with the stitching selector dial and sew 5 or 6 stitches.
-
Select the buttonhole stitching with the stitching selector dial with the backwards stitching button (n° 9) until you reach the back buttonhole mark.
-
Select the buttonhole stitching with the stitching selector dial and sew 5 or 6 stitches.
-
Remove the cloth from the machine and cut the thread.
-
And now in order to open the buttonhole please use the buttonhole cutter as indi-
cated in the following illustration.
CLEANING AND STORAGE
-Your machine requires regular cleaning and lubrication. For satisfactory sewing, a machine which is used for a few hours a day needs to be cleaned and oiled once a month.
IMPORTANT: Disconnect power supply before performing maintenance on the machine. Remove holding cloth and needle. Remove needle plate. Brush off all dust and lint.
-Clean shuttle case with a cleaning brush or soft cloth. Use oil manufactured specially for sewing machine use. Other oil will eventually cause mechanism to jam. Apply one drop of oil on the shuttle where friction occurs.
34-E E-35
FRECUENTLY PROBLEMS
-Breaking lower thread.
-Thread not wound evenly on the bobbin or not drawn up correctly.
-Lower thread tension to light.
-Link stuck in the bobbin case and inside the tension spring.
-Irregular stitches.
-Incorrect size of needle for the material.
-Upper thread tension too loose.
-Incorrect lower tension.
-Fabric is not fed correctly.
-Pattern selection dial not set correctly.
-Link stuck on the feed dog.
-Noisy machine.
-Check for thread in shuttle.
-The slightest amount of thread in shuttle may cause noise or binding.
-Use cotton swab to clean.
-Fabric puckers.
-Upper or lower thread tension too tight.
-Stitch too long for material.
-Thread too thick.
-Incorrect threading of upper or lower thread.
-Breaking needle.
-Needle not correctly inserted.
-Needle bent.
-Needle clamp screw too loose.
-Needle too fine for the material.
-Dials have been changed while the needle was down in the material.
TECHNICAL SPECIFICATIONS
*Sewing Machine:
CC 12V ... 2000Ma
*Adapter CA/CC
Primary: CA 220-240V \~ 50/60Hz 650mA
Secondary: CC 12V ... 2000mA
This Sewing Machine conforms to the safety requirements and provisions of directives 2004/108/EC on Electromagnetic Compatibility.
This Adapter conforms to the safety requirements and provisions of directives 2006/95/EC on Low tension devices and 2004/108/EC on Electromagnetic Compatibility.
PROTECTION OF THE ENVIRONMENT – DIRECTIVE 2002/96/EC
This product has been designed and manufactured with high quality materials and components that can be recycled and reused.
When you see the symbol of a crossed out litter bin on wheels next to a product, this means that the product conforms to the European Directive 2002/96/EC. Please obtain information about the local recycling system for electric and electronic products.
Follow the local rules and do not dispose of used products by throwing them in the normal bins at home. Proper recycling of your used product will help avoid negative impacts on the environment and people's health.
36-F F-37
MACHINE À COUDRE
REMERCIEMENT D'ACHAT
natural_image
Close-up of a sewing machine needle stitching fabric, showing mechanical components and motion arrows (no text or symbols)natural_image
Close-up of a sewing machine needle being adjusted, showing thread and fabric movement (no text or symbols visible)COMMENT RETIRER LE BRAS LIBRE
natural_image
Close-up of a white robotic device with a black handle and a curved arrow pointing to it (no visible text or symbols)COMMENT ENFILER LE FIL SUPÉRIEUR
natural_image
Six-panel black-and-white photo collage showing a sewing machine, fan blade, and mechanical components (no visible text or symbols)40-F F-41

COMME CHANGER LE FUSEAU DU FIL INFÉRIEUR
natural_image
Close-up of a white electronic device with a black component and a directional arrow (no visible text or symbols)
natural_image
Close-up of a mechanical device with internal components and a circular component (no visible text or symbols)
natural_image
Close-up of a hand holding a mechanical component with a circular button, no visible text or symbols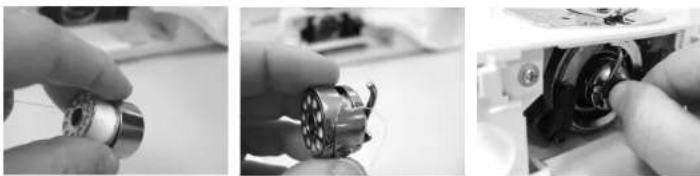
COMME LEVER LE FIL INFÉRIEUR
natural_image
Close-up of a sewing machine needle with a curved arrow indicating motion (no text or symbols visible)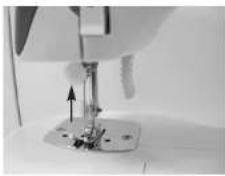
natural_image
Close-up of a sewing machine needle stitching fabric (no visible text or symbols)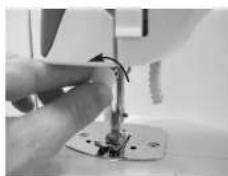
natural_image
Close-up of a sewing machine needle being adjusted with a hand (no visible text or symbols)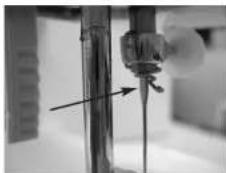
natural_image
Close-up of a mechanical component with an arrow pointing to a shaft (no visible text or symbols)
natural_image
Close-up of a hand using a sewing machine to press or install a small electronic component (no visible text or symbols)