Egoa - Dehumidifier AIR NATUREL - Free user manual and instructions
Find the device manual for free Egoa AIR NATUREL in PDF.
User questions about Egoa AIR NATUREL
0 question about this device. Answer the ones you know or ask your own.
Ask a new question about this device
Download the instructions for your Dehumidifier in PDF format for free! Find your manual Egoa - AIR NATUREL and take your electronic device back in hand. On this page are published all the documents necessary for the use of your device. Egoa by AIR NATUREL.
USER MANUAL Egoa AIR NATUREL
natural_image
White air naturel air conditioner unit with ventilation grille and ventilation slots (no visible text or symbols on body)natural_image
Line drawing of a portable air purifier with ventilation slots and control panel (no text or symbols)Non
natural_image
Line drawing of two identical portable air purifiers connected by coiled cables (no text or symbols)natural_image
Line drawing of a portable electronic device with a front panel and side door (no text or symbols)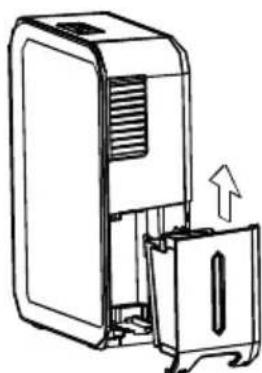
natural_image
Line drawing of a portable electronic device with a door and vent, showing internal components and an upward arrow indicating motion (no text or symbols)Entretien
natural_image
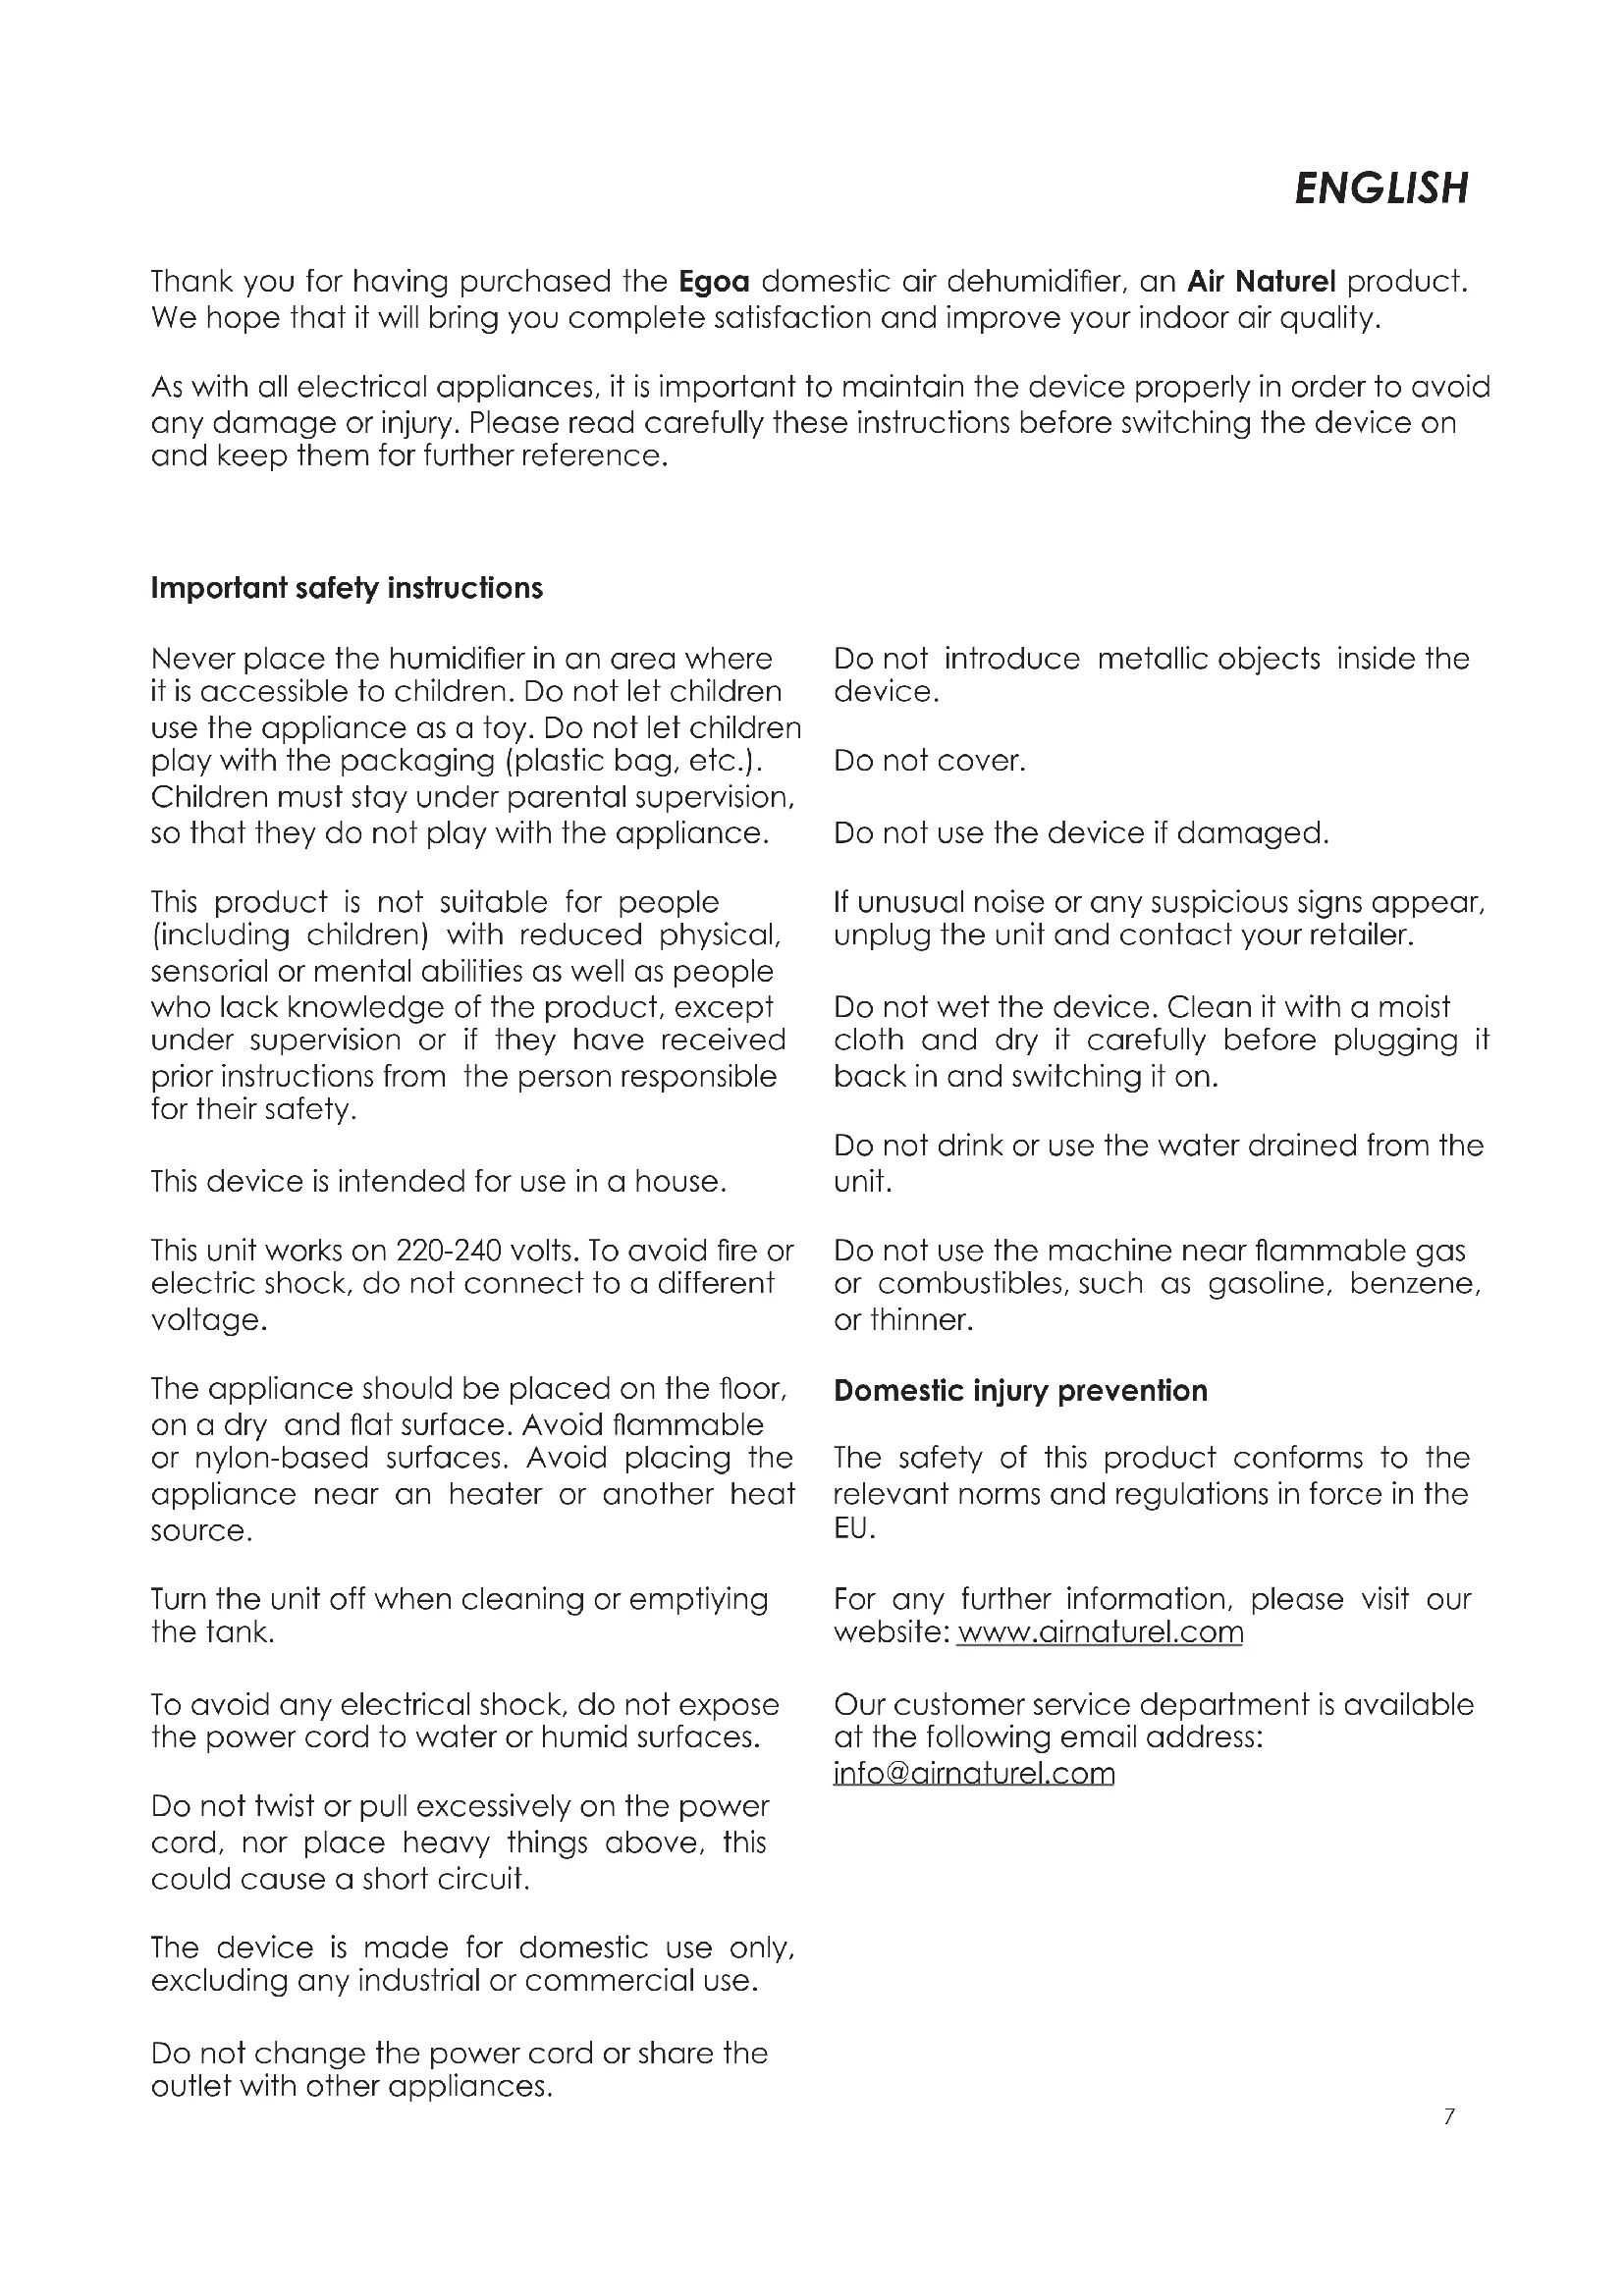
Technical line drawing of two air purifiers with a grid-patterned panel on one (no text or symbols)Thank you for having purchased the Egoa domestic air dehumidifier, an Air Naturel product. We hope that it will bring you complete satisfaction and improve your indoor air quality.
As with all electrical appliances, it is important to maintain the device properly in order to avoid any damage or injury. Please read carefully these instructions before switching the device on and keep them for further reference.
Important safety instructions
Never place the humidifier in an area where it is accessible to children. Do not let children use the appliance as a toy. Do not let children play with the packaging (plastic bag, etc.). Children must stay under parental supervision, so that they do not play with the appliance.
This product is not suitable for people (including children) with reduced physical, sensorial or mental abilities as well as people who lack knowledge of the product, except under supervision or if they have received prior instructions from the person responsible for their safety.
This device is intended for use in a house.
This unit works on 220-240 volts. To avoid fire or electric shock, do not connect to a different voltage.
The appliance should be placed on the floor, on a dry and flat surface. Avoid flammable or nylon-based surfaces. Avoid placing the appliance near an heater or another heat source.
Turn the unit off when cleaning or emptying the tank.
To avoid any electrical shock, do not expose the power cord to water or humid surfaces.
Do not twist or pull excessively on the power cord, nor place heavy things above, this could cause a short circuit.
The device is made for domestic use only, excluding any industrial or commercial use.
Do not change the power cord or share the outlet with other appliances.
Do not introduce metallic objects inside the device.
Do not cover.
Do not use the device if damaged.
If unusual noise or any suspicious signs appear, unplug the unit and contact your retailer.
Do not wet the device. Clean it with a moist cloth and dry it carefully before plugging it back in and switching it on.
Do not drink or use the water drained from the unit.
Do not use the machine near flammable gas or combustibles, such as gasoline, benzene, or thinner.
Domestic injury prevention
The safety of this product conforms to the relevant norms and regulations in force in the EU.
For any further information, please visit our website: www.airnaturel.com
Our customer service department is available at the following email address: info@airnaturel.com
Egoa
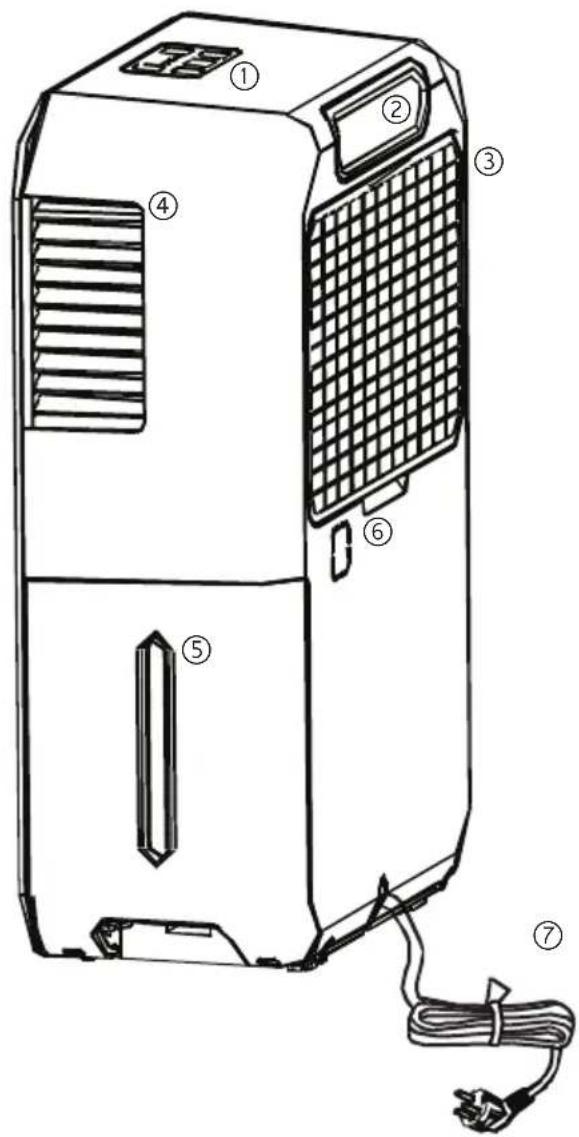
① Control panel
② Handle
③ Air grille and air filter
④ Dry air outlet
⑤ Water bucket with control window
⑥ Drain hose outlet
⑦ Power cord and plug
Control panel
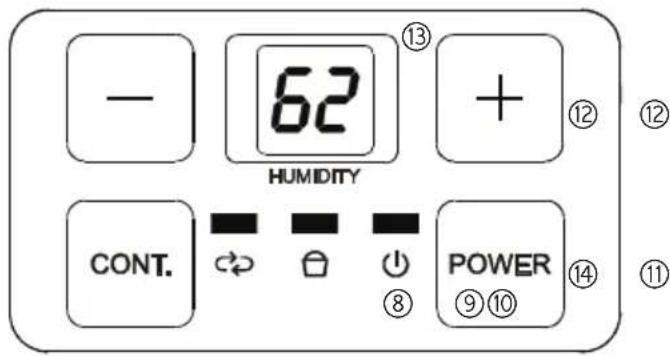
⑧ Power light
⑨ Full tank indicator
⑩ Continuous operation "on" indicator
⑪ Continuing operation mode button
⑫ Humidity level setting
⑬ Digital display
⑭ Power button
Specifications
Dehumidification power 10 L/day*
Product size 325 x 480 x 160 mm (h x w x d)
Net weight 9.2 kgs
Power 320 W
Tank capacity 1.5 L
Suitable for rooms up to 30 sq.m
Noise level 43 dB
Auto stop when the tank is full
Continuous drainage function
* at 30°C and 80% relative humidity
Egoa helps in preventing from moisture damage where books or valuables are stored, in basements, etc.
Starting the Egoa
Before plugging the device on mains power, check that the Egoa is turned off.
- Place the humidifier on the floor.
- Plug the power cord to the mains power and turn the device on.
- The Egoa dehumidifier is now ready to use.
- When first using the dehumidifier, operate the unit continuously for 24 hours.
- Check whether the filter is in place. Never use the device without filter.
Operating instructions
- Press POWER ⑭ to turn on and off the appliance. The LED ⑧ remains green when
Egoa is on. The POWER pad blinks 5 times per second when a humidity or temperature sensor malfunction occurs. - The humidity level can be set with humidity control pads ⑫ and digital display ⑬. The humidity can be set within a range of 35% RH (relative humidity) to 80% RH.
- When the Water full indicator light ⑨ glows, Egoa shuts down.
- Press CONT ⑪ to turn Egoa in continuous operation; the indicator ⑩ glows. Press again on CONT to cancel the continuous operation. This function allows a maximum dehumidification. The humidity level setting ⑫ cannot be used when continuous operation is on.
to automatically defrost. The error will clear after the unit self-defrosts.
- P2: the tank is full or not in the right position. Empty the tank and/or replace it in the right position.
Note: when more than one error occurs, the error display order is: P2-E2-E1-P1
Other features
- The full tank indicator glows when the tank is ready to be emptied, or when the tank is removed or not replaced in the proper position.
- Auto shut off: the water level shuts off the dehumidifier when the tank is full, or when the tank is removed or nor replaced in the proper position. When the set humidity is reached, the unit will be shut off automatically.
- Auto defrost: when the frost builds up on the evaporator coils, the compressor will cycle off and the fan will continue to run until the frost disappears.
- Auto restart: if the unit breaks off unexpectedly due to a power cut, it will restart with the previous setting automatically when the power resumes.
- Wait 3 minutes before resuming operation. After the unit has stopped, it cannot be restarted for 3 minutes. This is to protect the unit. Operation will automatically restart after 3 minutes.
Control panel description ⑬
- The digital panel shows the set humidity level while setting.
- Then it shows the actual room humidity level.
- Error codes displayed:
- E1: humidity sensor error. Unplug the unit and plug it back in. If the error persists, contact after sales service.
- E2: temperature sensor error. Unplug the unit and plug it back in. If the error persists, contact after sales service.
- P1 : unit is defrosting. Allow time for the unit
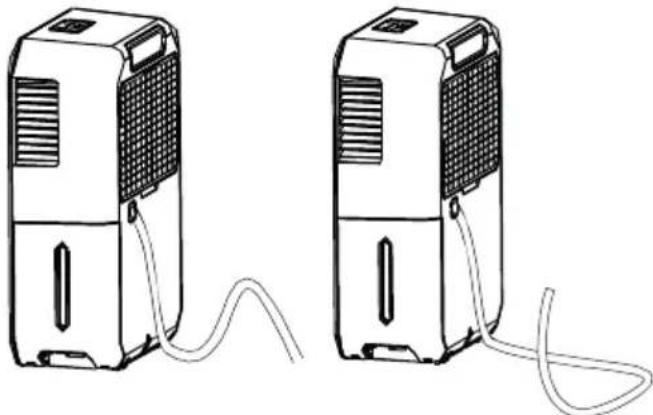
Continuous drainage
Plug the provided water hose to the drain hose outlet of the device⑥ and the other to a floor drain or a suitable drainage facility like a sink or a flush. Cut off the plastic cover located at drain hose outlet by a scissor. The drainage facility should be lower than the drain outlet of the unit. Make sure the connection of the water hose and the drain hose outlet is tight and do not let the water leak.
Tank drainage
- Unplug the device.
- Remove the tank and empty it.
- Replace the tank.
• Egoa is now ready to work again. - Egoa automatically stops when the tank is full.

natural_image
Two technical line drawings of a device with internal components and directional arrows indicating movement (no text or symbols)Maintenance
- Before any operation, unplug the device.
- Empty the water from the tank and rinse off with clear water. If needed, use a soft detergent.
- Check if the back vent is not dusty. If needed, clean it with a dry brush or a vacuum.
- Do not splash the device. If needed, use a wet cloth.
- Filters cleaning:
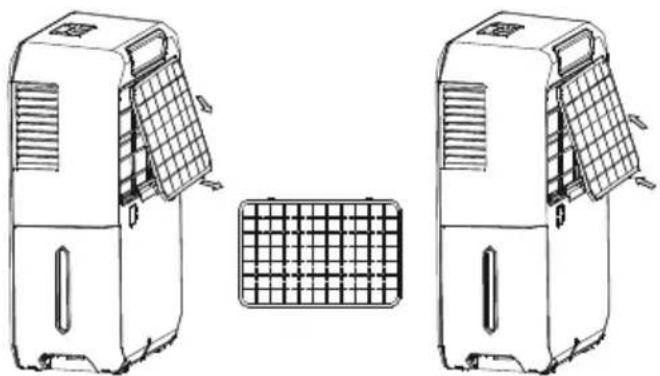
natural_image
Technical line drawing of two industrial air purifiers with a grid-patterned panel on one (no text or symbols)- Clean the filter with warm soapy water. Rinse and let the filter dry before replacing it.
Storage
- When not using the unit for a long time, after turning off the unit, wait a day before emptying the tank.
- Clean as previously recommended with a white vineagre based solution.
- Let the device dry.
- Store in a dry place, preferably in its original packaging. Avoid high temperatures.
Precautions
- Check that the device is not swamped.
- Do not use bleach or abrasives to wash the device. Use water and mild detergent.
- Do not use the appliance outdoor.
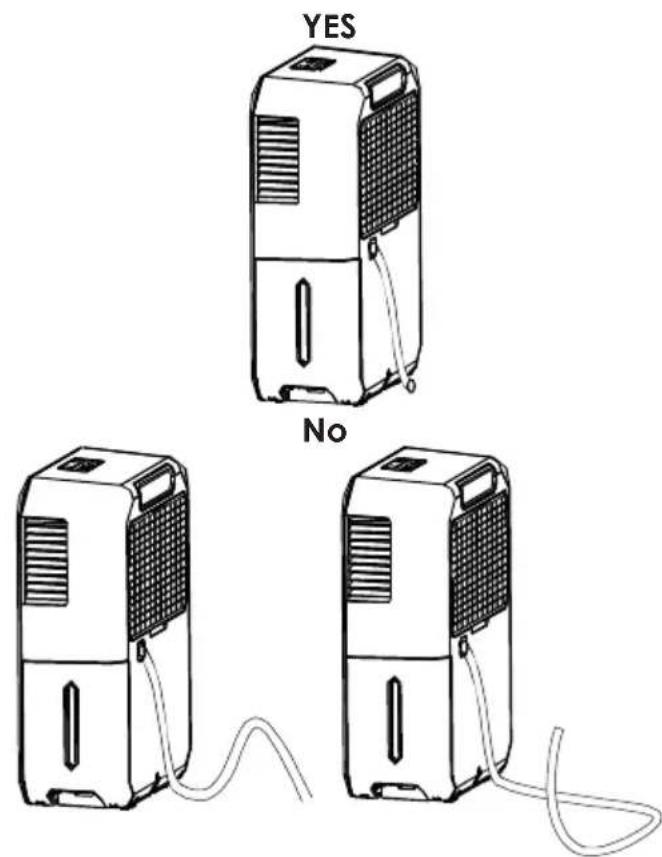
- Place the device on a hard surface.
• The device is suitable for use at temperatures between 5 and 35°C. - Allow at least 20 cm of space on all sides of the unit for good air circulation.
- Do not connect the dehumidifier to a multiple socket outlet, which is also being used for other electrical appliances.
- Plug the unit to an electrical socket with earth convection.
- The dehumidifier must be operated in an enclosed area to be more effective.
| Situation Solution | |
| The unit does not start. | Make sure the dehumidifier's plug is pushed completely into the socket.Check the house circuit breaker.Dehumidifier has reached its preset level or the tank is full.Tank is not in the proper position. |
| The dehumidifier does not dry the air as it should. | Allow enough time for the moisture to be absorbed.Make sure there are no curtains, blinds or furnitures blocking the front or back of the dehumidifier.The humidity control may not be set low enough.Check that all doors, windows and other openings are securely closed.Room temperature is too low, below 5°C.There is a kerosene heater or a vapor generating appliance in the room. |
| The device makes a loud noise when operating. | The air filter is clogged.The unit is tilted instead of upright as it should be.The floor surface is not level. |
| Frost appears on the coils. | This is normal. The dehumidifier has an auto defrost feature. |
| Water on the floor. The hose connection may be loose. | |
| E1, E2, P1 or P2 appear on the display. | These are error codes and protection codes. See the "Control panel description" 13 section. |
Garantie
The appliances are under warranty for a 1-year period from the purchase date. The warranty covers all failures resulting from hidden manufacturing or raw material defects. This warranty does not cover failures or damages resulting from an inadequate setup or usage, or from the normal wear and tear of the product.
Air Naturel cannot be held liable in case of an inadequate or dangerous use of the products.