Narciso Baby - Dehumidifier Argoclima - Free user manual and instructions
Find the device manual for free Narciso Baby Argoclima in PDF.

| Product type | Dehumidifier |
| Model | Narciso Baby 10 |
| Brand | Argoclima |
| Power supply | 220-240 V ~ 50 Hz |
| Refrigerant | R-134a (GWP = 1300) |
| Dehumidification capacity | Approximately 10 L/day (estimated) |
| Water tank | With full level indicator (red light) |
| Continuous drainage | Possible via PVC hose (not supplied, inner diameter 13 mm) |
| Defrost function | Automatic (yellow light) below 12 °C |
| Humidity control | Adjustment knob with continuous position |
| Air filter | Washable, cleaning recommended every 2 weeks |
| Exterior maintenance | Soft cloth and neutral detergent |
| Safety | Automatic shut-off if tank full; do not use with wet hands; not recommended for children |
| Minimum wall distance | 20 cm for heat dissipation |
| Minimum clothing distance | 50 cm above the appliance |
| Operating temperature | 5 °C to 35 °C (recommended above 5 °C) |
| Weight | Approximately 10 kg (estimated) |
| Dimensions (W x D x H) | Approximately 35 x 25 x 50 cm (estimated) |
| Warranty | Contact after-sales service |
Frequently Asked Questions - Narciso Baby Argoclima
User questions about Narciso Baby Argoclima
0 question about this device. Answer the ones you know or ask your own.
Ask a new question about this device
Download the instructions for your Dehumidifier in PDF format for free! Find your manual Narciso Baby - Argoclima and take your electronic device back in hand. On this page are published all the documents necessary for the use of your device. Narciso Baby by Argoclima.
USER MANUAL Narciso Baby Argoclima
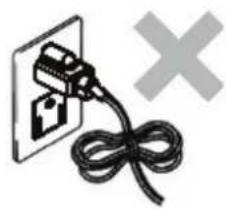
Do not fold the power cord as shown below!
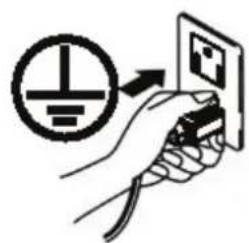
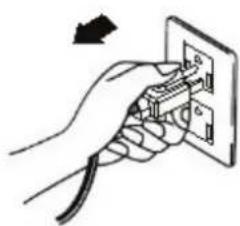
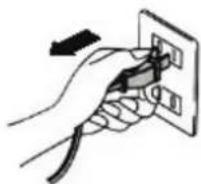
Make sure the plug is placed fully & firm into the socket!
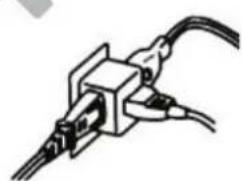
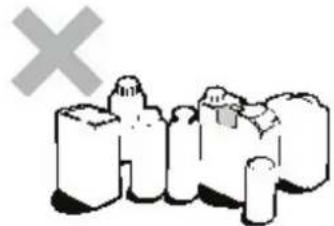
Do not use multiple socket as shown below!
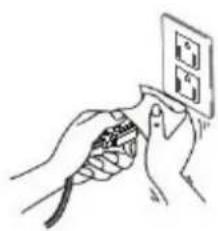
Make sure the plug is clean!
After turning the unit off, please take plug out of the socket.
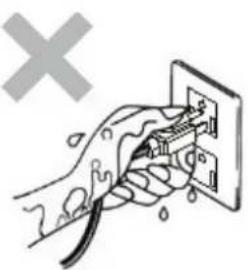
- Do not have wet hands when connecting the power plug.
CAUTION
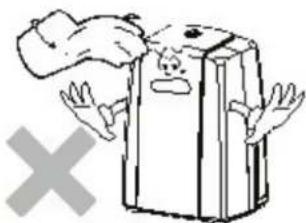
- Do not place anything on top of the control panel!
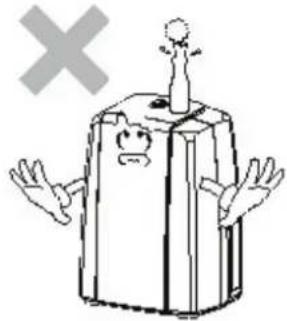
- Do not place anything over the inlet or outlet points.
Do not let children play with the unit or control!
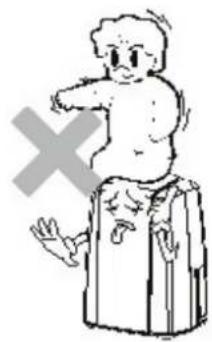
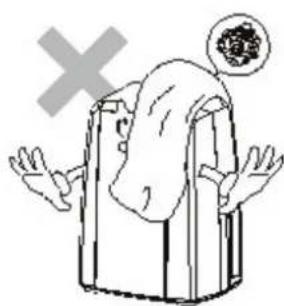
Do not wet the machine or the control panel!
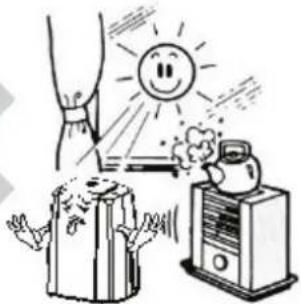
- Keep the flammable gas/oil away from the machine!
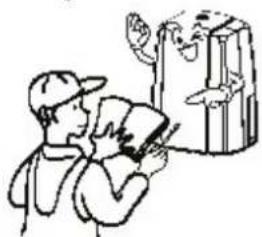
- Ask professionals to do the servicing!
DESCRIPTION OF COMPONENTS


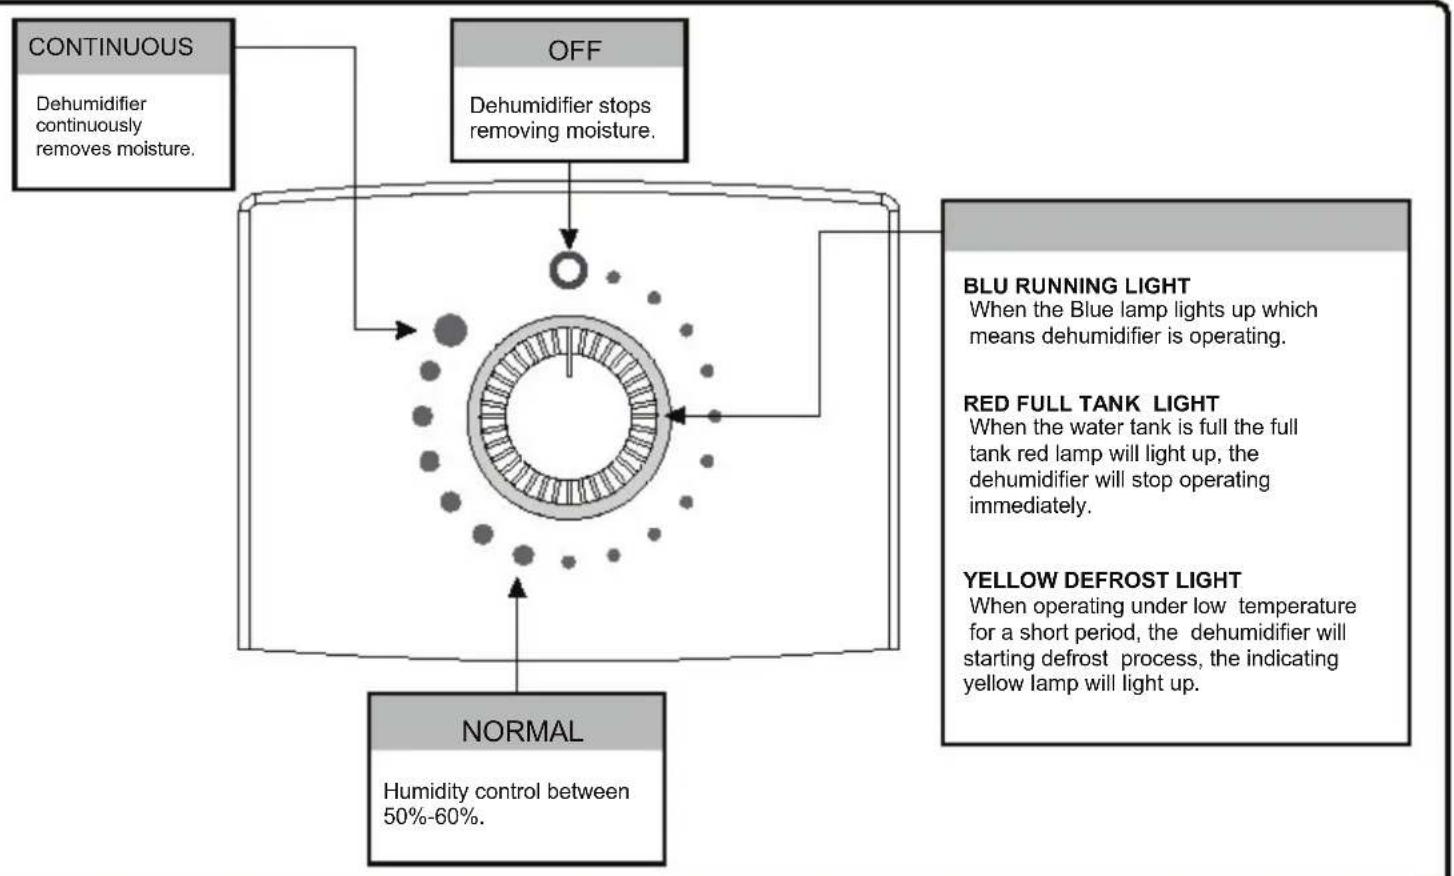
FUNCTION EXPLANATION
OPERATING INSTRUCTIONS
- Start Operation
1) Ensure that the unit is connected to the power socket.
2) Make sure the water tank is placed in proper position. (After plug on the machine for the first time, if the full tank lamp light up, just pull out the water tank then push it back to the proper position.)
3) Turn clockwise the humidity control knob to the suitable humidity (usually at normal position). If the humidity indoor is over the set humidity, then the machine will start removing moisture.
- Please turn the humidity control knob to the position of "continuous" to make the machine working continuously when exploded to a high humidity environment.
4) When the humidity in the room reached the set humidity then the machine will stop operating.
5) When the humidity in the room is over the set humidity then the machine will start removing moisture again.
6) The alternance between point 3). 4). 5) is controlled by the set humidity.
- When RED Full Tank Light is On
When the water tank is full, the red light will light up, the dehumidifier will stop operating. Remove the water from the tank, then place the water tank back to its proper position and the machine will start operating again.
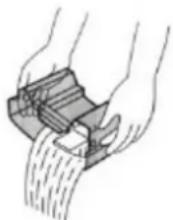
Remove the water in the water tank with two hands
DEFROST
When operating in low temperatures (less than 12^ ) the surface of the evaporator will accumulate frost and effect the efficiency of the dehumidifier. When this happens the machine will go into periodic defrost mode automatically. This is quite normal. Defrost light will come on. The unit will operate in temperatures down to 5^ . Defrost time may vary. If the dehumidifier freezes up turn the unit off for few hours and then restart. It is not recommended to use the dehumidifier in temperatures below 5^ .
EMERGENCY
Please unplug the machine when there is sometime wrong.
Contact the service agent immediately
Do not disassemble the dehumidifier yourself!

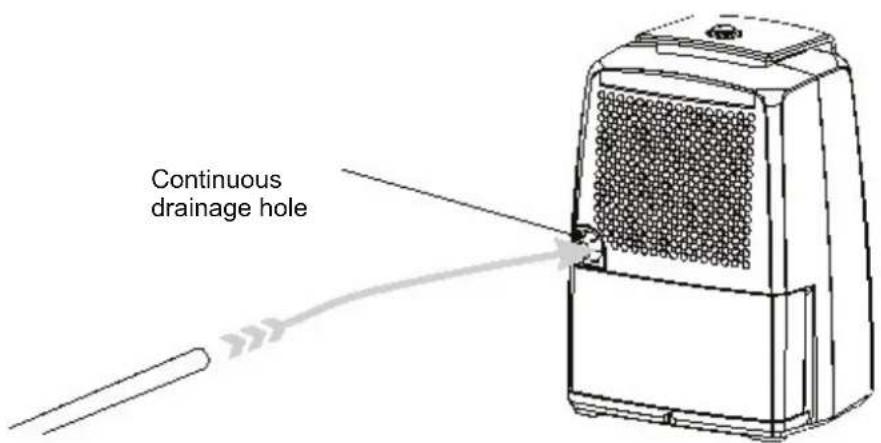
Continuous Drainage Under Good Condition
1) Put in the PVC hose into the back of the closed hole, and then connect the PVC hose to the front.
| 1. Prepare PVC hose to drain out water (The hose sold in market with inner dia. 13mm) 2. Take out the stopple of the drainage outlet. | For drainage Back of the unit Tube stopple |
| 3. Take out the soft cover, put it and tube stopple into the bucket for storage. | Soft cover Tube stopple |
| 4. Connect the PVC hose with the drainage outlet. | Drainage PVC hose |
| 5. Place the bucket on its original location. | Push bucket back into the unit toward the direction as the arrow points to Bucket |
2) Put the water tank back, according to the instructed way.
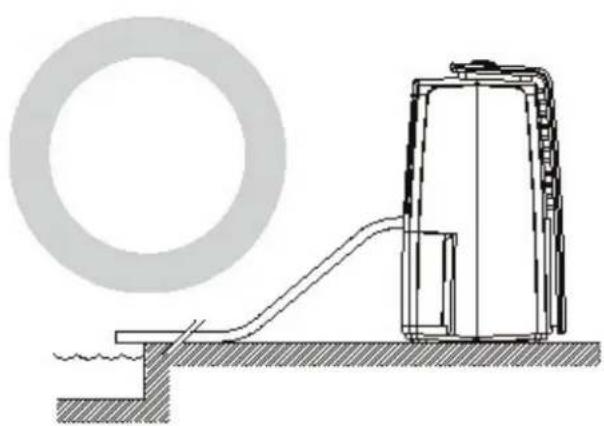
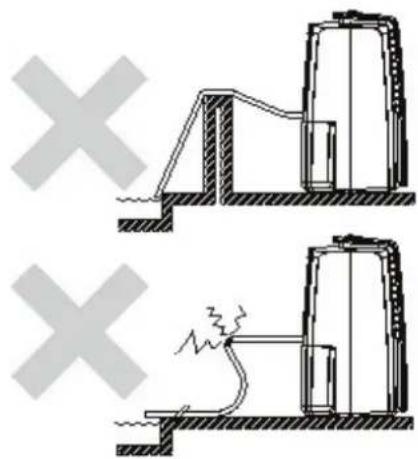
The Proper Way To Place The Water Drainage PVC Hose
When using continuous drainage, the PVC hose must be placed below the drainage hole. Avoid uneven surfaces and do not "kink" the hose.
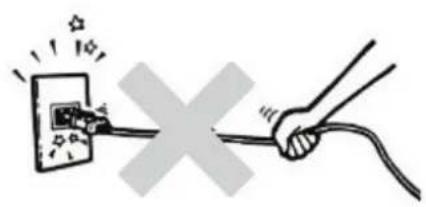
- Do not pull the power cord to avoid broken cord, which lead to danger.
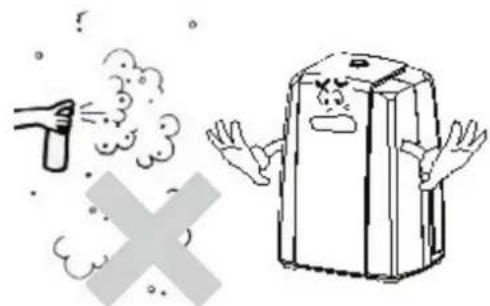
- Do not use insect, oil or paint spray around the machine, it might cause damage to the plastic parts or start a fire.
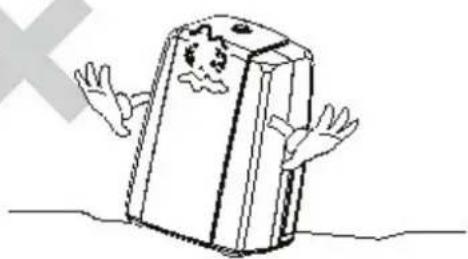
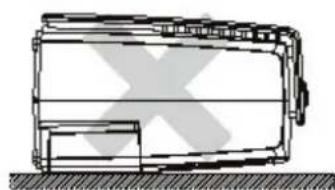
- Do not place the machine on an uneven ground, to avoid shaking, noise and leakage of water.
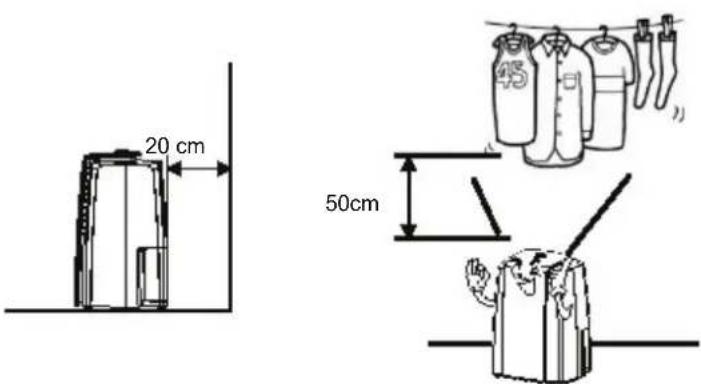
- Please always keep the unit 20~cm away from the wall to dissipate the heat properly. Hang clothes at least 50~cm above the machine.
It is dangerous to put anything into the machine.
- Close all the open windows to reach the maximum possible efficiency of removing moisture.
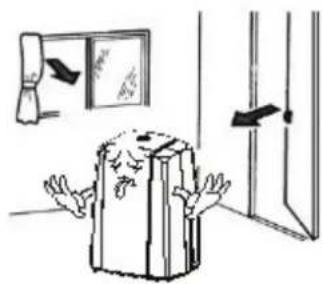
- Keep the machine away from any type of heat sources.
- When moving or put in storage, do not place the dehumidifier on side way or upside down and avoid violent shaking.
MAINTENANCE
Please make sure the dehumidifier is unplugged before serving or cleaning the machine, for safety reasons!
1) Clean the Shell :
A. Wipe the shell using soft cloth and eventually mild detergent.
B. Do not wash the machine with a hose, it will cause leakage of electricity.
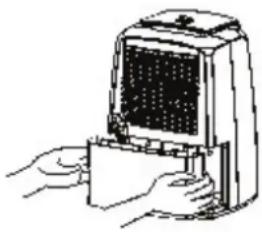
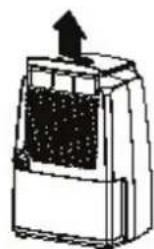
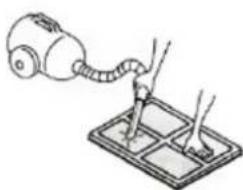
2) Clean the Air Filter :
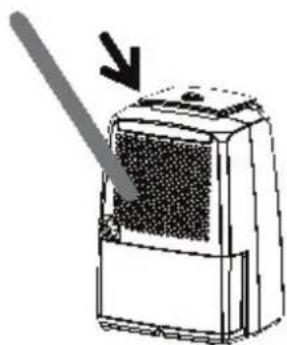
The propose of the air filter is to filter the dust or unclean material in the air. If the filter is blocked by the dust the usage of the electricity will be greater than normal. For the best more efficient of removing moisture, please clean the filter once in two weeks.
- Cleaning Steps :
A. Pull out the filter gently.
B. Clean the filter by vacuum cleaner or washing with clean water then dry the filter using dry cloth.
C. Place the filter back to it's position.
TROUBLESHOOTING
In case your dehumidifier shows any abnormality, please check the items mentioned below at first:
| Problem | Possible cause | Solution |
| Both fan and compressor not working | No power to unit | Check power to socket Check power switched on |
| Compressor or fan not working | Motor failure In "3 min lag delay" period Faulty electronics | Return for service Wait Return for service |
| Not collecting water | Air intake filter blocked. Refrigerant is low. Temperature and humidity are too low. | Clean filter Return for service Normal operation |
| Noisy unit | Floor is uneven. | Place on a level surface |
| Condenser is frozen | Filter is dirty. Temperature is too low. | Clean filter Switch off and wait for temperature arising |
| Loss of water | Tank not installed properly. Micro-switch failure. Unit has frozen. | Fit the tank properly Return for service Unplug and allow ice to melt |
| Other failure | Return to supplier for service. |
SPECIFICATIONS
| MODEL | NARCISO baby 10 |
| POWER | 220-240V /50Hz |
| MOISTURE REMOVAL | 10 L/D (30 °C 80%R.P. |
| POWER INPUT | 185W |
| SIZE OF SHELL (H W D) | 435*321*258 mm |
| WEIGHT | 10.6 kg |
| OPERATING TEMPERATURE | 5°C~32°C |
- If the power cord on this unit is damaged it must be replaced by the manufacturer, its service agent or qualified persons in order to avoid a hazard
- This appliance is not intended for use by children or other persons without assistance or supervision if their physical, sensory or mental capabilities prevent them from using it safely. Children should be supervised to ensure that they do not play with the appliance.
F-GAS REGULATION (EC) no. 842/2006
Do not vent R-134a into atmosphere: R-134a is a fluorinated greenhouse gas, covered by Kyoto Protocol, with a Global Warming Potential (GWP) = 1300.
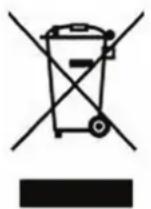
INFORMATION FOR CORRECT DISPOSAL OF THE PRODUCT IN ACCORDANCE WITH THE EUROPEAN DIRECTIVE 2002/96/EC
At the end of its working life this equipment must not be disposed of as an household waste. It must be taken to special local community waste collection centres or to a dealer providing this service. Disposing of electrical and electronic equipment separately avoids possible negative effects on the environment and human health deriving from an inappropriate disposal and enables its components to be recovered and recycled to obtain significant savings in energy and resources. In order to underline the duty to dispose of this equipment separately, the product is marked with a crossed-out dustbin.
TABLE DES MATIERES
AVERTISSEMENT/ATTENTION. 0
DESCRIPTION DES COMPOSANTS/FONCTIONS 1
INSTRUCTIONS POUR L'UTILISATION 2
DRAINAGE CONTINU 3
AVERTISSEMENTS. 4
ENTRETIEN/URGENCE 5
SPECIFICATIONS. 6
AVERTISSEMENT
HUMIDITE ENLEVEE 10 l/24h (30 °C 80% H.R.)