Era III Freight Train - Model making Märklin - Free user manual and instructions
Find the device manual for free Era III Freight Train Märklin in PDF.

User questions about Era III Freight Train Märklin
0 question about this device. Answer the ones you know or ask your own.
Ask a new question about this device
Download the instructions for your Model making in PDF format for free! Find your manual Era III Freight Train - Märklin and take your electronic device back in hand. On this page are published all the documents necessary for the use of your device. Era III Freight Train by Märklin.
USER MANUAL Era III Freight Train Märklin
natural_image
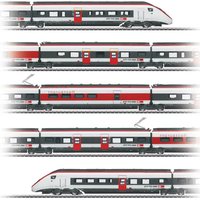
Side profile illustration of a steam locomotive with two freight trains and cargo containers on tracks (no text or symbols visible)- Using the Product as Intended 8
- Safety Notes 8
3.Contents 8 - Technical Information 9
- Notes about Using this Model for the First Time 9
- Preparations 9
- Operating 10
- Locomotive Characteristics 11
- Information about Operating the Train 11
- Trouble Running the Train 11
- Cleaning and Maintenance 12
- Disposing 12
- Symbols and Their Meaning 12
- Warranty 12
- Service and maintenance 25
- Spare parts 29
Carefully read through the operating instructions before using the model for the first time. The operating instructions come with the product and must therefore be kept as well as passed on when giving the product to a third party.
natural_image
Illustration of two hands holding a mechanical component with arrows indicating direction (no text or symbols)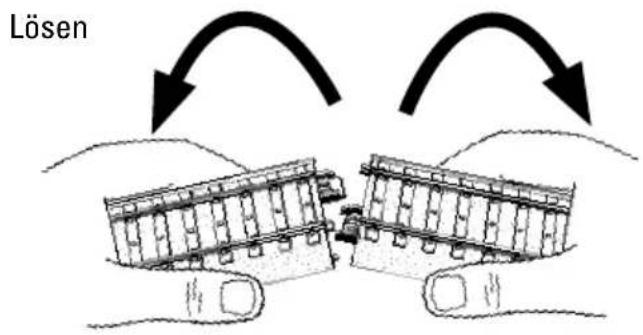
text_image
Lösentext_image
Diagram showing connections between a device, a switch, and a device with warning symbolstext_image
Diagram showing connections between a device, coiled cable, and a power outlet with checkmark indicatorWe are pleased that you have decided to purchase a product from the Märklin Company. With its 150+ year company history Märklin proves every day repeatedly that each of our individual products stands for tradition, quality, technical innovation, and successful market leadership. You will see that there are many arguments in favor of Märklin.
We hope you will have much pleasure and fun with your new Märklin product that we have manufactured for you with the greatest of care and passion.
Should you have comments and ideas, we would be happy to hear from you.
Your Märklin Team
1. Using the Product as Intended
This product is an H0 gauge (1:87 scale) model train for children ages 6 and above.
- This train can be operated on model railroad layouts equipped with Märklin C Track (see set contents).
• This train can be run on Märklin K-track.
2. Safety Notes
Carefully read the safety notes before using the model for the first time.
! Switched power packs for toys are not suitable to be used as toys. The use of switched power packs must always be done under the supervision of adults.
- Make sure you teach your children to use the switched power pack only in the manner described in the instructions.
• Make sure that you teach your children about the dangers of the household current system.
- Make sure you inspect the condition of the switched power pack and its connections to the wall outlet for damage at regular intervals (depending on how often the switched power pack is used to play with the train), at least once a week. This must be done with the switched power pack unplugged from the wall outlet. If you have the slightest suspicion that there is damage, the switched power pack may not be used again until it has been checked
and repaired by the Märklin Repair Department).
- The switched power pack may only be connected to a wall outlet with voltage that is the same as indicated on the specifications plate on the switched power pack.
- The switched power pack is designed for use in a dry area only.
- The switched power pack is not a toy. It is used to supply current to a model railroad layout.
- Never hold the switched power pack by its cord when carrying it.
• This product may only be used indoors.
- Do not store this product in direct sunlight or exposed to extremes of temperature or to high humidity.
- This locomotive must never be supplied with power from more than one switched power pack.
- WARNING! Not suitable for children under 3 years. Sharp edges and points required for operation. Danger of choking due to detachable small parts that may be swallowed.
- WARNING! If one of the cars in the train becomes damaged, the damaged car may not be used any longer.
- The LEDs in this item correspond to Laser Class 1 according to Standard EN 60825-1.
2.1 Important Notes
- The operating instructions are a component part of the product and must therefore be kept in a safe place as well as included with the product, if the latter is given to someone else.
- Only the 66361 switched mode power pack included with this starter set may be used.
- Märklin switched mode switched power packs may only be used with products from the Märklin brand.
- The locomotive may be run only when it has the body on it.
- Please see your authorized Märklin dealer for repairs or spare parts.
3. Contents
4-part train
12 no. 24130 sections curved C Track
4 no. 24172 sections straight C Track 172 mm
4 no. 24188 sections straight C Track 188 mm
1 no. 60116 digital connector box
1 no. 66361 switched power pack
1 no. 60657 Mobile Station
1 Operating instructions D GB F NL
1 Operating instructions E I S DK
1 Operating instructions Mobile Station D GB
1 Operating instructions Mobile Station F NL
1 Operating instructions switched power pack
1 Get on Board brochure
1 Warranty card
4. Technical Information
Switched power pack: input 230 volts AC output 18 volts DC/36 VA
Voltage supply train: max 22 volts DC Power consumption of train max 13 VA H0 Gauge (1:87 scale)
4.1 Overload Protection
A built-in overload circuit protects the switched mode power pack and the digital connector box from damage in the event of an overload or short circuit.
The locomotives will all come to a stop.
(See Section 10)
5. Notes about Using this Model for the First Time
- The switched power pack may not be plugged into the wall outlet yet.
- Set up the layout as shown in Part 6.
6. Preparations
6.1 Joining Track Sections and Setting up Track When setting up the track, please note the track numbers and the sequence for the track sections!
The number is located on the underside of the track.
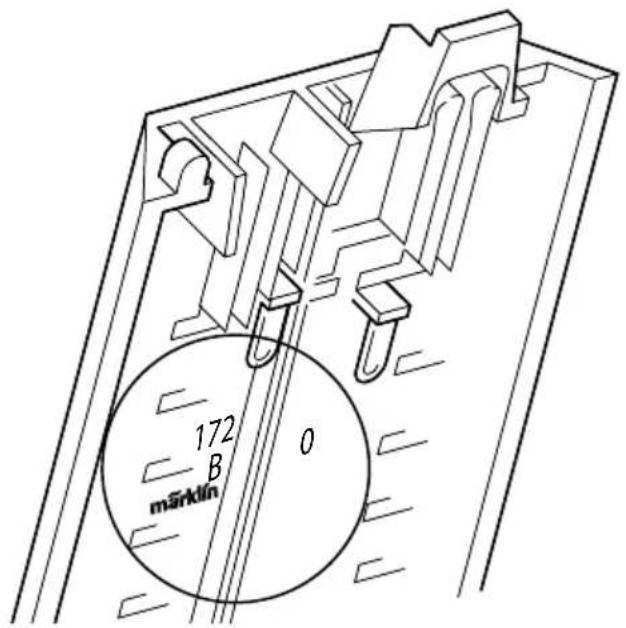
text_image
172 B 0 märklinPutting track together
natural_image
Illustration of hands holding a mechanical component with arrows indicating motion (no text or symbols)Taking
track apart
text_image
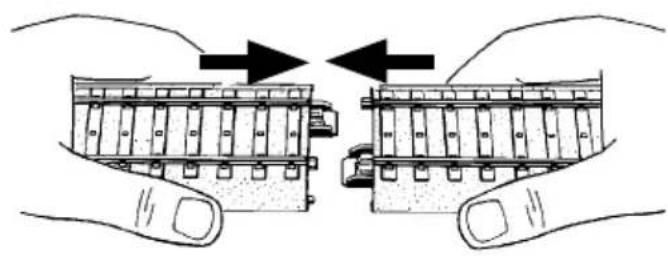
artPlug the digital connector box into any section of track as shown in the diagram.
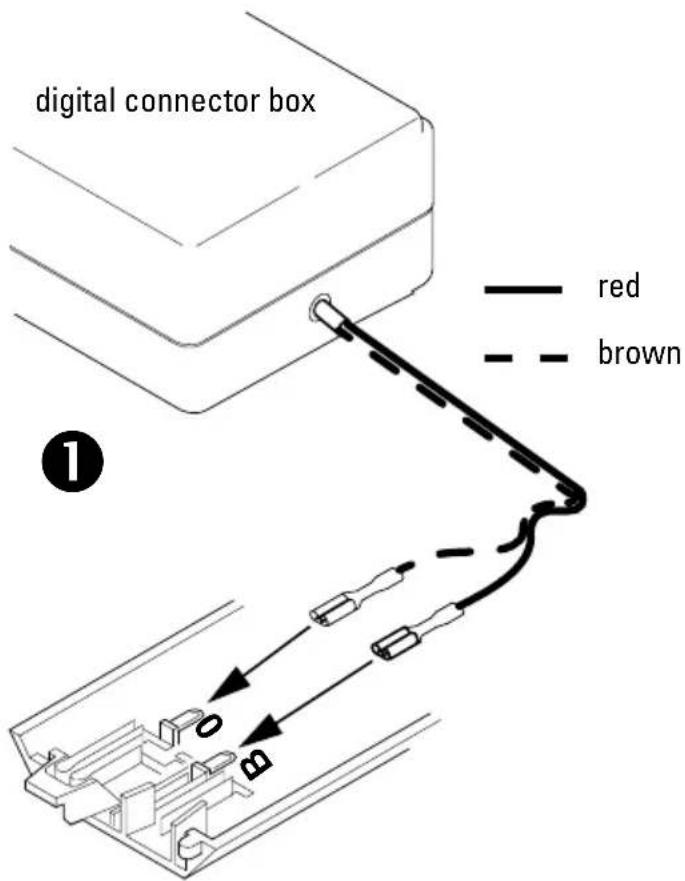
text_image
digital connector box red brown ①After the digital connector box is connected to a section of track, the track can be put together as shown in the following diagram.
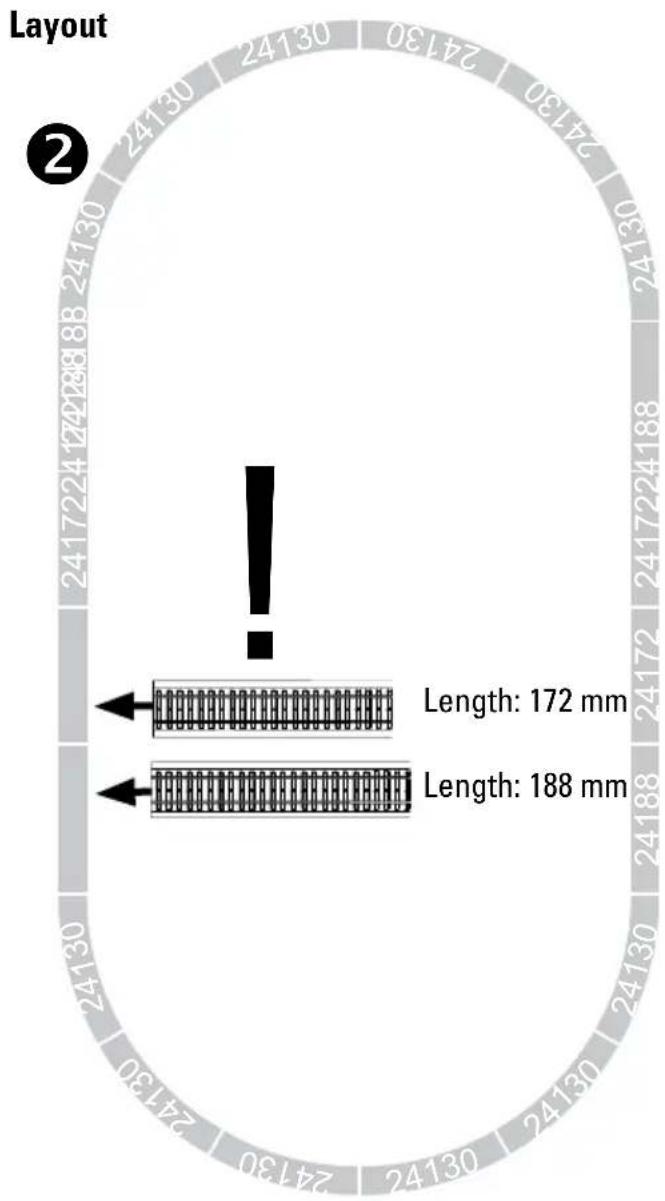
other
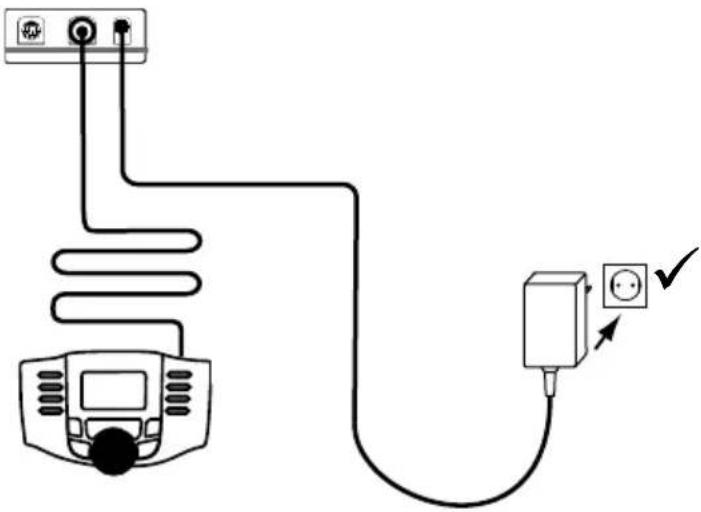
| Segment Length | | -------------- | | Length: 172 mm | | Length: 188 mm |Connect the Mobile Station and the switched mode power pack to the digital connector box.
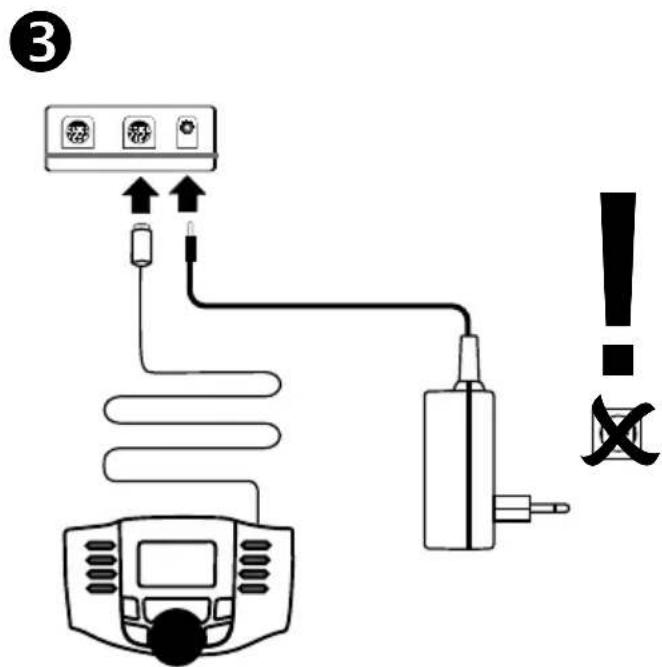
text_image
③ ! XOnce the Mobile Station and the switched mode power pack is connected to the digital connector box, the switched mode power pack can be plugged into a household current wall outlet.
text_image
Diagram showing connections between a device, coiled cable, and a power outlet with checkmark indicatorMake sure that work on the track layout is done only when the power is shut off.
7. Operating
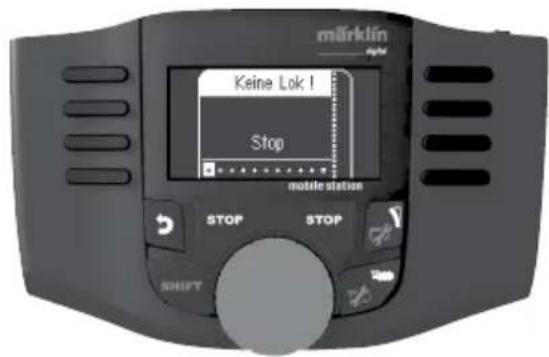
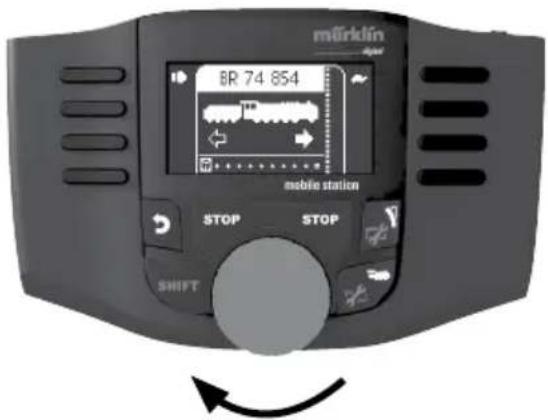
You will find the following display on your Mobile Station.
text_image
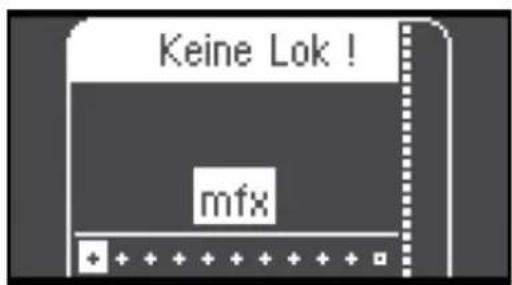
märklin Keine Lok! Stop mobile status STOP STOP SHIFT WebPlace your locomotive on the track. After that, press the Stop button in order to turn power on to the track layout. After a short while mfx will appear on the display and will blink. This indicates that the locomotive is recognized and that the data is being read in.
text_image
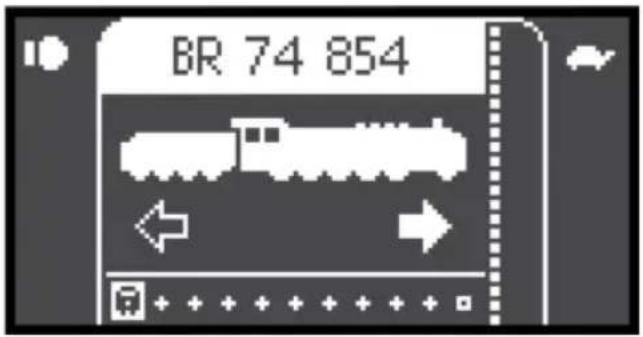
Keine Lok ! mfxWhen this process has been completed successfully, the locomotive will be stored in the first available space with its name, functions, and its symbol.
text_image
BR 74 854Now the locomotive is ready to be run.
text_image
märklin 6R 74 854 mobile station STOP STOP SHIFT7.1 Controlling the Locomotive
The locomotive is accelerated by turning the speed control knob. Turning the knob in the opposite direction will slow the locomotive.
The direction is reversed by pressing on the speed control knob when the locomotive is stopped.
An emergency stop is done by pressing the button „Stop“. When you press the button next to a function symbol, this function is turned on or off.
Note: When a new locomotive is selected and the Mobile Station is set for a speed position (it does not matter which one), the locomotive just selected will run at that speed that was last set. This locomotive cannot be controlled again until it has been selected again.
You will find a complete description of the possibilities and the operation of the Mobile Station in the instruction manual included with this device.
8. Locomotive Characteristics
- Recognition of the mode of operation: automatic.
- Mfx technology for the Mobile Station / Central Station. Name set at the factory: BR 74 854
- This locomotive is set for the address 78 for operation with other control devices.
• Various controllable functions. - Setting the locomotive parameters (address, acceleration/braking delay (ABV), maximum speed): with the Control Unit, Mobile Station, Central Station.
- Headlights, changing over with the direction of travel.
- Only the train control functions and headlight changeover feature are available in analog operation.
8.1 Function Switch
The Mobile Station can activate 16 digital functions on the locomotives.
| Controllable Functions | 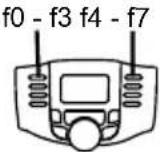 |
| Headlights, on/off Funktion 0 | |
| ABV, off/on Funktion 4 |
9. Information about Operating the Train Running 2 Trains
Only one switched mode power pack and one digital connector box may be used with this layout.
The switched mode power pack included with the starter set provides power sufficient for a maximum of 2 trains.
The locomotive to be controlled can be selected with the Mobile Station.
10. Trouble Running the Train
- If the train does not run, check to make sure that the connections have been done as shown in Section 6.
- Check to see if there a short circuit or an overload on the layout or if a locomotive or car is derailed. Correct the short circuit or the overload by reducing the number of power consumers (locomotives, lighted cars, etc.), and set the derailed locomotive or car back on the rails.
- If the locomotive is damaged, do not use it any more. If a car becomes damaged, remove this car from the train and do not use it anymore.
11. Cleaning and Maintenance
- Check to see if hair or dirt gets on the axles on the train and remove this hair or dirt from the axles with the help of a pair or tweezers so that the train runs correctly.
• The train can be wiped with a dry, lint-free cloth. - Additional maintenance information can be found in Section 15.
12. Disposing
Products marked with a trash container with a line through it may not be disposed of at the end of their useful life in the normal household trash. They must be taken to a collection point for the recycling of electrical and electronic devices. There is a symbol on the product, the operating instructions, or the packaging to this effect. The materials in these items can be used again according to this marking. By reusing old devices, materially recycling, or recycling in some other form of old devices such as these you make an important contribution to the protection of our environment. Please ask your city, town, community, or county authorities for the location of the appropriate disposal site.
Additional Information: www.maerklin.com/en/imprint.html
13. Symbols and Their Meaning

indicates adherence to all basic safety and health requirements

Toy for use with a transformer

Rated voltage
14. Warranty
The warranty card included with this product specifies the warranty conditions.
- Please contact your authorized Märklin dealer for repairs or contact:
Märklin Start up can be added to and expanded with Märklin H0 or Märklin Digital. See your authorized Märklin dealer for advice.
Cher client,
natural_image
Illustration of two hands holding a mechanical component with arrows indicating direction (no text or symbols)Résoudre
text_image
udretext_image
Diagram showing connections between a device, a plug, and a warning symbol with an exclamation marktext_image
Diagram showing connections between a device, coiled cable, and electrical outlet with checkmark indicatortext_image
Diagram showing connections between a device, cable, and warning symbol with exclamation marktext_image
Diagram showing connections between a device, coiled cable, and a power outlet with checkmark indicatornatural_image
Black and white icon depicting a train, airplane, and toy car (no text or symbols)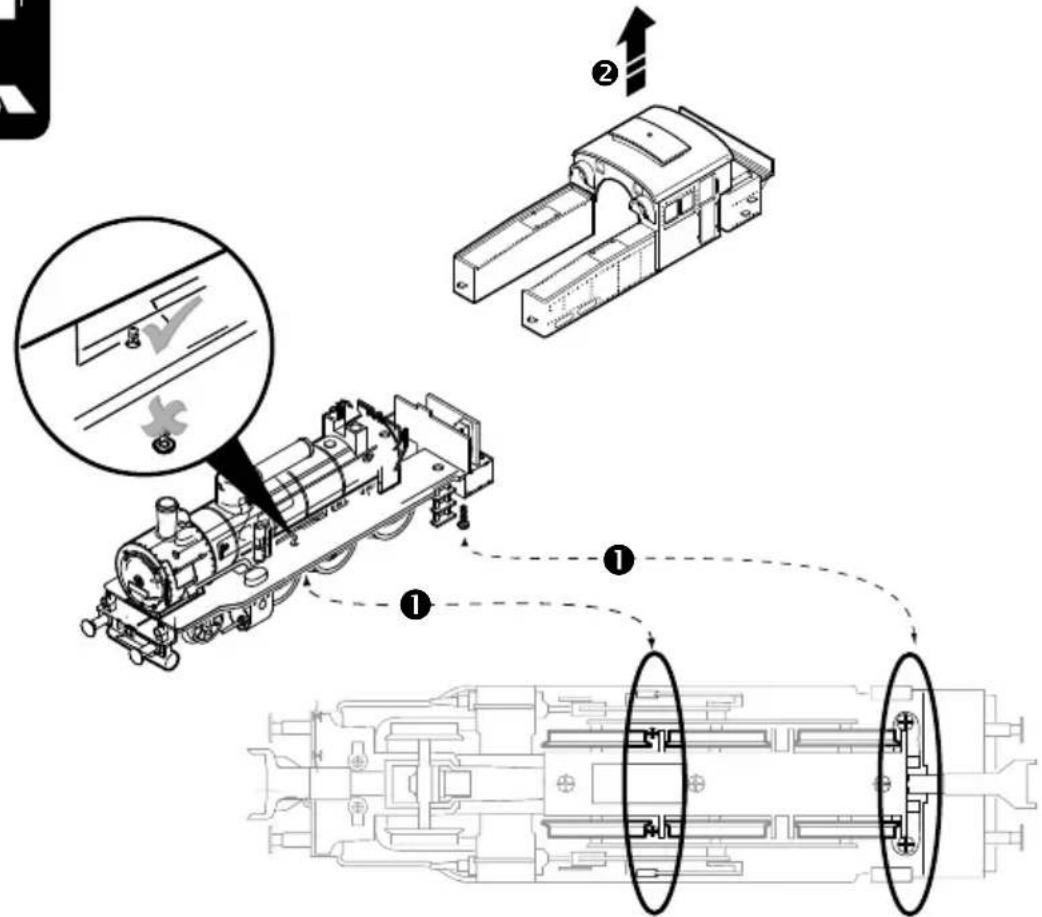
text_image
Technical diagram illustrating a mechanical assembly process with labeled steps and component views
text_image
Technical diagram showing a steam locomotor assembly with labeled components and warning indicators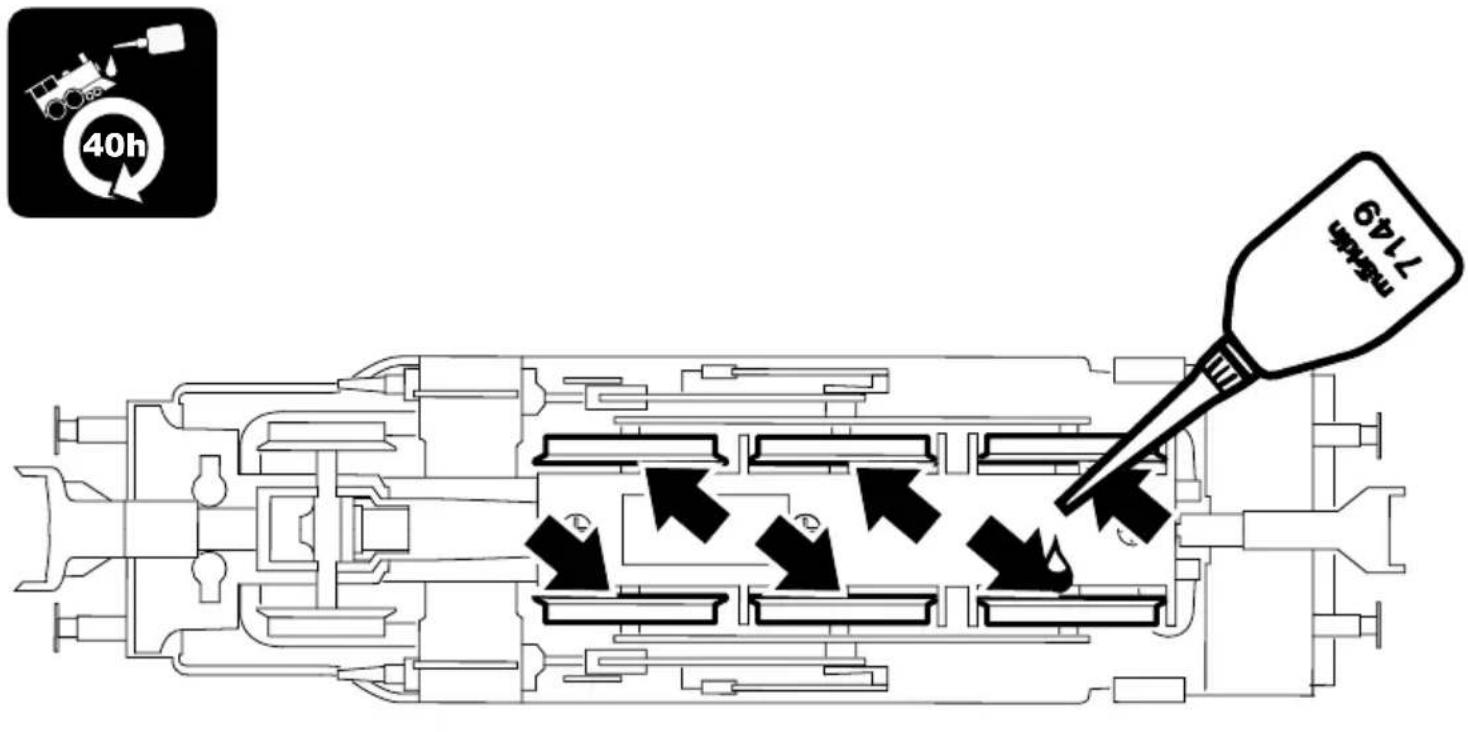
text_image
40h 17:49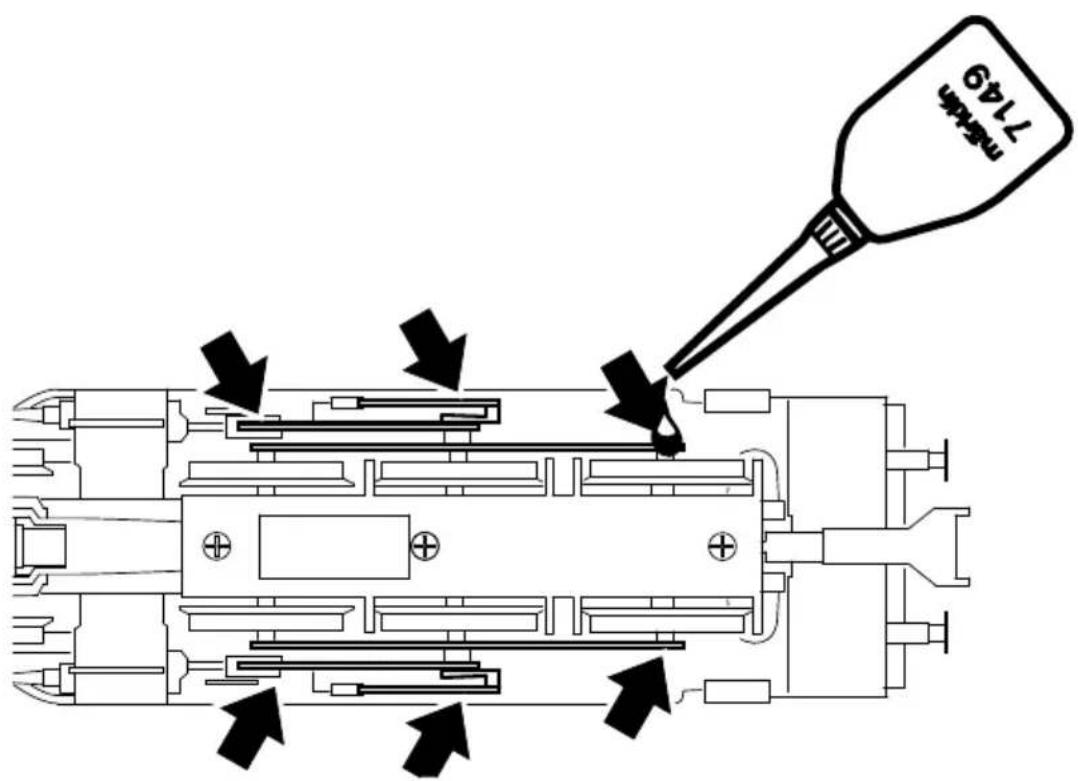
text_image
7149 新規件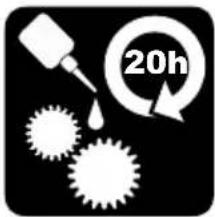
natural_image
Black and white icon showing a dropper, virus particles, and a 20-hour cycle arrow (no text or symbols)
text_image
Trix 66626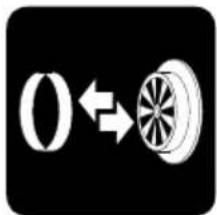
text_image
0←→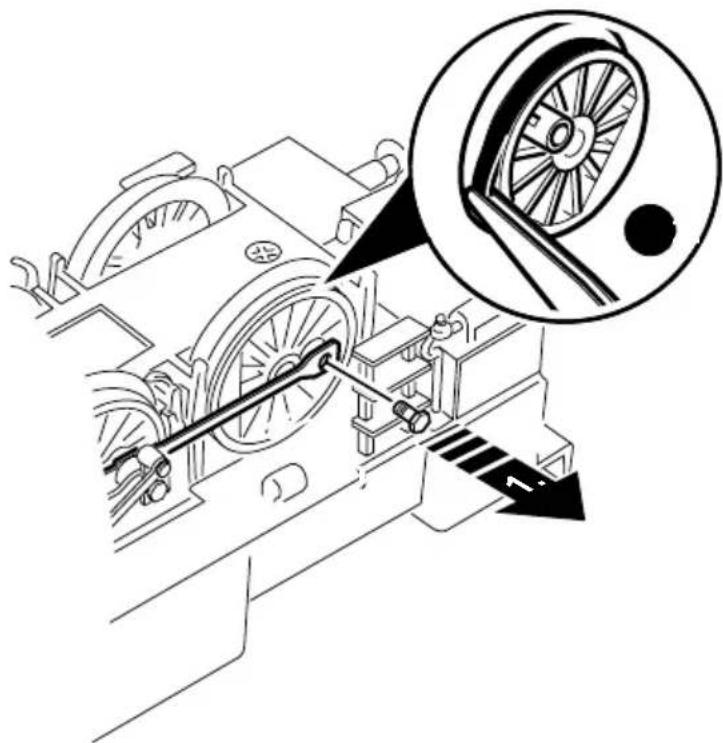
natural_image
Technical line drawing of a mechanical device with a wheel and gear mechanism, showing no text or symbols.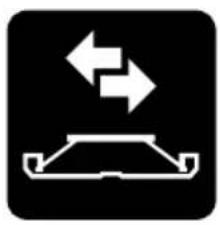
natural_image
Symbol of a car with bidirectional arrow indicating speed or speed (no text or numbers present)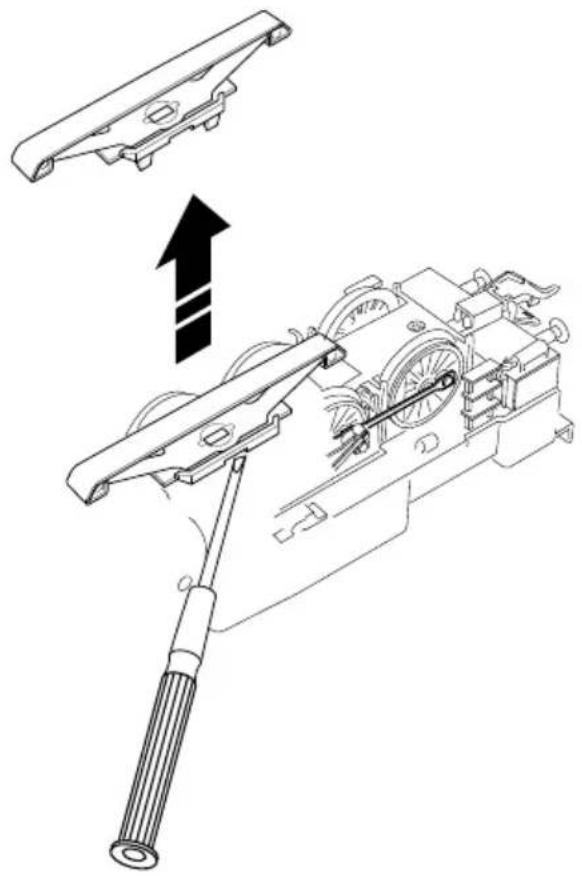
natural_image
Technical line drawing of a mechanical assembly with a lever and bracket, showing motion direction (no text or symbols)
natural_image
Symbol of a person holding a device with bidirectional arrow, no text or numbers present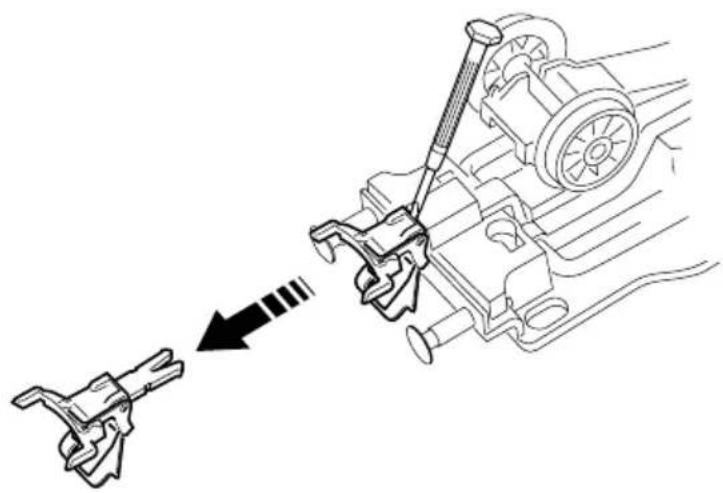
natural_image
Mechanical assembly diagram showing a lever mechanism interacting with a motor (no text or labels)
natural_image
Black-and-white illustration of lightbulb, crystal plate, and circular base (no text or symbols)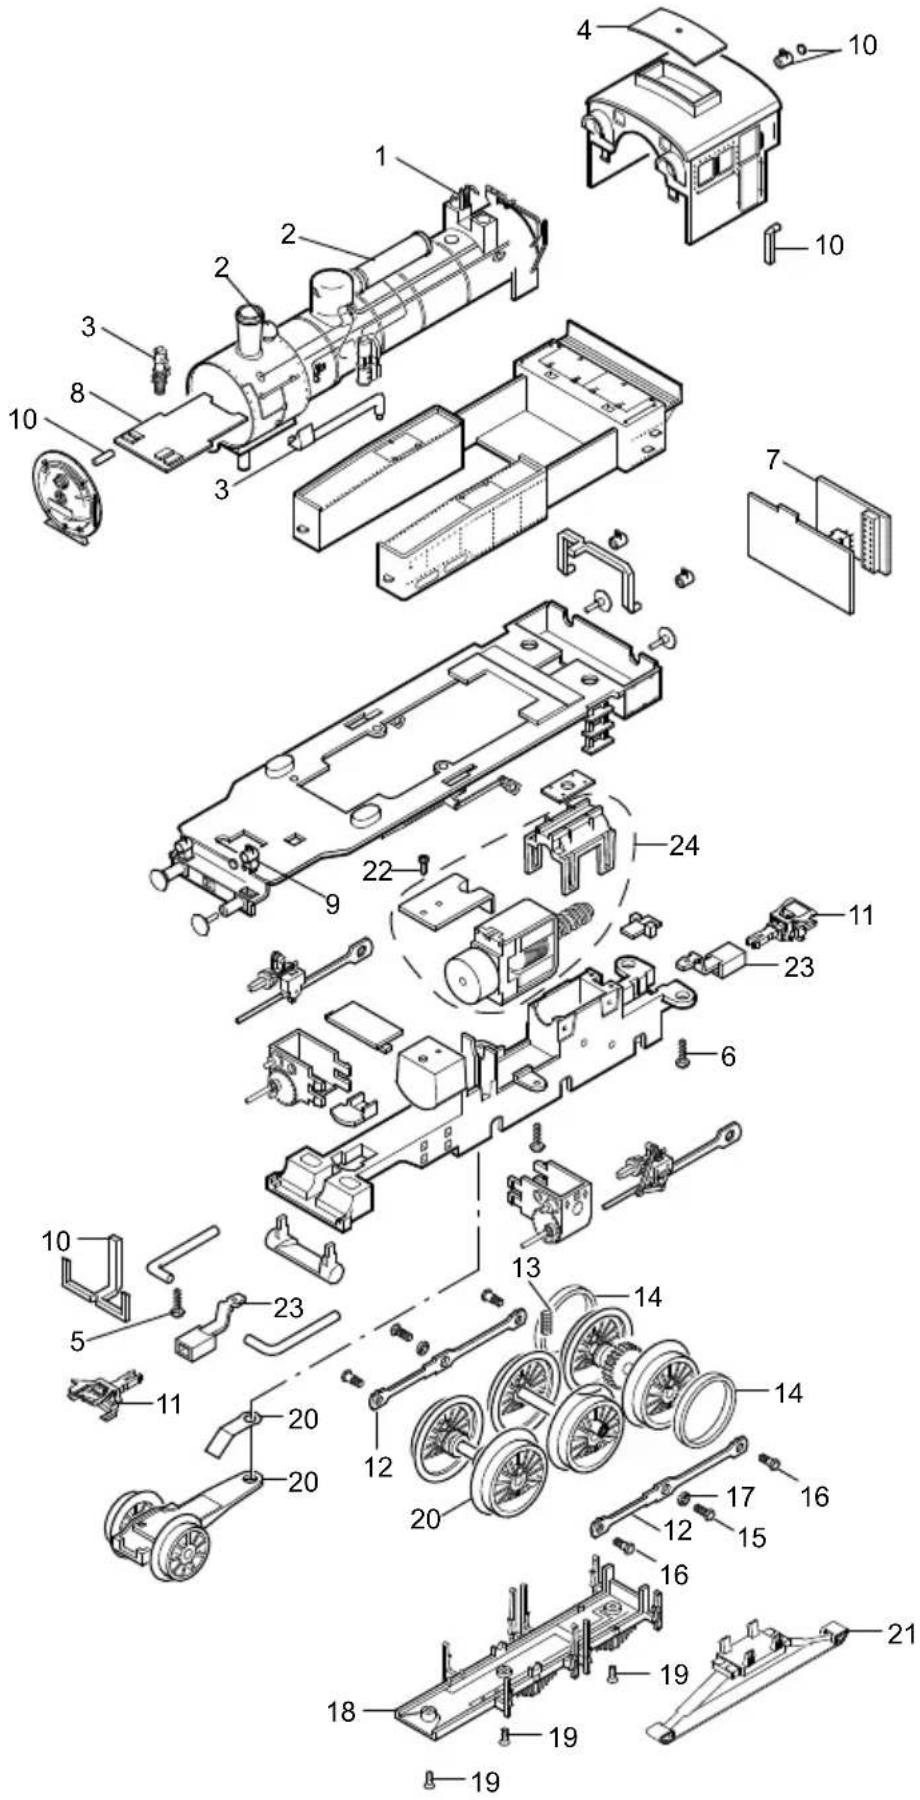
text_image
Exploded view diagram of a mechanical assembly with numbered components for identificationDetails in the diagram may vary from the model.
Note: Some parts are offered only unpainted or in another color.
Parts not shown on the diagram can only be repaired as part of a repair done by the Märklin Repair Service.
F
Due to different legal requirements regarding electro-magnetic compatibility, this item may be used in the USA only after separate certification for FCC compliance and an adjustment if necessary.
Use in the USA without this certification is not permitted and absolves us of any liability. If you should want such certification to be done, please contact us – also due to the additional costs incurred for this.