Sky Surfer 2.0 RTF - Remote control toy GRAUPNER - Free user manual and instructions
Find the device manual for free Sky Surfer 2.0 RTF GRAUPNER in PDF.



| Product type | Radio-controlled toy - electric airplane with sail (paramotor) |
| Brand | Graupner |
| Model | Sky Surfer 2.0 RTF |
| Sail dimensions | 1260 x 460 mm |
| Chariot length | Approx. 220 mm |
| Chariot height | Approx. 300 mm |
| Flight weight | 600 g |
| Flight speed | 10 - 15 km/h |
| Flight time | 8-10 minutes (with LiPo 2/1100 20C battery) |
| Model power supply | LiPo 7.4 V 2 cells battery (not included) |
| Transmitter power supply | 4 AA batteries or rechargeable batteries (1.2 V / 800 mAh recommended) |
| Radio frequency | 2.4 GHz |
| Radio functions | Left/Right, Depth (throttle), Throttle |
| Recommended age | 14 years and older (under 14 with adult supervision) |
| Flight conditions | Outdoor, calm to light wind (max 2.5 m/s) |
| Main spare parts | Motor with gear shaft (92210.11), Receiver/ESC unit (92210.21), 2.4 GHz transmitter (92210.22), Screw set (92210.23) |
| Maintenance and cleaning | Clean after each flight with appropriate products |
| Warranty | 24 months (subject to conditions) |
Frequently Asked Questions - Sky Surfer 2.0 RTF GRAUPNER
User questions about Sky Surfer 2.0 RTF GRAUPNER
0 question about this device. Answer the ones you know or ask your own.
Ask a new question about this device
Download the instructions for your Remote control toy in PDF format for free! Find your manual Sky Surfer 2.0 RTF - GRAUPNER and take your electronic device back in hand. On this page are published all the documents necessary for the use of your device. Sky Surfer 2.0 RTF by GRAUPNER.
USER MANUAL Sky Surfer 2.0 RTF GRAUPNER
text_image
GRACING GM SPORT II...we make the sport stuff
Powered by Graupner
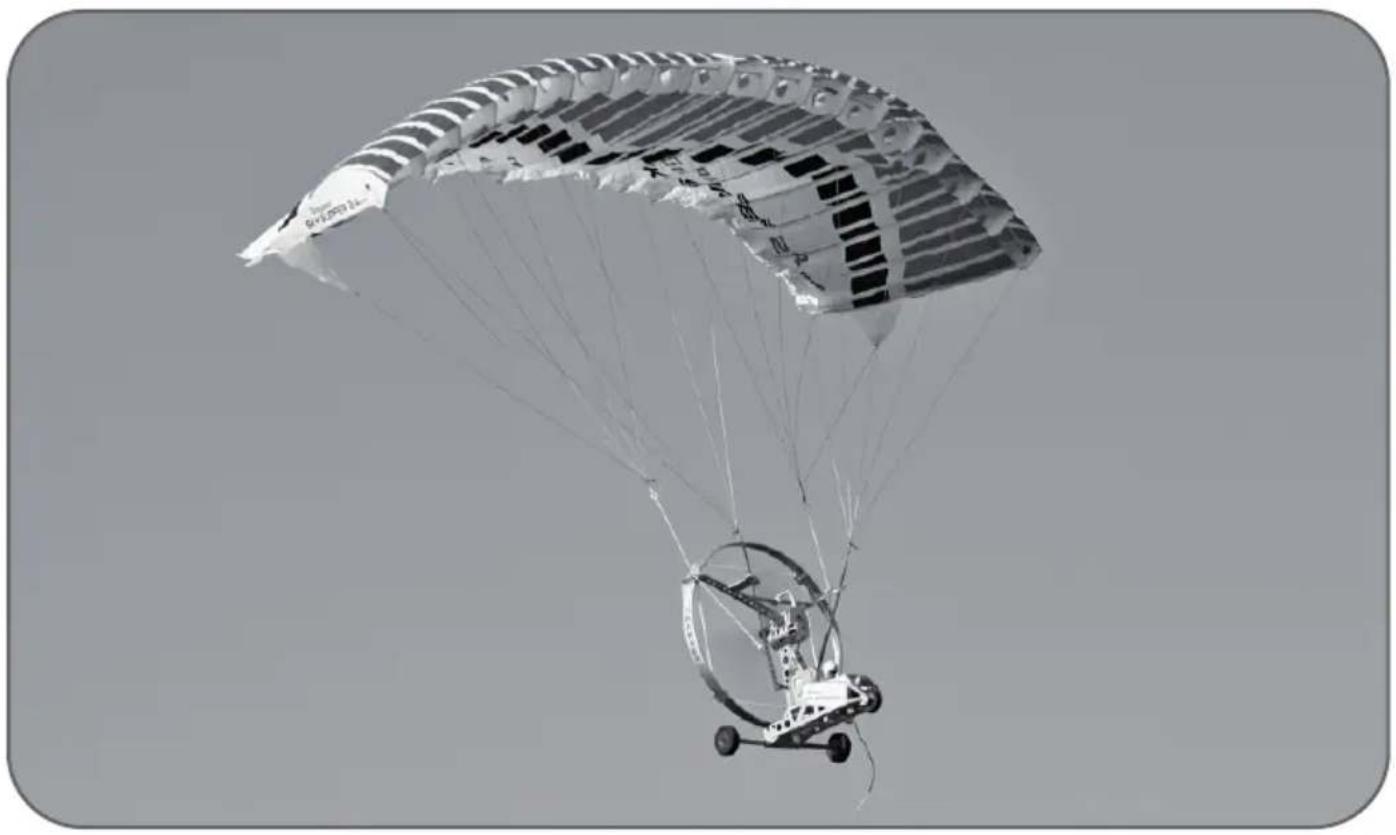
92210 Sky Surfer 2.0 RTF 2.4 GHz
natural_image
Black-and-white photo of a paraglider landing with extended parachute structure (no visible text or symbols)Instruction Manual English 21-40
natural_image
Simple line drawing of a landscape with mountains, trees, and figures (no text or symbols)text_image
WALTNISSE WA!! WA-!!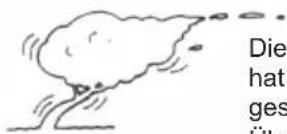
natural_image
Illustration of a power transmission tower with buildings and a small house, no text or symbols presentnatural_image
Diagram showing a person on a curved path with trees and mountains, no text or symbols presentnatural_image
Technical line drawing of a mechanical bracket assembly with an inset showing a spherical component (no text or symbols)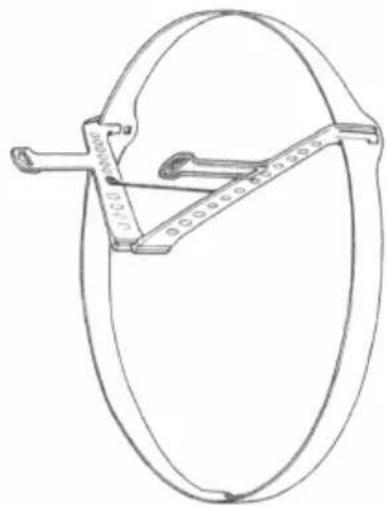
natural_image
Line drawing of a circular mechanical device with a ruler, no text or symbols present2
natural_image
Technical line drawing of a mechanical device with two components, one showing a shaft and wheel assembly (no text or symbols)natural_image
Technical line drawing of a mechanical device with wheels and a curved blade (no text or symbols)4
natural_image
Line drawing of an arrow-drawn bowing machine with wheels and a curved blade (no text or symbols)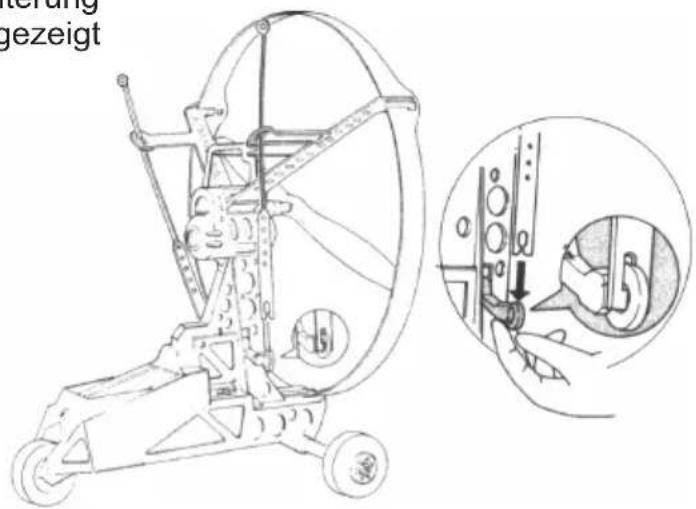
text_image
terang gezeigt5
natural_image
Technical line drawing of a mechanical assembly with internal components (no text or symbols)natural_image
Illustration of a power cord connected to a battery and a wall-mounted socket (no text or symbols)natural_image
Line drawing of a person operating a large arc-shaped device with a wheel nearby (no text or symbols)
natural_image
Line drawing of a person standing with a pole, holding a tool (no text or symbols)natural_image
Illustration of two people using a windmill and a mechanical device (no text or symbols)natural_image
Illustration of a person using a net to lift a bucket (no text or symbols)
natural_image
Illustration of a person using a telescope to interact with a curved mechanical component (no text or symbols)natural_image
Diagram showing a parachute with its main body, a parabolic trajectory, and a small object with curved motion lines (no text or symbols)natural_image
Diagram of a fan-shaped structure with radial lines and a central circular element, no text or symbols present.natural_image
Diagram of parabolic parachutes with labeled components and motion arrows (no text or symbols)natural_image
Simple line drawing of a parachute with a small satellite dish below, labeled with number ② (no text or symbols on the diagram itself)Declaration of Conformity in accordance with the Radio and Telecomunikations Terminal Equipment
Act (FTEG) and Directive 1999/5/EG (R&TTE)
declares that the product
No. 92210 WP Sky Surfer 2.4 RTF
Geräteklasse: 2
Equipment class
complies with the essential requirements of § 3 and the other relevant provisions of the FTEG (Article 3 of the R&TTE Directive).
Harmonised standards applied
EN 60950-1+A11+A1 2010
EN 62311 2008
Health and safety requirements pursuant to § 3 (1) 1. (Article 3 (1) a))
EN 301 489-1 V1.9.2
EN 301 489-17 V2.1.1
Protection requirement concernig electromagnetic compatibility
Measures for the efficient use of the radio frequency spectrum
§ 3 (2) (Article 3 (2))
CE0678①
Stefan Graupner, Managing Director
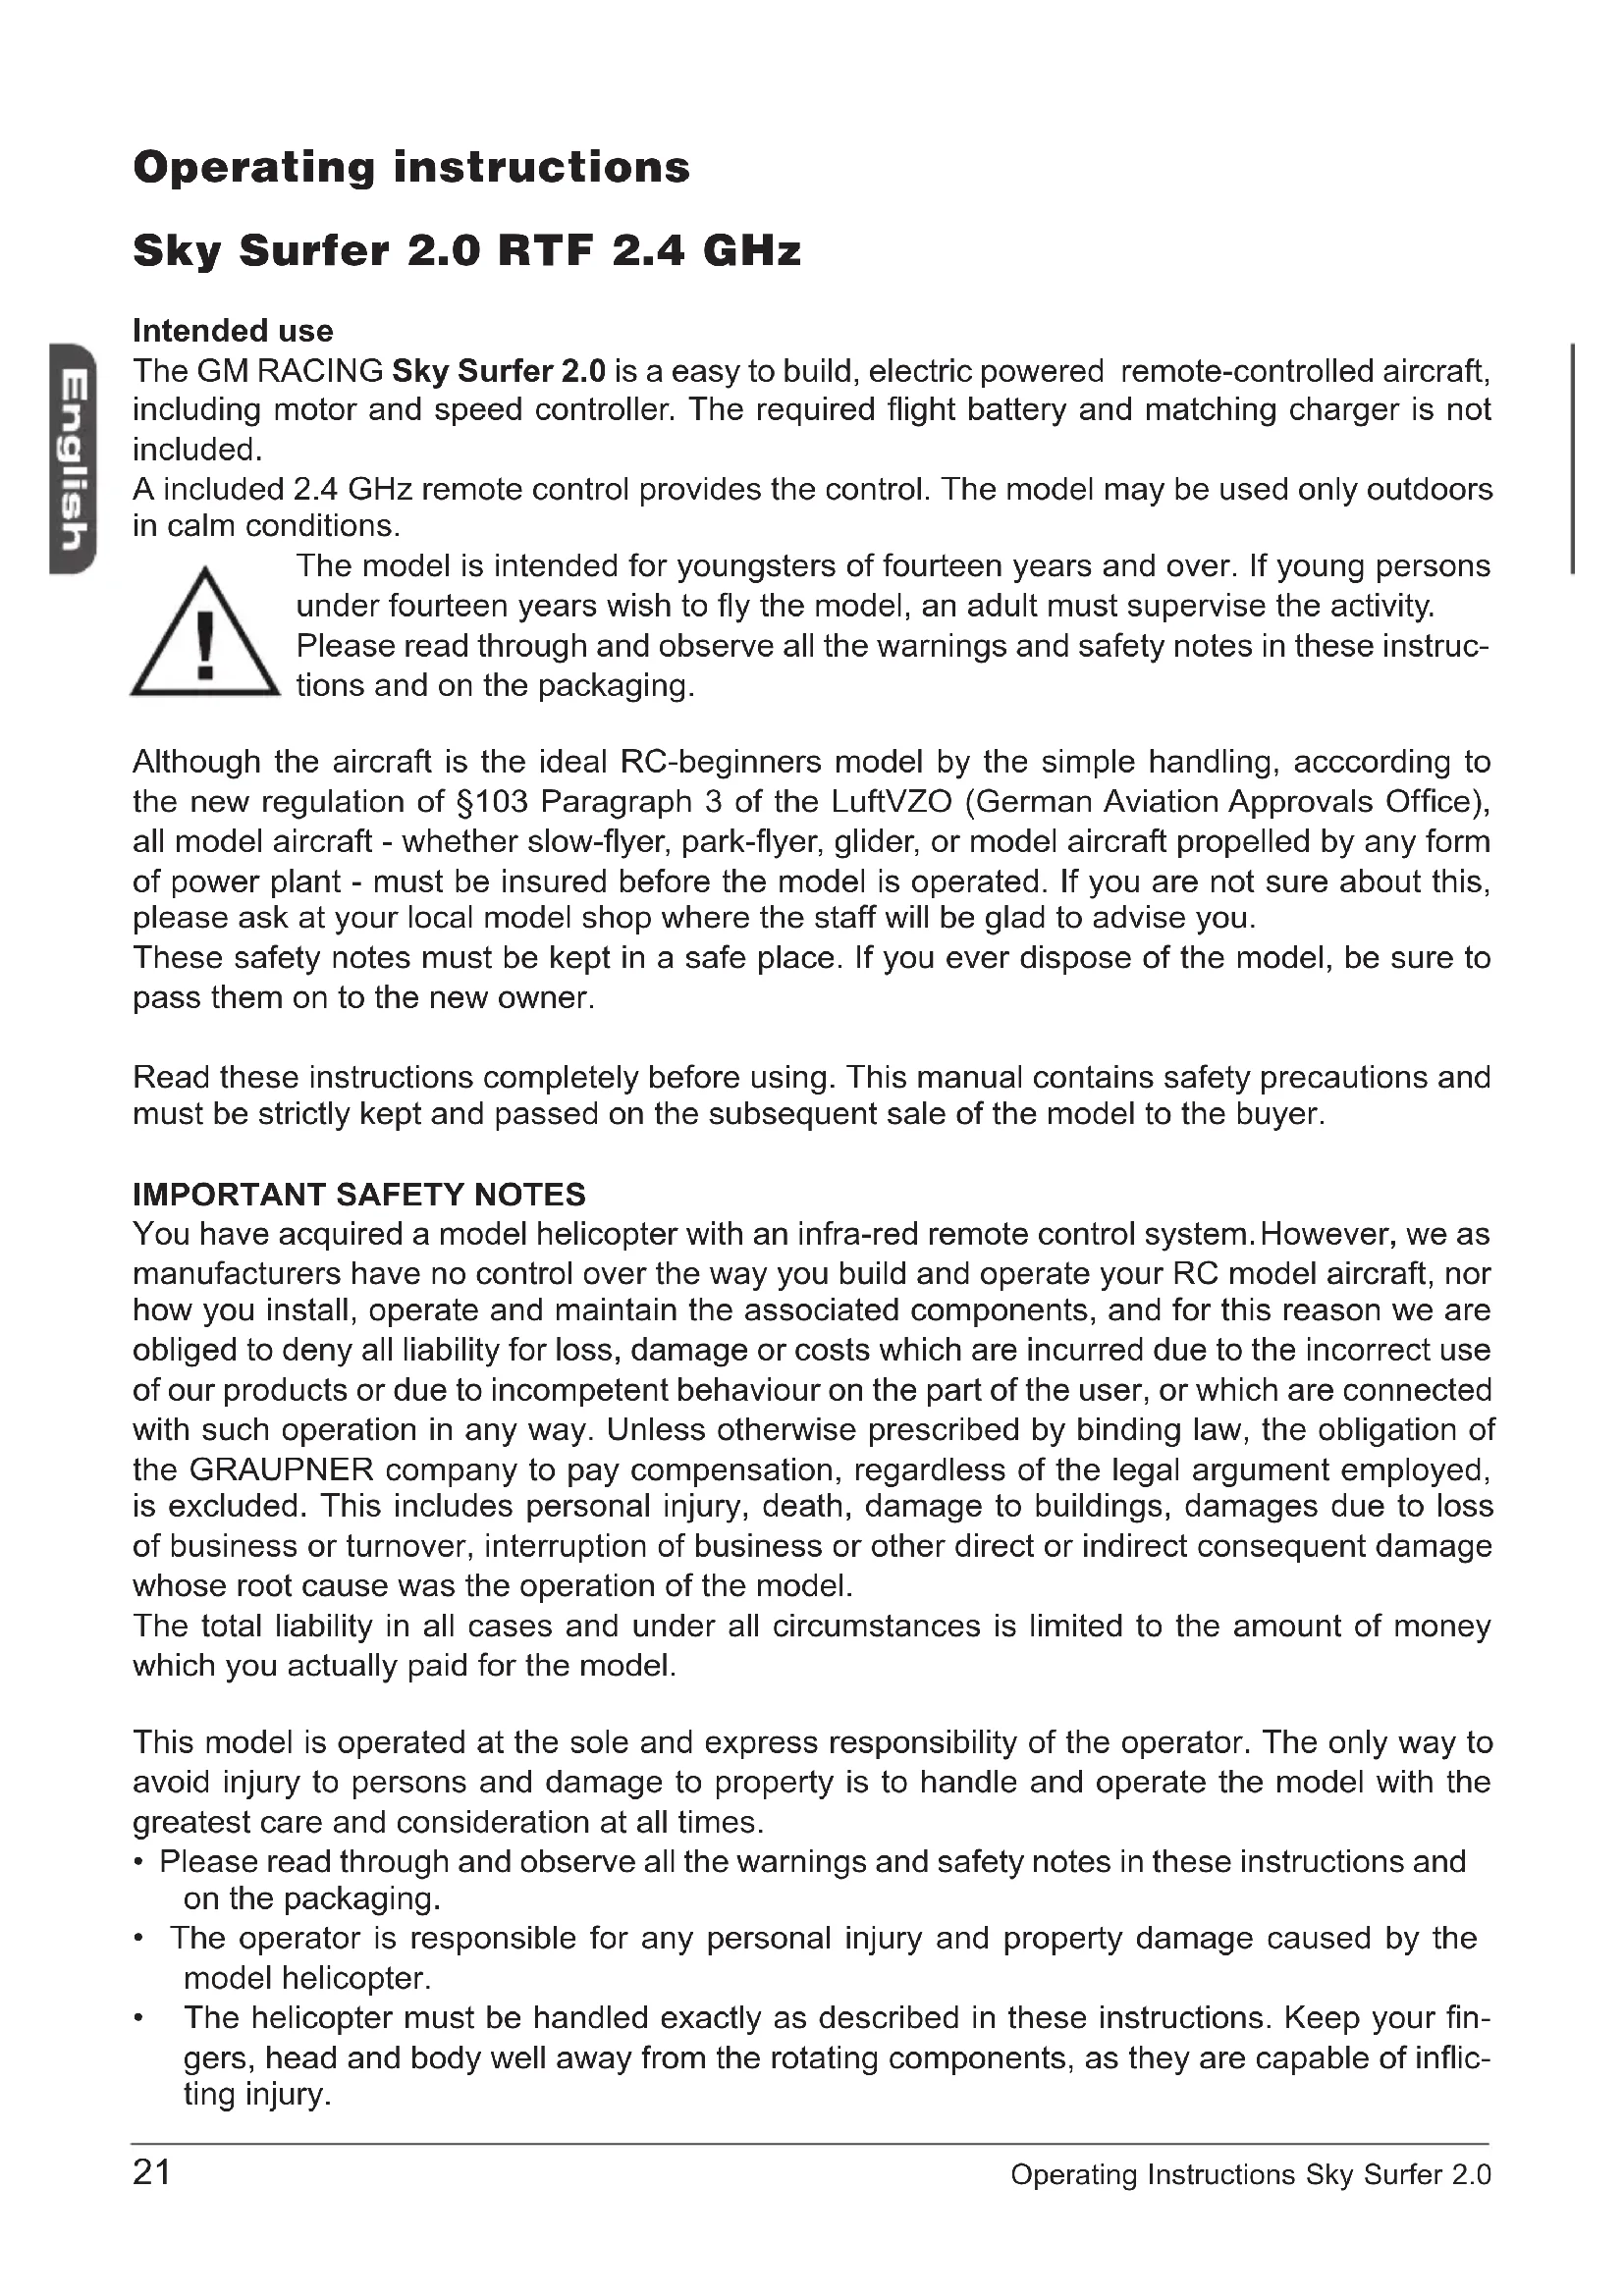
Operating instructions
Sky Surfer 2.0 RTF 2.4 GHz
Intended use
The GM RACING Sky Surfer 2.0 is a easy to build, electric powered remote-controlled aircraft, including motor and speed controller. The required flight battery and matching charger is not included.
A included 2.4 GHz remote control provides the control. The model may be used only outdoors in calm conditions.
The model is intended for youngsters of fourteen years and over. If young persons under fourteen years wish to fly the model, an adult must supervise the activity.
Please read through and observe all the warnings and safety notes in these instructions and on the packaging.
Although the aircraft is the ideal RC-beginners model by the simple handling, according to the new regulation of §103 Paragraph 3 of the LuftVZO (German Aviation Approvals Office), all model aircraft - whether slow-flyer, park-flyer, glider, or model aircraft propelled by any form of power plant - must be insured before the model is operated. If you are not sure about this, please ask at your local model shop where the staff will be glad to advise you.
These safety notes must be kept in a safe place. If you ever dispose of the model, be sure to pass them on to the new owner.
Read these instructions completely before using. This manual contains safety precautions and must be strictly kept and passed on the subsequent sale of the model to the buyer.
IMPORTANT SAFETY NOTES
You have acquired a model helicopter with an infra-red remote control system. However, we as manufacturers have no control over the way you build and operate your RC model aircraft, nor how you install, operate and maintain the associated components, and for this reason we are obliged to deny all liability for loss, damage or costs which are incurred due to the incorrect use of our products or due to incompetent behaviour on the part of the user, or which are connected with such operation in any way. Unless otherwise prescribed by binding law, the obligation of the GRAUPNER company to pay compensation, regardless of the legal argument employed, is excluded. This includes personal injury, death, damage to buildings, damages due to loss of business or turnover, interruption of business or other direct or indirect consequent damage whose root cause was the operation of the model.
The total liability in all cases and under all circumstances is limited to the amount of money which you actually paid for the model.
This model is operated at the sole and express responsibility of the operator. The only way to avoid injury to persons and damage to property is to handle and operate the model with the greatest care and consideration at all times.
- Please read through and observe all the warnings and safety notes in these instructions and on the packaging.
- The operator is responsible for any personal injury and property damage caused by the model helicopter.
-
The helicopter must be handled exactly as described in these instructions. Keep your fingers, head and body well away from the rotating components, as they are capable of inflicting injury.
-
It is the owner's responsibility to operate the helicopter safely. The manufacturer and distributor accept no liability if incompetent or inappropriate use of the model results in loss or damage.
- This product is suitable for young persons of fourteen years and over. Younger children may only play with it under the constant supervision of an adult.
- You alone are responsible for the safe operation of this model!
Warning notes
-
The set contains small parts which could cause injury if swallowed; for this reason it must be kept out of the reach of children under three years of age.
-
Do not attempt to fly the model indoors. The helicopter should only be flown in an open indoor space devoid of obstacles.
- Always ensure that the batteries are new or fully charged.
- Do not dismantle or modify any of the parts supplied in the set; this applies in particular to the transmitter and the flight battery.
- Do not allow moisture or damp to penetrate the components, as water may damage the electronics.
- Take care to avoid the rotors coming into contact with fingers, hair or loose clothing.
- Remember to switch the model off when you are not using it.
- Use only the recommended battery charger and flight battery.
- We recommend adult supervision when young people fly the model. Children must be advised of the potential hazards involved in handling the model.
Safety notes regarding power sources (Transmitter Sky Surfer 2.0)
- Never attempt to charge any battery which is not specifically stated to be rechargeable.
- Unless the instructions expressly state otherwise, always remove rechargeable batteries from the device before charging them.
- Rechargeable batteries must only be charged under the supervision of an adult.
- If you are using dry cells, never use different cell types, nor a mixture of new and used cells.
- Use only batteries of the recommended type, or their exact equivalent.
• Always take care to insert battery cells with correct polarity. - When dry cells are exhausted, remove them from the device immediately.
• Take care not to short-circuit battery terminals. - Never use defective or damaged rechargeable or dry batteries, or packs consisting of different cell types.
Warnings relating to the use of LiPo batteries (Sky Surfer 2.0)
Lithium-Polymer (abbreviation: LiPo) batteries require particularly careful handling. This applies to charging and discharging techniques, and also to storage and other aspects of general handling. Special measures must be observed, and these are outlined below.
- Mishandling these batteries may lead to explosions, fire, smoke and a risk of poisoning. In addition to these hazards ignoring our instructions and warnings will result in loss of battery performance and other problems.
The capacity of a LiPo battery declines every time you charge or discharge it. Storing these batteries at excessively high or low temperatures may also cause a gradual reduction in capacity. In typical modelling usage these batteries will be subject to high discharge currents and motor induction currents, with the result that their capacity will fall to around 50 - 80% of the capacity of a new battery after 50 charge / discharge cycles even if you observe all the
charge and discharge requirements.
LiPo batteries must not be thrown in a fire or incinerated.
- LiPo cells must not be allowed to come into contact with fluids such as water, salt water or drinks, even for a very short period. Avoid all contact with liquids of any type.
Individual cells and packs made up of cells are not playthings, and must not be allowed into • hands of children. Store batteries and cells well out of the reach of children.
- Batteries must be kept out of the reach of babies and small children at all times. If a battery should be swallowed, seek emergency medical attention immediately.
Batteries must not be placed in a microwave oven or subjected to pressure. This may result in smoke and fire or even worse.
Never dismantle a LiPo battery. Dismantling a pack may cause internal short-circuits, with the possible results of gassing, fi re, explosion and other problems.
LiPo batteries contain toxic electrolytes and electrolyte vapours which are damaging to health. Take great care to avoid direct contact with electrolyte. If electrolyte contacts your skin, eyes or any other body part, immediately wash it off using plenty of clean water, then consult a doctor.
The company of Graupner GmbH & Co. KG is unable to ensure that you use the correct methods to charge and discharge these cells, and for this reason we are obliged to refute any claim under guarantee if the cells have been charged or discharged incorrectly.
Additional notes on handling LiPo batteries
For the charging of LiPo battery packs use only the licensed chargers with their corresponding connecting leads. Any manipulation of the charger or of the charging lead may cause serious damages. By means of the charger you have the full and absolutely imperative control of each single cell of the battery pack.
- The battery to be charged must be placed on a non-flammable, heat resistant and non-conductive surface. Keep inflammable and volatile materials well away from the charging area. Batteries must not be left on charge unsupervised.
- Avoid short-circuits. Never short-circuit these batteries. Shorting the terminals allows a very high current to flow, and this heats up the cells. This in turn may lead to a loss of electrolyte, gassing (venting of gas) or even an explosion. When handling Graupner LiPo batteries keep them well away from conductive objects and surfaces to avoid the danger of a short-circuit.
It is essential to avoid cell voltages above 4.25 V, as higher voltages cause permanent damage to the cells and cause fire.
- Take great care never to charge these batteries with reversed polarity. If batteries are charged with reversed polarity abnormal chemical reactions take place, causing cell ruptures, smoke and flames, and the battery gets useless.
The permissible range of temperature during the charging and storing of LiPo batteries is • from 0 – 50°C.
- Storing: LiPo cells should be stored with a charged capacity of 10 – 20 %. If the voltage of the cells go down under 3 V, it is absolutely imperative to recharge them (10-20 %). Deep-discharging and storing in a discharged condition (cell voltage under 3 V) render the battery useless.
Batteries must not be placed in a microwave oven or subjected to pressure. This may result • in smoke and fire or even worse.
Never dismantle a LiPo battery. Dismantling a pack may cause internal short-circuits, with the possible results of gassing, fire, explosion and other problems.
Damaged cells must never be re-used.
Indications of damage include broken housings, distortion of battery cells, escaping elec-•
trolyte or a smell of electrolyte. If your LiPo battery exhibits any of these problems it must not be used again.
Damaged or exhausted cells constitute toxic waste and must be disposed of in the appropriate manner.
Batteries which are build in a device should always be removed if the device is not to be used immediately.
Always switch equipment off after use in order to avoid the cells becoming deep-discharged.
Recharge batteries in good time. Do not use deep-discharged batteries again.
Safety notes
Do not touch the propeller!•
Keep away all body parts, clothing and other items from the range of the propeller.
- If the rotors are damaged or broken, do not attempt to fly the model again, as it will be uncontrollable and could injure you.
Never try to open the model or modify its construction.
The operator of the model must be in full possession of his or her bodily and mental faculties. As with car driving, operating a model aircraft under the influence of alcohol or drugs is not permissible under any circumstances.
• The Sky Surfer is indeed easy to fly, but you should never endanger others.
• Never fly towards people or animals or even fly over them.
- The motor of the Sky Surfer 2.0 gets very hot during operation, so it has to cool down before the next launch at least 20 minutes - otherwise the motor can be damaged!
Use only the recommended power battery. Batteries over 20C may not be used under any circumstances, otherwise the motor may be damaged!
Recommended accessories:
Order No. 92210.1 LiPo battery 7.4 V 2/1100 20C•
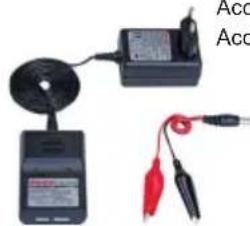
• Order No. 6454 Charger LiPo Balancer Charger 2-3 S 12 V/230 V
• Order No. 3621.4 AA Eco Power 1.2V/800 mAh or
• Order No. 3426 AA Power battery
Safety notes
natural_image
Illustration of a paraglider flying over a landscape with mountains and small figures below (no text or symbols)-
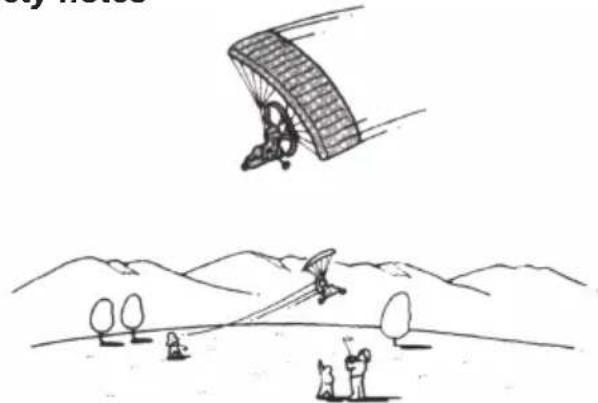
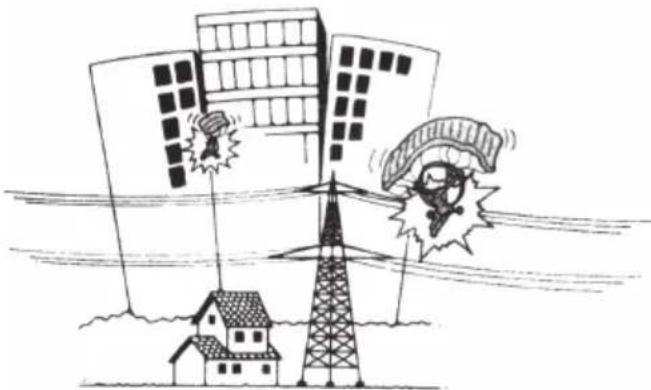
Be sure to choose a fl ying site which is wide enough and clear of trees and powerlines.
-
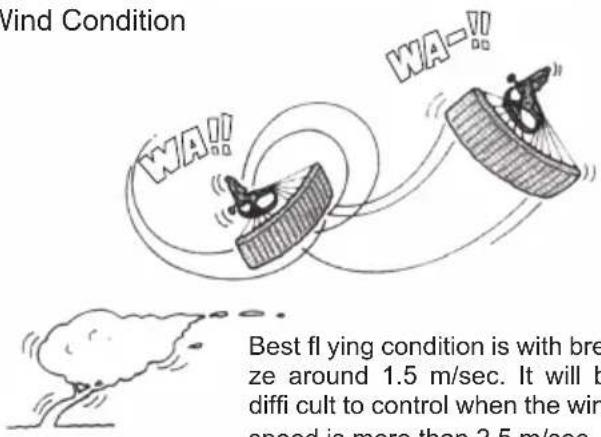
Wind Condition
text_image
Wind Condition WA!! WA!! Best fl ying condition is with breze around 1.5 m/sec. It will be diffi cult to control when the win speed is more than 2.5 m/sec.Best fl ying condition is with breeze around 1.5 m/sec. It will be diffi cult to control when the wind-speed is more than 2.5 m/sec.
natural_image
Illustration of a power transmission tower with buildings and a small house, no text or symbols present-
Do not operate near tall buildings or power-lines!
-
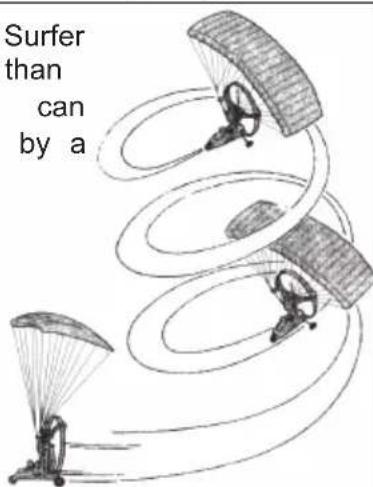
In case of the Sky Surfer climbs up much higher than you wanted, you can descend the model by a corkscrew flight.
text_image
Surfer than can by a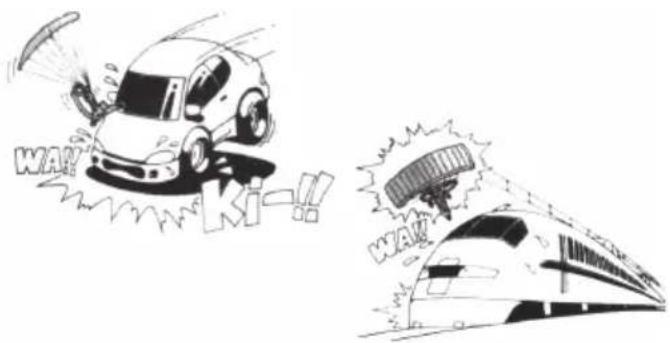
text_image
WA! KI-!- Do not operate near a traffic c-road. Do not operate near a rail-road.
natural_image
Diagram showing a person climbing a mountain slope with trees and an arrow indicating motion (no text or symbols)-
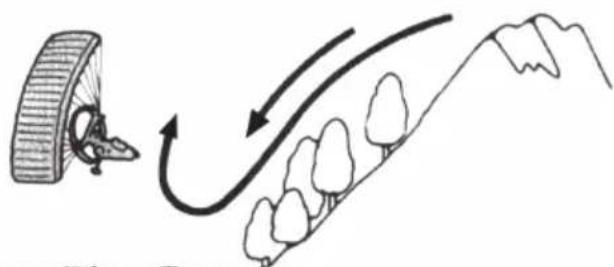
Descending air current is likely to be occurred at foots of mountains and bank which causes diffi cult to climb up.
-
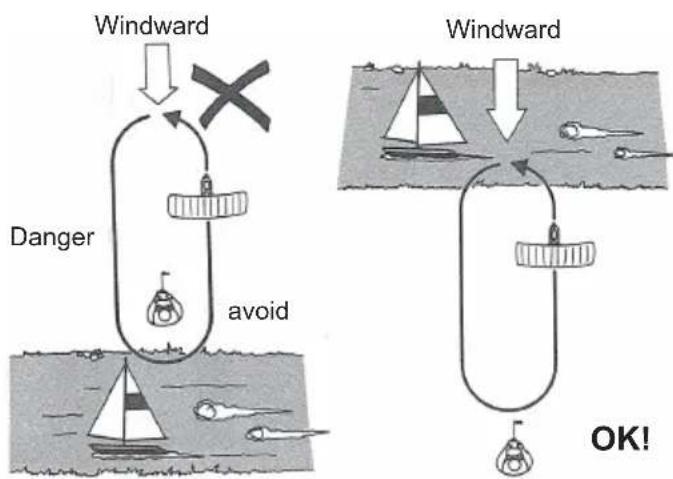
Near rivers or lakes
When operating near rivers or lakes and if the Sky Surfer lands on water, you may not get it back depending on the condition.
Check the wind direction and do not operate on the leeward side of rivers and lakes.
Even when operating on the windward side, keep enough distance and altitude.
text_image
Windward Danger avoid Windward OK!- Specifications
text_image
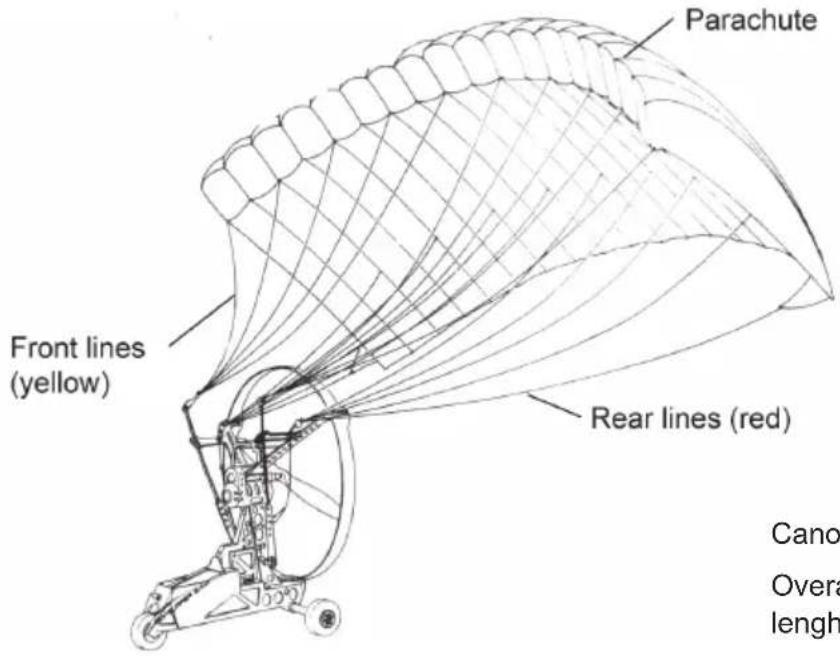
Parachute Front lines (yellow) Rear lines (red) Cano Overa lengthRC-functions:
Right/Left
Height control via speed controller
Canopy size 1260 x 460 mm
Overall fuselage
lenght approx. 220 mm
Overall fuselage
height approx. 300 mm
All up weight approx. 600 g
Speed 10 - 15 km/h
Motor run time approx. 8-10 min. (Battery
LiPo 2/1100 20C
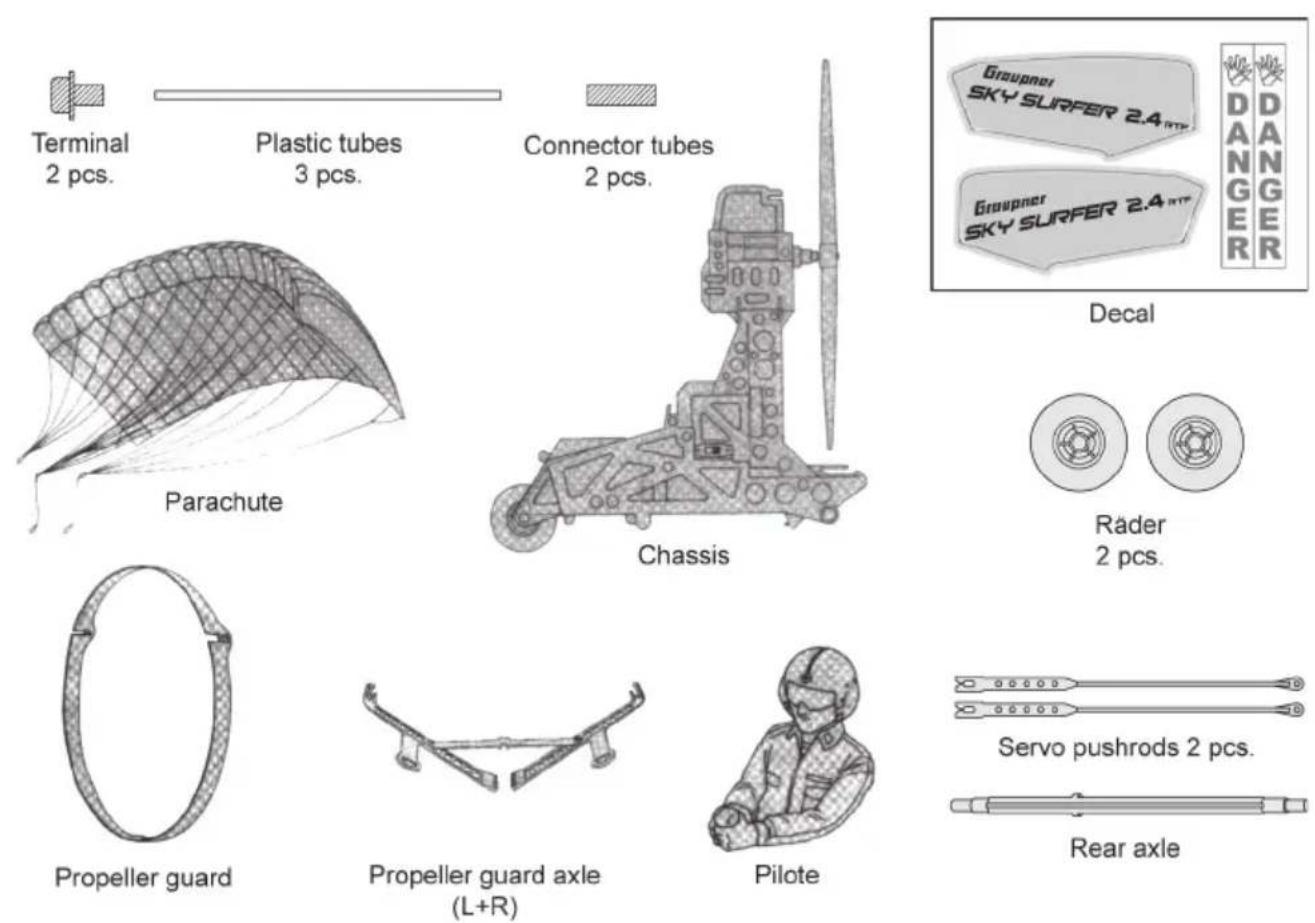
- Content
ELECTRICAL ELEMENTS
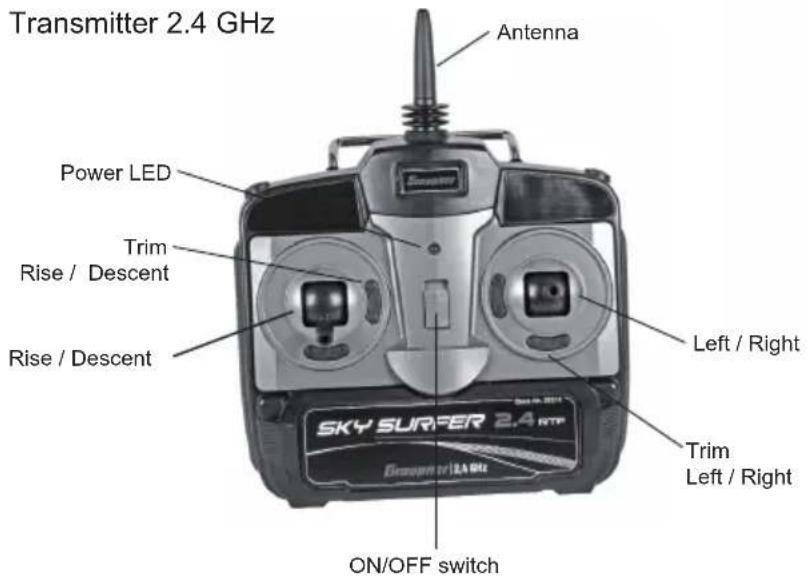
text_image
Transmitter 2.4 GHz Antenna Power LED Trim Rise / Descent Rise / Descent Left / Right SKY SURFER 2.4 RTF On/OFF switch Trim Left / Right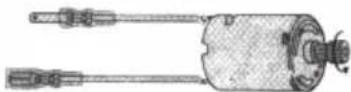
Driving motor (built-in)
natural_image
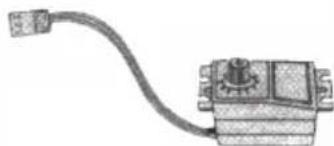
Illustration of a mechanical device with a curved cable and central knob (no text or symbols)Steering servo (built-in)
3. Assembly
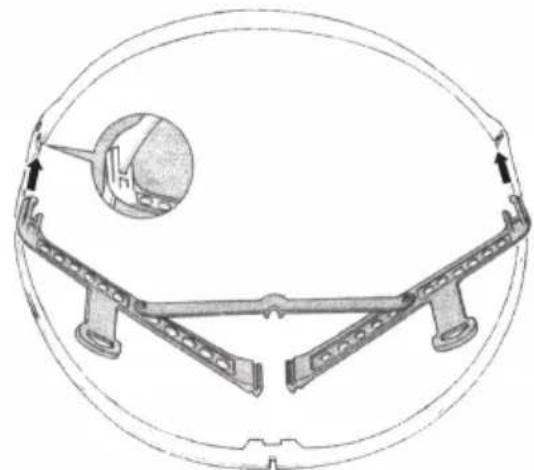
1 Snap propeller guard axle set into propeller guard
natural_image
Technical line drawing of a mechanical assembly with a circular outline and an inset showing a spherical component (no text or symbols)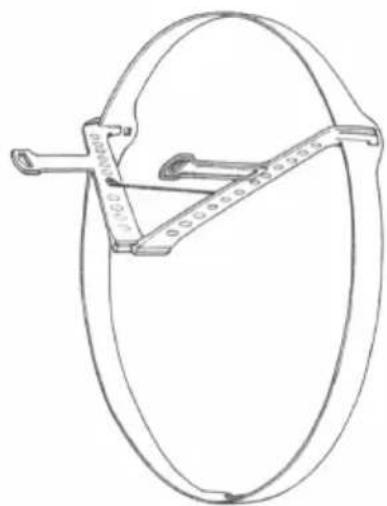
natural_image
Line drawing of a circular mechanical device with a handle and scale bar (no text or symbols)2
natural_image
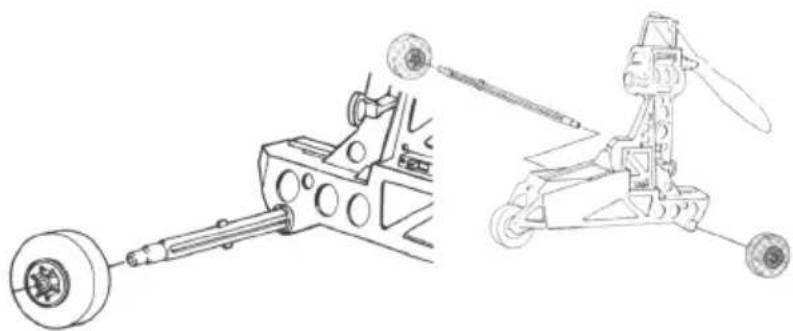
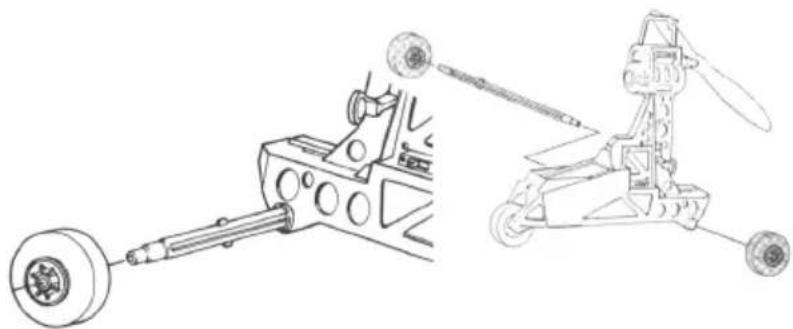
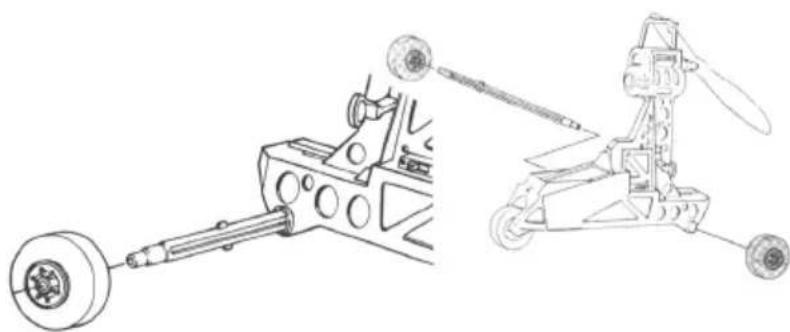
Technical line drawing of a mechanical device with two components, one showing a shaft and the other a wheel assembly (no text or symbols)The stopper of the rear shaft must fit into the groove of the chassis. Snap system, just snap the tires onto the axle. Pay attention to the „klick“.
When remove the tire, just pinch the stopper of the axle tip.
3
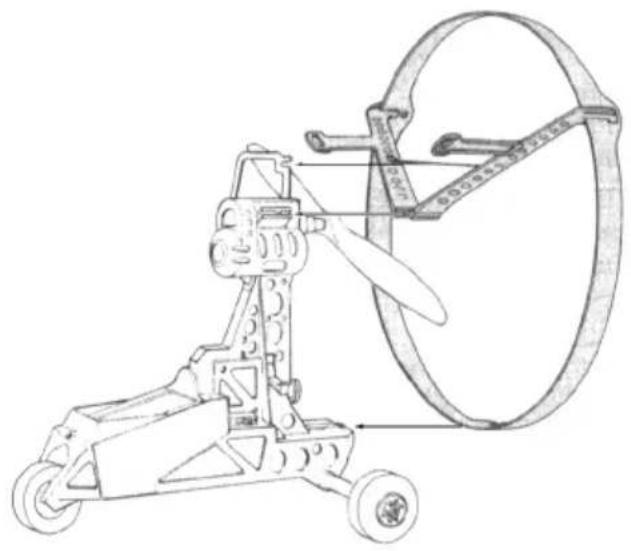
Snap Propeller guard into main body. A click sound tells you that it fi ts tight.
natural_image
Technical line drawing of a mechanical device with wheels and a curved blade (no text or symbols)4
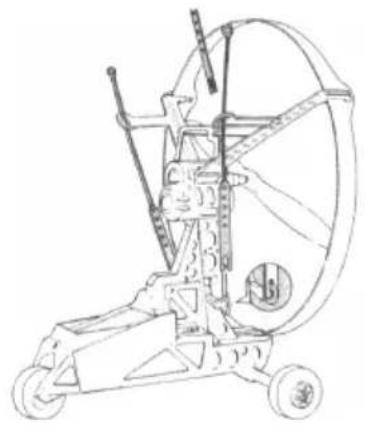
Fit the two servo pushrods through the slots in either side of the propeller guard holder. Connect the pushrods to the servo output arms as shown in the illustration.
natural_image
Line drawing of an arrow bowing cart (no text or symbols)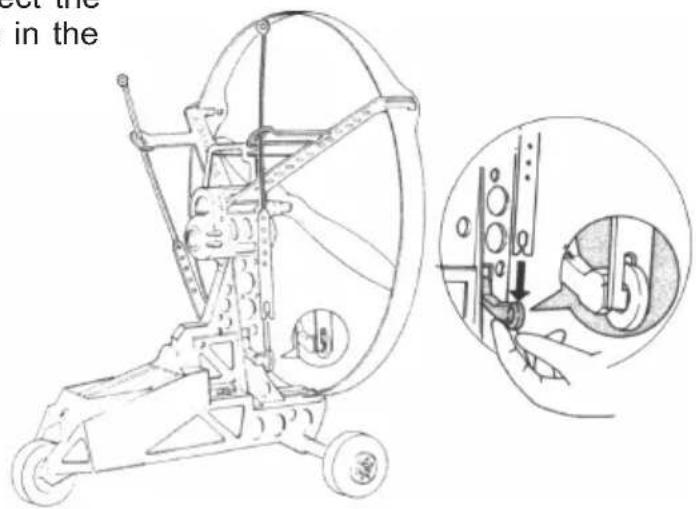
text_image
set the in the5
Tear off the double sided tape and fix the pilot in the seat as shown in the illustration.
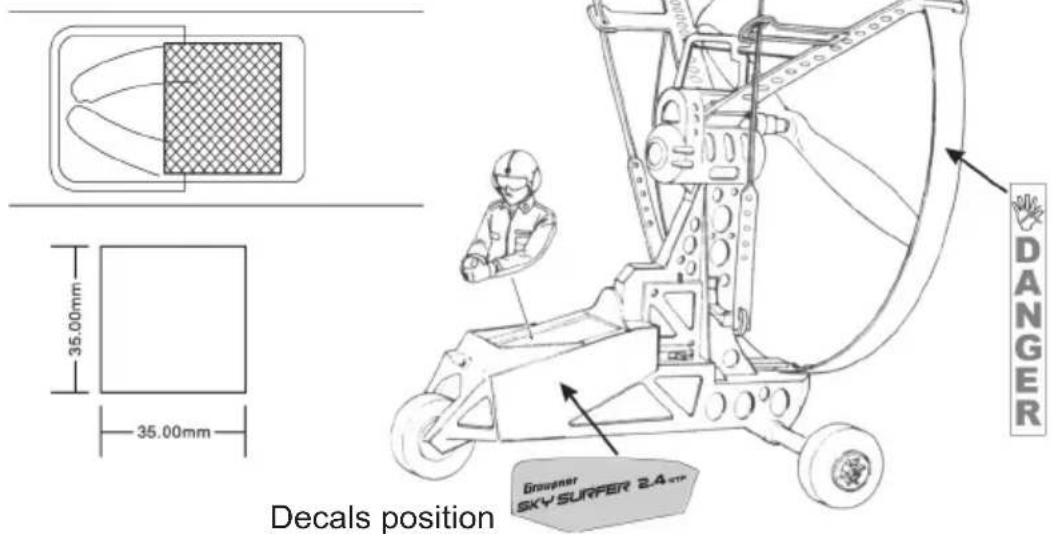
text_image
35.00mm 35.00mm Decals position DANGER Grounger SKY SURFER 2.4 TP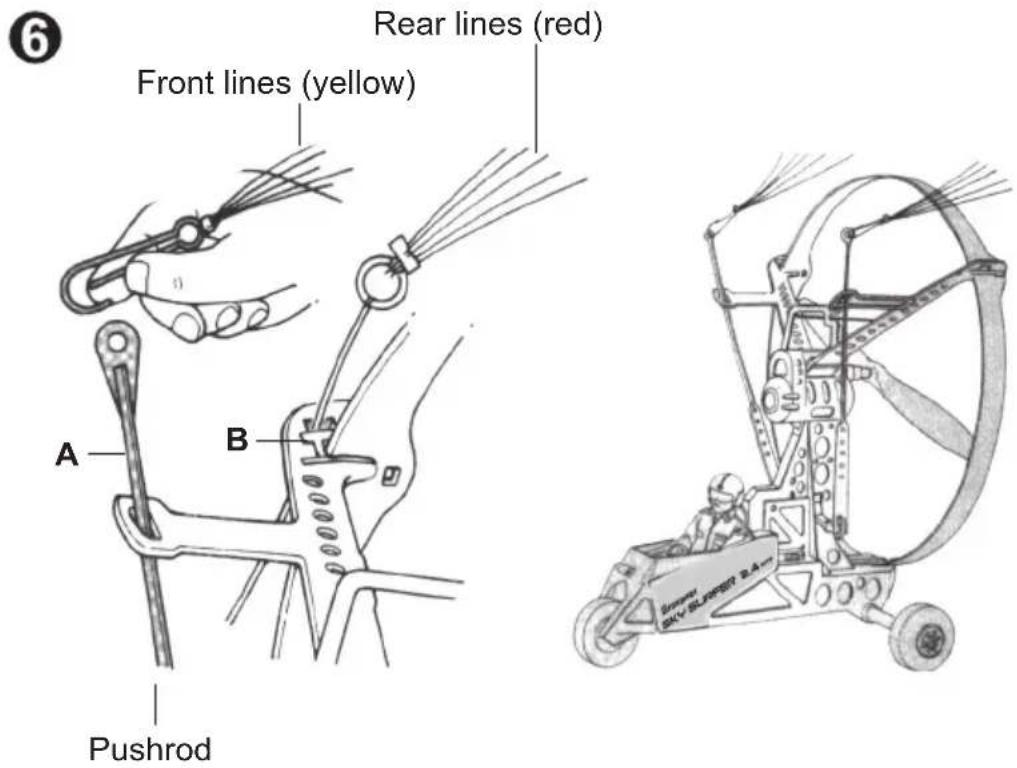
text_image
6 Front lines (yellow) Rear lines (red) A B Pushrod BMW AIR SLABER 2.4Hook up front lines (yellow) at the top of left and right pusrod (A) as shown.
7
text_image
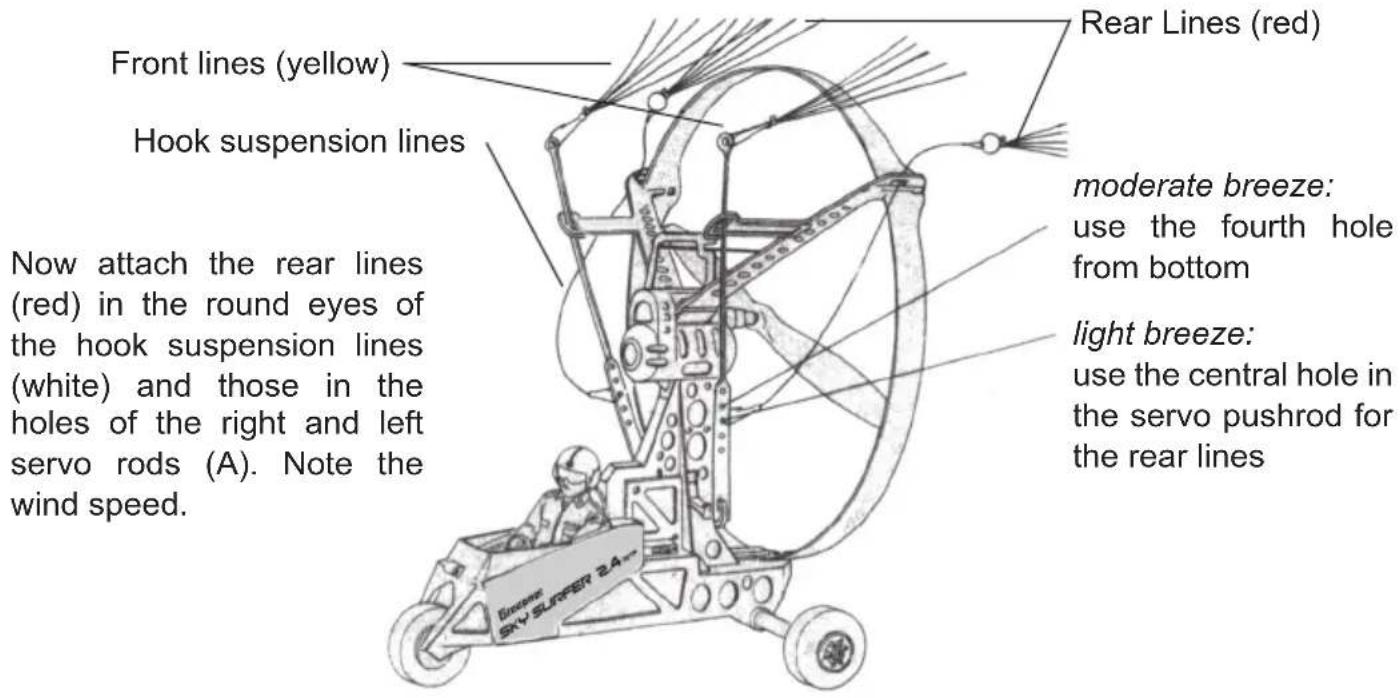
Front lines (yellow) Hook suspension lines Now attach the rear lines (red) in the round eyes of the hook suspension lines (white) and those in the holes of the right and left servo rods (A). Note the wind speed. Rear Lines (red) moderate breeze: use the fourth hole from bottom light breeze: use the central hole in the servo pushrod for the rear linesIndicators to control the wind speed:
- light breeze (about 16 km / h): leaves on the tree move
- moderate breeze (about 30 km / h): Leaves and small twigs in constant motion If the wind is stronger (over 30 km / h) the Sky Surfer must never be flown!
The model's airspeed has to be adjusted to suit the prevailing wind conditions and the pilotes preferences, and this is done by selecting different connection holes to alter the angle of attack. The higher the holes are chosen, the faster the model flies.
8
text_image
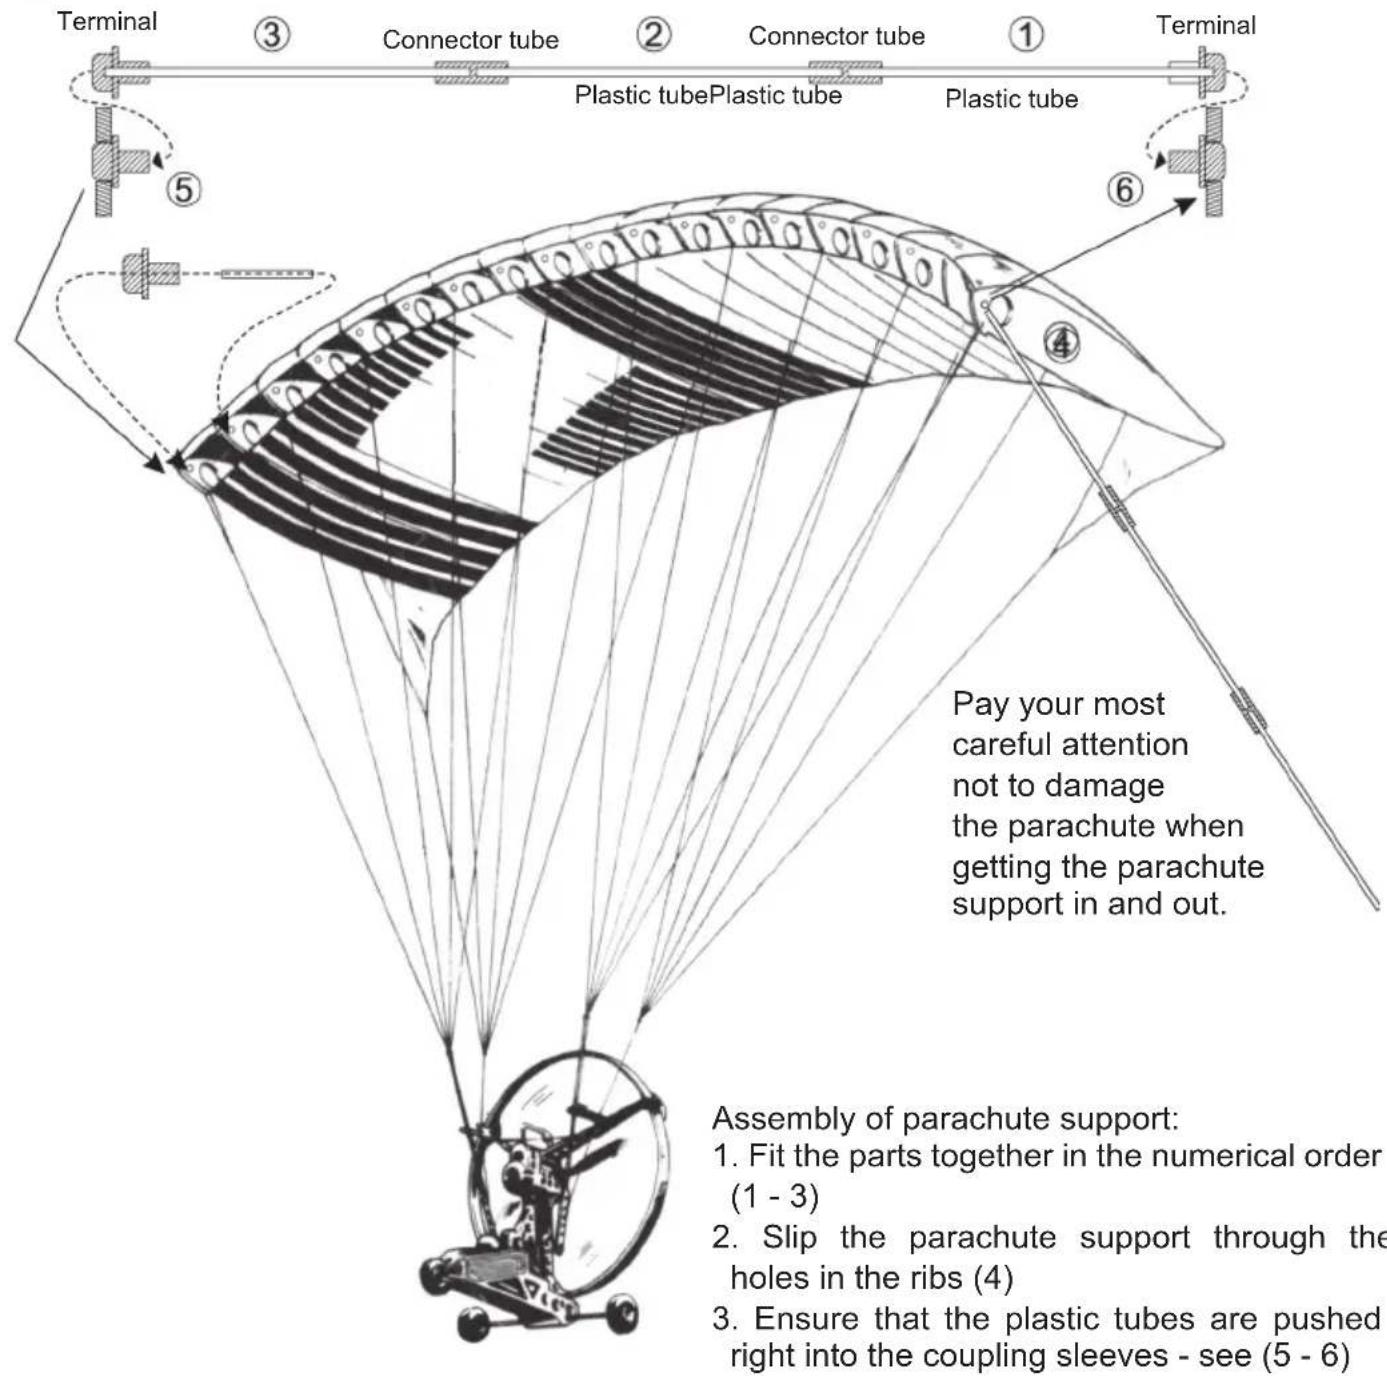
Terminal Connector tube Connector tube Plastic tube Plastic tube Plastic tube Terminal Pay your most careful attention not to damage the parachute when getting the parachute support in and out. Assembly of parachute support: 1. Fit the parts together in the numerical order (1 - 3) 2. Slip the parachute support through the holes in the ribs (4) 3. Ensure that the plastic tubes are pushed right into the coupling sleeves - see (5 - 6)The parachute support rod can be removed for easier transport.
9
-
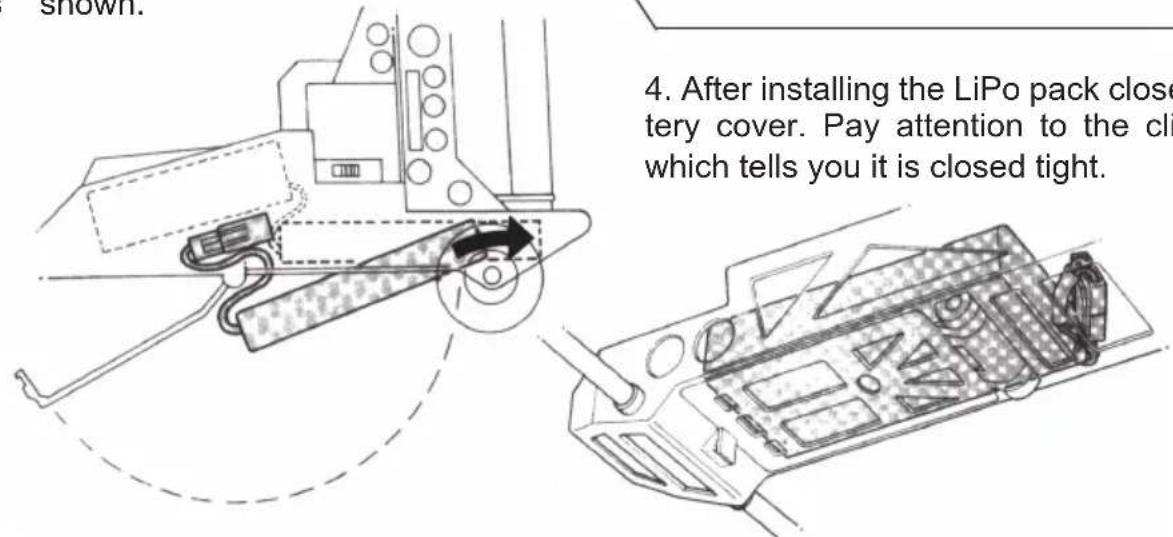
Open the battery cover located at the bottom of the chassis by removing the stopper.
-
Pull out connector located in the battery compartment and connect the battery pack.
-
Put the connector first in battery compartment and then the LiPo battery pack as shown.
text_image
4. After installing the LiPo pack close tery cover. Pay attention to the cli which tells you it is closed tight.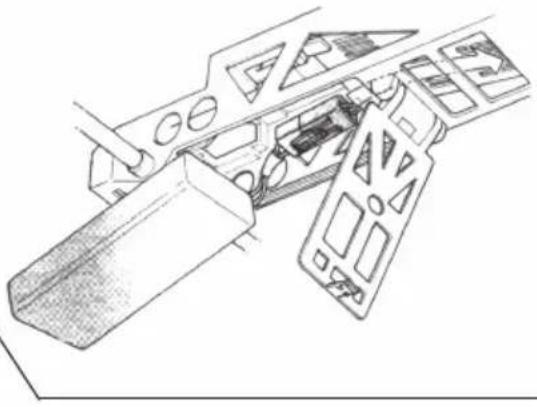
natural_image
Technical line drawing of a mechanical assembly with internal components (no text or symbols)- After installing the LiPo pack close the battery cover. Pay attention to the click sound which tells you it is closed tight.
10
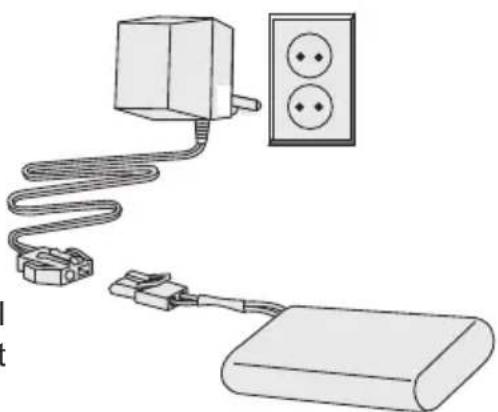
Charge the flight battery:
Safety notes:
First read • all safety notes on page 2!
Use only the recommended LiPo balancer charger • order-No. 6454. Charge only indoors!
The battery to be charged must be placed on a non-fl ammable, heat resistant and non-conductive surface. Keep infl ammable and volatile materials well away from the charging area. Batteries must not be left on charge unsupervised.
The charging process should be proceed under the supervision of adults, with children should be kept away.
natural_image
Illustration of a power cord connected to a battery and a wall-mounted socket (no text or symbols)Charging process:
Please read the manual of the used charger carefully!

Insert transmitter batteries:
First read • all safety notes on page 2!
Make sure that the transmitter is turned off - ON / OFF switch down.
Open the battery compartment cover on the back of the transmitter and insert four AA bat-• teries or rechargeable batteries. Ensure correct polarity!
Close the battery compartment cover.
Now turn on the transmitter. The LED lits red.
- A flashing red LED and a beep sound indicates low transmitter voltage, do not operate the model and change the transmitter batteries first - or charge the transmitter batteries.
- This is also during operation. Once the LED on the transmitter begins to flash or the low voltage alarm will sound, stop flying immediately and change batteries - or charge the transmitter batteries.
Binding:
This allows the transmitter to connect to the receiver. The components must be connected once, this process is called „binding“. This binding is the Sky Surfer 2.0 is already done in advance, so you can fly your model right away. In case of a binding should be necessary later, do the following:
Make sure that no other 2.4 GHz transmitter (eg. WLAN) is turned on in the area.
Turn the radio and then the Sky Surfer on.
- Now press the button on the receiver-ESC unit of the Sky Surfer, the LED will start flashing red after a short time. After a few seconds it should turn solid green again, the binding is successful.
• If the LED continues to flash red, repeat the process.
Sky Surfer 2.0 Trimm functions:
The two sticks are equipped with digital trims. A quick press of a button adjusts the neutral position to a certain value.
• Turn on the transmitter first, then the model.
- Move the left throttle all the way up, then all the way down (see illustration).
- The motor must not start now, if not press the lower left trim button until the motor stops.
Now move the right joystick to the middle. The red servo arm underneath the motor must be absolutely horizontal. To move it clockwise, press the right trim button, press the left in order to move the servo arm counterclockwise.
- Use this option even in flight trim. With the right control lever in the middle, the Sky Surfer must fly exactly straight. If the Sky Surfer flies a left curve, press the right trim button until it flies straight ahaed. Accordingly, press the left button trim, when he flies to the right.
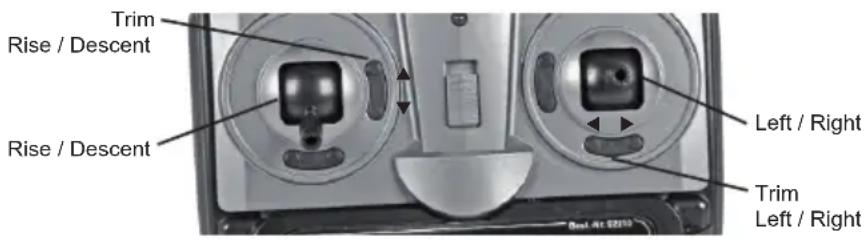
text_image
Trim Rise / Descent Rise / Descent Left / Right Trim Left / Right4. Starting and flying the Sky Surfer 2.0
Check before flight:
- Check if LiPo flight battery is fully charged. Fly with with a fully charged battery only!
Check that your transmitter batteries are full 2. or the transmitter batteries are charged. Fly with with a fully charged battery only!
Check the Sky Surfer 2.0 for damage dirt, as this can increase weight and thus provide poor flight characteristics.
Check the propeller for damage.4.
Check the servo functions.5.
Check the lines for damage and 6 proper mounting on the chassis. They may not be twisted.
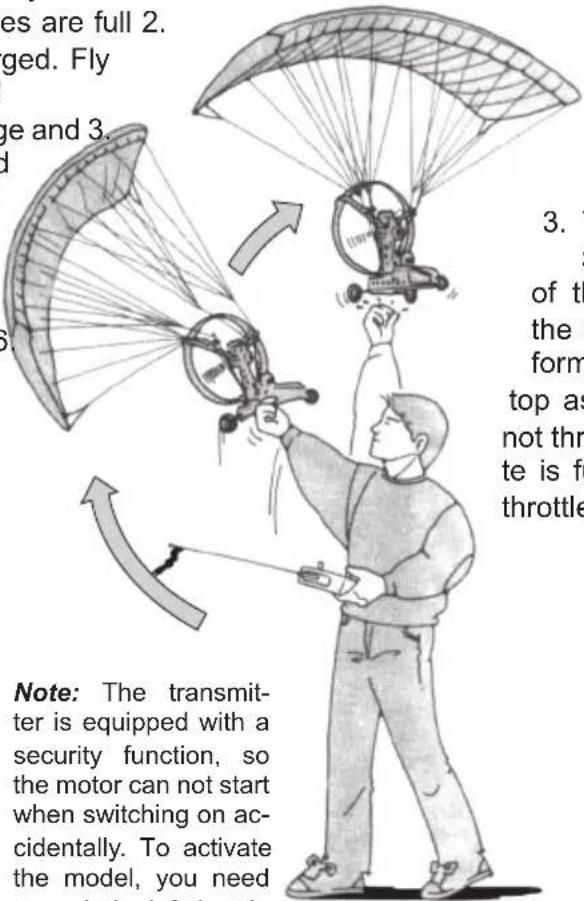
text_image
es are full 2. ged. Fly ge and 3. d Note: The transmit- ter is equipped with a security function, so the motor can not start when switching on ac- cidentally. To activate the model, you need to switch the throttleLeave he right control stick during the launch in the middle position - servo rod horizontal.
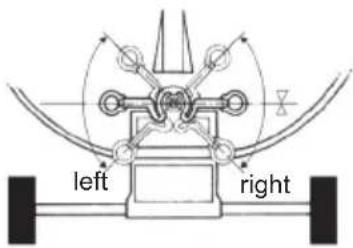
text_image
left rightNote: The transmitter is equipped with a security function, so the motor can not start when switching on accidentally. To activate the model, you need to push the left throttle stick to the top of the transmitter once (full throttle) and then again all the way down (motor off). Only after you have reached the bottom position - for acoustic control a short beep sounds - the receiver in the Sky Surfer responds and you can control the model.
Starting procedure:
-
Note the wind direction! Always start against the wind direction.
-
Turn ON transmitter first and then the model.
-
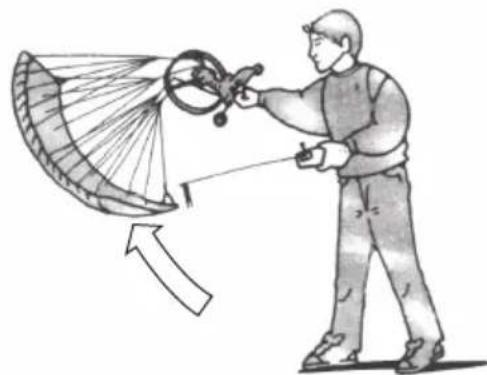
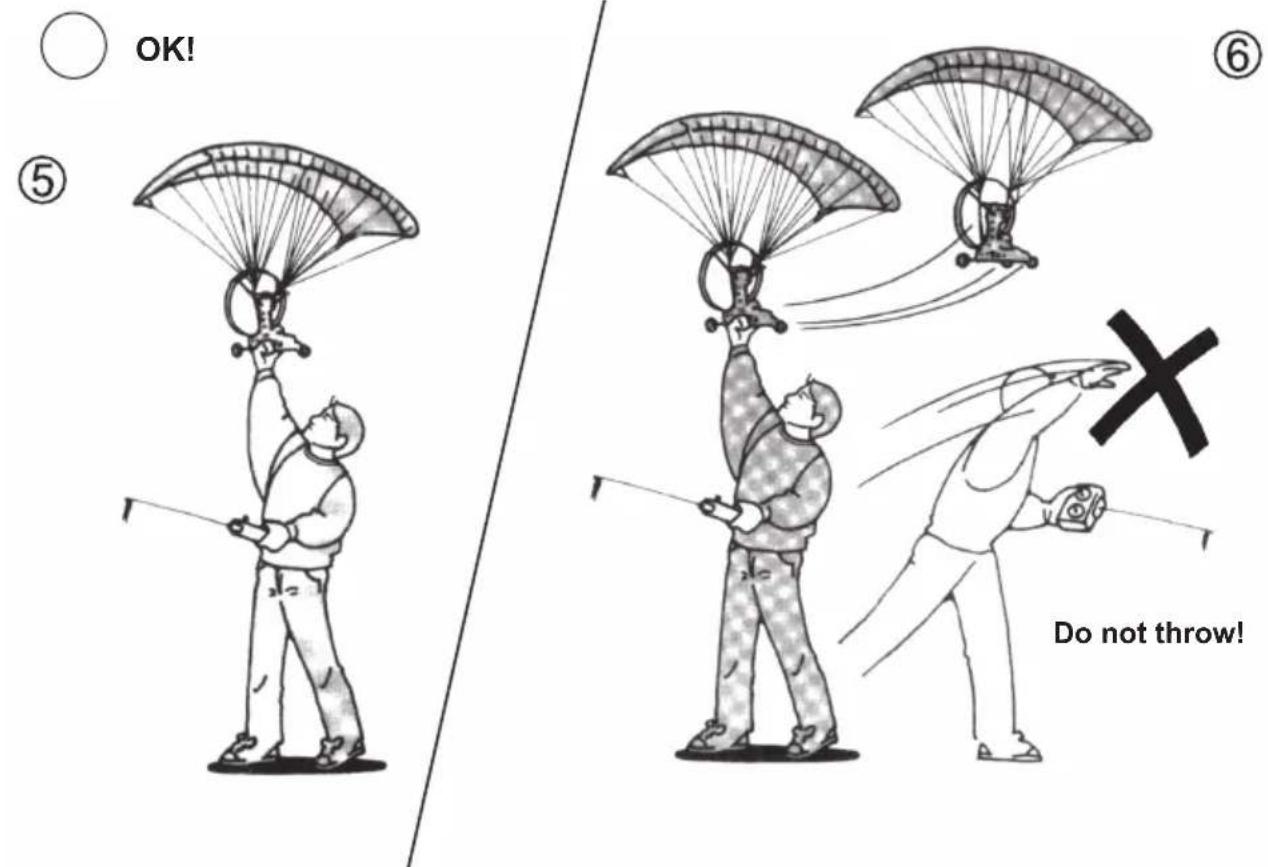
To start, hold the Sky Surfer 2.0 at the bottom of the chassis and move the arm shown with a uniform motion from bottom to top as shown in the fig. Do not throw! Once the parachute is fully deployed, give full throttle on the transmitter.
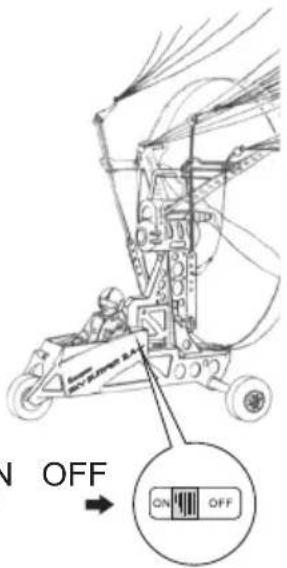
text_image
N OFF ON OFFON
Rise off ground with assistant
Turn ON transmitter first and then the model.
natural_image
Line drawing of a person operating a large arc-shaped device with a base (no text or symbols)
Note the wind direction! Always start against the wind direction.
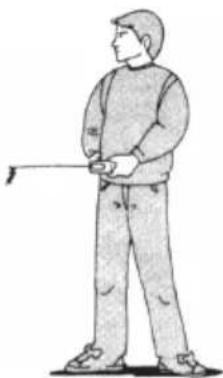
natural_image
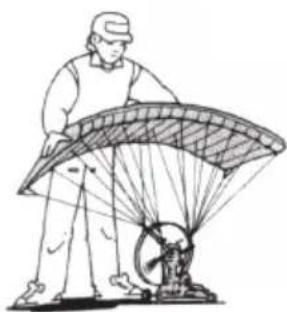
Line drawing of a person standing with a pole, holding a tool (no text or symbols)Place the model on a flat surface. The assistant stands behind the model, unfolds the parachute and holds it so tightly that the lines are taut. The pilot gives full throttle and at the same time the assistant releases the screen - the model starts.
Rise off ground without assistant
Turn ON transmitter fi rst and then the model.
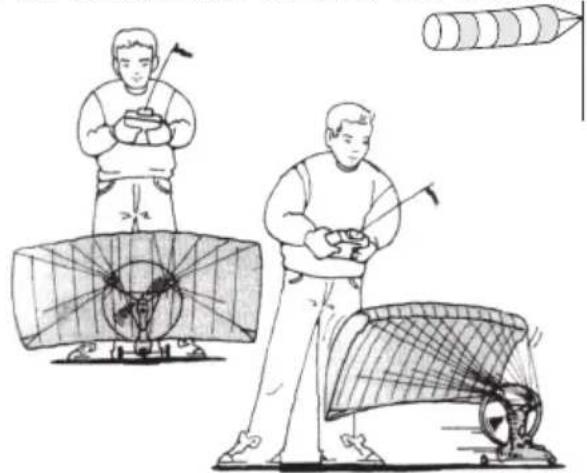
natural_image
Illustration of two people using a windmill and a wheel, with no visible text or symbolsNote the wind direction! Always start against the wind direction.
If the wind is so strong that the Sky Surfer 2.0 does not remain on the starting spot, no start is possible!
If the wind is less strong, place the parachute as shown in the fi gure on your feet and give full throttle on the transmitter. After rolling about 4 - 5 m on level ground the Sky Surfer should take off.
Please note: depending on wind conditions, the Sky Surfer is rising faster or slower, but usually
at a 10 degree angle - which is relatively flat. Make sure before you start that there are no trees or other obstacles in the flight path!
Hand launching
Turn ON transmitter fi rst and then the model.
Place in a 45 degree angle against the wind.
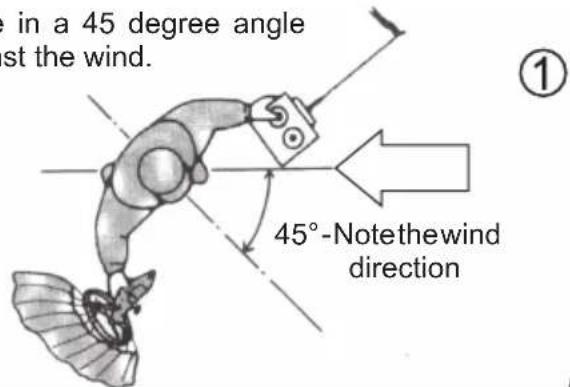
text_image
in a 45 degree angle st the wind. 45°-Notethewind direction ①②
Note the wind direction! Always start against the wind direction.
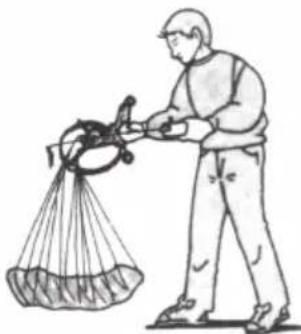
natural_image
Illustration of a person using a tool to lift a large bucket into a net (no text or symbols)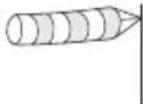
To start, hold the Sky Surfer 2.0 at the bottom of the chassis
③
natural_image
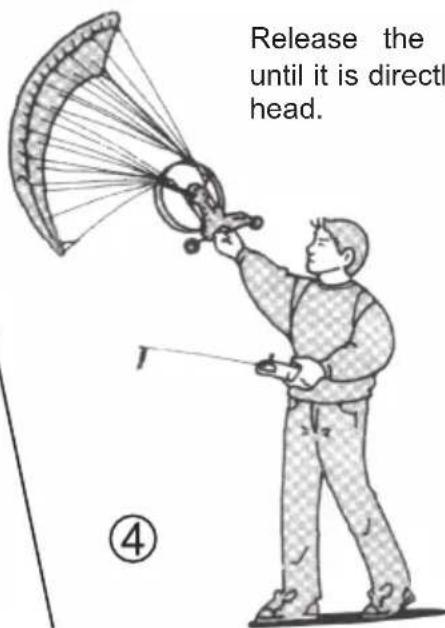
Illustration of a person using a telescope to interact with a curved mechanical component (no text or symbols)Move the arm shown with a uniform motion from bottom to top as shown in the fig. Do not throw! Once the parachute is fully deployed, give full throttle on the transmitter.
text_image
Release the until it is direct head. ④Release the model not until it is directly over your head.
text_image
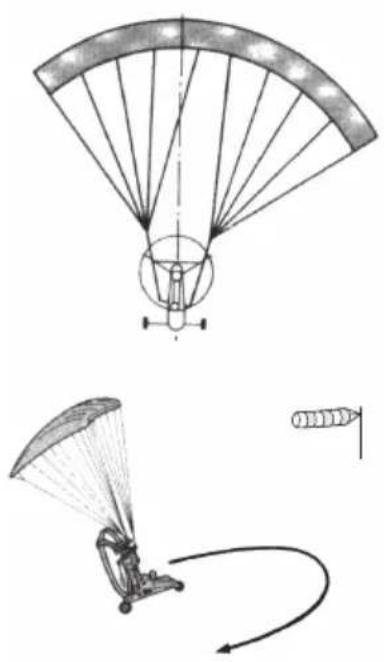
OK! ⑤ ⑥ Do not throw!A) Right turn
natural_image
Diagram of parabolic parachuting system with fan, payload, and rotor (no text or labels)Press the right joystick on the transmitter to the right to fly a right turn.
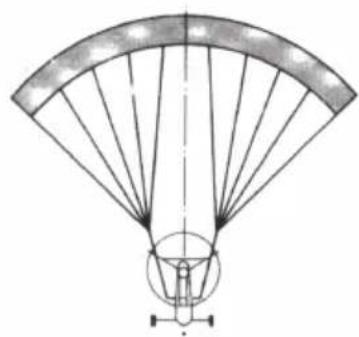
B) Fly straight ahead
natural_image
Diagram of a fan-shaped structure with radial lines and a central circular element (no text or symbols)Leave the right joystick in center position to fly straight ahead.
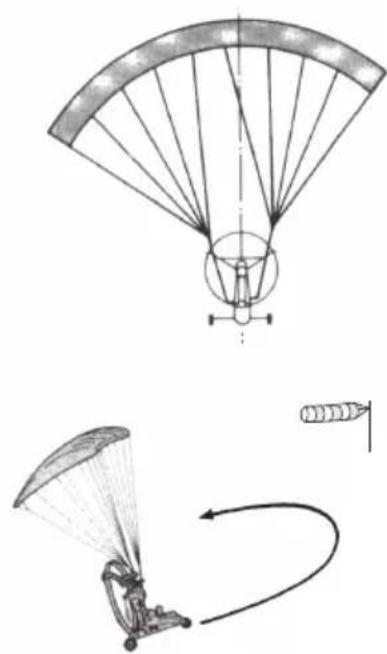
C) Left turn
natural_image
Diagram of parabolic parachutes with labeled components and motion arrows (no text or symbols)Press the right joystick on the transmitter to the left to fly a left turn.
5. Landing the Sky Surfer 2.0
Watch the flight time. After 8-10 minutes (depending on wind conditions) the battery is weak and you must initiate the landing.
Note: if the battery is too weak, the model can no longer be controlled, which makes the landing much more diffi cult.
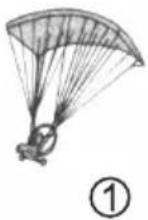
- Rotate the model in the wind direction at a height of 20 - 30 m to prepare for landing.
- Keep attention to the height and position, do not descent too fast and navigate to your landing site.
- At about 10 m altitude the final landing phase begins. Slowly release the accelerator to control the descent angle and land safely.
If the wind freshens up unexpectedly during the flight and makes the control of your Sky Surfer difficult or impossible, immediately make an emergency landing and wait until the wind stagnates.
- The landing must be done always against the wind to reduce speed and allow a soft touchdown.
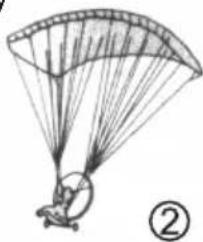
natural_image
Simple line drawing of a parachute with a small figure inside, labeled with number ② (no text or symbols on the diagram itself)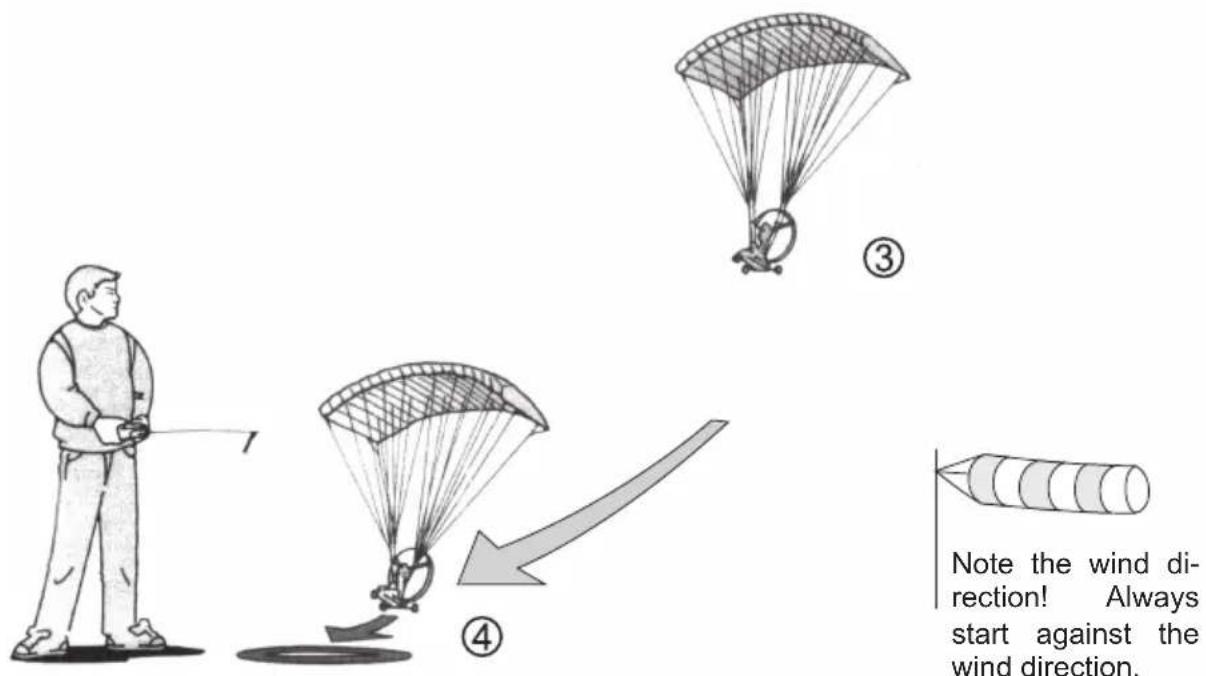
text_image
Note the wind direction! Always start against the wind direction.Turn OFF the Sky Surfer fi rst and then the transmitter.
The motor of the Sky Surfer 2.0 gets very hot during operation, so it has to cool down before the next launch at least 20 minutes - otherwise the motor can be damaged!
After use unplug the fl ight battery and remove it from the model!
We wish you loads of fun and pleasure fl ying your Sky Surfer 2.0!
6. Care and maintenance
- Clean the model carefully after every fl ying session.
- The model and the remote control system components should only be cleaned using suitable materials.
Please ask your local model shop for advice on this.
- Trouble shooting
| Problem Cause Solution | ||
| Propeller does not ro-tate | ON/OFF-switch OFF• Flight battery fully discharged• | Switch ON the model• Charge fl ight battery• |
| Propeller suddenly stops rotating | Battery almost discharged, the• ESC switches off the motor for sa-fety reasons | Charge fl ight battery• |
| The Sky Surfer is not re-sponding to commands of the transmitter | Throttle stick not calibrated• Transmitter - Receiver not bound together | push the left throttle stick to the top• of the transmitter once (full throttle) and then again all the way down (motor off) Bind transmitter / receiver - see• point 11 |
Environnemental Protection Notes
natural_image
Symbol of a trash bin with crossed lines indicating no waste or discharge (no text or labels)When this product comes to the end of its useful life, you must not dispose of it in the ordinary domestic waste. The correct method of disposal is to take it to your local collection point for recycling electrical and electronic equipment. The symbol shown here, which may be found on the product itself, in the operating instructions or on the packaging, indicates that this is the case.
Individual markings indicate which materials can be recycled and re-used. You can make an important contribution to the protection of our common environment by re-using the product, recycling the basic materials or recycling redundant equipment in other ways.
Environmental Protection Notes
Important information regarding the disposal of dry and rechargeable batteries:
In Germany the Battery Regulation places a legal requirement on all consumers to return all used and exhausted dry and rechargeable batteries. It is prohibited to discard these items through the domestic refuse system. Old dry and rechargeable batteries can be handed in at no charge at your local community collection point, at our dealers, and at any other retail outlet where dry and rechargeable batteries of the same type are sold.
An alternative method of disposal for any exhausted battery which we originally supplied is to send it to us, with pre-paid postage, at the following address.
You can make an important contribution to the protection of our shared environment in this way.
Dry and rechargeable batteries which contain harmful materials are marked with the following symbols, in order to draw attention to the fact that they must not be discarded through the household refuse system.
Under each symbol is stated the chemical symbol for the toxic metal concerned.
Cd Hg Pb
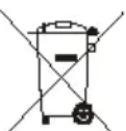
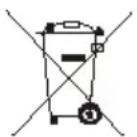
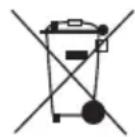
Li-Po
Battery contains:
1) Cd: cadmium
2) Hg: mercury
3) Pb: lead
4) Li-Po: Lithium-Polymer
Manufacturer's declaration declaration by GRAUPNER GmbH & Co. KG, Henriettenstr. 94 - 96, D-73230 Kirchheim/Teck, Germany
Content of the manufacturer's declaration:
If material defects or manufacturing faults should arise in a product distributed by us in the Federal Republic of Germany and purchased by a consumer ( § 13 BGB ), we, GRAUPNER GmbH & Co. KG, Kirchheim/Teck, acknowledge the obligation to correct those defects within the limitations described below.
The consumer is not entitled to exploit this manufacturer's declaration if the failure in the usability of the product is due to natural wear, use under competition conditions, incompetent or improper use (including incorrect installation) or external influences.
This manufacturer's declaration does not affect the consumer's legal or contractual rights regarding defects arising from the purchase contract between the consumer and the vendor (dealer).
Extent of the guarantee
If a claim is made under guarantee, we undertake at our discretion to repair or replace the defective goods. We will not consider supplementary claims, especially for reimbursement of costs relating to the defect (e.g. installation / removal costs) and compensation for consequent damages unless they are allowed by statute. This does not affect claims based on legal regulations, especially according to product liability law.
Guarantee requirements
The purchaser is required to make the guarantee claim in writing, and must enclose original proof of purchase (e.g. invoice, receipt, delivery note) and this guarantee card. He must send the defective goods to us at his own cost, using the following address:
Service Department, GRAUPNER GmbH & Co. KG, Henriettenstr. 94 - 96, D-73230 Kirchheim/Teck, Germany
The purchaser should state the material defect or manufacturing fault, or the symptoms of the fault, in as accurate a manner as possible, so that we can check if our guarantee obligation is applicable.
The goods are transported from the consumer to us and from us to the consumer at the risk of the consumer.
Duration of validity
This declaration only applies to claims made to us during the claim period as stated in this declaration. The claim period is 24 months from the date of purchase of the product by the consumer from a dealer in the Federal Republic of Germany (date of purchase). If a defect arises after the end of the claim period, or if the evidence or documents required according to this declaration in order to make the claim valid are not presented until after this period, then the consumer forfeits any rights or claims from this declaration.
Limitation by lapse of time
If we do not acknowledge the validity of a claim based on this declaration within the claim period,
all claims based on this declaration are barred by the statute of limitations after six months from the time of implementation; however, this cannot occur before the end of the claim period.
Applicable law
This declaration, and the claims, rights and obligations arising from it, are based exclusively on the pertinent German Law, without the norms of international private law, and excluding UN retail law.
DECLARATION OF CONFORMITY
Declaration of Conformity in accordance with the Radio and Telecomunikations Terminal Equipment Act (FTEG) and Directive 1999/5/EG (R&TTE)
declares that the product
No. 92210 WP Sky Surfer 2.4 RTF
Geräteklasse: 2
Equipment class
complies with the essential requirements of § 3 and the other relevant provisions of the FTEG (Article 3 of the R&TTE Directive).
Harmonised standards applied
EN 60950-1+A11+A1 2010
EN 62311 2008
Health and safety requirements pursuant to § 3 (1) 1. (Article 3 (1) a))
EN 301 489-1 V1.9.2
EN 301 489-17 V2.1.1
Measures for the efficient use of the radio frequency spectrum § 3 (2) (Article 3 (2))
CE0678①
Stefan Graupner, Managing Director
natural_image
Illustration of a disaster scene with a tower, buildings, and smokestacks (no text or symbols)natural_image
Diagram showing a paraglider on a hill with motion arrows indicating curved trajectory (no text or symbols)natural_image
Technical line drawing of a mechanical assembly with a circular outline and an inset showing a spherical component (no text or symbols)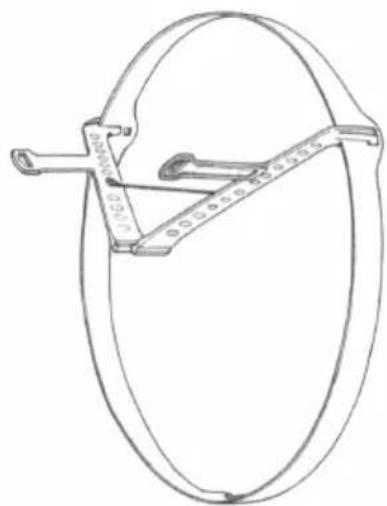
natural_image
Line drawing of a circular mechanical device with a ruler, no text or symbols present2
natural_image
Technical line drawing of a mechanical device with two components, one showing a shaft and wheel assembly (no text or symbols)natural_image
Technical line drawing of a mechanical device with wheels and a curved blade (no text or symbols)4
natural_image
Line drawing of an arrow-drawn bowing machine (no text or symbols)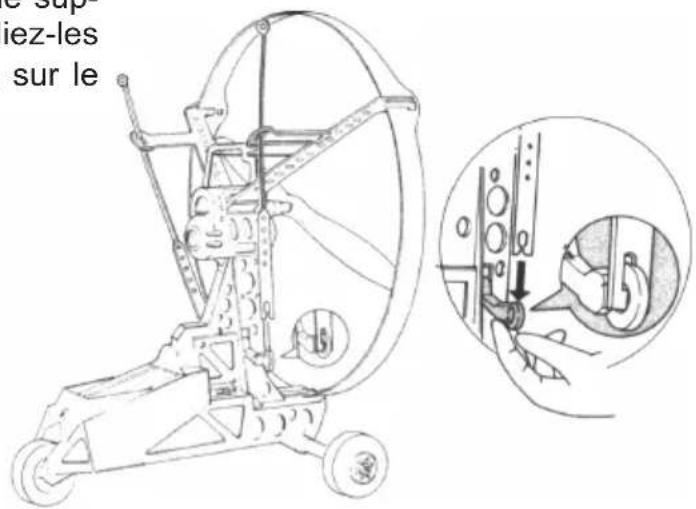
text_image
é cup iez-les sur le5
natural_image
Technical line drawing of a mechanical assembly with a tool and gear (no text or symbols)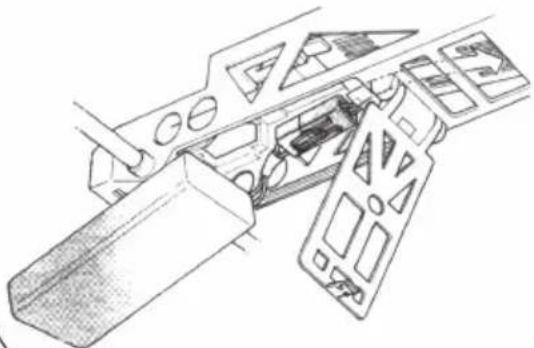
natural_image
Technical line drawing of a mechanical assembly with internal components (no text or symbols)natural_image
Technical line drawing of a mechanical component with internal parts and mounting holes (no text or symbols)10
Charge de l'accu:
natural_image
Illustration of a power plug connected to a battery via a coiled cable, with two outlets nearby (no text or symbols)natural_image
Illustration of a person operating a large arc-shaped device with a wheel nearby (no text or symbols)natural_image
Line drawing of a person standing with a pole, holding a tool (no text or symbols)natural_image
Illustration of a person using a net to lift a bucket (no text or symbols)
natural_image
Illustration of a person using a telescope to interact with a curved antenna (no text or symbols present)natural_image
Diagram of parabolic launch with parachute and rotor components (no text or labels)natural_image
Diagram of a fan-shaped structure with internal lines and a central circular element (no text or symbols)natural_image
Diagram of parabolic parachutes with structural details and motion arrows (no text or labels)natural_image
Simple line drawing of a parachute with a satellite below, labeled with number ② (no text or symbols on the diagram itself)natural_image
Symbol of a trash bin with crossed lines indicating no waste or discharge, and a solid black rectangle below (no text or labels)Declaration of Conformity in accordance with the Radio and Telecomunikations Terminal Equipment Act (FTEG) and Directive 1999/5/EG (R&TTE)
declares that the product
No. 92210 WP Sky Surfer 2.4 RTF
Geräteklasse: 2
Equipment class
complies with the essential requirements of § 3 and the other relevant provisions of the FTEG (Article 3 of the R&TTE Directive).
Harmonised standards applied
EN 60950-1+A11+A1 2010
EN 62311 2008
Health and safety requirements pursuant to § 3 (1) 1. (Article 3 (1) a))
EN 301 489-1 V1.9.2
EN 301 489-17 V2.1.1
Measures for the efficient use of the radio frequency spectrum § 3 (2) (Article 3 (2))
CE0678①
LiPo-Akku 7.4 V/1100mAh 20C
LiPo battery 7.4 V/1100mAh 20C
LiPo accu 7.4 V/1100mAh 20C
6454
Zubehör
Accessoires
Accessoires
natural_image
Electrical components including a DC power supply, connected to a battery pack and two test probes (no visible text or symbols)LiPo Balancer Charger 2-3S
12V/230V
92210.3
natural_image
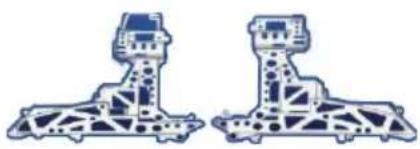
Two identical blue-tinted mechanical or architectural diagrams with no visible text or symbolsRumpfgondeln Sky Surfer 2.0
Fuselage Sky Surfer 2.0
Cabine fuselage Sky Surfer 2.0
92210.4
natural_image
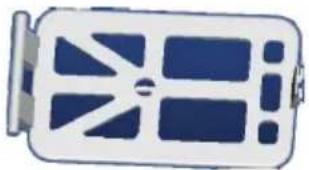
Illustration of a stylized battery with blue and white panels (no text or symbols)Akkufachdeckel
Battery cover
Couvercle batterie
92210.5
natural_image
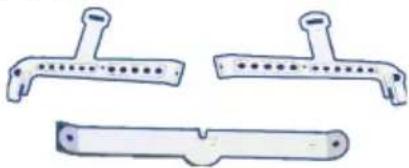
Three types of mechanical clamps or fittings shown in line drawings (no text or symbols)Aufhängung Propellerring
Propeller guard mount
Support protection hélice
92210.6
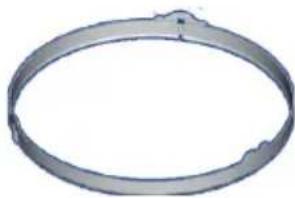
natural_image
Circular metal ring component with a small protrusion at the top (no text or symbols)Propellerring Sky Surfer 2.0
Propeller guard Sky Surfer 2.0
Protection hélice Sky Surfer 2.0
92210.7
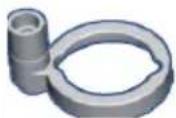
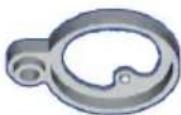
Motorhalterung
Motor mount
Support moteur
92210.8

Steuerstangen (2)
Servo rods (2)
Tringlerie servo (2)
92210.9

Propeller Sky Surfer 2.0
Propeller Sky Surfer 2.0
Hélice Sky Surfer 2.0
92210.10
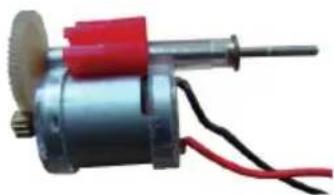
natural_image
Close-up of a small electric motor with red and black components, no visible text or symbolsnatural_image
Close-up of a small white mechanical component with red and blue wires, attached to a terminal block (no visible text or symbols)Lenkservo Sky Surfer 2.0
Steering servo Sky Surfer 2.0
Servo de commande Sky Surfer
92210.12
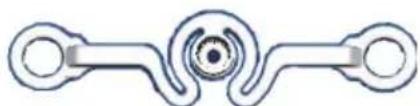
natural_image
Pure mechanical linkage diagram without any text, numbers, or symbolsServoarm Sky Surfer 2.0
Servo arm Sky Surfer 2.0
Palonnier servo Sky Surfer 2.0
92210.13
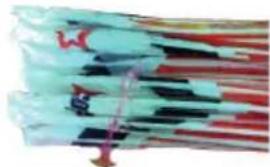
natural_image
Abstract illustration of layered music with red and blue stripes (no text or symbols)Gleitschirm Sky Surfer 2.0
Canopy set Sky Surfer 2.0
Parapente Sky Surfer 2.0
natural_image
Electronic circuit board with integrated circuits and capacitors (no visible text or labels)text_image
Service Service Service Service Service Service Service Service Service Service Service Service Service Service Service Service Service Service Service Service Service Service Service Service Service Service Service Service Service Service Service Service Service Service Service Service Service Service Service Service Service Service Service Service Service Service Service Service Service Service Service
text_image
GENERAL REGULAR DESCRIPTIONS P.O. 806 5807 841-843 30 22 71 2 741-743 30 22 71 2 25064 Occupant P.O. 806 5807 741-743 30 22 71 2 741-743 30 22 71 2 741-743 30 22 71 2 741-743 30 22 71 2 741-743 30 22 71 2 741-743 30 22 71 2 741 - (44) 91 96 29 26 55 (8x - (44) 91 96 29 26 55 (9x - (44) 91 96 29 26 55 (9x - (44) 91 96 29 26 55 (9x - (44) 91 96 29 26 55 (9x - (44) 91 96 29 26 55 (9x - (104) 23 10 04 9 (9x - (104) 23 10 04 9 (9x - (104) 23 10 04 9 (9x - (104) 23 10 04 9 (9x - (104) 23 10 04 9 (9x - (104) 23 12 2 (9x - (104) 23 12 2 (9x - (104) 23 12 2 (9x - (104) 23 12 2 (9x - (104) 23 12 2 (9x - (104) 23 12 (9x - (104) 23 12 (9x - (104) 23 12 (9x - (104) 23 12 (9x - (104) 23 (9x - (104) 23 (9x - (104) 23 (9x - (104) 23 (9x - (104) 23 (9x - (104) 23 (9x - (104) 23 (9x - (104) 23 (9x - (108) 30 (9x - (108) 30 (9x - (108) 30 (9x - (108) 30 (9x - (108) 30 (9x - (108) 30 (9x - (108) 30 (9x - (108) 30 (9x - (106) 30 (9x - (106) 30 (9x - (106) 30 (9x - (106) 30 (9x - (106) 30 (9x - (106) 30 (9x - (106) 30 (9x - (106) 30 (9x + (106) 30 (9x + (106) 30 (9x + (106) 30 (9x + (106) 30 (9x + (106) 30 (9x + (106) 30 (9x + (106) 30 (9x + (106) 30
text_image
#92210 Sky Surfer 2.0 Barb. No. City N. N 341500 Barb. No. City N. City N. City N. City N. City N. City N. City N. City N. City N. City N. City N. City N. City N. City N. City N. City N. City N. City N. City N. City N. City N. City N. City N. City N. City N. City N. City N. City N. City N. City N. City N. City N. City N. City N.
text_image
GRUPNER Modellau GRAPNITE URKUDE Warranty certificate Certificat de garante Certificato di garanza Certificado de garanta Zaucn list grapuner • grapuner • grapuner GRAUPNER • GRAUPNER • GRAUPNER • GRAUPNER GRAUPNER • GRAUPNER • GRAUPNER • GRAUPNER GRAUPNER • GRAUPNER • GRAUPNER • GRAUPNER
text_image
WARGANITED FOR 24 MONTHS Covonier GmbH & Co. KG. Heinricharträge 34-36 - D-7230 Kretchen/tech. Germany guaranteis this product for a period of 24 months from date of purchase. The guarantee applies only to such material or production devices which are pursuant at the time of purchase to the product. Damping due to wear outstanding requirements and/or use of acceptable accessories is harding or to use of acceptable accessories is the users' legal rights and guarantees under given the users' legal rights and guarantees under given the users' legal rights and guarantees under given the users' legal rights and guarantees under given the users' legal rights and guarantees under given the users' legal rights and guarantees under given the users' legal rights and guarantees under given the users' legal rights and guarantees under given the users' legal rights and guarantees under given the users' legal rights and guarantees under given the users' legal rights and guarantees under Given the users' legal rights and guarantees under Given the users' legal rights and guarantees under Given the users' legal rights and guarantees under Given the users' legal rights and guarantees under Given the users' legal rights and guarantees under Given the users' legal rights and guarantees under Given the users' legal rights and guarantees under Given the users' legal rights and guarantees under Given the users' legal rights and guarantees under Given the users' legal rights and guarantees underGiven the users' legal rights and guarantees underGiven the users' legal rights and guarantees underGiven the users' legal rights and guarantees underGiven the users' legal rights and guarantees underGiven the users' legal rights and guarantees underGiven the users' legal rights and guarantees underGiven the users' legal rights and guarantees underGiven the users' legal rights and guarantees underGiven the users' legal rights and guarantees underGiven the users' legal rights and guarantees underGaining the users' legal rights and guarantees underGaining the users' legal rights and guarantees underGaining the users' legal rights and guarantees underGaining the users' legal rights and guarantees underGaining the users' legal rights and guarantees underGaining the users' legal rights and guarantees underGaining the users' legal rights and guarantees underGaining the users' legal rights and guarantees underGaining the users' legal rights and guarantees underGaining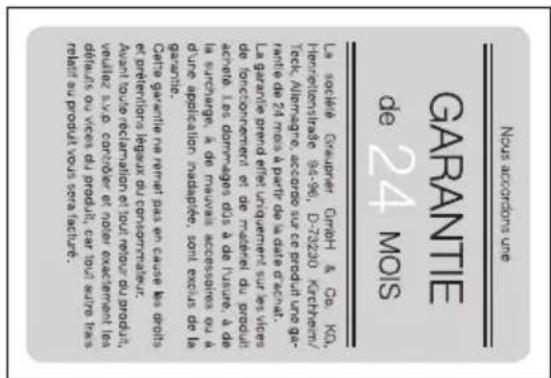
Specifications and availability subject to change. Supplied through specialist model shops only. We will gladly inform you of your nearest supplier. We accept no liability for printing errors.