HQC442 - Electric mower PHILIPS - Free user manual and instructions
Find the device manual for free HQC442 PHILIPS in PDF.
| Product Type | Electric Trimmer |
| Brand | Philips |
| Model | HQC442 |
| Power Supply | Mains (220-240 V) |
| Dimensions (L x W x H) | Approx. 15 x 5 x 4 cm |
| Weight | Approx. 200 g |
| Number of cutting positions (small guide) | 14 positions (from 4 mm to 40 mm) |
| Number of cutting positions (large guide) | Not specified |
| Cut without guide | Yes |
| Storage temperature | Between 15°C and 35°C |
| Maintenance | Clean after each use with the provided brush; avoid abrasives and solvents |
| Safety | Check mains voltage; avoid contact with water |
| Spare parts | Original Philips shaving unit; power cord by authorized service center |
| Included accessories | Small and large cutting guides, cleaning brush |
| Consumer service | See international warranty leaflet for number |
| Manual available | French (free PDF download) |
Frequently Asked Questions - HQC442 PHILIPS
User questions about HQC442 PHILIPS
0 question about this device. Answer the ones you know or ask your own.
Ask a new question about this device
Download the instructions for your Electric mower in PDF format for free! Find your manual HQC442 - PHILIPS and take your electronic device back in hand. On this page are published all the documents necessary for the use of your device. HQC442 by PHILIPS.
USER MANUAL HQC442 PHILIPS
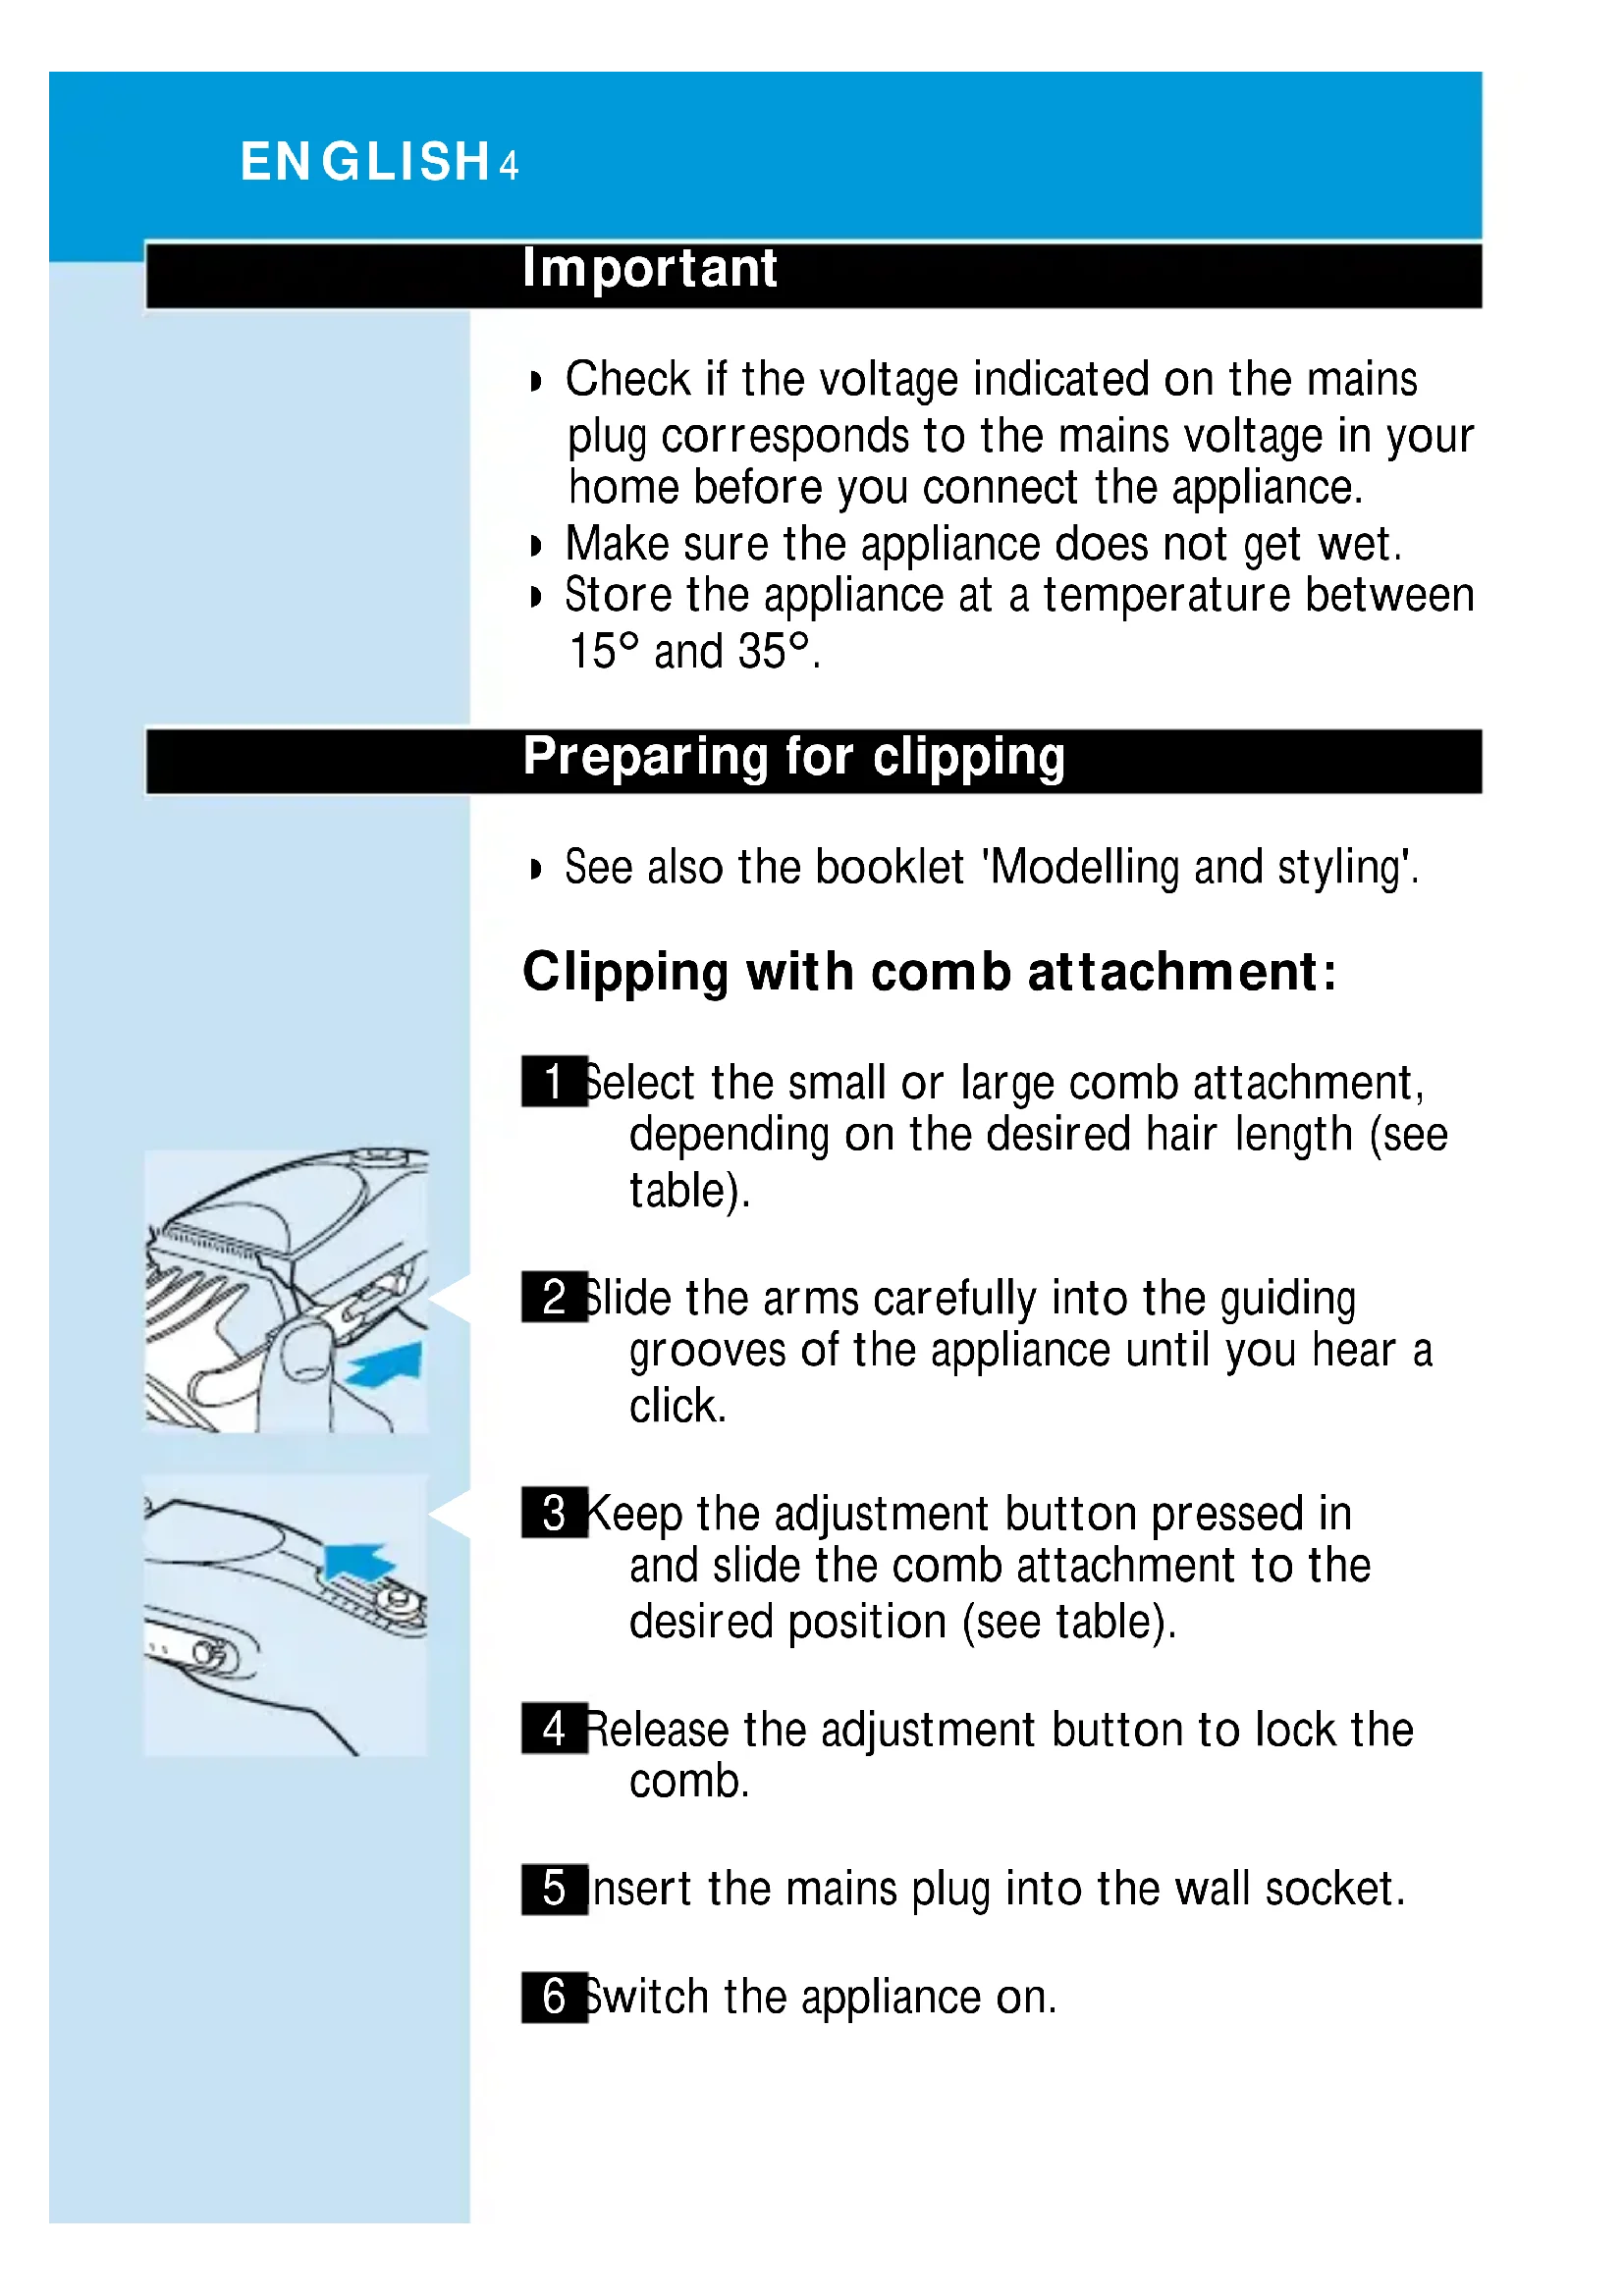
- Check if the voltage indicated on the mains plug corresponds to the mains voltage in your home before you connect the appliance.
- Make sure the appliance does not get wet.
- Store the appliance at a temperature between 15^ and 35^ .
Preparing for clipping
- See also the booklet 'Modelling and styling'.
Clipping with comb attachment:
natural_image
Diagram of a car's side profile showing dashboard and airway components (no text or labels)1 Select the small or large comb attachment, depending on the desired hair length (see table).
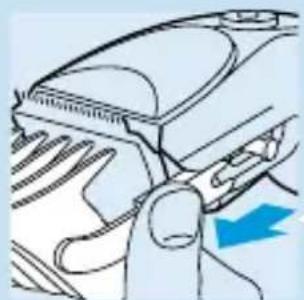
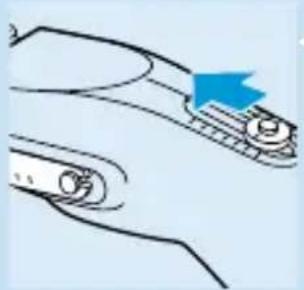
2 Slide the arms carefully into the guiding grooves of the appliance until you hear a click.
3 Keep the adjustment button pressed in and slide the comb attachment to the desired position (see table).
4 Release the adjustment button to lock the comb.
5 insert the mains plug into the wall socket.
6 Switch the appliance on.
natural_image
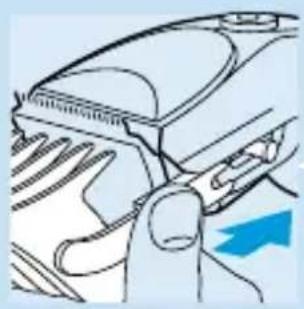
Diagram of a mechanical component with a blue arrow indicating direction (no text or symbols)If a lot of hair has accumulated in the comb, remove the comb attachment and blow and/or shake the hair out of the comb.
Cutting length settings
Small comb
setting hair length
1 4 mm 8 24 mm
2 7 mm 9 27 mm
3 10 mm 10 30 mm
4 13 mm 11 33 mm
5 16 mm 12 35 mm
6 19 mm 13 38 mm
7 21 mm 14 40 mm
Large comb
setting hair length
natural_image
Diagram of a car interior showing airflow direction and a blue arrow indicating flow (no text or symbols)Clipping without comb attachment
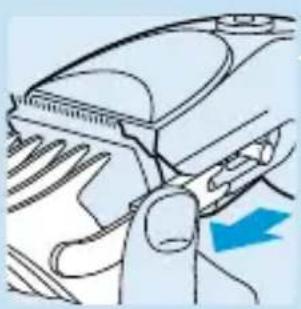
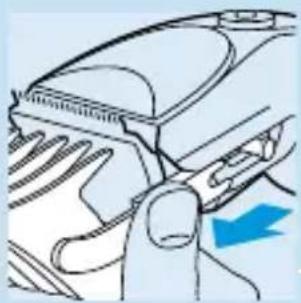
1 Pull the comb attachment off the appliance to remove it.
Clean the appliance every time you have used it.
Cleaning
Do not use abrasives, scourers or liquids such as alcohol, petrol or acetone to clean the appliance.
natural_image
Diagram of a car interior showing airflow direction and a blue arrow indicating flow (no text or symbols)1 Make sure the appliance is switched off and disconnected from the mains before you start cleaning it.
2 Remove the comb attachment.
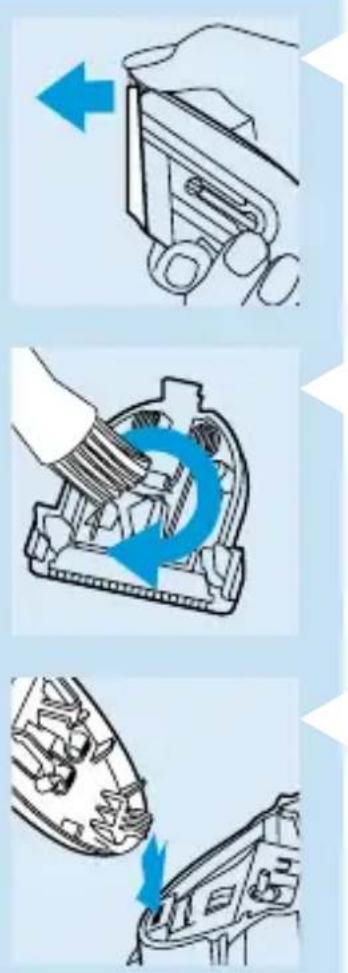
3 Remove the cutting unit.
4 Clean the cutting unit and the inside of the appliance with the brush supplied.
5 To reassemble the clipper, insert the hook of the cutting unit into the housing.
6 Push the cutting unit until you hear a click.
Replacement
A worn or damaged cutting unit should only be replaced with an original Philips cutting unit.
If the mains cord of this appliance is damaged, it may only be replaced by Philips or an authorised Philips service centre, as special tools and/or parts are required.
For telephone numbers of the Philips Helpdesk, see the Worldwide Guarantee leaflet.
W ichtig
natural_image
Diagram of a car interior showing airflow and exhaust components (no text or symbols)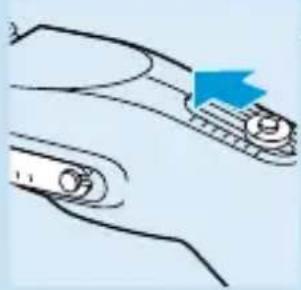
natural_image
Diagram of a mechanical component with a blue arrow indicating direction (no text or symbols)natural_image
Diagram of a car intake manifold showing airflow direction (no text or symbols)Reinigung
natural_image
Diagram of a car interior showing hand positioning and airflow direction (no text or symbols)natural_image
Illustration of a hand holding a car intake manifold with a blue arrow indicating direction (no text or symbols)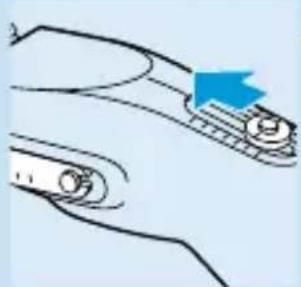
natural_image
Diagram of a mechanical component with a blue arrow indicating direction (no text or symbols)natural_image
Diagram of a car interior showing airflow direction and a blue arrow indicating flow (no text or symbols)Nettoyage
natural_image
Diagram of a car interior showing hand positioning and airflow direction (no text or symbols)natural_image
Hand holding a clip or clip device with a blue arrow pointing left (no text or symbols)natural_image
Illustration of a hand using a tool to rotate or rotate a mechanical component with blue arrows indicating rotation (no text or symbols)natural_image
Diagram showing a boat being lifted by a blue arrow, with no visible text or symbolsnatural_image
Diagram of a car's air intake manifold showing airflow direction (no text or symbols)
natural_image
Diagram of a mechanical component with a blue arrow indicating direction (no text or symbols)natural_image
Diagram of a car intake manifold with a blue arrow indicating direction (no text or symbols)
natural_image
Diagram of a car interior showing hand placement and blue arrow indicating direction (no text or symbols)natural_image
Hand holding a mechanical clip or clip with a blue arrow pointing left (no text or symbols)natural_image
Illustration of a hand using a tool to rotate or rotate a mechanical component with blue arrows indicating rotation (no text or symbols)natural_image
Diagram showing a mechanical component with a blue arrow pointing to a section of a device (no text or symbols present)natural_image
Diagram of a car intake manifold showing airflow direction (no text or labels)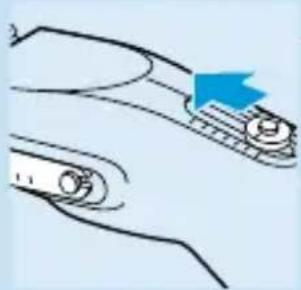
natural_image
Diagram of a mechanical component with a blue arrow indicating direction (no text or symbols)natural_image
Diagram of a car intake manifold showing airflow direction (no text or symbols)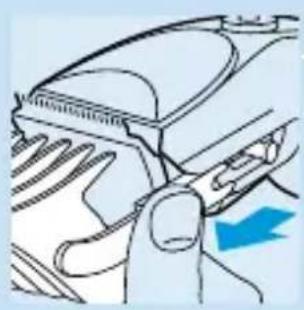
natural_image
Diagram of a car interior showing hand blades and dashboard (no text or symbols)natural_image
Hand holding a clip or clip device with a blue arrow pointing left (no text or symbols)natural_image
Illustration of a hand using a tool to rotate or rotate a mechanical component with blue arrows indicating rotation (no text or symbols)natural_image
Diagram showing a mechanical component with a blue arrow pointing to a section of a device (no text or symbols present)natural_image
Line drawing of a car interior showing hand positioning and airflow direction (no text or symbols)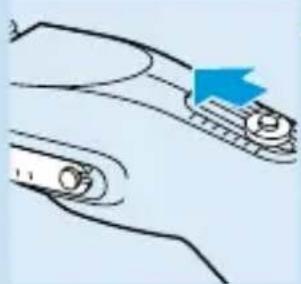
natural_image
Diagram of two curved mechanical components with a blue arrow pointing to one (no text or symbols)natural_image
Diagram of a car intake manifold showing airflow direction (no text or symbols)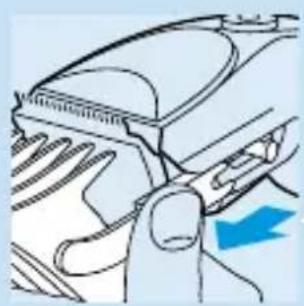
natural_image
Diagram of a car interior showing hand positioning and airflow direction (no text or symbols)natural_image
Hand holding a clip with a blue arrow pointing to it, no text or symbols presentnatural_image
Illustration of a hand using a tool to rotate a mechanical component with blue arrows indicating rotation (no text or symbols)natural_image
Diagram showing a mechanical component with a blue arrow pointing to a detail (no text or symbols present)natural_image
Diagram of a car's air intake manifold showing airflow direction (no text or symbols)
natural_image
Diagram of a mechanical component with a blue arrow indicating direction (no text or symbols)natural_image
Diagram of a car interior showing airflow direction and a blue arrow indicating flow (no text or symbols)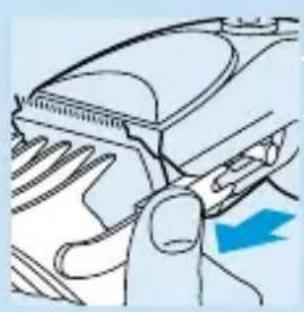
natural_image
Diagram of a car interior showing hand placement and blue arrow indicating direction (no text or symbols)natural_image
Hand holding a clip or clip device with a blue arrow pointing left (no text or symbols)natural_image
Illustration of a hand using a tool to rotate or rotate a mechanical component with blue arrows indicating rotation (no text or symbols)natural_image
Diagram showing a mechanical component with a blue arrow pointing to a section of a device (no text or symbols present)natural_image
Diagram of a car's front air intake and exhaust system, showing airflow path and valve position (no text or labels)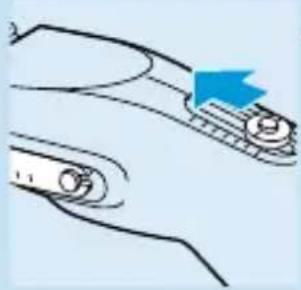
natural_image
Diagram of a mechanical component with a blue arrow indicating direction (no text or symbols)natural_image
Diagram of a car interior showing airflow direction and a blue arrow indicating flow direction (no text or symbols)Καθαρισμός
natural_image
Diagram of a car's exhaust pipe with airflow direction arrow (no text or symbols)natural_image
Hand holding a clip or clip device with a blue arrow pointing to the left side (no text or symbols present)natural_image
Illustration of a hand using a tool to rotate a mechanical component with blue motion arrows (no text or symbols)natural_image
Diagram showing a mechanical component with a blue arrow pointing to a section of a boat (no text or symbols present)natural_image
Diagram of a car's air intake mechanism showing airflow path and directional arrow (no text or symbols)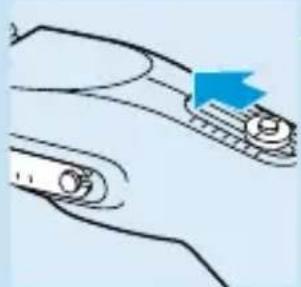
natural_image
Diagram of a mechanical component with a blue arrow indicating direction (no text or symbols)natural_image
Diagram of a car's front wheel and side arm, showing blade and handle (no text or symbols)