
SZ2178 - Vacuum Cleaner TRISTAR - Free user manual and instructions
Find the device manual for free SZ2178 TRISTAR in PDF.
| Product type | Canister vacuum cleaner with bag |
| Brand | TriStar |
| Model | SZ2178 |
| Power supply | 220-240 V ~ 50/60 Hz |
| Suction power | Electronically adjustable |
| Bag type | Disposable dust bag |
| Filters | Washable motor filter and HEPA micro-exhaust filter |
| Cord length | With automatic rewinder, yellow and red markers |
| Included accessories | Flexible hose, extension tubes, floor brush, dusting brush, crevice tool, small brush |
| Main functions | Vacuuming hard floors and carpets, use with accessories for furniture and crevices |
| Maintenance | Clean motor filter at least twice a year; replace bag when full |
| HEPA filter replacement | Open HEPA cover, remove old one, install new one |
| Safety | Unplug before maintenance; do not use on wet surfaces or to vacuum flammable liquids |
| Cord rewinding | Press rewind button, guide cord by hand |
| Warranty / Recycling | Do not dispose of with household waste; recycle at WEEE collection point |
Frequently Asked Questions - SZ2178 TRISTAR
User questions about SZ2178 TRISTAR
0 question about this device. Answer the ones you know or ask your own.
Ask a new question about this device
Download the instructions for your Vacuum Cleaner in PDF format for free! Find your manual SZ2178 - TRISTAR and take your electronic device back in hand. On this page are published all the documents necessary for the use of your device. SZ2178 by TRISTAR.
USER MANUAL SZ2178 TRISTAR
natural_image
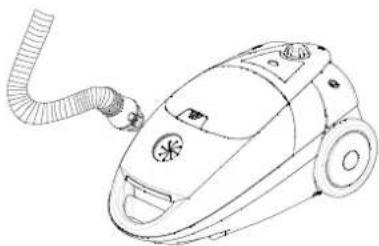
Line drawing of a vacuum cleaner with visible wheels and control buttons (no text or symbols)SZ - 2178
BELANGRIJKE VEILIGHEIDSVOORSCHRIFTEN
VEILIGHEIDSVOORSCHRIFTEN
natural_image
Line drawing of a vacuum cleaner with coiled hose and wheels (no text or symbols)Verwijderen:
natural_image
Illustration of a hand holding a pen with an arrow indicating upward motion (no text or symbols)natural_image
Pure electrical circuit lines without any symbolsnatural_image
Line drawing of a hand holding a small object against a woven background (no text or symbols)natural_image
Line drawing of a hand holding a device over a surface, no text or symbols presentnatural_image
Simple line drawing of a bent pipe or duct (no text or symbols)natural_image
Line drawing of a robotic vacuum cleaner with internal components and a hand adjusting the part (no text or symbols)natural_image
Technical line drawing of a vacuum cleaner with internal components and a magnified inset showing internal structure (no text or symbols)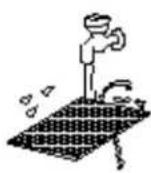
natural_image
Hand placing a component into a grid-like structure (no text or symbols visible)MESURES DE PRECAUTION
natural_image
Line drawing of a hand using a tool to lift a surface, no text or symbols presentnatural_image
Line drawing of a vacuum cleaner with attached hose (no text or symbols)natural_image
Illustration of a hand holding a pen with an upward arrow indicating motion (no text or symbols)natural_image
Pure mechanical component diagram without any text, numbers, or symbolsnatural_image
Line drawing of a hand holding a small object against a woven background (no text or symbols)natural_image
Line drawing of a hand cleaning a book on a wooden surface (no text or symbols)natural_image
Line drawing of a vacuum cleaner (no text or symbols)ENTRETIEN
natural_image
Technical line drawing of a robotic vacuum cleaner with internal components and a hand adjusting the part (no text or symbols present)natural_image
Technical line drawing of a vacuum cleaner's internal structure, showing housing and component layout (no text or symbols)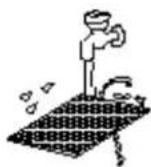
natural_image
Hand inserting a component into a grid-like structure (no text or symbols visible)VORSICHTSMASSNAHMEN

natural_image
Hand inserting a plug into an electrical outlet (no text or symbols visible)natural_image
Line drawing of a vacuum cleaner with attached hose (no text or symbols)Entfernen:
natural_image
Illustration of a hand holding a pen with an upward arrow indicating motion (no text or symbols)natural_image
Pure mechanical diagram showing two parallel rods with a central fastener and two directional arrows indicating motion (no text or symbols)natural_image
Line drawing of a hand holding a closed book against a woven background (no text or symbols)natural_image
Line drawing of a hand holding an open book, resting on a textured surface (no text or symbols)natural_image
Technical line drawing of a robotic vacuum cleaner with internal components and a hand adjusting the part (no text or symbols)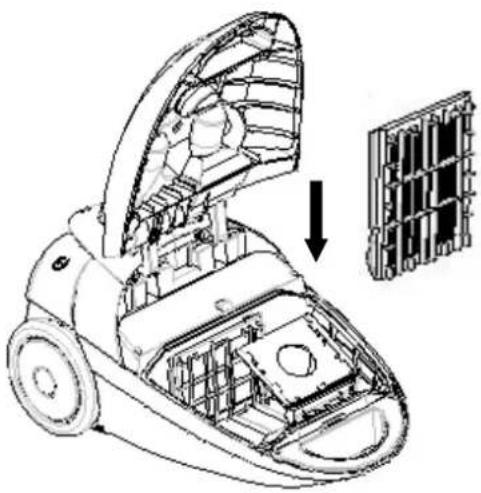
natural_image
Technical line drawing of a vacuum cleaner with internal components and a magnified inset showing internal structure (no text or symbols)natural_image
Two illustrations of a faucet and a grid-patterned object with water droplets, no text or symbols present.natural_image
Hand inserting a component into a device housing (no text or symbols visible)IMPORTANT SAFETY INSTRUCTIONS
When using an electrical appliance, basic precaution should always be followed, including the following:
READ ALL INSTRUCTIONS
BEFORE USING (THIS APPLIANCE)
WARNING-To reduce the risk of fire, electric shock, or injury:
- Do not leave the appliance when it is plugged in. Unplug it from the wall outlet when not in use and before servicing.
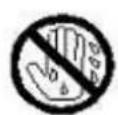
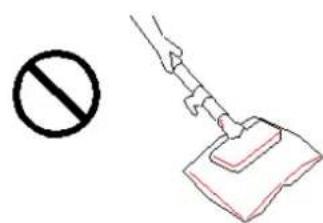
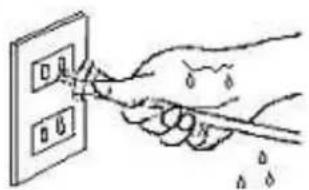
- To reduce the risk of electric shock, do not use the appliance outdoors or on wet surfaces
- Do not allow it to be used as a toy. Close attention must be taken when it is used near children.
- Use the appliance only as described in this manual. Use only the attachments recommended by the manufacture.
- Do not use the appliance with a damaged cord or plug. If the appliance does not work as it should have been dropped, damaged, left outdoors, or dropped into water, refer to a service
center.
- Do not pull or carry the appliance by cord, use cord as a handle, close door on cord, or pull cord around sharp edges or corners. Do not run the appliance over cord. Keep cord away from heated surfaces.
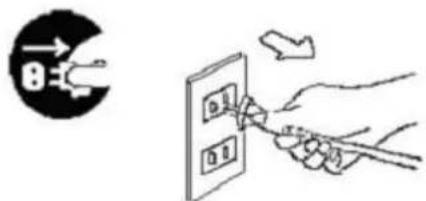
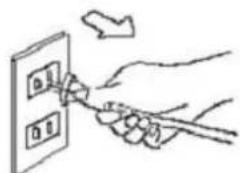
- Do not unplug by pulling on cord. To unplug, please grasp the plug instead of the cord.
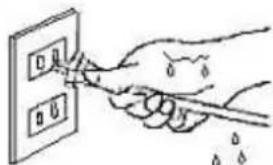
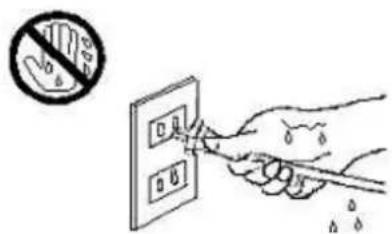
- Do not deal with the plug or the appliance with wet hands.
- Do not put any object into the openings. Do not use the appliance with any opening blocked. Keep free of dust, lint, hair or anything which may reduce airflow.
- Keep hair, loose clothing, fingers and all parts of body away from the openings and moving parts.
- Turn all controls off before unplugging.
- Use special care when cleaning it on stairs.
- Do not use the appliance to pick up flammable or combustible liquids, such as gasoline, or use it in the areas where they may be present.
- Hold the plug when rewinding the cord onto the cord reel. Do not allow the plug to whip when rewinding.
- Unplug the appliance before connecting the hose
- Do not pick up anything that is burning or smoking, such as cigarettes, matches, or hot ashes.
- Do not use the appliance without dust bag and/or filter in place.
- If the supplied cord is damaged, it must be replaced by the manufacturer or its service agent or a similarly qualified person in order to avoid a hazard.
SAVE THESE INSTRUCTIONS
PRECAUTIONARY MEASURES
If the opening that sucks in the air, the suction pipe or the telescopic wand stick on pipe is blocked, you should turn off the appliance at once. First, clear the blocking substance before you attempt to start the appliance again.
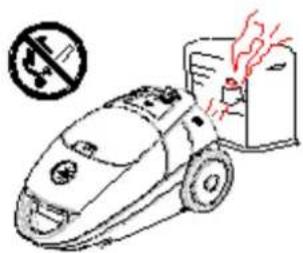
- Do not operate the vacuum cleaner too close to heaters and like radiators, cigarette butts etc.
- Before you insert the plug into the wall contact, make sure your hand is dry.
- Before you start using the
vacuum cleaner, please remove large or sharp objects from the floor in order to prevent that the paper filter is damaged.
- When you want to pull the plug from the wall outlet, please do this at the plug itself and not by means of the power cord..
This appliance is equipped with a plug and a cord, which rolls up automatically. If anything of the appliance gets damaged, both the plug and the cable must be repaired by a qualified technician or electrician.
ASSEMBLING VACUUM CLEANER
Always remove the plug from the power socket before fitting or removing accessories!
3. Connecting vacuum cleaner
1. Fitting or removing the flexible hose
Fitting:
Insert flexible hose into the air intake duct on the top of appliance. Press until it clicks into position.
natural_image
Line drawing of a vacuum cleaner with coiled hose and wheels (no text or symbols)Removing :
Removing the plug from the power socket. To release the flexible hose firmly from the air intake duct.
2.Fitting the extension tubes and accessories
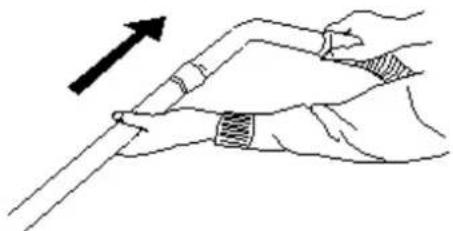
a. Fitting the extension tube to the handle.
b. Fitting the exte
natural_image
Illustration of a hand holding a pen with an arrow indicating upward motion (no text or symbols)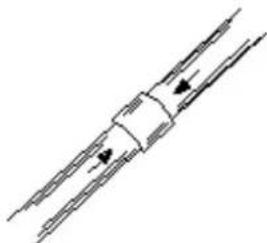
natural_image
Pure electrical circuit lines without any symbolsc. Fitting the brush to the extension tube.
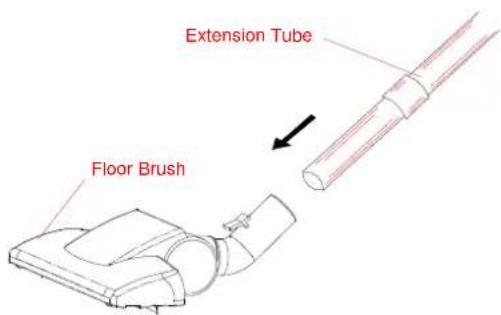
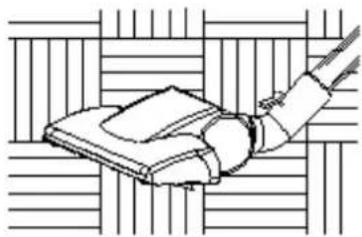
d. Fitting Floor brush
It is ideal for the daily cleaning on carpets and hard floors..
natural_image
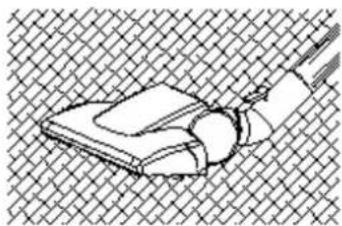
Line drawing of a hand holding a closed book against a woven background (no text or symbols)Clean on the carpet
natural_image
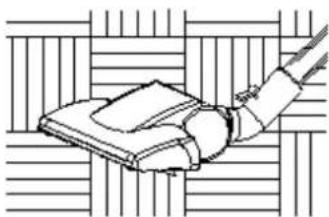
Line drawing of a hand holding a book against a striped background (no text or symbols)Clean on the hard floor
2.Cleaning tools use
The crevice tool and dusting brush are stored on the accessories holder.
Crevice tool:
For radiators, crevices, corners, baseboards and between cushions.
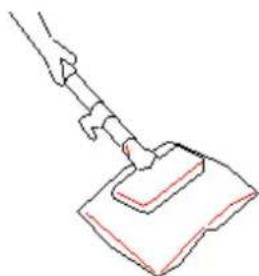
Dusting brush is used for the furniture, venation, blinds, book, lamp shades and shelves.
The small brush is used for clean the sofa.
INSTRUCTIONS FOR USE
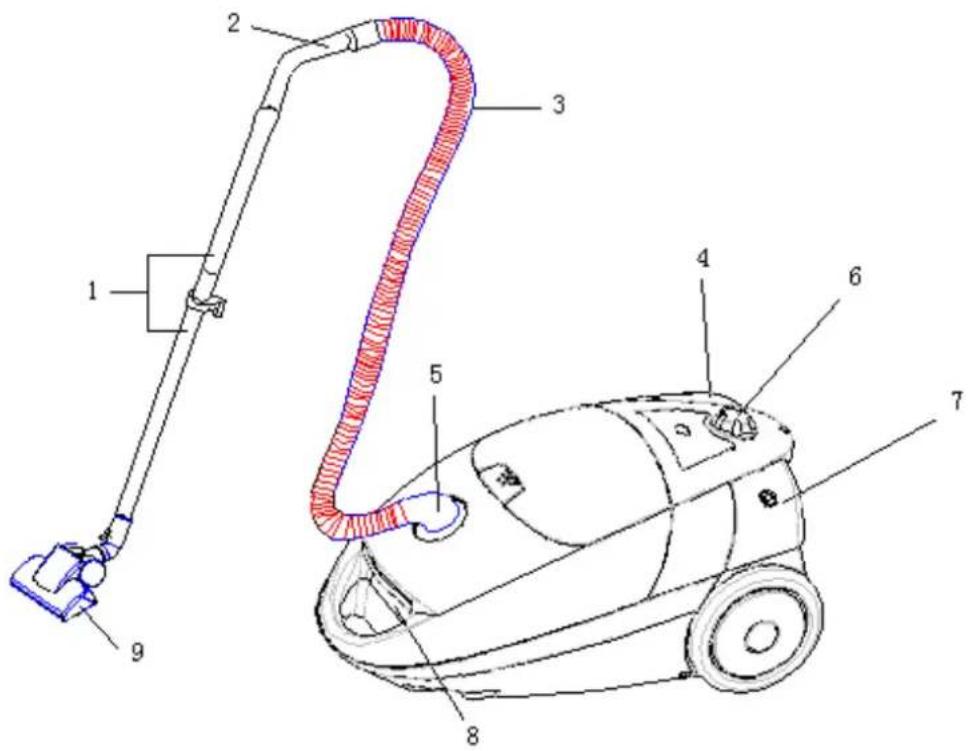
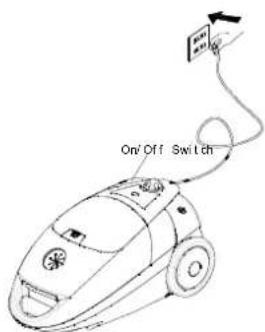
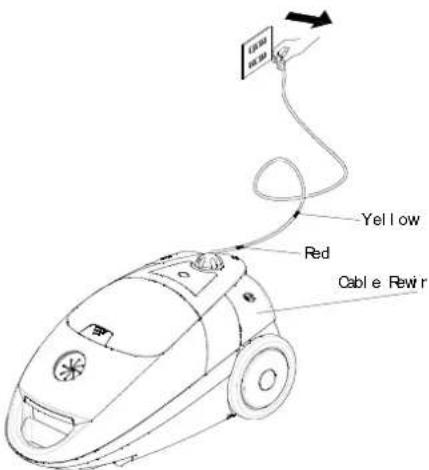
Before using appliance, unwind a sufficient length of cable and insert the plug into the power socket. A yellow mark on the power cable shows the ideal cable length. Don't expend the cable beyond the red mark.
- Press the ON/OFF button to switch the appliance on.
- To rewind the power cable, press the rewind button with one hand and guide the cable with the other hand to ensure that it does not whip causing damage.
For SZ-2178 slide the Electronic Power Switch to control the suction of the cleaner,

MAINTENANCE
- Changing of the dust bag
● Always operate the cleaner with dust bag installed.
- If you forget to attach the dust bag or attach it in the wrong manner, the dust cover may not close completely.
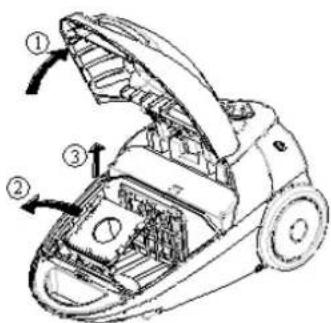
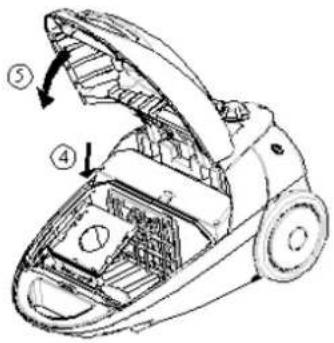
After removing the flexible tube, open the front cover.
Rotate the support of the bag to the correct position.
Remove the dust bag.
Replace the paper bag when it is full of dirt and put in a new one.
Close the cover by passing down until it is locked.
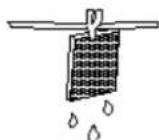
Cleaning filter
- Filter should be cleaned at least twice a year or when it becomes visible solid.
● Always operate the cleaner with filter installed. - Otherwise, reduced suction or motor damage may be result.
- Disconnect from electrical outlet, before cleaning filter.
- Do not use a washing machine to rinse filter.
- Do not use hair drier to dry it.
natural_image
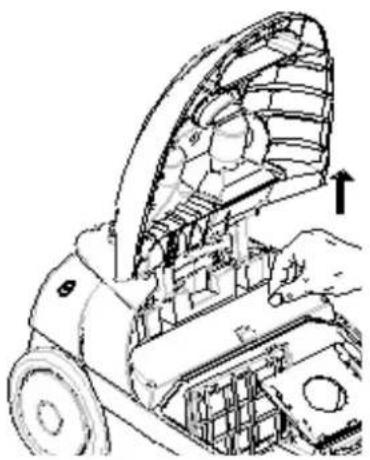
Technical line drawing of a mechanical device with a hand operating it, showing internal components and a directional arrow (no text or symbols)- Pull dust bag upward
- Pull filter supporter upward
- Remove filter.
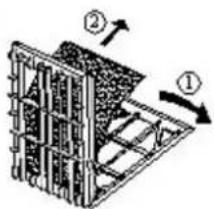
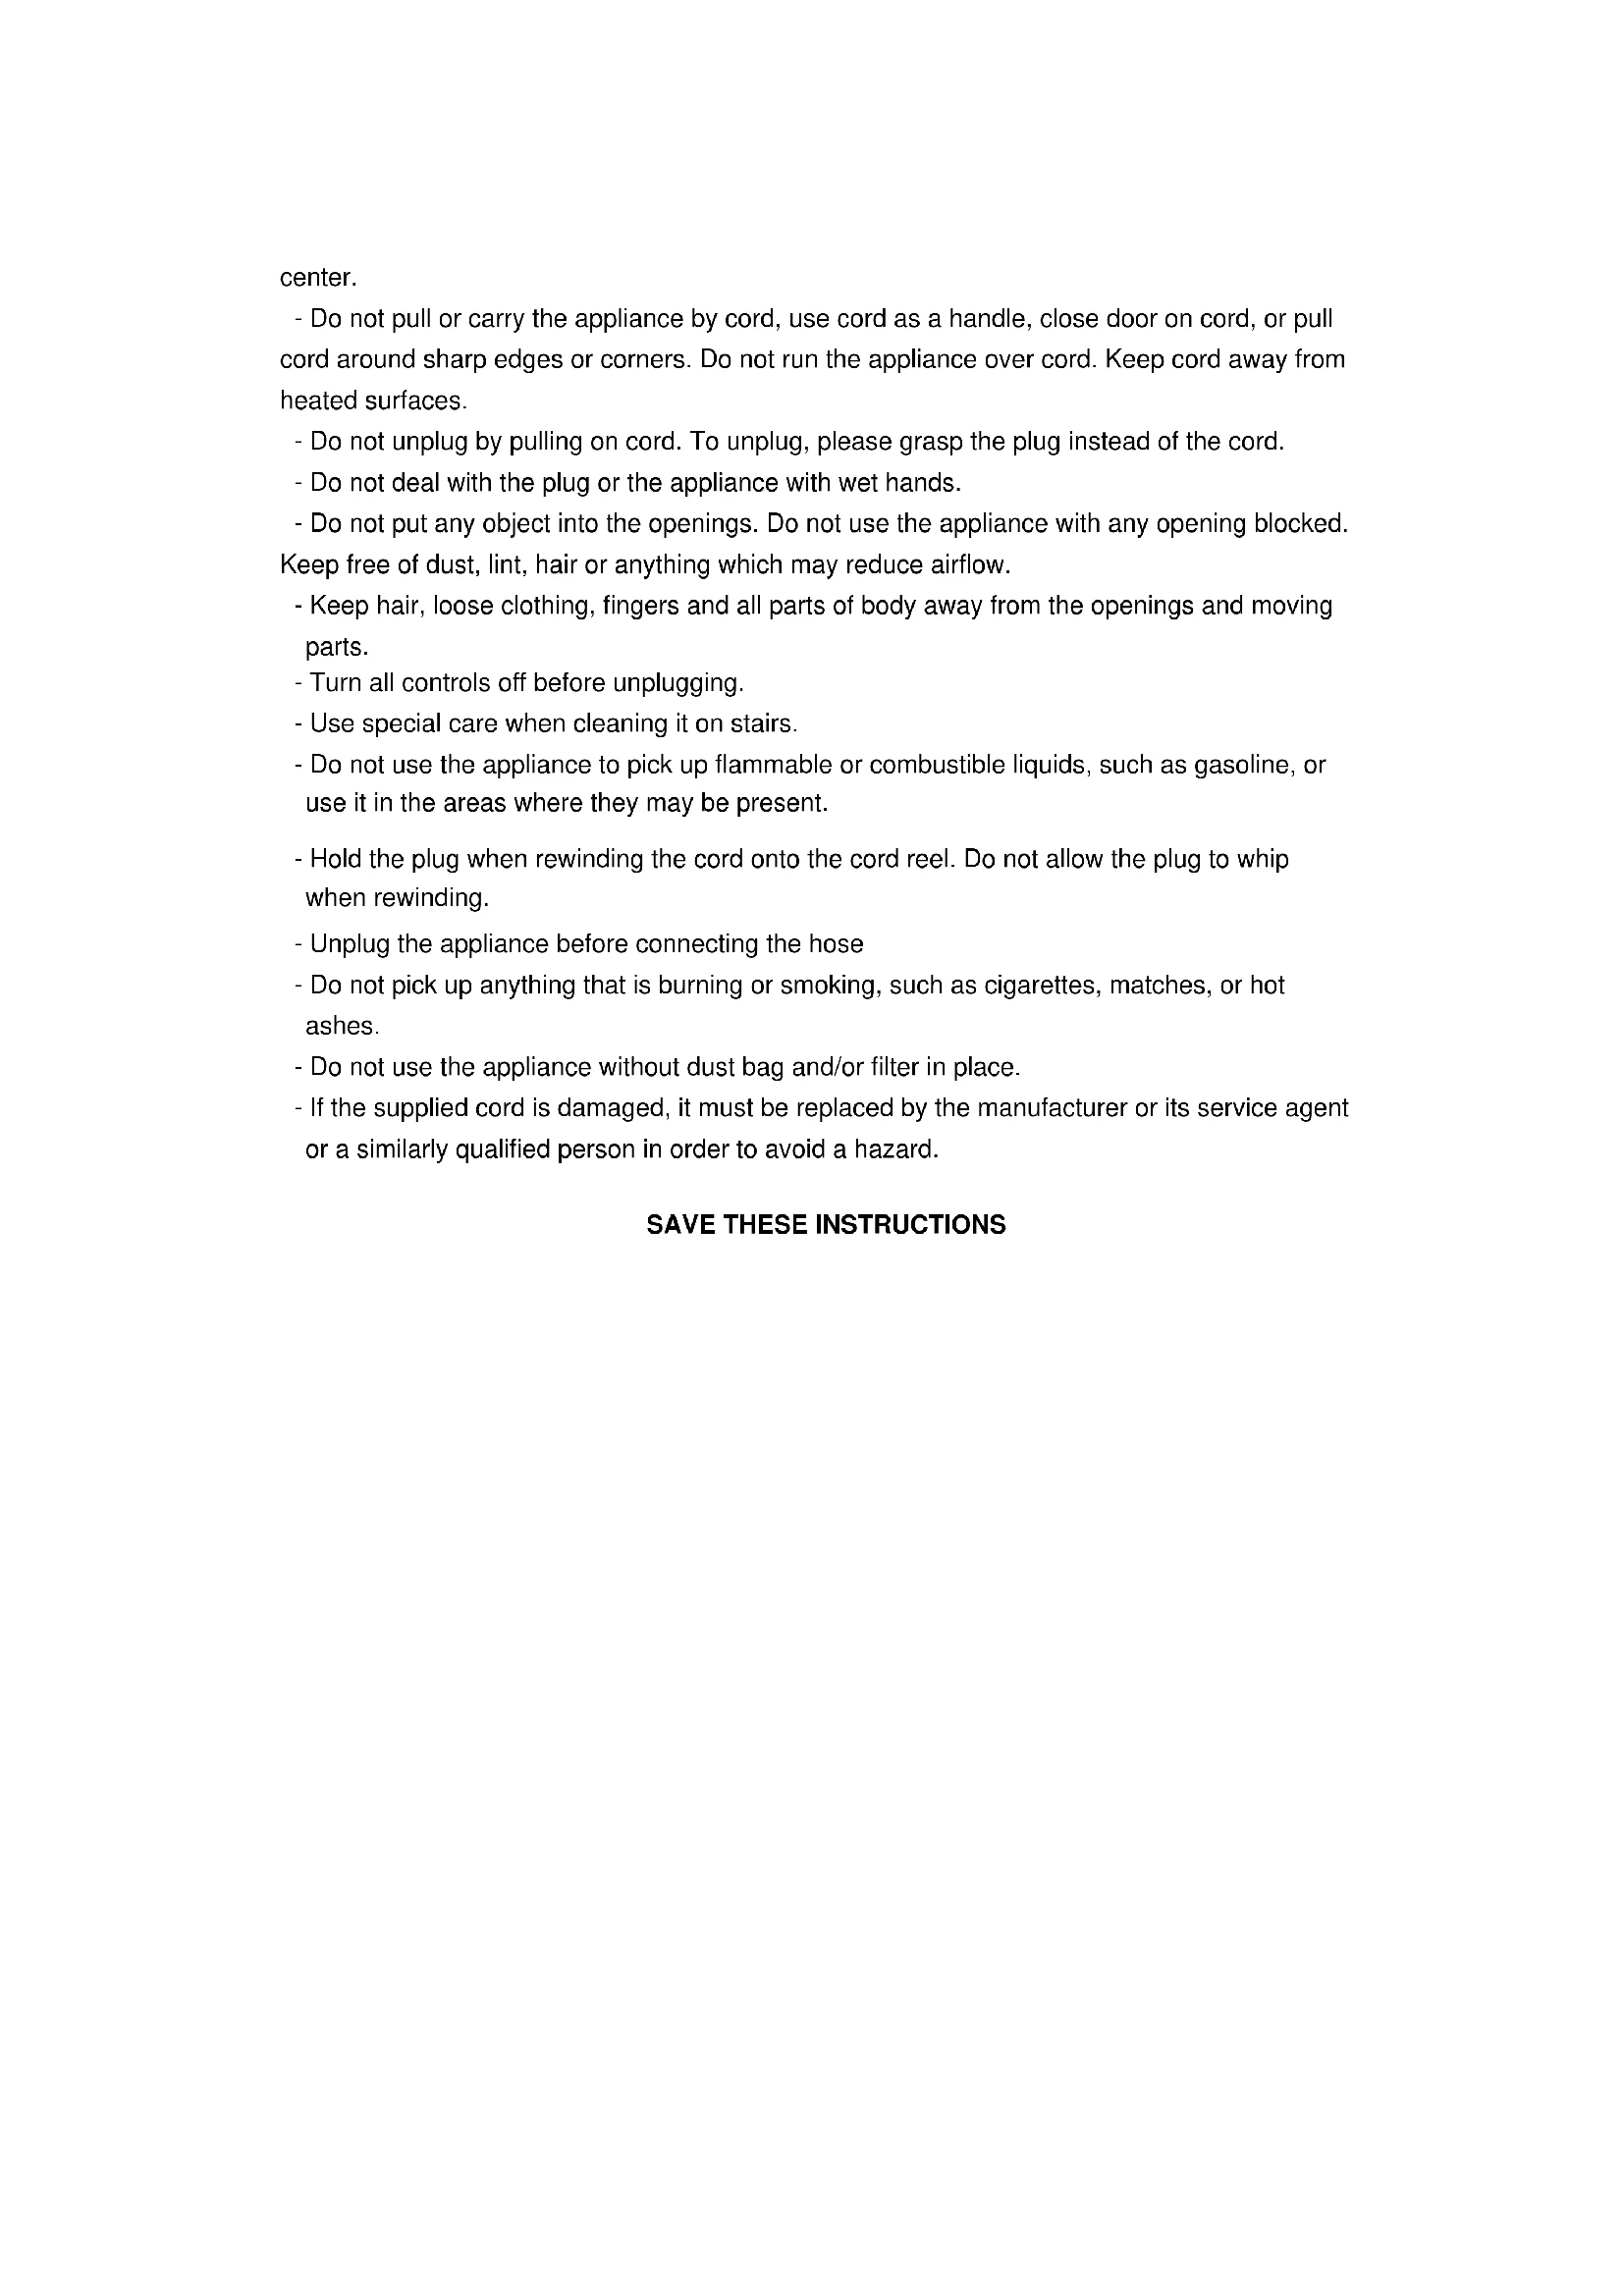
- Rinse filter in lukewarm water and dry the filter completely

natural_image
Technical line drawing of a vacuum cleaner internal structure with no visible text or symbols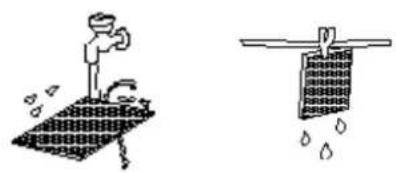
natural_image
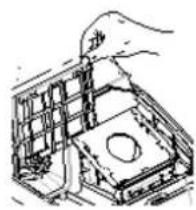
Two hand-drawn illustrations: one showing a faucet on a drain with water droplets, the other showing a net with water droplets (no text or symbols)- Put the filter into the Grille-Filter and put them back.
natural_image
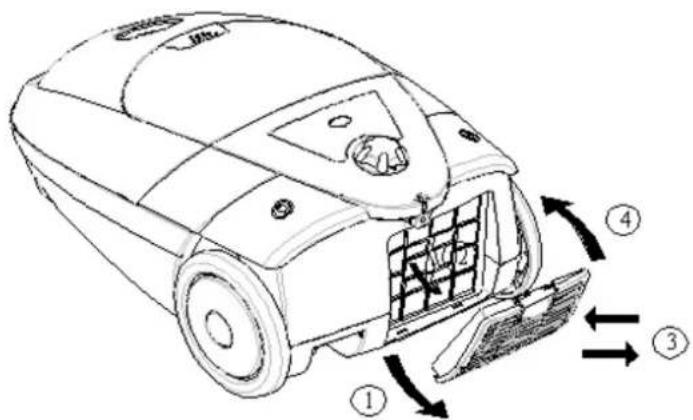
Hand inserting a component into a device housing (no text or symbols visible)Changing the HEPA (High Efficiency Particulate Air filter) filter
- Open the cover for HEPA filler.
- When opening the cover for HEPA filler, use your two fingers pulling the clasp for HEPA, and pulling HEPA up.
- Take the HEAP out and change a clean one.
- Close the cover for HEPA filler.
Indications for protection of the environment
This appliance should not be put into the domestic garbage at the end of its useful life, but must be disposed of at a central point for recycling of electric and electronic domestic appliances. This symbol on appliance, instruction manual and packaging puts your attention to this important issue. The materials used in
this appliance can be recycled. By recycling used domestic appliances you contribute an important push to the protection of our environment.
Ask your local authorities for information regarding the point of recollection..
IMPORTANTI ISTRUZIONI DI SICUREZZA

natural_image
Line drawing of a vacuum cleaner with coiled hose and wheels (no text or symbols)Smontare:
natural_image
Line drawing of a hand holding a tool with an arrow indicating upward motion (no text or symbols)natural_image
Pure electrical circuit lines without any symbolsnatural_image
Line drawing of a hand holding a book against a woven background (no text or symbols)PULIRE I TAPPETI

natural_image
Line drawing of a hand holding a device against a grid background (no text or symbols)- Pulire gli attrezzi
natural_image
Simple line drawing of a bent pipe fitting (no text or symbols)natural_image
Technical line drawing of a mechanical device with internal components and an upward arrow indicating motion (no text or symbols)natural_image
Two technical diagrams showing structural components with arrows indicating direction (no text or symbols present)natural_image
Technical line drawing of a mechanical device with internal components (no text or symbols)

natural_image
Hand placing a component into a mechanical housing (no text or symbols visible)natural_image
Hand inserting a card into a wall socket (no text or symbols visible)natural_image
Line drawing of a vacuum cleaner with coiled hose and wheels (no text or symbols)Retirando :
natural_image
Line drawing of a hand holding a tool with an arrow indicating direction (no text or symbols)natural_image
Pure electrical circuit lines without any symbolsnatural_image
Line drawing of a mechanical device with a handle and internal components (no text or symbols)
natural_image
Simple line drawing of a cylindrical object with a looped end, no text or symbols presentnatural_image
Line drawing of a hand holding a small object against a woven background (no text or symbols)natural_image
Line drawing of a hand holding a book on a wooden surface (no text or symbols)natural_image
Simple line drawing of a bent pipe or duct (no text or symbols)natural_image
Technical line drawing of a robotic vacuum cleaner with internal components and a hand adjusting the part (no text or symbols present)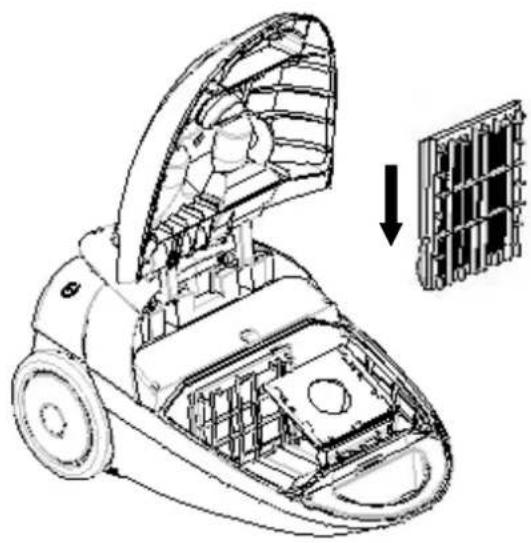
natural_image
Technical line drawing of a vacuum cleaner with internal components and a magnified inset showing structural details (no text or symbols)natural_image
Hand placing a component into a grid-like structure (no text or symbols visible)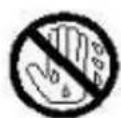
natural_image
Hand inserting a plug into an electrical outlet (no text or symbols visible)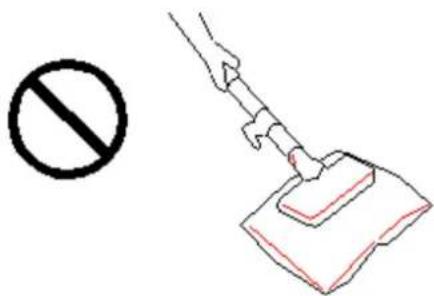
grandes e afiados do chão para evitar que o filtro de papel seja danificado.
natural_image
Line drawing of a vacuum cleaner with coiled hose and wheels (no text or symbols)natural_image
Illustration of a hand holding a tool with an arrow indicating upward motion (no text or symbols)natural_image
Pure electrical circuit lines without any symbolsnatural_image
Line drawing of a hand holding a small object against a grid background (no text or symbols)Limpar o tapete
natural_image
Line drawing of a hand holding a device over a surface, no text or symbols presentLimpar o chão duro
natural_image
Line drawing of a vacuum cleaner (no text or symbols)MANUTENÇÃO
7. Trocando o saco de poeira
natural_image
Technical line drawing of a mechanical device with internal components and a hand adjusting parts (no text or symbols)natural_image
Technical illustration of a vacuum cleaner with internal components and a magnified inset showing internal structure (no text or symbols)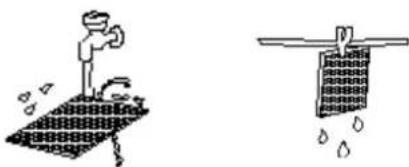
natural_image
Two hand-drawn diagrams showing a person using a tool on a surface and another with water droplets falling (no text or symbols)natural_image
Hand placing a component into a grid-like structure (no text or symbols visible)natural_image
Technical line drawing of a mechanical device with internal components and housing (no text or symbols)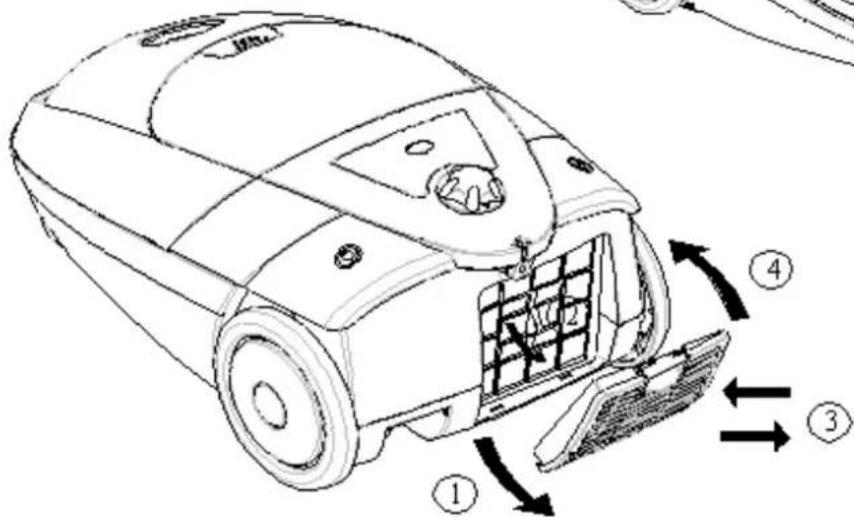


- BELANGRIJKE VEILIGHEIDSVOORSCHRIFTEN
- VEILIGHEIDSVOORSCHRIFTEN
- MESURES DE PRECAUTION
- ENTRETIEN
- VORSICHTSMASSNAHMEN
- IMPORTANT SAFETY INSTRUCTIONS
- READ ALL INSTRUCTIONS
- BEFORE USING (THIS APPLIANCE)
- SAVE THESE INSTRUCTIONS
- PRECAUTIONARY MEASURES
- ASSEMBLING VACUUM CLEANER
- Connecting vacuum cleaner
- Fitting or removing the flexible hose
- 2.Fitting the extension tubes and accessories
- INSTRUCTIONS FOR USE
- MAINTENANCE
- Cleaning filter
- Changing the HEPA (High Efficiency Particulate Air filter) filter
- Indications for protection of the environment
- IMPORTANTI ISTRUZIONI DI SICUREZZA
- MANUTENÇÃO
- Trocando o saco de poeira
Brand : TRISTAR
Model : SZ2178
Category : Vacuum Cleaner