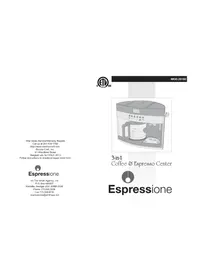
Moka Aroma 1337 - Coffee machine Espressione - Free user manual and instructions
Find the device manual for free Moka Aroma 1337 Espressione in PDF.

User questions about Moka Aroma 1337 Espressione
0 question about this device. Answer the ones you know or ask your own.
Ask a new question about this device
Download the instructions for your Coffee machine in PDF format for free! Find your manual Moka Aroma 1337 - Espressione and take your electronic device back in hand. On this page are published all the documents necessary for the use of your device. Moka Aroma 1337 by Espressione.
USER MANUAL Moka Aroma 1337 Espressione
Even if the appliances are made in conformity with the European regulatory specifications in force and therefore all potentially hazardous parts are protected. Carefully read these warnings and use the appliance only for the use it is designed for in order to prevent accidents and damage. Keep this manual close by for future consultation. If you should decide to give this appliance to other people, remember to also include these instructions.
The information provided in this manual is marked with the following symbols indicating:

Danger for children

Danger due to electricity

Danger of damage originating from other causes

Warning of burns
Warning - material damage
INTENDED USE
You may use your appliance to prepare coffee and cappuccino; and thanks to the possibility of dispensing hot water, you can also prepare tea and tisanes. This appliance is designed only for private use, and is therefore to be considered unsuitable for commercial or industrial purposes.
No other use of the machine is contemplated by the manufacturer, which is exempt from any liability for all types of damages caused by improper use of the machine. Improper use also results in any form of warranty being forfeited.
RESIDUAL RISKS
The construction characteristics of the appliance this publication refers to do not allow the user to be protected from a direct jet of steam or hot water.

Warning!
Danger of burns - When dispensing hot water and steam, do not direct the jets towards others or yourself. Hold only the plastic part of the tube.

Use only containers made of material "for foods".
IMPORTANT SAFEGUARDS
READ ALL THESE INSTRUCTIONS.
- This appliance is for household use only.
- We decline any responsibility resulting from misuse or any use other than those covered in this booklet.
- We suggest you keep the original box and packaging, as our free-of-charge service does not cover any damage resulting from inadequate packaging of the product when this is sent back to an Authorised Service Centre.
Danger for children
- This appliance is not suitable for use by people (children included) with physical, sensorial or mental disabilities; users lacking experience and knowledge of the appliance, or those who have not been given the user's instructions, must be supervised by a person responsible for their safety.
- Children must be supervised at all times to ensure they do not play with the appliance.
-
Do not leave the packaging near children because it is potentially dangerous.
-
In the event that this appliance is to be disposed of, it is suggested that the power chord is cut off. It is also recommended that all potentially dangerous components are rendered harmless to prevent children hurting themselves when playing with the apparatus.
Danger due to electricity
- Before connecting the appliance to the power supply, make sure that the voltage indicated on the plate on the bottom of the machine corresponds to the local mains voltage.
- Before filling the tank with water, remember to always disconnect the appliance at the socket.
- If the electric cable is damaged it must be replaced by the manufacturer or its Technical Assistance Service, or in any case by a person with similar qualifications, in order to avoid any risk.
- Never let the live parts come into contact with water: this may cause a short circuit.
- Unplug before any cleaning or maintenance operations.
- To protect against risk of electrical shock, do not immerse the appliance, cord or plug in water or other liquid.
- Do not leave the power cord against sharp edges or sharp parts.
- Do not place the appliance or power cord close to or on top of hot electric or gas cookers, or close to a microwave oven.
- This appliance has a polarized plug (one blade wider than the other). As a safety feature, this plug will fit in a polarized outlet only one way. If the plug does not fit fully in the outlet, reverse the plug. If it still does not fit, contact a qualified electrician. Do not attempt to defeat this safety feature.
Danger of damage originating from other causes
- Choose a sufficiently well lit and clean environment, with an easily accessible electric socket.
- Avoid putting excessive quantities of water into the tank.
- The appliance is not to be used if it has been dropped, if there are visible sign of damage, faults or suspected defects after dropping or if it is leaking water. To prevent any accident, all repairs, including the replacement of the power cord, must be carried out by an Authorised Service Centre or, in any case, by qualified personnel. Otherwise, the warranty may be revoked.
- Turn the appliance off and unplug from outlet when not in use, before putting on or taking off parts and before cleaning. To disconnect, turn the appliance of first, and pull the plug out from wall outlet.
Warning of burns
-
Never direct the steam or hot water jet towards parts of the body; handle the steam/hot water spout with care: risk of scalding!
-
The appliance's external metallic parts must not be touched when the machine is functioning as it could cause burns.
- If water does not come out of the filter holder, it may be because the Thermocream® filter is clogged. Stop the brewing and wait ten seconds. Remove and disconnect the filter holder because any remaining pressure could cause splashes or squirts. Then clean as explained in the relevant paragraph.
Warning - material damage
- Place the machine on a stable surface where it cannot be knocked over.
- Choose a sufficiently well lit and clean environment, with an easily accessible electric socket.
- Never put any object other than the pods in the pod filter holder. They could cause serious damage to the appliance.
- Never use the machine without water because the pump will burn out.
- Never fill the water tank with hot or boiling water.
- Do not place the machine on very hot surfaces or near open flames in order to prevent damage to the body.
- The cable must not touch any hot parts of the machine.
- Do not use sparkling (carbonated) water.
- Use only ground coffee or pods bearing the E.S.E. standard mark.
- Never put substances other than coffee into the filter holder. They could cause serious damage to the appliance.
- Do not leave the machine at a room temperature below 0^ because the water remaining in the boiler could freeze and cause damage.
- Never use the appliance outdoors.
- Do not expose the appliance to atmospheric agents (rain, sun...).
- Before cleaning the appliance always unplug it and allow it cool down. Clean only with a non-abrasive cloth that has been slightly dampened with water, adding a few drops of mild, non-aggressive detergent (never use solvents that damage plastic).
SAVE THESE INSTRUCTIONS
SHORT CORD INSTRUCTIONS
A short power cord is provided to reduce the hazards resulting from entanglement or tipping over a longer cord. An extension cord may be used whit care. However, be sure the marked electrical rating is at least as great as the rating of this appliance. The extension cord should be positioned such that it does not drape over the counter or tabletop where it can be pulled on by children or tripped over. The electrical rating of this appliance is listed on the bottom panel of the appliance.
DESCRIPTION OF THE APPLIANCE
A - Drip tray
B - Cup-resting grill
C - Filter holder for ground coffee
D-ThermocreamDisc
E - Perforated silicone disc
F-Thermocream® Filter
G-Machine body
H - Maxi Cappuccino attachment and wand for water and steam supply
I - Power cord + Plug
J - Coffee measure/pressor
K - Pod filter holder
L - Drain pan
M - Pod filter
N-Tank lid
O - Water tank
P - Steam dispensing cock
Q - Boiler temperature indicator lamp
R - Steam function switch
S - Coffee dispensing switch
T - Coffee dispensing indicator lamp
U - On-off switch
V - "ON" indicator light
Identification data
The following machine identification data are shown on the plate placed underneath the machine's standing base:
- manufacturer and CE mark
- model (Mod.)
- serial number (SN)
- electrical supply voltage (V) and frequency (Hz)
absorbed electric power (W) - assistance toll-free number
Always give the model and serial number to the Authorised Service Centres when requesting assistance.
PRELIMINARY PHASES FOR USE
Using the appliance for the first time
Check that the voltage of the domestic network is the same as that indicated on the technical information plate of the appliance. Place the appliance on a stable surface.
Open the tank lid (N). Fill the tank up to the level marked MAX (Fig. 3).
While filling, pay close attention that the water does not dampen the switch area to prevent infiltrations inside the electrical parts.
Insert the plug into the socket, which must be earthed.
Starting the first time
After having filled the tank with cool tap water, start the machine by pressing the button (U). Indicator lamps (V) and (Q) turn on to indicate that the machine is on and that the internal boiler has started to heat up, respectively. Press the coffee dispensing switch (S) until you see water come out of the filter holder seat (Fig. 4). If you are starting the machine for the first time or after a period of time during which it has not been used, it is recommended that at least one cup of water be allowed to pass through the boiler's hydraulic circuit. Also open the cock (P) by slightly turning it anti-clockwise after having placed a container underneath the Maxi Cappuccino device wand (H).
Then close the cock (P) by turning it clockwise, and press the coffee dispensing switch (S) to make the water stop coming out. The machine will be ready to make coffee when the indicator lamp (Q) turns off.
HOW TO MAKE COFFEE
Put the Thermocream® Disc (D), the perforated silicone disc (E) and the Thermocream® Filter (F) into the filter holder in the order indicated (Fig. 5). Measure out the coffee in the filter and lightly press with the specially provided presser: completely fill two measures for two cups of coffee, and fill only one for one cup. Insert the filter holder into its seat.

Warning!
Tighten well by turning it from left to right while making sure you have hooked it properly onto the flange (Fig. 6).
If too much ground coffee is put inside the filter, turning the filter holder may prove difficult and/or you may get leaks from the filter holder when the coffee is being dispensed.
Check that the steam function button (R) has not been unintentionally pressed.
It is advisable to let the filter holder heat up a few minutes in its seat before making a cup of coffee so that the first cup is piping hot, too. This will not be necessary for the cups of coffee that follow.
To start dispensing, press the switch (S): the coffee will start coming out of the spouts of the filter holder. Press the switch (S) again to stop it. The minimum serving of coffee is 50ml .

Warning!
Like in professional coffee machines, do not remove the filter holder when the dispensing switch (S) is on; danger of burns!

Warning!
Wait about ten seconds after the coffee has been dispensed before removing the filter holder; To remove it, turn it slowly from right to left so as to prevent splashes or spurts of water or coffee.
When the machine is in stand-by, the lamp (Q) will turn on and off periodically. This shows that the boiler thermostat is tripping, which serves to keep the water temperature optimum.
When warming up, your appliance may release small puffs of steam from the filter holder; this is perfectly normal.
It is a good idea to start dispensing the coffee only when this indicator lamp (Q) is off.
Remove the cup grill (B) to make coffee in a large cup (Fig. 8).
How to make coffee with a pod
To make coffee with pods you must use the specific pod filter (K) that came with the coffee maker as described below:
1 Put the drip tray (L) and pod filter (M) inside the filter holder (K).
2 Place the pod in the filter (Fig. 16).
3 Push the pod towards the bottom of the filter with your fingers (Fig. 17).
4 The pod must be well centred and placed inside the filter.
5 Now it is possible to put the filter holder in its seat. Tighten the filter holder while making sure you have hooked it properly onto the flange (Fig. 6).
6 The pod could remain stuck in the upper part of the machine after making the coffee and when removing filter holder. To remove it, tilt the filter holder (Fig. 18) so the pod can fall onto it.
In order to always get an excellent cup of coffee, buy the pod that bears the E.S.E. compatibility mark.
If the pod is not inserted well, or if the filter holder is not tightened firmly, a few drops of water could leak from the filter holder.
Filling the water tank during use
No special operation is necessary when the water in the tank runs out because the machine has a special self-priming valve. All you have to do is fill the tank with cool tap water up to the MAX level after unplugging it from the socket-outlet. Pay close attention that the water does not dampen the switch area to prevent infiltrations inside the electrical parts.
HOW TO MAKE CAPPUCCINO
To prepare a cappuccino or hot chocolate or to heat any other beverage, press the switch (R); the indicator lamp (Q) turns on. When it turns off, the machine will be ready to generate steam.
When warming up, your appliance may release small puffs of steam from the filter holder; this is perfectly normal.
Now open the steam dispensing cock (P) anti-clockwise, having the foresight to position a cup underneath
the Maxi Cappuccino device (H) Fig. 9: at first a little water will come out, immediately followed by a strong jet of steam.
Plunge the wand all the way into the pot of milk (Fig. 10) and open the dispensing cock (P). During these operations you may notice that the warning light (Q) goes on and off from time to time, indicating that the boiler thermostat is keeping the water required for the steam supply at the right temperature.
It is opportune you start dispensing the steam only when this indicator lamp is off. Dispense the steam for a few seconds after every use in order to free the hole of any milk residue.
After the cappuccino is prepared, press the switch (R) to cut out the steam function.
MAKING FURTHER CUPS OF COFFEE
To prepare a cup of coffee right after making cappuccino, it is necessary to bring the boiler back to the coffee preparation temperature by performing these operations: press the steam function switch (R). You may notice that the indicator lamp (Q) is on. This luminous indication serves to tell you that the temperature in the boiler is still high, i.e. it is still that for steam; you must therefore wait a few seconds until the lamp (Q) turns off. If you want to cool down the boiler faster, place a container underneath the cappuccino maker, press switch (S) and at the same time keep the cock (P) open; make water come out of the Maxi Cappuccino device until when the indicator lamp (Q) turns back on; now close the cock (P) and turn the switch (S) off. Wait for the lamp (Q) to turn off before making another cup of coffee.
HOW TO MAKE TEA OR TISANES
When the machine is in the coffee-ready position, i.e. with the lamp (Q) off, place a cup underneath the spout (H) and press the coffee dispensing switch (S). Open the steam dispensing cock (P) immediately afterwards; in this way hot water will come out of the spout. The maximum quantity for two cups is 200ml .
USEFUL TIPS FOR OBTAINING A GOOD ITALIAN ESPRESSO
The ground coffee in the filter holder has to be pressed lightly. Whether the coffee is stronger or weaker depends on the degree the coffee is ground, the quantity put into the filter holder and the pressing. Just a few seconds are needed for the coffee to flow down into the cups. If the dispensing time is longer, this means that the coffee is ground too fine or that the coffee put into the filter holder has been pressed too much.
CLEANING THE APPLIANCE

Warning!
All cleaning operations described below must be performed with the machine off and with the electric plug disconnected from the socket-outlet.

Warning!
Regular maintenance and cleaning preserve and keep the machine efficient for a longer amount of time. Never wash machine components in the dishwasher. Do not use direct jets of water.

Warning!
All operations must be performed when the machine is cold.
Cleaning the filter containing the grounds
Check that the holes are not clogged and if so, clean them with a small brush (Fig. 11). Dispense boiling water from the filter holder with the filter inside, without coffee grounds, after placing a glass underneath the dispenser in order to dissolve or remove any coffee residue or impurities.

Warning!
Slowly remove and disconnect the filter holder because any remaining pressure could cause splashes or squirts.
It is advisable to thoroughly clean the filter (F) about every 3 months using detergent tabs, which can be found at retail stores and the Authorised Service Centres, following the instructions inside the package. As
an alternative, you can use a simple dishwasher detergent tab (without added rinse aid or other chemical additives) as follows:
- Put a dishwasher detergent tab into the filter (without coffee) when the machine is hot (after heating for at least five minutes).
- Couple the filter holder to the machine and put a container underneath the filter holder.
- Press the coffee button to start dispensing water, and dispense the water for 15-20 seconds.
- Stop the water supply and let the tab act for at least 15 minutes while keeping the filter holder coupled on the machine.
- Repeat the water dispensing operation by operating the pump for about 15-20 seconds, and then letting it rest for another 15-20 seconds, until two tanks of water are used up.
- Remove the filter holder from the machine, remove the filter and rinse it well under running tap water.
- Turn off the machine, disconnect the power cable from the socket-outlet and clean the coupling seat of the filter holder with a sponge in order to remove any detergent residue from the shower disc.
- Turn the machine back on, couple the filter holder once again and dispense at least 2 cups of water again to complete the rinsing.
If the coffee machine is used daily, it is advisable to carry out the cleaning operation at least every three months.
Cleaning the pod filter holder
Start dispensing with the filter holder connected and without the pod inside by pressing the button (S) after having placed a glass underneath the filter holder. In this way any coffee residue or impurities present in the filter holder will dissolve and be removed.
Cleaning the silicone disc
Wash the silicone disc (E) under running water, bending it slightly on the sides in order to free the centre hole of any residue of coffee grounds that could clog it (Fig. 12).
Cleaning the filter holder seat

Warning!
Each intervention must be carried out with machine off. All elements must be at ambient temperature in order to prevent residual pressure inside the boiler.
With time, coffee residue may accumulate on the filter holder seat. It can be removed with a toothpick, a sponge (Fig. 13), or by letting water run through without fitting the filter holder (Fig. 4).
Loosen the screw in the centre of the filter holder coupling seat (Fig. 14) with a 5mm hex wrench if the machine no longer supplies water or coffee from the filter holder seat. Remove the spring. Put the spring to soak in a descending solution in order to eliminate the residue of lime that prevents its proper operation.
Cleaning the Maxi Cappuccino device

Warning!
Perform this operation when the chrome-plated pipe is cold so as to prevent burns.
Unscrew the device (H) from the small pipe and wash it with running water. The small pipe can be cleaned with a non-abrasive cloth. Screw the cappuccino maker back on as far as it will go. If necessary, clean the small steam outlet hole again with a pin. After use, always let the steam nozzle run for a few seconds so to free the outlet from any possible residue.
Cleaning the tank
Periodically clean the inside of the tank with a sponge or damp cloth.
Cleaning the grill and drip tray
Remember to empty the drip tray from time to time (A).
Remove the grill (B) and wash it under running water; remove the drip tray (A) from the machine, empty it and wash it under running water.
Cleaning the machine body

Warning!
Clean the fixed parts of the machine using only a damp, non-abrasive cloth so as to not damage the body.
DECALCIFICATION
Good maintenance and regular cleaning preserve and keep the machine efficient for a longer amount of time, considerably limiting the risks of lime deposits forming inside the appliance. However, should your coffee machine fail to work properly as a result of the frequent use of hard, high calcium content water, you may perform a decalcification procedure to restore its operational efficiency. Espressione does not assume any responsibility whatsoever for damage to components inside the coffee machine caused by the use of noncompliant products containing chemical additives. Should you need to decalcify your appliance, please follow the instructions which come with the decalcifying product.
PUTTING OUT OF SERVICE
If the machine is put out of service, electrically disconnect it. Empty the water tank. Use the handle to tilt the appliance and make the water come out of the spout while paying close attention that the water does not dampen the switch area to prevent infiltrations inside electrical parts. Empty the drip tray and clean it (see paragraph "Cleaning the appliance"). In the case of scrapping, you must separate the various materials used in making the machine and dispose of them based on their composition and on the legal provisions in force in the country of use.
TROUBLESHOOTING

Warning!
If there are problems with operation, immediately turn off the machine and unplug it from the socket-outlet.
| PROBLEMS CAUSES | ES SOLUTIONS | |
| The coffee maker does not supply boiling water for tisanes. | Air has probably entered the circuit and deactivated the pump. | Check that the water level in the tank is correct. If necessary, fill it with cool tap water. Repeat the operations described in the “Preliminary phases for use” paragraph. |
| The steam exit hole on the dispenser wand is clogged | Unclog any deposits that may have formed in the hole of the dispenser wand with a pin. | |
| Steam overflowing from the edges of the filter ring. | You are trying to dispense the coffee with the steam function on. Check that the steam function button has not been unintentionally pressed. | Stop the coffee delivery. Press the button (R) to cut out the steam function. Wait for the lamp (Q) to turn off before making another cup of coffee. |
| The coffee maker does not supply steam. | There is little water and the pump does not suck it up | Check that the water level in the tank is correct. If necessary, fill it with cool tap water. |
| The steam exit hole on the dispenser wand is clogged. | Unclog any deposits that may have formed in the hole of the dispenser wand with a pin. | |
| Coffee overflowing from the edges of the filter ring. | Probably an excess amount of ground coffee has been placed in the filter ring preventing the filter ring from being correctly tightened into its housing. | Slowly remove and disconnect the filter holder because any remaining pressure could cause splashes or squirts. Clean the coupling seat with a sponge (Fig. 13). Repeat the operation placing the correct quantity of coffee in the filter. |
| Coffee overflowing from the edges of the filter ring | Residues of ground coffee have remained on the gasket of the filter holder coupling seat. | Clean the seal with a toothpick or a sponge (Fig. 13). |
| The hole of the silicone disc is clogged. | Wash the silicone disc (E) under running water, bending it slightly on the sides in order to free the centre hole of any residue of coffee grounds that could clog it (Fig. 12). | |
| Coffee overflowing from the edges of the filter ring. | The exit holes of the filter containing coffee grounds are clogged. | Slowly remove and disconnect the filter holder because any remaining pressure could cause splashes or squirts. Clean the clogged filter holes with a small brush or a pin.. |
| Faulty pod. Replace the pod in the filter holder (K). | ||
| The coffee is not supplied or flows too slowly. | The holes of the perforated disc in the filter holder coupling seat are clogged. | Turn on the machine without the filter holder, making the water run. If the water still does come out from all the holes evenly, carry out the descaling cleaning operation. |
| The spring in the centre of the filter holder coupling seat is blocked by lime. | Loosen the screw in the centre of the filter holder coupling seat with a 5 mm hex wrench (Fig. 14). Remove the spring. Put the spring to soak in a descaling solution in order to eliminate the residue of lime that prevents its proper operation. | |
| The exit holes of the filter containing coffee grounds are clogged. | Slowly remove and disconnect the filter holder because any remaining pressure could cause splashes or squirts. Clean the clogged filter holes with a small brush or a pin. | |
| The coffee blend is ground too fine. | Try using coarser coffee blends. | |
| The coffee blend is pressed down too much. | amper coffee inside the filter using less pressure. | |
| The tanks is not inserted well. Fit | the tank securely by pushing it as far as it will go. | |
| The hole of the silicone disc is clogged. | Wash the silicone disc (E) under running water, bending it slightly on the sides in order to free the centre hole of any residue of coffee grounds that could clog it (Fig. 12). | |
| There is little water and the pump does not suck it up. | Check that the water level in the tank is correct. If necessary, fill it with cool tap water | |
| Faulty pod. Replace the pod in the filter holder (K). | ||
| Broken pod. | Remove the pod filter holder (K), clean the seat with a sponge, and put a new pod inside. | |
| The coffee is too watery and cold. | The blend has been ground too coarsely. | A more finely ground blend must be used to obtain a more concentrated and hotter coffee. Anyhow, this problem is easily solved thanks to the Thermoc-ream® System, which always guarantees hot coffee accompanied by a reach cream, even with coarsely ground beans. |