Mara PL62T - Coffee machine Lelit - Free user manual and instructions
Find the device manual for free Mara PL62T Lelit in PDF.
User questions about Mara PL62T Lelit
0 question about this device. Answer the ones you know or ask your own.
Ask a new question about this device
Download the instructions for your Coffee machine in PDF format for free! Find your manual Mara PL62T - Lelit and take your electronic device back in hand. On this page are published all the documents necessary for the use of your device. Mara PL62T by Lelit.
USER MANUAL Mara PL62T Lelit
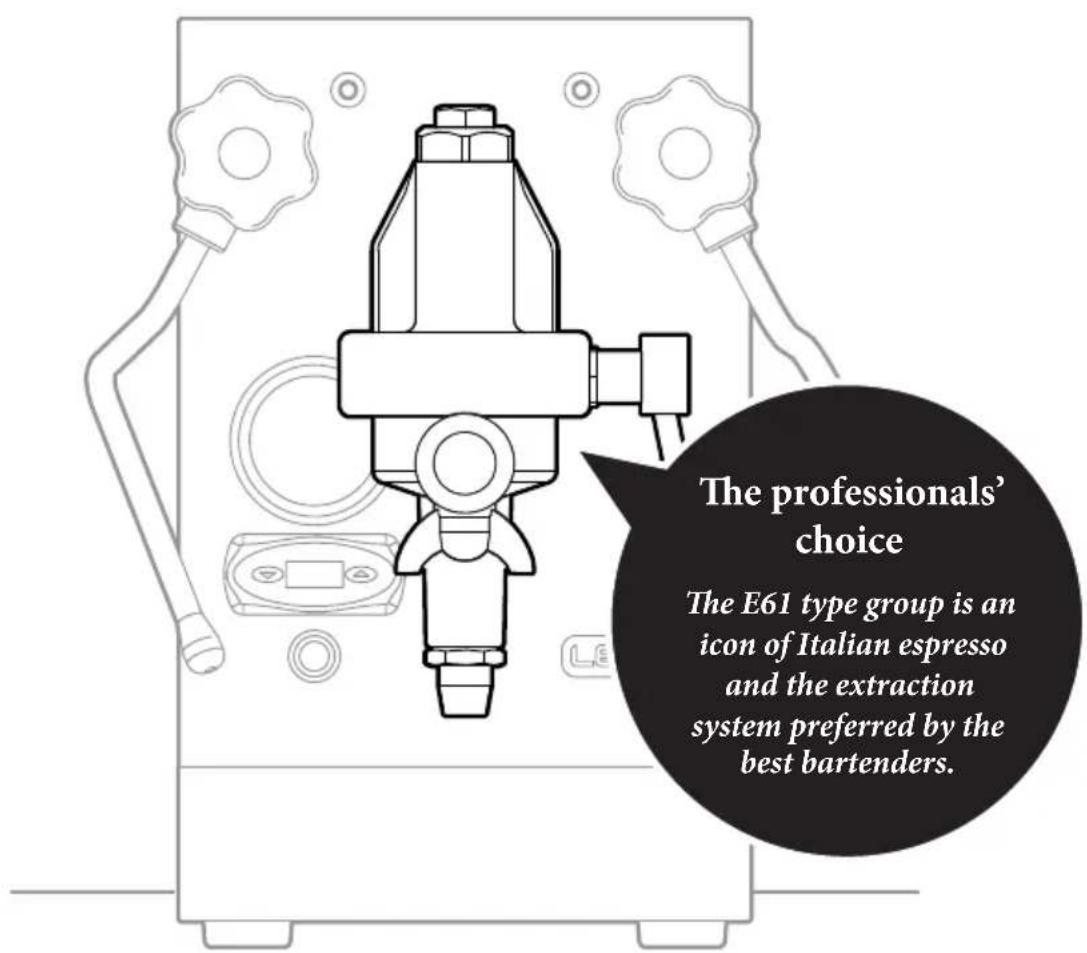
The most compact espresso machine with E61 type group
User Manual
for the following models:
Pro Line - Mara
PL62S
PL62
PL62T
Dimensions:
22x40x35,6 cm
Weight:
18,8 kg
Power supply:
230V 50Hz/120V 60Hz
Power:
1400W + 50W
Pump:
15 bar
Boiler pressure:
1,2 bar
Water tank capacity:
2,5 lt
Copper boiler capacity:
1,4lt

THANK YOU FOR CHOOSING US
Careful design and choice of components are the secret of the excellent performance of all of our models.
We develop our products with technology applied only to the best professional machines. The materials used meet very high standards of quality and reliability to provide you with durable, and long-lasting products.

Write down the serial number of your product
Serial number
Purchased from Date of purchase
Indice
Safety notes 32
Main specifications 37
E61 type group 38
Product overview 39
Instructions for use 40
The art of espresso coffee 45
Cleaning and maintenance 49
Solving the most common problems 51
Warranty terms 52
01.
Safety notes
Please read this manual carefully before using the machine.
This coffee machine is reccomended for making 1 or 2 cups of coffee and has multi-directional tube for steam and one for hot water.
The controls on the front panel have easily understandable symbols.
The machine is designed for home use and is not suitable for heavy duty professional use.
The noise level of the appliance does not exceed 70 dB (A).
The information and pictures provided may be changed without notice to improve the machine performance.
Symbols used
It is absolutely essential to observe the following warnings and symbols:
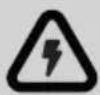
Shock hazard. Failure to comply may cause electric shock with danger to life.
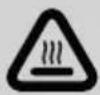
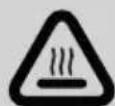
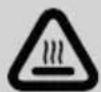
Burn hazard. Failure to comply may cause severe burns.

Caution. Failure to comply may cause damage to the appliance.

Please Note. This symbol indicates important advice and information for the user.
Numbers in brackets
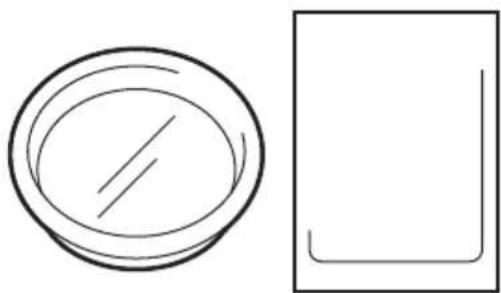
The numbers in brackets refer to the key provided in the description of the appliance in Chapter 04 "Product overview" and to the pictures in the Quick start guide attached.
IMPORTANT SAFEGUARDS

General warnings
This manual is an integral and essential part of the product. Please read all these warnings carefully as they provide important information on safe installation, use and maintenance. These instructions should be carefully retained for future reference.
-
This appliance can be used by children aged from 8 years and above and persons with reduced physical, sensory or mental capabilities or lack of experience and knowledge if they have been given supervision or instruction concerning use of the appliance in a safe way and understand the hazards involved. Children shall not play with the appliance. Cleaning and user maintenance shall not be made by children without supervision.
-
This appliance can be used by children aged from 8 years and above
if they have been given supervision or instruction concerning use of the appliance in a safe way and if they understand the hazards involved. Cleaning and user maintenance shall not be made by children unless they are older than 8 and supervised. Keep the appliance and its cord out of reach of children aged less than 8 years.
- Appliances can be used by persons with reduced physical, sensory or mental capabilities or lack of experience and knowledge if they have been given supervision or instruction concerning use of the appliance in a safe way and understand the hazards involved. Children shall not play with the appliance.
- This appliance is intended to be used in household and similar applications such as: staff kitchen areas in shops, offices and other working environments; farm houses; by clients in hotels, motels and other residential type environments; bed and breakfast type environments.
-
The appliance is only designed for making espresso coffee or hot drinks using the hot water or steam tubes and for pre-heating cups.
-
Any use other than that described above is improper and could be hazardous; the manufacturer accepts no liability whatsoever for any damage arising from improper use of the appliance.
- This appliance is not intended for use by persons (including children) with reduced physical, sensory or mental capabilities, or lack of experience and knowledge, unless they have been given supervision or instruction concerning use of the appliance by a person responsible for their safety.
- Children must not be allowed to play with the appliance.
- The appliance must not be left unattended or used outdoors.
- The appliance should not be immersed in water or cleaned by spraying.
- The appliance must not be exposed to atmospheric agents (rain, sun, ice).
-
If the appliance is stored in rooms where the temperature can go below freezing, the tank and the water pipes must be emptied.
-
All the packing material (plastic bags, polystyrene, etc.) should be keep out of the reach of children.
- No liability is accepted for the use of unauthorized spares and/or accessories.
- No liability is accepted for repairs not carried out by authorized service centres.
- The manufacturer accepts no liability for tampering with any of the appliance components.
In all the above cases the warranty will be void.

Essential safety warnings
As with all electrical appliances, the risk of electric shock cannot be excluded, therefore, the following safety warnings should be carefully observed.
- To avoid spilling the connector, never pull the power cord.
- Always attach plug to appliance first, then plug cord into the wall
outlet.
- To disconnect the appliance, turn any control to "off", then remove plug from wall outlet.
- In the event of any fault or malfunction, do not attempt to carry out repairs. Switch the appliance off, remove the plug and contact the Service Centre.
- In the event of damage to the plug or the power cord, do not operate the appliance, these should be replaced only and exclusively by the Service Centre.
- Unplug from outlet when not in use.
- Before cleaning the exterior surfaces of the appliance, putting on or taking off parts, switch it off, remove the plug from the outlet and allow to cool.
- To reduce the risk of injury do not drape cord over the counter top or table top where it can be pulled on by children or tripped over unintentionally.
- Do not let cord touch hot surfaces.
- Do not let cord hang over edge of table or counter.
- The use of accessory attachments not recommended by the appliance manufacturer may result in fire, electric shock or injury to persons.
- Do not place on or near a hot gas or electric burner, or in a heated oven.
- Before switching on, ensure that the power supply voltage corresponds to that indicated on the plate on the base of the appliance and that the power supply is properly earthed.
- Do not tamper with the appliance. Contact an authorized technician or the nearest service centre for any problem.
- Do not touch the appliance if your hands or feet are wet.
- Do not touch the plug with wet hands.
- Ensure that the electrical outlet is always freely accessible so that the plug can be easily removed when necessary.
- When removing the plug, always hold it directly. It should never be removed by pulling on the power cord, as this can cause damage.
- To protect against fire, electric shock and injury to persons do not im
merse cord, plugs in water or other liquid.
- Do not use adapters, multiple sockets or extension cords. If their use is unavoidable, use simple adapters or multiple sockets and extension cords that conform to current safety standards, taking care not to exceed the current limit marked on the simple adapter or extension cord, or the maximum capacity of the multiple socket.
Warning about burn/scald risks
This appliance produces hot water and steam; therefore the following safety warnings should be strictly observed.
- Warning: hot surfaces remain hot for a certain time also after use.
- When the appliance is switched on, do not touch the cup warming plate as it is hot.
-
Be careful when touching the steam (4) and hot water wands (12).
-
The parts marked with "CAUTION HOT" are very hot, therefore, the utmost care should be taken when operating near them. Use handles or knobs.
- Take care to avoid contact with water spray or jets of steam.
- Never direct the steam or water spray towards your body.
- Never remove the filter holder (e) during operation.
- Only place cups and glasses for use with the coffee machine on the cup warmer (9). Other objects should not be placed there.
- Dry the cups thoroughly before placing them on the cup warmer (9).
SAVE THESE INSTRUCTIONS
02.
Main specifications
We design our machines based on our customers' needs.
We are sure that the features selected for this model will meet all your wishes, so you can make perfect tasting coffee for yourself and your guests.

PID controller
[only on the PL62T]
To regulate the boiler temperature and always have the perfect settings for the coffee extraction.

Coffee pressure gauge
For constant vision of the pressure in the coffee brewing system, to know whether your Espresso is being made properly.

Multi-directional
anti-burn steam wand
To make cappuccinos or heat drinks easily and safely.

Stainless steel
For maximum hygiene in the kitchen and easy cleaning of the appliance. A simple wipe with a sponge and your machine will shine again.

Steam boiler gauge
To instantly check the steam pressure and know when the steam wand is ready for use.

Cup warmer
To warm up the coffee cups and get the best out of your Espresso.
03.
E61 type group
38
The E61 type group is a mechanical distribution unit that we use in high quality espresso coffee machines to enhance the organoleptic properties, the flavour and aroma of authentic Italian Espresso.
The mechanism combines a thermal siphon system and a pre-infusion process to extract the most flavour and aroma from the coffee.
The thermo-siphon ensures a stable water temperature inside the system, while automatic pre-infusion allows longer contact between the hot water and the ground coffee before extraction.
The result is a rich, aromatic brew with a compact cream on top.
04. Product overview
Take your new espresso coffee machine out of the box and have a look at the various components and accessories designed for you.
39
- Water tank cover.
- LED machine on.
- Steam knob.
- Steam wand.
- Steam and coffee pressure gauge.
- PID controller (only on PL62T).
- Main on/off switch.
- Removable drip tray with cup rack.
9.Cup warmer.
10. LED heating element.
11. Hot water knob.
12. Hot water nozzle.
13. Coffee distribution unit.
14. Coffee distribution lever.
Contents of the box
a. Stainless steel tamper for the PL62 and PL62T - Plastic tamper for the PL62S
b. Coffee measuring spoon
c. Power cord
d. Blind filter
e. 2 cup filter holder and 1 cup filter holder (only for the PL62 and PL62T)
05. Instructions for use
Lelit coffee machines are not automatic. To make a good cup of coffee, you must know how to use them properly and will need a bit of practice. Follow the instructions carefully. You can also refer to the Quick start guide where you will find illustrated instructions. You'll soon be making coffee just like in the cafes, with the ideal smooth, creamy texture you prefer.

to start
Starting the machine
It is important to carefully follow these instructions the first time the machine is started, to ensure that it works properly. These instructions are only for the first time the machine is used. The instructions given in the subsequent chapters are for all further use. For subsequent uses do not consider this chapter and follow the chapter Making an Espresso.
A Open the packaging
A.1 Open the packaging and place the machine on a flat surface.

Be careful. The machine weighs 19kg

Water filling
B.1 Remove the tank from the machine.
B.2 Fill the tank with cold water.
B.3 Replace the tank in the machine.
Caution. The tank has an automatic water detection system. When replacing the tank ensure the tubes are not bent and that the filter on the end of one of the tubes is properly inserted.

Switch on the coffee machine

Caution. Ensure the power supply voltage is the same as that indicated on the
information plate and that the supply system has an adequate circuit breaker.
C.1 Connect the power cord (c) to the socket on the back of the machine.
C.2 Plug into the power outlet.
C.3 Switch the machine on by pressing the main on/off switch (7).
C.4 The machine is switched on when the machine on LED (2) and the heating element LED (10) are on.
C.5 Wait for the heating element LED (10) to switch off.

Checking that the machine is working properly
Coffee
D.1 Insert the filter holder (e) without any coffee in the distribution unit (13) and fasten it firmly, at least up to align the handle with the padlock symbol indicated on the group.
D.2 Raise the coffee lever (14) to allow about half a litre of water run out.
D.3 Once the required quantity is reached, return the lever (14) to the start position to stop the flow of water.

Note. This allows the water circuit to fill up completely and rinses it out at the same
time.
Hot water
D.4 Place a jug under the hot water nozzle (12).
D.5 Turn the hot water knob (11) anti-clockwise.
D.6 After about one litre of water has come from the nozzle (12) turn the knob (11) clockwise to close it.
Steam
D.7 Point the steam wand (4) at the drip tray rack (8).
D.8 Turn the steam knob (3) anti-clockwise.
D.9 When steam starts coming out of the steam wand turn the knob (3) clockwise to close it.

Note. Only for the PL62T model: check that the PID controller reaches the ideal
temperature of 121^ pre-set by the factory. To change this setting, read the paragraph on "Changing the settings".

to start
Making an Espresso
Thanks to the default settings, the machine is immediately ready to make an Espresso.
42
Note. The machine comes with a cup warmer (9). Using warm cups enhances the organoleptic qualities, the flavour and aroma of an Espresso.
E
Preparing the machine for making coffee
E.1 Check the water level in the tank. If there is no water, follow the instructions in item B.
E.2 Switch the machine on by pressing the on/off main switch (7).
E.3 Wait for a few minutes until the heating element LED (10) switches off.
E.4 Insert the filter holder (e) without any coffee in the distribution unit (13) and fasten it firmly, at least up to align the handle with the padlock symbol indicated on the group.
E.5 Wait until the heating element LED (10) switches off – about 20 minutes – and the pressure gauge (5) shows about 1-1,2 bar.
E.6 Raise the coffee distribution lever (14) and allow the water to flow for a few seconds.
E.7 Return the coffee distribution lever (14) back to its initial position. The machine is ready to make coffee.
Note. This balances the temperature of the distribution unit with that of the filter holder, which is essential for making excellent coffee.
Note. The continuous switching on and off of the heating element LED (10) shows that the heating element is keeping the water in the boiler at the ideal temperature.
F
Distributing the coffee
F.1 Insert the selected filter in the warm filter holder (e).
F2 Fill the filter with the desired quantity of ground coffee.
目
Note. We suggest 7g for one cup and 14g for two cups.
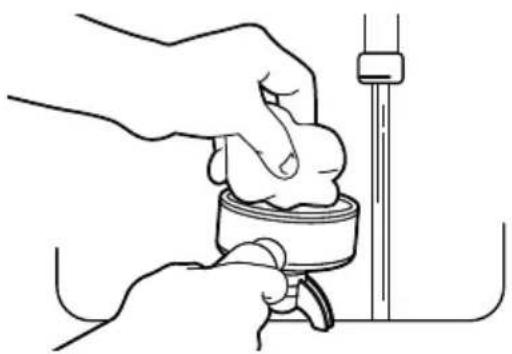
F3 Press the coffee with the tamper (a) and clean any coffee residues from the edge of the filter holder.
F4 Insert the filter holder (e) in the distribution unit (13) and fasten it firmly, at least up to align the handle with the padlock symbol indicated on the group.
F5 Place one or two coffee cups on the cup rack (8), under the filter holder (e).
F6 Raise the coffee distribution lever (14) to start distribution.
F.7 Once the required amount of coffee is reached, return the lever (14) to its initial position.
F8 Remove the filter holder (e), empty it and clean it carefully with a damp cloth.

Caution. The filter holder must not be removed before coffee brewing is completed.
Note. For proper brewing the pressure gauge (5) must indicate 8 ÷ 10 bar.

for experts
Steam and hot water
The machine has a steam wand for heating milk and obtaining a dense, creamy froth for perfect cappuccinos.

Preparing the coffee machine
G.1 Check the water level in the tank. If there is no water, follow the instructions in item B.
G.2 The coffee machine is ready when the heating element LED (10) switches off.

Caution. Never place your hands or other body parts under the steam wand. This
can cause serious burns.

Steam distribution
H.1 Turn the steam knob (3) anti-clockwise with the steam wand (4) pointed at the drip tray (8) and allow a little water to flow out.
H.2 When steam starts coming out, place the recipient with the drink under the steam wand (4).
H.3 Once the desired result is achieved, close the steam knob (3).

Note. See chapter 06 "The art of making espresso coffee" for the best way to froth milk.

Caution. Clean the steam wand (4) after every use:
Point the steam wand at the cup rack and release some steam at least once. Clean the wand (4) carefully with a sponge or a clean cloth. The chapter on "Cleaning and maintenance" provides all the necessary instructions.

Hot water distribution
1.1 Place a jug under the hot water nozzle (12) and open the hot water knob (11) by turning it anti-clockwise until you have the quantity of hot water required.
1.2 Close the hot water knob (11).

for experts
Changing the settings (only for PL62T)
The PID is set by the factory to 121^ . Instructions for adjusting the setting are given below.

Adjusting the boiler temperature
J.1 Press the "down" button.
J.2 When the display shows "PRG" press the "up" button.
J.3 When the display shows the boiler temperature, set the temperature using the "up" and "down" buttons till you reach the required temperature: min 110^ - 126^ .
J.4 Use the "up" and "down" buttons to adjust the temperature as desidered.
J.5 About 3 seconds after the last button has been pressed, the setting will be saved and the display will indicate the temperature.
Note. Converting the temperature: press "down" and "up" buttons at the same time for about 3 seconds. When the display shows "C-F", release both buttons and afterwards press the button "up" to convert the temperature from Celsius degrees to Fahrenheit degrees. About 3 seconds after the last button has been pressed, the setting will be saved.
06.
The art of espresso coffee
Contrary to what you might think, making a perfect Espresso is not that easy. It takes experience, ability, passion and a little bit of curiosity. In this paragraph we would like to share with you some of the basic rules for making a perfect cup of Espresso.
Suggested doses:
Ristretto (Strong) about 20 ml - Espresso about 30 ml - Lungo (Long) about 60 ml.
The "5 M's"
If you want to make perfect Empressos, you should start by ensuring the five essential factors which turn a simple cup of coffee into an Espresso for connoisseurs! These are the "5 M's"; in Italian: miscela (blend), macinatura (grinding), macchina (machine), manualità (skill) and manutenzione (maintenance).
1-Miscela (Blend)
Good Espressos are always made with a good blend of coffee. An Espresso with the right taste requires a blend of two types of coffee, Arabica and Robusta. The first gives the coffee its delicate aroma and the right amount of acidity, while the second type gives it its full taste, body and cream. The quantities depend on your own taste. Try out different combinations until you find the blend you like best!
2-Macinatura (Grinding)
The grinder is a must for making good Espresso. Coffee should always be ground just before it is used so that it preserves its taste and aroma. The Le-lit grinders let you adjust the grinding
level to suit the coffee blend in order to establish the correct extraction time and amount of cream.
Lelit coffee machines are designed and built to let you adjust the water pressure and temperature to your requirements. The right balance of these two factors allows you to extract from the ground coffee not only the substances that provide its taste, but also the insoluble particles that give your coffee body and aroma.
Half of the result depends on how you use the machine. A passionate expert is an essential part of the Espresso production chain and can enhance the result to bring additional value to the final product. Passion and practice are, therefore, the secrets to learning how to use the machine. You can experiment with different blends of coffee, grinding, pressing, water temperature and pressure, not just to make an Espresso, but to make the one that is just right for you.
Daily maintenance, scheduled maintenance and care of the machine will ensure the quality of the beverage and the durability of the product you have purchased.
A clean machine says a lot about your passion for coffee making.
Coffee varieties
The choice of the blend is an essential factor for making the ideal coffee for your taste. There are a lot of different varieties of coffee blends on the market to choose from. The differences in flavour, aroma and texture depend on the quantities of the two varieties of coffee that make the blend.
Arabica
This is a sweeter and more delicate variety of coffee, with a rich aroma and cream that is very thin, dense and compact.
Arabica
It is grown between 900/2000 m Rich aroma
The beans have an elongated oval shape with an "S" shaped groove.
Caffeine between 0.9 1.7%
Robusta
This variety is woody, bitter, full-bodied and spicy,with little aroma. Its cream is more frothy and grey.
Robusta

It is grown between 200/600 m Spicy aroma
The beans have a round shape with a straight groove.
Caffeine between 1.8 4%
No variety of coffee can make an ideal
Espresso on its own.
The perfect Espresso has a top layer of cream 2-3 mm thick, a nut brown to dark brown colour, with reddish tinges and light streaks, a harmonious flavour, a strong, balanced aroma and a sweet, long-lasting aftertaste.
It has a strong aroma with notes of flowers, fruits, toast and chocolate. These sensations can last just a moment or can persist for a few minutes in your mouth. The taste is round and well structured. The acid and bitter perceptions are well balanced whereas there is little or no astringency.
The ideal parameters to obtain this type of coffee are:
7± 0,5g. of ground coffee.
25 seconds to brew 30 ml.
88 / 92^ when brewing and 80^ in the cup.
8/10 bar pressure during extraction.
Even Arabica blends often contain a small amount of Robusta, which is necessary to enhance the cream and add aroma and body to the espresso.
Blends made for coffee bars usually contain 20% Robusta but in southern Italy, where they prefer a stronger taste, the percentage can reach 40-50%.
At the end of the day, it's just a matter of taste...Experiment until you find the blend you like best!
Cappuccinos
There's nothing better than a cappuccino to start your day. Although they are made and served everywhere, few people know how to make one properly.
Making the coffee is only part of this complex procedure. The froth often creates major problems, but thanks to the steam wand on our machine, with a few suggestions and a little practice you'll soon be making cappuccinos just like in the coffee bars!
Milk and jug
You need 100 ml of milk to make a cappuccino.
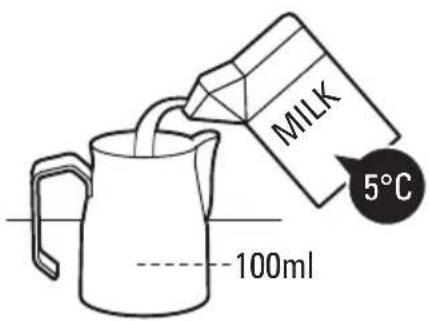
Fresh whole milk provides a smoother, creamier and tastier froth. Milk will not froth at over 65^ so cold milk from the fridge should be used to allow more time for it to froth. The best jugs to use are made of stainless steel and have a spout, like the Lelit jug (code PL101-PL102 - not included).
The jug should never be more than half filled with milk.
Frothing the milk
Before using the steam wand, some steam should be released for about
two seconds, as it always contains some water due to condensation.
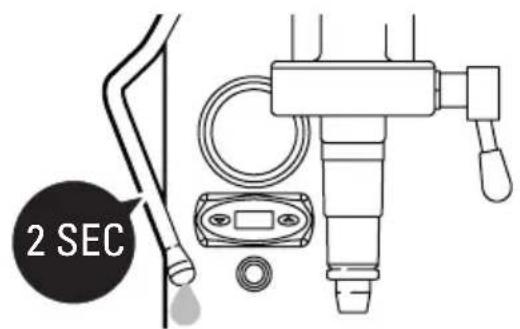
47
Insert the wand so that the end of the nozzle is near the side of the jug (pretend you have split the top section into four parts and insert the nozzle into one of them) and about one centimetre below the surface of the milk. Since the milk will start to expand in volume, you will have to gradually lower the jug so that the nozzle is always kept immersed at the same depth. This process is complete when the milk reaches a temperature of about 37^ , or when you can feel the warmth with your hand. You can use the thermometer too (code PL107 - not included).
Processing the milk
This phase is very important to make the cream thick, with a fine texture and a shiny surface.
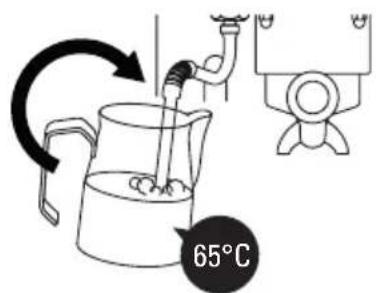
Insert the wand all the way down and tilt the jug to create a vortex. Heat the milk to the desired temperature, without exceeding 65^ . Close the steam.
Prepare the milk by first tapping the jug on the countertop to remove any air bubbles and then rotating it to keep the milk and froth well amalgamated. The final result should be a smooth, creamy surface without any bubbles.
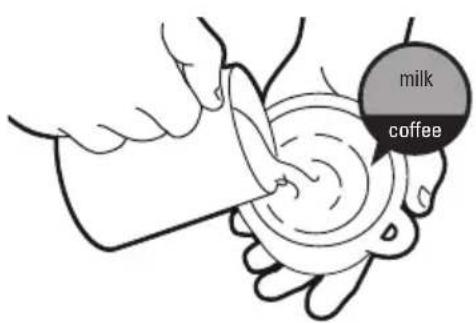
Pouring the milk
You should leave the milk to settle for a least half a minute, so we suggest you always prepare it before making the coffee. The doses for a cappuccino should be one part Espresso and two equal parts of milk and froth.
Clean the steam wand with a damp cloth.

To see the tutorial, please scan the QR-Code.
To read the QR code, download the proper app from your store.
07.
Cleaning and maintenance
Cleaning and maintenance of the machine are essential for the quality of the coffee and the durability of the appliance.
Cleaning
The machine must be cleaned at least once a week.
Before starting, remove the plug from the electrical outlet and allow the machine to cool.
Use a soft cloth, preferably microfiber, like the Lelit cloth (code MC972 - not included), and moisten it with plain water. Do not use abrasive detergents and do not immerse the machine in water.
For thorough maintenance, we suggest you use the Lelit brush (code PL106 - not included), which will help you clean the nozzles and the spaces between the gaskets more effectively, removing stains and coffee residues from even the smallest cracks.
Warm running water can be used to clean the removable parts of the machine. The filters and filter holder should never be washed in a dishwasher.
There is no need to clean the filters after each use, but just to ensure they are not clogged.
However, to ensure the best performance from your machine, it is essential to thoroughly clean the steam wand and filter holder after each use.
The filter holder should be cleaned to remove the greasy coffee residues that can negatively affect the taste of your espresso.
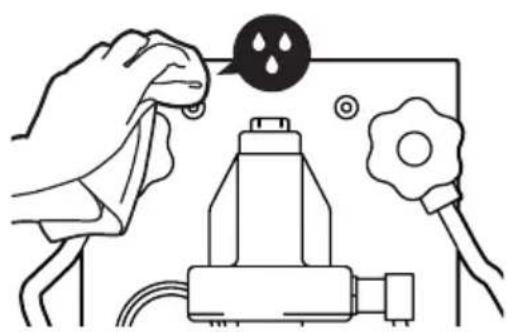
Wash the exterior part of the steam wand with a damp cloth and release a little steam to remove any milk residues from inside the tube, as these could obstruct the steam output, making it more difficult to froth milk properly.
Dscaling the machine
Use of the machine creates a natural formation of lime scale, over a time period depending on how frequently the machine is used and on the hardness of the water.
Lime scale deposits can obstruct the tubes and decrease the brewing temperature, altering the quality of the coffee and reducing the lifetime of your machine.

To avoid the formation of limescale, which can also deposit in the internal circuits, we recommend the use of our Lelit resin filter (code MC747 -MC747PLUS) to soften the water. Please insert the filter in the tank following the instructions on the packaging. The filter purifies the water from the calcium and magnesium salts which are deposited to form lime scale and affect the taste of your coffee. Remember that the filter loses its effectiveness after a certain number of gallons treated, so replace it periodically. Instructions for the use and replacement of the filter are given on the box.
To avoid any possibility of damaging the machine's components, NEVER, UNDER ANY CIRCUMSTANCES, ADD ANY DESCALING PRODUCTS TO THE WATER TANK.

Watch the tutorial to understand how the water softener filters work.
Back-flushing
It is advisable to back-flush the machine once a month (washing the operational parts used during brewing) using the blind filter supplied (d) and the Lelit detergent sachets (code PL103 - not included).
This is done very easily, simply by following the instructions on the sachet.
Any other servicing must be performed only by an authorized service representative.
08.
Solving the most common problems
We recommend careful reading of this guide in order to solve the most common problems before referring to an authorised service centre.

The coffee comes out too cold
| The machine has not reached the right temperature. | Follow the instructions in the paragraph on "Making an espresso". |
| The filter holder has not been warmed sufficiently. | Follow the instructions in the paragraph on "Switching the machine on". |

The coffee comes out too quickly and without any cream
| It is ground too coarse. Grind the coffee finer. |
| The amount of coffee is insufficient. Put more coffee in the filter. |
| The coffee has not been pressed enough. Press the coffee harder. |
| The coffee is old or unsuitable. Use a different blend of coffee. |

The coffee does not come out or comes out in drops
| The coffee has been ground too fine. Grind the coffee coarser. |
| There is too much coffee in the filter. Put less coffee in the filter. |
| The coffee has been pressed too much. Press the coffee less. |
| The outlet is obstructed. Back-flush the machine, see paragraph on “Cleaning and maintenance”. |

The pilot LED (2) does not switch on and the machine does not work.
| The power cord plugs are not inserted properly. | Ensure the power cord plugs are properly inserted in their sockets. |
| The power cord is damaged. Refer to the Service | Centre to replace the power cord. |

The machine does not produce any steam even if the LED (10) is off.
| The outlet holes in the nozzle at the end of the steam pipe are obstructed. | Clean the holes with a needle. |

The machine is switched on but the LED (10) does not switch off.
| The heating element is damaged. Contact a Service Centre. |
| The internal pressure switch is not working. Contact a Service Centre. |
| The PID is not working. Contact a Service Centre. |
09.
Warranty terms
Legal warranty
This product is covered by the warranty laws valid in the country where the product has been sold; specific information about the warranty terms can be given by the seller or by the importer in the country where the product has been purchased. The seller or importer is completely responsible for the product.
The importer is completely responsible also for the fulfillment of the laws in force in the country where the importer distributes the product, including the correct disposal of the product at the end of its working life.
Inside the European countries the laws in force are the national laws implementing the EC Directive 44/99/CE.
IMPORTANT INFORMATION
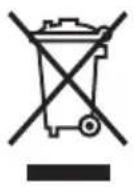
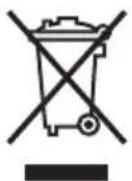
For the correct disposal of the product in accordance with EU DIRECTIVE 2002/96/EC and with Legislative Decree no.151 of 25 July 2005. At the end of its working life, the product must not be disposed of as urban waste. It must be taken to a special authorised differential waste collection centre or to a dealer providing this service. Disposing of a household appliance separately avoids possible negative consequences for the environment and health caused by improper disposal and enables recovery of the materials it contains, with significant savings in energy and resources. The product is marked with a crossed-out wheelie bin as a reminder of the need to dispose of household appliances separately.

EC DECLARATION OF CONFORMITY
Gemme Italian Producers srl declares under its own responsibility that the product:
Coffee machine type: PL62 - PL62 - PL62T to which this declaration relates conforms to the following standards: EN 60335/1 - EN 60335/2/15 - EN 61000/3/2 - EN 55014
pursuant to directives: Low Voltage Directive EC 2006/95 - Directive EMC EC 2004/108
NB: This declaration is null and void should the machine be modified without our specific authorisation. Castegnato, 01/02/2014 - Managing Director
Gemme Italian Producers srl 25045 Castegnato (Bs)

Ligne Pro - Mara
PL62S
PL62
PL62T
Dimensions: 22x40x35,6 cm
Poids net: 18,8 kg
Alimentation electrolyte: 230V 50Hz/ 120V 60Hz
Puisance: 1400W + 50W
Pression pompe: 15 bar
Pression chaudiere: 1,2 bar
Directive Basse Tension CE 2006/95 - Directive CEM CE 2004/108
Gemme Italian Producers srl
25045 Castegnato (Bs)

Bedienungsanleitung
für die Modelle:
Linie Pro - Mara
PL62S
PL62
PL62T
Abmessungen:
22x40x35,6 cm
Nettogewicht:
18,8 kg
Gemme Italian Producers srl 25045 Castegnato (Bs)

Gemme Italian Producers srl 25045 Castegnato (Bs)

Doze recomandate: Ristretto (mic) circa 20ml - Espresso circa 30ml - Lungo (mare) circa 60ml
Cele ,5 M”
Daca doriti sa preparati un'espresso ca la carte,trebuie sa incepeti prin respectarea celor cinci parametri fundamentali care fac dintr-o simpla cafe, un'espresso pentru cunoscatori! Multe persone le numesc cele ,5 M": miscela (amestec), macinatura (rasnire), macchina (masina),manualita (dexteritate) si manutenzione (intretinere).
1-Miscela (Amestec)
Gemme Italian Producers srl 25045 Castegnato (Bs)

PykoBoOcTBO no 3Kcnnyataunn dnn moJe ne
Линь Pro - Mara
PL62S
PL62
PL62T
Pa3Mepbl 22*40*35.6 cm
Bec HeTTo 18,8 K
NCTOCHNK NHTAHNA 230B50T-120B60
MoHocTb 1400BT+50BT
ДаВлелпс HaCoca 156ap
Uym yctpoicBa He npebbIwaet 70 d5 (A).
Данные и пьовдмBLEи n3obpaжehЯ могут 6bITb ИЗMeHeHbI 6e3 npedBaPHTeJIbHOrO yBeDOMJIeHЯ B CBa3N C HeNpepbIBHbIM yJyUWeHnem napametPOB MaunHbI.
IcnoJb3yeMbIe cHMBOJIbI
OueHb BaxHo co6IoudaTb yka3aHnI n CmB0nbI, npNBedeHHbIe HnKe:

OIIacHocTb IopaxeHnE 3JIeKTpPueCKnM TOKOM.
Izhopupobahue daHHo20 npedynpckdeHua moHem npubecmu K nopakHeHuO 3neKmpuueckum mOKOM cy2p03ou dna Hcu3Hu.
Onachoctb nolyeHn oXorOB. HsOpupobaHue 3mo20 npedynpckdeHn moKem npubecmu K ouunapubauu uUu oKoZam.

BHMaHne. H2hopupobAHue daHHoO npedynpexKdeHu MOkem npubecmu KmpaMe uUu nobpeXkeHIO KofeBaPku.

IpmeaHne. mom cumboyka3b1baem Ha baxhblu coBem uuu uHfopmauuo dna noib3oamena.
UΦpblB cko6kax
LcnpbBCKo6kax OTHOCaTcK 063HaueHnM, npNBedeHHbIM B ONcaHn UcToiCTBa B rnaBe 04 „KpaTkne cBeDeHnO6 n3deJnn“ N IJIIOCTpaCnM KpaTKoro pyKOBOdCTBa B npNIOxKeHn.

06uye yka3aHnra
Hacmouee pykoobcmo RoJemCra Heombemmo u cocmaBHOaCmbu 3deJura. BhumameJIbHo npOumaume pykoobcmo, maK kaK OHO codepkum baxhIe yka3aHua, omHocrauec K bezonachoMu ycmpoucMa, e20 ekcnnyamauu u obcyxuaHIO. Coxpanume pykoobcmo dna obauen 8 byduem.
- YCTPOICTBO MOKET NCSOJIb3OBaTbcr
DeTBMN B BO3pacte OT 8 let n CTap
We, a TAKKe JIOdbMn C OPGAHueHHbl
MN φH3NUeCKIMN, CEHCOPHBIMN IIN
NCNXUeCKIMN HeIOCTaTKAMN IIN npi
OTCYTCTBn ONbITA n 3HaHn NOD npi
CMOTPOM IIN npi O3NaKOMJIeHN C
nprHcIpaMn 6e3Opachoro INCNOJb3OBAHnY UCTPOJCTBa n HΦopMauzneO
CyUeCTByUoUx OnaCHOCTax. YCTPOI
CTBO He DOJXHO INCNOJb3OBaTbcR
DeTBMN DnI nRpbl. YnCTKa n TexHn
YeCKoe 06cnykBaHnE He DOJXHbl
BbINOJIHrTBcR DeTBMN 6e3 npiCMOTpa. - YCTPOICTBO MOKET INCNOJb3OBaTbc
Cra DeTBMN B BO3pacte OT 8 let n
CTapWe nOd npiCMOTpom IIN n pRn
O3NaKOMJIeHN C nprHcIpaMn 6e3O
NAChOrO INCNOJb3OBaHnY UCTPOICTBa
n INHOpMaUneO CyUeCTByUOux ONaCHOCTaX. YnCTKa N TexHnueCKoe 06CnyKuBaHne He DoJNkHbI PpOBoDnTbCra DeTbMn B BO3paCTe Do 8 JeT n 6e3 npncMOtpa.
-XpaHnTe yCTpoiCTBO n erO shHyp B HeIOCTyIHHOM MecTe dIra DeTeB BO3- pacte do 8 net.
- UcpoCTBa MOyT 6bITb NCNoB3OBAHbl JIOdbMn C OrpaHnueHHbIMNΦn3UeCKMn, CeHCOPHbIMN IIN PCNXuYeCKMn HeoCTaTKAMN IIN PpN OTCYTCTBn ONbITA N 3HaHn TOJbKO NOI PPNCOTPMn IIN PpN O3HaKOMJeHN C PpNHcPiMaN 6e3Opachoro NCNoB3OBAHna YcPoCTBa IN HcOpMaCneO CyuEcTBYUOux ONaCHOCTx. UcpoCTBO He DoJXHO NCNoB3OBA TbCBaTeBmDJIgPbI.
-TO yCTPOIcTBO IpeHa3HauHeO dJIa 6bITOBOro n aHaIOnuHoro npImeHnra, HApPIMep: nepcoHaIOM KuxnB Mara3nHax, Ofncax N dpynx pa60uX MeCTAX; CeIbCKOXO3rICTBeHNbIMN IpeDpNtTnMn; KIneHTaMNB OTeJx, MOTeJx N dpynx Xnblix; NOMEuHnx; MeCTaMn TnPa «HOUnerN 3aBTPaK» n T.I.
- XpaHInTe BCE yNaKOBOHbIe MaTePpHaJIbI (IINaCTnKOBbIe NaKeTbI, NeHOnPiact N T.D.) B HeDoCTyINHom dJaDeTei MeCTe.
- YcTpoIcTBo npeHa3HaueHo nCKnIO
YHTeNbHO DnI npiroTOBHeHnKoCpe 3cnpceco n TOpRux HAnrTKOB C NOMO- 10 TOpRyE BDOHnnnapa n dny NOOrpeBa YaWeK.
- YcIpoIcTBo He npEJaHa3HauHeNo IJIa NCIOJIb3OBaHnA JInCuAMN (BkJIIOUaJ DeTei) C OrpaHnueHHbIMN cIN3NuYeCKIMN, CEHCOPHBIMN INI NcNXuYeCKIMN HeIOCTaTKaMn, a TaKKe pPn OTCyTCTBnOblTa n 3HaHn 6e3 pPncMOtPa INI O3HaKOMNeHnA C PpIHcUpAMN 6e3oNaCHOrO NCIOJIb3OBaHnA YcTPOIcTBA n INHΦOpMaUneO cyUeCTByUOux ONaCHOCTx.
- CnéДиTe 3a DeTbMn, YTOБы OHn He nIgpaIIc yCTpOiCTBOM.
-ПОНЗВОДИТЕЛБ He HecET OTBETCTBEHHOCTN 3a HecaHKUHOHPOBAH-HOE BMeIaTeJIbCTBO B KaKoJ-JIbO I3 KOMNoHEHTOB yCTpoIcTBA.
-Любая Экплуataця, OTлична OT ONиcaHHоь Вышe,ЯВлЯETСАЗКПлуataциЕ He NO Ha3HauceHиO MoKet ПpeДставлгТь OnaCHOCTb;пpon3BO-DNTeЛь He HecET OTBETCTBEHHOCTN 3a yUeP6,прИнHeHbI B pe3yIb-Tate HeHaJnEkaSeyЗКПлуataциУстpoiCTBa.
-ПрОИЗВОДИТЕЛь He HeCET OTBETCTBEHHOCTN 3a NcIIOJIb3OBAHne HeOpnHaJIbHbIX 3aIaChbIX YacTei n/NIIaKCECCyapOB. - PpOIN3BODIITeJIb He HecET OTBeT
CTBeHHOCTn 3a peMOHT, BblIOJIHeHbI HeyIOnHOMOeHHbIMN cepBnC-HbIMN UeHTpAMN.
- 3anpeaetcra octabnryyctpoiCTBO6e3 npncmOTpa nnoB3OBaTbcra IM BHe NOMEueHna.
- He donyckaTe haxoJdeHn np6Opa nO B03dEeCTBnEm aTMocpepHbIX YBJIeHn (doXdb, COJHcE, MOpO3).
- Ecnn yctpoiCTBO xpaHITcB NOMeueHnX, rDe Tempepatypa MoKet Unpactb Hxke TOnkN 3aMep3aHnA, OOpOxHnTe BoIep n Tpy6Kn dIy CpKyJIaCIN BObl.
- He moTe yCTpoiCtBO noD cTpyeB ODoI Hn He nOrgykaIte erO B Body.
MaHometp Ha BbInycke kOpe
YTO6bI BcERda BnDEtB DaBHeHne B KoFeHOn rpynpe N DOJIxHbIM O6pa3OM CNeDITb 3a nprirotOBHeHem 3cnpecco.

Iobopotha Tpy6ka napoo6pa3OBaTeTc 3aunTOJ OT OXOROB
Дя npiroTOBHeNЯ KaIyHNO IJIr ropuNX HAnITKOB IpOCTbIM, 6e3oNaChbIM IN ppaKTNUHbIM MToDOM.

Hepxabeoua ctaIb
IЯ MaKcMaJIbHOJ rHneHbI Ha KxHe u yO6HO rMbITbY. OoctaToUHO JERKO rIpOTnpaHnC NOMoUbIO r6Kn I KoPeBapKa CHOba 6yDet 6necTeTb.

IoproToBka KoepeBapKn 3cnpecco IJn npiroToBneHnKoPe
E.1 IpoBepbTe ypoBEnb BOdbI B pe3epByape. B cnyae OTCyTCTBnB BOdbI, CneDyIte yKa3aHnM B nyKTe B.
E.2 BkIIOUHTe KoOeBapKy c NOMOuBIO rIaBHorO BbIKIOUaTeJI (7).
E.3 Doxntecb, KOrda CBeToOnoI (10) norachet.
E.4 BCTaBbTe, npnIOxN HekOTOpoe ycHnne, pIbTpOpePkaTeIb (e) 6e3 KoPe B rpynny (13), noka pyka He BbIPOBHReTc C cIMBOJOM 3aMka, paCNOIOXeHHbIM Ha rpynne.
E.5 Doxntecb, KOrda CBeToIOoI (10) norachet - okono 20 MmHyT - a MaHometp (5) nokaxet daBleHne okono 1-1,2 6ap.
E.6 IoHIMnTe pIyar BbIycka Kope (14) n BBInyckaIte BOdy B TeueHne HeckOJIbKINx CeKyHd.
E.7 BepHnTe pbIurBbIpycKa KoPe (14) B nCxOJHoe noJIOXeHne. KopeBaPka roToba K pa6oTe.

IpnmeaHne. C nomoub yka3aHHo2 npouecca cmumynupyemc co2nacobaMeKdy memnepamypou zpynnbu u memnepamypou funbmpodepkameia - bakhuiMemp dna nonyuhenra omnuuH2o Kofoe.

IpnmeaHne. HenpepbBHOe muzane cbe mooduoda (10) cbudemebcmbyem o, umo cn nomoubIO conpomubienu uuknUHO ha2pebaemc boda bHympu 6oupepa.

Bbinyck Kope
F.1 BCTaBbTe Bbl6paHbI ΦnIbTp BΦnIbTpOpeKataeIb (e).
F.2 HANOHNHTe HNbTp Heo6XOINMbIM KOJNUcETBOM MOJNTORO KoPe.

IIpIeHHe. Pekomehdyemc7 2 dna oohu do3b u 14 2 dna dbyx do3.
F.3 Ytpam6yIte MoIOTbI KOpe C NOMOuBIO Temnepa (a) n ydaIInTe C Kpa a HnIbTpA OCTaTKN KOpe.
F.4 BCTaBbTe, npnIOxNt HeKOTOpoe ycInne, pIbTpOepeKaTeIb (e) 6e3 KoPe B rpynny (13), noka pyka He BbipOBHReTc C CmBOJOM 3aMka, paCNOIOXeHHbIM Ha rpynne.
F.5 NomeCTIte OndHy nIIe YauKHa peWetky dny awek (8) noD fNtpoepkaTeJeM (e).
F6IOnHmnte pbyar BbInycka Kofoe (14) nna HauJa BbInycka.
F.7 NocJIe DoCTnHexHn Tpe6yemoro KOJInueCTBa, BepHITe pbIur BbInycka KoFe (14) B nCxOHDHOE IIOJOKeHHe
F.8 CHINTE pntbtpoepkaTeB (e), ouHCTte erO OT KofoenHO rUuN TuaTeBHO npOTpNTBnXHO TKAHBO.

BHHMaHHe. DuIbmpoepkameh He doWkeh cHumammbcdo OKohuaHa Bbinycka Kofoe.
173

IpumeyaHne. Ipu npabunbHom bynycke Kofoe MaHomemp daBneuRa bynycka
kofoe (5)doonkeh noka3biamb8÷106ap.

ДЯ спунлuctов
Iap n ropya Boda
YcTpoIcTBO OCHaSeHO Tpy6KoI dIpa, KOtOpA IO3BOJraTe B3bNAbT CaMbIM COBepHbIM O6pa3OM MOJOKO I NOJyUHT b KpeMoO6pa3HyU NeHky, 6laOJaPRA KOtOpO MoXHO DoBeCTN KanyuHIO DO COBepseHCTBa.

Iodrotobka KoPeBapKn 3cnpecco
G.1 PpOBepe Te ypoBeHb BoDbI B pe3epByape. B cnyae OTCyTCTBnA BoDbI, CneNyTe yKa3aHnM B IVHKe B.
G.2 KofeBapka 3cnpcecco roTOBa Kpa6Ote, KOrda CBetOnIOI (10) norachET.

BHHMaHHe. Huko2da he noocmaabnaime pyku unu dpyue yacmu mea nod
mpy6ky dna napa unu bodbl. Onachocmb oko2o8.

Bbinyck napa
H.1 NOBepnTe peryIaTOp npap (3) npotnb yacobO BcpeJIKN, Tpy6ky npap (4)HaNPaBbTe Ha peWETky IODIOHa (8) n daIte BbIITN He6oNbOOMY KOINueCTBY BObl (KOHDeHCAT).
H.2 Korda Naayet BbIXOHTb nap nomecnte pe3epByap c HAnNTKOM dIa B3bHaHnI NOI Tpy6ky dna npa (4).
H.3 Пи дocнжен Tpe6yemoro pe3yntata 3akpoite pernyrTop napa (3) no yacoboi CTpeIke.

IpmeHne. Cm. 2aBy 06 «Uckyccmbo Kofoe 3cnpecco», omobu omkpmb
dər ce6r npuuu Meod 36buaHua MoIoka.

BHHMaHHe. B KOHe Ke KaKdo2o uCnoNb3ObaHua napa ouuuaume mpy6ky napa
(4): HanpaBme mpy6ky napa b HanpaBeneu nooDoHa u bInycmme nap He mee e odHOzo pa3a. TuameNo ouucmume mpy6ky (4) c nomoubTo 2y6ku uU yucmoi mkahu. B znaBe «Yucmka u yxod» bbl haideme BCE heo6xodMbte yka3aHua.
BbInyck ropey BODbl
I.1 PomeCTnTe emKoCTb nO Tpy6ky IJRA noaun ropaye BODbl (12) n OTKpoTeperyjAToP ropayeBODbl (11) npOTnB YacOBoC TpeKN, HabpaTpe6yEmoe KOnuEcTBO.
1.2 Ito doctnkeHnn Tpe6yemoro kOnueeTba 3akpoTe pepyIaTOp ropuee BODbI (11) no yacoB0N CTpeJIke.

JNACTOB
N3meHeHne Hactpoek (TOnbKO dIa PL62T)
PID-KoHTpoJIb IMeET 3aBODcKne yCTaHOBKn 121°C. HnKe OINcBbAeTcR, KaK n3MeHntb 3TN NaCTpOiKN.

I3mehene TempepaTypb I B6oJInepe
J.1ДерхиTe HaKaToH KHOnKy «ВИЗ»
J.2 Korga dincnnei nokaibaeT PRG》,HaKMITE Ha KhoNky BBepx
J.3 KOrda nIcIIeI nokKeT tempeatypy 6oJIepa, MoXHO 3aJaTB C NOMOuK HONOK «BBepx» I «BHN3» BeJIuHHy Tpe6yEmoTtempeatpybI: MmHmym 110C° - MaKcIMym 126C°.
J.4 IcnoJIb3yIte KHOJIKII «BBepX» I «BHN3», TTO6bl N3MeHHTb Tpe6byemyTo TemnepaTpy.
J.5 Yepe3 3 cekyndbl nocne haxatna nocneDne KnaBnI daHHbIe coxpaHOTcN I dncnne OTo6pa3nt TemnepaTypy.
IIpMeyaHne. U3MeHue eduHuuy u3MepeHua memnepamypb: IepKume odHOBpeMeHHo hakambmu Khonku «Bu3» u «BbePx» 3 cekyHdbu. Ko2da ducnneu noka3b1baem “C-F”, onyckaeme obe kHonku u nomom hakmume ha Khonky «BbePx», umobu nomehmb eduHuuy u3MepeHua memnepamypb c IIeIbcui bΦapeHzeum. Yepe3 3 cekyHdbu nocle hakamur nocehdneu knaBuu duHHb coxpaHoomc.
06.
NckyccTBO npnroTOBJeHna Kope 3cnpecco
Bonpekn kaxyueenca npocote, npiroTOBnTb ndealhbi 3cnpecco He taK JERKO. 3TO Tpe6yeT onbta, MaCTepcTBa, cTpaTn HEMHOrO IIO6o3HaTeJbHOCTN. B 3tOM pa3dJe Mbl XOTUM NO- DeJIITbcra CBAM HeKOTOpBMN OCHOBHbIMC CBeDEHnA M0 npiroTOBneHN NDeaJIbHoro Kofoe.
PekomeHdyemble 03bl: PucptpTo - OKOJIO 20 MJI, 3cnpecco - OKOJO 30 MJI, JyHro - OKOJO 60 MJI
5M
Ecni Bbl XOTITE npnroTOBtB KaueCTBeHHbI 3cnpceco, npmite K CBeDeHIO TByb OCHOBbIX PaKTopOB, KOtopbie NOMoAOT 3HaTOKaM npeBaataB npocToB KoPe B 3cnpceco! MhOrne Ha3bIBaIOT ux ,5 M: Miscela (cmecb), Macinatura (nomoi), Macchina (kopeBapka), Manualita (noBKOCTb pyk) u Manutenzione (noDepxKaHne BVNCpabHOM COCTOHN).
1-Miscela (Cmecb)
B OCHOBE BbIaHIOJIeOcR BkyCa 3cnpecco BCERda IeKNT PpeBOcXoHnA CmEcB. YTo6bl NOnyHTb cBaIaHcnpOBaHHbIK BkyC 3cnpecco, CneJyET CMeuATb DBa BNu Ka KoPe: apabika n po6ycta.
IepBbI Daet ToHKn apomat n HeKOTOpbIKcJIbI npNBkyc, BTOPOJ daET 6oraTbIKBky, KOHCnCTeHIO, neHky B yauke. Iponopun3aBnCrt ToNbKO OT BaWero BKyca.
3KcnpmeHTpyyTe, yTObI haHTn coYeTaHHe, HAnboJe noDxOJaee dna Bac!
2-Macinatura (Homon)
Koepemonka ABnraTcH Heo6xOaMbIM WaROM dIpy npiroTOBHeH N XopoWero 3cnpecco. Koep BCerda Hoe6xOaHMo MoNtB HENOCpeDCTBeHHo nepei PpoUeDpyo npiroTOBHeHNAOTOM yTO IMEHHO B HEMONOTOM BVne OH
COxpaHReT BeCb CBoB BKyc n apomat. C NOMOuIbHO KoΦeMoJok Lelit TaKKe MoXHo N3MeHrTbCTeNEh NOMOJa B COOTBeTCTBnC Tpe6oBaHNMy K CMEcN DJIa IpaBnIbHOH CKOpocTNkCTpaKcNn I npaBnIbHOH NeHKn.
3-Macchina espresso (KofoBapka Jnla 3cnppecco)
KoepeBapKn Lelit cnpoeKtpoBaHbI npOn3Be-DeHb TaKIM 6pa3OM, YTO daBJIeHne I TeMnepaTpypeRyIpuyTcB COOTBcTbN C BaaHmN nOtpe6HoCTaMn. ImEHNO 6laRaOpAp npabINbHO peryInpOBKe 3Tnx DByx nepemHbIX IMeETcBO3MOXHOCTb 3KCTpaHPOBaTb N3 MOnToON CMeCN He ToJbKO pAcTBOpMbIe BeueCTBa, npndaHOUne BKyc, HO TaKKe I HePacTBOpMbIe, npndaHOUne KOHCNCTeHcNIO I apomat KoPe.
4-Manualita (IOBkoctb pyk)
IIOOBHnA pe3yIbTaTata 3aBNCHT OT TORO, KAK NCNOJIb3yIOTc NMEHOUNEcR INHCTpyMeHTbl. BJIIO6JIeHHbI B CBOE DeNo CneuaNtCT YBIIaETcR KJIIOueBBIM 3JIeMeHToM IPOIN3BOIDCTBeHHoI cENoCKN 3CNPceCO, OH MOKe T3MeHHTb pe3yIbTaT B QaIke, PnIDAB DOnONHITeJbHbIE NOJIe3HbIe CBOINCTBa KOHeHOMy npOdyKty. TaKIM O6pa3OM, yBNeueHHOCbI INpakTKa pacKPOIOT CEKPteBI K OCBOEHIO KOpeBapKn.
3KcnpMeHTpOBaHne c pa3nUHybIMN CmecrM, NOMON, TempeOBKO, Tempeatypo
I DaBHeHem BObI, N03BOJrOT PnIroTOBHTb yHkAJIbHbI KoOe.
KynbTnBnpyeTcHa BbICoTax 900-2000M
Had ypoBHeM Mopr
BoratbApomat
CopekhaHne kOeHnHa:0,9-1,7%
Po6ycTa
3TOT COPT - BOJOKHnCTbI, TOpBkN, KOHCnCTeHThBi, CO Cna6bIM nprHbIM apomATOM, daet 6oJIee 6ObemHyIO neKy ceporo Ubeta.

Po6ycta
KyIbTnBnpyetcHaBaICoTaX200-600M HAdypOBHemMopr
Ocobn npaHb apomat
Copekhae kOepHa:1,8-4%
ToIbKO n3 Ondoro copTa KoOe HeBO3MOxHNO npuroTOBnTB uDeaIbHbI 3cnpecco.
IdeaJIbHbI 3cnpceco IMeET neHky TOnUHOB 2-3 MM opexOBoro CBeTa, nepexOJaero B TeMHo-KOpNueHBi C KpaCHOBaTbIMN OTPaxeHNrMM IN CBETlbIMN NOLOCKAMN, rapMOHnHbIM BKyCOM, CNlbHbIM N cBaJAHNCnPOBaHHbIM apOMATOM, OH - CnaDKN, DyWnCTbIN, CO BKyCOM, KOtOpBIO OuYuaetcE eE DoJrRO BO pTy. ImeET MOuHbIM apOMAT C HOTKAMN UBeTOB, fpyKToB, NOxkapenHOrO Xne6a N WOKoJADA. 3TN OuSyehnM ORyT dInTBcR HeDOLrHO, HO MOrYT N OCTaBAtbcR BO pTy B TeueHHe HECKoJIbKnx MINHT. Bkyc - Zelhbl, XopoWo ctpykTypuPobAHbI. Kncbln I rOpbkN Bkyc OTJNUHO cBaJAHCnPOBaHbl, npn 3Tom TepNKoCTb OTCytCTByET INIe EDA OUsyTIma.
IealbHbIe npaMetpbI dIra erO npuroTOBHe HNIA:
7± 0,52 monomozo kofe.
YdaJIeHHe HaKnIc KoPeBaP
NcnoIb3OBAHne KoepeBapKn npnBOaNT K eCTeCTBeHHOMy OTIOXKeHNHO HAKIN, CKOpocTb KO-Topo 3aBNCNT OT YAcTOTbl NcNoIb3OBAHnYCTpOJCTBa N XeCTKOCTN BOaBl.
I3BecTKOBbIE OTNOxHn 3a6nBaHT Tpy6Kn n CHNkaHOT Tempepaty Ha BbIXOe, BnnaHa KaueCTBO BbIXoJrero Koe n COKpaJra cPok cnjkbI yCTpOInCTBa.

Bo n36exaHne o6pa3oBaHnHaKInn, KOtopa OTKnaIbIbAeTcBHyTpN 60JIePa, Mbl peKOMeHN dyem Bcerda nCNoIb3OBAbTbΦnIbTp-ymrYHTeJIb BObl Ha OCHOB NHOOO6MeHHbIX CMOn Lelit (KoD MC747 - MC747PLUS), KOTOpbl, 6yduu BCTabJIeHHbIM Bpe3epByap, OHIuaet BDOy OT CoJe KALbUry N MaHnR, KOtOpbl eOpa3yOT HAKINb IN BIIraJOT Ha BKyc KoPe. IopraOK nCNoIb3OBAHn IN 3aMeHbl Yka3aH Ha ynakOBKe camoroΦnlbtpa. IJRA TORO, UTO6bl IpeIDOTBpATNTb BO3MOxHoe NOBpeXdHeHne KOMnoHEtOB MaMInhbl, HIN B KOEM CJUYAE HE IO5ABJIYTE CPEICTBA IJRA YDAJIEHNHAKINN B pe3epByap dny BoDi.
BbInonHnTb 3Ty npoceDpy oueh npocTo - cneIyIte yka3aHnA m Ha ynaKOBke kaxdOrO naketNa.

ДлгпрсмOTpa ИнстукиИ OTСКАнчуITE QR-KOD,ЧТобI NOHЯТьΚak Фильтpo pa6oTaET
06paTHa npOMbIBka
Pa3 B MecrH Heo6xOJIMO BbIIOJIHrTb O6paTHyIO IpOMbIKy (IpOMbIBKa aKTHBbIX cacte, INcONb3yEMbIX DnRA BblNyCk KaOpe), INcONb3yra CJIeON QnJIbTp, BXOJaU B KOMNKeKT NocTabKN (d) n COOTBeTCTByHOUne NaKETNI MOIOJero CpeiCTBa Lelit (KoD PL103 He BXOJIT B KOMNKeKT NocTabKN).
08.
Решене hanболee уactbix проблем
Mbi pekomehnyem Bam BnmaTeIbHo npouHTaTb daHHoe pyKOBoDCTBO nIpeweHn o6x npo-6nem, npexde yem obpaataBcB Cnyk6y cepBnca nIN B aBTOpN3OBaHHbI cepBnchbl ueHtp.
1
BbTeKaIoUn KoOe HmeeT Hn3KyIO TeMnepaTyPy
Hndkatop (2) He 3aropaetc, n KoceBapka He pa6oTaet
| KohtaktbI Ka6eJIЯ NiTuHЯ BCTaBHeHb I HeNpaBnIb- | BCTaBbTe npaBnIbHO KOHTaKtbl Ka6eJIЯ NiTuHЯ B |
| Ho. | COOTBETCTByIOUne rHe3da. |
| Ka6eJIЯ NiTuHЯ NoBpeXdEh. ObpaTntecb B cepBnCHbI ΚeHTp DIIЯ 3aMeHbI Ka- | |
| 6eJIЯ. |
5
KoepBaPaKa He BbIaeT nap, CBeToAnoI (10) He rOpHT
KoepBaPa BKnIOyeHa, Ho INHdkaTOp (10) He racHeT.
TAPAHNTHbIE O6a3ATEJIbCTBA
3Ta npOdyKzIy 3aUHcEHa rapaHTnHbIM 3a- KOHOM, DeNCTBvUOzIM B CTPaHe, rDe OHa 6bla npOdaHa; KOHKpeTHa INOpMaZrO rapaHTnHbIX cPOKAX MOKeT 6bl TaHa npOdaBcOM/ MMnOpTePOM B CTPaHe, rDe npOdyKzIy 6bla KynJIeHa.
IpoDABeUIMNOpTeP NOHOCbIO OTBETCTBeHHbI 3a 3Ty npOyKuHIO. IMNOpTeP OTBETCTBeHEN 3a BblONHeHne DeiCTByIOx 3aKOHOB B CTpaHe, rDe paCnPoCTpaHReT IpOdyKT, BKIoUaY npaBnIbHyU yTIN3aUIO npOdyKTa No OKOHaHmero cPoka cnJXbI.
B eBpOeNcknx CtpaHax DeIcTByIOT HaUHOHaJIbHbIe 3aKoHbI, KOTOpBIE OcyIeCTBnIOT DeIeTeJIbHocTb DInpeKTnBbl 44/99/CE EC.
PNEyPEXDEHNA
IIN npabunbnoyumu3auuu npodykma e coombemcmbu c INPEKTB0B 2002/96 / EC u 3AKOHJATEJIbHBIM IIEKPETOM No 151 om 25 uonra 2005 zoDa. IIO OKoHuaHn Cpoka kcnnyamauu u3deue he cledyem ymuu3upobam bMecme c sbimobm Mycopom. Eo neo6xodmo cdamb 8 oOnu u3 cneuaun3upobahnbux uenmpo no cbopy omxodob, opaun3oBaHHbx Mecmhmu Bnaemmu uu dupeam, OKa3bibaouum nodo6hble ycnyu. Omdenbna ymuu3auaa 6bimoboo npubopa no3boJam eum 36ekamb BO3MOHNbIX Heaumubhix nocledcmbu dnn okpykaoue ue cpdbu 3dopobba, ABNIOUUXC pe3ynbamom Henpaunbho ymuu3auuu u no3boJam enccmanohumb mamepuanb, u3 komopbx bInonHeNo u3deue u noNyumb cepbe3hyo ekohomuo 3hepua u pecypcoB. B Kauecmbe Hanomunahan o heo6xodumocmu omdeibHO ymuu3auuu sbimoboo npubopa, na u3deenu u meemc 3NaOK nepeepkhymo2 konmeihepa da Mycopa.
C E
DEKJIAPAUJRA COOTBETCTBNA TPEBOAHNMAEC
Komnau Gemme Italian Producers srl 3aBnaem nod cboo ombemcmbeHHocmb, umo u3dene:
Kofoeapka muna: PL62S - PL62 - PL62T, k komopo omhocumc daHHa deKnapaua, coombemcmbyem cedyouuM
HOPMaM:
EN 60335/1 - EN 60335/2/15 - EN 61000/3/2 - EN 55014 cozaocho noioxehu m dupekmue:
ДуpeкMuBa no Hu3Komy HanpЯЖeHuTo 2006/95 EC - ДуpeEkMuBa
ЭMC EC 2004/108
Ipumueaue: Hacmoua a deknapua mepem cuy, ecu ycmpoocmbo 6bui bhecehbl u3mehenu 6e3 hauueo nucbMeHHO20 pa3peuehur.
Kacmehbo, 01/02/2014 - Tenepea/bnduupekmop
Gemme Italian Producers srl 25045 Castegnato (Bs)