
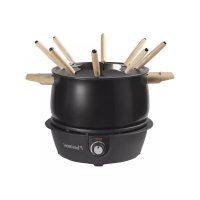
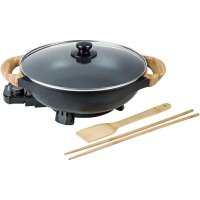
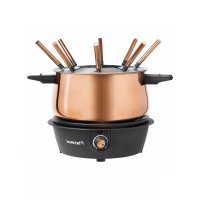
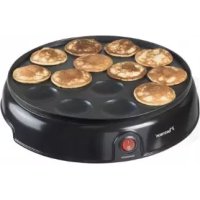
DCM8162 - Fondue, raclette and wok appliance BESTRON - Free user manual and instructions
Find the device manual for free DCM8162 BESTRON in PDF.
| Product type | Fondue, raclette and wok appliance |
| Brand | Bestron |
| Model | DCM8162 |
| Power supply | 220-240 V ~ 50/60 Hz |
| Power | 1200 W (estimated) |
| Main functions | Fondue, raclette, wok, and baking cupcakes, madeleines, muffins, mini tarts, pies in crust, small cakes |
| Capacity | 16 cupcakes (estimated) |
| Temperature | Thermostatic regulation with power and ready indicators |
| Indicator lights | Power indicator and ready indicator |
| Cooking plates | Non-stick coating, removable for cleaning |
| Safety | Automatic shut-off not mentioned; requires supervision; do not immerse; short cord |
| Cleaning and maintenance | Clean the plates with a damp cloth and mild detergent after cooling; do not immerse the appliance |
| Warranty | 60 months (5 years) subject to conditions |
| Usage | Household only, not professional |
| Supplied accessories | Cooking plates, paper molds (not included?) |
| Dimensions | Not specified |
| Weight | Not specified |
Frequently Asked Questions - DCM8162 BESTRON
User questions about DCM8162 BESTRON
0 question about this device. Answer the ones you know or ask your own.
Ask a new question about this device
Download the instructions for your Fondue, raclette and wok appliance in PDF format for free! Find your manual DCM8162 - BESTRON and take your electronic device back in hand. On this page are published all the documents necessary for the use of your device. DCM8162 by BESTRON.
USER MANUAL DCM8162 BESTRON
natural_image
Abstract black arrow symbol pointing right, no text or symbols presentBESTRON®
DCM8162
natural_image
Line drawing of a microwave oven with four round cavities on a tray (no text or symbols)NL Handleiding cup-cake maker
EN Instruction manual cup-cake maker
R. Neyman Quality control
CONDITIONS DE GARANTIE
DÉCLARATION DE CONFORMITÉ CE
SAFETY INSTRUCTIONS - General
- Please read these instructions carefully and retain them for future reference.
- Use this appliance solely in accordance with these instructions.
- This appliance can be used by children older than 8 years and persons with reduced physical, sensory or mental capabilities or lack of experience and knowledge, but only if they have been given supervision or instruction concerning use of the appliance in a safe way and understand the hazards involved.
- Children should be supervised to ensure that they do not play with the appliance.
- Have any repairs carried out solely by a qualified electrician. Never try to repair the appliance yourself.
SAFETY INSTRUCTIONS - Electricity and heat
parts of the appliance may get hot. t touch these parts to prevent burning yourself.
- Verify that the mains voltage is the same as that indicated on the type plate on the appliance before use.
• Always plug the appliance into an earthed wall socket.
• Always remove the plug from the wall socket when the appliance is not in use. - Always remove the plug from the wall socket by pulling on the plug, not the power cord.
- Regularly check the appliance's power cord to make sure it is not damaged. Do not use the appliance if the power cord is damaged. Have a damaged power cord replaced by a qualified service department.
- The appliance is fitted with a short power cord to reduce the risk that you become entangled in the loose cord and, in so doing, cause the deep fryer to topple and splash you with hot frying oil.
- Do not use an extension lead.
- The appliance needs space to allow heat to escape, thereby avoiding the risk of fire. Make sure that the appliance has sufficient space around it, and does not come in contact with flammable materials. The appliance must not be covered.
- Never use the appliance in the vicinity of flammable materials.
- Make sure that the appliance, the power cord or the plug do not come into contact with heat sources, such as a hot hob or naked flame.
- Make sure that the housing, the power cord and plug do not come in contact with water.
SAFETY INSTRUCTIONS - Use
• Never use the appliance outdoors.
• Never use the appliance in humid rooms.
- Place the appliance on a stable and flat surface where it cannot fall over.
- Make sure that your hands are dry when you touch the appliance, the power cord or the plug.
- Switch off the appliance and remove the plug from the wall socket in the event of a malfunction during use and before cleaning the appliance, or storing the appliance after use.
- Never leave the appliance unattended when in use.
- Never move the appliance when it is switched on or is still hot. Switch off the appliance, and wait until it has cooled down before moving it.
- Make sure there is sufficient free space around the appliance (at least 10 cm), as well as above the appliance (at least 30 cm).
- Parts of the appliance will become hot during use, and for this reason always hold the handle when opening and closing the lid.
- Do not put heavy objects on the lid to keep the appliance closed.
- Make sure that water does not come into contact with the hot baking plates during or shortly after use; contact with water could deform the baking plates such that they no longer fit properly.
- Do not touch the appliance if it has fallen into water. Remove the plug from the wall socket immediately. Do not use the appliance any more.
- Clean the appliance thoroughly after use (see "Cleaning and maintenance").
- This appliance may not be used through an external timer or by means of a remote control.
OPERATION - General
The appliance is intended only for domestic use, not for professional use.
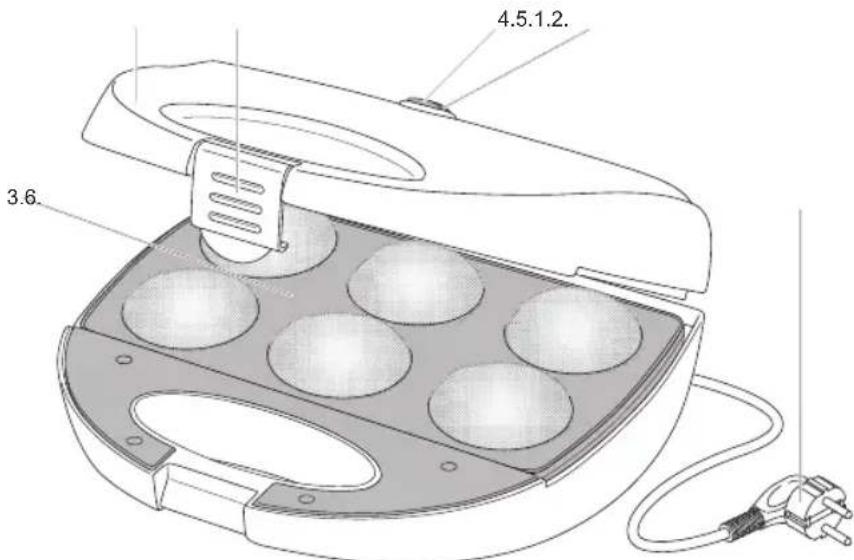
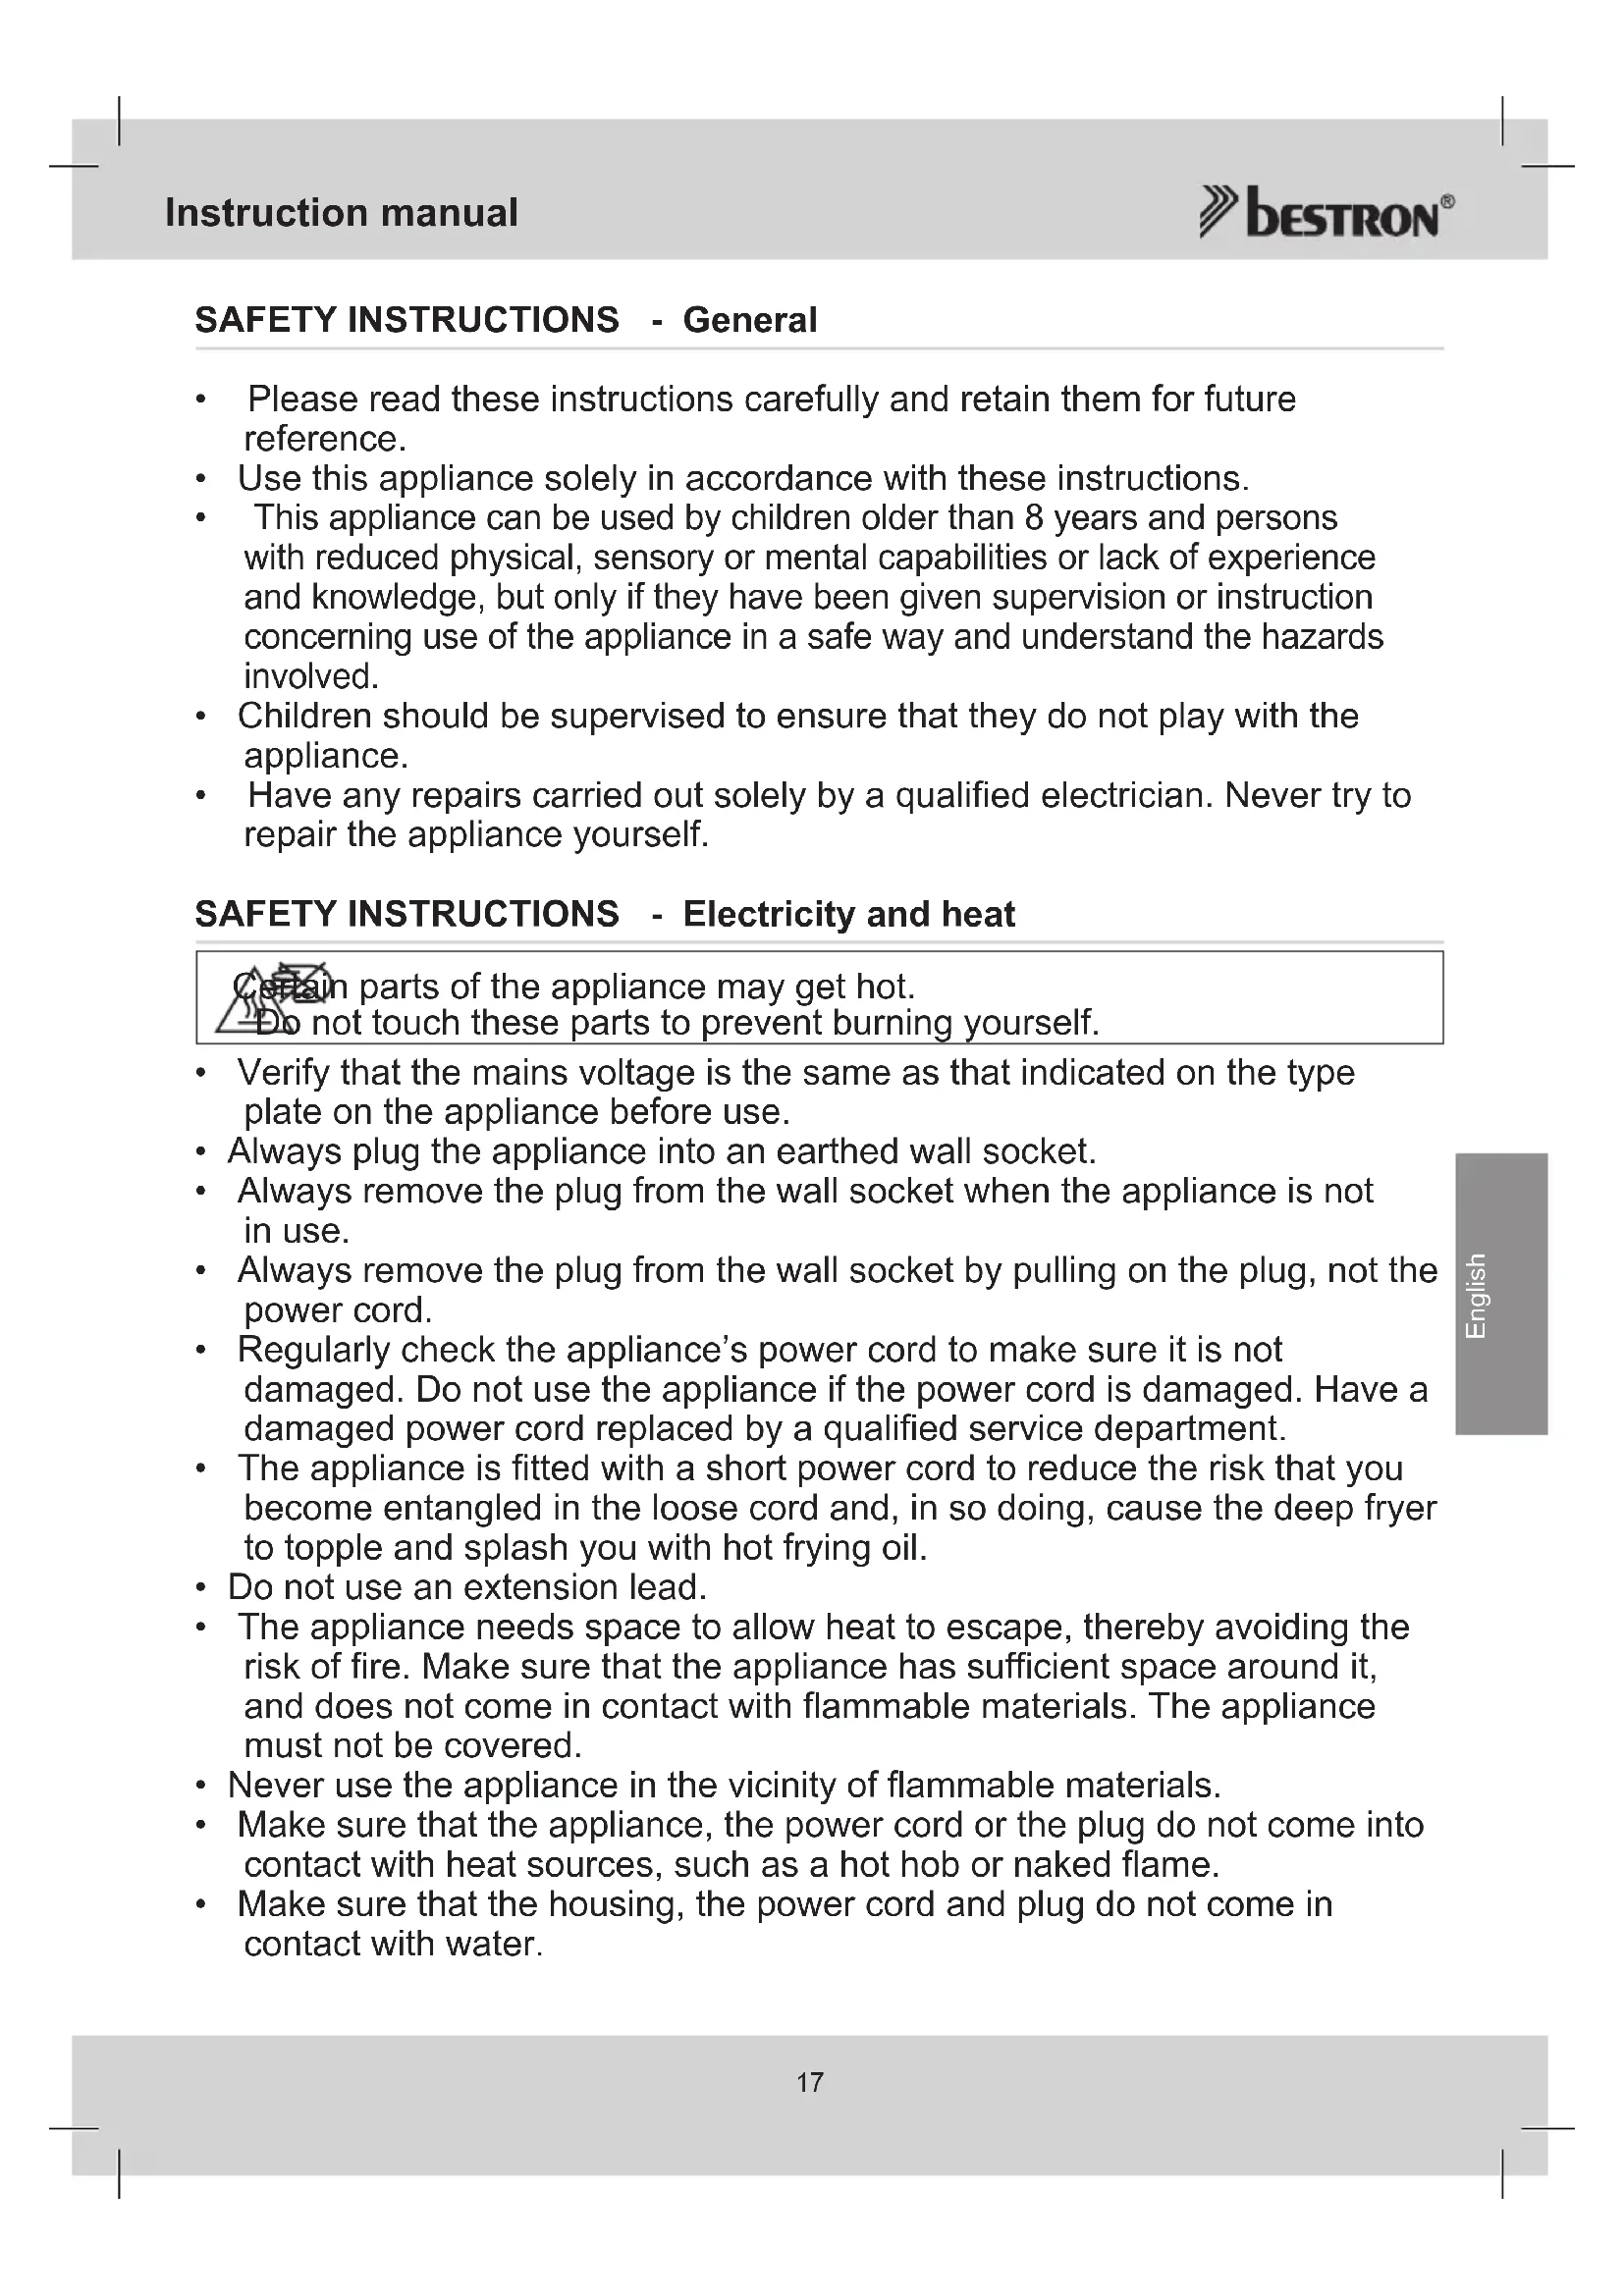
Figure 1
- Housing
- Fastening clip
- Baking plate
- Ready-to-use light
- Power light
- Power cord and plug
OPERATION - Before use for the first time
Clean the baking plates before first use (see 'Cleaning and maintenance'). The appliance may emit a little smoke and a characteristic smell when you switch it on for the first time. This is normal, and will soon stop. Make sure the appliance has sufficient ventilation. During use the heating element will switch on and off to keep the temperature of the baking plates constant. Consequently, the temperature pilot light will also occasionally be illuminated.
OPERATION
This appliance prepares cup-cakes, muffins, puff snacks, pasty and mini pies.
- Cup-cake: This is a small cake in a paper cake case, which you can decorate with frosting, marzipan, chocolate, different sugar pearls, etc...
- Muffin: This is a small cake in a paper cake case made of muffin dough, sometimes mixed with different ingredients such as cherries, chocolate, forest fruit, etc....
- Puff snack: This is a cup made of puff pastry filled with sweet or salty filling, for example apple/cinnamon, cherries, leek/union, ham/cheese etc...
- Puff pastry: This is a cup made of puff pastry filled with for example chicken ragout, etc....
- Mini pie: This is a small dough cup filled with sweet or salty filling, for example strawberries, jam, tuna, mushroom/leek etc...
CUP-CAKES/MUFFINS - Basic recipe cup-cakes
Ingredients (16 pieces)
- 2 eggs
• 145g castor sugar
• 1/2 sachet vanilla sugar
• 145g self-raising flour (sifted) - pinch of salt
- 65g melted butter
• 16 paper cake cases
Figure 2
Beat the eggs with the castor sugar and vanilla sugar. Stir scoop to scoop the flour through it. and then the salt. Then stir the butter through the batter. Place the paper cake cases in the appliance. Fill each hollow in the lower plate for 1/2 with cupcake batter. Bake the cup-cakes until they are golden-brown (approx 7-10min.).
- Prepare the batter as basic recipe above.
- Lift the top plate of the appliance.
- Fill each hollow in the lower plate for 1/2 with cupcake batter. The batter may not come above the edge of the cups. You can use paper cake cases first in the appliance (see figure 2).
- Lower the upper plate.
- Close the cupcake maker with the fastening clip.
- Put the plug into the wall socket. The "power" light will illuminate, and the appliance will begin to heat up.
- After 3-5 min. the "power" light extinguishes. The "ready-to-use" light will now illuminate. Check the baking process of the cup-cakes. During use the heating element will switch in and out to keep the temperature of the baking plates constant. Consequently the "power" and "ready-to-use" lights will also repeatedly illuminate and extinguish.
- Bake the cup-cakes until they are golden-brown (approx 7-10min.).
- Decorate the cup-cakes possibly
Tips
• Use your favorite recipes and mixes, or the recipes in the book of recipes.
- Most cup-cakes bake in 5 to 6 minutes. To determine if cup-cakes are done, insert a toothpick into the center of the cupcake; if it comes out clean, the cup-cakes are done.
- Cup-cakes or muffins are very fragile and hot when just baked. Carefully remove them from the cupcake maker and place on a wire rack. Use caution as the cup-cakes and steam are very hot. Allow the cup-cakes or muffins to stand about 5 minutes before serving, even if you wish to serve warm muffins.
• Use paper cake cases if desired when baking cup-cakes and muffins. They make removing and serving easy. Paper cake cases are required for brownies and cheesecake as the baked brownies or cheesecakes are so hot and delicate and must cool some before they are firm enough to hold their shape.
- You can decorate the cup-cakes with for example: frosting, marzipan, fondant, icing, chocolate, chocolate vermicelli, sugar pearls, dusting sugar etc.
Bon appetit!
CLEANING AND MAINTENANCE
- Remove the plug from the wall socket, and allow the appliance to cool down completely.
- Clean the baking plates with a damp cloth, if necessary with an additional couple of drops of washing-up liquid. Make sure no traces of detergent remain on the plates. Dry the baking plates thoroughly.
- Clean the appliance with a damp cloth and then dry it thoroughly.
- Keep the appliance in a dry place.

- Verify that the appliance is not connected to the power supply before you clean it. Never use corrosive or scouring cleaning agents or sharp objects (such as knives or hard brushes) to clean the appliance. these could damage the non-stick coating on the baking plates.
- Never immerse the appliance, the plug or the power cord in water or other liquid. Never put the appliance in a dishwasher.
THE ENVIRONMENT

- Dispose of packaging material, such as plastic and boxes, in the appropriate waste containers. When this product reaches the end of its useful life do not dispose of it by putting it in a dustbin; hand it in at a collection point for the reuse of electrical and electronic equipment. Please refer to the symbols on the product, the user's instructions or the packaging.
- The materials can be re-used as indicated. Your help in the re-use, recycling or other means of making use of old electrical equipment will make an important contribution to the protection of the environment.
- Contact your municipality for the address of the appropriate collection point in your neighbourhood.
GUARANTEE TERMS
The importer guarantees the appliance against defects caused by manufacturing and/or material faults for 60 months from the date of purchase, subject to the following conditions.
- No charges will be made for labour costs or materials during the warranty period. Any repairs carried out during the warranty period do not extend the warranty period.
- The importer automatically becomes the owner of any faulty parts that he replaces or a faulty appliance (in the event of replacement of the appliance).
- All claims submitted under warranty must be accompanied by the original bill of sale.
- Claims under warranty must be submitted to the dealer where the appliance was purchased or to the importer.
- The warranty is issued solely to the first purchaser and cannot be transferred.
- The warranty does not cover damage caused by:
a. Accidents, incorrect use, wear and/or neglect.
b. Faulty installation and/or use in a manner contravening the prevailing legal, technical or safety regulations.
c. Connection to a mains voltage other than the voltage specified on the type plate.
d. Unauthorized modifications.
e. Repairs carried out by third parties.
f. Careless transport, i.e. without suitable packaging materials or protection.
- No claims may be made under this warranty for:
a. Losses incurred during transport.
b. The removal or changing of the appliance's serial number. - The guarantee does not cover power cords, lamps or glass parts.
- No claims can be submitted under this warranty for damage other than the repair or replacement of faulty parts. The importer can never be held responsible for any consequential loss or damage or any other consequences, resulting either directly or indirectly from the appliance supplied by the importer.
- In case of claims under guarantee you can contact your dealer where the appliance is purchased. Bestron offers you also the possibility to send the appliance directly to our Service Department. Do not send your appliance without consulting us. The package may be refused and any any costs will be for your account. Please contact the Service Department and they will tell you how to pack and send the appliance.
- This appliance is not suitable for professional use.
SERVICE
If a fault should occur please contact the BESTRON service department: www.bestron.com/service
CE DECLARATION OF CONFORMITY
This product conforms to the essential requirements of the following EU safety directives:
• EMC Directive 2014/35/EU
• Low Voltage Directive 2014/30/EU

R. Neyman Quality control
- BESTRON®
- CONDITIONS DE GARANTIE
- DÉCLARATION DE CONFORMITÉ CE
- SAFETY INSTRUCTIONS - General
- SAFETY INSTRUCTIONS - Electricity and heat
- SAFETY INSTRUCTIONS - Use
- OPERATION - General
- OPERATION - Before use for the first time
- OPERATION
- CUP-CAKES/MUFFINS - Basic recipe cup-cakes
- Tips
- CLEANING AND MAINTENANCE
- THE ENVIRONMENT
- GUARANTEE TERMS
- SERVICE
- CE DECLARATION OF CONFORMITY
Brand : BESTRON
Model : DCM8162
Category : Fondue, raclette and wok appliance