NE6223 - Radio Renkforce - Free user manual and instructions
Find the device manual for free NE6223 Renkforce in PDF.
| Product type | DAB+ / FM Radio |
| Brand | Renkforce |
| Model | NE6223 |
| Dimensions | 190 x 125 x 118 mm |
| Weight | Approx. 725 g |
| Mains power supply | Power adapter 100-240 V / 50-60 Hz (output 6 V DC) |
| Battery power supply | 4 AA 1.5 V batteries (Mignon) |
| Power consumption | 1 W (standby) / 6 W (max.) |
| Battery life | Approx. 16 h (depending on volume) |
| Audio output power | 2 W RMS |
| Frequency ranges | FM: 87.5 - 108 MHz / DAB: 174 - 240 MHz |
| Number of presets | 20 (10 FM + 10 DAB) |
| Display | Backlit LCD |
| Antenna | Telescopic, fully extendable |
| Main functions | DAB+ and FM reception, auto search, manual tuning, alarm with snooze, sleep timer, station information display |
| Headphone jack | Yes, 3.5 mm jack (disables the speaker) |
| Initial setup | First start: automatic DAB search; time setting automatically via DAB or manually |
| Maintenance and cleaning | Clean the exterior with a soft, dry cloth; do not use harsh detergents |
| Safety | Indoor use only; avoid contact with moisture; do not open the casing; use only the supplied power adapter |
| Spare parts compatibility | No user-serviceable parts; repair by qualified technician only |
| Warranty | Refer to the manual for warranty conditions (not specified in the instructions) |
Frequently Asked Questions - NE6223 Renkforce
User questions about NE6223 Renkforce
0 question about this device. Answer the ones you know or ask your own.
Ask a new question about this device
Download the instructions for your Radio in PDF format for free! Find your manual NE6223 - Renkforce and take your electronic device back in hand. On this page are published all the documents necessary for the use of your device. NE6223 by Renkforce.
USER MANUAL NE6223 Renkforce
GB Operating Instructions
NE-6223 DAB+ Radio
www.business.conrad.at
- Introduction 25
- Scope of Delivery 26
- Intended Use 26
- Explanation of Symbols 27
- Safety Notes 27
- Features 29
- Components and Control Elements 30
- Set-Up 31
- Commissioning 31
a) Inserting/Replacing the Batteries 31
b) Mains Connection 32
- Operation 33
a) General Functions 33
b) Menu Operation. 34
c)Operation in DAB-Mode. 35
d) Operation in FM-Mode 37
e) System Settings. 38
f) Alarm Function. 40
- Handling 42
- Maintenance 43
- Troubleshooting 44
- Disposal 45
a) Product. 45
b) Disposal of Used Batteries 45
- Technical Data 45
1. Introduction
Dear Customer,
thank you for purchasing this product.
This product complies with the statutory national and European specifications. To maintain this status and to ensure safe operation, you as the user must observe these operating instructions!

These operating instructions are part of this product. They contain important notes on commissioning and handling. Also consider this if you pass on the product to any third party. Therefore, retain these operating instructions for reference!
If there are any technical questions, please contact:
International: www.conrad.com/contact
United Kingdom: www.conrad-electronic.co.uk/contact
2. Scope of Delivery
DAB+ radio
AC/DC adapter
- Operating Instructions
Up-to-date Operating Instructions:
- Open www.conrad.com/downloads in a browser or scan the displayed QR code.
- Select document type and language and enter the item number into the search field. After submitting the query you can download displayed records.

3. Intended Use
The DAB+ radio is used to receive radio channels in the private area. It is not suitable for commercial purposes.
The device must only be supplied with power via batteries or the included AC/DC adapter. The mains adapter is only approved for connection to 100-240 V/50-60 Hz alternating voltage.
It is intended for indoor use only. Do not use it outdoors. Contact with moisture, e.g. in bathrooms, must be avoided under all circumstances.
Any use other than that described above will damage this product and involves the risk of short circuit, fire, electric shock, etc.
The entire product must not be modified or converted, and the casing must not be opened.

Observe all safety information in these operating instructions!
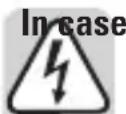
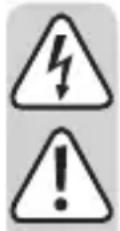
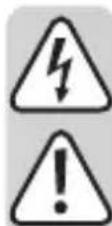
4. Explanation of Symbols
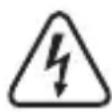
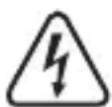
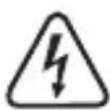
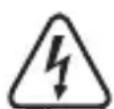
The symbol with a lightning bolt in a triangle is used where there is a health hazard, e.g. from electric shock. The device contains no parts that require servicing by the user. Therefore, never open the device.

The exclamation mark indicates important notes in these operating instructions that must be strictly observed.
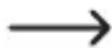
The arrow symbol indicates special advice and operating information.

This symbol with the house informs the user that the device must only be used in enclosed rooms.
5. Safety Notes
of damage caused by non-compliance with these operating instructions, the warranty/guarantee will expire. We do not assume any liability for consequential damage!

We do not assume any liability for property damage and personal injury caused by improper use or non-compliance with the safety instructions. In such cases the guarantee/warranty will expire!
Dear Customer: The following safety information is intended not only for the protection of the device but also for the protection of your health. Please read the following items carefully.
- For safety reasons, any unauthorized conversions and/or modifications to the product are not permitted.
- The mains adapter corresponds to protection class II. Only a proper mains socket (100-240 V/50-60 Hz) of the public supply net must be used as voltage source.
- Use only the enclosed AC/DC adapter or batteries for power supply.
- The mains socket must be close to the device and easily accessible.
- Never touch the power unit with wet or damp hands. There is a risk of potentially fatal electric shock!
- Do not touch the AC/DC adapter if it is damaged. First, power down the respective mains socket on all connections (e.g. via the respective circuit breaker and FI switch) and then carefully pull the AC/DC adapter from the mains socket. Never use the product if the AC/DC adapter is damaged.
- Never replace a damaged connection cable of the AC/DC adapter. If the connection cable is damaged, the AC/DC adapter is unusable and must be disposed of. It must not be repaired.
- To disconnect the device from the mains completely, the mains plug has to be pulled out of the socket.
- Never place containers containing liquids, e.g. glasses, buckets, vases or plants on the device or in its vicinity. Liquids may get into the housing and impair electrical safety. This also poses great danger of fire or potentially fatal electric shock! If this is the case, first power down the respective mains socket on all connections (e.g. switch off circuit breaker and FI switch) and then pull the AC/DC adapter from the socket. Do not operate the product anymore afterwards, but take it to a specialist workshop.
- Do not take the device into operation near bathtubs swimming pools splashing water.
- Do not place any open sources of fire, such as burning candles, on or directly next to the device.
- Protect the product from extreme temperatures direct sunlight, strong vibrations, mechanical stress, high humidity, moisture, flammable gases, vapours and solvents.
- Only operate the device in moderate climates, never in tropical climates.
- Handle the product with care. Impact, blows or falls from even a low height will damage the product.
- Never operate the device unattended.
- This device is not intended for being used by persons (including children) with limited physical, sensory or mental abilities or lack of experience and/or lack of knowledge unless they are supervised by a person responsible for their safety or instructed in how to use the device.
- This product is not a toy and not suitable for children. Children cannot judge the dangers involved when handling electrical devices.
- Do not leave any packaging material unattended. It may become a dangerous toy for children.
- Consult an expert if you are unsure as to the function, safety or connection of the product.
- If there are any questions that are not answered in this operating manual, contact our technical support or another expert.
6. Features
- Reception of DAB+ (digital) and FM (analogue)
20 channel memory slots (10 x FM and 10 x DAB)
LCD with lighting
Automatic setting of time and date - Headphones connection
- Telescopic aerial
Operation via AC/DC adapter or batteries possible
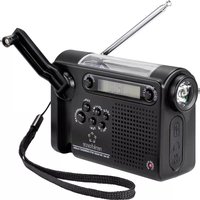
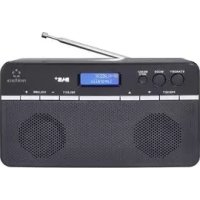
7. Components and Control Elements
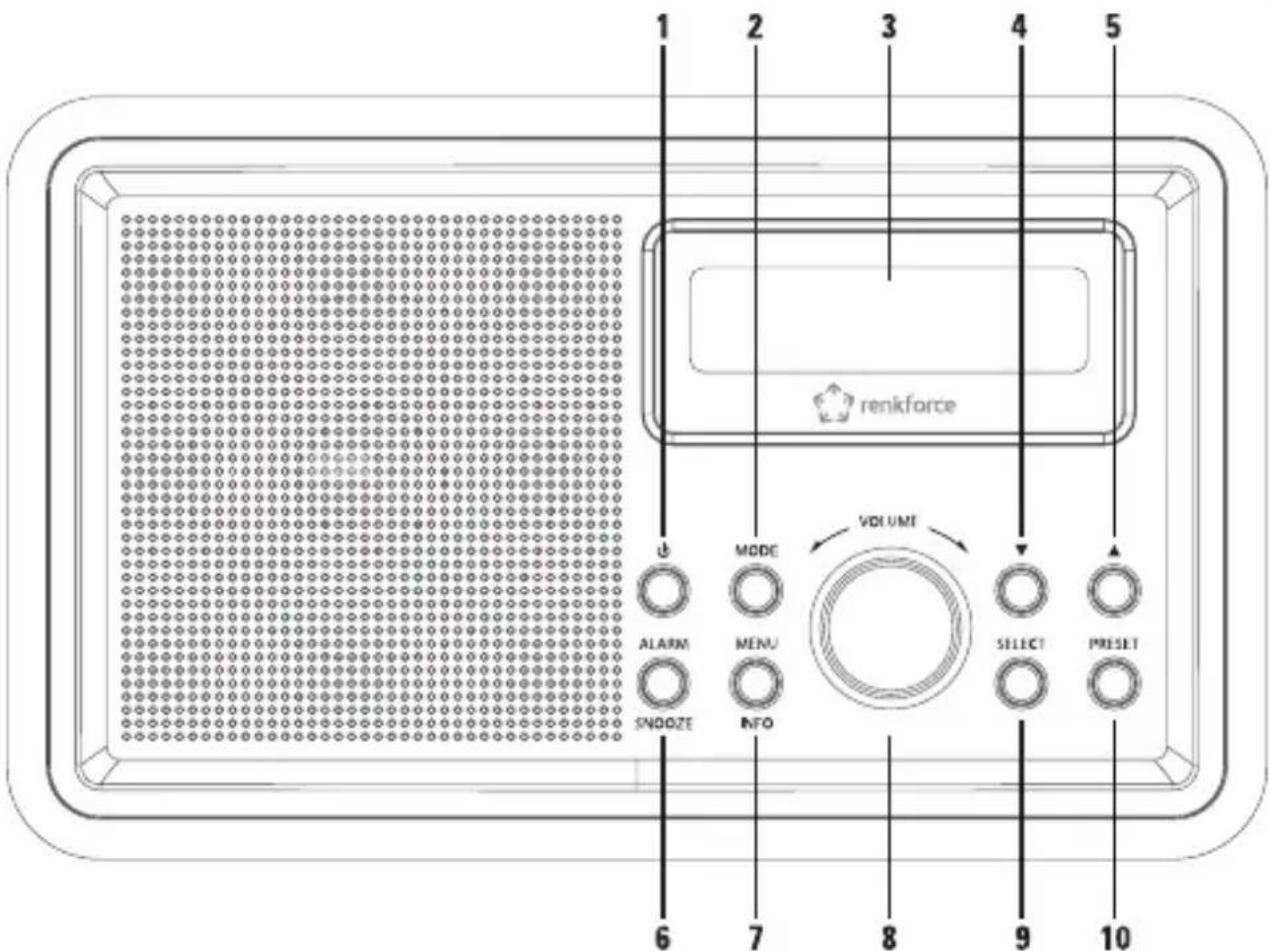
(1)Button
(6) ALARM/SNOOZE button
(2) MODE button (7) MENU/INFO button
(3) Display (8) VOLUME controller
(4) Button 3) SELECT button
(5) Button 10) PRESET button
8. Set-Up

Never cover the device. Ensure proper ventilation when setting up the device. Maintain a sufficient distance to other devices and walls.
When setting up the product, make sure that the connection line is not pinched or damaged by sharp edges.
Make sure that it has a stable footing and place it on a stable underground, since falling off of the device may injure persons.
Observe that the device feet may leave coloured prints on certain furniture surfaces. Use protection between your furniture and the device.
- Place the device on a level and stable surface.
- Completely pull out the telescopic aerial and align it vertically.
- If reception is not satisfactory after connection and commissioning, change the alignment of the telescopic aerial or the site of setup of the device for best reception.
9. Commissioning
a) Inserting/Replacing the Batteries
For mains-independent operation, the device can be operated with four batteries type 1.5 V Mignon (AA).

Keep batteries out of reach of children.
s keep batteries out of the reach of children. Otherwise, there is a danger of them being swallowed by children or pets. If swallowed, consult a doctor immediately.
Remove the batteries from the battery compartment if you are not using the device for an extended period of time to prevent damage to the device by leakage. Leaking or damaged batteries may cause alkali burns if they come in contact with the skin. Therefore, use suitable protective gloves.

All batteries should be replaced at the same time. Mixing old and new batteries may cause the batteries to leak which will result in damage to the device.
Batteries must not be short-circuited, taken apart or thrown into fire. There is a danger of explosion!
Do not expose the batteries to any extreme conditions. Do not place them on radiators and do not expose them to direct solar radiation.
Do not recharge normal, non-rechargeable batteries; danger of explosion! Only charge rechargeable batteries intended for this purpose and use suitable chargers.
Always observe the correct polarity (plus/+ and minus/-) when inserting the batteries.

Remove drained batteries from the device as soon as possible to prevent leaking. Use only batteries of the same type and with the same charge condition. Use only leak-protected batteries.
- Open the battery compartment on the rear of the device.
- Insert four new type 1.5 V Mignon batteries (AA) in the battery compartment in the correct polarity. The correct polarity is indicated in the battery compartment.
- Close the battery compartment again.
- If the device no longer works or if the display contrast deteriorates, the batteries are discharged and must be replaced.
b) Mains Connection
Only the enclosed plug-in AC/DC adapter must be used for mains power supply.
If the device is not used for an extended period (e.g. before starting extended travels), pull the AC/DC adapter from the socket and remove the batteries.
The mains socket to which the AC/DC adapter is connected must be close to the device and easily accessible to quickly separate the device from the mains voltage in case of an error.
Ensure that the voltage indication on the mains adapter matches the mains voltage of your power supply. Never try to operate the AC/DC adapter with any other voltage.
Be careful when handling mains adapters and mains connections. Mains voltage may cause potentially fatal electric shock.
Make sure that no cables lie around openly. Install cables professionally to prevent accidents.
- Connect the low-voltage plug of the mains adapter to the AC/DC adapter connection DC 6V on the rear of the device.
- Plug the AC/DC adapter into a mains socket.
- At first commissioning, the message "Time is not set" appears in the display (3).
When receiving DAB stations, the time will set itself automatically. If only FM reception is possible, the time can also be set manually (see "System Settings/Time and Date Settings").
10. Operation
a) General Functions
Switching on
- Push the button (1) to switch on the device.
- After first activation, the device will automatically perform a station scan in the DAB reception range. During the search, the display information shows progress and the number of stations found.
- After completion of the station scan, the first station in alphanumeric order is played back.

If no stations are found, no signal could be received. In this case, move the device or align the telescopic aerial differently, and perform the station scan again.
Setting the volume
- Turn the VOLUME controller (8) to set the volume.
Turning clockwise Volume is increased
Turning counter-clockwise Volume is reduced
Selection of the operating mode DAB/FM
- Push the button MODE (2) to switch between DAB and FM operation.
Switching Off
- Push the button (1) to switch the device off again.
In spite of the deactivated condition, the device is connected to the mains when supplied via the AC/DC adapter.
Connection of Headphones
- If required, plug the connection plug of your headphones into the headphones socket at the rear of the device.
- Once headphones are connected, playback takes place via the headphones and the integrated speaker is switched off.
b) Menu Operation
- Push and hold the MENU/INFO (7) button until the display (3) switches to the menu view.
- Push the (4) or (5) button to navigate the menu.
- Push the SELECT (9) button to select a menu item.
- Push the MENU/INFO (7) button to jump back one level in the menu.
Menu Structure
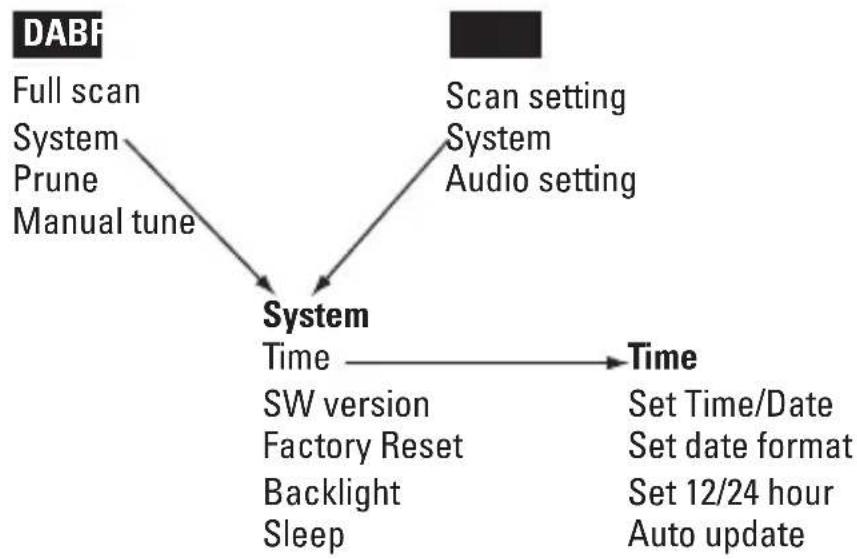
c) Operation in DAB-Mode
Search
- The automatic "Full scan" searches through all DAB channels and thus will find all stations that are broadcast in the reception area.
- In the DAB menu, select the item "Full scan" and push the SELECT (9) button.
- The scan starts and the progress bar and number of stations found appear in the display (3).
- After completion of the station scan, the first station in alphanumeric order is played back.
If no station is found, check the alignment of the telescopic aerial and if required, change the site of setup of your device.
Check if DAB stations are broadcast in your area.
Station selection
- Push the (4) or (5) button until the desired station appears in the display (3).
- Push the button SELECT (9) to confirm your selection.
Station storage
The device can save up to 10 DAB stations.
- Select the other DAB station to be saved as described above.
- Push and hold the PRESET (10) button until the display (3) shows "Preset Store" and the number of the station memory.
Empty station memories show "Empty" in the display; if the station memory is already occupied, the name of the station saved there will appear.
- Use the button (4) or (2) to select the desired memory slot and confirm your selection with the SELECT (9) button.
Selection of the stored stations
- Push the PRESET (10) button briefly and select the desired station with the (4) or (5) button.
- Push the button SELECT (9) to confirm your selection.
If no station is saved on the selected station button, the display (3) will show "Preset empty".
Deleting saved stations
- To delete a saved station, just save another station on its storage space.
Manual station search
- In the DAB menu, select the item "Manual tune" and push the SELECT (9) button.
- Select the label (5A to 13F) to be searched and its frequency with the 4 or (5) button and confirm your selection with the SELECT (9) button.
- The signal strength display appears, and when an ensemble is found, the associated name appears in the display (3).
- Push the SELECT (9) button to add the ensemble to the station list.
Calling information
- Push the MENU/INFO button (7) to call various information.
The following information is displayed:
Information on title/artist etc. > Signal strength > Programme type > Ensemble name > Frequency > Signal error rate > Data bit rate > Information for power supply > Time > Date
Deleting inactive stations
Stations that are no longer broadcasting can be deleted from the station list.
- In the DAB menu, select the item "Prune" and push the SELECT (9) button.
- Select "Yes" and push the SELECT (9) button again.
- All stations that cannot be received are deleted from the station list.
d) Operation in FM Mode
Manual station search
- Briefly push the (4) or (5) button to change the reception frequency step by step.
- Every push of a button changes the reception frequency in steps of 50kHz .
Automatic station search run
- Push the (4) or (5) button and keep it pushed until the station scan starts (Scanning...).
- If a FM transmitter with sufficiently strong signal is found, the scan stops and the transmitter is played back.

Please set weaker stations by manual station selection.
Use the menu "Scan setting" to set if the automatic station scan is to find only strong stations ("Strong stations only") or all stations ("All stations"). The setting "All stations" may lead to the station scan stopping after every frequency stop in some broadcasting areas. In this case, set the search setting to "Strong stations only".
Station storage
- The device can save up to 10 FM stations.
- The station storage, selection of the stored stations and deletion of stored stations take place as described for DAB operation.
Mono-stereo switching
You may choose if you want to receive FM radio stations in stereo or mono. For weak stations, mono reception is recommended, since this type of reception produces less noise.
- In the FM menu, select the item "Audio setting" and push the SELECT (9) button.
- Select "Stereo allowed" to receive stereo stations.
- Select "Forced mono" to receive stations in mono mode.
- Push the button SELECT (9) to confirm your selection.
Calling information
- Push the MENU/INFO button (7) to call various information.
- For example, the following information is displayed:
Radio text > Programme type PTY > Frequency > Mono, Stereo > Information for power supply > Time > Date
e) System Settings
- In the DAB or FM menu, select the item "System" and push the SELECT (9) button.
Setting time and date
- Select "Time" and push the SELECT (9) button.
- Select "Set Time/Date" and push the SELECT (9) button.
- Set the time and date with the 4 or (5) button. Push the SELECT (9) button to confirm every item to be set.
Date format
- In the TIME menu, select the item "Set date format" and push the SELECT (9) button.
- Select the desired option and confirm your selection with the button SELECT (9).
DD-MM-YYYY Date format day/month/year
MM-DD-YYYY Date format month/day/year
Time format
- In the TIME menu, select the item "Set 12/24 hour" and push the SELECT (9) button.
- Select the desired option and confirm your selection with the button SELECT (9).
12 12h format
24 24h format
Automatic time reconciliation
- In the TIME menu, select the item "Auto update" and push the SELECT (9) button.
- Select the desired option and confirm your selection with the button SELECT (9).
"Update from any" Automatic time reconciliation of DAB or FM
"Update from DAB" Automatic time reconciliation of DAB only
"Update from FM" Automatic time reconciliation of FM only
"No update" no automatic reconciliation of time
Display of the Software Version
- In the system menu, select the item "SW version" and push the SELECT (9) button.
- The display (3) shows the software version.
Reset to factory settings
- In the system menu, select the item "Factory Reset" and push the SELECT (9) button.
- Select "Yes" and push the SELECT (9) button.
- The integrated micro processor is reset and the device switches off.
All settings are deleted in this procedure.
Display Illumination
- In the system menu, select the item "Backlight" and push the SELECT (9) button.
- Select the desired brightness of the display lighting and confirm the setting with the SELECT (9) button.
High bright lighting
Medium medium brightness
Low low brightness
Sleep Timer
The sleep timer switches off the device automatically after an adjustable time.
- In the system menu, select the item "Sleep" and push the SELECT (9) button.
- Set the desired sleep time with the (4) or (5) button and then push the SELECT (9) button.
- The device will switch off automatically after the end of the set time. When you select the item "Sleep off", the sleep timer is deactivated.
The following sleep times are available: Sleep off/10/20/30/60/70/80/90 minutes
f) Alarm Function
The device has 2 alarm times and a snooze function.

The alarm function is only active while the device is supplied with the AC/DC adapter.
Alarm time setting
- Push the ALARM/SN00ZE (6) button repeatedly until the alarm time to be set (alarm 1 or 2) is displayed.
- Push the SELECT (9) button and set the desired parameters with the () or (5) button in sequence.
- Push the SELECT (9) button to confirm every parameter.
On time Alarm time
Duration Alarm duration
Source Alarm with alarm sound/DAB radio/FM radio
Daily/Once/Weekends/Weekdays daily/once/on weekends only/on weekdays only
Bar display Setting the alarm volume
Alarm On/Off Alarm function On/Off
- If an alarm is activated, it will be shown in the display (3) as a symbol with the device switched off.
- The alarm will sound with an increasing alarm sound volume at the set alarm time.
Activating/deactivating the alarm function
- Repeatedly push the ALARM/SN00ZE (6) button with the device deactivated until the desired alarm function is activated or deactivated.
The following calling alarm options are available:
Alarm 1: Off Alarm 1: On Alarm 1: Off Alarm 1: On
Alarm 2: Off Alarm 2: Off Alarm 2: On Alarm 2: On
- Select the desired option and confirm the setting with the button SELECT (9).
Snoopze function
- When the alarm sounds, you can mute it for an adjustable time by pushing ALARM/SN00ZE (6) button.
- The snooze time depends on how often you push the ALARM/SNOOZE (6) button.
- The following snooze times are available: 5/10/15 or 30 minutes.
- After the end of the set snooze time, the alarm signal will sound again.
The snooze time that can be set also depends on the settings for the alarm duration in the Alarm time setting. The snooze time cannot be set to be longer than the alarm duration.
11. Handling
- Never plug the power plug into a mains socket immediately after the device has been taken from a cold to a warm environment. The resulting condensation may destroy the device. Allow the device to reach room temperature before connecting it. Wait until the condensation has evaporated.
- Never plug in or unplug AC/DC adapters when your hands are wet.
- Never disconnect AC/DC adapters from the mains socket by pulling at the cable. Always pull it out of the mains socket holding it by the contact surfaces provided for this purpose.
- Unplug the AC/DC adapter from the mains socket if you do not use the device for some time.
- For safety reasons, disconnect the AC/DC adapter from the mains socket in case of an electrical storm.
- Do not listen to excessively loud music over an extended period of time, particularly when using headphones. This may damage your hearing.
12. Maintenance
Regularly check the safety of the DAB+ radio, e.g. for damage to the AC/DC adapter or the casing.
If you have reason to believe that the device can no longer be operated safely, disconnect it immediately and make sure it is not operated unintentionally. Pull the AC/DC adapter from the socket and remove the batteries!
It can be assumed that safe operation is no longer possible if:
- there is visible damage to the device or to the AC/DC adapter
- the device is longer working
- the device has been stored under unfavourable conditions for an extended period of time or
- the device has been subjected to heavy stress during transport
Always observe the following safety information before cleaning or servicing the device:
Live components may be exposed if covers are opened or components are removed.
The device must be disconnected from all power sources before any servicing or repair work is carried out.
Capacitors inside the device may still carry voltage even though they have been disconnected from all power sources.
Only qualified experts familiar with the hazards involved and the relevant regulations must perform repairs.
Cleaning
Clean the exterior of the device with a soft, dry cloth or brush only. Never use any aggressive cleaning agents or chemical solutions as these may damage the surface of the casing.
13. Troubleshooting
By purchasing the DAB+ radio, you have acquired a product designed to the state of the art and operationally reliable. Nevertheless, problems or errors may occur. Therefore, we would like to describe how to eliminate possible errors here:

Always observe the safety information!
No function after the device has been switched on:
- The AC/DC adapter is not properly plugged into the socket or the low-voltage plug is not correctly connected to the mains adapter connection DC 6V.
- The mains socket is not supplied with current.
- No batteries are inserted in case of battery operation or the batteries are discharged.
No sound is audible at playback:
The volume is set too low.
- The installed speaker is off because headphones are connected.
- Radio reception is too weak.
Interference signals are audible. Operation is impaired or the display shows no clear indication:
- The device is subject to interference from other devices with high interference emission (e.g. a mobile phone).
- The integrated microprocessor must be reset. Switch the device off and on again or reset it to factory settings.
Radio reception is impaired or impossible:
- Extend the telescopic aerial to its full length and try out different alignments.
- Set up the device elsewhere.
- Check if DAB broadcasting is available in your area.
14. Disposal
a) Product
Electronic devices are recyclable waste and must not be disposed of in the household waste!
Purpose of the product according to the applicable statutory provisions at the end of its service life.
Remove any inserted batteries from the device and dispose of them separately from the product.
b) Disposal of Used Batteries
You as the end user are required by law (Battery Ordinance) to return all used batteries. Disposing of them in the household waste is prohibited.
Batteries that contain any hazardous substances are labelled with the adjacent icon to indicate that disposal in domestic waste is forbidden. The descriptions for the respective heavy metals are: Cd = cadmium, Hg = mercury, Pb = lead.
You can return your used batteries free of charge to collection points in your municipality and anywhere where batteries/rechargeable batteries are sold. You thus fulfil your statutory obligations and contribute to the protection of the environment
15. Technical Data
Operating voltage. 100-240 V/50-60 Hz (AC/DC adapter) / 6 V/DC (radio)
Power consumption.1 W (standby) / 6 W (max.)
Batteries .4 x 1.5 V Mignon cell (AA)
Battery lifetime approx. 16 h (depending on volume)
Output. 2 W RMS
Reception frequencies .87.5-108 MHz (FM) / 174-240 MHz (DAB)
Dimensions. 190 x 125 x 118 mm
Weight .Approx. 725 g
Table des matieres
Page
Chere cliente, chere client,
France (email): technique@conrad-france.fr
Copyright 2016 by Conrad Electronic SE.
Legal notice
This is a publication by Conrad Electronic SE, Klaus-Conrad-Str. 1, D-92240 Hirschau (www.conrad.com).
All rights including translation reserved. Reproduction by any method, e.g. photocopy, microfilming, or the capture in electronic data processing systems require the prior written approval by the editor. Reprinting, also in part, is prohibited. This publication represents the technical status at the time of printing.
Copyright 2016 by Conrad Electronic SE.
Information legales
Copyright 2016 by Conrad Electronic SE. V3_0216_01