AE Internet Radio - Radio Acoustic Energy - Free user manual and instructions
Find the device manual for free AE Internet Radio Acoustic Energy in PDF.

User questions about AE Internet Radio Acoustic Energy
0 question about this device. Answer the ones you know or ask your own.
Ask a new question about this device
Download the instructions for your Radio in PDF format for free! Find your manual AE Internet Radio - Acoustic Energy and take your electronic device back in hand. On this page are published all the documents necessary for the use of your device. AE Internet Radio by Acoustic Energy.
USER MANUAL AE Internet Radio Acoustic Energy
1 Introduction
1 2 Switching-on and Off and Adjusting Volume
23 Connecting the Radio to a Wireless Network.
2 4 Selecting Radio Stations
35 Saving and Playing Radio Station Presets
3 6 Listening to On Demand Content
47 Setting the Clock
4 8 Setting the Alarm
4 9 Interrogating the Current Alarm Setting
5 10 Listening to Windows Media Player via Radio
6 11 The Radio Configure Menu
7 12 Troubleshooting
7 13 Licence Information and Warranty
1. Introduction
To be able to use the radio a broadband internet connection and a wireless access point (Wi-Fi) connected to your broadband internet, preferably via a router, is required.
Note: If the wireless network is configured to use Wired Equivalent Privacy (WEP) or Wi-Fi Protected Access (WPA) data encryption then the WEP or WPA password will be needed to enable the radio to communicate with the network.
Before commencing setup make sure that the wireless access point equipment is switched on and connected to broadband internet. The instructions supplied with the wireless access equipment may be required.
The radio controls referred to in the following pages are illustrated in the diagram.
2. Switching-on and Off And Adjusting Volume
First plug the mains adaptor into a wall socket and its cable into the socket on the radio labeled 7.5V DC on the back of the radio.
Note: Use only the mains adapter supplied with the radio. Using a different adaptor may cause permanent damage to the radio and could be hazardous.
In use, the radio can be switched on or off with the standby button. If switched off using the standby button, the radio will take 10 seconds or so to start playing when switched on again. If switched off at the mains, the radio will take up to 60 seconds to start playing when switched on again. When the radio is in standby mode it displays the time. See section 7, "Setting the clock".
English
3. Connecting the Radio to a Wireless Network.
When first switched-on the radio display will illuminate and show:
Reciva Radio ARM Powered
After a few seconds, the display will show:
Waiting For Connection
followed by:
When the display shows
The display on the front of the radio now shows:
Press the select button again and the display will now show:
Scanning
The radio looks for a connection to a wireless network. If it can't find one the display will show:
No Wireless Networks Found
If no network is found refer to the instructions supplied with the wireless access equipment and check that it is operating and setup appropriately.
When the radio finds a wireless network, it displays the network name (the ESSID) on the display. The name would have been allocated to the network access point by the person who set up the network. For example:
10 Sandwich Gdns
It is possible (and in some locations highly likely) that the radio will find more than one wireless access point. Turn the knob on the radio to show the names for each access point that the radio has found. When the name for the desired access point is shown on the display, press the select button.
If the network is not configured to need a WEP password, the display should show:
Waiting For Connection
then:
Wireless Network OK
If the display briefly shows
The display will automatically enter the password entry mode. To enter the password, use the knob to select each character of the code in turn, pressing the select button after each character.
Note: WEP and WPA passwords are case sensitive and must be entered correctly. After the final character, use the knob to select the end character then press the select button. The radio should now be able to connect to the network. The display will show:
Wireless Network OK
If the display again shows
4. Selecting Radio Stations
Note: If necessary press the back button to return to the previous display.
4.1 Press the select button. The display will show:
If the display does not show
4.2 Press the select button and turn the knob to select from
Press the select button to select the desired option.
English
4.3 If
Once the location has been selected turn the knob until the display shows the desired country and press the select button. Next turn the knob until the display shows the desired station and press the select button. After a short while the radio will connect to the station.
4.4 If
Note: Some radio stations do not broadcast 24 hours a day, and some stations are not always on-line. If a particular station that is known to be broadcasting on-line is not listed as available on the radio an update request can be made at: http://www RECiva.com/ and request it be added.
Note: If the station has on-demand content (that is, it provides the option of listening to programmes which have already been broadcast), it will not begin playing immediately but will request selection of either
5. Saving and Playing Radio Station Presets
5.1 To save a specific radio station as a preset, hold down one of the preset buttons (1 to 8) while the station is playing until the display shows:
Assigned to Preset #
Note: # refers to the preset button number.
5.2 Playing a preset radio station
When a radio station is playing, briefly press the preset button (1 to 8) for the desired station. Note: Be careful not to hold the button down otherwise a desired preset may be overwritten.
6. Listening to On demand Content
Some radio stations provide access to programmes that have already been broadcast. When such a station is selected it will not start playing immediately but instead the display shows:
Turn the knob to select
If
When
After the date has been selected, a start time may be selected. Set a desired programme Start Time (i.e the desired point during the programme) using the knob and press the select button. Start Time selection will be different for each station. For example, on BBC stations Start Times can only be incremented by 5 minutes at a time.
English
Programmes which allow Start Time selection also enable fast-forward and rewind while the radio is playing. Pressing the select button shows the programme elapsed time. Turn the knob to change this time, up or down in 1 minute intervals. Press the select button again to play the programme from that point.
7. Setting the Clock
The radio incorporates a clock that should be set to the correct local time. To set the clock first Press the select button and proceed as follows.
Note: If necessary press the back button to return to the previous display.
Turn the knob until the display shows:
Press the select button and turn the knob until the display shows:
Turn the knob until the display shows:
Press the select button. The display will show the radio's current time setting. For example:
Set Time 14:03
Turn the knob to set the hours and press the select button. Turn the knob again to set the minutes and again press select. The display will briefly show (for example):
Time Set 15:06
8. Setting the Alarm
The radio incorporates an alarm function that switches the radio on from Standby. The last selected station will play (assuming it is on-line). If the station is off-line or the network has a fault then a buzzer will sound as the alarm. To set the alarm first Press the select button and proceed as follows.
Note: If necessary press the back button to return to the previous display.
Turn the knob until the display shows:
Press the select button and turn the knob until the display shows:
Turn the knob until the display shows:
Press the select button. The display will show the alarm options.
Turn the knob to swap between Yes and No and press the select button. If No is selected the alarm is disabled. The display will briefly show:
Alarm is Off
If Yes is selected the display will show the radio's current time setting. For example:
Set Alarm 14:03
Turn the knob to set the hours and press the select button. Turn the knob again to set the minutes and again press select. The display will briefly show (for example):
Alarm Set 15:06
9. Interrogating the Current Alarm Setting
To interrogate the current alarm setting press the select button and proceed as follows.
Note: If necessary press the back button to return to the previous display.
Turn the knob until the display shows:
Press the select button and turn the knob until the display shows:
Turn the knob until the display shows:
Press the select button. The display will briefly show the radio's current alarm setting. For example:
Current Alarm 07:45 (On)
English
10. Listening to Windows Media Player via Radio
Windows Media Player enables the playback of audio files (.MP3,.WMA) and playlists (.M3U) stored on a networked PC. These files can be "broadcast" to the internet radio via the wireless access equipment. It has been verified to work on Windows 2000 and Windows XP.
10.1 To set up the Windows PC to allow the radio to replay stored audio files proceed as follows.
Using Windows Explorer, locate the folder where the audio files are stored. Right click on the folder.
Select "Properties".
Click on "Sharing".
Select both "Share this folder on the network" and "Allow network users to change my files".
10.2 To locate the PC audio files using the radio proceed as follows. Switch on the radio and wait for Stations to be shown or for playback to start. Press the back button repeatedly until Stations is shown.
Turn the knob until the display shows
Press the select button. The display will show:
Press the select button. The display will show:
Press the select button. The display will show:
Finding Shares
A rotating bar will be shown while the search is in progress. When the search is complete a list of shares will be shown. Turn the knob to highlight the correct share.
Press the select button. The radio will search for shared folders. Turn the knob to highlight the correct folder.
Press the select button. The display will show:
File Scan
Text on the bottom row of the display will change to indicate that the file scan is in progress. If a large number of audio files are stored this could take
several minutes to complete. When the file scan is complete the display will show:
Note: The first time the file scan is done a file called. reciva_media_cache is written to the folder where the audio files are stored. This is in order to speed up subsequent file scans.
10.3 To listen to a single track proceed as follows.
Turn the knob until
Turn the knob until the desired artist is shown and press the select button.
Turn the knob until the desired album name is shown and press the select button.
Turn the knob until
Turn the knob until the desired track is shown and press the select button.
Turn the knob until
10.4 Further playback and playlist options.
Selecting alternative menu options when
10.5 Controlling Playback
Use the stop button to stop playback.
Use the play/pause button to either pause a currently playing track or to restart a currently paused track or to restart a stopped track.
Use the skip to previous track button to start playback of the previous track in the queue.
Use the skip to next track button to start playback of the next track in the queue.
English
10.6 Browsing Tracks
Press the browse button to show the currently playing track name. Turn the knob to see which tracks are queued for playback. To jump to a particular place in the queue press the select button when the desired track is shown.
10.7 To play tracks randomly proceed as follows.
Select the individual tracks as described previously. Navigate to top level menu item
Press the select button and turn the knob until
Press the select button.
Turn the knob until
Turn the knob to select yes/no to confirm that shuffle mode should be enabled.
10.8 To play tracks in the queue repeatedly proceed as follows.
Select the individual tracks as described previously.
Navigate to the top level menu item
Turn the knob until
Turn the knob until
Turn the knob to select yes/no to confirm that repeat mode should be enabled.
11. The Radio Configure Menu
The configure menu enables selection of radio setup items. To choose the desired option proceed as follows.
Note: If necessary press the back button to return to the previous display.
Press the select button and turn the knob until the display shows:
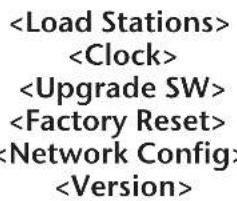
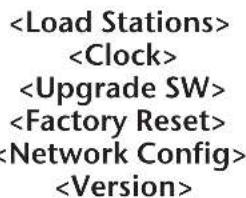
Press the select button and turn the knob until the display shows the desired option. The following options are available:
Press the select button to select the desired option.
Use this option to download an updated list of radio stations from the internet.
Use this option to set the time, to set an alarm and to view the current alarm setting.
Use this option to download new software for the radio from the Reciva portal on the internet. This may take several minutes - do no switch off the power to the radio until the operation is complete.
Puts all the settings back to their defaults as they were when they left the factory. Only do this if the radio display has locked up and will not operate - all the stored presets and wireless network connection setup will be lost.
Enables scanning for connection to another wireless network, or manually to configure the network parameters. Use this if the radio is moved to another building.
Displays the versions numbers of the various parts of software and hardware on the internet radio.
English
12. Troubleshooting
If problems occur when connecting the radio to the wireless network, these steps may help to resolve them:
12.1 Confirm that a Wi-Fi connected PC can access the Internet (i.e. can browse the web) using the same network.
12.2. Check that a DHCP server is available, or that a static IP address is configured on the radio.
12.3. Check that a firewall is not blocking any outgoing ports. As a minimum the radio needs access to UDP and TCP ports 80, 554, 1755, 5000 and 7070.
12.4. Check the access point does not restrict connections to particular MAC addresses. The radio's MAC address can be viewed using the menu item Configure -> Network Config -> View Config -> MAC address.
12.5 If the network is encrypted check that the correct password has been entered into the radio. Remember that the password is case sensitive.
12.6. If the radio connects to the network successfully, but is unable to play a particular station (or stations), this may be due to one or more of the following:
The station is not broadcasting (remember it may be located in a different time zone).
The station has reached the maximum allowed number of simultaneous listeners.
The station is not broadcasting anymore.
The link held by the radio to the station is out of date.
The Internet connection between the server (often located in a different country) and the radio is too slow.
Try using a PC to play the programme via the station's web site. If the station plays successfully use the form at http://www RECiva.com/stations/addstation.asp to notify us so that we can change the station data that is used by the radio.
12.7 For further troubleshooting information and details of more in-depth user functions and settings
please go to our web site on www.acoustic-energy.co.uk and follow the links for customer support.
13. Licence Information and Warranty
This product contains software licensed under version 2 of the GNU Public License and version 2.1 of the GNU Lesser Public License, The source code for this software is available from: http:// www.recviva.com/gpl/
This product includes technology owned by Microsoft Corporation and under a licence from Microsoft Licensing GP. Use or distribution of such technology outside of this product is prohibited without a license from Microsoft Corporation and/or Microsoft Licensing, GP as applicable.
Your Acoustic Energy Internet Radio is guaranteed against original defects in materials, manufacture and workmanship for one year from the date of purchase.
Under this warranty Acoustic Energy agrees to repair any defect or, at the company's discretion, replace the faulty component(s) without charge for parts or labour. This warranty does not imply any acceptance by Acoustic Energy or its agents for consequential loss or damage and specifically excludes fair wear and tear, accident, misuse or unauthorised modification.
This warranty is applicable in the United Kingdom only and does not in any way limit the customer's legal rights. Claims and enquiries under the warranty for Acoustic Energy products purchased outside the UK should be addressed to the local importers or distributors. If you have reason to claim under the warranty please contact your dealer in the first instance.
Please retain all original packaging materials for possible future use. We suggest that you complete details of purchase now and keep this information in a safe place for future reference.
Deutsch
Inhalt
Seite Abschnitt
Reciva Radio ARM Powered
Assigned to Preset #
Current Alarm 07:45 (On)
10. Windows Media Player über Radio horen
Reciva Radio ARM Powered
Unos segundos mas tarde, la pantalla mostrara:
Scanning (Explorando)
Reciva radio ARM Powered
Waiting for connection
Puis
Wireless Network OK
(Chargement stations)
ДяТOrO,УTo6bI NcNoJIb3ObA Tb paIIO, Heo6xOdIMbl BbICOKOCKOpocTHaR (broadband) INTEpHET CB83b I 6ecnpOBODHaN INTEpHET CB83b (Wi-Fi), npicoeDnHeHHaK broadband-INTEpHET uepe3 poyTep.
PpmeaHne:Ecnn6ecnpoBnHa cetbCKOHpynpoBaHa Ha nCnoJb3ObaHne KoInpOBKnInΦopMaun KaWiredEquivalent Privacy (WEP) nn Wi-Fi Protected Access (WPA),Torga WEP n WPA napoi6byT Heo6xOdmbI dNra coeHNHeHn paDIO C cetbIO.
IpeepHaHJOM yCTaHOBKN y6eINTEcB YTO Wi-FiobopydOBaHHe BkIIOUeHO I NOIDCOeINHeO K broadband-INEpHET. MoKTe NOTpe6oBaTbCnHCTpyKu npocTabJIeMa c Wi-Fi obopydOBaHem.
Hacpoikn paio, oncaHHbIe Ha nocJeuOx CTpaHuaX IJIIOCTpnpoBaHbI B HxepacnoNoKeHHo Dnargpamme.
2.BKIOUeHne N BbIKIOUeHne paIIO nperyIpOBKa 3Byka
Chauana nocknoute Bnky aanterpa B wtenceIbHyo p03eKy, a KOHeu Ka6eB rHe3do, 0603haueHoe 7.5V DC ha o6paTHO CTOpOHe paHO.
PpmeaHne:NcnoB3yTe TOnbKO aanTep, noCTabIeMbI cpaNo. NcnoB3oBaHne npyroro aanTepa He6e30nacHO MoKeT npBeCTN K NOBpeXDeHIO paNo.
PaIIO BKJIIOUaTeTcO (on) n BbIKJIIOUaTeTcO (off) KHOIIKOI standby. Ecn paIIO OTKJIIOUeHc NcNOJIb3OBAHNEM ToIbKO KHOIIKN BbIKJIIOUeHnRA standby,paIIO BO36HOBnIT pa60TuYepe3 10 cekyHd,ecn erO BKJIIOuHTb CHOba.Ecn npOTKJIIOUeHm OTKJIIOUaJcN aADANTep,TO paIIO BO36HOBnIT pa60TuToJIbKO Yepe3 60 cekyHd npINOCJeDyUoUeM eRbKJIIOUeHnI.
2.BKIOUeHne N BbIKIOUeHne paNIO nperyInpOBka 3Byka
Pycckn
3. NpoknoueHne paNo K cetu HHTepHET.
PnBkIIOueHm paIIO, IINcIIe 3aCBETITcN oTO6pa3NT:
Reciva Radio ARM Powered
Yepe3 HeckoIbKO cekyHd ImCIIeOTo6pa3NT:
Waiting For Connection
3aTEM:
Korda nncnne oTo6pa3nt
PpmeaHHe: Pn Heo6xOdmocTN, KhoNka back Bo3BpaTNT KnpdeIduyemy OTo6paXeHHo Ha dncnnee.
Ceyuc dinncnei oTo6paKaet:
CHOBA HAKMITE KONKY select n DnCnJIe OTO6pa3NT:
Scanning
3TO 3NaHT, TPO paIIO NUIET COEINHHeN C VHTepHETOM. EcII ON He HaxOIT COEINHHeN, INCIIe OTO6pa3NT:
No Wireless Networks Found
Ecno coeHHe He HaJeHO, 6paTnTecK HcTpkykun NoCTabJIeMoC Wi-Fi 6OpOydoBaHmN npOBepbTe, BCE JIN BbIIOHeHO cOrJaCHO HcTpkykun.
Korda paio haieT coeHneHne, dncnne oTO6pa3nt Ha3BaHne (ESSID) nn Kaoe-To npyroE mHa npimep:
10 Sandwich Gdns
-IMRAKOMPnAHIN INI YeIOBeka, KTO 06ecneuHBaet CBA3b.
Bo3MOxH0 (BO MHOrnX perNoHax C 6oNbIOW BepoTHOCTbHO), yTo paIIO HaIeT 6OJe OJHOro NOCTaBUNKa ycIyr CB3N. BKIOHTe KHOKNy Ha paIIO, YTO6bl NOKa3aTb IMeHa BCex NOCTaBUNKOB CB3N, KOtOpBX paIIO O6hApYkUIO. KorDa HA DcINPee OT6pa3NTcKKeJaEMbI NOCTaBUNK CB3N, HAKMITE KHOKNy select.
EcHcTb cKOHnHynpoBaHa TaK, YTO WEP npoJIb He Tpe6yETc, DnCnEe OTo6pa3NT:
Waiting For Connection
3aTEM:
Wireless Network OK
Ecnn nncn knpKaIOBpeMeHNO OTo6paKaET
Icnne aBOMaTnueckn BbIEeTepeXIM BBOda napoJ.
IIra BBOda napoJ noBopaHBaTe pyKy Ira BbOpa KaJDo 3HaKa KOna, HaxIma KHOkY select nocne KaJDo 3HaKa.
PpimmuHHe: WEP n WPA npoJn CyBCTBnTeNbHbI K perNCTpy n DOJIKHB6bITb BBeJeHbI npaBnIbHO. Nocne nocJeHrero 3HaKa NOCTaBbTe pykY B NOIOXeHne end, 3aTeM HAKMTe KNOKy select. Tenepb paNo DOJXHo COeHNHTcR C cTbO. DncJIe OTo6pa3NT:
Wireless Network OK
Ecnn nncnne CHOBA noka3bIbaeT
4.Bb6op padnoctaHcnn
PpimueaHne: Pn HEO6xOIMOCTN, KHOIka back B03BpaNTK npdebluyemy OTObpaKeHHo Ha dncnnee.
4.1 HaXMMTe KHOKNy select. DnCnJIe OTO6pa3NT:
Ecn n dncnne He oTo6paXaET
4.2 HaxMMTE KhoNky select IN NOBepHInTe pyKy IIN Bb6opa
Haxmte KhoNky select N BbIepeTe Jkenaemyo onuio.
4.3 EcnBbIbpaHa onu
Pycckn
PnBbIbOpEOnuN
HCHOBA HAXMITE KHONKY select. Hepe3 HeKOtopoe BpEMpaIO COeINHTcO CTaHtneI.
4.4 Ecnn Bb6paHa onu
H CHOBA HAXMITE KHOKNY select. Hepe3 HeKOToPOe BpEMpaNO COeINHTCQ CTaHnne.
PpimMeaHne: HeKOTOpbIe cTaNn H BbIXoJr T EΦnp 24 yacaB cyTKN HHeKOTOpbIE cTaNn H BcERda pa60aTOB pexnme on-line. Ecn OnpeJeHHa rCTaHn, n3BeCTHaR kAk pa60taUoAaB peXnme broadcasting on-line, He nomueHa B nepeuHb padnoCTaHn, doabntb ee B cnncok pa3peuHbix CTaHn MoXHo Ha caYTe: http://www RECiva.com
PpmeHHe:Ecnn 3Ta CTAHnna "CTaHnna nO BocTepeBaHnIO"(HTo 3HaHT,HTo npOBaIep Daet OOnIO IpnocJywnBaHnI pOrpamM, KOTOpbIe yKe TpaHcInpoBaHnCb),TO OHa He HaHHe Pa60TaTb HEmdJIeHHo,a 3aInpocNT Bbl6paTb
OnuIO
5.CoxpaHHeHne n npocnyuBaHne 3apaHee yctaHOBnEHHO paNOCtAHm
5.1ДЯ COXPAHEHNA PAHOCTAHN KAK 3apaHee YCTaHOBNEHHO, DEPKITE B HAXATOM COCTOHN Ody N3 YCTaHOBOUHbIX KHONOK (1-8) BO BPem npocnyBaHnRA PAHOCTAHN IO TEX NOP, NOKA DmCJIeH He OTO6pa3NT:
Assigned to Preset #
Приимеанно: - COOTBETCTBYET HOMepy yctaHOBOHON KHONK.
5.2PocnyuBbHne3apaHeeycTaHOBNeHHo paNOCtAHn.
Korda paNocTaHnra pa6oTaET, KpaTKOBpeMeHHo HaxMnte OHy n3 yCTaHOBOUHbIX KHOIOK (1-8) JeJaemoi paNOCtAHn.
Pnmuehane: Bybte octopoXhbl, He depknte KhoNky B Haxatom coCToHm, HNaYe XeJaemay yCTaHOBka MoKet 6bItb nepe3anicaHa.
6.Посслушване NO BOCTepeBoaHIO
Hekotopbye paHocTaHcHmEOTIOCTynKnporpaMMam, KOtOpbIy yKe TpaHCnIpOBaHncb. KOrDa Bb6pHa TaKaar CTAHU, ee pa6Ota He HauHHeTcHemeDHeHHo; B3aMeH 3OMy DcPiNe OTo6pKaAeT:
IOBOPOTOMpyKN,BbI6epNTeONUHO
Ecnn Bb6pana OnuY
daIbSe CneDyIte COrnaCHO INHCTpyKUIM.
Korda Bb6pHa onuHa
IIOBepHnTe pyky dIy Bb6opApJxJaEMOn npOrpAMMbIn HaxKMnTe KhoNkY selc. PaHNo HaHHeT nRpA Tb nnDcPiEe MoKET OTO6pa3nTb nepeYe hPnOrpAMM dIy Bb6opAp DaTb.IcNoJIb3yIte pyky dIy Bb6opAp DaTbJxJaEMOn npOrpAMMbIn HaxMnTe KhoNkY selct.
Iocne Bb6opa DaTbI nporpaMbI, MoKeT 6bTb Bb6paHO Bpem nporpaMMbI. YcTaHOBnTe Start Time nBbl6paHHo nporpaMMbI (MOMeH BPemHn B TeueHne nporpaMMbI) NcNoJIb3yra pUky, 3aTeM HaxMnTe KhoNkyselct.
Bb6op Start Time 6byet pa3nHbIM dJa KaJdoi cTAnu. HanpImep dJa cTAnuBBC, Start Time MoKet 6bIb yBeJIuHcHo Ha 5 MInyT 3a OIN pa3.
Iporpamma, KOtopa no3BOJRAET Bb6npaTb Start Time, TaKke daet BO3MOXHOCTB BO Bpem pa60tbl nporpammbl CdeLaTB nepeMOTKY Bnepei Ha3ad. Haxmaj KONky select, DCnne OTO6pa3NT Bpem pa60tbl nporpammbl. C NOBOPOTOM pyKN 3TO Bpem MeHReTC: YBeJIuYBaETcN INN yMeHbUaeTc C INTEPBA1OM B 1 MNHyT. HaxMITE KONky select CHOba, YTO6bl nporpamma HauJaPa60Ty c 3TOr MOMHTa.
Pycckn
7.YCTaHOBka YacOB
Bpaio BMOHTnpoBaHbI yacbl, KOToPbIe IOnXHbI 6bITb HAcTpoEhblIg OTo6paXeHHaMeTHOr BpeMeHN. HaxmTe KHOkky select n BbIOJHnTe CneNyUoee:
PpmeaHHe: Pn Heo6xOIMOCTN, KhoNka back Bo3BpaNTK npdeIyUeMy OTo6paXeHNHO DaCnnee.
Bpaaate pyky do tex nop, noka dncnne He oTo6pa3nt:
HaKMMTe KHOKNy select. Bpaaate pyky do Tex nop, noka dncnne He oTo6pa3nt:
BpaaTe pyky do Tex nop, noka dncnne He oTo6pa3nt:
Haxmte KhoNky select. IucnneI OTo6pa3NT HAcTpoKy BpeMeHN Ha paNo. HanpImep:
Time Set 14:30
Ibopauhba pyky, yCTaHOBnTE qac n HaXMnTe KhoNkyselct.Bpaaa pyky CHOBA,yCTaHOBnTE MNHyTbINCHOBa HaxMnTE KhoNkSy selct. Dncnne KpATKOBpeMeHHO NOKaKeT yCTaHOBJIeHHe BpeM, HanpIMep:
Time Set 15:06
8.YcTaHOBka6yDnIbHnIka.
Bpaio BMOHTIPOBaH 6yDnIbNk, KOToPi BKIOHaET paio n3 pexima OxuaHna. Bbipanha noCneJeH cTahnra 6ydt paOtaTb (npednonarA, yTO oHa BpeXmme on-line).Ecni cTahnra OTKnHOHTcRn HApUHTcCB3b, TORda 3ByKOBoE yCTpoiCTBO 3ByuNT KAc abapinH aCRHaIIIN3aUN. IIny UcTaHOBKn 6yDnIbHnKa, HaxMnte KONky select n CNeDuYte yKa3AHm.
PpmeaHHe: Pn Heo6xOIMOCHT KONka back Bo3BpaNTK npdeIyUeMy OTO6paXeHNHO Hdncnnee.
BpaaaiTe pyky do tex nop noka dincnnei He oTo6pa3nt:
Haxmte KhoNky select.
BpaaaiTe pyky do tex nop, noka dincnne He oTo6pa3nt:
Bpaaate pyky do tex nop, noka dincnne He oTo6pa3nt:
HaKMTe KhoNky select. DnCnne oTo6pa3nT onuio 6yDnBnka:
Yes/No
IIOBepHnTe pyky B noJoxKeHne Yes nnn No n HaxMnte KHOkny select. EcnBbIbpaHo N0, 6yDnJIbHnk 6ydt npBvBeH B hepa6ooye coCTOaHne n dncnne ODHOKpATHO OTO6pa3HT:
Alarm is Off
EcnBb6paHo Yes, nncnnei nokket Tekyuee Bpemn HacptoKn. Hanpumep:
Set Alarm 14:03
IobepHnTe pyky Iyra yctaHOKn Yaca n HaxMnte KhoNk yselect.BpaauTe pyky cHOBa YTO6bl yCTaHOBnTB MInHyTb I N HaxMnTe KhoNk yselect. Dncnne ODHOKpAHO OTo6pa3NT (HanpImep):
Alarm Set 15:06
I npOBepKn Tekyue HAcTPOKn 6yDnblHnKa HaKMITE KhoNky select, daane CneDyTe yKa3aHnM.
PpmeaHne:Ecnn Heo6xOIMO, KhoNka back Bo3BpaTNT K npedbIyueMy OTo6paXeHHo Ha dncnnee. BpaauTe pyky Do Tex nop, noka dinCnien He oTo6pa3nt:
Haxmte KhoNky select. BpaaTe pyky do Tex nop, noka dinnne He oTo6pa3nt:
Bpaaate pyky do tex np, noka dincnien He oTo6pa3nt:
HaKMTe KONky select. DnCnnei ODHOKpaTHO 0To6pa3nt BpeM TeKyueHacTpoKn 6yDnIbHnka. HanpImep:
Current Alarm 07:45 (On)
Pycckn
10. Послuyшваиме Windows Media Player урета ради.
Windows Media Player cnoocb H Bocnpn3BODITb ayNo foNbI fOpMaTob (.MP3. .WMA) n CnCOK BOCpOn3BeHnra (.M3U), coXpaHeHHbIe Ha PC, NOKJIIOHcHOM K CeTn. 3Tu foAIIb MOrY T 6bITb BOCpOn3BeHbI "broadcast" B INTePnet paIIO uepe3 Wi-Fi o6OpyObaHne. 3To 6blNO noTBePckJeHO pa6To0i Windows 2000 u Windows XP.
10.1ДЯнсгposипбвялhoe paio nporpibatb coxpaehhble aydno faajB Windows PC BbINOHHTe cneDyOuee:
IcnoB3yTe Windows Explorer nHaxOxJdeHnnaKn c coXpaHeHHbIMn ayDnO paJlAmn. KInkHnTe npBoi KHONKO MbluN No naKe.
Bb6epTe "CBoYCTBa".(Properties)
KJIINKHInTe "O6MeH".(Sharing)
Bb6epTe onuHIO : "O6MeHrTb 3Ty nAnky B cTeN" (Share this folder on the network) N "I03BOJNTb noJIb3OBaTeJIaM CETn H3MeHrTb MoI paJIbI" (Allow network users to change my files).
10.2 Pa3MeueHne PC aydno faaiNoB c nOMOuHpaIIO:
BknHouTe paJIO.
Doxdtceb 0to6paXeHn Stations Ha nncnnee nn Na hauana Bocnpo3BeDeHn faIIOB.
MHorokpaTHo HaxmMaIte KhoNky back do Tex nop, noKa Stations He OTo6pa3nTcH a nCnnee.
IbopauBaTe pyky do Tex np, noka dincnien He oTo6pa3nT
.
HaKMMTe KhoNky select. NucnneI OTo6pa3NT
HaKMMTe KhoNky select. Ncnnne OTo6pa3nT
Hakimnte KhoNky select. Ducnnei noKaxet
Finding Shares
68yua nooc6ydt noka3aHa B Teuehen npoecca nonka. I0 3abepeHNO noncka, nepeehb paioB 6ydt OTo6paXeH Ha DnCnnee.
IIOBOPOTMpyKN BbIeJIte Heo6xOIMbI ΦaII. Haxmnte KhoNky select.PaIIO hAIeT nanky c 1aJAMn.
IIOBOPOTMpykN BbIeJIte Heo6xOIMyIO paIKy. HaxMMTe KHOIIky select. DcIneN nokaxet
File Scan
TeKCT Ha HIXHHeI CTPOUKe IINCNIIe N3MEHIT INHIMKaUNHO, YTO O3HaHaAeT faiN HaxOJNTcB IpoueCe cKaHnPoBaHnE. Ecln CoXpAHeNo 60JIbwoe KOINHECTBO faiIOB, 3OT IpoueCC MoKET 3aHrTB HeCKoJIbKO MmHT.
OTobpa3ntcnaDnCnnee,KOrda npouecc cKaHnpOBaHn 3aKOHueH.
PpmeaHne:Korda cKaHnpoBaHne BbIOnHeNo BnepBbIe, faI .reciva_media_cache"6ydt 3aNcaH B nanky, rde coxpaHbI BCE aydno faiNb. 3TO BblonHReTcra Ira TOrO, YTo6bI yckopntb IpOecC cKaHnpoBaHna CJeDyUux paIIOB.
10.3ДЯ npocnyuBaHn 3aIncn BbINOJIHnTe CLEyOuee:
ПоворачваitepykydoTexnopokkaДиспileн He OTo6pa3nT
IobopaHbAte pyky do tex nop, noka mja Jkenaemoro aptncta He oTo6pa3ntcHa dncnnee. Haxmmte KhoNky select.
IobopauBaIte pyky do Tex nop, noka Ha3baHne XeJaemoro aIb6oma He OTo6pa3ntcra Ha dncnnee. Haxmnte KhoNky select.
Повораивайу ручу до тex nop,пoka
IobopaHbaiTe pyky Do Tex nop, noka XeHaemar 3aNcB He OTo6pa3ntcna Hnncnnee. Haxmnte KhoNky select.
IbopauBaTe pyky Do Tex np, noka
10.4 DanbHeWeB OBCPOn3BeDeHne H onuH CnNcKa BOCPOn3BeHnH FaiJIOB.
Bb6npa anbTepeHaTHBbIe OnHMeHIO, npB KNoeHHo OnuN
Pycckn
3aTEM NOBepHnTe pykny DJIy BbIbopa
10.5 KoHTpOJIb BOCIpOIN3BeDEHnA.
UcnoJIb3yIe KHOJky stop Ira OCTaHOBKn BOCIpOIN3BeDEHnA.
NcnoB3yTe KHOKpy play/pause nI npIOCTaHOBKn Irgpaouee 3aIncn nn dnn
IpoDIOJIKeHnB OBCPON3BeDEHnI PpIOCTaHOBJIeHHo3aIINi IINI JIb BOCPON3BeDEHnI OCTaHOBJIeHHo3aIINcN.
NcnoIb3yTe KHOKky skip to previous track nna Hauana BOCnpOn3BedeHn npdebyuee 3aunCn B cnncke.
IcnoIb3yIe KHOIky skip to next track IaHaHana BOCnpoN3BeDEHnA CNeIyoUe 3AnCnB CnNCke.
10.6 POnck 3aHnC B CInCKe
HaKMTe KHONky browse nIy oTo6paKeHnHa
HcPiEe Ha3BaHnB BocPOn3BODmOy 3aNcN.
PiBePHTe pyKy dIy npOCMOTpa 3aNcN, KOtOpA
HaxoNTcB B OepeEn BocPOn3BeDeHn. DnIy Bb6opa
3aNcN HaxMtTe KHOKy select, JeIaEmar 3aNcB
OT6pa3ITcH a NcPiEe.
10.7 BeCnpaDooHoe Bocnpn3BeDeHne 3aIncei. BbI6epnte 3aIncB kak 6bIIO oNMcHo Bblie.
IpepeMeCTnTEcB Ha
IobopaHbAte pyky do tex nop, noka
ПоворачиваitepykydoTexnop,noka
IobepHnTe pykny dny BbIbopa yes/no nIy IOTBepKdEHNr ONmN nepeTaHOBKn.
10.8 NOBTOHoe BOCPON3BedeHne 3aIncen B Cnucke.
BbIepnte 3aIscb kac 6blIO onncaHO Bblie.
IpeMeCTnTecb Ha
Поворашиваши ручу до Тх по, поka
Поворачьайтуку до ТЕХ по,пoka
NoBepHnTe pykny dIy BbIbopa yes/no nIy NoTBePckdEHNr OIcN NOBTOpeHn.
11. Páñno Meñó
MeHIO NO3BOJnE T BbI6paTb Heo6xOJMbIe HAcTpOKn DnPaNo. DnBbI6opa XeJaEMOn OuMN BbINONHTe CnEyUoSe:
PpmeHHe: Pn Heo6xOIMocTn, KhONKa back B03BpaNTK PnpdeIbIyUeM y OTo6paKeHHo Ha dncnnee.
HaKIMnTe KhoNky select.
NobopaHbAaTe pyky Do Tex nop, noka Ha dncnnee He oTo6pa3ntc:
HaKIMInTe KHOINKy select.
IobopaHbAte pyky Do Tex nop, noka dincnnei He OTO6pa3NT XeHaemyIOOnuHO. CneyuOUMN ONUYMM MOyT 6bITb:
HaKIMnTe KhoNky select nBbIbopa XeNaemOn onuN.
NcnoB3yIte 3Ty onuIO nla 3aRpy3Kn 06HOBJEHHORO cnMCKa paNocTaHn B INHTepHET.
UcnoIb3yIte 3Ty ONuIO IJRA yCTaHOBKn BpeMeHN, 6yDnJIbHnKa I NpOCMOTpa TEkyue HAcTPOKn 6yDnJIbHnKa.
Pycckn
(AE)ACOUSTIC ENERGY
IcnoB3yTe 3Ty OOnIO DnA 3aRpy3Kn HOBOr nporpamHOrO o6ecneueHnA dNra paNo n3 nopTaNa Reciva B IVtepHET. 3To MoKet 3aHrTb HecoNbKO MInHyT, He OTKnHOaHTe paNo n3 CETn DO NOnHOrO 3aBepWeHnO npaun.
3Ta onpI npINBOIT BCE HAcTPOKn B INCXOHDoe nIOXKeHne. BbINONHJte 3TO TOnbKO TOgDa, KOrda dncnn He haoDNTcB 3a6NOKIpOBaHHOM COCToHNN. Ppi 3ToI onpIIN BCE coxpaHeHHBe paHee yCTaHOBKn I NOkNIOpHeHne K CETn 6ydyT ydaNeHbl.
Jaet Bo3MOxHOCtB IpOcNEIb CB83b C KaKoJ-N60
dpyro CeTbIO Nn BpyHyIO HAcTpOITb npaMeTpbl cTeN.
ICpONb3yIte 3Ty ONuHO, ecN paNIO nepemeueHO B
dpyro NOMEUeHHe.
OtpaKaET Bce BO3MOXHbIe BapnAHTbI pa3NHyBIX YacTei nporpaMHorO u annapaTHoro o6ecneueHnB INHTepHetpaNo.
12.YcTaPaHeHHe HEnCnpaBHOCTe
Ecnn npo6nembl Bo3nKaIO T npn noKnHoueHN paJNO K cTn CneDyUOuNE WArn MoYr NmOyb pa3peWntb nx:
12.1 Y6eIntecb yTO PC NOcOeINHeHbIK Wi-Fi IMeET DOCTyn K IVHTepHET (T.e. MoXeT npOCMaTPnbTaB Web), IcNoJIb3yra ONDHy NTy Xe CETb.
12.2Поверьт,чTo DHCPсервр дoctupenиIP aDPEC HAcTpoEH ha paHIO.
12.3 Поберьт,чTO 3auntHЯ CNTeMa He 6IOKnpyet KaKHe-Ni6o NcXOJaUne nopTb. KaK MInHmym,paIIO Heo6xOIMM DoCTyn K UDP n TCP npTam 80,554,1755, 5000 and 7070.
12.4 Поверпгу Wi-Fi He orpaHnHbAET doctyaK MAC apecam. MAC apeca paIIO MOyT 6blt npocMOTpeHb uee3 onu MeHIO Configure -> Network Config -> View Config -> MAC address.
12.5 EcTb 3aKoInpObaHa, npOBepbTe npabHocTB BBeDeHHoro npoJIra Ha paIIIO. POMHITe YTO npoJIb yBCTBnTeHEN K perNCTpy.
12.6 Ecnn paanno coeHnreTc n CetbHO YCneuHO, HOB03MOxHO npocnyaTb Kakyo-No 0CTaHnO (NtCTaHn), 3TO MOKeT 6bIb KaK CNeDCTBNE OndHO r3CneNyoo:
CTaHnIe He Beuaet (nomHInTe O pa3Hnue Bo BpeMeHHbIX nOraCax)
CTaHnIa DoCTnIa MaKcMmaJIbHO pa3peUeHHOrO KOnuHeCTBa CnyuataTenei.
CTaHnI npEePaTnla CBoE BeuHaHe.
JINHncoeHNHeHnpaIIO co cTaHnei npocpoeHa.
HHTepHcEeHeHHe MeKdy cepBepOM npaNo OueHb MeJeHHoe.
PonbTaIeTcB NcNoJIb3OBA Tb PC nI npocnyuBaHn nporpAmMbI cpe3 Web-caIT cTAHCIN. EcnI cTAHCIN pa6oTaET yCneUHO,ncNoJIb3yIe foPmY ha http: //www RECiva.com/stations/add station.asp IyBEOMJIeHn HaC,HTo6bl Mbl MOrJI IN3MeHnTB HΦopMaUIO O cTAHCIN,NCNOLb3yEmo paINO.
12.7ДЯ NOJUyehn60nee detaIbHOn INHΦOpMaUN 06 yCTpaHEnn HEnCnpaBHOCTe, a TAKKe INHΦOpMaUN OФуHKuaX NHaCTpoiKaX, NoKanyIcTa NocTe HaW Be6caT: www.acoustie-energy.co.uk И сдeуITE CcbIrkam NOdEprxKn IONb3OBaTeJIa
13.Ифорmaцьо Лицен Ha nporpaMMHoe obecneueHne
3TOT npodukt codepknt npoprpaMMHoe oecneueHme liuehnpobahhoe noB bpcn 2 ot GNU Public License n Bpcn 2.1 ot GNU Lesser Public License, Vcxohbni kOd Ira 3TOrO npoprpaHoro oecneueHnMoKet 6bItb haJeH h caIte http://www RECiva.com/gpl/
3TOT npOyKT BkIIOuAe TExHOnoNHO, npHaadJeXaUH KOpnpaMn Microsoft n noJ liueh3ne oT Microsoft Licensing GP. IcNoJIb3OBAHne nn pacnpocTpaneHne daHHo TeXHoONrnn dJa ceJe He npEHa3NaHeHHbIX dJra daHHoro npOyKta 3aIpeSeHo 6e3 liueh3nn ot KopnpaMn Microsoft w/ni JIneH3nn ot Microsoft Licensing GP.
内容1.简介
Reciva Radio ARM Powered
数秒钟之后,显示屏将出现:
Waiting For Connection
接着显示:
Waiting For Connection
然后显示:
Wireless Network OK
Current Alarm 07:45 (On)
10. 通过收音机收听Windows Media Player
选择“Share this folder on the network”及“Allow network users to change my files”。
Manual Part No. MA1701