
Contour D1 - Loudspeaker PURE - Free user manual and instructions
Find the device manual for free Contour D1 PURE in PDF.
| Product Type | Speaker with docking station and radio |
| Brand | PURE |
| Model | Contour D1 |
| Dimensions (W x H x D) | 308 mm x 174 mm x 145 mm |
| Power Supply | 12 V DC, 2.4 A mains adapter (100-240 V AC, 50/60 Hz) |
| Radio Types | DAB/DAB+/DMB-R digital and FM (RDS) radio |
| Bluetooth | A2DP and AVRCP profiles |
| Docking Station | Compatible with iPhone, iPad, iPod (Lightning and 30-pin adapters included) |
| Auxiliary Input | 3.5 mm stereo mini-jack |
| Headphone Output | 3.5 mm stereo mini-jack |
| Speakers | 2 x 3 inch full-range drivers |
| Output Power | 2 x 10 W RMS (with bass vent) |
| Display | Customizable LCD with auto-dimming, large text and icons |
| Remote Control | Infrared, CR2025 coin cell battery included |
| Antenna | Telescopic |
| Alarms | 2 configurable alarms (radio, iPod, tone) with snooze |
| Sleep Timer | 15 to 90 minutes |
| Equalizer | Bass and treble adjustment from -3 to +3 |
| Software Update | Via USB (mini-B) or internet via Pure Connect |
| Cleaning | With a dry cloth only |
| Safety Instructions | Do not expose to water, heat sources, or open the casing |
| Warranty | 2 years (excluding accidental damage) |
Frequently Asked Questions - Contour D1 PURE
User questions about Contour D1 PURE
0 question about this device. Answer the ones you know or ask your own.
Ask a new question about this device
Download the instructions for your Loudspeaker in PDF format for free! Find your manual Contour D1 - PURE and take your electronic device back in hand. On this page are published all the documents necessary for the use of your device. Contour D1 by PURE.
USER MANUAL Contour D1 PURE
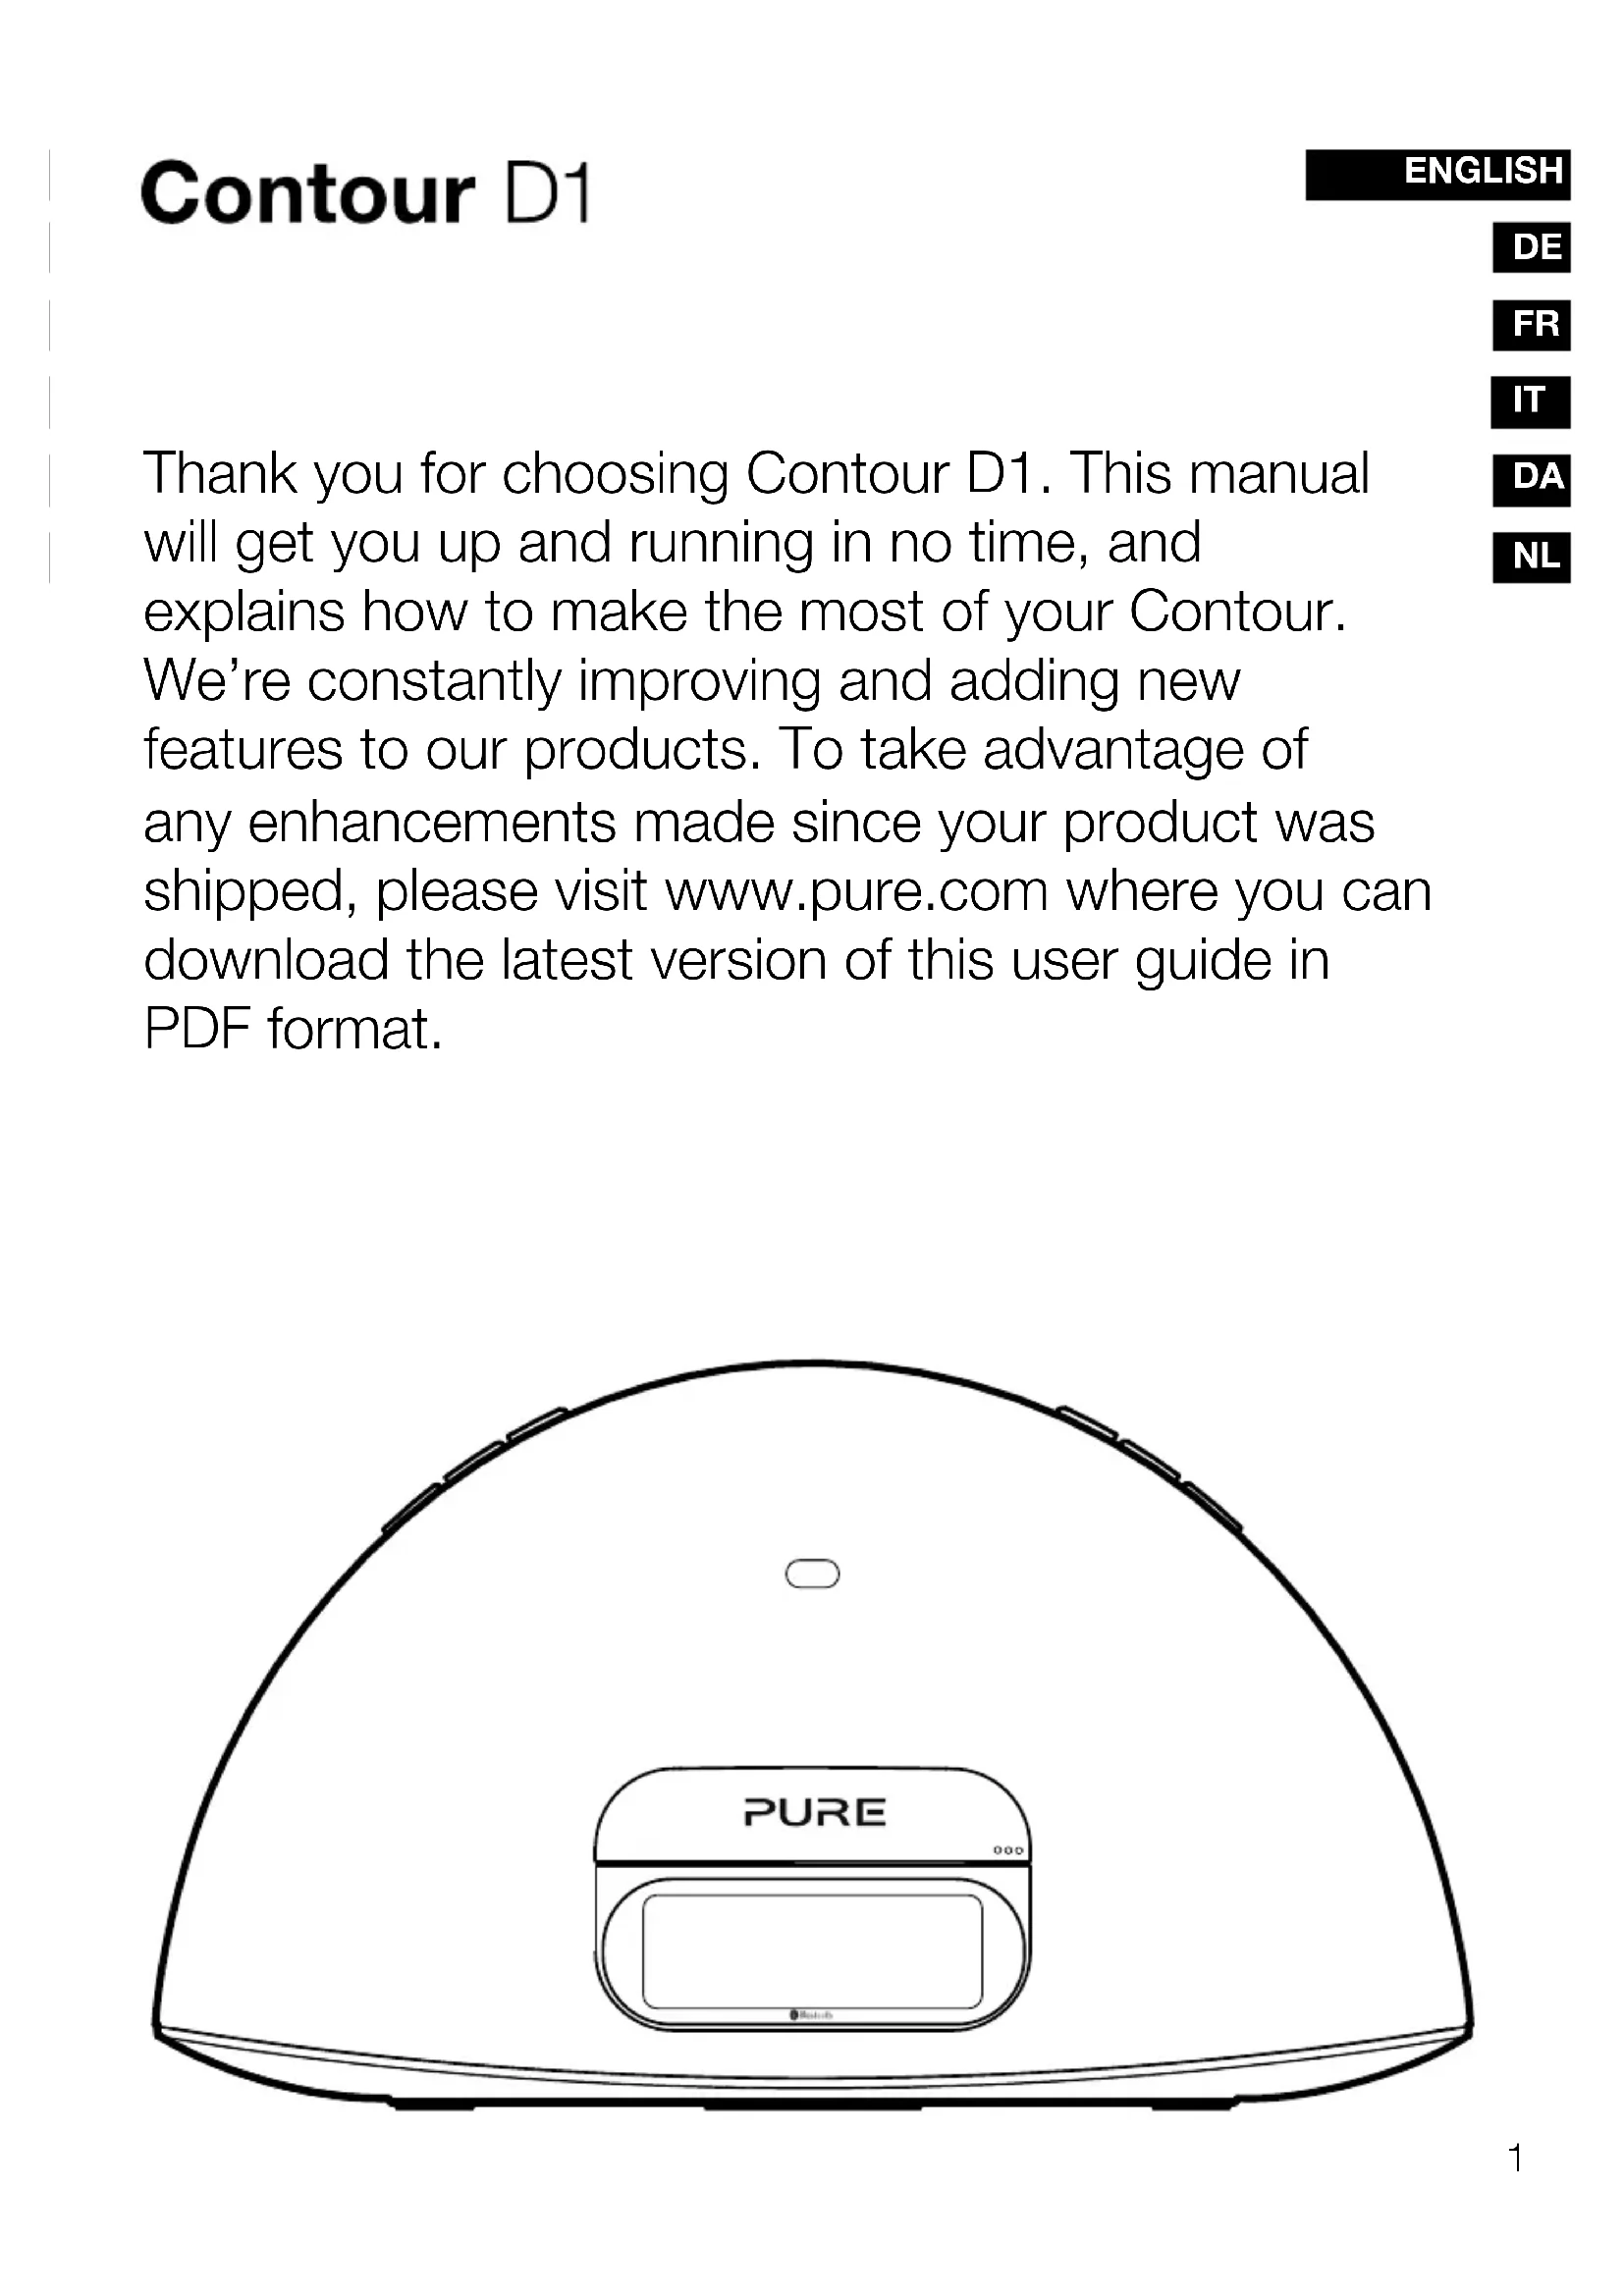
Thank you for choosing Contour D1. This manual will get you up and running in no time, and explains how to make the most of your Contour. We're constantly improving and adding new features to our products. To take advantage of any enhancements made since your product was shipped, please visit www.pure.com where you can download the latest version of this user guide in PDF format.
Safety instructions
- Read these instructions.
- Keep these instructions.
- Heed all warnings.
- Follow all instructions.
- Keep the radio away from heat sources such as naked flames, candles, radiators, heaters or other appliances that produce heat.
- Do not expose the unit to direct sunlight.
- Do not use the radio near water
- Avoid objects or liquids getting into the radio.
- Clean only with dry cloth.
- Ensure that the unit has adequate ventilation (at least 10cm space all round).
- Do not remove screws from or open the radio casing.
- Fit the mains adapter to an easily accessible socket, located near the radio in case isolation from the mains is required and ONLY use the mains power adapter supplied by Pure (model number KSAS0251200240HK or KSAS0251200240D5).
- Only use attachments/accessories specified by the manufacturer.
- When plugged in, the radio remains connected to the mains power, even in standby with the display backlight off.
- To disconnect completely, unplug from the mains socket.
- WARNING: To reduce the risk of fire or electric shock, do not expose this apparatus to rain or moisture. The apparatus shall not be exposed to dripping or splashing and objects filled with liquids, such as vases, shall not be placed on apparatus.
- CAUTION: Danger of explosion if the battery in the remote control is incorrectly replaced. Replace only with the same or equivalent type.
- WARNING: The battery in the remote control shall not be exposed to excessive heat such as sunshine, fire or the like.

WARNING
DO NOT INGEST BATTERY, CHEMICAL BURN HAZARD
The remote control supplied with this product contains a coin/button cell battery. If the coin/button cell battery is swallowed, it can cause severe internal burns in just 2 hours and can lead to death. Keep new and used batteries away from children. If the battery compartment does not close securely, stop using the product and keep it away from children. If you think batteries may have been swallowed or placed inside any part of the body, seek immediate medical attention.

Damage to hearing can occur with consistent exposure to high volume when using headphones. Always check the volume level before inserting headphones into your ears. Stop listening to your radio if you find it distracting while performing any activity that requires your full attention.
Contents
4 Getting started
4 Setting up
7 Controls and connectors
8 Remote control
8 Display
9 Listening to iPod/iPhone/iPad
10 Pure Connect app
11 Listening to radio
11 Selecting Digital or FM radio
11 Changing stations
11 Saving and selecting your favourite stations
11 Changing the information displayed on screen
12 Using Bluetooth
12 Using the aux input
13 Alarms and timers
13 Setting an alarm
14 Cancelling a sounding alarm
14 Snoozing a sounding alarm
14 Changing the snooze duration
14 Cancelling a snoozing alarm
14 Setting the sleep timer
14 Cancelling the sleep timer
15 Options and settings
15 Digital radio options
15 FM radio options
15 General options
16 Advanced options
17 Help
17 Secondary and inactive stations
17 Hints and tips
18 Specifications
Getting started
Setting up

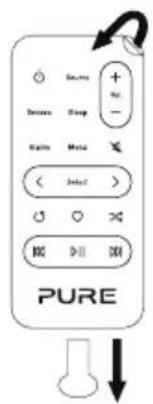
Pull the plastic tab from the remote control battery compartment and remove the protective film from remote buttons.

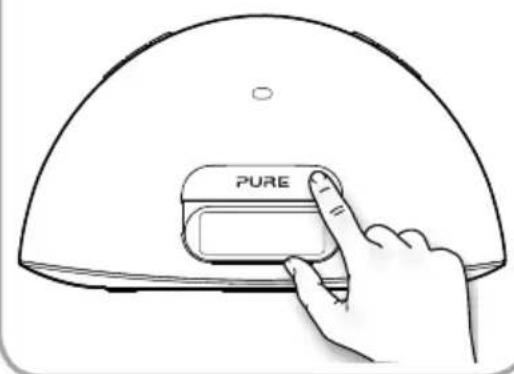
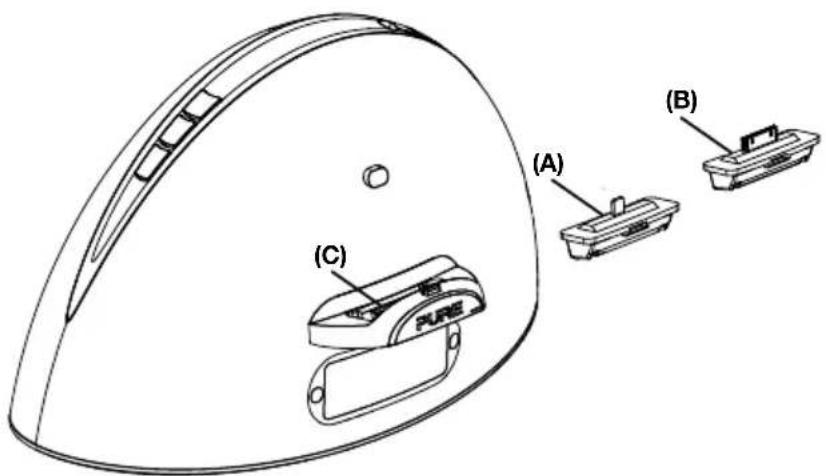
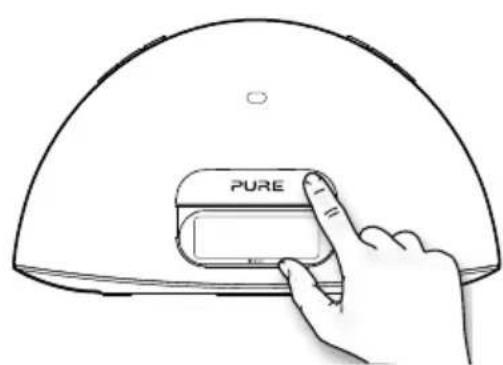
Push the right hand end of the front panel to release the dock.

Insert the adaptor (lightning A) or 30 pin B) that corresponds to your iPod/iPhone/ iPad into the connector socket C as shown on the following page.
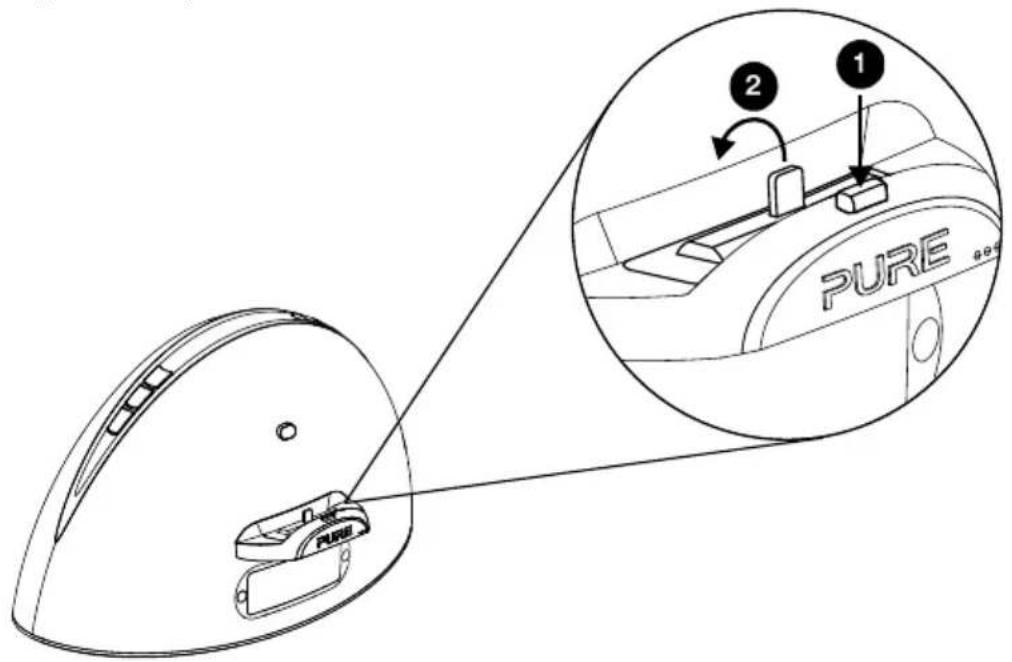
Removing an adaptor:
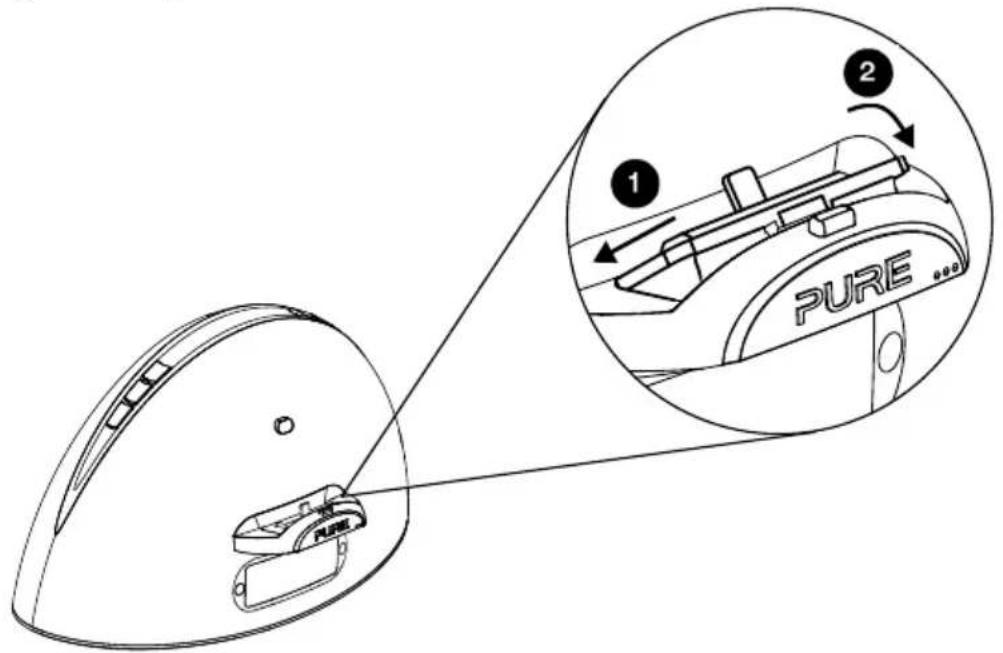
Inserting an adaptor:

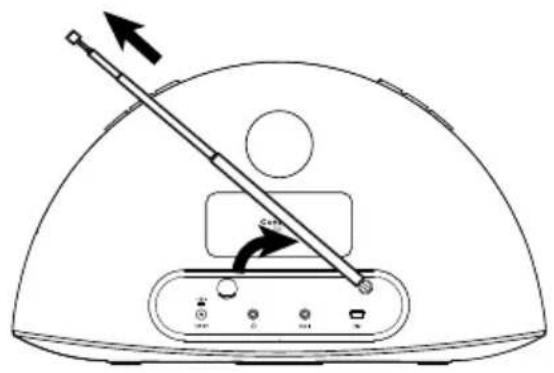
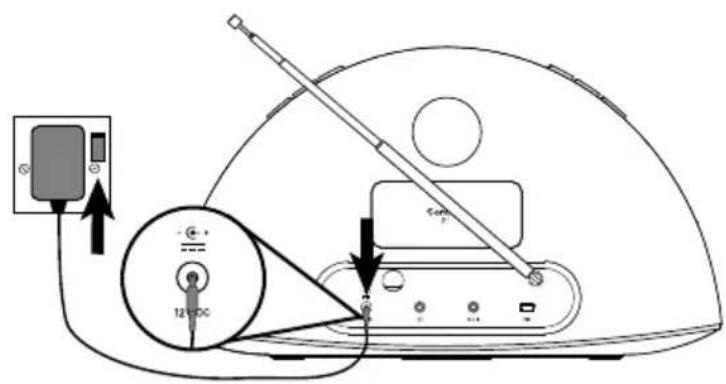
Fully extend the aerial.

Insert the connector of the mains power adapter into the socket on the rear of Contour. Attach the appropriate adapter pins for your region, if required and plug in to the mains supply.

Press and on the remote to view the available languages (English/French/German/Italian/Spanish) used for displaying menus and options and press Select to confirm your choice.


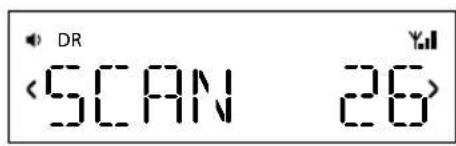
Wait for Contour to complete an autotune, which finds all available digital stations (this takes about one minute).
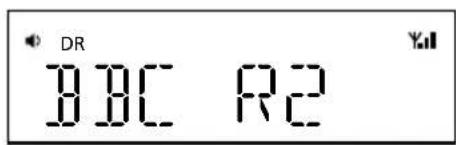
When the autotune is complete, a digital station will be selected.
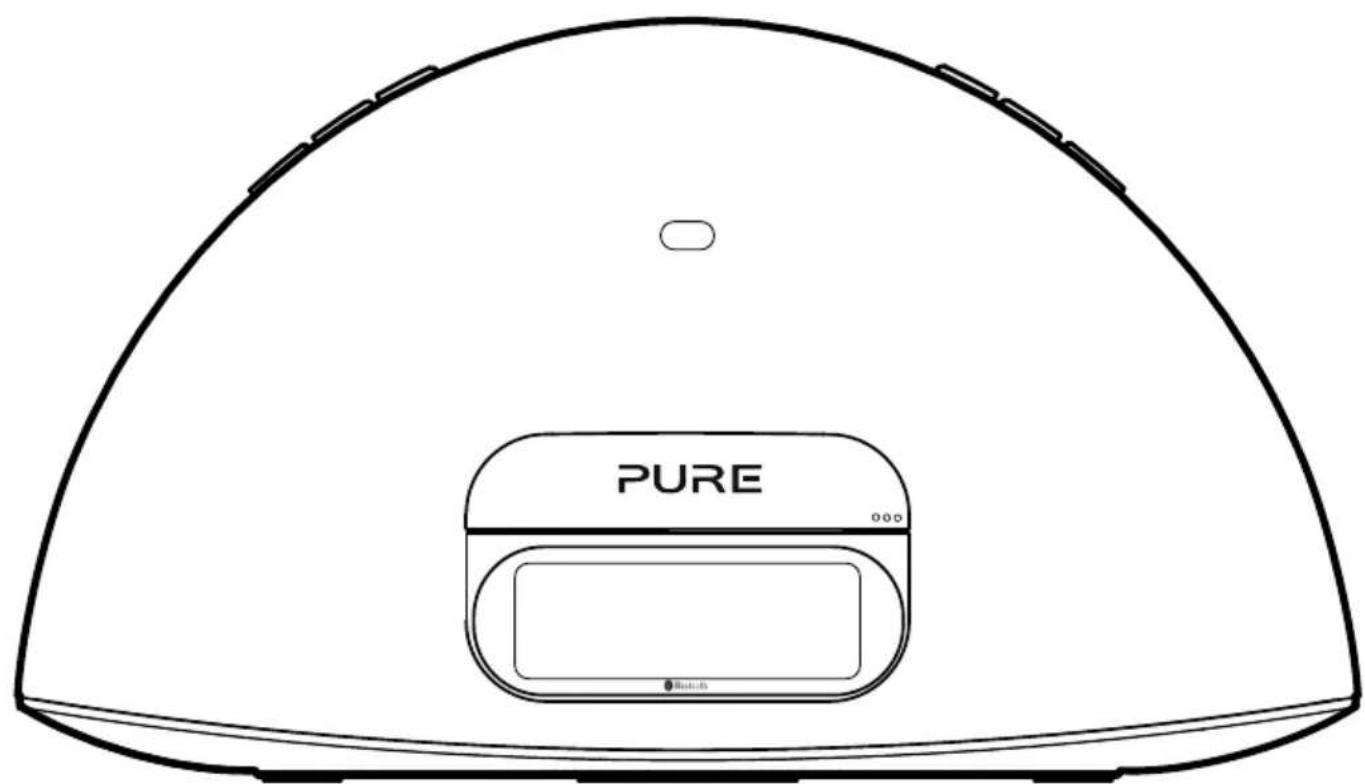
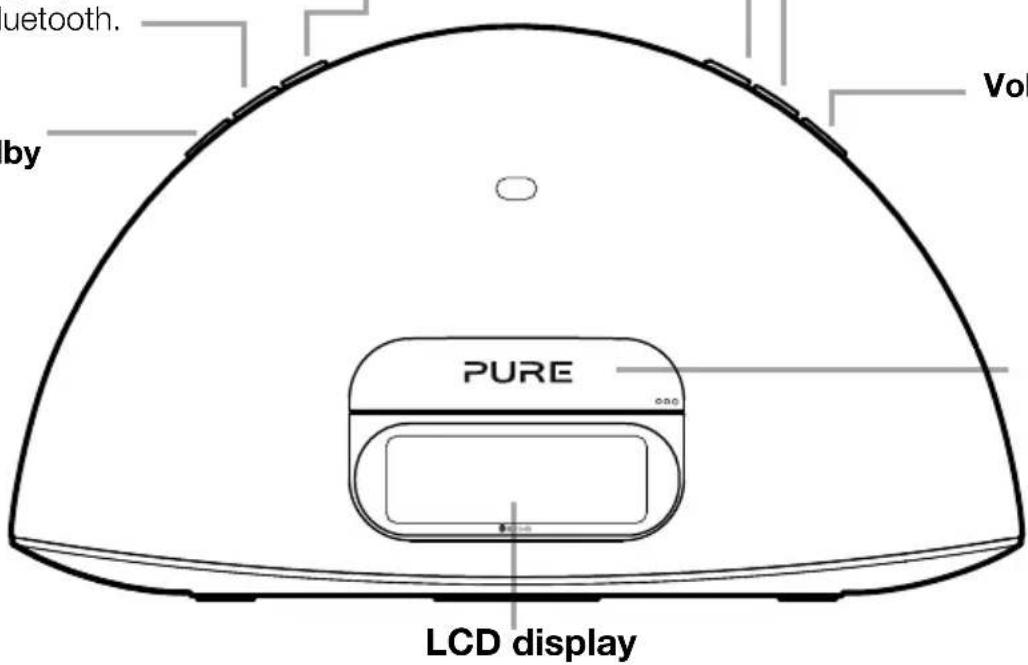
Controls and connectors
Source
Press to change between Digital radio, FM, iPod, Auxiliary input and Bluetooth.
Favourites/Snoopze
Press and repeat to browse through your favourite stations. Press to snooze a sounding alarm.
Mute
Volume down
Volume up
On/
Standby
iPod/iPhone/ iPad dock
Press the right hand end of the front panel to open the iPod dock.
LCD display

Bass port
Remote control holder
Storage recess for remote control.
Power adapter socket
Connector for supplied mains power adapter.
Headphone socket
3.5mm stereo headphone socket.
Aux In socket
Analogue stereo input for MP3 player.
USB socket
USB connector for software updates (mini-B type).
Remote control

On/Standby
Snoopze
Press to view the current Snooze time. Use < > and Select to change. Press to snooze a sounding alarm.
Sleep
Press and repeat to set a sleep timer. See page 14.
Alarm
Press to set up an alarm. See page 13.
Menu
Press to view options menu. In iPod source press to navigate iPod menu.*

Play/Pause
Play/pause current track.
Source
Press to change between Digital radio, FM, iPod, Auxiliary input and Bluetooth.
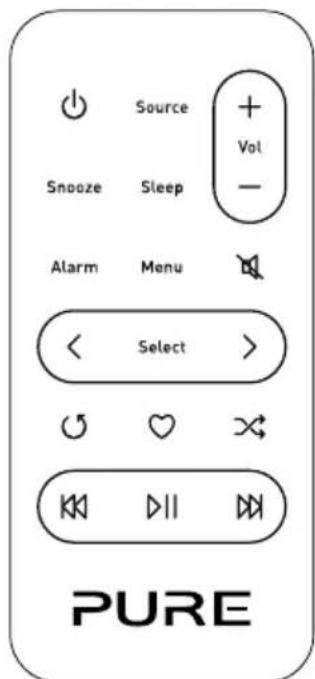
and Skip to start of current track or go to previous/next track. Hold to fast rewind or fast forward. In FM seek tune to the next station.

Volume up

Volume down

Mute

Select>
Browse and select tracks and menu options. In FM < step down and up the frequency range in steps of 0.05 MHz. Press and hold to seek tune to the next station.

Repeat
Toggle to repeat current track, repeat all or no repeat.

Shuffle
Shuffle the track playback order.

Favourites
Press to view your favourite stations list. Then press and hold to save the current station.
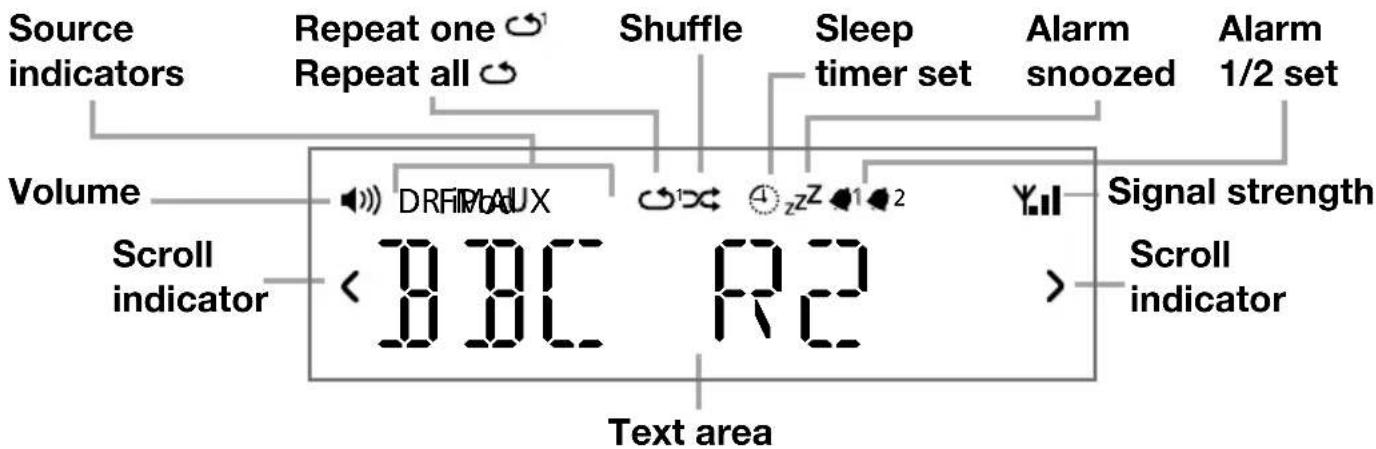
Display
Listening to iPod/iPhone/iPad EN
Compatibility
Contour is compatible with most iPod, iPhone and iPad models. For the latest information, check the compatibility table on our website: www.pure.com/products/ipod-compatibility.
Docking your device
- Push the right hand end of the front panel as shown to release the dock.
- Carefully dock your device onto the connector.
Your device will start charging as soon as it is docked and will continue charging whether Contour is switched on or in standby.
Note: If Contour is switched on, Contour will automatically switch to the iPod source as soon as you dock your iOS device. If Contour is in standby, Contour will remain in standby and start charging your iOS device.
Note: The headphone socket is disabled when an iPhone/iPod/iPad is docked.

Selecting the iPod source
Press the Source button to select IPOD. On devices with apps you can also play audio from other apps e.g. the Pure Connect app, if you pause the iPod playback.
Controlling your device
When the iPod source is selected your device will start playing the last iPod track you were listening to. Use the remote or controls on your Apple device to navigate menus and control playback.
To access the Contour options menu while you have an iPod/iPhone docked, press and hold the Menu button on the remote.*
Changing the information displayed on screen
Press and hold the Menu button, press Select to choose the DISPLAY option.
Choose one of the following options:
TITLE/ARTIST Track title and artist name.
TIME Full screen clock.
*Not supported on Apple products running iOS version 7.
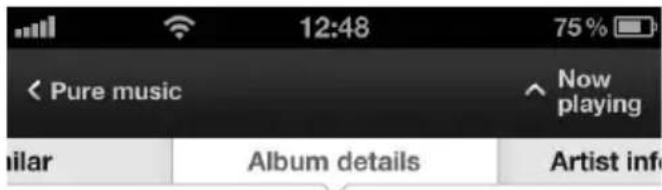
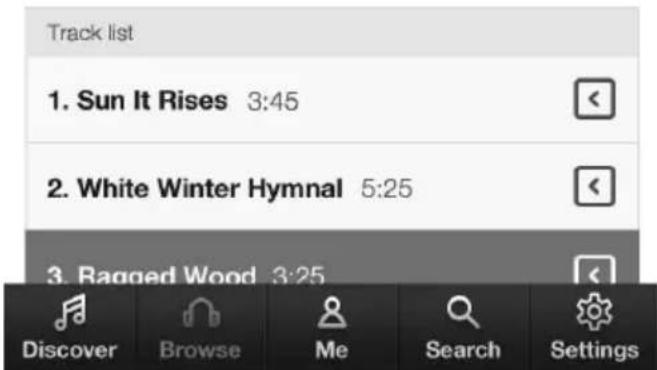
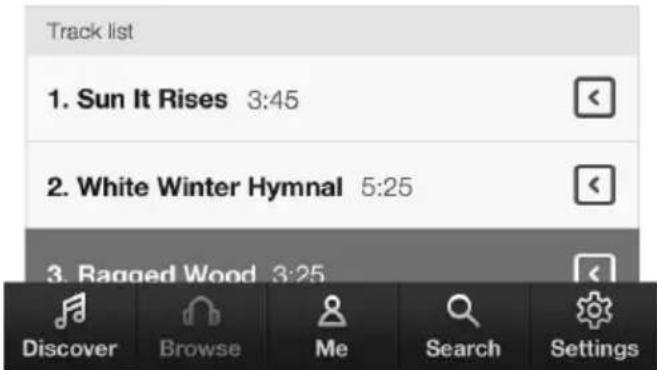
Pure Connect app
Make the most of Contour's high quality audio by installing the free Pure Connect app on your iPod touch, iPhone or iPad. The Pure Connect app gives you free access to thousands of internet radio stations, on demand content (podcasts and listen again programmes) and ambient sounds, as well as millions of tracks, via Pure's on-demand music streaming service.


Fleet Foxes Fleet Foxes


Fleet Foxes are an indie folk band that formed in Seattle, Washington. They are signed to the Sub Pop and Bella Union record labels... Read more

iOS Pure Connect App
Listening to radio
EN
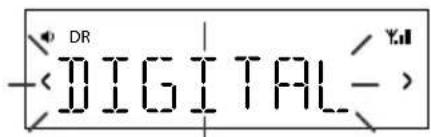
Selecting Digital or FM radio
Press the Source button to select DIGITAL or FM. You'll see the relevant icon.
Changing stations
Digital
Press
FM
Press for hold or to seek to the next station with a strong signal.
Press < or > to change the frequency in steps of 0.05 MHz.
Saving and selecting your favourite stations
You can save up to 40 (FM or digital) stations in a list for easy access.
Saving
- Tune to the station you want to save as a favourite.
- Press on the remote to view the favourites list.
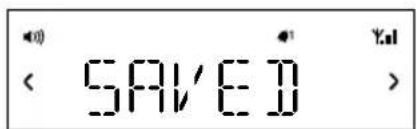
- Press < or > on the remote to decide where you want to save the favourite (if you choose an existing favourite it will be replaced).
- Press and hold down or Select on the remote until you see 'SAVED' on the screen.
Selecting
Press on the unit or remote to view the favourites list.
Press again on the unit to cycle through the list or press on the remote.
Wait for the station to change if using the main unit or press Select on the remote to change immediately.
Changing the information displayed on screen
Press the Menu button, press and to browse and press Select to choose the DISPLAY option.
Choose one of the following options:
STATION Station name or frequency.
TEXT Scrolling text broadcast by the station.
TIME Full screen clock updated by the radio broadcast.
Using Bluetooth
You can stream audio to Contour from a Bluetooth device.
Note: Adding a Bluetooth device varies on different mobile devices. See your Bluetooth mobile device manual for specific information.
Preparing Contour to stream audio using Bluetooth
- Enable Bluetooth on your mobile device.
- On your mobile device, select the option to add a new Bluetooth device. On some mobile devices you may need to select the search or scan option.
- Start the pairing process on your mobile device. Do this by selecting CONTOUR D1 *** from the list of available devices that appear on the mobile device's screen. On most Bluetooth devices, your device will automatically connect to Contour once paired. On some devices, you will need to manually connect after pairing. See your Bluetooth device user guide for more information.
Note: ***** represents a six digit code that will be unique to each Contour.
Any audio you play on your mobile device will now be streamed to your Contour.
Note: If you cannot see Contour when searching for Bluetooth devices, check that the
Bluetooth setting is set to "On" on Contour (see page 16 for more information).
Note: You will need to disconnect any connected mobile Bluetooth devices from Contour to stream from a different Bluetooth device. Bluetooth will automatically disconnect if you go out of range of Contour. To manually disconnect you will usually need to use the Bluetooth settings on your mobile device.
Note: Some legacy Bluetooth devices may prompt you to enter a passcode when trying to pair with Contour. If this occurs, enter the code 0000.
Using the aux input
Connecting an auxiliary device
Connect the line out or headphone socket of your auxiliary device to the Aux-In socket on your Contour using a suitable cable.

Selecting the auxiliary input
Press the Source button to select AUX.
Alarms and timers
Contour features two alarms and a sleep timer.
Setting an alarm
You can set an alarm to sound a tone, tune to a radio station or play a track from your iPod/iPhone.
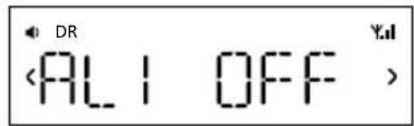
Press the Alarm button on the remote to show the status of Alarm 1, press
Press the Select button to choose and adjust either alarm and press or and Select to adjust the following settings:
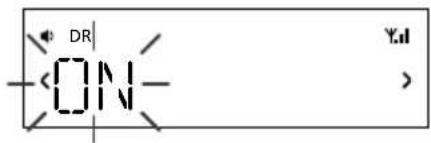
Alarm on/off
Press < or > to choose between 'ON' (alarm sounds) or 'OFF' (alarm does not sound) and press Select.
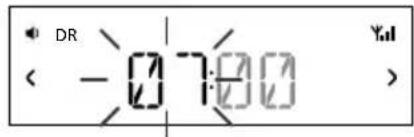
Time
Set the alarm time. Press < or > to adjust the hours then press Select. Repeat to set the minutes then press Select.
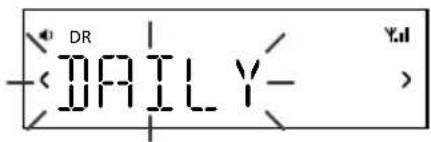
Days
Set the days that the alarm sounds. Press < or > to choose between: DAILY (every day), ONCE (no repeat), WEEKENDS or WEEKDAYS (Monday to Friday) then press Select.
Type
Press < or > to choose between: DIGITAL, FM, IPOD or TONE (buzzer).
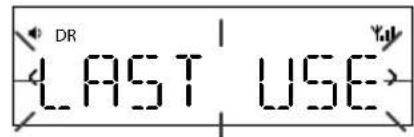
Station
If you've set alarm mode as DIGITAL or FM, press < or > to choose between: LAST USED (Last station tuned to) or select a favourite if you have any saved.
Note: NO PRESETS is displayed if you have not created any favourites.
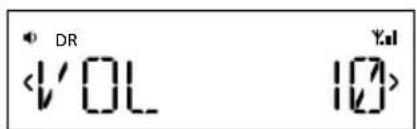
Volume
Press
You see the message 'SAVED' once you have completed all the alarm settings.
The 1 and 2 icons on the screen indicate when an alarm is set.
Cancelling a sounding alarm
To cancel a tone alarm press the Alarm, Select or Standby button.
To cancel a radio alarm press any button except volume.
Note: A sounding alarm will switch off after one hour unless you cancel it.
Snoozing a sounding alarm
To snooze a sounding alarm press the Favourites/Snoopze button on Contour or the Snooze button on the remote. The alarm will be silenced for 10 minutes (the default snooze time) then sound again.
The z^Z icon on the screen indicates when an alarm is snoozed.
Changing the snooze duration
The default snooze time for the alarms is 10 minutes. To change the snooze time:
Press the Snooze button on the remote and press < or > to choose a snooze duration then press Select to confirm. You can also change the snooze duration in the Clock menu. See the following page for more information.
Cancelling a snoozing alarm
To cancel a snoozing alarm press the Alarm or Select button.
Setting the sleep timer
The sleep timer switches your radio into standby after a number of minutes has elapsed.
- Press the Sleep button on the remote and repeat to increase the duration of the sleep timer from 15 to 90 minutes
- Push Select, or wait to start the sleep timer.
The ① icon on the screen indicates when the sleep timer is set.
Note: Press the Sleep button on the remote control again at any time to view the time remaining.
Cancelling the sleep timer
Press the Sleep button and set the timer duration to OFF.
Options and settings
EN
Press the Menu button to access the options menu, press
Digital radio options
Autotune
Scans all digital frequencies for stations, automatically adds any new stations found to the station list and removes inactive stations. To stop an autotune press Menu.
FM radio options
FM Stereo
Choose from Stereo or Mono (default). Mono may improve audio clarity where stereo signals are weak.
General options
Clock
The clock is automatically set if you have a good digital or FM (RDS) signal and will automatically update for daylight saving time. You can adjust the following settings:
SET TIME Manually set the time and date if required.
12/24HR Choose between 12 or 24 hour time display.
SNOOZE Set your preferred snooze duration for alarms.
SYNC TO Choose the radio source that you want to use for setting the time.
BOTH (Default) Set the time by using both the digital and FM (RDS) radio signal.
DIGITAL Set the time using the digital radio signal.
FM Set the time using the FM (RDS) signal.
Backlight
DURATION
Choose how long the backlight remains switched on:
TIMED The backlight turns on for 7 seconds when any button is pressed (default).
OFF The backlight does not switch on
ON The backlight is always on when the radio is on.
LEVEL
Choose the brightness of the backlight:
AUTO Adjusts automatically depending on the light level in your room (default).
1-5 Set a brightness level between 1 (dim) and 5 (bright).
Audio
Adjust the bass and treble:
BASS Adjust the bass between -3 (minimal bass), 0 (neutral) and 3 (maximum bass).
TREBLE Adjust the treble between -3 (minimal treble), 0 (neutral) and 3 (high treble).
Language
Choose from English, French, German, Italian or Spanish.
Advanced options
Press the Menu button to access the options menu, press or to scroll to SETTINGS and press Select to confirm.
Bluetooth
You can use the Bluetooth menu to make Contour visible or invisible to other Bluetooth devices. Choose from one of the following options:
ON (DISCOVERABLE)
ON (HIDDEN)
OFF
Bluetooth name
Scroll to BT NAME and press Select to display the name that Bluetooth uses to identify Contour.
Bluetooth version
Scroll to BT VER and press Select to display the Bluetooth version on Contour.
Bluetooth upgrade
Scroll to BT UPGRD and press Select to upgrade the Bluetooth software on Contour.
Version
Scroll × to VERSION and press Select to display the software version on Contour.
Update
Scroll to UPDATE and press Select to update Contour's software. Software updates for your Contour D1 may be made available in the future. If you register your product and include a valid e-mail address you will receive notification of software updates (register at www.pure.com/ register). Available software updates are also listed at: http://support.pure.com.
Reset
Reset removes all saved favourites and resets all options to their defaults. Scroll< >to RESET and press Select.
Choose YES to confirm the reset or NO to cancel the reset.
Secondary and inactive stations
Secondary digital services
Secondary services accompany some stations, providing extra information or alternative content and may only be broadcast at certain times. Secondary services will appear next to the primary station in the list.
Inactive or unavailable digital radio station
Inactive or unavailable stations
Inactive or unavailable stations are those which appear on the station list but are not currently available because either you are outside the broadcast area, have lost reception or the station is not currently broadcasting. Unavailable stations have a '?' before their name on the station list. If you select a station which has this symbol, your radio tries to tune to that station. If still unavailable, you will return to the last station you were listening to.
Hints and tips
Display says 'NO SIG'
Use Autotune (page 15) to search for stations. Try adjusting your aerial or radio position.
Receiving new digital stations that have started broadcasting
Use Autotune (page 15) to scan for new stations and add any new stations to the station list.
Contour does not recognise my iOS device
If Contour does not recognise your iOS device after it has been docked, try cleaning the contacts of the connector module with a dry cloth.
Specifications
Radio Digital and FM radio
Frequencies DAB/DAB+/DMB-R/Parametric stereo decode up to 256 kbps, FM radio 87.5-108 MHz
Bluetooth A2DP and AVRCP support
iPod/iPhone/iPad Supports most iPod, iPhone and iPad models. For the latest information, check the compatibility table on our website: www.pure.com/products/ipod-compatibility.
Speakers 2 full-range 3'' drive units.
Audio output 2 x 10W RMS. Rear bass port.
Input connectors 12V DC power adapter socket. iPod/iPhone/iPad connector. 3.5mm Aux-in for auxiliary devices. USB (mini-B type) for software updates.
Output connectors 3.5mm stereo output for headphones.
LCD display Custom auto-dimming LCD display, large text and feature icons.
Remote control Infrared remote control. CR2025 button cell battery included.
Mains power supply Adapter: Input: 100-240V, 50/60Hz, 0.9A Output: DC 12V, 2.4A; Main unit: DC 12V
Dimensions 308mm wide x 174mm high x 145mm deep.
Aerial Telescopic aerial.
Approvals CE marked. Compliant with the EMC and Low Voltage Directives (2004/108/EC and 2006/95/EC). ETSI EN 300 401 compliant.
Copyright
Copyright 2013 by Imagination Technologies Limited. All rights reserved. No part of this publication may be copied or distributed, transmitted, transcribed, stored in a retrieval system, or translated into any human or computer language, in any form or by any means, electronic, mechanical, magnetic, manual or otherwise, or disclosed to third parties without the express written permission of Imagination Technologies Limited. Version 1 November 2013.
Trademarks
Contour, Pure, the Pure logo, Imagination Technologies, and the Imagination Technologies logo are trademarks or registered trademarks of Imagination Technologies Limited.
iPad, iPod and iPhone are trademarks of Apple Inc., registered in the U.S. and other countries.
"Made for iPod," "Made for iPhone," and "Made for iPad" mean that an electronic accessory has been designed to connect specifically to iPod, iPhone or iPad, respectively, and has been certified by the developer to meet Apple performance standards. Apple is not responsible for the operation of this device or its compliance with safety and regulatory standards. Please note that the use of this accessory with iPod, iPhone or iPad may affect wireless performance.
All other product names are trademarks of their respective companies.
Warranty Information
Imagination Technologies Limited warrants to the end user that this product will be free from defects in materials and workmanship in the course of normal use for a period of two years from the date of purchase. This guarantee covers breakdowns due to manufacturing or design faults; it does not apply in cases such as accidental damage, however caused, wear and tear, negligence, adjustment, modification or repair not authorised by us. Please visit www.pure.com/register to register your product with us. Should you have a problem with your unit please contact your supplier or contact Pure Support at the address shown on the rear of this manual. If you need to return your product please use the original packaging and include all parts and accessories. We reserve the right to refuse incomplete or badly packaged returns.
Disclaimer
Imagination Technologies Limited makes no representation or warranties with respect to the content of this document and specifically disclaims any implied warranties of merchantability or fitness for any particular purpose. Further, Imagination Technologies Limited reserves the right to revise this publication and to make changes in it from time to time without obligation of Imagination Technologies Limited to notify any person or organization of such revisions or changes.
Correct disposal of this product

This marking indicates that this product should not be disposed with other household waste throughout the EU. To prevent possible harm to the environment or human health from uncontrolled waste disposal, recycle it responsibly to promote the sustainable reuse of material resources. To return your used device, please use the return and collection system or contact the retailer where the product was purchased. They can take this product for environmental safe recycling.
Contour D1
EN
DEUTSCH
iPod-/iPhone-/iPad-Dock

Fleet Foxes Fleet Foxes


Fleet Foxes are an indie folk band that formed in Seattle, Washington. They are signed to the Sub Pop and Bella Union record labels... Read more
iOS Pure Connect App
Radio horen
DE

Fleet Foxes Fleet Foxes


Fleet Foxes are an indie folk band that formed in Seattle, Washington. They are signed to the Sub Pop and Bella Union record labels... Read more

ACTIVE (DECOUVRABLE)
ACTIVÉ (MASQUÉ)
DÉSACTIVÉ
Nom du Bluetooth
kbit/s, radio FM 87,5 - 108 MHz

Fleet Foxes Fleet Foxes


Fleet Foxes are an indie folk band that formed in Seattle, Washington. They are signed to the Sub Pop and Bella Union record labels... Read more
App Pure Connect per iOS
Ascolto della radio
www.pure.com/products/ipod-compatibility.

Fleet Foxes Fleet Foxes


Fleet Foxes are an indie folk band that formed in Seattle, Washington. They are signed to the Sub Pop and Bella Union record labels... Read more

iOS Pure Connect-app
Afpilning af radio
Valg af digital-ller FM-radio
iPod/iPhone/ iPad-dock

Fleet Foxes Fleet Foxes


Fleet Foxes are an indie folk band that formed in Seattle, Washington. They are signed to the Sub Pop and Bella Union record labels... Read more

iOS Pure Connect App
Imagination Technologies Limited
Home Park Estate
Kings Langley
Herts,WD4 8LZ
United Kingdom
http://support.pure.com
Pure
Friedrich-Ludwig-Jahn
StraBe 2-14
64589 Stockstadt/Rhein
Deutschland
http://support.pure.com/de

- Safety instructions
- WARNING
- Contents
- Getting started
- Listening to iPod/iPhone/iPad
- Listening to radio
- Using Bluetooth
- Using the aux input
- Alarms and timers
- Options and settings
- Help
- Specifications
- Getting started
- Setting up
- Controls and connectors
- Source
- Favourites/Snoopze
- iPod/iPhone/ iPad dock
- Remote control holder
- Power adapter socket
- Headphone socket
- Aux In socket
- USB socket
- Remote control
- Snoopze
- Sleep
- Alarm
- Menu
- Select>
- Repeat
- Shuffle
- Favourites
- Display
- Listening to iPod/iPhone/iPad EN
- Compatibility
- Docking your device
- Selecting the iPod source
- Controlling your device
- Changing the information displayed on screen
- Pure Connect app
- Listening to radio
- Selecting Digital or FM radio
- Changing stations
- Digital
- FM
- Saving and selecting your favourite stations
- Saving
- Selecting
- Using Bluetooth
- Preparing Contour to stream audio using Bluetooth
- Using the aux input
- Connecting an auxiliary device
- Selecting the auxiliary input
- Alarms and timers
- Setting an alarm
- Alarm on/off
- Time
- Days
- Type
- Station
- Volume
- Cancelling a sounding alarm
- Snoozing a sounding alarm
- Changing the snooze duration
- Cancelling a snoozing alarm
- Setting the sleep timer
- Cancelling the sleep timer
- Options and settings
- Digital radio options
- Autotune
- FM radio options
- FM Stereo
- General options
- Clock
- Backlight
- DURATION
- LEVEL
- Audio
- Language
- Advanced options
- Bluetooth
- Bluetooth name
- Bluetooth version
- Bluetooth upgrade
- Version
- Update
- Reset
- Secondary and inactive stations
- Secondary digital services
- Inactive or unavailable stations
- Hints and tips
- Display says 'NO SIG'
- Receiving new digital stations that have started broadcasting
- Contour does not recognise my iOS device
- Specifications
- Copyright
- Trademarks
- Warranty Information
- Disclaimer
- Correct disposal of this product
- Contour D1
- iPod-/iPhone-/iPad-Dock
- Radio horen
- Nom du Bluetooth
- Ascolto della radio
- Afpilning af radio
- Valg af digital-ller FM-radio
- iPod/iPhone/ iPad-dock
- Pure
Brand : PURE
Model : Contour D1
Category : Loudspeaker