Evoke D4 Bluetooth - Radio PURE - Free user manual and instructions
Find the device manual for free Evoke D4 Bluetooth PURE in PDF.


| Product Type | Digital and FM Radio |
| Brand | Pure |
| Model | Evoke D4 Bluetooth |
| Dimensions (W x H x D) | 180 x 217 x 115 mm |
| Weight | Approximately 1.2 kg |
| Power Supply | Mains adapter 9 V DC, 1500 mA (supplied) or rechargeable battery ChargePAK F1 (optional) |
| Power Consumption | In use: 3.5 W; Standby with display: < 0.8 W; Standby without display: < 0.5 W |
| Speaker | 3-inch full-range |
| Display | OLED screen 128 x 22 pixels white on black background |
| Presets | 15 DAB stations and 15 FM stations |
| Connectivity | Bluetooth, auxiliary input (3.5 mm jack), headphone output (3.5 mm jack), USB mini-B port (for updates) |
| Main Functions | DAB/DAB+/FM Radio, Bluetooth streaming, dual alarms, kitchen timer, sleep timer, snooze, scrolling text, auto-tune |
| Care and Cleaning | Clean with a soft, dry cloth. Do not use abrasive products. |
| Safety | Do not expose to water, do not open the casing, use only the supplied adapter, keep button batteries out of reach of children |
| Spare Parts and Repairability | Mains adapter (ref. ZDD090150, ZDD090150BS, ZDD090150AU) and ChargePAK F1 battery available separately. Repairs by a professional. |
| General Information | 3-year warranty, CE certification, C-Tick mark |
Frequently Asked Questions - Evoke D4 Bluetooth PURE
User questions about Evoke D4 Bluetooth PURE
0 question about this device. Answer the ones you know or ask your own.
Ask a new question about this device
Download the instructions for your Radio in PDF format for free! Find your manual Evoke D4 Bluetooth - PURE and take your electronic device back in hand. On this page are published all the documents necessary for the use of your device. Evoke D4 Bluetooth by PURE.
USER MANUAL Evoke D4 Bluetooth PURE
Thank you for choosing Evoke D4 with Bluetooth. This manual will get you up and running in no time and explains how to make the most of Evoke's great features. If you need additional help with topics not covered in this manual, please visit the Pure support pages at support.pure.com.
Safety Instructions
- Read these instructions – All the safety and operating instructions should be read before this product is operated.
- Keep these instructions – The safety and operating instructions should be retained for future reference.
- Heed all warnings – All warnings on the appliance and in the operating instructions should be adhered to.
- Follow all instructions – All operating and use instructions should be followed.
- Keep the radio away from heat sources such as radiators, heaters or other appliances that produce heat.
- Do not expose the unit to direct sunlight.
- Do not use the radio near water.
- Avoid objects or liquids getting into the radio.
- Do not remove screws from or open the radio casing.
- Fit the mains adapter to an easily accessible socket, located near the radio and ONLY use the mains power adapter supplied by Pure (model number ZDD090150, ZDD090150BS or ZDD090150AU).
- Always switch the radio off and disconnect it from mains power before inserting or removing a ChargePAK.
- Should not be immersed in water, used in shower or bathroom if plugged into the mains.
- WARNING: To reduce the risk of fire or electric shock, do not expose this apparatus to rain or moisture. The apparatus shall not be exposed to dripping or splashing and objects filled with liquids, such as vases, shall not be placed on apparatus.
- WARNING: The direct plug-in adapter is used as disconnect device, the disconnect device shall remain readily operable.
- CAUTION: Danger of explosion if battery is incorrectly replaced. Replace only with the same or equivalent type.
- WARNING: The battery (battery or batteries or battery pack) shall not be exposed to excessive heat such as sunshine, fire or the alike.
- This equipment is a Class II or double insulated electrical appliance. It has been designed in such a way that it does not require a safety connection to electrical earth.

WARNING
DO NOT INGEST BATTERY, CHEMICAL BURN HAZARD
The remote control supplied with this product contains a coin/button cell battery. If the coin/button cell battery is swallowed, it can cause severe internal burns in just 2 hours and can lead to death.
Keep new and used batteries away from children. If the battery compartment does not close securely, stop using the product and keep it away from children. If you think batteries may have been swallowed or placed inside any part of the body, seek immediate medical attention.

Damage to hearing can occur with consistent exposure to high volume when using headphones. Always check the volume level before inserting headphones into your ears.
Use of headphones while operating a vehicle is not recommended and is illegal in some areas. Stop listening to your radio if you find it distracting while operating any type of vehicle or performing any other activity that requires your full attention.
Contents
EN
4 Introduction
4 Front panel controls
5 Rear connectors
5 Remote control
6 Switching between Sleep, Standby and On
7 Getting started
8 Changing digital radio stations
8 Changing FM radio stations
9 Pausing and controlling scrolling text
10 Storing and selecting presets
10 To quick-store a station to a preset button (1-4)
10 To store a station to the preset list (1–15)
10 To recall a preset when listening to digital radio or FM radio
11 Using Bluetooth
12 Setting the alarm & timers
12 Snoozing a sounding alarm
13 Changing the alarm snooze time
13 Setting the kitchen timer
13 Setting the sleep timer
14 Options and settings
14 Digital radio settings
14 FM radio settings
15 General settings
16 Clock settings
17 Display settings
17 Bluetooth settings
18 Using a ChargePAK F1
19 Help and specifications
22 Pure Warranty Statement for Australia
Introduction
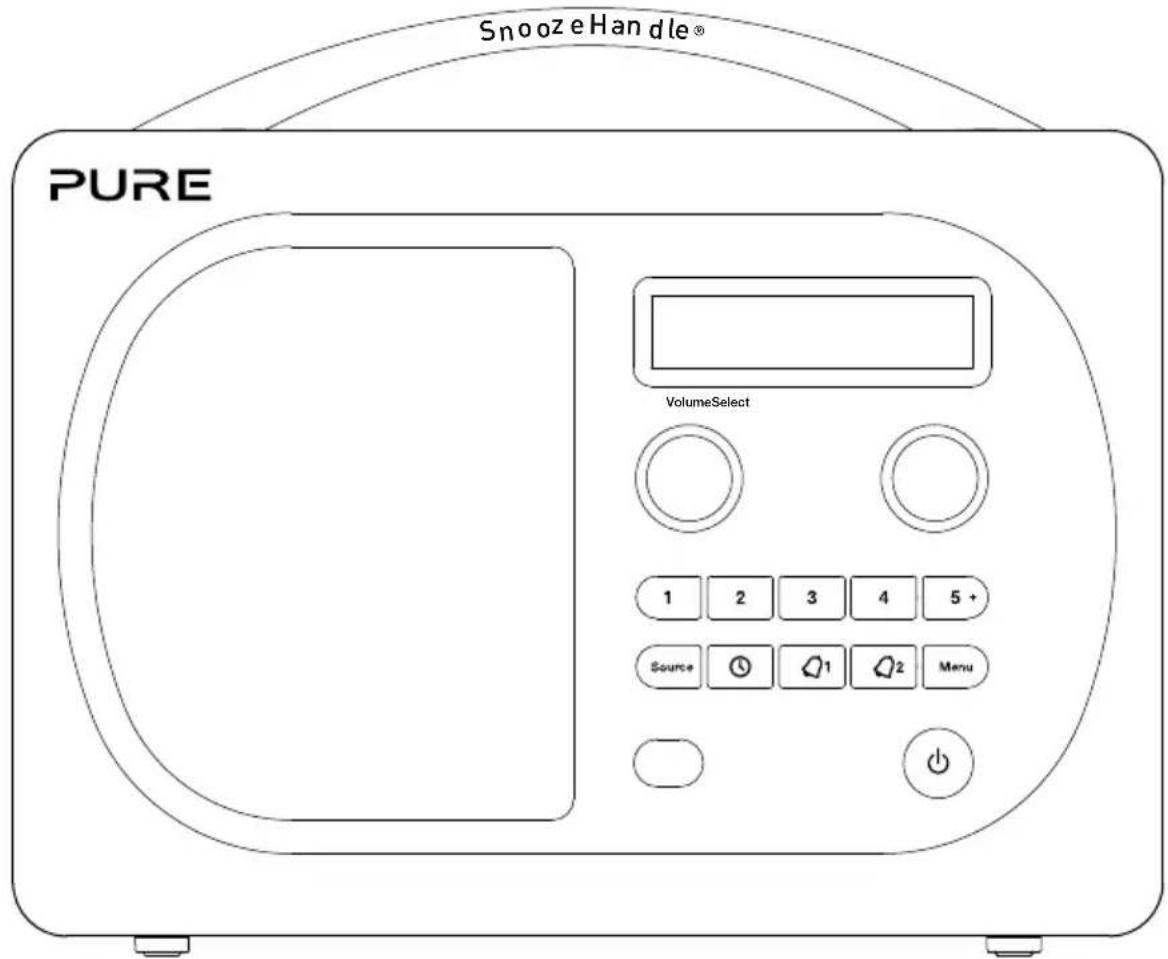
Front panel controls
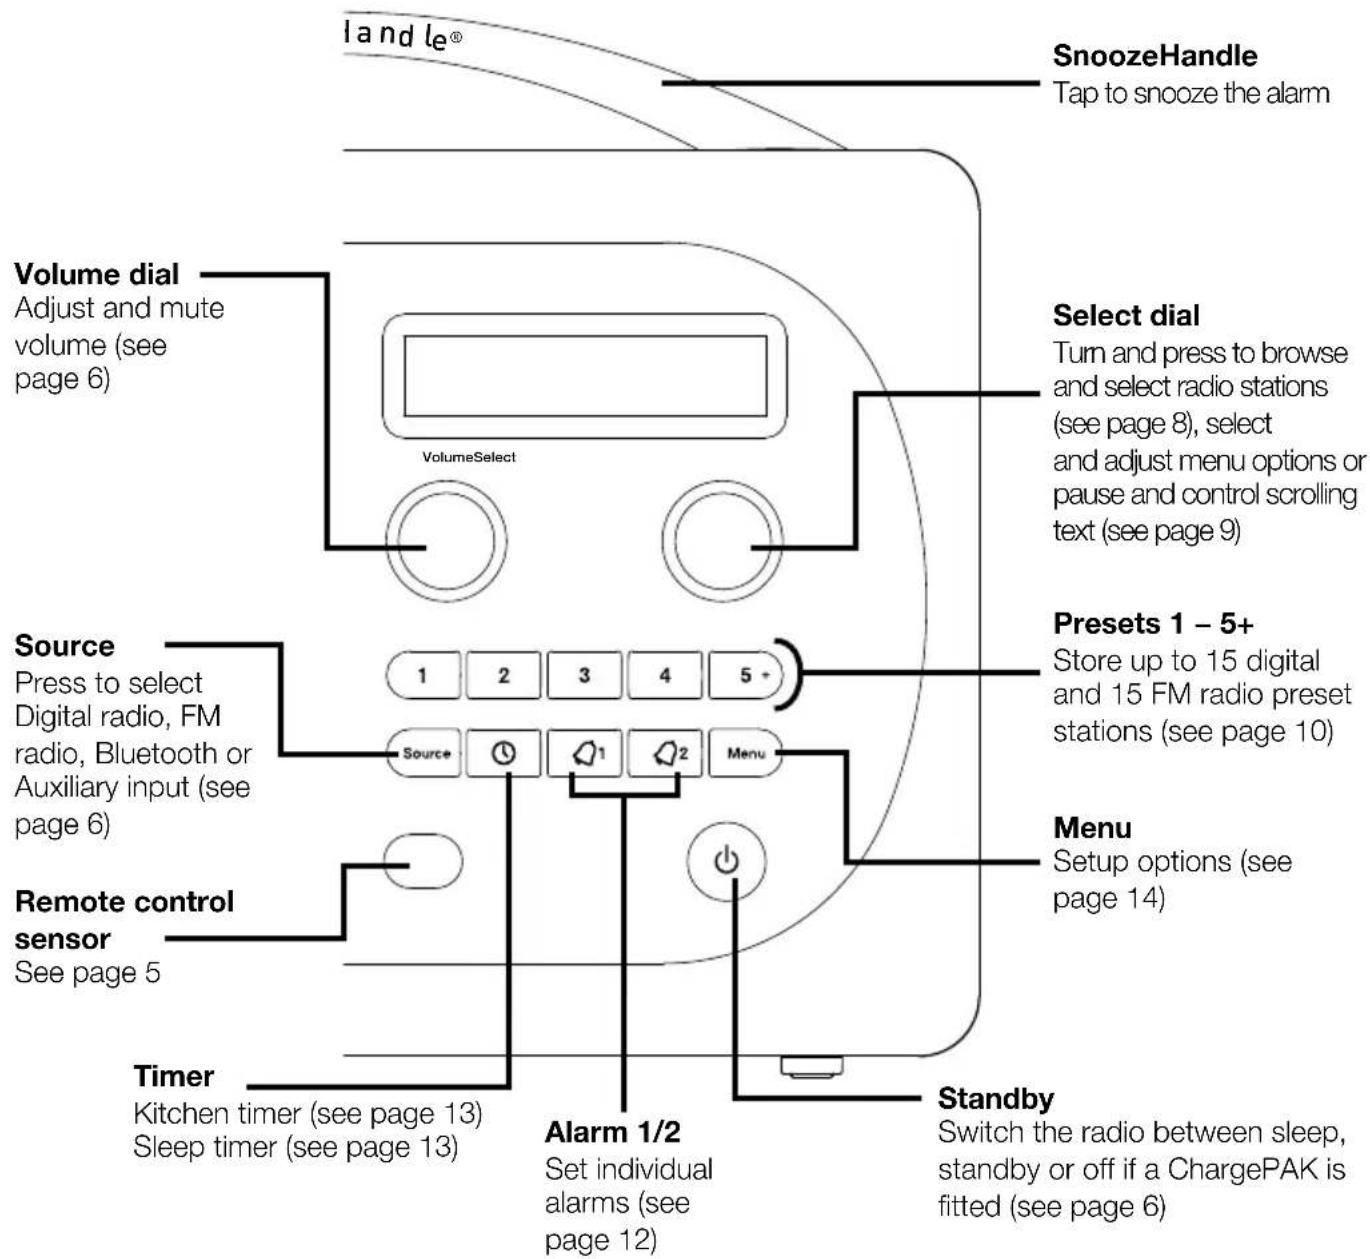
flowchart
graph TD
    A["Volume dial"] --> B["Adjust and mute volume (see page 6)"]
    B --> C["VolumeSelect"]
    C --> D["Select dial"]
    D --> E["Turn and press to browse and select radio stations (see page 8), select and adjust menu options or pause and control scrolling text (see page 9)"]
    E --> F["Presets 1 - 5+"]
    F --> G["Store up to 15 digital and 15 FM radio preset stations (see page 10)"]
    G --> H["Menu Setup options (see page 14)"]
    H --> I["Standby Switch the radio between sleep, standby or off if a ChargePAK is fitted (see page 6)"]
    I --> J["Alarm 1/2"]
    J --> K["Set individual alarms (see page 12)"]
    K --> L["Remote control sensor See page 5"]
    L --> M["Timer Kitchen timer (see page 13) Sleep timer (see page 13)"]
    M --> N["Source Press to select Digital radio, FM radio, Bluetooth or Auxiliary input (see page 6)"]
Rear connectors
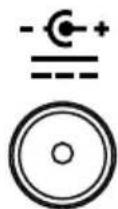
9V DC
Connect to supplied mains adapter only

The image contains a graphical icon of headphones, which is not standard text. According to the instructions, non-text figures/diagrams are to be ignored. Therefore, no OCR output is generated.
3.5 mm stereo headphone socket

Aux in
Analogue stereo input for iPod, MP3 player, etc
[Non-Text]
Mini-B type USB connector for upgrades only
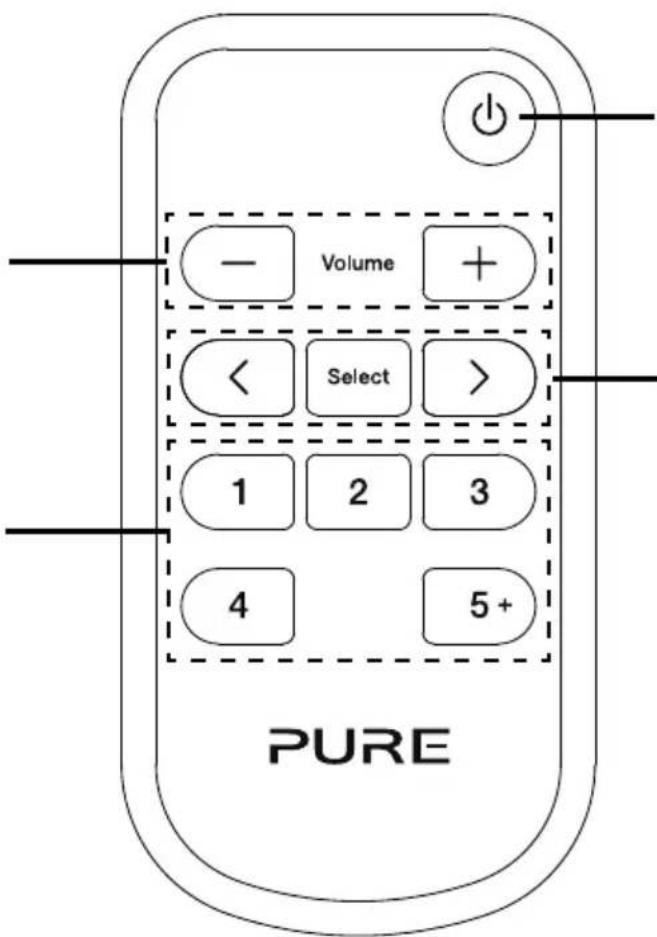
Remote control
Volume
Increase and decrease the volume
Presets 1 - 5+
Store up to 15 digital or 15 FM radio preset stations (see page 10)
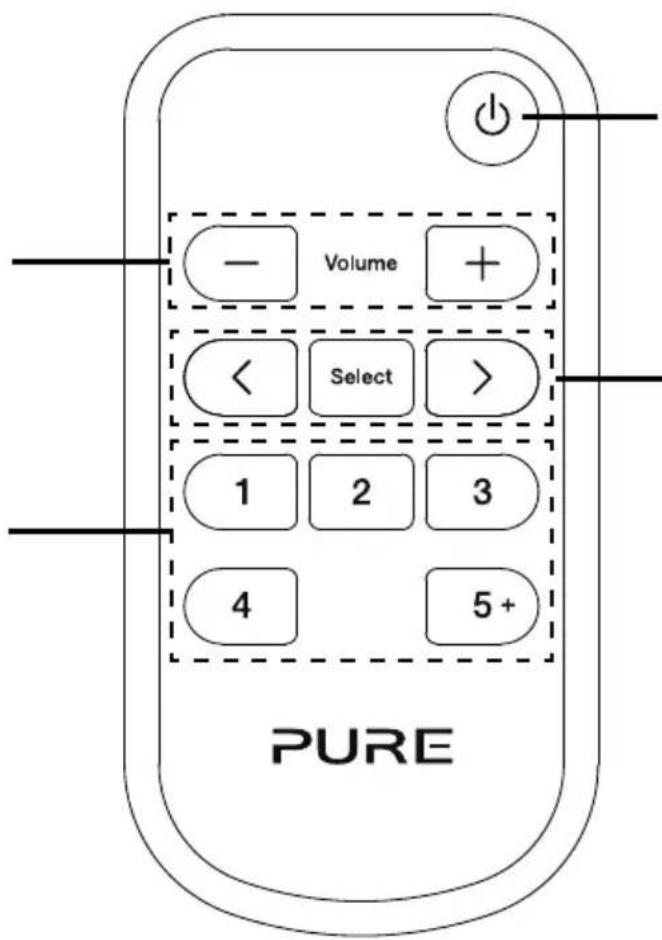
Standby
Switch the radio between sleep, standby or off if a ChargePAK is fitted (see page 6)
Press to browse and select radio stations (see page 8) or pause and control scrolling text (see page 9)
Switching between Sleep, Standby and On
Evoke has three power modes, Standby, Sleep and On. In Standby, Evoke uses minimal power and displays the clock. In Sleep mode, Evoke is ready to stream music using Bluetooth. See page 11 for more information.
To enter Sleep mode, press Standby.
To enter Standby mode, press and hold Standby.
Once in Sleep/Standby mode, press Standby to switch to On.
Note: If you press the Standby button and Evoke is being powered by the ChargePAK F1, Evoke will power off and not enter Sleep or Standby mode.
Adjusting and muting the volume
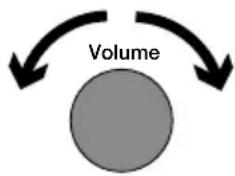
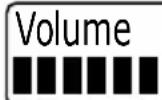
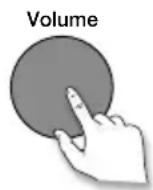
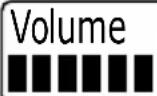
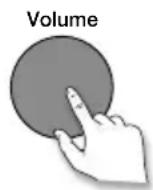
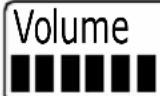
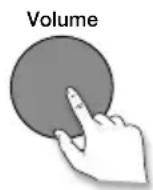
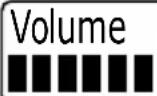
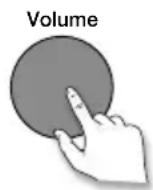
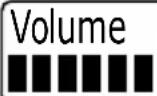
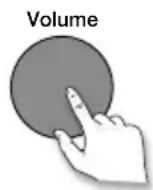
Turn the Volume dial or press the Volume buttons on the remote to increase or decrease the volume. Press the Volume dial to mute.
flowchart
graph TD
    A["Volume"] --> B
    B --> C
    C --> A
BBC Radio 2
Muted
Changing source
Use the Source button to choose between digital radio, FM radio, Auxiliary device (a separate device such as an MP3 player connected to the Aux In socket) or Bluetooth.
FM radio
Auxiliary Input
Changing the information shown on screen
You can change the information that is displayed on screen. To change the information that is displayed on screen:
- Press Menu.
- Turn and press the Select dial to select 'Information'.
- Turn and press the Select dial to select one of the following options:
Scrolling text
Information broadcast by most digital stations and some FM radio (RDS) stations.
Clock Displays the time (and an alarm indicator if the alarm is set).
Signal strength Displays signal strength.
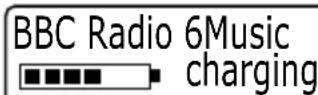
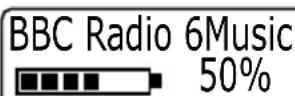
Battery information Displays a charging or power remaining indicator for a ChargePAK F1 rechargeable battery pack (available separately).
Charging indicator (when receiving mains power)
Charge remaining (when powered by a ChargePAK)
OR
Getting started
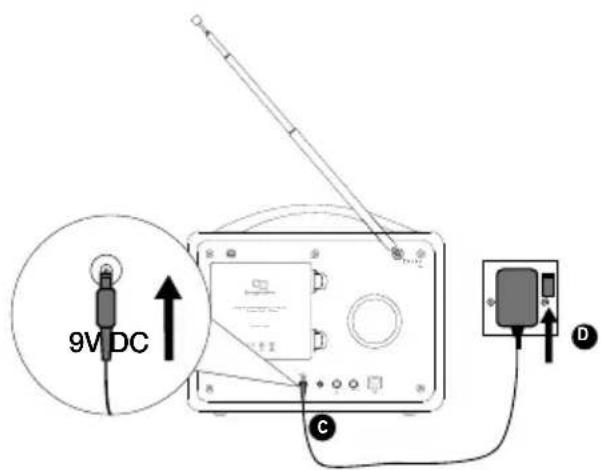
Quick set up
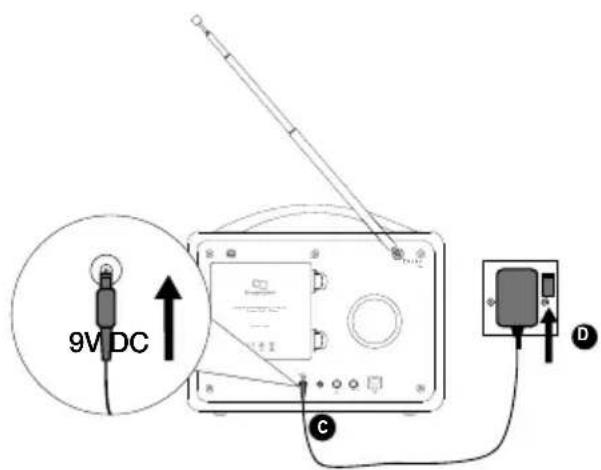
Note: If you have a ChargePAK F1 rechargeable battery (sold separately) fit it now before plugging in Evoke. See page 18 for more information.
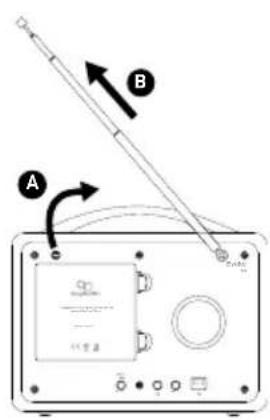
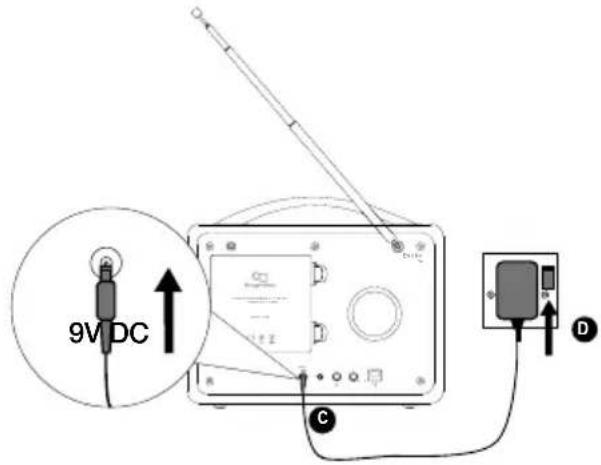
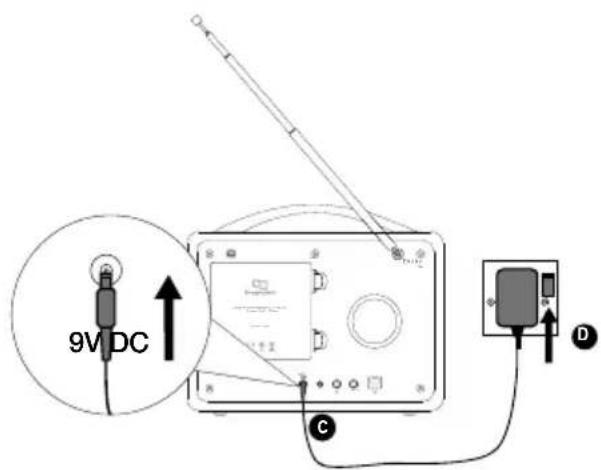
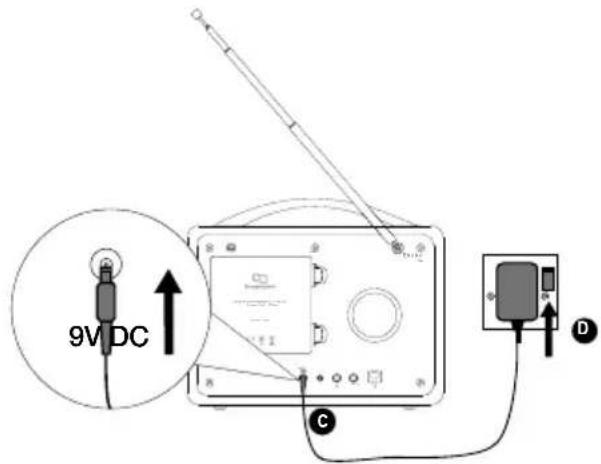
1 • Unclip the aerial and fully extend it (steps A and B).
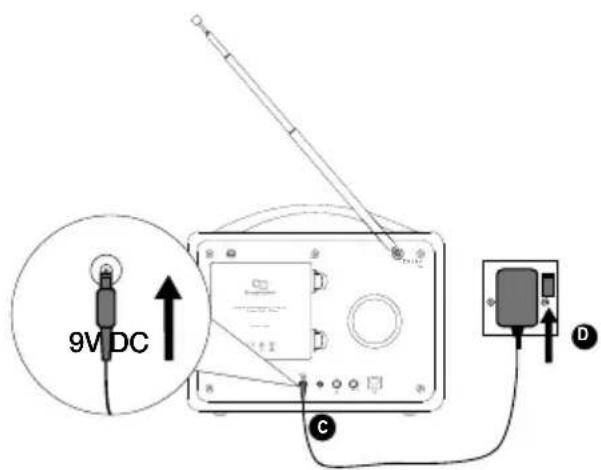
- Insert the jack of the supplied mains adapter into the socket on the rear of the radio (C).
- Plug the mains adapter into the mains supply (D).
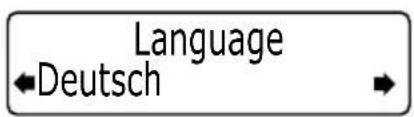
2 Select your language when prompted. Turn the Select dial to select a language (English/Français/Deutsch/Italiano) and push to confirm.


3 Wait for your radio to complete an Autotune and find all available digital stations. When the Autotune is complete, a station will start playing.

Changing digital radio stations
Using the front panel controls
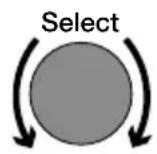
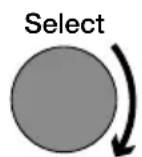
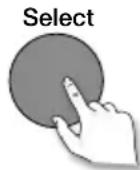
Turn the Select dial left or right to browse through the list of available digital stations. Push the Select dial to change the station.
Station list ←BBC Radio 6Music

BBC Radio 6Music Now playing: Race For T
Using the remote control
- Press the < or > button on the remote to browse through the list of available digital stations.
- Press the Select button to change the station.
Changing FM radio stations
Seek tuning
Using the front panel controls
Turn the Select dial right or left to seek to the next or previous FM radio station that has a strong signal.
87.50MHz FM Searching... >
96.60MHz FM
Using the remote control
Press and hold the < or > button to start seeking to the next or previous FM station.
Manual tuning
- Change the FM radio tuning mode to 'Manual' (see page 14).
- Turn the Select dial right or left or press the < or > buttons on the remote control to step up or down 0.05 MHz.
Pausing and controlling scrolling text
EN
Using the front panel controls
- When ‘Scrolling text’ information is displayed in either digital or FM radio, push the Select dial to pause the scrolling text.

- Turn the Select dial right and left to scroll forwards and backwards through the text. To exit push the Select dial.

BBC Radio 6Music ←Prize by Flaming Lips→

Exit
Using the remote control
-
When ‘Scrolling text’ information is displayed in either digital or FM radio, press the Select button to pause the scrolling text.
-
Press the <> buttons to scroll forwards and backwards through the text. To exit press the Select button again.
Storing and selecting presets
Store up to 15 digital and 15 FM radio stations for quick access.
BBC Radio 6Music Now playing: No Cars G
Preset 1 stored
Preset 06 ←Preset empty
Preset 10 ◀Preset empty
Preset 10 stored
Preset 10 ←DR theJazz
theJazz Now: Remember by Ha
To quick-store a station to a preset button (1–4)
Tune to the digital or FM radio station you want to store. Press and hold one of the numbered Preset buttons (1–4) for two seconds until you see a message to confirm that the preset has been stored on the top line.
To store a station to the preset list (1–15)
- Tune to the digital radio or FM radio station you want to store.
- Press and release the 5+ button to view the numerical list of stored presets, then turn and press the Select dial or use the
- Press and hold the 5+ button (or the Select dial) for two seconds until you see a message to confirm that the preset has been stored. The current digital/FM radio station is now stored to that number.
To recall a preset when listening to digital radio or FM radio
- To tune to Presets 1 to 4, press the corresponding numbered button on the front panel or on the remote control (1 to 4).
- To access the full list of presets (from 1 to 15) on the front panel press and release the 5+ button, turn the Select dial right or left to scroll through the list of presets, then push and release the Select dial to tune to the selected preset. To access the full list of presets (from 1 to 15) using the remote control, press and release the 5+ button and use the
Using Bluetooth

You can also stream audio to Evoke from a Bluetooth device.
Note: Adding a Bluetooth device varies on different mobile devices. See your Bluetooth mobile device manual for specific information.
Preparing Evoke to stream audio using Bluetooth
- Enable Bluetooth on your mobile device.
- On your mobile device, select the option to add a new Bluetooth device. On some mobile devices you may need to select the search or scan option.
- Start the pairing process on your mobile device. Do this by selecting ‘Evoke...’ from the list of available devices that appear on the mobile device’s screen. This will connect automatically once paired.
Any audio you play on your mobile device will now be streamed to your Evoke.
Note: You will need to disconnect any connected mobile Bluetooth devices from Evoke to stream from a different Bluetooth device. Bluetooth will automatically disconnect if you go out of range of Evoke. To manually disconnect you will usually need to use the Bluetooth settings on your mobile device.
Note: Some legacy Bluetooth devices may prompt you to enter a passcode when trying to pair with Evoke. If this occurs, enter the code 0000.
Setting the alarm & timers
flowchart
graph TD
    A["Alarm 1 Setup\nOn"] --> B["Alarm time\n08:00"]
    B --> C["Alarm repeat\nDaily"]
    C --> D["Alarm source\nFM"]
    D --> E["Alarm FM\nLast listened"]
    E --> F["Alarm volume\n■■■■■■■■■■■■■■■■■■■■■■■■■■■■■■■■■■■■■■■■■■■■■■■■■■■■■■■"]
    F --> G["Alarm saved"]
    G --> H["08:30\nThe alarm is set to sound at 8:30 am"]
    H --> I["08:30 22:45"]
    I --> J["08:30 08:30"]
Setting an alarm
Evoke has two alarms which can switch the radio on and tune to a digital or FM radio station or sound an alarm tone.
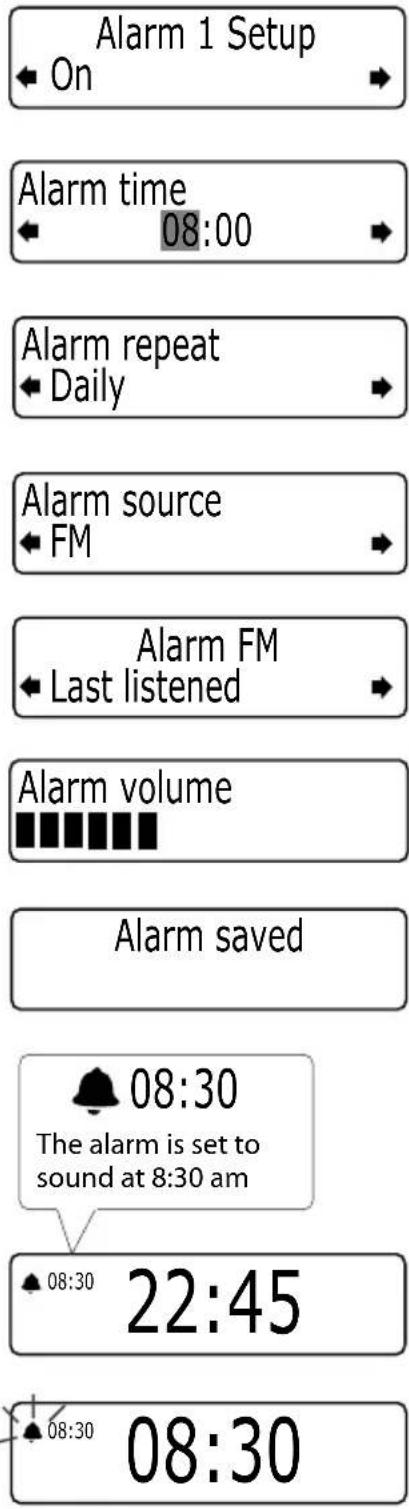
- Press the Q^1 or Q^2 button.
- Turn and press the Select dial to select 'On'. The alarm is now active.
- To set the time you want the alarm to sound turn the Select dial to adjust the hours and then push to confirm. Repeat to adjust the minutes.
- Turn and press the Select dial to choose when you want the alarm to repeat. The available options are 'Daily', 'Weekdays', 'Weekends' or 'Once only'.
- Turn and press the Select dial to choose the type of alarm you want to sound: 'DR' (digital radio), 'FM' or 'Tone'. If you select 'Tone', there are no further options.
- For DR (digital radio) and FM radio alarms only, push the Select dial to select 'Select station' and choose the radio station you want to use for the alarm.
For digital radio alarms
Select 'Last listened', or a preset station. If you select 'Last listened' the alarm will tune to the last digital station you listen to before the alarm sounds.
For FM radio alarms
Choose between 'Last listened' or a preset station. If you select 'Last listened' the alarm will tune to the last FM station you listen to before the alarm sounds.
- If you have selected a digital or FM radio alarm you can turn the Select dial to adjust the volume level for the alarm.
That's it! You can see if the alarm is currently switched on in the 'Full screen time' display (see page 6). Alarms can be set and adjusted from standby by pressing the ☐1 or ☐2 button.
Note: The alarm function does not work when Evoke is being powered by the ChargePAK F1.
Cancelling a sounding alarm
To cancel a sounding alarm, press either the Menu, Source, 1, 2 or Select dial. If you press the Standby button during a sounding alarm, Evoke will enter standby.
Snoozing a sounding alarm
Tap the SnoozeHandle to snooze a sounding alarm for the specified time (default 10 minutes).
Set snooze time ←5 minutes
Changing the alarm snooze time
- Press Menu.
- Turn and press the Select dial to choose 'Clock'.
- Turn and press the Select dial to choose 'Set snooze time'.
- Turn and press the Select dial to change the snooze time between 1 and 59 minutes.
Kitchen timer 01 hours 00 minutes
Setting the kitchen timer
Evoke has a countdown timer which will sound an alarm after a set time period.
Kitchen timer 01 hours 30 minutes
To set the kitchen timer
- Press the Timer ⏻ button, turn the Select dial and push to select 'Kitchen timer'.
- Turn the Select dial to change the hours and push to confirm. Turn again to change the minutes and push to confirm and start the countdown timer.
The alarm will sound after the time period you have set whether the radio is on or in standby. Cancel the beeping alarm tone by pressing any button on the radio.
Timers cleared
To stop and reset the kitchen timer
To stop and reset the countdown timer to zero before it sounds a beeping tone, press and hold down the Timer ⏻ button for three seconds until you see the message 'Timers cleared'.
Set sleep time ←45 minutes
Setting the sleep timer
Evoke has a sleep timer that switches your radio into standby (or off if powered by a ChargePAK) after a set time period.
08:30 45
To set the sleep timer
- Press the Timer button, turn the Select dial and push to select 'Sleep timer'
- Turn the Select dial to increase the duration of the sleep timer from 15 to 90 minutes. Press the Select dial to start the sleep timer.
The time remaining until shut-down is displayed on the right of the full-screen time view.
Timers cleared
To cancel the sleep timer
Press and hold the Timer button until you see the message 'Timers cleared'.
Options and settings
Digital radio settings
Autotune
You can use the autotune function to automatically scan for new digital radio stations and remove inactive ones.
Note: Autotune is only available when you have selected 'Digital radio' as the radio source.
To carry out an autotune:
- Press Menu.
- Turn and press the Select dial to choose 'Autotune'. The number of stations found will be displayed during the autotune.
When the autotune has finished, Evoke will tune to the last station that you were listening to.
FM radio settings
FM stereo option
You can choose between ‘Stereo’ or ‘Mono’ reception when listening to FM radio. You may want to choose Stereo if listening using headphones.
Note: The FM stereo option is only available when you have selected ‘FM radio’ as the radio source.
To change between Stereo or Mono reception:
- Press Menu.
- Turn and press the Select dial to choose 'FM stereo'.
- Turn and press the Select dial to choose between 'Stereo' or 'Mono' FM reception.
FM tuning mode
Note: The FM tuning mode option is only available when you have selected ‘FM radio’ as the radio source.
Press Menu and turn and press the Select dial to choose ‘FM tuning mode’. Choose from the following two modes:
Seek
When you turn the Select dial, the radio tunes to the next station with a good signal.
Manual
When you turn the Select dial, the radio tunes up or down the FM radio frequency range by 0.05 MHz.
General settings
Changing your preferred language
You can select the language that your Evoke uses for menus and options.
- Press Menu.
- Turn and press the Select dial to choose 'Settings'.
- Turn and press the Select dial to choose 'Language'.
- Turn and press the Select dial to select a menu language from ‘English’, ‘French’, ‘German’ or ‘Italian’.
Carrying out a factory reset
Resetting your Evoke removes all presets, stored stations, alarms and resets all other options to default settings.
- Press Menu.
- Turn and press the Select dial to choose 'Settings'.
- Turn and press the Select dial to choose 'Factory reset'.
- Turn and press the Select dial to select 'Yes' to reset Evoke to factory settings. Select 'No' if you do not want to reset your Evoke to factory settings.
Displaying the software version
To display the software version:
- Press Menu.
- Turn and press the Select dial to choose 'Settings'.
- Turn and press the Select dial to choose 'SW version'.
Updating Evoke's software
Software updates for your Evoke may be made available in the future. If you register your product and include a valid e-mail address you will receive notification of software updates (register at www.pure.com/register). Alternatively, visit http://support.pure.com at any time to check for available software updates.
To update your software
Connect your radio to your PC using a suitable A-to-mini B type USB cable. Follow the instructions provided with the software download at http://support.pure.com
Note: USB update requires a PC running Windows or a Mac running MAC OS 10.6 or above and a suitable USB cable (not included).
Clock settings
Setting the time and date
The time and date on Evoke are automatically set by the FM or digital radio signal. If the time/date does not update automatically, you can manually set it using this option.
Note: Any time or date updates received by an FM or a digital broadcast will override manual settings, if clock synchronisation is enabled (see below for more information).
Setting the time and date manually
- Press Menu.
- Turn and press the Select dial to choose 'Clock'.
- Turn and press the Select dial to choose 'Set time & date'.
- Turn and press the Select dial to set the hour. Repeat to adjust the minutes.
- Turn and press the Select dial to set the day of the month. Repeat to set the month and year.
Changing the time format
- PressMenu.
- Turn and press the Select dial to choose 'Clock'.
- Turn and press the Select dial to choose 'Set 12/24 hour'. Repeat to set the required time format.
Changing the date format
- Press Menu.
- Turn and press the Select dial to choose 'Clock'.
- Turn and press the Select dial to choose 'Set date format'. Repeat to set the required date format.
Clock synchronization options
You can select the radio sources that you want to use for setting the time. By default, Evoke uses both the FM and digital radio signals to synchronize the time.
To specify the clock synchronization options:
- Press Menu.
- Turn and press the Select dial to choose 'Clock'.
- Turn and press the Select dial to choose 'Clock sync'.
- Turn and press the Select dial to choose the required clock synchronization option.
Display settings
Adjusting the display
You can adjust the brightness and time-out duration of the display for when the unit is switched on and in standby. To change display options:
- Press Menu, scroll to 'Display settings' and push the Select dial.
- Now choose either 'Active' to change settings that apply when the unit is switched on, or 'Standby & Sleep' to change settings that apply in standby and sleep.
Changing the display time-out duration
Select ‘Duration’ and choose from the following two modes:
Always on The screen is always set to your preferred brightness level.
Timed off The screen is set to your preferred brightness level when a button is pressed and then switches off after 7 seconds of inactivity.
Changing your preferred brightness level
Select ‘Active brightness’ and choose from the following options:
Automatic The brightness of the screen adjusts automatically depending on the level of light in the room (default).
1-10 Turn the Select dial to vary the brightness level between 1 (very dim) and 10 (very bright) and push to confirm your preferred setting.
Bluetooth settings
You can use the Bluetooth menu to make Evoke visible or invisible to other Bluetooth devices.
- Press Menu.
- Turn and press the Select dial to choose 'Settings'.
- Turn and press the Select dial to choose 'Bluetooth'.
- Turn and press the Select dial to select one of the following options:
On (discoverable)
On (hidden)
Off
Bluetooth name
To display the name that Bluetooth uses to identify Evoke:
- Press Menu.
- Turn and press the Select dial to choose 'Settings'.
- Turn and press the Select dial to choose 'BT Device Name'.
Using a ChargePAK F1
ChargePAK makes your Evoke truly portable, so you can enjoy the programmes you love in the garden or at the beach.
Because it's rechargeable, ChargePAK is much cheaper than regular batteries. It's also more eco-friendly because it reduces the amount of toxic substances sent to landfill. And, because it's a fit-and-forget solution that charges whenever your radio is connected to the power outlet, it's much more convenient than standard rechargeable batteries.
Installing a ChargePAK
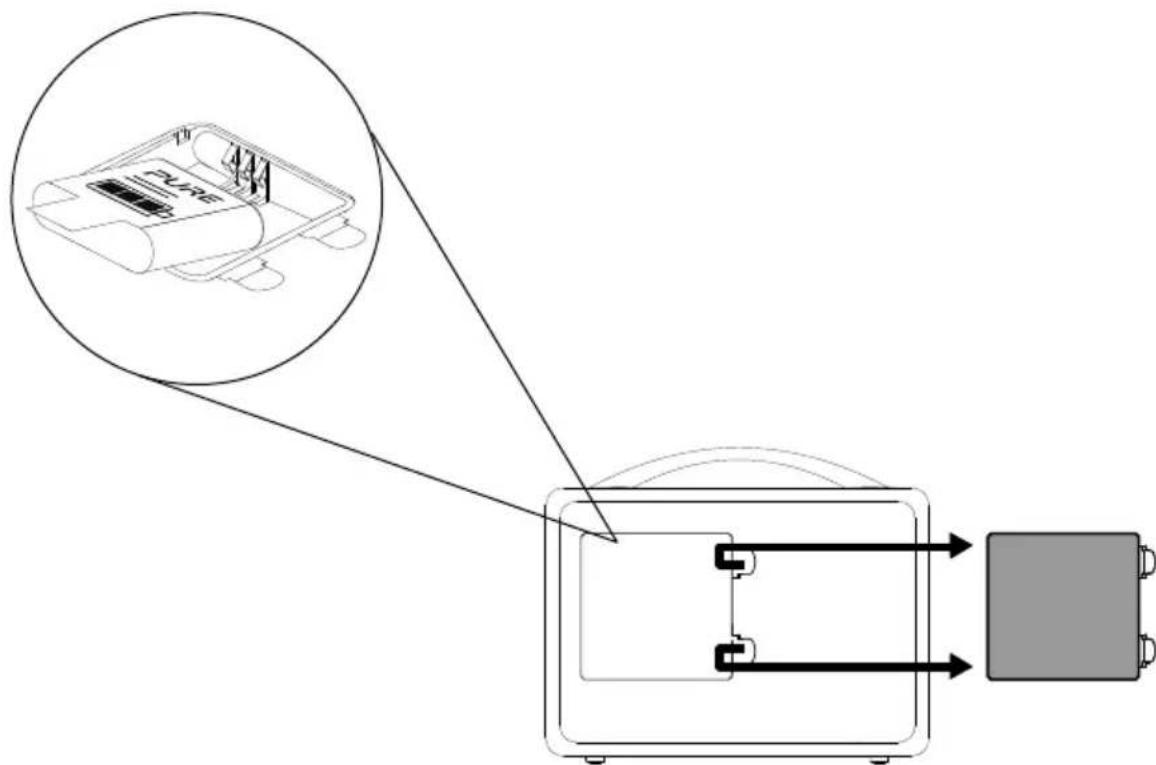
- Switch your Evoke off and disconnect it from the power supply.
- Open the battery compartment and position ChargePAK so that the Pure label is facing the battery compartment lid and ChargePAK's contacts line up with the three terminals in the battery compartment.
- Replace the battery door and connect your product to a power outlet.
- ChargePAK will begin charging. When charging your ChargePAK for the first time or after an extended period of inactivity we recommend that you charge it for around 24 hours to ensure full battery power.
Note: It is normal for your ChargePAK to get warm, especially during charging. Your ChargePAK will give years of trouble-free use under normal circumstances, but like all rechargeable batteries its efficiency will gradually reduce with age.
Important: Evoke can only be powered with a Pure ChargePAK F1 and is not compatible with any other batteries, either disposable or rechargeable, or any other ChargePAK model.
Help and specifications
Secondary and inactive stations
(<>) Secondary digital radio services
Some stations have accompanying secondary services which provide extra information or alternative content and may only be broadcast at certain times. If a station has a secondary service available, the station shows ‘>>’ next to its name in the station list and the secondary service appears next to the station in the list. A secondary service has a ‘<<’ before its name in the station list.
(?) Inactive or unavailable digital radio stations
Inactive or unavailable stations appear on the station list preceded by ‘?’ and cannot be tuned to. A station may be inactive or unavailable because the station is not broadcasting at the current time (check with the station) or has stopped broadcasting altogether. Also, you may not have a strong enough signal to receive the Multiplex on which the station is broadcast.
Hints and tips
Display says 'No stations available'
Use Autotune (see page 14) to search for stations. Try adjusting your aerial or radio position.
Receiving new digital radio stations that have started broadcasting
Use Autotune (see page 14) to scan and add any new digital services to the station list.
The screen is very dark
Check that the light sensor (behind the speaker grille) is not obstructed.
Resetting your radio
Resetting your radio removes all presets, clears the station list and resets all options to defaults. See page 15 for more information.
Technical specifications
Radio Digital and FM radio
Frequencies DAB/DAB+/DMB-R/Parametric stereo decode up to 256 kbps, FM radio 87.5-108 MHz
Bluetooth A2DP support
Speaker Full-range 3" drive unit
Inputs 9V DC power adapter socket (230V supplied). 3.5mm stereo Aux In for auxiliary devices. USB connection (Mini-B type) for product upgrades only
Outputs 3.5mm stereo headphone
Presets 15 digital radio and 15 FM radio presets
Display High contrast white graphical 128 x 22 pixel Organic LED (OLED) display
Mains power adapter Adapter: Input AC 100 - 240 V\~,50/60 Hz, 0.5A; Output DC 9.0V , 1500mA;
Main unit: DC 9.0V, 1.5A
ChargePAK Pure ChargePAK F1 rechargeable battery pack (available separately)
Power consumption Standby with clock display: >0.8W, Standby with display off: >0.5W, Active: 3.5W
Dimensions 180mm high x 217mm wide x 115mm deep
Aerial Captive telescopic aerial
Approvals CE marked. Hereby, Pure, declares that this Band II LPD device is in compliance with the essential requirements and other relevant provisions of Directive 1999/5/EC. The Declaration of Conformity may be consulted at http://www.pure.com/R&TTE-DoC. ETSI EN 300 401 compliant Australian C-Tick N1600 and Electrical Safety
Correct disposal of this product
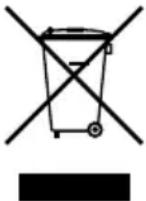
This marking indicates that this product should not be disposed with other household waste throughout the EU. To prevent possible harm to the environment or human health from uncontrolled waste disposal, recycle it responsibly to promote the sustainable reuse of material resources. To return your used device, please use the return and collection system or contact the retailer where the product was purchased. They can take this product for environmental safe recycling.
Copyright
Copyright 2014 by Imagination Technologies Limited. All rights reserved. No part of this publication may be copied or distributed, transmitted, transcribed, stored in a retrieval system, or translated into any human or computer language, in any form or by any means, electronic, mechanical, magnetic, manual or otherwise, or disclosed to third parties without the express written permission of Imagination Technologies Limited.
Trademarks
Evoke D4 with Bluetooth, ChargePAK, Pure, the Pure logo, Imagination Technologies, and the Imagination Technologies logo are trademarks or registered trademarks of Imagination Technologies Limited. All other product names are trademarks of their respective companies. Version 3 August 2014.
Warranty Information
Imagination Technologies Limited warrants to the end user that this product will be free from defects in materials and workmanship in the course of normal use for a period of three years from the date of purchase. This guarantee covers breakdowns due to manufacturing or design faults; it does not apply in cases such as accidental damage, however caused, wear and tear, negligence, adjustment, modification or repair not authorised by us. Please visit www.pure.com/register to register your product with us. Should you have a problem with your unit please contact your supplier or contact Pure Support at the address shown on the rear of this manual.
Disclaimer
Imagination Technologies Limited makes no representation or warranties with respect to the content of this document and specifically disclaims any implied warranties of merchantability or fitness for any particular purpose. Further, Imagination Technologies Limited reserves the right to revise this publication and to make changes in it from time to time without obligation of Imagination Technologies Limited to notify any person or organisation of such revisions or changes.
Pure Warranty Statement for Australia
This statement replaces any reference to warranty which may be contained elsewhere within this manual.
What do you need to do now?
- Keep your proof of purchase as evidence of your purchase date. This proof of purchase would need to be presented if warranty service was ever required.
- Register your purchase on-line at http://www.pure.com/au/product-registration/ for free technical support.
If you have any questions about your warranty you can call us toll free 1800 988 268.
What's covered by this warranty?
- Pure agrees to refund, repair or replace, at your election, without charge to you, any part found to be defective during the warranty period.
- If equipment has been used according to its accompanying instruction manual and is used in a domestic situation, a three year warranty period applies (excludes rechargeable ChargePAK where fitted. A one year warranty period applies to all ChargePAKs).
How do you make your claim?
Call 1800 988 268 for instructions on how to return your Pure product for warranty service or go to http://support.pure.com/au/ and complete the contact us form.
What's NOT covered by this warranty?
Under this express warranty Pure will not be liable for loss or damage of any kind whatsoever, whether direct, indirect, incidental, consequential or otherwise.
- Replacement of parts due to normal wear and tear.
- Products with serial number defacement, modification or removal.
• Water damage or corrosion caused by dampness. - Any damage or deterioration due to shipment.
- Any product which has been subjected to misuse, abuse or accident.
Australian consumers — The benefits to the consumer given by this express warranty are in addition to other rights and remedies of the consumer under a law in relation to the goods or services to which this warranty relates. Our goods come with guarantees that cannot be excluded under the Australian Consumer Law, You are entitled to a replacement or refund for a major failure and for compensation for any other reasonably foreseeable loss or damage. You are also entitled to have the goods repaired or replaced if the goods fail to be of acceptable quality and the failure does not amount to a major failure.
Pure is distributed and supported in Australia by PIONEER ELECTRONICS AUSTRALIA PTY LTD, 5 ARCO LANE, HEATHERTON, VICTORIA, 3202.
Evoke
D4 with Bluetooth
EN
DEUTSCH
FR
IT
DA
NL

The image contains a graphical icon of an earphone. There is no text or mathematical content to process.
flowchart
graph TD
    A["Volume"] --> B
    B --> C
    C --> A
BBC Radio 2
Muted
Wechsel der Quelle
flowchart
graph LR
    A["Autotune"] --> B["29"]
    B --> C["+1 min"]
    C --> D["Now tuning..."]
    D --> E["BBC Radio 2<br>Talking to the people wh"]
Station list ←BBC Radio 6Music

BBC Radio 6Music Now playing: Race For T
87.50MHz FM Searching... >
96.60MHz FM
BBC Radio 6Music Now playing: Race For T

BBC Radio 6Music Playing: Race For Th
BBC Radio 6Music ←Prize by Flaming Lips →
Beenden
BBC Radio 6Music Now playing: No Cars G
Preset 1 stored
Preset 06 ←Preset empty
Preset 10 ←Preset empty
Preset 10 stored
Preset 10 ←DR theJazz
theJazz Now: Remember by Ha
The alarm is set to sound at 8:30 am
08:30
22:45
08:30
08:30
Set snooze time ←5 minutes
Kitchen timer 01 hours 00 minutes
Kitchen timer 01 hours 30 minutes
Timers cleared
Set sleep time ←45 minutes
08:30 45
Timers cleared
Always on (permanent)

The image contains a graphical icon of headphones, which is not standard text. According to the instructions, non-text figures/diagrams are to be ignored. Therefore, no OCR output is generated.
flowchart
graph TD
    A["Volume"] --> B
    B --> C
    C --> A
BBC Radio 2
Muted
flowchart
graph LR
    A["Autotune"] --> B["29"]
    B --> C["+1_min"]
    C --> D["Now tuning..."]
    D --> E["BBC Radio 2<br>Talking to the people wh"]
Station list ←BBC Radio 6Music

BBC Radio 6Music Now playing: Race For T
87.50MHz FM Searching... >
96.60MHz FM
BBC Radio 6Music Now playing: Race For T

BBC Radio 6Music ←Playing: Race For Th →
BBC Radio 6Music ◀Prize by Flaming Lips

Sortie
BBC Radio 6Music Now playing: No Cars G
Preset 1 stored
Preset 06 ←Preset empty
Preset 10 ←Preset empty
Preset 10 stored
theJazz Now: Remember by Ha
Kitchen timer 01 hours 00 minutes
Kitchen timer 01 hours 30 minutes
Timers cleared
Set sleep time
45 minutes

08:30
45
Timers cleared
Bluetooth Support A2DP

The image contains a graphical icon of an earphone. There is no text or mathematical content to process.
Presa cuffie stereo da 3,5 mm

Aux in
flowchart
graph LR
    A["Volume"] --> B["Volume"]
    B --> C["Tube with tick marks"]
    C --> D["Tube with tick marks"]
    D --> E["Tube with tick marks"]
    E --> F["Tube with tick marks"]
    F --> G["BBC Radio 2 Muted"]
Modificare la sorgente
flowchart
graph LR
    A["Source"] --> B["FM radio"]
    C["Source"] --> D["Auxiliary Input"]
flowchart
graph LR
    A["Autotune"] --> B["29"]
    B --> C["+1_min"]
    C --> D["Now tuning..."]
    D --> E["BBC Radio 2<br>Talking to the people wh"]
Station list ←BBC Radio 6Music

BBC Radio 6Music Now playing: Race For T
Uso del telecomando
87.50MHz FM Searching...
96.60MHz FM
Uso del telecomando
BBC Radio 6Music ←Prize by Flaming Lips →

Esci
Uso del telecomando
BBC Radio 6Music Now playing: No Cars G
Preset 1 stored
theJazz Now: Remember by Ha
Set snooze time ←5 minutes
Kitchen timer 01 hours 00 minutes
Kitchen timer 01 hours 30 minutes

The image contains a graphical icon of an earphone. There is no text or mathematical content to extract.
3,5 mm stereohovedtelefonstik.

Aux in
Analog stereoindgang til iPod, mp3-afspiller mm.
[Non-Text]
Mini-B USB- stik kun til opgraderinger
Fjernbetjening
Lydstyrke
Skru op og ned for lydstyrken.
Faste stationer
1 - 5+
Gem op til 15 DAB- eller FM-stationer (se side 10).
Standby
flowchart
graph TD
    A["Volume"] --> B
    B --> C
    C --> A
BBC Radio 2
Muted
Skift af lydkilde

Station list ←BBC Radio 6Music

BBC Radio 6Music Now playing: Race For T
87.50MHz FM Searching... >
96.60MHz FM

BBC Radio 6Music ←Prize by Flaming Lips →

Afslut
BBC Radio 6Music Now playing: No Cars G
Preset 1 stored
Preset 06 ←Preset empty
Preset 10 ←Preset empty
Preset 10 stored
Preset 10 ←DR theJazz
theJazz Now: Remember by Ha
Hurtig lagring af en fast station (1-4)
Set snooze time ←5 minutes
Ændring af alarmens 'snooze-tid'
Kitchen timer 01 hours 00 minutes
Kitchen timer 01 hours 30 minutes
- version, august 2014.
Garantioplysninger

The image contains a graphical icon of an earphone. There is no text or mathematical content to process.
flowchart
graph TD
    A["Volume"] --> B
    B --> C
    C --> A
BBC Radio 2
Muted
Van bron veranderen

Station list ←BBC Radio 6Music

BBC Radio 6Music Now playing: Race For T
87.50MHz FM Searching... >
96.60MHz FM
BBC Radio 6Music ◀Prize by Flaming Lips →

Afsluiten
BBC Radio 6Music Now playing: No Cars G
Preset 1 stored
Preset 06 ←Preset empty
Preset 10 ←Preset empty
Preset 10 stored
Preset 10 ←DR theJazz
theJazz Now: Remember by Ha
The alarm is set to sound at 8:30 am
08:30
22:45
08:30
08:30
Set snooze time ←5 minutes
Kitchen timer 01 hours 00 minutes
Kitchen timer 01 hours 30 minutes
Timers cleared
Set sleep time ←45 minutes
08:30 45
Timers cleared
Imagination Technologies Limited
Home Park Estate
Kings Langley
Herts, WD4 8LZ
United Kingdom
http://support.pure.com
Pure
Friedrich-Ludwig-Jahn-
Straße 2-14
64589 Stockstadt/Rhein
Deutschland
http://support.pure.com/de
Pure Australasia Pty Ltd
PO Box 5049
Wonga Park
Victoria 3115
Australia
sales.au@pure.com
http://support.pure.com/au
PURE
www.pure.com
connect.pure.com
www.facebook.com/pure

- Safety Instructions
- WARNING
- Contents
- Introduction
- Getting started
- Changing digital radio stations
- Changing FM radio stations
- Pausing and controlling scrolling text
- Storing and selecting presets
- Using Bluetooth
- Setting the alarm & timers
- Options and settings
- Using a ChargePAK F1
- Help and specifications
- Pure Warranty Statement for Australia
- Introduction
- Front panel controls
- Rear connectors
- Remote control
- Volume
- Presets 1 - 5+
- Standby
- Switching between Sleep, Standby and On
- Adjusting and muting the volume
- Changing source
- Changing the information shown on screen
- Getting started
- Quick set up
- Changing digital radio stations
- Using the front panel controls
- Using the remote control
- Changing FM radio stations
- Seek tuning
- Manual tuning
- Pausing and controlling scrolling text
- Storing and selecting presets
- To quick-store a station to a preset button (1–4)
- To store a station to the preset list (1–15)
- To recall a preset when listening to digital radio or FM radio
- Using Bluetooth
- Preparing Evoke to stream audio using Bluetooth
- Setting the alarm & timers
- Setting an alarm
- For digital radio alarms
- For FM radio alarms
- Cancelling a sounding alarm
- Snoozing a sounding alarm
- Changing the alarm snooze time
- Setting the kitchen timer
- To set the kitchen timer
- To stop and reset the kitchen timer
- Setting the sleep timer
- To set the sleep timer
- To cancel the sleep timer
- Options and settings
- Digital radio settings
- Autotune
- FM radio settings
- FM stereo option
- FM tuning mode
- Seek
- Manual
- General settings
- Changing your preferred language
- Carrying out a factory reset
- Displaying the software version
- Updating Evoke's software
- To update your software
- Clock settings
- Setting the time and date
- Setting the time and date manually
- Changing the time format
- Changing the date format
- Clock synchronization options
- Display settings
- Adjusting the display
- Changing the display time-out duration
- Changing your preferred brightness level
- Bluetooth settings
- Bluetooth name
- Using a ChargePAK F1
- Installing a ChargePAK
- Help and specifications
- Secondary and inactive stations
- (<>) Secondary digital radio services
- (?) Inactive or unavailable digital radio stations
- Hints and tips
- Display says 'No stations available'
- Receiving new digital radio stations that have started broadcasting
- The screen is very dark
- Resetting your radio
- Technical specifications
- Correct disposal of this product
- Copyright
- Trademarks
- Warranty Information
- Disclaimer
- Pure Warranty Statement for Australia
- What do you need to do now?
- What's covered by this warranty?
- How do you make your claim?
- What's NOT covered by this warranty?
- Evoke
- Wechsel der Quelle
- Modificare la sorgente
- Uso del telecomando
- Fjernbetjening
- Lydstyrke
- Faste stationer
- Skift af lydkilde
- Hurtig lagring af en fast station (1-4)
- Ændring af alarmens 'snooze-tid'
- Garantioplysninger
- Van bron veranderen
- Pure
- Pure Australasia Pty Ltd
Brand : PURE
Model : Evoke D4 Bluetooth
Category : Radio