MC 4 - Coffee machine Petra Electric - Free user manual and instructions
Find the device manual for free MC 4 Petra Electric in PDF.
User questions about MC 4 Petra Electric
0 question about this device. Answer the ones you know or ask your own.
Ask a new question about this device
Download the instructions for your Coffee machine in PDF format for free! Find your manual MC 4 - Petra Electric and take your electronic device back in hand. On this page are published all the documents necessary for the use of your device. MC 4 by Petra Electric.
USER MANUAL MC 4 Petra Electric
natural_image
Exterior view of a modern stainless steel coffee pot with black handle and brand logo (no text or symbols on body)D Gebrauchsanweisung
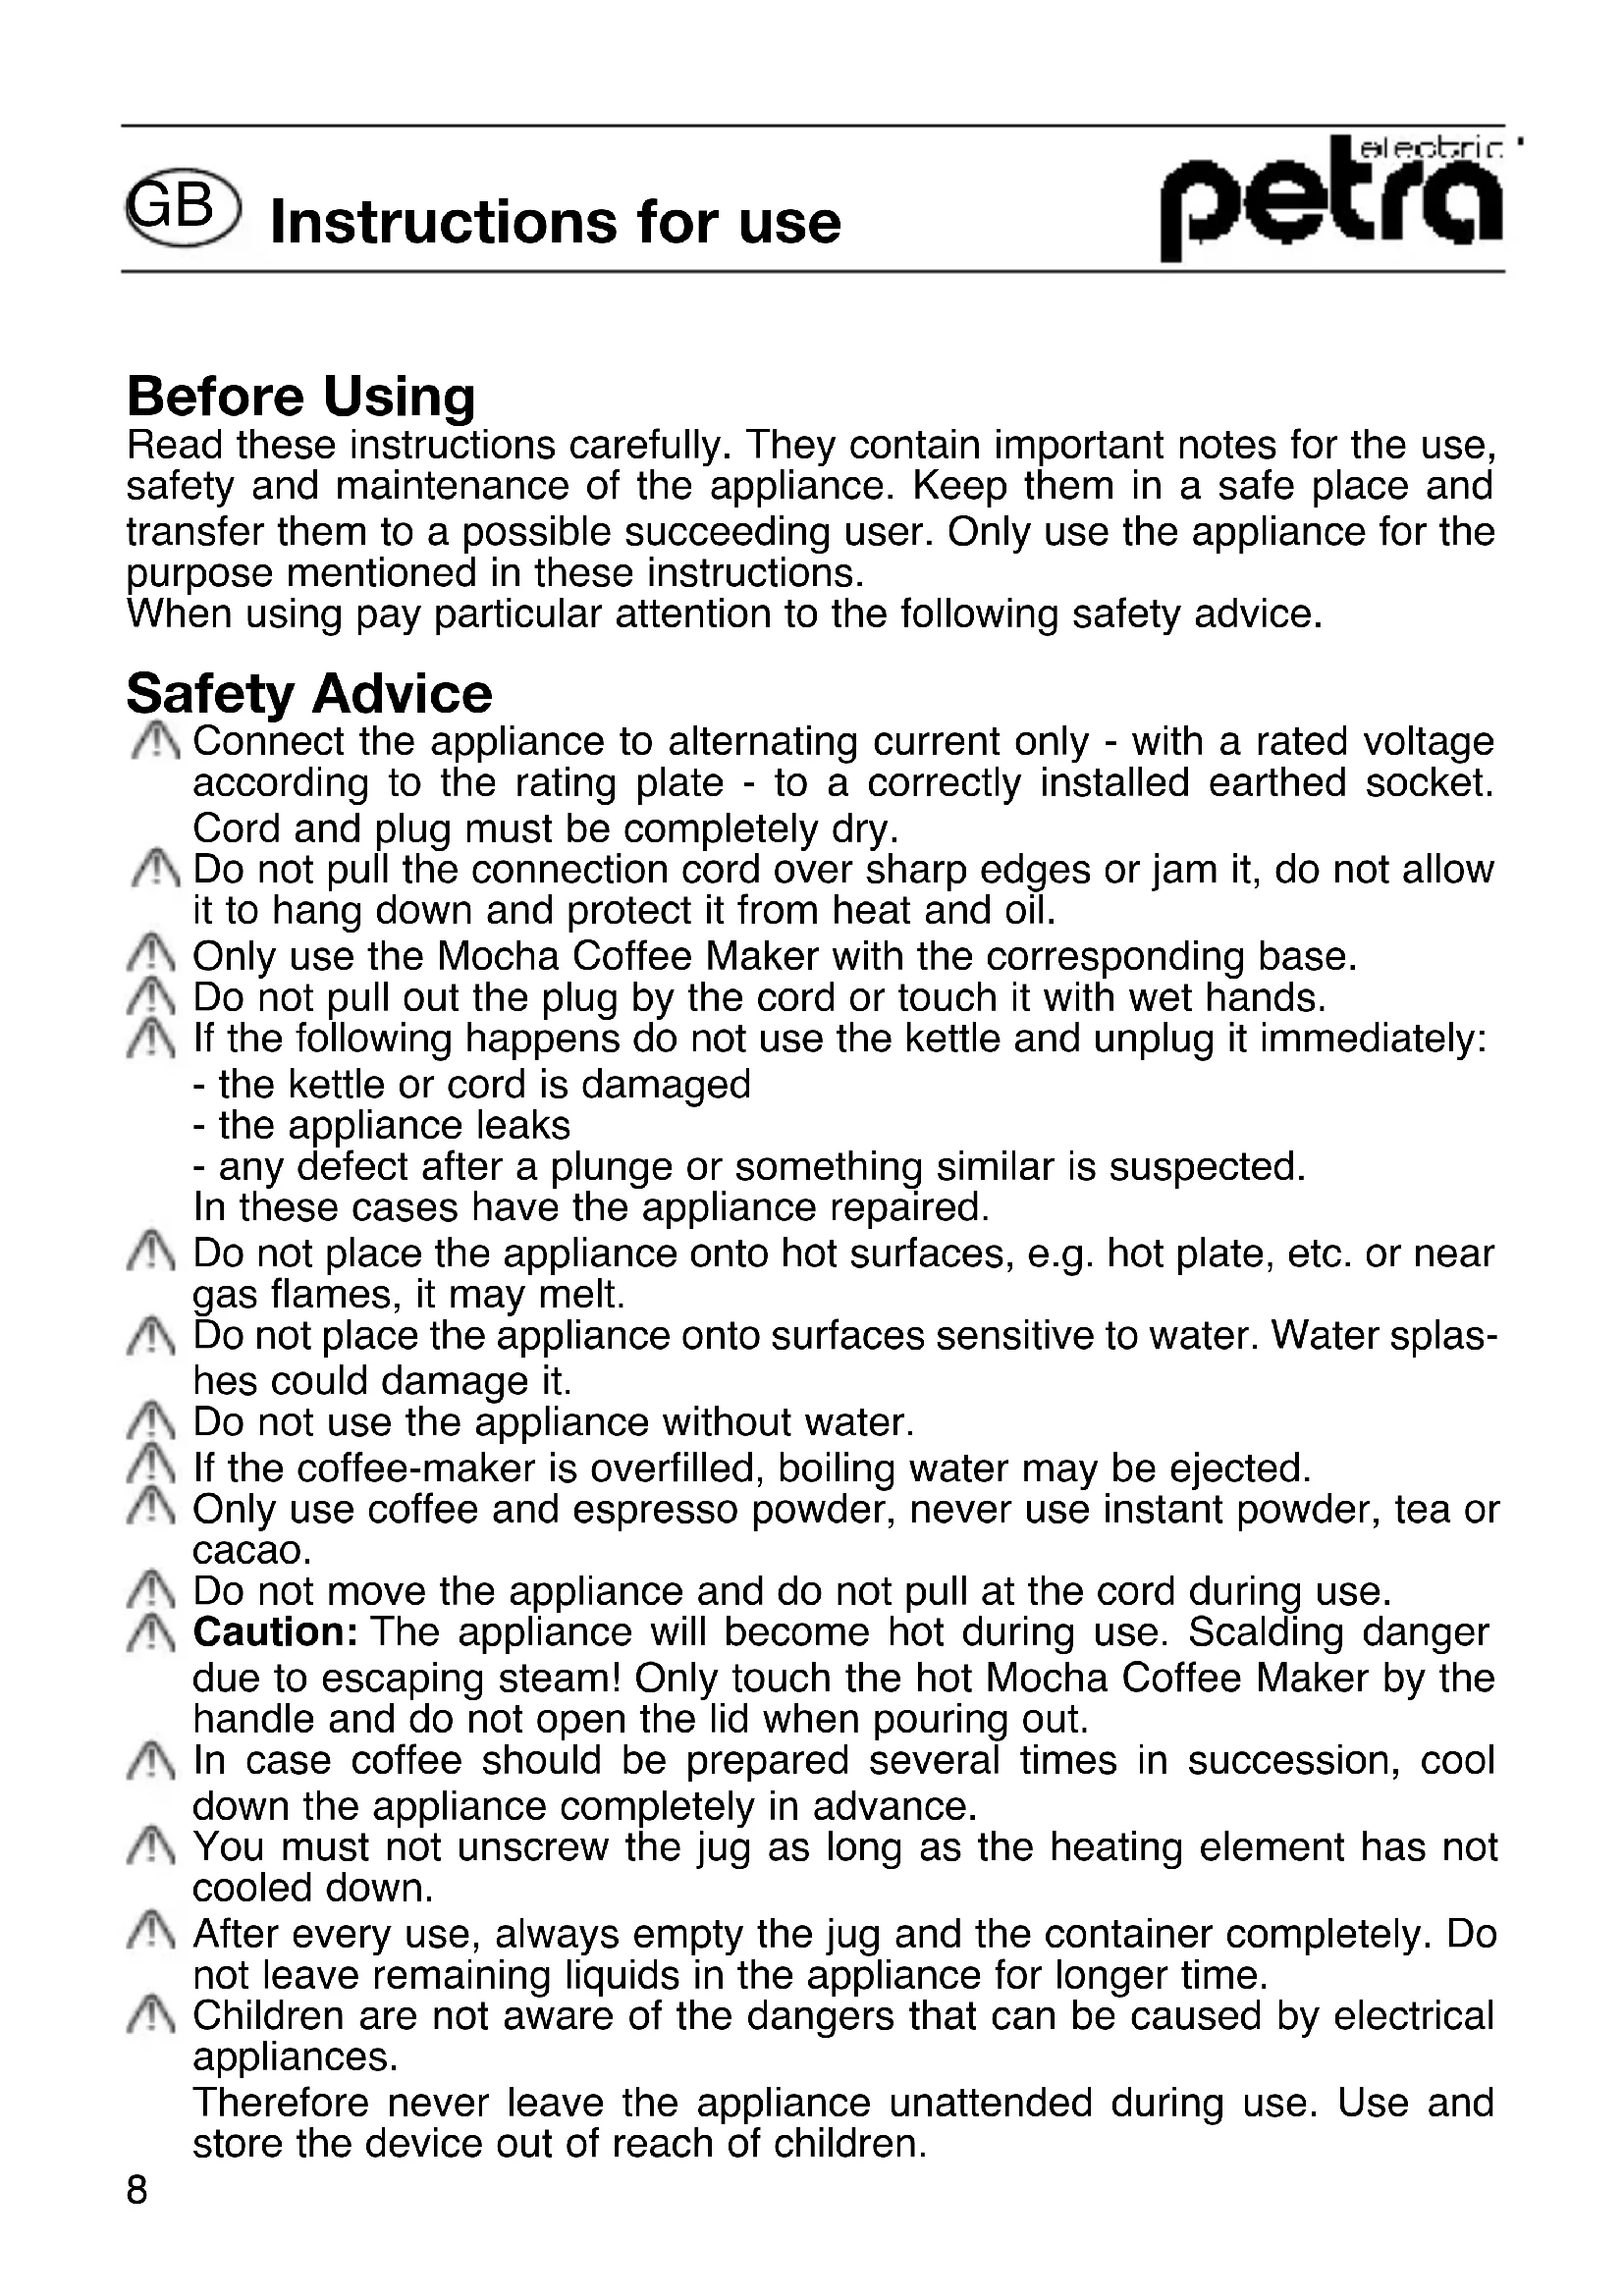
GB Instructions for use
F Mode d'emploi
I Istruzioni per l'uso
E Instrucciones de uso
NL Gebruiksaanwijzing
Vor dem Benutzen
text_image
Labeled diagram of a stainless steel coffee kettle with numbered parts for identificationInbetriebnahme
text_image
Technical diagram of a mechanical assembly with numbered components, likely a valve or pump component.natural_image
Close-up of a metallic mechanical component with a dial and a pointed tip, showing no visible text or symbols.Read these instructions carefully. They contain important notes for the use, safety and maintenance of the appliance. Keep them in a safe place and transfer them to a possible succeeding user. Only use the appliance for the purpose mentioned in these instructions.
When using pay particular attention to the following safety advice.
Safety Advice
Connect the appliance to alternating current only - with a rated voltage according to the rating plate - to a correctly installed earthed socket. Cord and plug must be completely dry.
Do not pull the connection cord over sharp edges or jam it, do not allow it to hang down and protect it from heat and oil.
Only use the Mocha Coffee Maker with the corresponding base.
Do not pull out the plug by the cord or touch it with wet hands.
If the following happens do not use the kettle and unplug it immediately:
- the kettle or cord is damaged
- the appliance leaks
- any defect after a plunge or something similar is suspected.
In these cases have the appliance repaired.
Do not place the appliance onto hot surfaces, e.g. hot plate, etc. or near gas flames, it may melt.
Do not place the appliance onto surfaces sensitive to water. Water splashes could damage it.
Do not use the appliance without water.
If the coffee-maker is overfilled, boiling water may be ejected.
Only use coffee and espresso powder, never use instant powder, tea or cacao.
Do not move the appliance and do not pull at the cord during use.
Caution: The appliance will become hot during use. Scalding danger due to escaping steam! Only touch the hot Mocha Coffee Maker by the handle and do not open the lid when pouring out.
In case coffee should be prepared several times in succession, cool down the appliance completely in advance.
You must not unscrew the jug as long as the heating element has not cooled down.
After every use, always empty the jug and the container completely. Do not leave remaining liquids in the appliance for longer time.
Children are not aware of the dangers that can be caused by electrical appliances.
Therefore never leave the appliance unattended during use. Use and store the device out of reach of children.
⚠️ Unplug in the following cases:
- faults during use
- prior to cleaning and maintenance
- after use.
Do not immerse the heating vessel or base in water.
In case of misuse, wrong handling or incorrect repair no liability will be taken for possible damages. Claims under guarantee are also excluded in such cases.
The appliance is not designed for commercial purposes.
In case the cord of this appliance is damaged, it has to be replaced by authorized service agent of the manufacturer or a person having similar qualifications. Substantial dangers for the user can appear from inappropriate repairs.
text_image
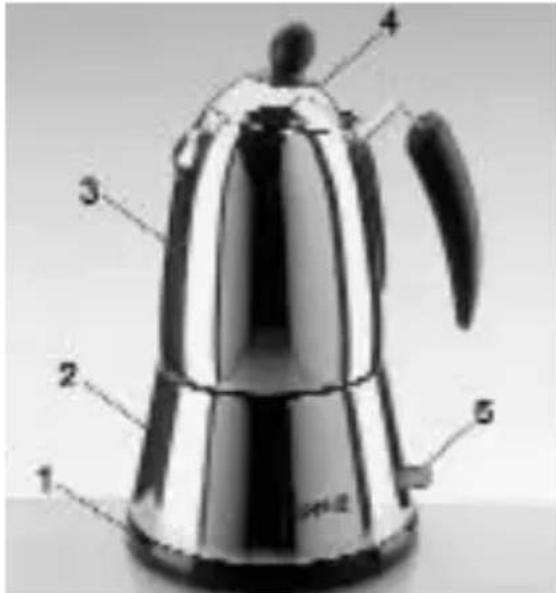
Labeled diagram of a stainless steel coffee kettle with numbered parts for identificationPutting into operation
Before first use clean all the components and rinse them under clear water. Firstly unscrew the jug (3) from the heating vessel (2) by turning counterclockwise.
The heating vessel must not be immersed into the water.
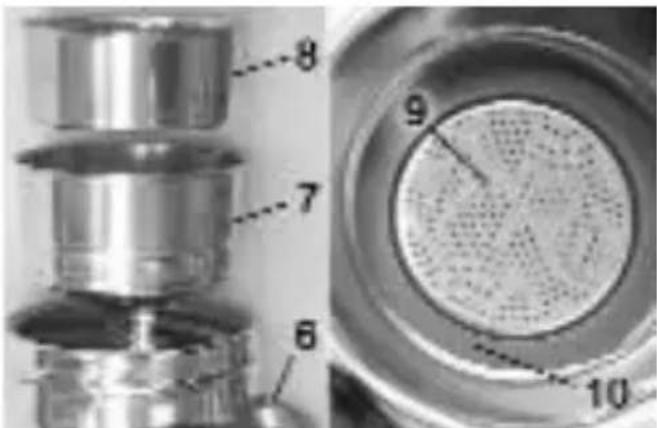
In order to take off the filter disk (9) remove the sealing (10) which must not be damaged. Inserting must be effected in a way that the joint disk and the filter disk are laid side by side.
The non-required length of the cord can be rolled up at the bottom of the base (1). The cord must not touch the hot appliance. Put the plug into an earthed socket.
text_image
8 7 6 9 10Preparation
With the Mocha Coffee Maker, you can prepare either 2 or 4 cups (50-60 ml respectively) of coffee with strong, intensive flavour.
- Fill fresh water for 2 or 4 cups into the heating vessel (2) up to the level indication.
- Insert the funnel shaped filter (7) into the heating vessel (2). For 2 cups, the additional sieve attachment has to be inserted into the funnel shaped filter (7).
- Fill in medium-ground coffee powder from coffee or espresso beans up to the rim into the funnel shaped filter (7) (for 4 cups) or into the sieve attachment (8) (for 2 cups). Fill in coffee powder loosely. If the coffee is ground very fine or if the powder is pressed on, the filter might be-come blocked. Remove the remaining powder on the rim by the finger.
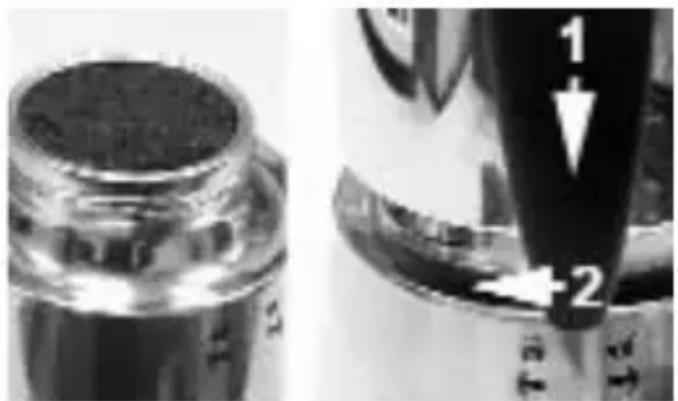
- Put the jug (3), like indicated in the illustration, onto the heating element (2) and screw it tightly clockwise. Close the lid (4).
natural_image
Close-up of two mechanical components with no visible text or symbols- Put the appliance onto the base (1) and press the start button (5). The control lamp on the button indicates that the appliance is heating.
- The coffee is ready after a few minutes. It is well audible when the heating switches off automatically and the control lamp switches off.
- The coffee is served directly from the appliance. For an equally strong coffee, stir the jug carefully prior to pouring out.
- After every use rinse the jug and the container and clean the sieve attachment and funnel shaped filter. It is normal that some water with some coffee powder remains in the heating element.
- All the parts must be dry prior to screwing of the appliance.
Coffee variations
A strong coffee, prepared with the Mocha Coffee Maker MC 4, allows you many variations:
Café mocha with liquid chocolate, hot milk and cream,
Caramel macchiato with hot, frothed milk, vanilla flavour and caramel,
Café coretto with a splash of anise, sambuca, amaretto, grappa
or fernet.
Safety system
The safety valve (6) protects the appliance from too much pressure. Therefore it must not be manipulated. The security performance of the valve is not ensured if the appliance is operated with too much water.
In case of erroneous operation without water, a thermostat protects the appliance from overheating by switching off the heating. After cooling down the appliance is again ready for operation.
If the first thermostat fails in case of improper use, an additional temperature control ensures a reliable protection.
De-scaling
Lime scales cause loss of energy and reduce the life time of the appliance. Therefore, the container should regularly be de-scaled with usual de-scaling agents suitable for stainless steel. Please consider the user instructions of the manufacturer.
Only heat up the substance in open container, it must not boil, otherwise it will foam over the top of the kettle. After de-scaling rinse carefully with water. Guarantee does not cover damages resulting from non-observance of the manufacturers instructions.
Cleaning and maintenance
Before cleaning unplug the appliance and let it cool down. Never immerse the heating vessel into water. The single components are not dishwasher-proof. Clean the outside of the appliance with a damp cloth only.
All metal components are made from rust-resistant stainless steel. Any iron moulds are only residues which stick on the surfaces. They can be removed with a special polishing agent for stainless steel. Do not use any caustic or scouring cleaning agents.
Check regularly whether the funnel shaped filter, sieve attachment, joint disk and filter disk are damaged and replace them if necessary.
Causes for failure
- Appliance switches off early:
The lime scale built up in the heating vessel is too thick. - There is a steam escaping from the safety valve:
The coffee is too pulverized.
If the failure cannot be removed have the appliance repaired.
For UK use only
- This product is supplied with a 13 A plug conforming to BS 1363 fitted to the mains lead. If the plug is unsuitable for your socket outlets or needs to be replaced, please note the following. If the plug is a non-rewireable one, cut it from the mains lead and immediately dispose of it. Never insert it into a socket outlet as there is a very great risk of an electric shock.
- The replacement of the plug at the mains lead has to be done according to the following instructions:
Warning - This appliance must be earthed
Important: The wires in this mains lead are coloured in accordance
with the following code:
green/yellow Earth
blue Neutral
brown Live
As the colours of the wires in the mains lead of this appliance may not correspond with the coloured markings identifying the terminals in your plug, proceed as follows:
- the wire which is coloured green and yellow must be connected to the terminal which is marked with the letter E or by the earth symbol, or coloured green or green and yellow,
- the wire which is coloured blue must be connected to the terminal which is marked the letter N or coloured black,
- the wire which is coloured brown must be connected to the terminal which is marked with the letter L or coloured red.
- If a 13 A (BS 1363) plug is used it must be fitted with a 3 A fuse conforming to BS 1362 and be ASTA approved. If any other type of plug is used, the appliance must be protected by a 5 A fuse either in the plug or adapter or at the distribution board.
If in doubt - consult a qualified electrician.
- Never use the plug without closing the fuse cover.

The appliance complies with the European directives 73/23/EEC and 89/336/EEC.
At the end of its lifetime this product must not be disposed of through the normal domestic waste, but it should be handed to an assembly point for the recycling of electrical and electronical appliances. You can inquire about details at the local administration.
Subject to changes.