
104951 - Alarm bell HAMA - Free user manual and instructions
Find the device manual for free 104951 HAMA in PDF.

| Product type | Radio-controlled alarm clock with DCF77 reception |
| Brand | Hama |
| Model | 104951 |
| Power supply | 2 x 1.5V batteries (not included) |
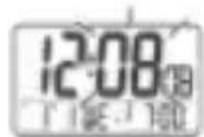
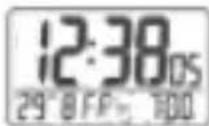
| Display | Large LCD screen |
| Displayed information | Hours, minutes, seconds, month, date, day of week |
| Dual alarm | Yes, with alarm 1 and alarm 2, adjustable snooze interval (1 to 59 min) |
| Snooze function | Yes, adjustable (default 4 min) |
| Time format | 12h/24h selectable |
| Time zone | Adjustable from -9 to +9 h for foreign time |
| Daylight saving time | Symbol displayed automatically after DCF reception |
| Day languages | 5 languages (German, English, Italian, French, Spanish) |
| Backlight | Yes, activation by button (duration 3 seconds) |
| Low battery indicator | Yes |
| Automatic signal reception | Every hour |
| Care and cleaning | Wipe with a soft dry cloth. Do not use abrasive products. |
| Safety | Observe battery polarity. Do not expose to moisture. |
Frequently Asked Questions - 104951 HAMA
User questions about 104951 HAMA
0 question about this device. Answer the ones you know or ask your own.
Ask a new question about this device
Download the instructions for your Alarm bell in PDF format for free! Find your manual 104951 - HAMA and take your electronic device back in hand. On this page are published all the documents necessary for the use of your device. 104951 by HAMA.
USER MANUAL 104951 HAMA
All listed brands are trademarks of the corresponding companies. Errors and omissions excepted, and subject to technical changes. Our general terms of delivery and payment are applied.
- Controlled by Radio Signal (German DCF77)
- Large LCD display
- Displays Hour, Minute, Second; Month, Date, Day of Week, Alarm Time
- Foreign Time Setting (-9 Hour to +9 Hour)
- Summer Time Indicator
- Dual Alarm with programmable snooze period
- Independent Alarm Time Setting - Crescendo Daily Alarm1 & Single Alarm 2
- 12 Hour or 24 Hour Display Format Selectable
- Weekday Indication in 5 Languages
- battery Low Indicator
- Backlight function
- Two Battery (1.5V) Operation
| INDICATOR STANDING | FOR INDICATOR STANDING FOR | ||
| Radio Signal Z | z | Repeat Alarm Indication | |
| D | D | ate M | M |
| F | Foreign Time Indication | S | Summer Time Indication |
| PM PM | (12 Hr Display only) | ALARM 1 | |
| AM AM | (12 Hr Display only) | ALARM 2 | |
| Radio Signal WeAkly |
0
Setting the time
- Once the battery is installed properly, all the displays on the face of the clock will light up briefly. The time & date will be: 1 D1 M WE 0:00 and the alarm1 time will be 7:00.
- Your radio-controlled clock will begin to seek out the DCF time signal automatically. This takes typically between 3-5 minutes in good conditions. If after 5 minutes the DCF time has not been received, use the MODE key to set the time manually. The clock will then automatically attempt to receive the DCF time each hour every day. When this is successful, the received time will override the manually set time.
Function Keys
Your radio-controlled clock has 6 easy to use function keys that control operation:
MODE
- To view alarm1 time or alarm2 time
- To set the time manually
To set the foreign time manually.

To increase the hour, minute, year, month, date during time setting
- To switch between 12 hour display format and 24 hour display format.
- To switch between the local time and foreign time

- To decrease the hour, minute, year, month, date, during time setting
To select the language of day of week.

SET
To set the daily alarm1
- To turn on or turn off the daily alarm1

SET
- To set the daily alarm2
- To turn on or turn off the daily alarm2
LIGHT • SNOOZE
- To turn on the backlight
- To switch to snooze mode when the alarm is activated
To set the time and date manually
Press and hold the MODE button for 3 seconds:
The hour digit will flash, then press the button or the button to adjust to the correct hour.
Press the MODE button:
- The minute digit will flash, then press the button or the button to adjust to the correct minute.
Press the MODE button:
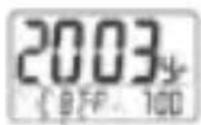
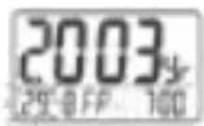
The year digit will flash, then press the button or the button to adjust to the correct year.


Press the MODE button:
- The month digit will flash, then press the button or the button to adjust to the correct month.
Press the MODE button:
- The date digit will flash, then press the button or the button to adjust to the correct date.
Press the MODE button and the time is set. If no key is pressed for 30 seconds, the clock w revert to normal time display.
To set the language of weekdays
- In normal mode, press and hold the button for 3 seconds.
- The language of the current weekdays will be displayed in the LCD : e.g. English (EN), German(GE), Italian(IT), French(FR), Spanish(SP).
- Press the button for 1 second to adjust to the correct language of weekdays.
To set the foreign time
- In normal mode, press and hold the button for 3 seconds. The clock will switch to foreign time with the "F" icon turn on.
- Press and hold the button for 3 seconds in foreign time will switch to normal time with the "F" icon turn off.
- In foreign time, press and hold the MODE button for 3 seconds to set the foreign time with the hour digit flashes.
- Press the button or the button to adjust to the correct hour for the time zone.
- Press the MODE button and the foreign time is set.
- If no key is pressed for 30 seconds, the clock will revert to foreign time display.
To set the daily ALARM 1
Press and hold the SET button for 3 seconds:
- The alarm1 hour digit will flash, then press the button or the button to adjust to the desired hour.
- Press the SET button, the alarm1 minute digit will flash, then press the button or the button to adjust to the desired minute.
- Press the SET button to show the current snooze period with the minute field flashes.
- Press the button or the button to adjust to the desired snooze period from 1 minute to 59 minutes.
- Press the SET button and the alarm1 time is set and enabled.
- If no key is pressed for 30 seconds, the clock will resume the alarm I display.
To set the ALARM 2
- Press and hold the SET button for 3 seconds:
- The Alarm 2 hour digit will flash, then press the button or the button to adjust to the desired hour.
- Press the SET button, the alarm2 minute digit will flash, then press the button or the button to adjust to the desired minute.
- Press the SET button to show the current snooze period with the minute field flashes.
- Press the button or the button to adjust to the desired snooze period from 1 minute to 59 minutes.
- Press the SET button and the alarm2 time is set and enabled.
- If no key is pressed for 30 seconds, the clock will resume the alarm 2 display.
Using the Alarm and SNOOZE for daily ALARM 1 or ALARM 2
- Press the SET/ SET button to turn the alarm1 on, or the alarm1 off/ the alarm 2 on, or the alarm2 off.
- When the current time reaches the alarm time that is enabled, the corresponding alarm is activated.
- Press the SET/ SET button when the alarm is activated will stop the alarm for 24 hours.
- When the alarm is activated, press the SNOOZE · LIGHT button and the alarm stops but sounds again after the snooze period (4 minutes snooze period is pre-programmed).
- The repeat alarm indicator will flash.
- The alarm will stop after 4 minutes if the SET/ SET button or SNOOZE LIGHT button is not pressed.
Receiving the radio control signal
The radio-controlled clock will automatically receive the radio signal every hour. It will take 3- minutes to receive the radio signal. If the DCF signal is received, the DCF tower will be visible the display, otherwise it will not.
Backlight
Press the SNOOZE · LIGHT button to light up the clock for 3 seconds.
Low battery level detection
Should the battery capacity drop to a level that is not sufficient to operate the clock, the low battery indicator will light up. The battery should be replaced as soon as possible.
Attention! Please dispose of used batteries in an ecologically safe manner.
Replacing the battery:
Please use only the types of battery that are approved for this device and ensure that the pc is correct when inserting a new battery.