
D107 - Hi-Fi System DENON - Free user manual and instructions
Find the device manual for free D107 DENON in PDF.
| Product type | Hi-Fi system with CD player, tuner, amplifier and speakers |
| Brand | Denon |
| Model | D107 |
| Dimensions (main unit) | 204 (W) × 293 (H) × 157 (D) mm (including stand) |
| Dimensions (speakers) | 204 (W) × 267 (H) × 82 (D) mm (including stand) |
| Weight (main unit) | 120 g (with batteries) |
| Power supply | 230 V AC, 50/60 Hz |
| Power consumption | 80 W (operating), < 1.5 W in eco standby mode |
| Output power (satellites) | 20 W + 20 W (6 Ω, 1 kHz, THD 0.9%) |
| Output power (subwoofer) | 40 W (12 Ω, 100 Hz, THD 0.9%) |
| Tuner frequency ranges | FM 87.5 – 108 MHz; AM 522 – 1629 kHz |
| CD player | Audio CD, CD-R/RW, MP3 (MPEG-1/2 Audio Layer 3) |
| CD playback functions | Random, programmed, repeat, search |
| Audio inputs | 1 x AUX (RCA jack) |
| Remote control system | Infrared, R03/AAA batteries (2 x) |
| Timer | Daily, once, sleep timer (max 60 min) |
| Sound adjustments | Bass (BASS), midrange (MID), treble (TREBLE), SDB (Super Dynamic Bass) |
| Display | Adjustable brightness (Normal, Dimmer-1, Dimmer-2) |
| Supplied accessories | Remote control, FM/AM antennas, speaker cables, stand, manual |
| Maintenance and cleaning | Soft dry cloth; do not use solvents |
| Spare parts and repairability | Contact an authorized Denon service center |
Frequently Asked Questions - D107 DENON
User questions about D107 DENON
0 question about this device. Answer the ones you know or ask your own.
Ask a new question about this device
Download the instructions for your Hi-Fi System in PDF format for free! Find your manual D107 - DENON and take your electronic device back in hand. On this page are published all the documents necessary for the use of your device. D107 by DENON.
USER MANUAL D107 DENON
TO PREVENT FIRE OR SHOCK HAZARD, DO NOT EXPOSE THIS APPLIANCE TO RAIN OR MOISTURE.
CAUTION
- Handle the power supply cord carefully
Do not damage or deform the power supply cord. If it is damaged or deformed, it may cause electric shock or malfunction when used. When removing from wall outlet, be sure to remove by holding the plug attachment and not by pulling the cord.
- Do not open the rear cover
In order to prevent electric shock, do not open the top cover.
If problems occur, contact your DENON DEALER. 3. Do not place anything inside
Do not place metal objects or spill liquid inside the system.
Electric shock or malfunction may result.
Please, record and retain the Model name and serial number of your set shown on the rating label. Model No. D-107, USW-107 and USC-107 Serial No.

CAUTION
RISK OF ELECTRIC SHOCK
DO NOT OPEN

CAUTION:
TO REDUCE THE RISK OF ELECTRIC SHOCK, DO NOT REMOVE COVER (OR BACK). NO USER-SERVICEABLE PARTS INSIDE. REFER SERVICING TO QUALIFIED SERVICE PERSONNEL.

The lightning flash with arrowhead symbol, within an equilateral triangle, is intended to alert the user to the presence of uninsulated "dangerous voltage" within the product's enclosure that may be of sufficient magnitude to constitute a risk of electric shock to persons.

The exclamation point within an equilateral triangle is intended to alert the user to the presence of important operating and maintenance (servicing) instructions in the literature accompanying the appliance.
NOTE:
This system uses the semiconductor laser. To allow you to enjoy music at a stable operation, it is recommended to use this in a room of 5^ 141F\~ 35^ 195F.
LABELS (for U.S.A. model only)
CERTIFICATION
THIS PRODUCT COMPLIES WITH DHHS RULES. 21 CFR SUBCHAPTER J APPLICABLE AT DATE OF MANUFACTURE.
CAUTION:
USE OF CONTROLS OR ADJUSTMENTS OR REFOR-MANCE OF PROCEDURES OTHER THAN THOSE SPECIFIED HEREIN MAY RESULT IN HAZARDOUS RADIATION EXPOSURE.
THE COMPACT DISC PLAYER SHOULD NOT BE ADJUSTED OR REPAIRED BY ANYONE EXCEPT PROPERLY QUALIFIED SERVICE PERSONNEL.
This device complies with Part 13 of the FCC Rules. Operation is subject to the following two conditions: (1) This device may not cause harmful interference, and (2) this device must accept any interference received, including interference that may cause undesired operation.
This Class B digital apparatus meets all requirements of the Canadian Interference-Causing Equipment Regulations.
-
Read Instructions - All the safety and operating instructions should be read before the product is operated.
-
Retain Instructions - The safety and operating instructions should be retained for L.L.R. reference.
-
Hedd Warnings - All warnings on the product and in the operating instructions should be adhered to.
-
Follow Instructions - At operating and use instructions should be followed.
-
Cleaning - Unplug this product from the wall outlet before cleaning. Do not use liquid cleaners or aerosol cleaners.
-
Attachments Do not use attachments not recommended by the product manufacturer as they may cause hazards.
-
Water and Moisture. Do not use this product near water for example, near a bath tub, wash bowl, kitchen sink, or laundry tub; in a wet basement, or near a swimming pool; and the like.
-
Accessories - Do not place this product on an unsteel coat, stand, t-shirt, bracelet, or table. The product may fall, causing serious injury to a child or adult, and serious damage to the product. Use only with a cart, stand, triped, bracket, or table recommended by the manufacturer, or sold with the product. Since the product is intended for use in the manufacturer's instructions, one should use a mounting
accessory recommended by the manufacturer.
- A product and cart combination should be moved with care. Quick stops, excessive force, an uneven surfaces may cause the product and cart combination to overturn.

-
Ventilation - Slots openings in the cabinet are provided for ventilation and to ensure reliable operation of the product and to protect it from overhearing, and these openings must not be blocked or covered. The openings should never be blocked by pacing the product on a bed, sofa, rug, or other surface. This product should not be placed in a stall in installation or transport as a boocase or rack unless proper ventilation is provided of the manufacturer's instructions have been adhered to.
-
Power Sources - This product should be operated only from the type of power source indicated on the marking label. If you are not sure of the type of power supply in your home, consult your product dealer or local power company. For products intended to operate from battery power, or other sources, refer to the operating instructions.
-
Grounding or Polarization - This product may be equipped with a polarized alternating-current plug (a plug having one blade wider than the other). This plug will fit into the power outlet only one way. This is a safety feature. If you are unable to insert the plug fully into the outlet, try reversing the plug. If the plug should still fail to fit, contact your technician to replace your obsolete outlet. Do not defect the safety purpose of the polarized plug.
2023.10.24
- Power-Cord Protection - Power-supply cords should be routed so that they are not likely to be walked on or pushed by items placed upon or against them, paying particular attention to avoid the risk of injury to the electronics, and the point where they exit from the product.
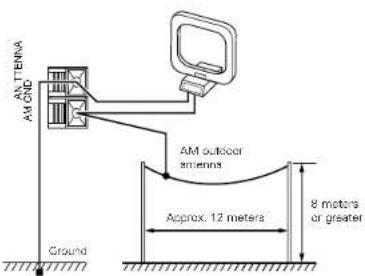
- Outdoor Antennas Grounding - If an outside antenna or cable system is connected to the product, be sure the antenna or cable system is grounded so as to provide some protection against voltage surges and built-up static charges. Article 9.10 of the National Electronic Code, ANSINFFA 70, provides information with regard to proper grounding of the mast and supporting structure, grounding of the lead-in wire to an antenna discharge unit, size of grounding conductors, location of antenna-discharge unit, connection to grounding electrodes, and requirements for the grounding electrode. See Figure A.
- Lightning - For added protection for this product during a lightning storm, or when it is unable to be removed for long periods of time, unplug it from the wall outlet and disconnect the antenna or cable system. This will prevent damage to the product due to lightning and powerline surges.
- Power Lines - An outside antenna system should not be located in the vicinity of overhead power lines or other electric light or power circuits, or where it can fall into such power lines or circuits. When installing an outside antenna system, extroco radio should be taken to loop from touching such power lines or circuits as contact, with them might be fatal
- Overloading - Do not overload with outlets, extension cords, or integral conversion roscopics as the can result in a risk of fire or electro shock.
- Object and Loud Entry - Never push objects of any kind into this product through openings as they may touch dangerous voltage points or short out parts that could result in a fire or electric shock. Never spill liquid of any kind on the product.
- Servicing - Do not attempt to service this product yourself as opening or removing covers may expose you to dangerous voltage or other hazards. For all servicing to qualified service personnel.
- Damage Requiring Service - Unplug this product from the wall outlet and refer servicing to qualified service personnel under the following conditions:
8) When the power-supply cord or plug 3 camaged, bit 1 liquid has been spilled, or objects have fallen into the water.
eIf the product has been exposed to rain or water,
di the product does not operate normally by following the operating instructions. Adjust only those controls that are covered by the operating instructions as an improper adjustment of other controls may result in damage and will often require extensive work by a qualified technician to restore the product to its normal operation.
of if the product has been dropped or damaged in any way, and
It When the product exhibits a distinct change in performance – this indicates a need for service. - Replacement Parts - When replacement parts are required, be sure the service technician has used replacement parts specified by the manufacturer or have the same characteristics as those specified in the product specifications may result in fire, electric shock, or other hazards.
- Safety Check - Upon completion of any service or repairs to this product, ask the service technician to perform safety checks to determine that the product is in proper operating condition.
- Well or Ceiling Mounting - The product should be mounted to a wall or ceiling only as recommended by the manufacturer.
2b. Rest: The product should be situated away from heat sources such as radiation, heat registers, stoves, or other products (including amplifiers) that produce heat.
ENGLISH FRANCAIS ESPANOL
See ENGLISH pages 8, 9.
Voir FRANCAIS page 33, 34.
Consute la pagina 58, 59 para ESPANOL.
CD RECEIVER / Receptor CD / Receptor de CD
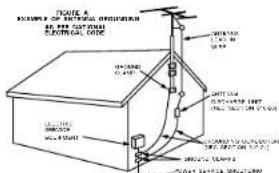
[Top panel / Panneau supérieur / Panel superior]
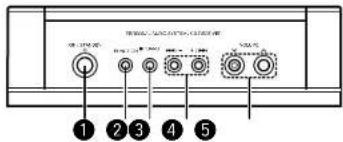
[Front panel / Panneau avant / Panel frontal]
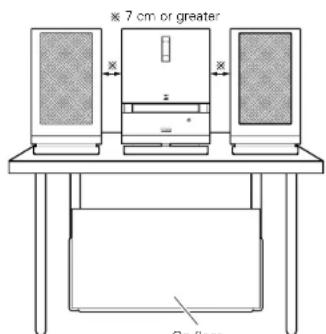
For heat dispersal, leave at least 10cm of space between the top, back and sides of subwoofer and the wall or other components.
PRECAUTIONS D'INSTALLATION
| 1) Features. | 5 |
| 2) Before using. | 5 |
| 3) Connections. | 6-8 |
| 4) Part names,functions and displays. | 8, 9 |
| 5) Remote control unit. | 10, 11 |
| 6) Opening and closing the disc door and loading discs. | 12 |
| 7) Menu function. | 13, 14 |
| 8) Clock adjustment. | 14 |
| 9 Listening to the radio | 15, 16 |
| 10 Using the timers | 17-20 |
| 11 Adjusting the tone | .21 |
| 12 Playing CDs | .21-25 |
| 13 Playing MP3 files | 26-28 |
| 14 Cleaning | .28 |
| 15 CDs | .28 |
| 16 Troubleshooting | .29 |
| 17 Specifications | .29 |
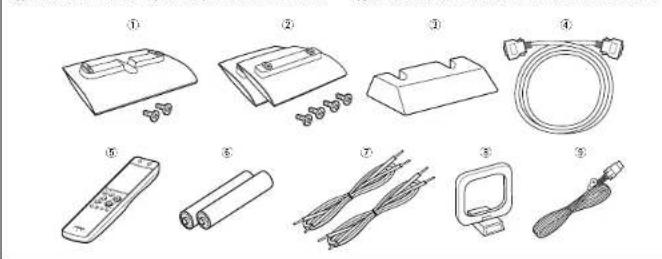
■ ACCESSORIES
Please check to make sure the following items are included with the CD receiver, subwoofer and speakers in the carton:
| ①Stand (Main unit) | 1 |
| Screw (4-10) | 2 |
| ②Stand (Speaker) | 2 |
| Screw (4-10) | 4 |
| ③Cable cover | 1 |
| ④System conductor cable | 1 |
| ⑤Remote control unit (RC-909) | 1 |
| ⑥F03/AAA batteries | 2 |
| ②Speaker cable | 2 |
| ⑧AM loop antenna | 1 |
| ⑨FM antenna | 1 |
| ⑩Pattern paper | 1 |
| ⑪Operating instructions | 1 |
| ⑫Service station list | 1 |
1 FEATURES
Quality power for high quality sound 20 W+20 W (6Ω/ohms, 1 kHz, T.H.D. 0.9 %) and 40 W (12Ω/ohms, 100 Hz, T.H.D. 0.9 %) high quality amplifier and terminals for large speakers.
TONE and SDB control TONE control is available for BASS and TREBLE separately and the SDB (Super Dynamic Bass) control enables powerful bass tones when listening at lower volume levels. This unit has Source Direct position to turn off the TONE/SDB.
- Easy-to use remote control unit
MP3 playback - CD-RW playback
2 BEFORE USING
Condensation
■ Condensation
Condensation can be seen as water droplets that have formed on the windows of a heated room in winter.
Conditions for the Formation of Condensation
In winter, when the unit is brought from outdoors to a warm indoor location, or when the room temperature is suddenly raised by a heater, condensation will form on the operating parts within the unit and normal operation will no longer be possible.
Condensation can also form in summer when the breeze from an air conditioner strikes the unit directly. Should this occur, change the setup location of the unit.
Measures to Take After Condensation Forms
If condensation has formed, switch on the power and leave the unit for a while. Although the time will differ according to the surrounding conditions, the unit should be usable in 1 to 2 hours.
Should condensation form on the disc, wipe the disc clean.
Other Precautions
- Illustrations used for descriptive purposes may differ from the actual items.
Please keep the instruction manual. After reading this instruction manual, please keep it in a safe place together with the warranty.
Setup Precautions
Please provide a spacing of more than 10 cm between the top, rear, and side surfaces of subwoofer and walls or other audio/video equipment, etc.
When using this unit or other electronic equipment that contains microprocessors at the same time as using a tuner or TV, noise or screen interference can occur on the audio and video of the tuner or TV. Should this occur, pay careful attention to the following points.
Separate this unit as much as possible from the tuner or TV.
- Separate the antenna line of the tuner or TV from the power cable and input/output connection cables of this unit as much as possible.
- Use of indoor antennas and 300Ω/ohms feeders are especially susceptible to such interference. We recommend the use of outdoor antennas and 75Ω/ohms coaxial cable.
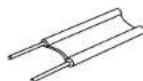
300Ωohms feedline
75 Qachms cxaxis cable
When not using the D-107
Under normal circumstances
Always remove the disc and turn the power off.
- When leaving home for long periods of times such as for trips, be sure to unplug the power supply cord.
When moving the D-107
Do not subject the D-107 to shocks.
Always check that the disc has been removed and the connection cords disconnected before moving the D-107.
ENGLISH
3 CONNECTIONS
NOTES:
Do not plug in the power plug into an outlet until all connections have been completed.
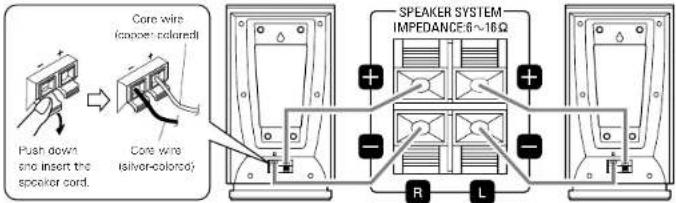
- Check the channels and be sure to connect left to left (L-white), right to right (R-red).
- Insert the power plug securely. An incomplete connection will cause noise to occur.
- After unplugging the power supply cord, wait about 5 seconds before unplugging it back
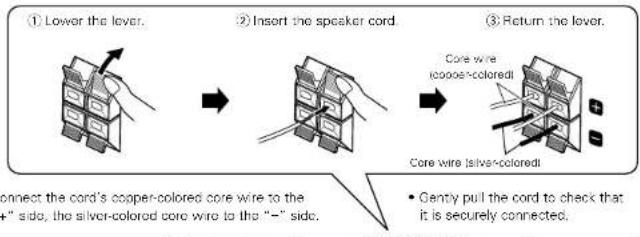
- Be sure to connect the speaker cords between the speaker terminals and the speaker systems with the same polarities to + , - to - . If the polarities are switched, the sound at the center will be weak, the position of the different instruments will be unclear, and the stereo effect will be lost.
- Do not bundle the Iain plug connection cables together or place them close to other electrical products such as TVs since this may cause harm or other noise.
Connecting the speaker systems
- Connect the speaker system for the left channel (the left side as seen from the front) to the "L" terminals, the speaker system for the right channel to the "R" terminals.
- Be sure to use speaker systems with an impedance of 6 kΩ/ths or greater.
The source selected by pressing the FUNCTION button is output from the AUX OUT terminals. If the function is set to "AUX", however, the sound of the component connected to the AUX IN terminals is not output from the AUX OUT terminals.
Do not press the FUNCTION button while recording a D-107 source on an external recorder.
NOTE: Pressing the FUNCTION button while recording a D-107 source on an external recorder will switch the source being recorded.
ENGLISH
Connecting a CD receiver and subwoofer
About mounting the main unit stand You will need a screwdriver to assemble.
①Connect the system cable to the bottom of the main unit.
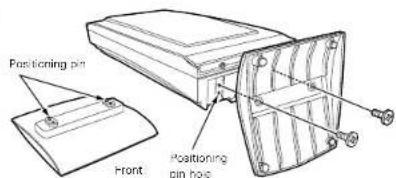
2Run the system cable around to the back, line up the positioning pin of the included main unit stand with the hole in the main unit, then mount with the included screws.
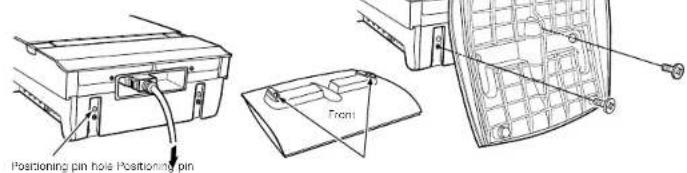
③Connect the plug on the opposite side of the system cable to the subwoofer.
Connect with the wider part of the system cable's connector facing upwards. Insert the plug securely, pressing it in all the way it will go.
■About mounting the cable cover [When mounting on the wall] (See page 8.)
Run the system cable around to the back, line up the positioning pin of the included cable cover with the hole in the main unit, then mount with the included screws.
![DENON D107 - ■About mounting the cable cover [When mounting on the wall] (See page 8.) - 1](/content/2026/02/380341/images/24ced475fefbc7fed4c8c96d20cdc83cb89c79a897433f0a4d6195026720d1f3.jpg)
Connecting the speakers
About mounting the speaker stand Paying attention to set the included speaker stand in the proper front/back position, line up the positioning pin with the hole in the speaker, then mount it with the included screws and fasten it securely.
Connecting the speakers and cords
- Use the included speaker cards to connect the speakers and subwoofer.
- Connect the left channel speaker the left side as soon from the front to the "L" terminals, the right channel speaker to the "R" terminals.
NOTES:
-
Be sure to unplag the power supply cord before connecting the speakers.
-
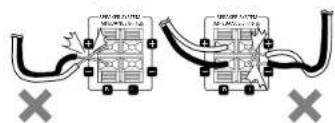
Be sure to connect the speaker's cords properly. H to +, - to -, L to L and R to R.
Do not short-circuit the speaker cords.
If the power is turned on, accidentally short-circuiting the speaker cords could cause damage or accidents.
- Be sure to connect the speaker to the speaker terminals with the proper polarities (+ to +, - to) if the polarities are wrong, the sound from the center will be weak, the positioning of the
instruments will be unclear and the stereo effect will be poor.
- Never play such special signals as sine waves or the fast-forwarding signals of a tape recorder continuously.
ENGLISH
Installing the FM indoor antenna
Tune in an FM station (see page 15), set the antenna in a position in which distortion and noise is minimum, then fasten the tip of the antenna in this position using tape or a pin.
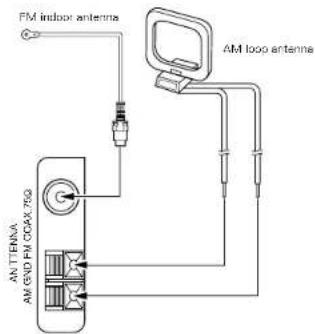
Connecting an FM outdoor antenna
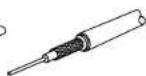
If broadcasts cannot be tuned in clearly with the included antenna, use an outdoor FM antenna, connect a converter adapter to the coaxial cable and connect the converter adapter to the set's FM COAX (75Ω/ohms) terminal.
Selecting a place for the FM outdoor antenna
- Set the antenna so that it is pointing towards the broadcast station's transmitting antenna.
- Behind buildings or mountains, set the antenna in the position at which reception is best, and also try changing the direction of the antenna.
- Do not install the antenna under power lines.
- Doing so is extremely dangerous, as the power line could touch the antenna.
- Install the antenna away from roads or tracks to avoid noise from cars or trains.
- Do not install the antenna too high, as it may be hit by lightning.
Note to CATV system installer:
This reminder is provided to Call the CATV system installer's attention to Article 820-40 of the NEC which provides guide lines for proper grounding and, in particular, specifies that the cable ground shall be connected to the grounding system of the building, as close to the point of cable entry as practical.
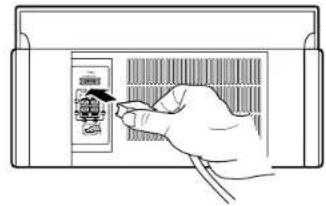
Installing the AM loop antenna
Tune in an AM station (see page 15), set the antenna in a position as far from the system as position in which distortion and noise is minimum. In some cases it is best to invert the polarities. AM broadcasts cannot be received well if the loop antenna is not connected or if it is set close to metal objects.
Assembling the AM loop antenna
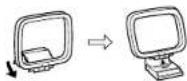
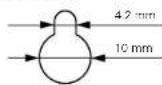
Assemble the included AM loop antenna as shown in the diagram.
Connecting the AM loop antenna
Connect the included AM loop antenna to the antenna terminals as shown in the diagram.
Lower
the lever
②Insert the
antenna wire.
③Return the
lever.


Installing an AM outdoor antenna
Connect the signal wire from the AM outdoor antenna to the antenna terminal (ANTENNA AM). Be sure to ground the antenna and connect the ground wire to the GND terminal. Also be sure to connect the included AM loop antenna
Mounting on a wall
The D-107 and speakers (USC-107) can be mounted on a wall.

Connect the system cable to the bottom of the D-107. (See page 7. * There is no need to mount the stand.

Connect the cords to the speakers. (See page 7.)

Mount the D-107 and speakers to the wall using commercially available screws and the holes on the rear panels of the D-107 and speakers.
When mounting the screws on the wall, for convenience the included template can be used to determine the positions of the screws beforehand.
× Select screws referring to the diagram below.
[Wall mount hole on rear panel of main unit and speakers]
4 Use the holes on the rear panels of the D-107 and the speakers to mount the D-107 and the speakers onto the screws in the wall.
5 Connect the system cable and speaker cords to the subwoofer. (See page 7.)
NOTES:
- When mounting on the wall, take care that no accidents occur due to the D-107 or speakers falling.
- Check the wall surface before mounting the D107 and speakers to make sure it is strong enough to support the weight.
- Consult a specialist if you do not know how strong the wall is.
- Straws for mounting the D-107 on the wall are not included. Use screws suited to the strength and material of the pillar or wall.
- Fasten the speaker cords and system cables in place so that there is no risk of them being pulled accidentally, causing the main unit or speakers to fall.
- Be sure to mount using screws for all four screw holes on the CD receiver and both screw holes on the speakers. If any of the screw holes are not used, the CD receiver or speakers will
be unstable and risk falling - Do not install the CD receiver too high up. If the CD receiver is too high, the remote control signals may have not reach it easily, making it difficult to operate.
Note that Denon will not be held responsible for any accidents or damage due to improper assembly or mounting, insufficient mounting strength, erroneous usage, natural disasters, etc.
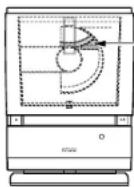
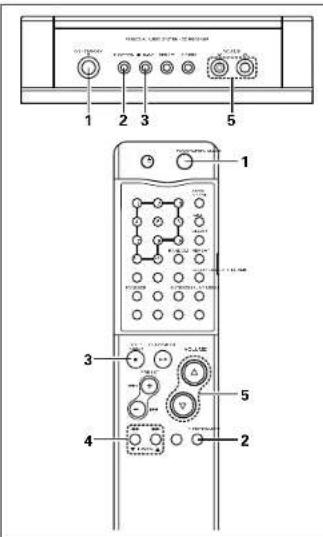
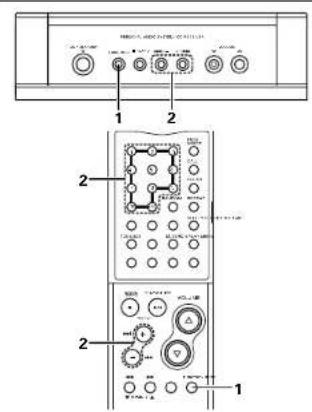
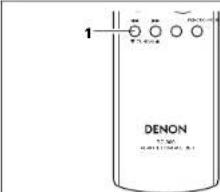
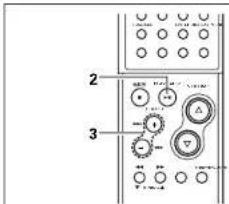
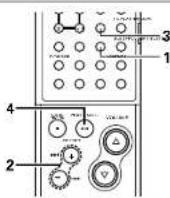
PART NAMES, FUNCTIONS AND DISPLAYS
(1) CD receiver (D-107), Speakers (USC-107) and Subwoofer (USW-107)
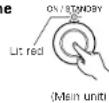
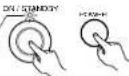
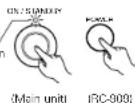
ON/STANDBY button
- Press to button on the power and press again to set the standby mode.
- The indicator color changes as follows, according to the condition:
When in the power on mode: Green When in the standby mode: Red
When in the timer standby mode Orange When in standby in the eco-mode: Light
FUNCTION button
- Press this to select the function
The function changes in the following order: each time this button is pressed:
TUNER AUX
ENGLISH
BAND button
-
In CD function, press this button to stop playback.
-
In tumor function, each time this button is pressed, the band and FM reception mode change as follows:
FM AUTO FM MONO AM
1-/+按钮
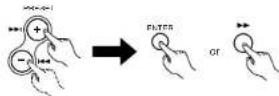
- Press the and buttons to move to the beginning of a specific track while in CD function. (See page 22.)
- When the function is set to "TUNER", press these button to select the preset number. (See page 16.)
Press these button to select the menu function (See pages 13, 14.)
VOLUME 一 buttons
- Press to lower or raise the volume.
The volume increase when the button is pressed and decreases when the button is pressed. - When one of the buttons is pressed, the volume level changes in 65 steps. The level is indicated on the display, ranging from "Volume 00" (minimum) to "63" then "Max". (Electronic control)
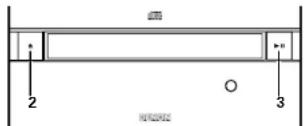
Disc door
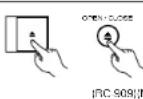
- Press the button to open and close the door.
- When a disc is loaded, it is drawn in automatically and the door closes.
The door automatically closes if it is left open for about 1 minute.
7 button
- Press this button to open and close the disc door.
- When pressed in the standby mode, the power turns on and the disc door opens.
Display
See page 9.
REMOTE SENSOR
- Aim the supplied remote control iFC 9099 at this sensor and operate.
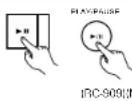
10▶/Ibutton
- Press this button to start playing a disc.
- The pause mode is set when this button is pressed while a CD is playing.
When pressed while in the pause mode, playback resumes. - When pressed while the disc door is open, the disc door closes and playback begins.
- When procssed in standby mode, the power automatically turns on and playback begins. [Auto on function]
- When pressed while the function is set to anything other than "CD", the function switches to "CD" and the CD starts playing [Auto on selection]
Main unit stand
- Mount using the included screws. (See page 7.)
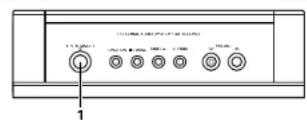
DIGITAL OUT OPTICAL terminal
AUX IN terminals
AUX OUT terminals
- No signals are output from these terminals when the function is set to "AUX".
FM antenna terminal (ANTENNA FM)
See page 8.
AM antenna terminals (ANTENNA AM)
- See page 8.
SYSTEM CONTROL terminal
Speaker terminals
Speaker stand
SYSTEM CONTROL terminal
Power supply cord
SPEAKER SYSTEM terminals
(2) Display
Mode display portion (Timer section)
This indicates the timer status.
This lights when the timer is set to "ON". It is also lit when the timer is in the standby mode. When the timer is set to "OFF", the indicator is off, even if the timer times are set.
SLEEP : This lights when the slop tumor is activated.
Mode display portion (CD section)
This indicates the CD mode.
Lights during play.
II. Lights during pause
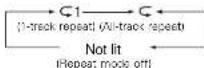
Lights as follows during repeat play. This light as follows each time the REPEAT button is pressed:

[For a music CD]
For MP3 files

(Repeat mode of A-track repeat)
MP3: This lights when a disc containing M format files is loaded.
FILE: This lights when the file name in the MP3 ID3-Tag is displayed.
TITLE: This lights when the title name in the MPS ID3-Taq is displayed.
FOLDER: This lights in the folder selection mode.
ARTIST: This light when the artist named MPS IDe-Tag is displayed.
ALBUM: This lights when the album name in the MP3 ID3-Tag is displayed.
PROG: Lights as follows during program play.
RAND: Lights during random play. This lights as follows each time the RANDOM button is pressed:
[For a music CD]

[For MP3 files]
FOLDER RAND RAND
1 folder all-track |All-track random model)
058) Not li
Random mode off!
Menu function display section
This lights when in the menu function.
Mode display portion (Tuner section)
This indicates the tuning mode.
P. SET: This flashes when presetting AM/FM stations, then stops flashing when the station is prosct.
AUTO: This lights when the "FM AUTO" mode is selected with the BAND button.
This lights during tuner reception when an AM or FM station is properly tuned in.
ST Lights when stereo is selected. MONO : This lights when the "FM MONO" mode is selected with the BAND button and when receiving a monaural broadcast while in the "FM AUTO" mode.
MEMO : This lights when prescting AAFFM stations, then turns off when the station is preset.
Mode display portion
(Tone control section)
This indicates sound adjustment modes.
SDB :This lights when the SDB (Super Dynamic Bassol function is set to "ON".
TONE: This lights when the level has been adjusted using the tone controls (BASS, MID and TREBLE).
Mode display portion (Multi-display section)
This indicates the various functions.
- When the function is set to "TUNER", the reception band and reception frequency are displayed here.
- When the function is set to "CD", the disc number, number of tracks, current track number, playing time and the various operating modes are displayed here.
- When the MENU button is pressed, the display switches to the displays of the various modes.

TRC-9003
ENGLISH
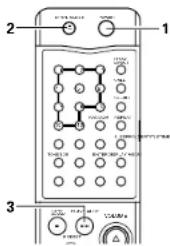
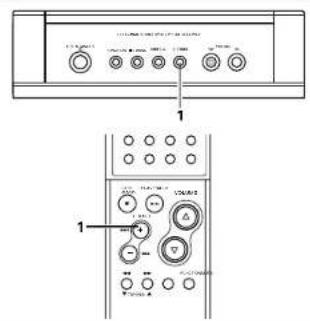
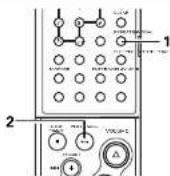
5 REMOTE CONTROL UNIT
The D-107 can be controlled from a distance using the included remote control unit (RC-909).
(1) Inserting Batteries
1 Remove the remote control unit's rear cover.
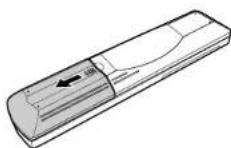
(2)Place two R03 (AAA) batteries in the battery compartment in the direction indicated by the marks.
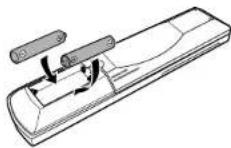
3.Close the rear cover.
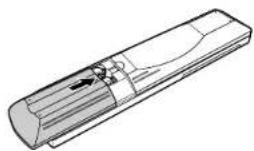
(2) Using the Remote Control Unit

- When operating the remote control unit, point it at the remote control sensor as shown on the diagram.
The remote control unit can be used from a direct distance of approximately 7 meters. This distance will be shorter, however, if there are obstacles in the way or if the remote control unit is not pointed directly at the remote control sensor.
The remote control unit can be operated at a horizontal angle of up to 30^ with respect to the remote control sensor.
NOTES:
- It may be difficult to operate the remote control unit if the remote control sensor is exposed to direct sunlight or strong artificial light.
Do not press buttons on the main unit and on the remote control unit at the same time. Doing so will result in malfunction.
ENGLISH
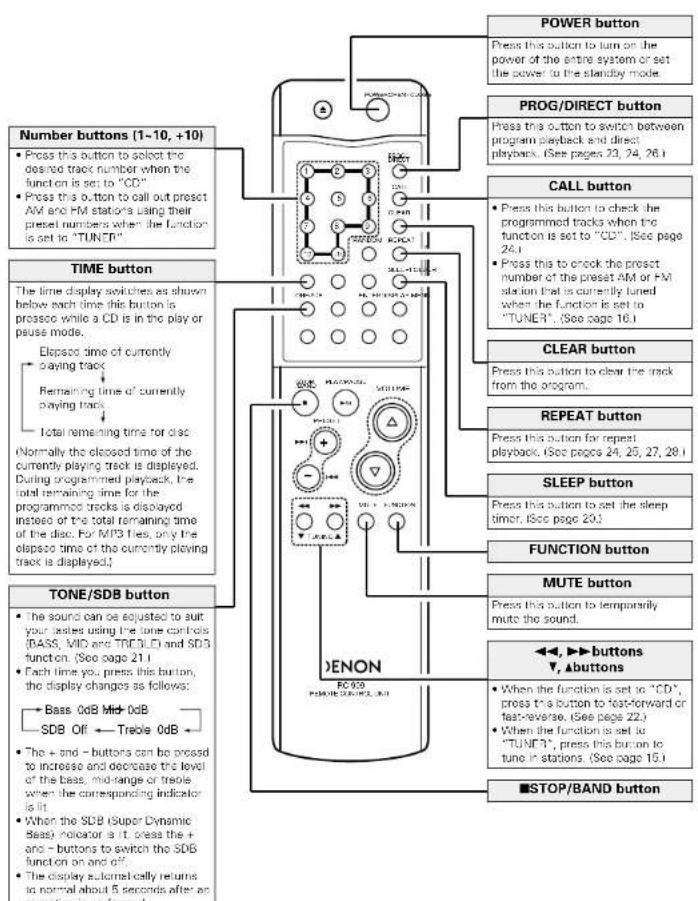
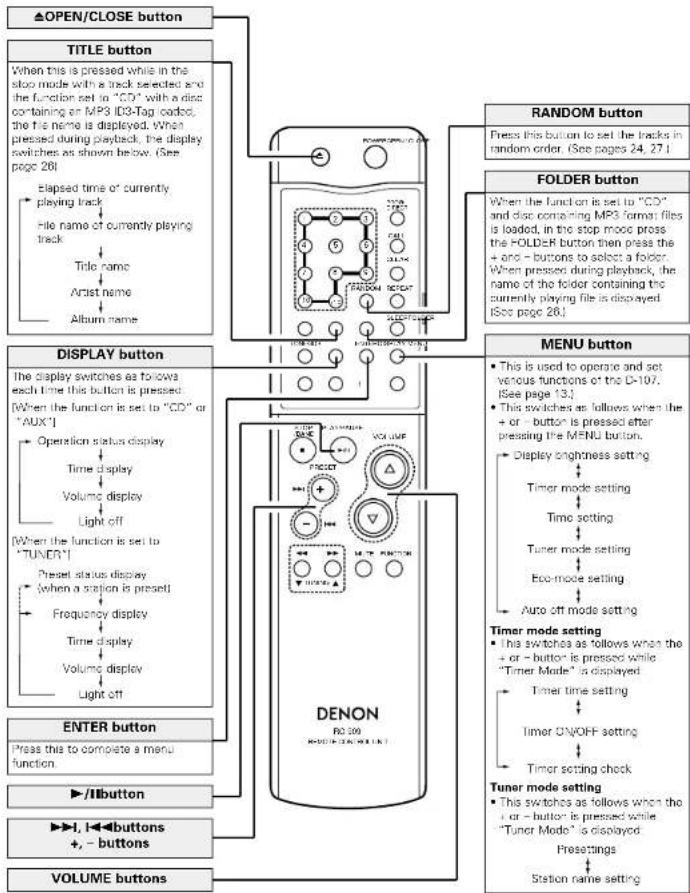
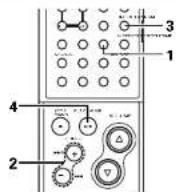
(3) Names and Functions of the Remote Control Buttons
■ Button not explained here function in the same way as the corresponding buttons on the main unit.
ENGLISH
6 OPENING AND CLOSING THE DISC DOOR AND LOADING DISCS
1 Press the button to turn the power on. Lit gro
2 Press the FUNCTION button and set the function to "CD".
3 Press the button.
The disc door
opens.
- When pressed in the standby mode, the power turns on and the disc door opens.
4 Once "Insert Disc" appears on the display, load the disc in the disc holder with the labeled side facing towards you.
※ Be careful not to touch the disc's surface.
Make sure the disc door is fully opened when loading discs. (Fig. 1)
* The door opens and closes when the function is set to anything other than "CD", but in this case the display does not switch.
5 The disc is automatically drawn in and the door closes.
To eject the disc, press the button.
When the button is pressed after the disc is loaded, the disc door closes and playback starts.
Disc holder
The disc holder is the place in the disc door here the disc is got.
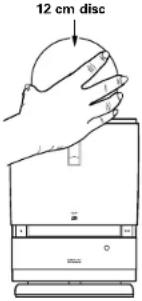
Fig.1
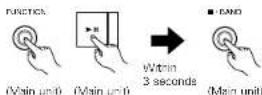
Removing a disc that has fallen from the disc holder
①With the disc door open, press the VOLUME button and button on the main unit simultaneously, then press the BAND button within 3 seconds.
- "Holder Down" is displayed and the disc holder lowers.
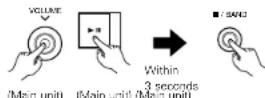
②Turn the main unit upside-down and remove the disc.
* Note that the disc may be scratched.
③Press the button to turn the power off.
NOTES:
- Do not load discs in the disc holder while the disc door is opening or closing. Doing so may cause the disc to fall from the disc holder. Make sure that "Insert Disc" is displayed before loading the disc.
- If your finger, etc., should get caught, keep calm and press the button.
- Do not insert foreign objects into the disc holder. Doing so could result in damage.
- Do not press the disc door in when the power is turned off. Doing so could result in damage.
7 MENU FUNCTION
■ Be sure to set the current time beforehand.
Various functions can be operated and various settings made using the menu function.
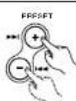
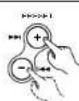
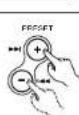
Press the + or - button after pressing the MENU button to perform the settings listed below.
| Setting item | Setting details | Page | |
| Display Mode (Display brightness setting) | Sat the display's brightness. Select "Normal", "Dimmer-1" or "Dimmer-2". | 13 | |
| Timer Mode (Timer mode setting) | TimerSet? (Timer time setting) | Use this to make the everyday timer and once timer settings. | 17, 18 |
| TimerOn/Off (Timer ON/OFF setting) | Use this to turn the everyday timer and once timer to "ON" or "OFF". | 18 | |
| TimerCheck? (Timer setting check) | Use this to check the everyday timer and once timer settings. | 19 | |
| ClockAdjust (Time setting) | Use this to set the current time. | 14 | |
| Timer Mode (Tuner mode setting) | TunerPreset (Presettings) | Use this to store the reception band and frequency at the number buttons. | 15 |
| StationName (Station name setting) | Use these to give names to automatically sat stations. | 16 | |
| Eco Mode (Eco-mode setting) | Use this for a lower power consumption in the standby mode. Set to "On" or "Off". | 13 | |
| AutoOff Mode (Auto off mode setting) | This function can be used to automatically set the power to the standby mode if the set remains in the stop mode for the set amount of time with the function set to "CD". Sat to "On" or "Off" and select the time (5, 10, 20 or 30 minutes). | 14 | |
- The MENU button functions in both the stop and play modes.

Press the MENU button to cancel the menu function currently being set.

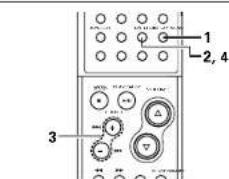
To set the menu functions back to the default values, press the FUNCTION and buttons on the main unit simultaneously, then within 3 seconds press the BAND button "RAM CLEAR" is displayed for approximately 2 seconds and the values are reset to their default.
Display brightness setting
Press the MENU button.

2 Press the ENTER button.
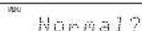
3 Press the + / - buttons to select the display brightness.
Each time you press this buttons, the display changes as follows:
Normal? Dimmer-1? Dimmer-2?
4 Press the ENTER button. The setting is entered.


Eco-mode setting
■ Be sure to set the current time beforehand.
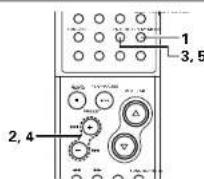
1 Press the MENU button.


2 Press the +f -buttons to select "ECO Mode".
3 Press the ENTER button.


4 Press the + / - buttons to make "On" or "Off" flash.
*The selected setting ''O''n'' or"Ol") switches each time the + / - buttons is pressed. The setting that is flashing is the one that is selected.
5 Press the ENTER button. The "MENU" indicator turns and the setting is completed

NOTE:
The display and indicators remain off while the standby mode is set in the eco-mode. To turn on the power, press the ON/STANDBY button on the CD receiver or the POWER button on the remote control unit. (The auto power on function does not work.)
ENGLISH
Auto off mode setting
■Be sure to set the current time beforehand.
1 Press the MENU button.

DisplayMode
2 Press the +/- buttons to
select "AutoOffMode".

Huaolffnode
3 Press the ENTER button.

Mode On/Off
4 Press the + / - buttons to make "On" or "Off" flash.
The selected setting ("On"
or "Off" switches each
time the +1- buttons is
pressed.
The setting that is flashing is the one that
is selected.

5 When "Off" is selected
Press the ENTER button.
The "MENU" indicator tu
and the setting is completed.

When "On" is selected
Press the ENTER button.
Proced to step 6.

time
6 Press the + / - buttons to
setting the time.
Each time you press this
buttons, the display
changes as follows:
and the power is set to the
standby mone after the set time.

CLOCK ADJUSTMENT
■Be sure to set the current time beforehand.
[Example]To sat the current time to "7:39 PM
Wednesday" (12 hour display model).
3,5,7,9
4,6,8,10
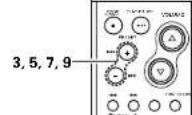
Press the button to turn the power on.

Press the MENU button.
DisplayMode
3 Press the + / - buttons to select "ClockAdjust".

ClockAdjust
4 Press the ENTER button.

50121099H
5 Press the + / - buttons to select "Wed".
电话:12:00PM
6 Press the ENTER button.

见下表:
7 Press the + / - buttons to adjust the hour “7 PM”.


7 Press the + / - buttons to adjust the hour “7 PM”.
Wed 2009 PPI
8 Press the ENTER button.

Wed 7:00PM
9 Press the + / - buttons to adjust the minutes "30".

见E
10 Press the ENTER button at the sound of the chime indicating the time is currently 7:30 PM.

The current time is displayed, the
"MENU" indicator turns off and
the setting is completed.
Wed 7:30PM
The clock may go off by up to about 1 minute per month. If it is off, reset the time.
ENGLISH
(1) Station Selection
[Example] Set the reception frequency to "FM 87.50 MHz".
1 Press the button to turn the power on.
MainunitHC-0093
2 Press the FUNCTION button and set the function to "TUNER".
3 Press the ■/BAND button to select "FM".
4 Press the TUNING buttons and set the receive frequency to FM 87.50 MHz
- When a station is tuned in, the V_ref indicator lights.

(RC 909)
Auto tuning
Hold the tuning button down for more than 0.5 second and release to automatically receive broadcast stations with strong signals. Tuning will not stop automatically if the antenna's input level is low (if the " indicator does not light).
- To stop auto tuning, press the TUNING buttons once (for under 0.5 seconds).
Manual tuning
The reception frequency changes each time one of the buttons is pressed (for less than 0.5 seconds).
5 Press the VOLUME buttons to adjust the volume.
Men unit

FC-9091
Receiving FM programs in stereo
When the reception mode is set to "FM AU" and a stereo broadcast is tuned in, the "ST" indicator lights and the broadcast is received
The antenna input level is low and stereo reception is unstable, set the reception mode to FM MONO to receive in mono and achieve oscillator sound. The last sat reception mode is used in the memory.
NOTE:
A humming sound may be heard when using a TV nearby while receiving AM programs. If this happens, move the system as far from the TV as possible.
(2) Storing Broadcast Stations
- Be sure to set the current time beforehand.
- Up to 30 FM and AM stations can be preset.
[Example] Store the taned "FM 87.50 MHz" to preset number "3".
1 Press the MENU button.

DisplayMode

2 Press the + / - buttons to select "Tuner Mode".
Tuner Mode

3 Press the ENTER button.
TUNER Presets

4 Press the ENTER button.
FH 87.50NH
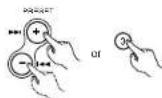
5 Press the BAND button and TUNING buttons, receive the broadcast station FM 87.50 MHz that you want to store to preset memory.

6 Press the ENTER button.

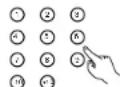
7 Press the + / - buttons or number buttons to display the number that you want to store.
8 Press the ENTER button.

9 Repeat step 3 to 7 to set other station, or change a preset station.
10 Press the MENU button to complete the setting.
- The "MENU" indicator turns off

To cancel the operation in the middle, press the MENU button before performing step 7.
NOTES:
If a station is present at a number where a station is already preset, the previous station is replaced with the new station.
The preset memory is not cleared immediately when the power supply cord is unplugged, but is cleared if the cord left unplugged for an extended period of time. If this happens, preset the stations again.
ENGLISH
(3) Giving names to preset stations
■ Be sure to set the current time beforehand.
Names of up to 11 characters can be given to preset stations.
1 Perform steps 1 and 2 under "Listening to preset stations" above to display the preset number of the station to which you want to give a name.
2 Press the MENU button.
D islayHode
3 Press the +f buttons to select "Tuner Mode".

Tuner Mode
4 Press the ENTER button.

Tuner Preset
5 Press the +/- buttons to select "StationName".

StationName
6 Press the ENTER button.
The character input mode is sat.


7 Press the ENTER button again.

8 Press the + / - buttons to select a character, then press the ENTER or button to enter that character.
- The selected character is entered, the cursor moves to the next place and the unit is set to the next character input standby mode.

The character switches as follows each time the + button is pressed. (Display order) (The character switches in the opposite order when the - button is pressed.)
ABCDEFGHIJKLMNOP
QRSTUVWXYZ012345
6789``
To correct a character you have already input, press the button to move the cursor to the character you want to correct, then select the new character.
9 After inputting the last character you want to input, press the MENU button. The preset number selected in step 1 flashes.

10 Press the ENTER button.
- "StationName" is displayed after the name you have input is displayed.

11 To continue giving names, press the +/- buttons after step 6 to display the preset number of the station to which you want give a name, then perform steps 7 to 10.
12 Press the MENU button to complete the setting. The "MENU" indicator turns off.

To cancel the operation in the middle, press the MENU button before performing step 9.
(4) Listening to Preset Stations
[Example] Listen to the station of preset number "3" that was set in step (2).
1 Press the FUNCTION button and set the function to "TUNER".

(Main unit) (PC-909)
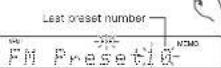
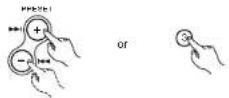
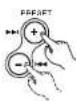
2 Either press the + / - buttons to select the preset number or press the number buttons "3" to display "Preset03".

Main unit)
|RC 909|
(FC 908)
To display the preset number, press the CALL button while listening to a preset station.
ENGLISH
10 USING THE TIMERS
(1) Before Using the Timer
■ Be sure to set the current time beforehand. (See page 14.)
The timer cannot be set unless the currently time is set.
■ Be sure to preset a station when using the timer function with the tuner. (See page 15.)
Types of timer settings
EVERYDAY TIMER: Use this to turn the power on and standby at the same time every day.
ONCE TIMER: Use this to turn the power on and standby once.
SLEEP TIMER : Use this to set the power to turn standby after 10 to 60 minutes, in steps of 10
minutes operated from the remote control unit.
(2) Setting the everyday or once timer
[Example] Setting the everyday time to play preset number 3 (FM 87.50 Mhz) from 12:35 PM to 12:56 PM with the volume set to "24".
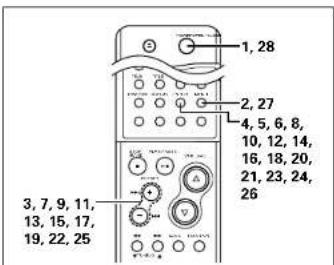
1 Press the button to turn the power on.

2 Press the MENU button.

DisplayMode
3 Press the + / - buttons to select "Timer Mode".

T 1
4 Press the ENTER button.


press the ENTER button to select "Every".
Evenly Unce?
The selected setting "every" or "Onca") switches each time the +/- buttons is pressed. The setting that is flashing is the one that is selected.
6 Press the ENTER button.

0000
Press the + / - buttons, adjust the hours of the starting time.
m
8 Press the ENTER button.
12
9 Press the +/- buttons, adjust the minutes of the starting time.
123567890
10 Press the ENTER button.
100
11 Press the + / - buttons, adjust the hour of the ending time.
中
12 Press the ENTER button.
中
13 Press the + / - buttons, adjust the minutes of the ending time.


中
14 Press the ENTER button.
MCDC/Tuner?
The selected setting ("CD" or "Tuner") switches each time the +/- buttons is pressed.
The setting that is flashing is the one that is selected.
15 Press the + / - buttons to select "Tuner Mode".

CD+Une
16 Press the ENTER button.

17 Press the + / - buttons, select the desired broadcast station.

18 Press the ENTER button.

19 Press the + / - buttons, adjust the volume.

TUNERVOI
ENGLISH
21 Press the ENTER button.
21 Press the ENTER button.

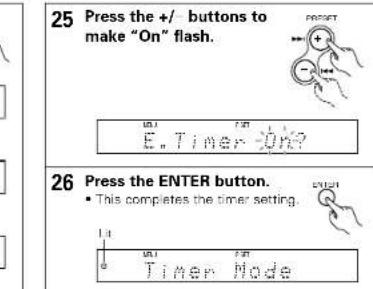
23 Timer ON/OFF setting
Press the ENTER button to select "Every".

The selected setting ("Every" or "Once") switches each time the +/- buttons is pressed.
The setting that is flashing is the one that is selected.
If there is a power failure
- if there is a power failure or if the power supply cord is unplugged from the power outlet, the time settings are cleared. Reset the current time.
The once timer settings are cleared. Reset the timer. - If the everyday timer settings and the timer's presettings are cleared, make the preset settings again.
[Example] Listening to a CD using the once timer.
1 Press the button and load the CD.
The power turns on and the disc door opens.
2 Now follow steps 2 to 27 on pages 17, 18.
Select "Onco" at step 6, "CD" at step 16 and "Onco" at step 23
NOTE:
When setting the function while setting the timer, the timer can be set by selecting "CD" even if no disc is loaded.
In this case, "Insert Disc" appears on the display. Press the button and insert a disc.

24 Press the ENTER button.

ENGLISH
(3) Turning the everyday timer and once timer on and off
The timers can be turned on and off.
1 Press the MENU button.

DisplayMode
2 Press the + / - buttons to select "Timer Mode".

Timer Node
3 Press the ENTER button.

TimerSet?
4 Press the + / - buttons to select "TimerOn/Off".
Time:00:00
5 Press the ENTER button.

EveVvNce?
(4) To check the timer setting
1 Press the MENU button.

DisplayMode
2 Press the + / - buttons to select "Timer Mode".

3 Press the ENTER button.
0000 1
4 Press the + / - buttons to select "TimerCheck".
1
Timer Check?
5 Press the ENTER button.
Example]
When the everyday timer is set to "On" and the once timer is set to "Off"
中

6 Press the + / - buttons to make the indicator for the timer you want to check flash.
The selected setting ("On" or "Off") switches each time the +/- buttons is pressed. The setting that is flashing is selected.
The timer settings can be checked as long as they are set, even if the timer is turned off.
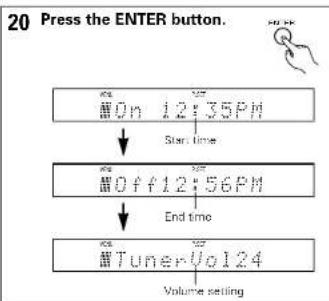
7 Press the ENTER button. [Example]
When the everyday timer has been selected 31 time

8 Press the + / - buttons to check the timer settings
Each time you pross this buttons, the display changes as follows:

00n 12:35PM
1 Start time
00f1256PM
End time
Tuner Vol 124
Function and volume setting
9 Press the ENTER button.

Time Mode
10 Press the MENU button to complete the setting.
The "MENU" indicator turns off.
ENGLISH
(5) Order of priority of the everyday and once timers
If the times set for the everyday and once timers overlap, the once timer has priority.
[Example 1] When the once timer start time is reached after the power has been turned on with the everyday timer (1)

[Example 2] When the once timer start time is reached after the power has been turned on with the everyday timer ②

[Example 3] When the everyday timer start time is reached after the power has been turned on with the once timer (1)
EVERYDAY TIMER ON

[Example 4] When the everyday timer start time is reached after the power has been turned on with the once timer ②

[Example 5] When the everyday timer and once timer start times are the same

(6) Sleep function
The time for switching off the power can be set at up to 60 minutes in 10 minute intervals.
[Example] Setting so that the power is set to the standby mode after 60 minutes
1 Press the FUNCTION button to select the desired function and start playback.
2 Press the SLEEP button twice. The "SLEEP" indicator lights.
Each time you press this button, th display changes as follows: 605040392810Canceling the sleep timer
3 The power is set to the standby mode after 50 minutes.
Press the SLEEP button repeatedly until the "SLEEP" indicator turns off. The sleep timer is also canceled if the POWER button is pressed, turning the power off
11 ADJUSTING THE TONE
The bass (BASSI, mid-range (MID), treble (TREBLE) supor dynamic bass (SDB) can each be adjusted to achieve the classified tones.
1 Press the TONE/SDB button to adjust the tone and display the mode.
Each time you press this
button, the display changes as follows:
Bass 0dB Mid 0dB
SDB Off Treble 0dB

2 To adjust the bass, mid-range or treble
Press the + / - buttons to adjust the level.
The level can be adjusted in the range of -10 to 0 to +10 in steps of 2.
The "TONE" indicator is displayed when the level is set at anything other than 0dB.
To adjust the SDB
The volume of the bass sound is increased according to the overall volume and the above BASS adjustment.
Press the + / - buttons to
select "On" or "Off"
- When set to "On", the "SDB" indicator lights.

3 The adjusted value is displayed for approximately 5 seconds, after which the display returns to normal.
About installation
The quality of the sound produced from the speakers depends on the size of the room, the type of room (Japanese style or western style) and how the speakers are mounted. Adjust the sound to suit your tastes.
■ About main unit installation
When installing on a desk or table, mount the included stand and set the unit vertically. (See page 7.)
The disc may fall out of the disc holder if the unit is sat in any direction other than vertically. (See pega 12.)
■ About speaker installation
- Set the speakers sufficiently apart from each other to achieve a suitable stereo effect (sense of expansion).
- It is recommended that the speakers be placed at least 7 cm from the D-107. (See the diagram below.)
About subwoofer installation
- The set's sound balance is set assuming the suwoofoer is installed on the floor.
- If the subwoofer is placed against a wall, the bass sound may scorn amplified due to the sound reflecting off the wall. Adjust the bass sound (BASS) to suit your tastes.
See "Adjusting the tone" for instructions on adjusting the bass sound (BASS).
12 PLAYING CDs
(1)Playing CDs
1 Press the button to turn the power on.
2 Load a CD in the disc door. (See page 12.)
3 Press the button to start playback.
(2) Stopping playback
1 During playback, press the BAND button.

Main unit:

NOTES:
- "No Disc" is displayed when no disc is loaded or the disc is loaded inside out.
According to recording quality, some CD-R/RW cannot be played. - The all track/1 track remaining time is not displayed if the information on the disc cannot be read properly due to scratches or dirt. In this case, some time may be required for cueing.
- When the or button is pressed while in the standby mode, the power turns on and the disc loading/unloading operation or the playback operation is performed.
- Do not use CDs that have the exposed adhesive or marks remaining from cellophore tape, rental CD labels, or other sources. Use of CDs in this condition will result in difficulty in removing the CD or could cause breakdown.
ENGLISH
(3) Finding the desired position while listening to the sound [Manual search]
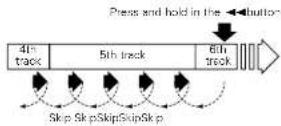
Use this function to skip rapidly through the cisc while listening to the sound.
This function comes in handy when you want to find a certain section within a long track.
Searching forward
1 During playback, press and hold in the button.
- The "▶" indicator flashes.
- Normal playback resumes from the point at which the button is released.
(Playback) Skip SkipSkipSkipSkip
- Playback stops if the end of the last track on the disc is reached while pressing the▶ button.
For high-speed forward search without hearing the sound, press the button while in the pause mode.
Searching backward
1 During playback, press and hold in the button.
The indicator flashes. Normal playback resumes from the point at which the button is released.

Manual search stops and playback starts if the beginning of the fast track on the disc is reached while pressing the button.
For high-speed backward search without hearing the sound, press the button while in the pause mode.
NOTE:
There may be a slight break in the sound when returning to normal playback from the manual search mode.
(4) Finding the beginnings of tracks during playback [Automatic search]
Moving ahead to the beginning of the next track
1 During playback, press the button.
During the search operation, press the button again to move further on to the beginning of the following track.
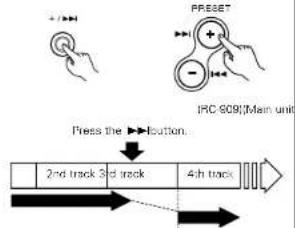
Moving back to the beginning of the current track
1 During playback, press the + button.
During the search operation, press the button again to move further back to the beginning of previous track.

ENGLISH
(5) Stopping playback temporarily [Pause] Use this function to stop playback temporarily then resume from the same point.
1 During playback, press the button. !

Press the button to resume playback from the point at which the pause mode was set.
(6)Playing a certain track [Direct search]
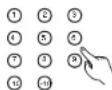
1 Press the number buttons to input the number of the desired track. Playback starts from the selected track.
To use the direct play function during programmed playback, first stop playback then press the PROG/DIRECT button to cancel the programmed play mode.
(7) Stopping playback after cueing [Pause]
Cueing using the direct search function
The pause mode can be set after a track is quad using the direct search function for convenience when recording onto a cassette tape or MD.

1 During playback, press the /lbutton.
2 Press the number buttons or I 1 buttons to input the number of the desired track.
Press the button to start playback.
Cueing with the programmed search function
1 Start the programmed play mode. (See page 24.)
2 Press the /lbutton. The pause mode is set.

3 Press the for 1 buttons to input the number of the desired track.

Press the button to start playback.
ENGLISH
(8) Playing tracks in a certain order [Programmed playback]
Use this function to select certain tracks from the disc and program them to play in a certain order.
Up to 30 tracks can be programmed.
![DENON D107 - Playing tracks in a certain order [Programmed playback] - 1](/content/2026/02/380341/images/5b5834febf2fa8d62da77c2a603df16ab1e5c2e89def1a8d48e796a25c34a504.jpg)
1 In the stop mode, press the PROG/DIRECT button.
The PROG indicator lights
![DENON D107 - Playing tracks in a certain order [Programmed playback] - 2](/content/2026/02/380341/images/28cd865432802da314f8eabb9e61bc26f5964e1bbd761cdcef5e8760d5e257b5.jpg)
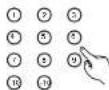
2 Press the number buttons to select the tracks for programmed playback. [Example]
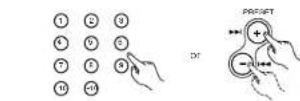
To program the 5th, 12th and 7th tracks, press ,
3 Press the /lbutton. The tracks are played in programmed order.
![DENON D107 - Playing tracks in a certain order [Programmed playback] - 3](/content/2026/02/380341/images/271dd86b32efc4eeda398466d41da33d231fba7bf4bde269ee8a3c4101e57346.jpg)
- To check the contents of the program, press the CALL button. The programmed tracks appear in the programmed order on the display each time the CALL button is pressed.
- To change the program settings, press the PROG/DIRECT button, clear the entire program, then repeat steps 1 to 3.
To clear the entire program, press the PROC/DIRECT button while in the stop mode.
To use the direct play function, first press the PROG/DIRECT button while in the stop mode to cancel the program mode.
The last programmed track is cleared each time the CLEAR button is pressed
(9) Playing in random order [Random playback]
Use this function to play all the tracks on the disc once in random order.
![DENON D107 - Playing in random order [Random playback] - 1](/content/2026/02/380341/images/da612ca7d83cc87e9d619e53997433a5bc7536381cdfe3c86b03a6221c763580.jpg)
1 In the stop mode, press the RANDOM button. The "RAND" indicator lights.
2 Press the button. Tracks are automatically played in random order.
![DENON D107 - Playing in random order [Random playback] - 2](/content/2026/02/380341/images/46fe60e09d1b6c6be45e868eec736d74f0e150c7fa18fce6e7577867d16e2f98.jpg)
PAVPAS
Press the REPEAT button during random playback to set the all-track random repeat mode. All the tracks are played once in rs order, then repeated in another random or
To cancel the random play mode, either set the stop mode or press the RANDOM button again
NOTES:
The random play mode cannot be set while in the play or pause mode
- The single track repeat mode cannot be set during random playback.
The all track remaining time is not displayed during random playback.
The random play mode cannot be set when in the all-track repeat mode.
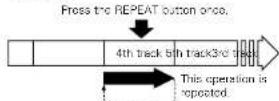
(10) Playing repeatedly [Repeat playback]
Playing all tracks repeatedly [All track repeat]
![DENON D107 - Playing all tracks repeatedly [All track repeat] - 1](/content/2026/02/380341/images/4016692b5186d719df7721efaffb58994ef6bab3c609ff7f414a167547a54f80.jpg)
1 In the stop mode, press the REPEAT button twice. The "C" indicator lights.
![DENON D107 - Playing all tracks repeatedly [All track repeat] - 2](/content/2026/02/380341/images/9ac000be0b2e13c9f909bb5c64d1c9cdc841c0126094180ad38ea54bdcee3427.jpg)
2 Press the /llbutton.
- The disc is played repeatedly.
- Once the last track on the disc is played, playback continues from the beginning of the first track.

The all track repeat mode can also be set by pressing the REPEAT button twice during playback.
If the REPEAT button is pressed duringprogrammed playback, the tracks are playedrepetently in the programmed program.
To cancel the all track repeat mode, press the REPEAT button repeatedly until the 一 _ 一 ^ 一 indicator turns off.
NOTE:
The random play mode cannot be set when in the all-track repeat mode.
ENGLISH
Playing a single track repeatedly
[Single track repeat]
![DENON D107 - [Single track repeat] - 1](/content/2026/02/380341/images/5dd3684294efef8edf5902f948dc9ae1ec4fd6476bc9e9cfedda9f2db47a3e74.jpg)
1 In the stop mode, pre REPEAT button once.
![DENON D107 - [Single track repeat] - 2](/content/2026/02/380341/images/7956cec563db3d046b69da94892ab3ea345776b13ea6c926d1849a0959a9a9cb.jpg)
The indicator lights.
![DENON D107 - [Single track repeat] - 3](/content/2026/02/380341/images/3a80ade42d4c2febce4afba44737e9ff7d4fd42fb2c85923b22816d582749665.jpg)
2 Press the number buttons or I, I buttons to input the number of the desired track.
![DENON D107 - [Single track repeat] - 4](/content/2026/02/380341/images/416248dbb815ae1b3058b8c390c7addbc3d3530631788fc93c8c0b2e07b4c32f.jpg)
※ Step 3 can be skipped when a track is selected using the number buttons.
![DENON D107 - [Single track repeat] - 5](/content/2026/02/380341/images/2d3b8f742f71ed92630a8e18caf9e7faedefe01677c1de05ed1348b036f63700.jpg)
3 Press the button.
- Playback starts.
- Once the selected track of it is played again from the beginning.
The single track repeat mode can also be set by pressing the REPEAT button during playback. The current track is played repeatedly. To cancel the single track repeat mode, press the REPEAT button repeatedly until the "C indicator turns off.
NOTE: The single track repeat mode cannot be sat during programmed playback or random playback.
13 PLAYING MP3 FILES
There are many sites on the Internet from which you can download music files in MP3 format. These files can be downloaded following the instructions on the site and stored on CD-R/RW discs which can then be played on the D-107.
The music on commercially available music CDs can be converted into MP3 files on a computer using MP3 encoding programs. When this is done, the data is reduced to approximately 1/10 the original size. This MP3 data can then be stored on a CD-R/RW disc, allowing you to create a single 12 cm CD-R/RW disc containing about 10 times more music than a normal music CD, that is some 100 tracks or more (*). This is an approximately value for MP3 files of tracks about 5 minutes long converted at a standard bit rate (128 kbps) and stored on a CD-R/RW disc with a capacity of 650 MB.
- Recordings you make are for your personal use and should not be used in ways infringing upon the copyright holder as per copyright laws.
NOTES:
- The D-107 is compatible with "MPEG-1 Audio Layer-3" and "MPEG-2 Audio Layer-3" standards Isempiring frequencies - 32kHz 44.1 kHz and 48 kHz. It is not compatible with "MPEG-2.5 Audio Layer-3", MP1 or MP2 standards.
- When writing MP3 files on a CD-R/RW disc, set the writing program's format to "ISO9660 level 1" or "ISO9660 level 2", "Joliet" or "Romoo" MP3 files written in other formats may not play properly. With some writing programs it is not possible to record in "ISO9660" format. Use an "ISO9660" format writing program.
- Generally speaking, the higher the MP3 file's bit rate, the better the sound quality. With the D-107 it is recommended to use MP3 files written with a bit rate of 128 kbps or greater.
- The writing program may change the positions of the folders and files when writing the MP3 files on the CD-R/RW disc, so the files may not be played in the expected order.
- Make sure to give MP3 files the extension ".MP3". Files with extensions other than ".MP3" or without extensions cannot be played. (On Macintosh computers, MP3 files can be played by adding the extension ".MP3" after the file name consisting of a maximum of 8 Roman capital letters and/or numerals when recording them on CD-R/RW discs.)
-
To protect copyrights, no digital signals are output when playing MP3 files.
-
A maximum of 512 folders can be played on the D-107.Folders over 8 layers down, however, cannot be played. The maximum number of files is also 512. If there are 513 files, only the first 512 are played. (Random playback is not possible if there are 257 or more files. Files other than those with the extension .MP3" are not counted.)
- On the D-107, folder and file names can be displayed like titles. Roman capital letters and/or numerals and "_" (underscores) are scrolled. However, a maximum of 12 characters can be displayed in the "Joliot" mode and 32 characters in the "Romeo" mode.) In addition, folder and file names using other symbols will not be displayed properly.
The D-107E is compatible with ID3-tag (Ver. 1.*).
It may not be possible to play some CD-R/RW discs due to dirt, scratches or the disc's properties. - Do not apply seals or tape to the label or signal side of CDs or CD-R/R/W discs. The glue could get on the disc surface, making the disc get stuck inside the set.
- The D-107 is multi-session compatible. Only music CDs can be played if the first session is a music CD, and only MP3 files can be played if the first session consists of MP3 files.
- The D-107 is not compatible with packet write programs.
The D-107 is not compatible with play lists.
ENGLISH
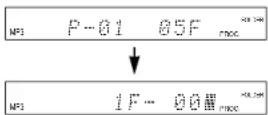
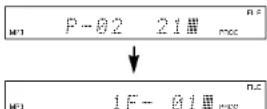
(1) Playing a certain track [Playing folders or files]
![DENON D107 - Playing a certain track [Playing folders or files] - 1](/content/2026/02/380341/images/3ad647162ced9b19f59d3f8d6f097c9e41982e34ec36367f66910edfaa7fb3bf.jpg)
![DENON D107 - Playing a certain track [Playing folders or files] - 2](/content/2026/02/380341/images/b592cf221f14b0d8d15d3dac4807ee4590b8431e9f8a309e6eb7a9e9e1b4632a.jpg)
1 Load a disc containing MP3 files.
![DENON D107 - Playing a certain track [Playing folders or files] - 3](/content/2026/02/380341/images/42ca00e768ac7542234850ef6dc277c51669c33fb4e9930f2cf3dd4a44fae4de.jpg)
(Main unit) (RC 909)
[Example] When the number of folders is "120" and the number of files is "512"
![DENON D107 - Playing a certain track [Playing folders or files] - 4](/content/2026/02/380341/images/c081ca6963ba9788043a55fa40b99c0e455e6cf552a3cb0034d538bbd4fe26d2.jpg)
2-1 To select a folder
① In the stop mode, press the FOLDER button to turn on the "FOLDER" indicator.
② Press the + / - buttons to select the folder you want to listen to.
- The folder name scrolls on the display.
![DENON D107 - Playing a certain track [Playing folders or files] - 5](/content/2026/02/380341/images/6594870a75665cd8d612f131f3cf45d4852415bf5e4cf57d1d786109ffeaf45b.jpg)
![DENON D107 - Playing a certain track [Playing folders or files] - 6](/content/2026/02/380341/images/151af6e191adbebb923e72d1789cc6a3cf5fba3276de3f9d6caf835961a736b7.jpg)
[TC-909]
2.2 To select a file
① In the stop mode, press the TITLE button to turn on the "FILE" indicator.
This operation is only necessary when the "FOLDER" indicator is "OK".
② Press the + / - buttons to select the file you want to listen to.
- The file name scrolls on the display.
3 Press t button.
After the track number is displayed, the folder or file name scrolls on the display and playback status.
- The stop mode is set automatically once the last track on the disc is played.
When the TIME button is pressed during playback, the "FOLDER" or "FILE" indicator turns off and the track number of elapsed track time are displayed.
The display switches as follows each time the TITLE button is pressed during playback:
File name The "FILE" indicator lights.
Title name The "TITLE" indicator lights.
Artist name The "ARTIST" indicator lights.
Album name The "ALBUM" indicator lights.
Elapsed time of currently paying track
No Title, "No Name" and "No Album Name" are displayed if there is not data for the title name, artist name or album name, respectively.

(No-909)


(1RC-0C)MaIn unit:
(2) Playing tracks in a certain order [Programmed playback of folders or files]
Use this function to select certain tracks from the disc and program them to play in a certain order. A maximum of 30 files and folders can be programmed. (Programs can included both files and folders.)
![DENON D107 - Playing tracks in a certain order [Programmed playback of folders or files] - 1](/content/2026/02/380341/images/3d993d73fc843fa145b2f068923dcae9fb8eda55a7526268acf5991678be149e.jpg)
1 In the stop mode, press the PROG/DIRECT button.
The "PROG" indicator lights.
![DENON D107 - Playing tracks in a certain order [Programmed playback of folders or files] - 2](/content/2026/02/380341/images/024a3f98a4f3961da1d05a8971fd586606afcfcfbf0bbb2270bcb62f519b95ba.jpg)
2-1 To select a folder
① Press the FOLDER button to turn on the "FOLDER" indicator.
② Press the number buttons to select the folder you want to program.

[Example] When 'folder "5" is programmed in the first place
NOTES:
- Programming is not possible in the play or pause mode.
- Direct searching is not possible during programmed playback.
2-2 To select a file
① Press the TITLE button to turn on the "FILE" indicator.
This operation is only necessary when the "FOLDER" indicator is out.
② Press the number buttons to select the file you want to program.

[Example] When the 21st track is
programmed in the second place
3 Press the button.
The tracks are played in the programmed order.
When the TIME button is pressed during playback, the
"FOLDER" or "FILE" indicator turns off and the track number of elapsed track time are displayed.
To check the contents of the program, press the CALL button. The programmed tracks appear in the programmed order on the display each time the CALL button is pressed.
To change the program settings, press the PROG/DIRECT button, clear the entire program, then repeat steps 1 to 3.
※ To clear the entire program, press the PROG/DIRECT button while in the stop
To use the direct play function, first press the PROG/DIRECT button while in the stop mode to cancel the program mode.
The last programmed track is cleared each time the CLEAR button is pressed.
(3) Playing in random order [Random playback]
The D-107 is compatible with discs containing up to 256 tracks.
Listening to all the tracks in random order [All-track random]
Use this function to play all the tracks on the disc once in random order.
![DENON D107 - Listening to all the tracks in random order [All-track random] - 1](/content/2026/02/380341/images/63cbc9b50a4277b76bf676e7aa3bfeb3031d1171708dc1bd4f9fb45e276a731a.jpg)
1 In the stop mode, press RANDOM button twice.
The "RAND" indicator lights.

2 Press the button.
Tracks are automatically played in random order.

* Press the REPEAT button during random playback to set the all track random repeat mode. All the tracks are played once in random order, then repeated in another random order.
To cancel the all-track random mode, press the RANDOM button repeatedly until the "RAND" indicator turns off.
NOTES
The random play mode cannot be set while in the play or pause mode.
- The angle track repeat mode cannot be set during random playback.
The all-track remaining time is not displayed during random playback.
- Random playback is not possible during programmed playback.
The random play mode cannot be set when in the all-track repeat mode.
Listening to all the tracks in a single
[1-folderrandom]
Use this function to play all the tracks in a single folder once in random order:
1 In the stop mode, press the FOLDER button.
The "FOLDER indicator lights.

2 Press the I and buttons to select the folder to be played in.
- The folder name scrolls on the display.

3 Press the RANDOM B once.
The "RAND" and "FOLDER" indicator lights.
4 Press the /llbutton.
A track in the selected fold selected automatically and payback starts:
The stop mode is set automatically once all the tracks in the folder have been played.
When the TIME button is pressed during playback, the track number of elapsed track time are displayed. (The "FOLDER" indicator do not turn off.)
To cancel the 1-follower random mode, press the RANDOM button repeatedly until the "RAND" indicator turns off.
The 1-holder all-track repeat mode cannot be set during random playback.
(4) Playing repeatedly. [Repeat playback]
Playing a single track repeatedly [Single track repeat]
![DENON D107 - Playing a single track repeatedly [Single track repeat] - 1](/content/2026/02/380341/images/4490d9246798b8697657ef1dbe61d3c9f786f86bc5deb9fe85fe8e6d5c38fa2b.jpg)
1 In the stop mode, press the REPEAT button once. The "C1" indicator lights.
NOTE: The single track repeat mode cannot be set during programmed playback or random playback.
2 Press the number buttons or I, buttons to input the number of the desired track.


Step 3 can be skipped when a track is selected using the number buttons.
3 Press the button.
- Playback starts
Once the selected track it is played again from beginning.


The single track repeat mode can also be set by pressing the REPEAT button during playback. The current track is played repeatedly.
To cancel the single track repeat mode, press the REPEAT button repeatedly until the "C indicator turns off.
ENGLISH
Listening to all the tracks in one folder repeatedly [1-folder all-track repeat]
1 In the stop mode, press the FOLDER button.
The "FOLDER" indicator lights.

2 Press the and buttons to select the folder you want to listen to.
- The folder name scrolls on the display.
3 In the stop mode, press the REPEAT button twice.
- The "C" and "FOLDER" indicator lights.

4 Press the /lButton. Playback starts from the
track in the selected folder
Once the last track in the selected folder has been played, playback resumes from the beginning of the first track in the selected folder and the tracks are repeated.
When the TIME button is pressed during playback, the track number of elapsed track time are displayed. (The "FOLDER" indicator do not turn off.)

The all track repeat mode can also be set by pressing the REPEAT button twice during playback.
*if the REPEAT button is pressed during programmed playback, the tracks are played repeatedly in the programmed order.
* To cancel the 1-folder all-track repeat mode, press the REPEAT button repeatedly until the ^ indicator turns off.
NOTE:
The random play mode cannot be set while in the 1-holder all-track repeat play mode.
Playing all tracks repeatedly
[All track repeat]
1 In the stop mode, press the REPEAT button 3 times.
The "C" indicator lights.

2 Press the lButton The disc is played repeat Once the last track on th is played, playoack conti from the beginning of th track.

The all-track repeat mode is also set when the REPEAT button is pressed 3 times in the play mode.
If the REPEAT button is pressed during programmed playback, the tracks are played repeatedly in the programmed order.
* To cancel the all track repeat mode, press the REPEAT button repeatedly until the indicator turns off.
NOTE:
The random play mode cannot be set when in the all-track repeat mode.
14 CLEANING
Cleaning the main unit
Use a soft cloth and wipe lightly to remove dirt from the cabinet and operation panel.
- When using chemically treated cloths, follow the precautions that have been written for them.
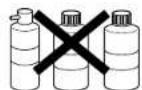
Do not use benzene, thrimers, or other organic solvents or insecticides on the main unit since they may cause a change in quality or color.
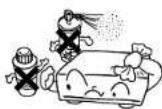
NOTE: Do not use record spray or antistatic. Also do not use volatile chemicals such as benzene or thinner.
Record
record
spire
Cleaning discs
Fingerprints or dirt on the disc may lower sound and picture quality or cause breaks in playaack. Wipe off fingerprints or dirt.
Use a commercially available disc cleaning set or a soft cloth to wipe off fingerprints or dirt.

Wigs gently from the middle outwards.
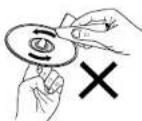
Do not wipe with a circular motion.
15 CDs
Discs
This unit uses CDs (optical digital audio disc) which bear the mark located at the right.

Note that speciely shapes CDs, for example, heart shaped or hexagonal cannot be played. Do not attempt to use such CDs since doing so may cause breakdown of this unit.


Holding discs
Avoid touching the surface of discs when loading and unloading them.
Be careful not to get tinglegments on the signal surface to the side which shines in (rainbow colors).
Cautions on Handling Discs
Do not get fingerprints, grease or dirt on discs.
- Be especially careful not to scratch discs when removing them from their cases.
- Do not bend discs.
Do not heal discs. - Do not enlarge the semicircle.
- Do not write on the labeled lpr ball-point pen or a pencil.
Water droplets may form on the surface if the disc is moved suddenly from a cold place to a warm one. Do not use a hairdryer, etc., to dry the disc.
Cautions on Storing Discs
Always eject discs after playing them
- Keep discs in their cases to protect them from dust, scratches and warping.
Do not put discs in the following places: 1. exposed to direct sunlight for long period time
- Places exposed to heat from heaters, etc
ENGLISH
16 TROUBLESHOOTING
Check the following before assuming there is a problem with the set.
Are connections proper?
Are you operating as described in these operating instructions?
If the set does not seem to be operating properly, check the items listed on the table below. If the cause of the problem cannot be found, the set may be malfunctioning. Immediately turn off the power and unplig the power supply cord, then contact your store of purchase or your nearest DENON dealer.
| Symptom Cause Countermeasure Page | |||
| General | Power does not turn on. | ■ Is the power supply card plugged into a power outlet?■ Is the system cable connected properly? | ■ Plug the power supply card into a power outlet.■ Connect securely. |
| This unit does not operate properly when remote control unit is used. | ■ Are the batteries dead?■ Is the remote control unit too far from the set? | ■ Replace with new batteries.■ Move the remote control unit closer to the set. | |
| Receiver section | Display does not light and no sound is produced. | ■ Is the speaker cords not properly connected?■ Is the function property set?■ Is the volume set to "CC"? | ■ Connect securely.■ Set to the proper position.■ Adjust the volume. |
| Sound is not produced from one side only. | ■ Is the speaker cords not properly connected?■ Is the input cords not properly connected? | ■ Connect securely.■ Connect securely. | |
| Positions of instruments inverted for stereo sources. | ■ Are the left and right speakers or input cords inverted? | ■ Check the left/right connections. | |
| Hissing noise is heard when an FM station is tuned in. | ■ Is the antenna cable properly connected? | ■ Connect the antenna cable properly.■ Connect an outdoor antenna. | |
| Scratchy or missing noise is heard when an AM station is tuned in. | ■ Is there interference from a TV set, or interference from another broadcast station? | ■ Turn off the TV.■ Change the position or direction of the AM station. | |
| Humming noise is heard when an AM station is tuned in. | ■ Is the signal comed over the power supply cord being modulated by the power supply frequency? | ■ Insert the power plug in the opposite direction. | |
| CD player section | Zeroes are displayed when a disc is inserted. | ■ Is the disc loaded properly?■ Has the CD N/RW disc been finalized? | ■ Load the disc properly.■ Finalse the CD N/RW disc. |
| Play modulo is not set when ▪N按钮 is pressed. | ■ Is the disc dirty or scratched? | ■ Wipe the dirt off the disc or replace the disc. | |
| No sound is produced, or sound is distorted. | ■ Are the various adjustments and settings on the receiver appropriate? | ■ Check the buttons on the receiver and its input function setting and adjust as necessary. | |
| Specified position of disc is not played. | ■ Is the disc dirty or scratched? | ■ Wipe the dirt off the disc or replace the disc. | |
| MP3 files cannot be played. | ■ Is the disc recorded in "ISO9660 Level 1", "ISO9660 Level 2", "Jollet" or "Homo" format?■ Does the MP3 file have an extension? Or is the extension anything other than "MP3"? | ■ Record the disc in "ISO9660 Level 1" "ISO9660 Level 2", "Jollet" or "Homo" format.■ Be sure to give MP3 files the extension "MP3". | |
17 SPECIFICATIONS
■Amplifire section
Practical maximum output:
Satellite: 20 W + 20 W (6Ω/ohms, 1 kHz, T.H.D. 0.9 %)
Subwoofer: 40 W 112 Qohms, 100 Hz, T.H.D. 0.9 %
Receiver section
Audio input/output jacks:
Receive frequency bands:
Receive sensitivity:
FM stereo separation:
AUX input/output jacks, Optical digital out jacks
FM:37.50 MHz to 108.00 MHz
AM:520 kHz to 1710 kHz
FM:1.5 V / 75 / ahms
AM:20μA
35dB(1kHz)
CD section
Wow and flutter.
Sampling frequency:
Light source:
Clock and Timer section
Clock:
Timers:
Below measurement limits (±0.001% W peak)
44.1 kH2
Semiconductor laser
Crystal oscillation synchronizing system
Within one minute per month
Everyday timer (1 setting)
Once timer (1 setting)
Sleep timer (maximam 60 min.)
Common Sections
Power supply
Power consumption:
Maximum external dimensions:
80W
(in the standby mode: 1.5 W or less when the eco-mode is set, 20 W normally)
D-107: 204 (M) - 293 (H) - 157 (D) mm (Including stand)
(8-1/32" - 11-17/32" - 6-3/16")
With stand removal: 204 (W) - 267 (H) - 82 (D) mm (6-1/32" - 10-33/84" - 3-16/84"
USC-107: 162 (M) - 293 (H) - 149 (D) mm (Including stand) (6-38") - 11-17/32" - 5-56/44"
※Withstand removed 162 W/ -267 H-72 ID mm (6-3/8" - 10-33/64" - 2-53/64")
USW-107:447(W)210(H)205(D)mm(Including net 17-1932"8.1/64"8.5/164")
D-107; 2.6 kg (5 lbs 11.7 oz)
USC-107: 1.4 kg (3 lbs 1.74 oz) (each)
USW-107:7.9kg(17 lbs 6.7 oz)
Remote control unit (RC-909)
Remote control system:
Power supply:
Maximum external dimensions:
Infrared pulse
3 V DC (using two RO3/AAA type batteries)
48W1·210(H)·29(D)mm
(1-57/64"·8-17/64"·1-9/64")
120g(4.2oz) (including batteries)
- For improvement purposes, specifications and functions are subject to change without advanced notice.
FRANCAIS
TABLE DES MATIERES
Precautions installation
Borne DIGITAL OUT OPTICAL
Bornes AUX IN
16 Bornes AUX OUT
Section de I'affichage principal (Section tuner)
Normal? Dimmer-1? Dimmer-2?
m = 311 ;
programme on deuxieme place

Bome OPTICAL DIGITAL OUT
FM:87,50 MHz a 108.00 MHz
AM:520kHza1710kHz
FM:1.5pV/75ghms
AM:20W
35dB(1kHz)
USC-107:162(L)·293(H)-148(P)mm
(Support inclus)
Ayes support retire.
162 267 H 72 P mm
USW107447L210H205P1mm
(Filed inclus)
D-07:2.6kg
USC-107: 1,4 kg (chacun)
USW-107-7,9kg
Telecommande (RC-909)
Pate supcror
[Conctor]
No frinltno (non electronic designtive)
Normal? Dimmor-1? Dimmor-2?
Uniden principal (FC-009)
Terminal OPTICAL DIGITAL OUT
FM:97,50 MHz a 108,00 MHz
AM:520kHza1710 kHz
FM:1.5pV/75gohmios
AM:20 V
35dB(1kHz)
USC-107:162(Anl:293(Al:149(Fd)mm
(Base incluida)
USW-107:447 (An) 210 (A1) 205 (Fd) mm
Printed in China 511 3855 008


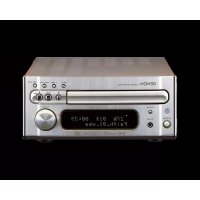
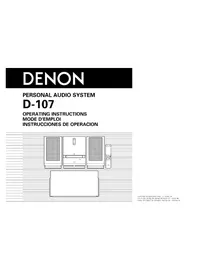
- CAUTION
- RISK OF ELECTRIC SHOCK
- DO NOT OPEN
- CAUTION:
- NOTE:
- LABELS (for U.S.A. model only)
- CERTIFICATION
- ENGLISH FRANCAIS ESPANOL
- CD RECEIVER / Receptor CD / Receptor de CD
- PRECAUTIONS D'INSTALLATION
- ■ ACCESSORIES
- FEATURES
- BEFORE USING
- Condensation
- ■ Condensation
- Conditions for the Formation of Condensation
- Other Precautions
- Setup Precautions
- When not using the D-107
- Under normal circumstances
- When moving the D-107
- ENGLISH
- CONNECTIONS
- NOTES:
- Connecting the speaker systems
- Connecting a CD receiver and subwoofer
- About mounting the main unit stand You will need a screwdriver to assemble.
- ■About mounting the cable cover [When mounting on the wall] (See page 8.)
- Connecting the speakers
- Connecting the speakers and cords
- Installing the FM indoor antenna
- Connecting an FM outdoor antenna
- Selecting a place for the FM outdoor antenna
- Note to CATV system installer:
- Installing the AM loop antenna
- Assembling the AM loop antenna
- Connecting the AM loop antenna
- Installing an AM outdoor antenna
- Mounting on a wall
- PART NAMES, FUNCTIONS AND DISPLAYS
- ON/STANDBY button
- FUNCTION button
- BAND button
- 1-/+按钮
- VOLUME 一 buttons
- Disc door
- button
- Display
- REMOTE SENSOR
- 10▶/Ibutton
- Main unit stand
- DIGITAL OUT OPTICAL terminal
- AUX IN terminals
- AUX OUT terminals
- FM antenna terminal (ANTENNA FM)
- AM antenna terminals (ANTENNA AM)
- SYSTEM CONTROL terminal
- Speaker terminals
- Speaker stand
- Power supply cord
- SPEAKER SYSTEM terminals
- Display
- Mode display portion (Timer section)
- Mode display portion (CD section)
- Menu function display section
- Mode display portion (Tuner section)
- Mode display portion
- (Tone control section)
- Mode display portion (Multi-display section)
- REMOTE CONTROL UNIT
- Inserting Batteries
- Using the Remote Control Unit
- Names and Functions of the Remote Control Buttons
- OPENING AND CLOSING THE DISC DOOR AND LOADING DISCS
- Press the button.
- Once "Insert Disc" appears on the display, load the disc in the disc holder with the labeled side facing towards you.
- The disc is automatically drawn in and the door closes.
- Removing a disc that has fallen from the disc holder
- MENU FUNCTION
- Display brightness setting
- Eco-mode setting
- Auto off mode setting
- ■Be sure to set the current time beforehand.
- Press the MENU button.
- Press the +/- buttons to
- select "AutoOffMode".
- Press the ENTER button.
- Press the + / - buttons to make "On" or "Off" flash.
- When "Off" is selected
- When "On" is selected
- Press the + / - buttons to
- CLOCK ADJUSTMENT
- Press the button to turn the power on.
- Press the MENU button.
- Press the + / - buttons to select "ClockAdjust".
- Press the ENTER button.
- Press the + / - buttons to select "Wed".
- Press the ENTER button.
- Press the + / - buttons to adjust the hour “7 PM”.
- Press the ENTER button.
- Press the + / - buttons to adjust the minutes "30".
- Press the ENTER button at the sound of the chime indicating the time is currently 7:30 PM.
- Station Selection
- Press the TUNING buttons and set the receive frequency to FM 87.50 MHz
- Auto tuning
- Manual tuning
- Press the VOLUME buttons to adjust the volume.
- Storing Broadcast Stations
- Giving names to preset stations
- Listening to Preset Stations
- USING THE TIMERS
- Before Using the Timer
- Setting the everyday or once timer
- Press the ENTER button.
- If there is a power failure
- Turning the everyday timer and once timer on and off
- To check the timer setting
- Order of priority of the everyday and once timers
- Sleep function
- ADJUSTING THE TONE
- Press the TONE/SDB button to adjust the tone and display the mode.
- To adjust the bass, mid-range or treble
- To adjust the SDB
- Press the + / - buttons to
- About installation
- ■ About main unit installation
- ■ About speaker installation
- About subwoofer installation
- PLAYING CDs
- (1)Playing CDs
- Stopping playback
- Cueing using the direct search function
- Cueing with the programmed search function
- Playing tracks in a certain order [Programmed playback]
- Playing in random order [Random playback]
- Playing repeatedly [Repeat playback]
- Playing all tracks repeatedly [All track repeat]
- Press the /llbutton.
- Playing a single track repeatedly
- [Single track repeat]
- PLAYING MP3 FILES
- Playing a certain track [Playing folders or files]
- To select a file
- Press t button.
- Playing tracks in a certain order [Programmed playback of folders or files]
- 2-1 To select a folder
- 2-2 To select a file
- Press the button.
- Playing in random order [Random playback]
- Listening to all the tracks in random order [All-track random]
- In the stop mode, press RANDOM button twice.
- Press the button.
- NOTES
- Listening to all the tracks in a single
- In the stop mode, press the FOLDER button.
- Press the I and buttons to select the folder to be played in.
- Press the RANDOM B once.
- Press the /llbutton.
- Playing repeatedly. [Repeat playback]
- Playing a single track repeatedly [Single track repeat]
- Press the number buttons or I, buttons to input the number of the desired track.
- Press the button.
- Playing all tracks repeatedly
- CLEANING
- Cleaning discs
- CDs
- Discs
- Holding discs
- Cautions on Handling Discs
- Cautions on Storing Discs
- TROUBLESHOOTING
- Check the following before assuming there is a problem with the set.
- SPECIFICATIONS
- FRANCAIS
- TABLE DES MATIERES
- Precautions installation
- Borne DIGITAL OUT OPTICAL
- Bornes AUX IN
- Bornes AUX OUT
- Section de I'affichage principal (Section tuner)
Brand : DENON
Model : D107
Category : Hi-Fi System